Metroid: Zero Mission Walkthrough – Missile Expansions
Here you’ll find the location for every Missile Expansion in Metroid: Zero Mission, as well as detailed explanations on how to get them and what powerups you’ll need. This list is ordered by way of progression; for a list of Missile Expansions by area, click here.
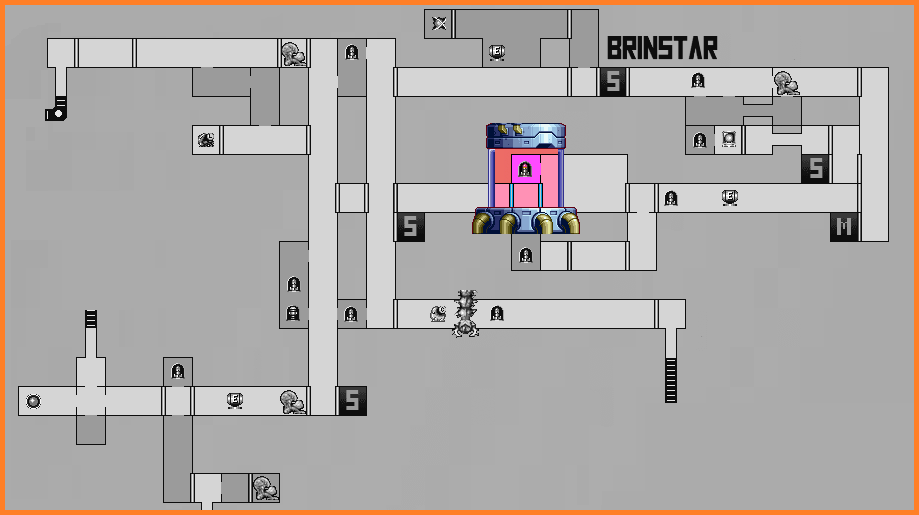
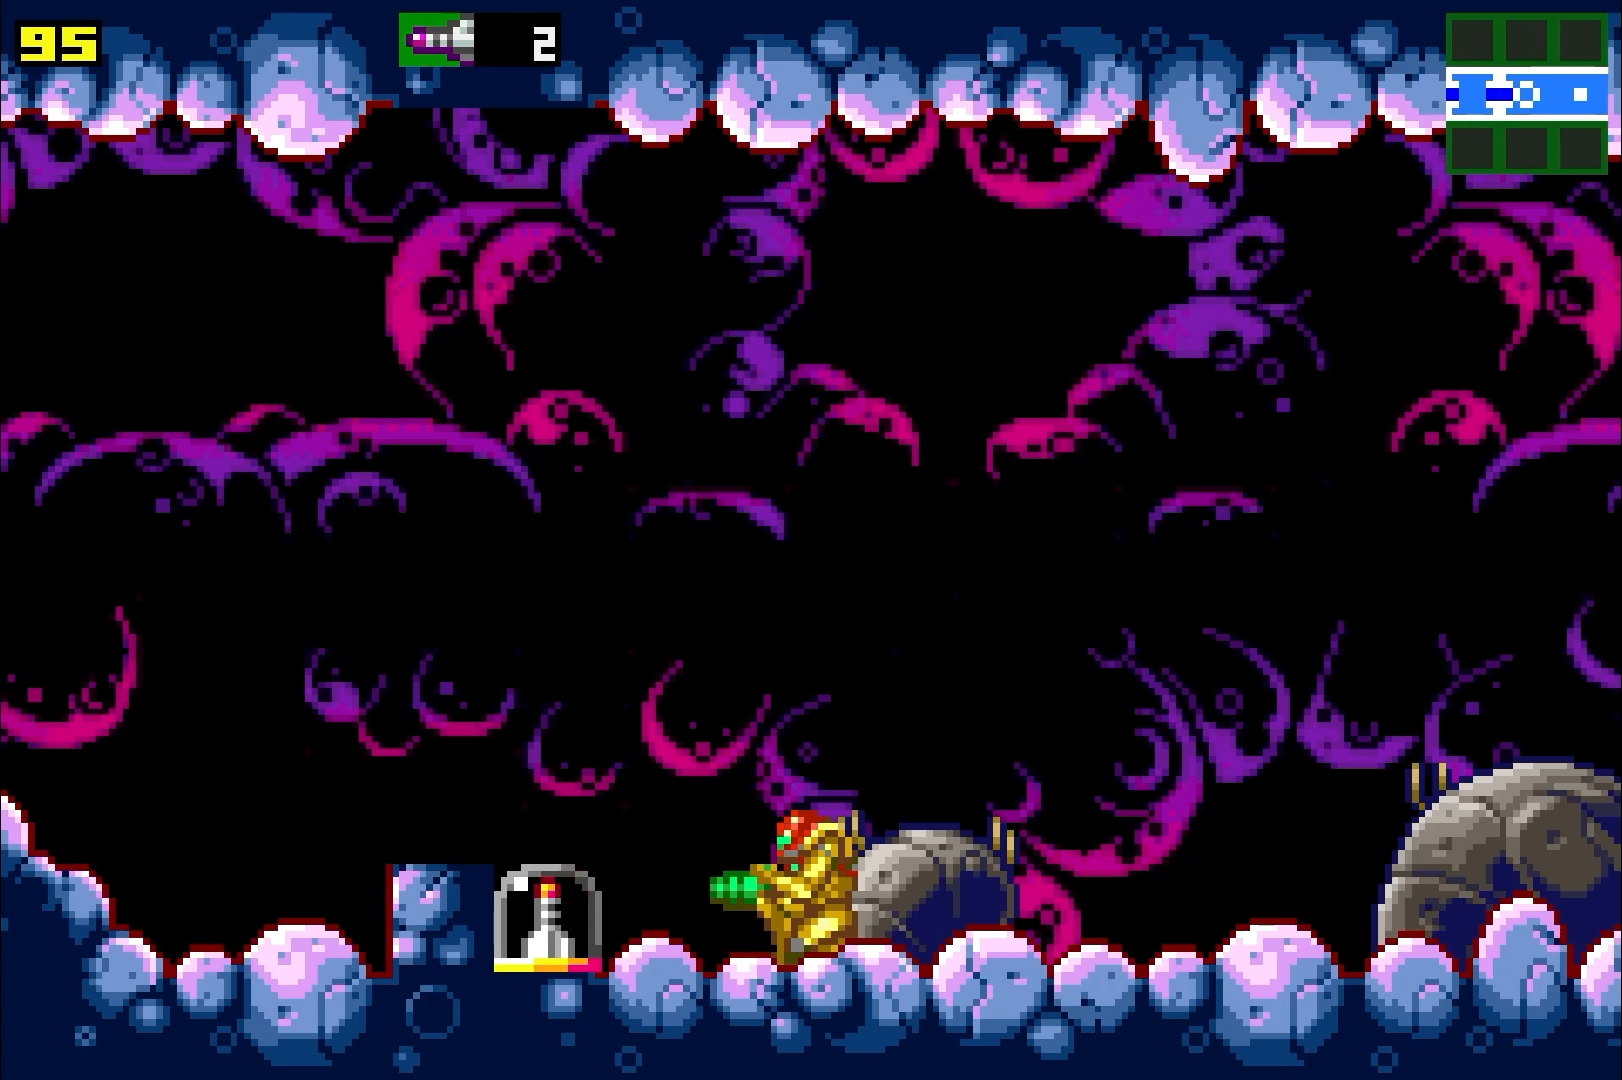
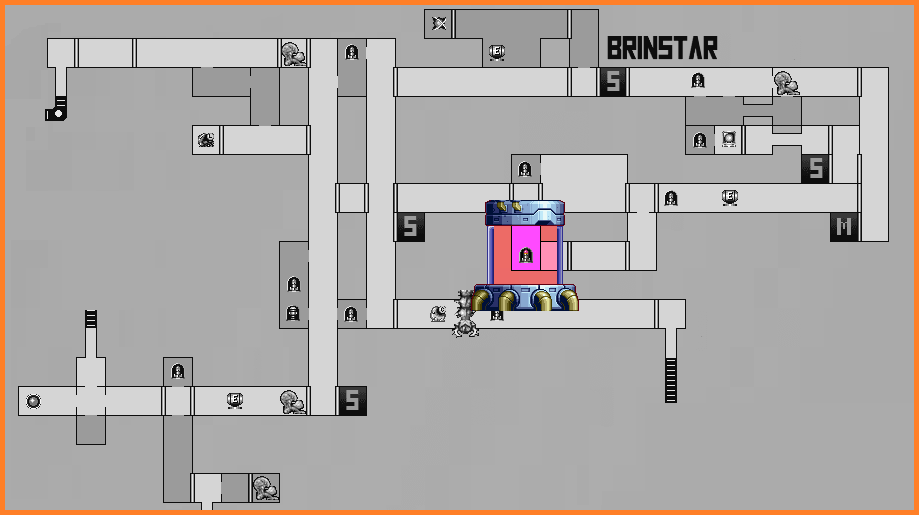
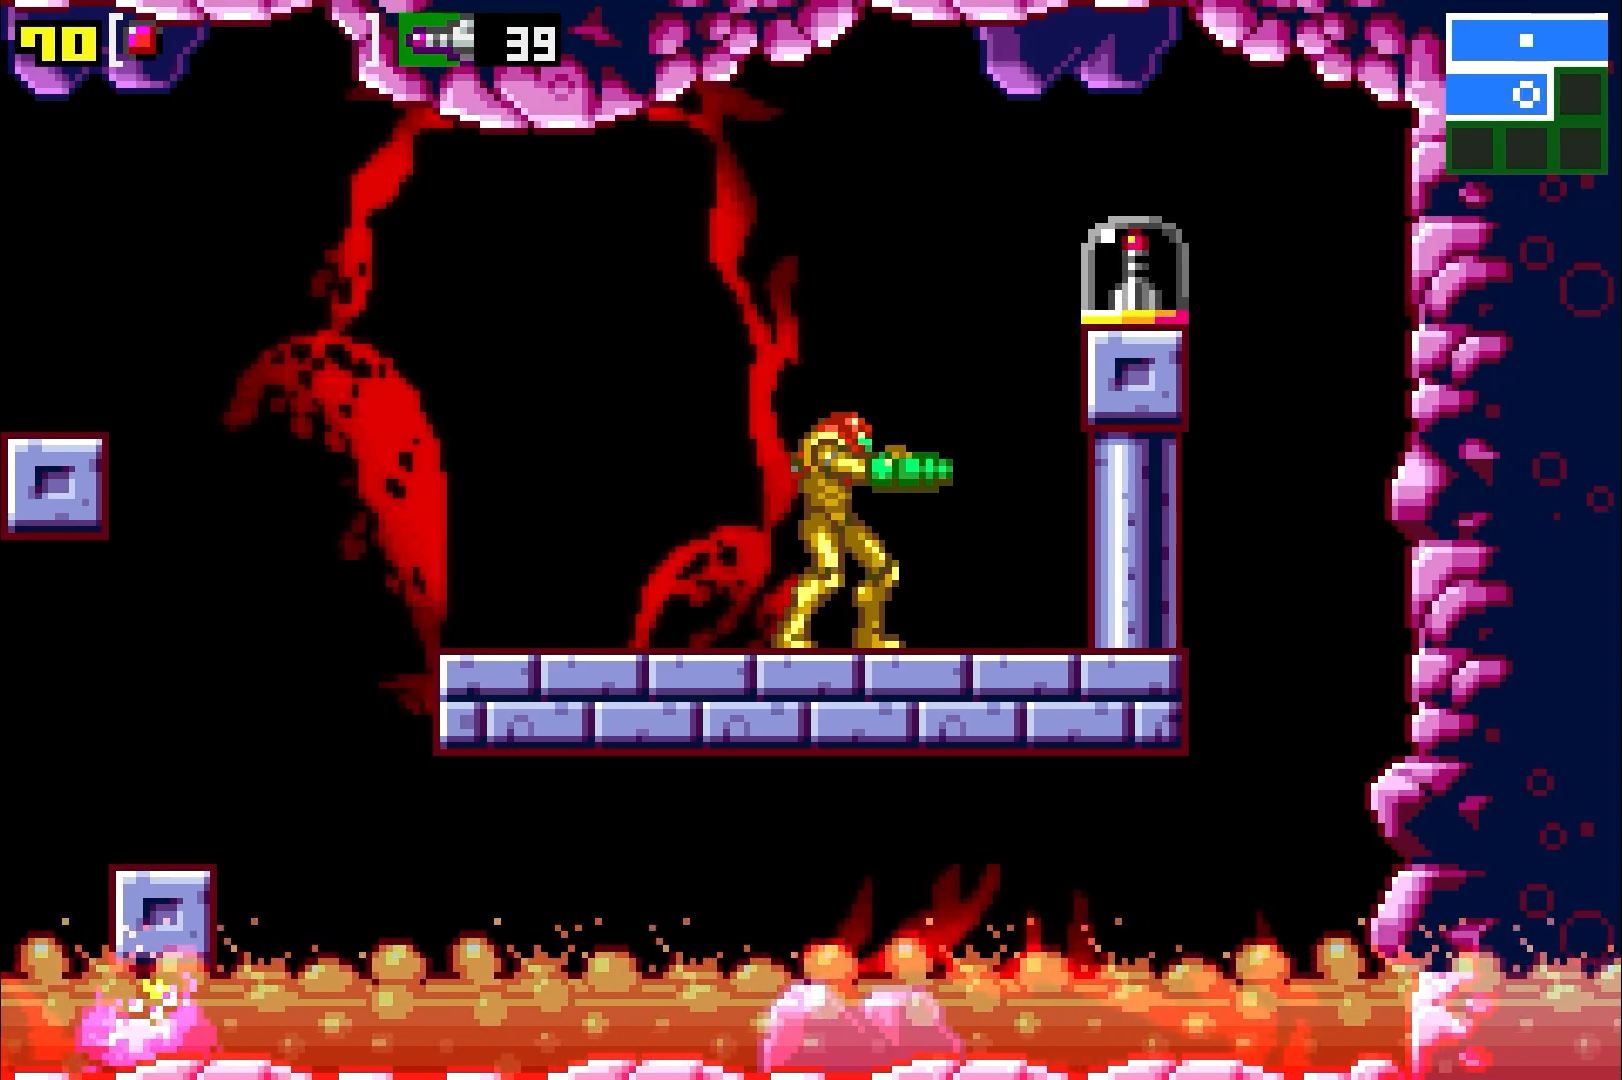
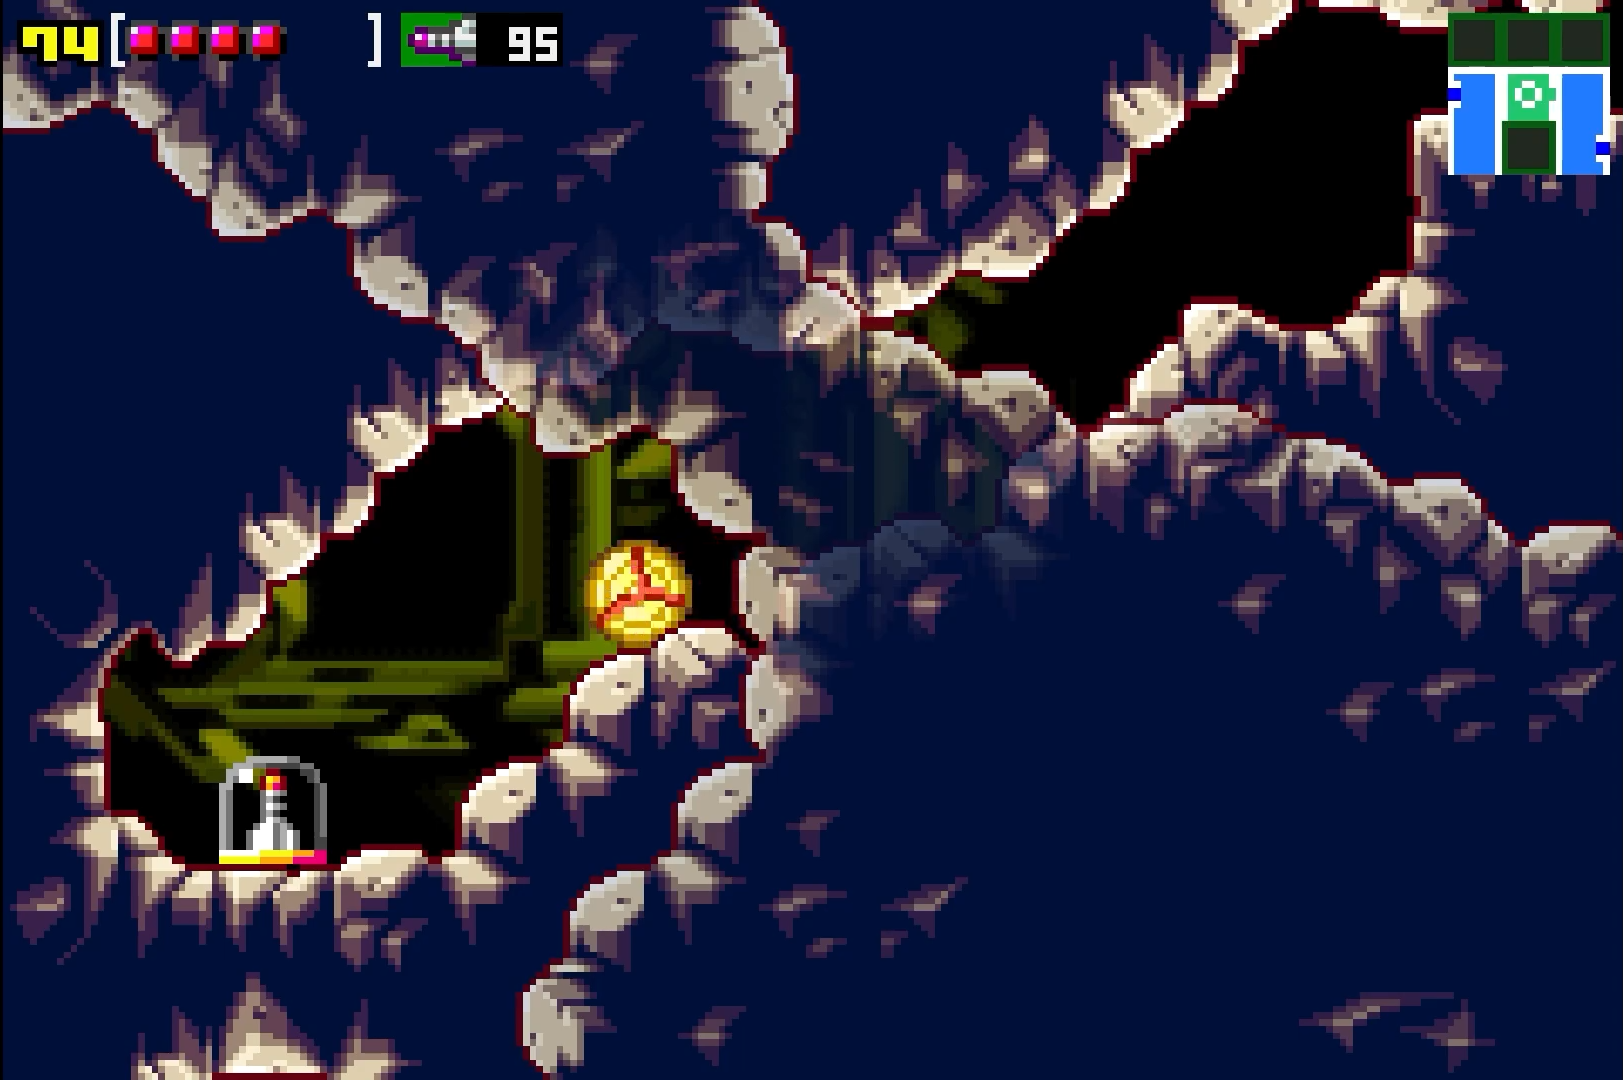
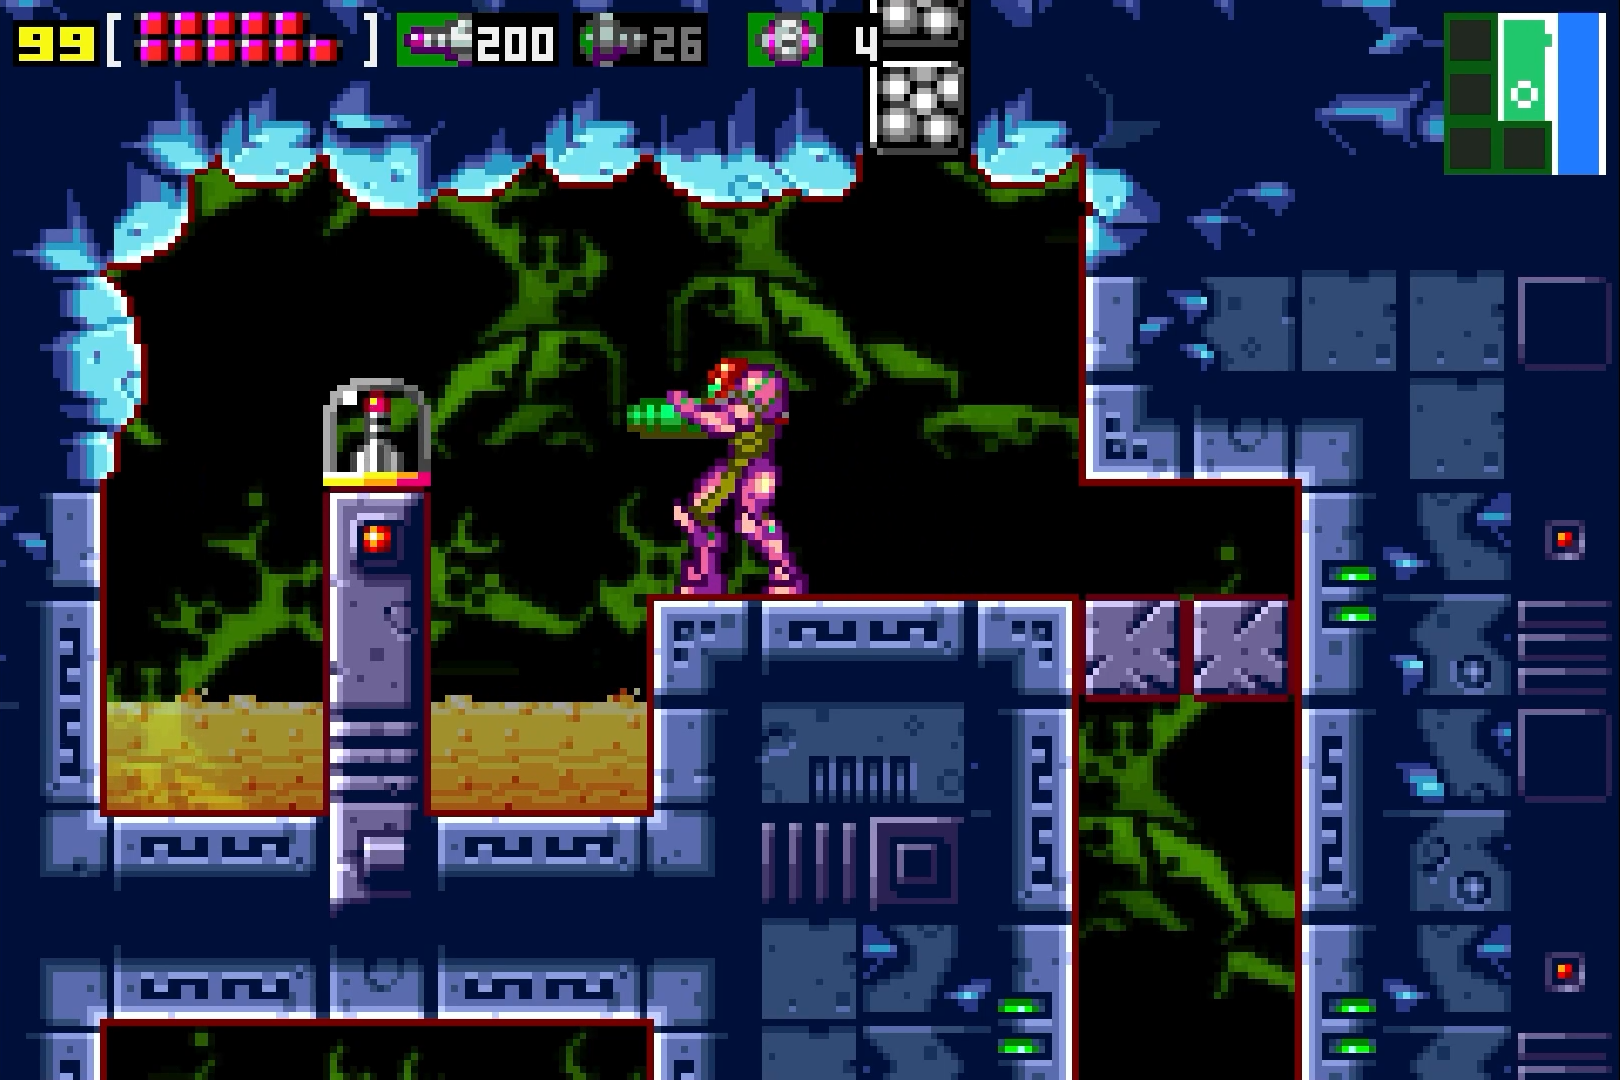
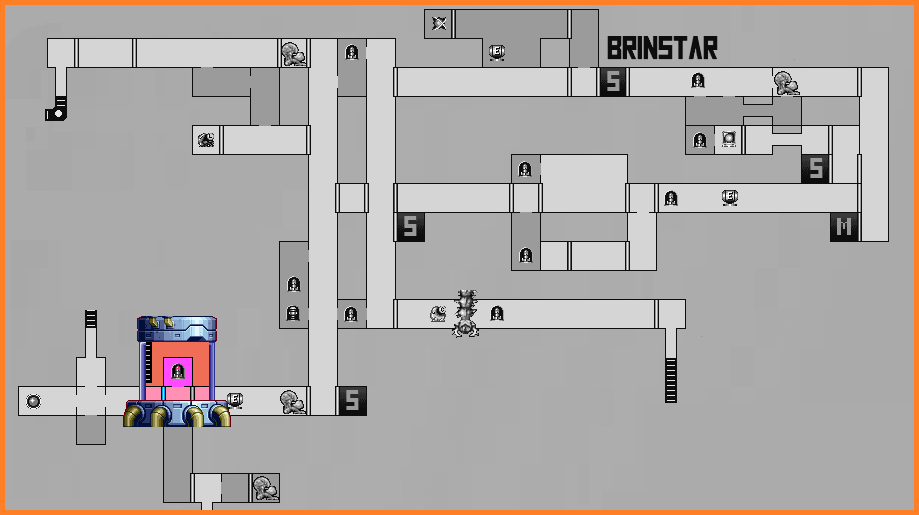
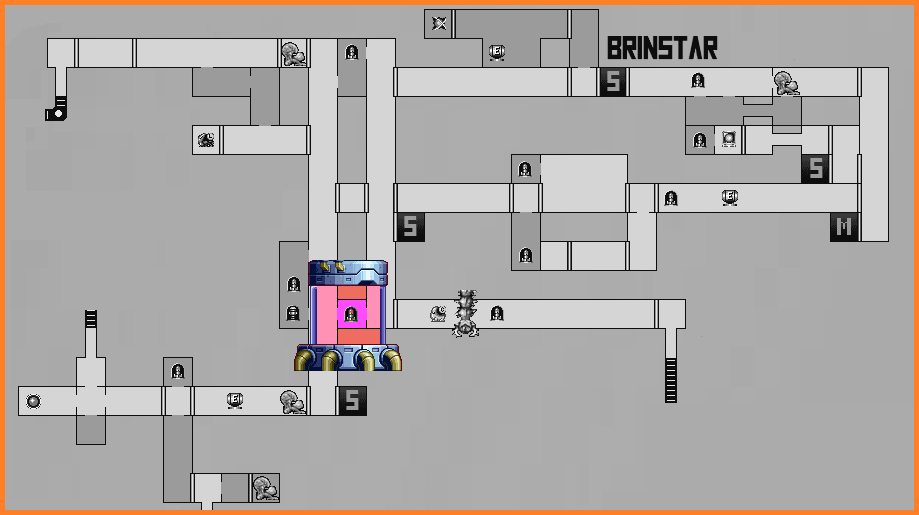
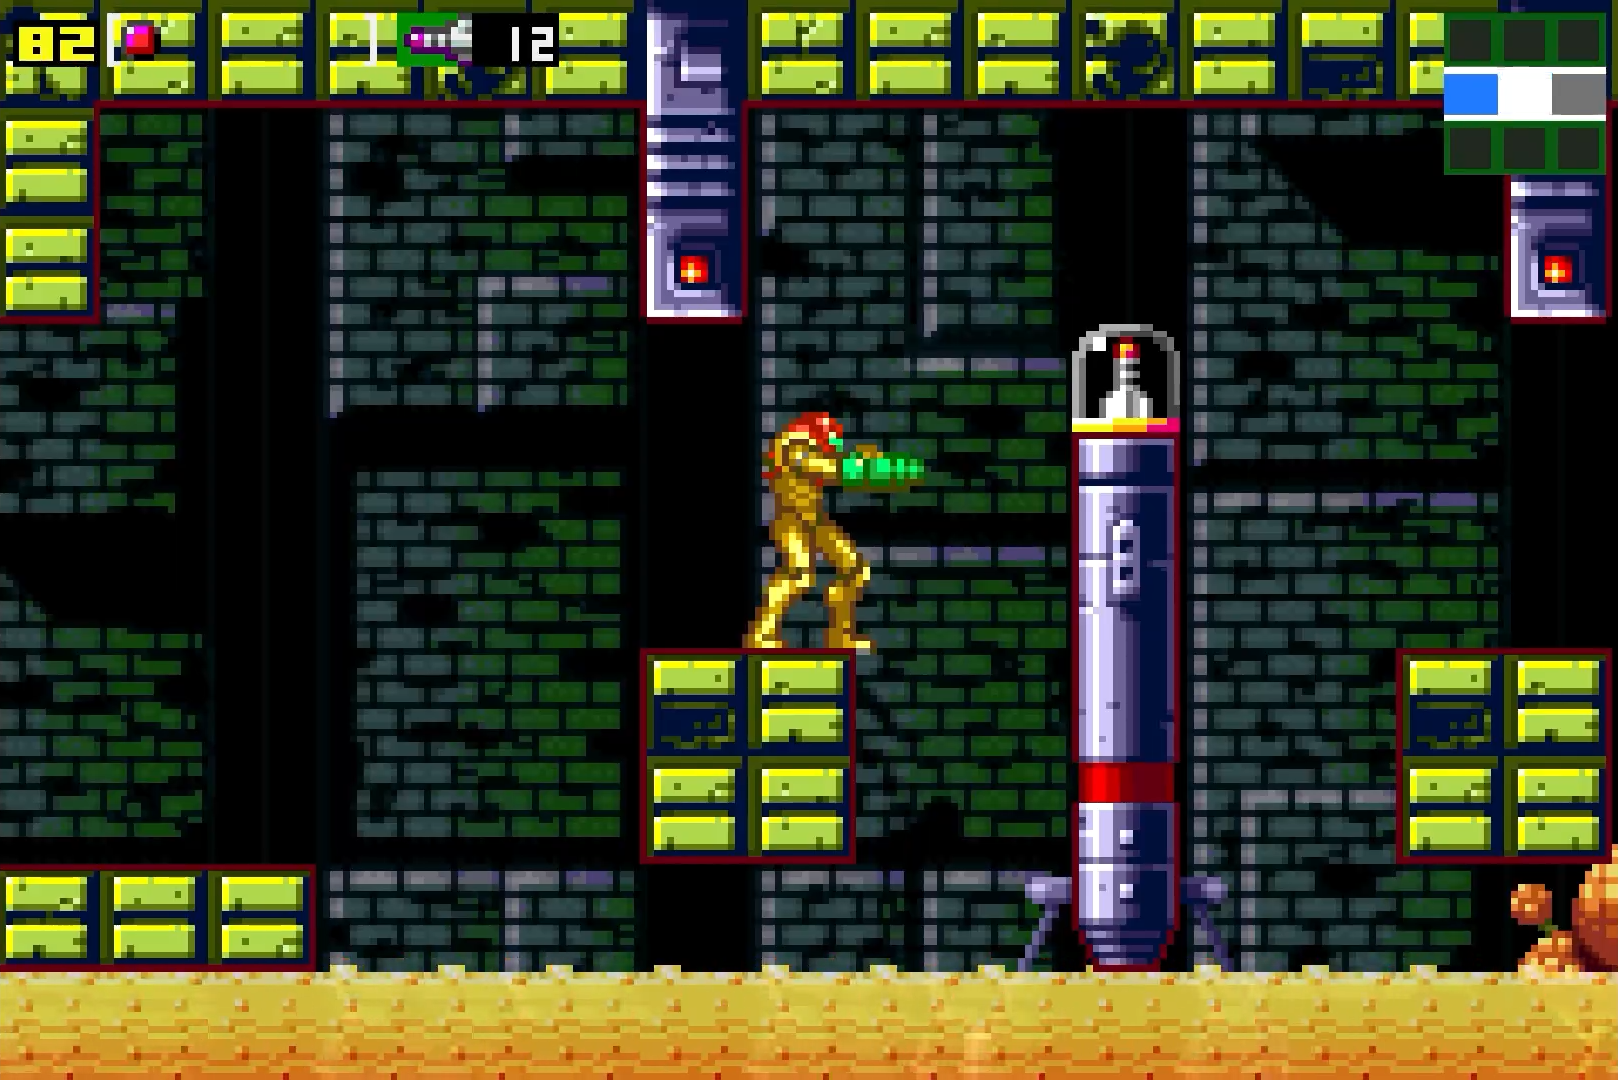
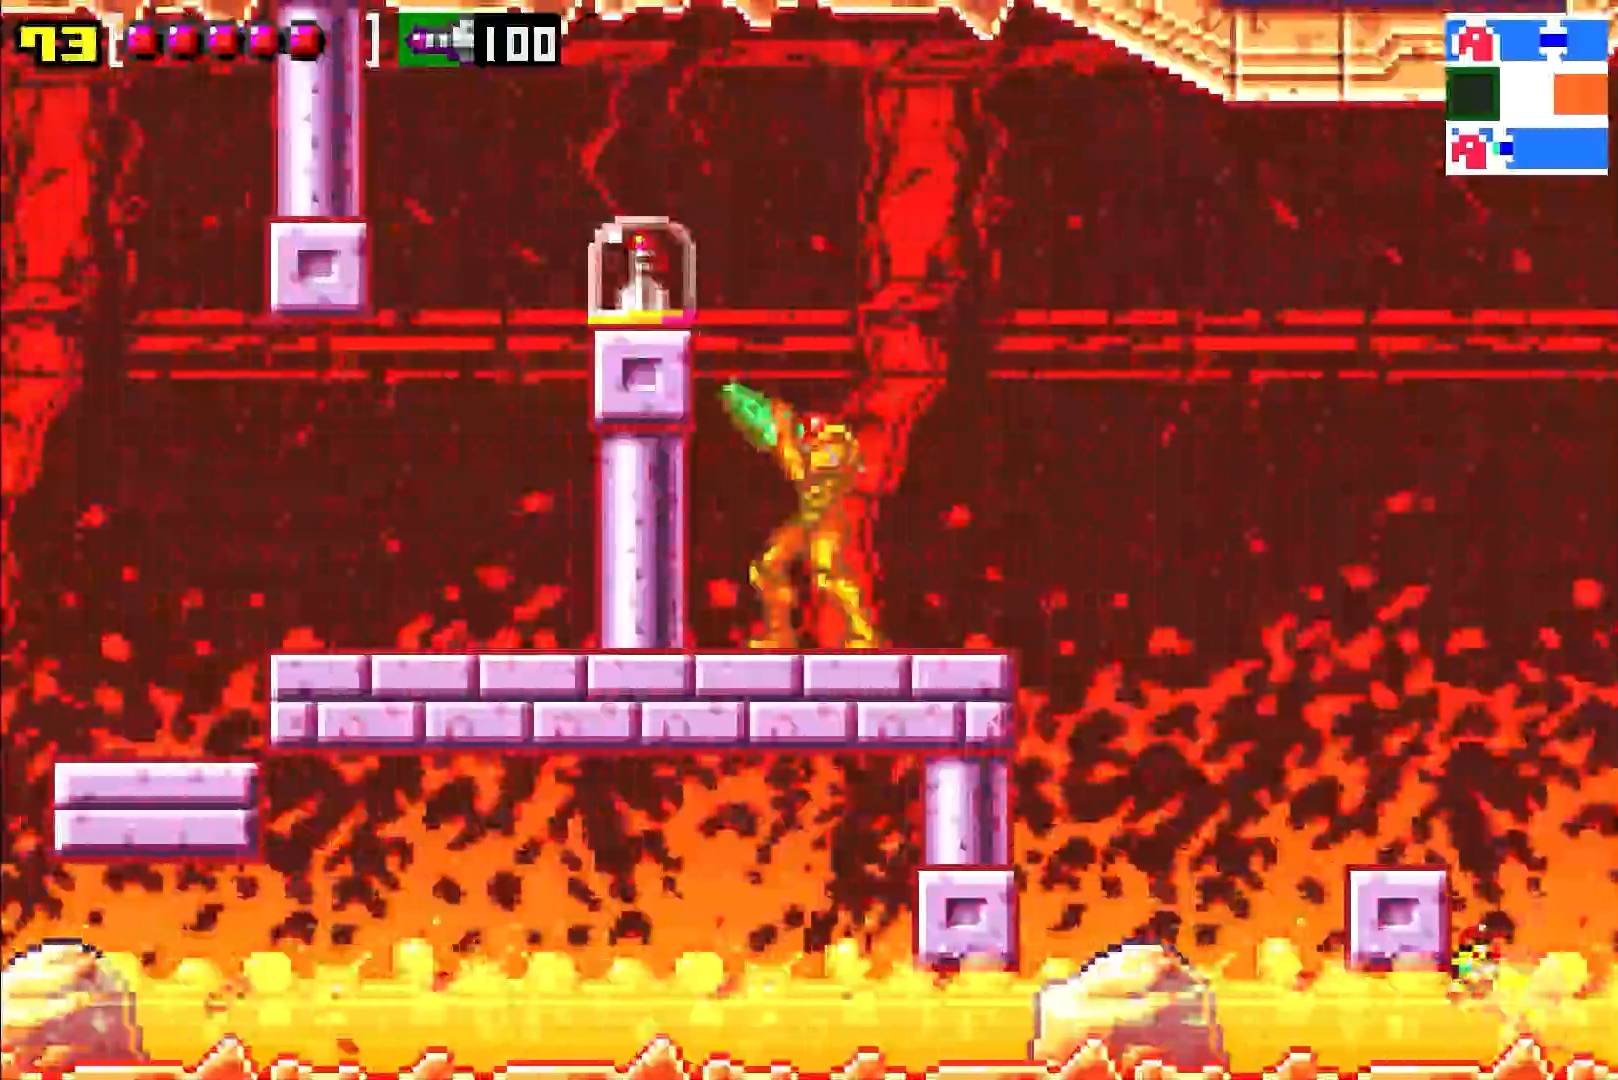
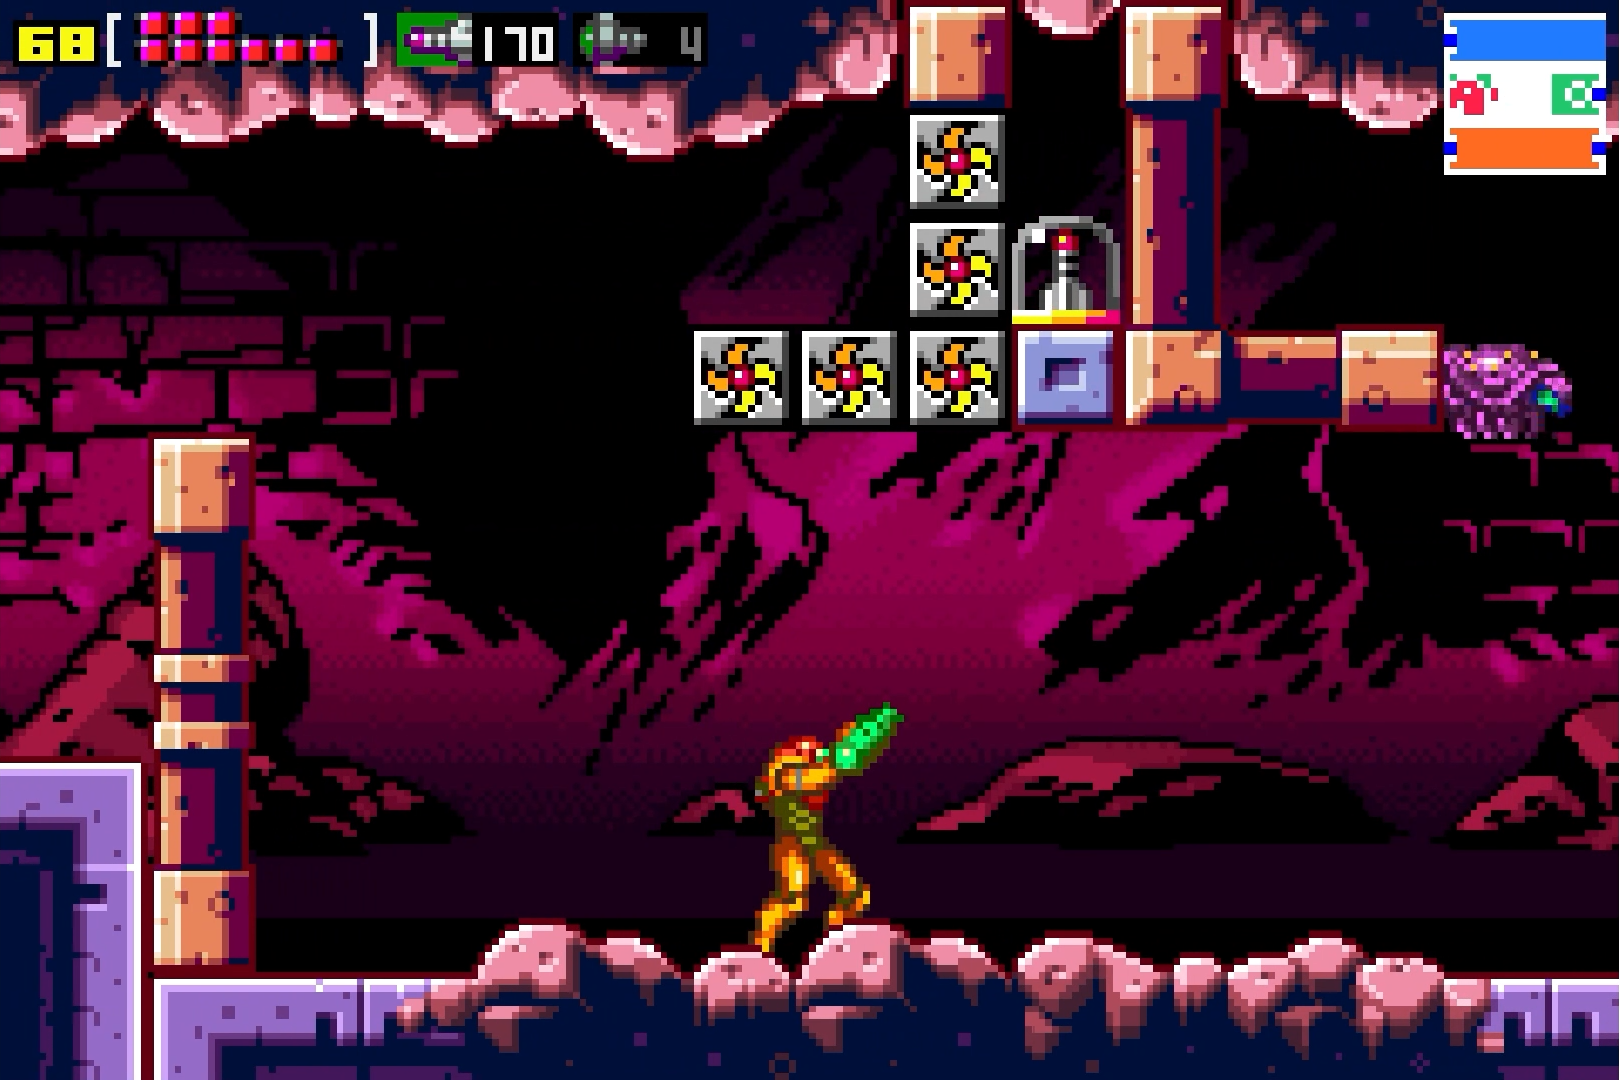
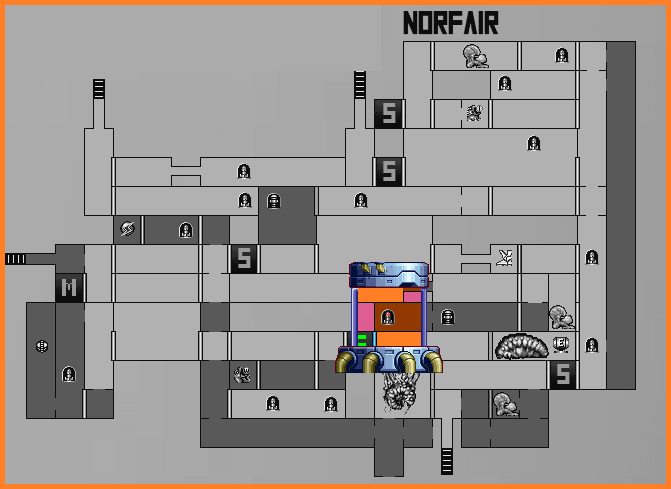
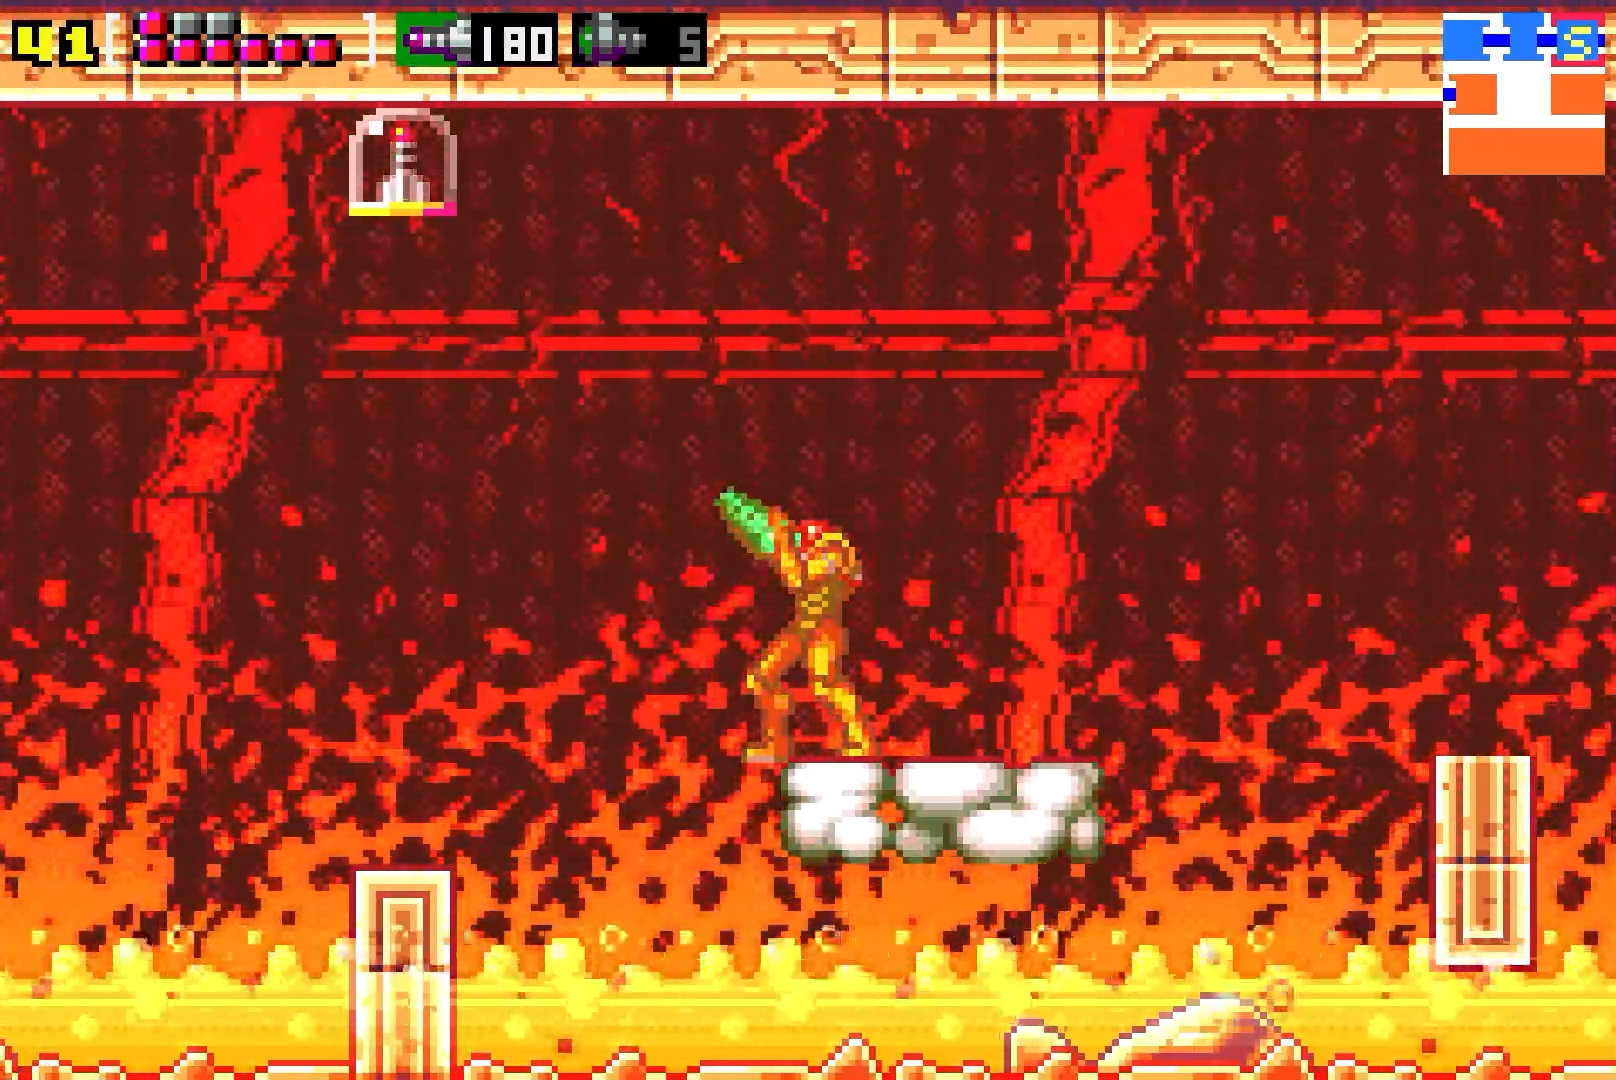
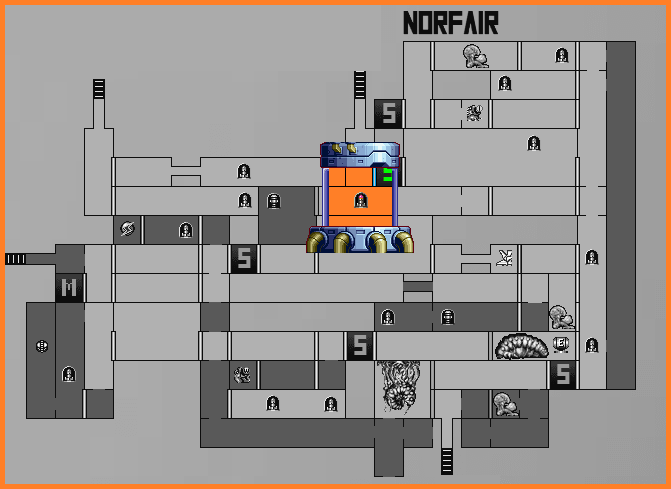
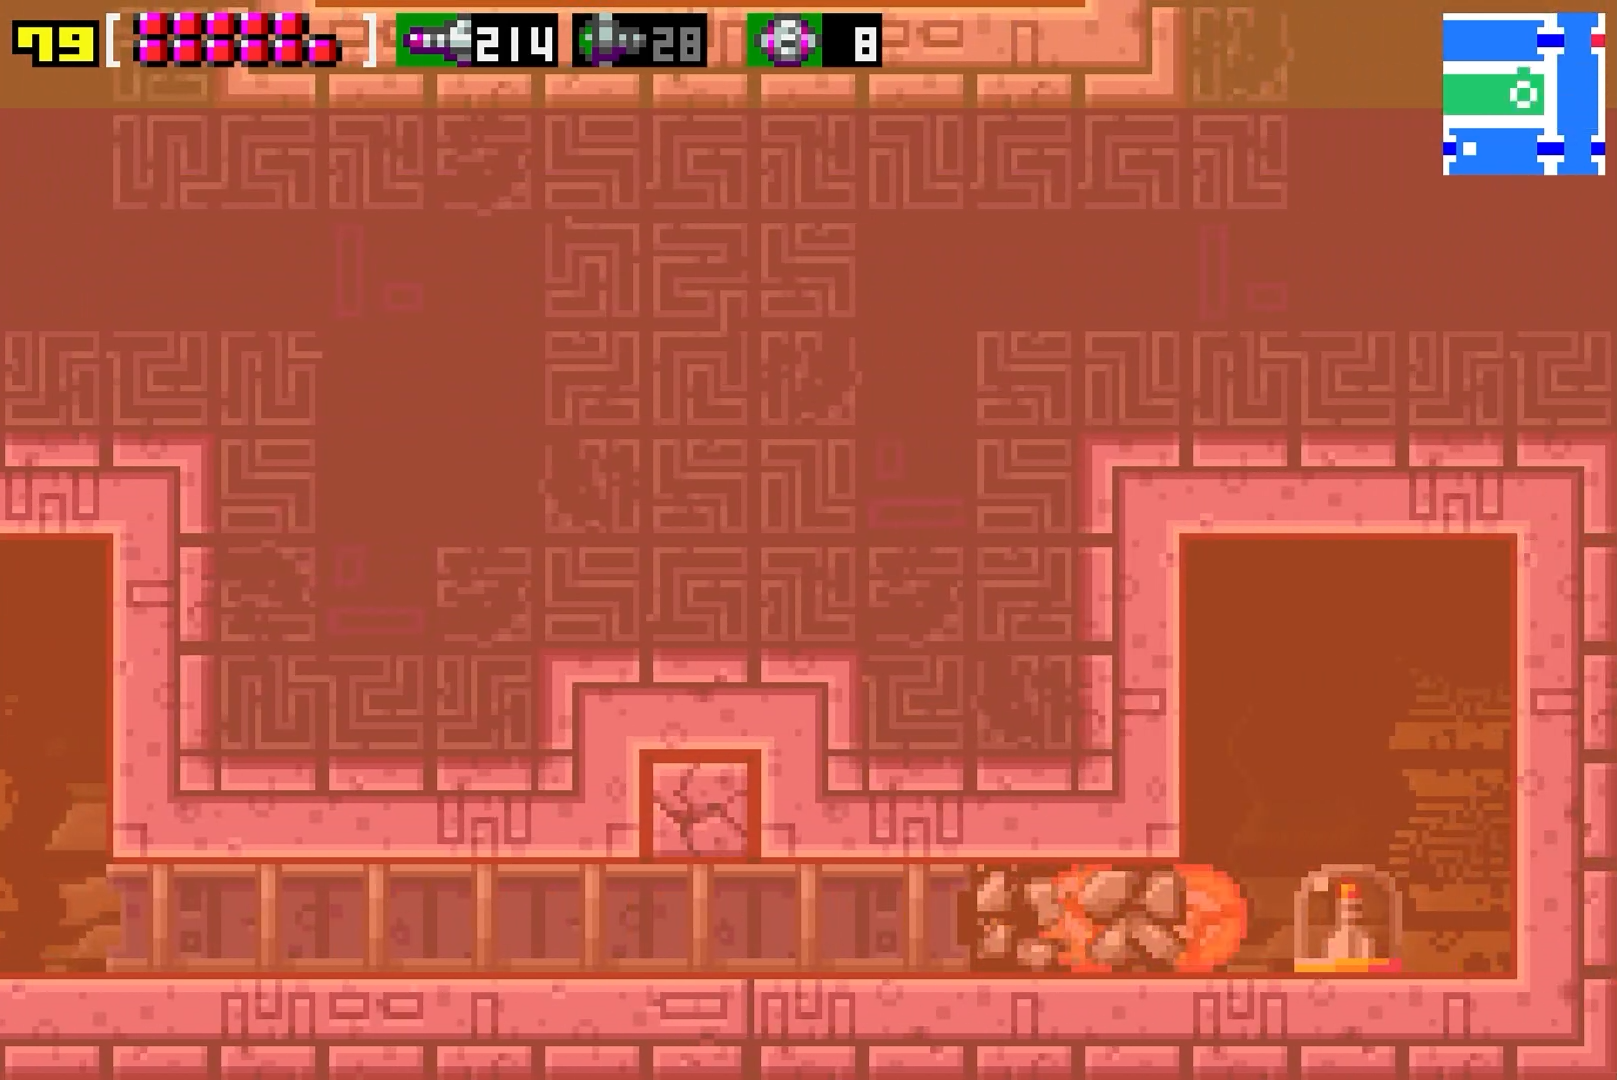
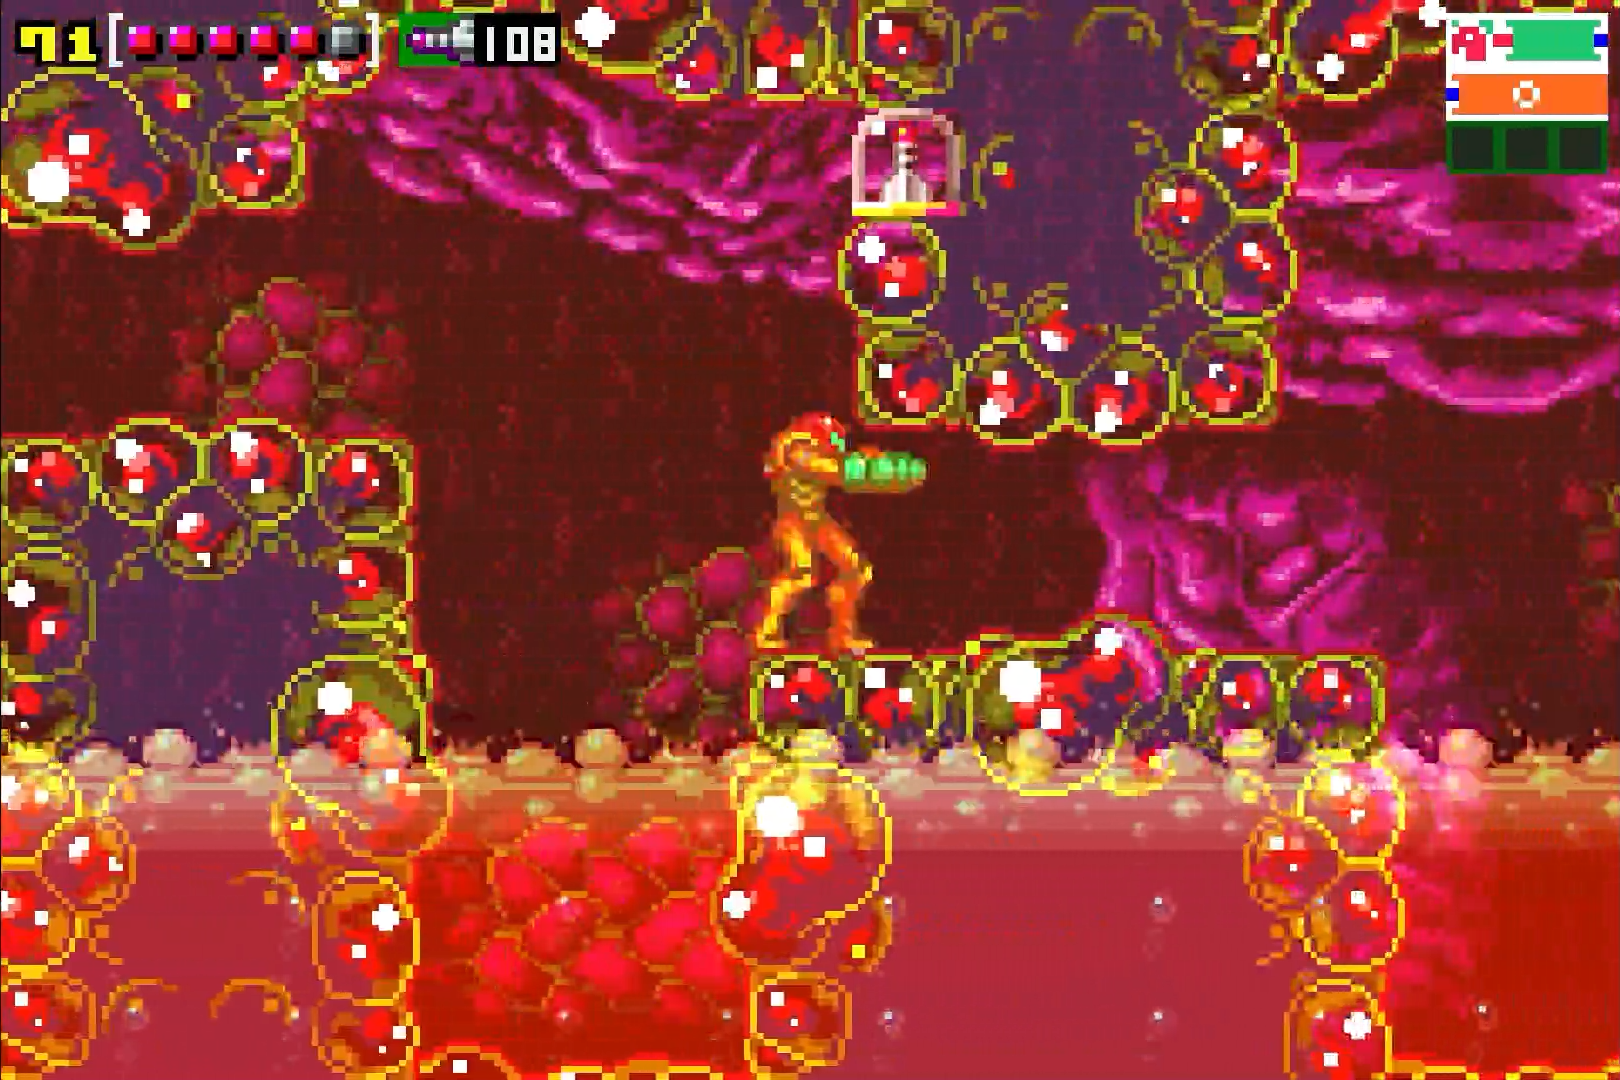
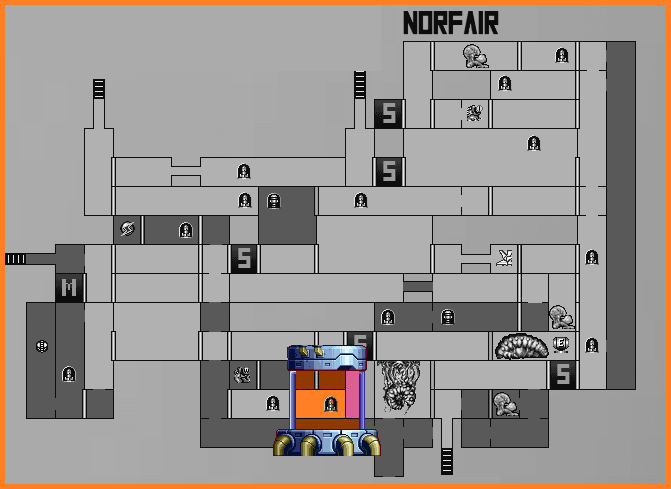
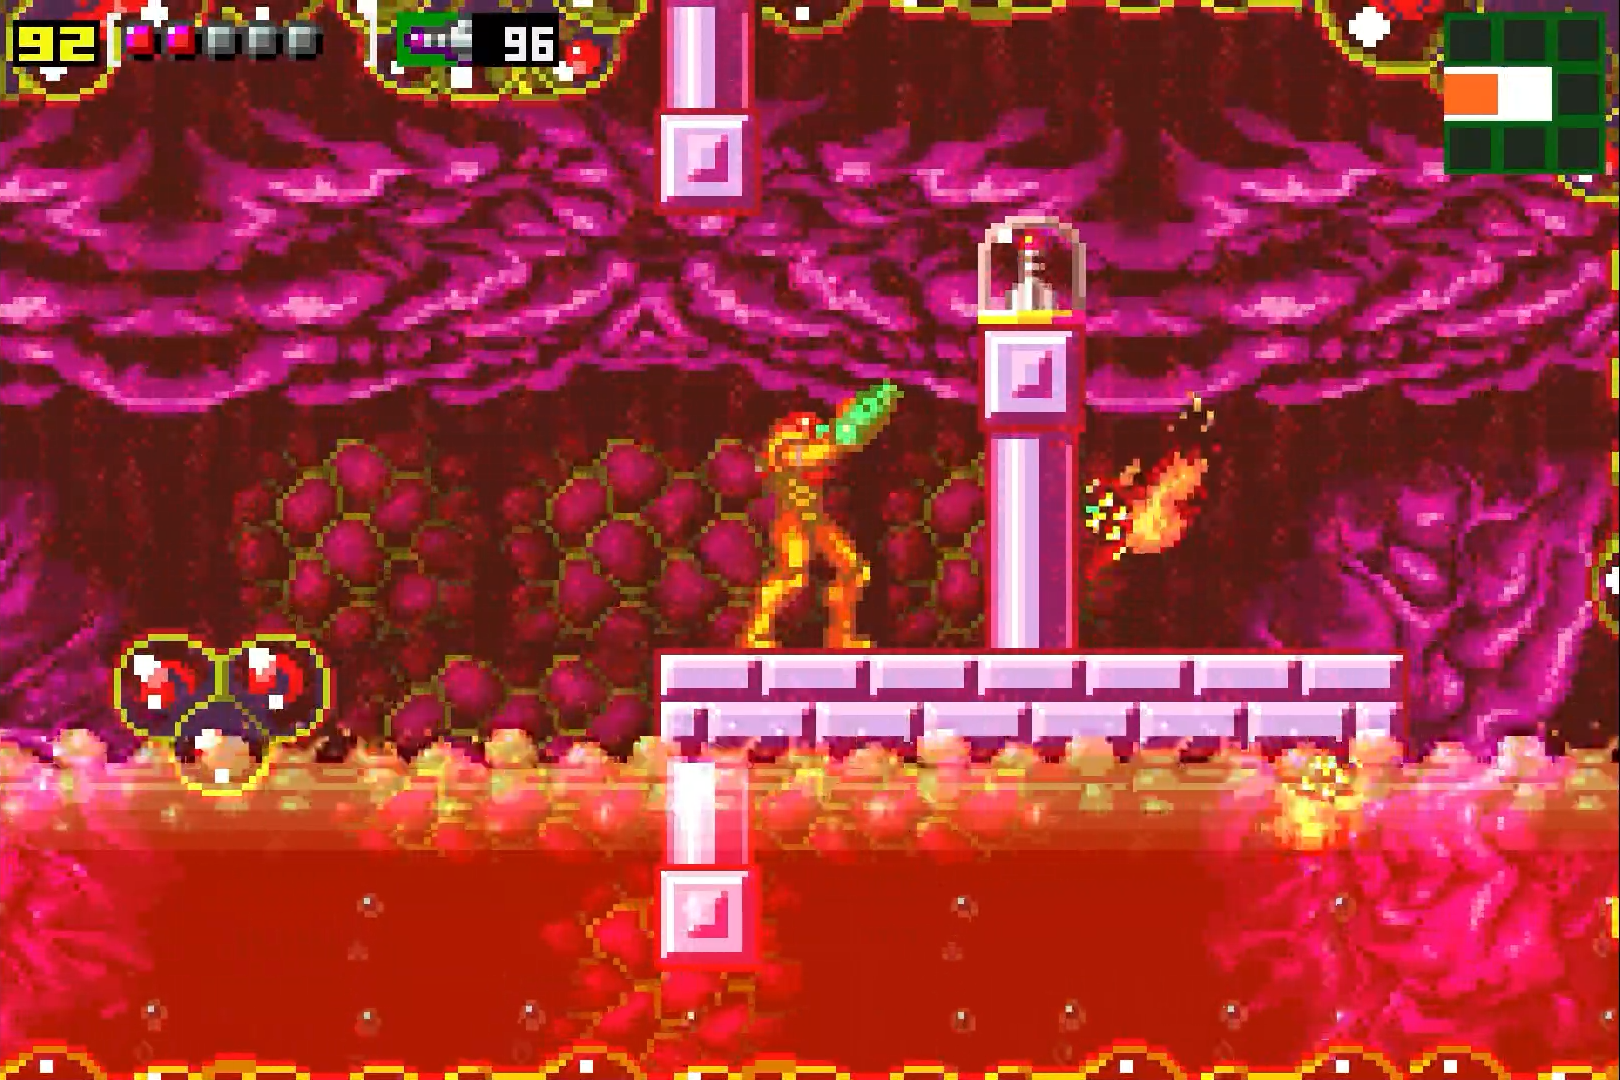
Missile Expansion #1
Location: Brinstar
Requirements: None (you will fight Deorum immediately after)
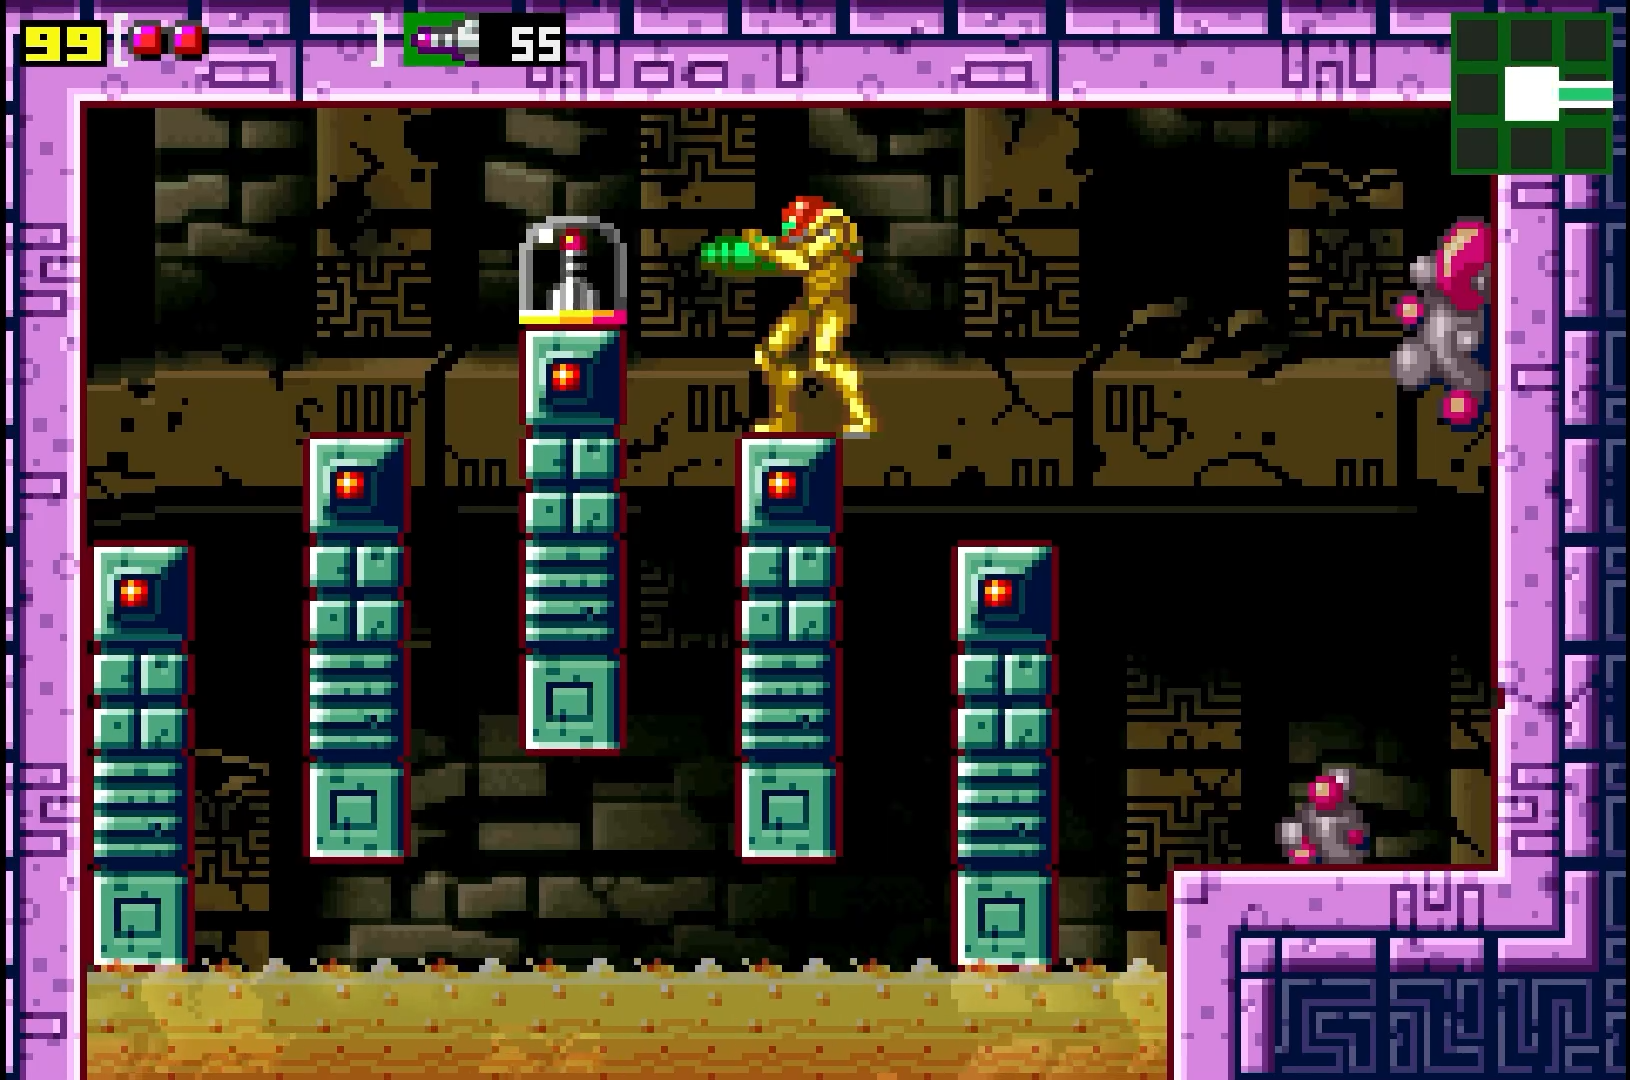
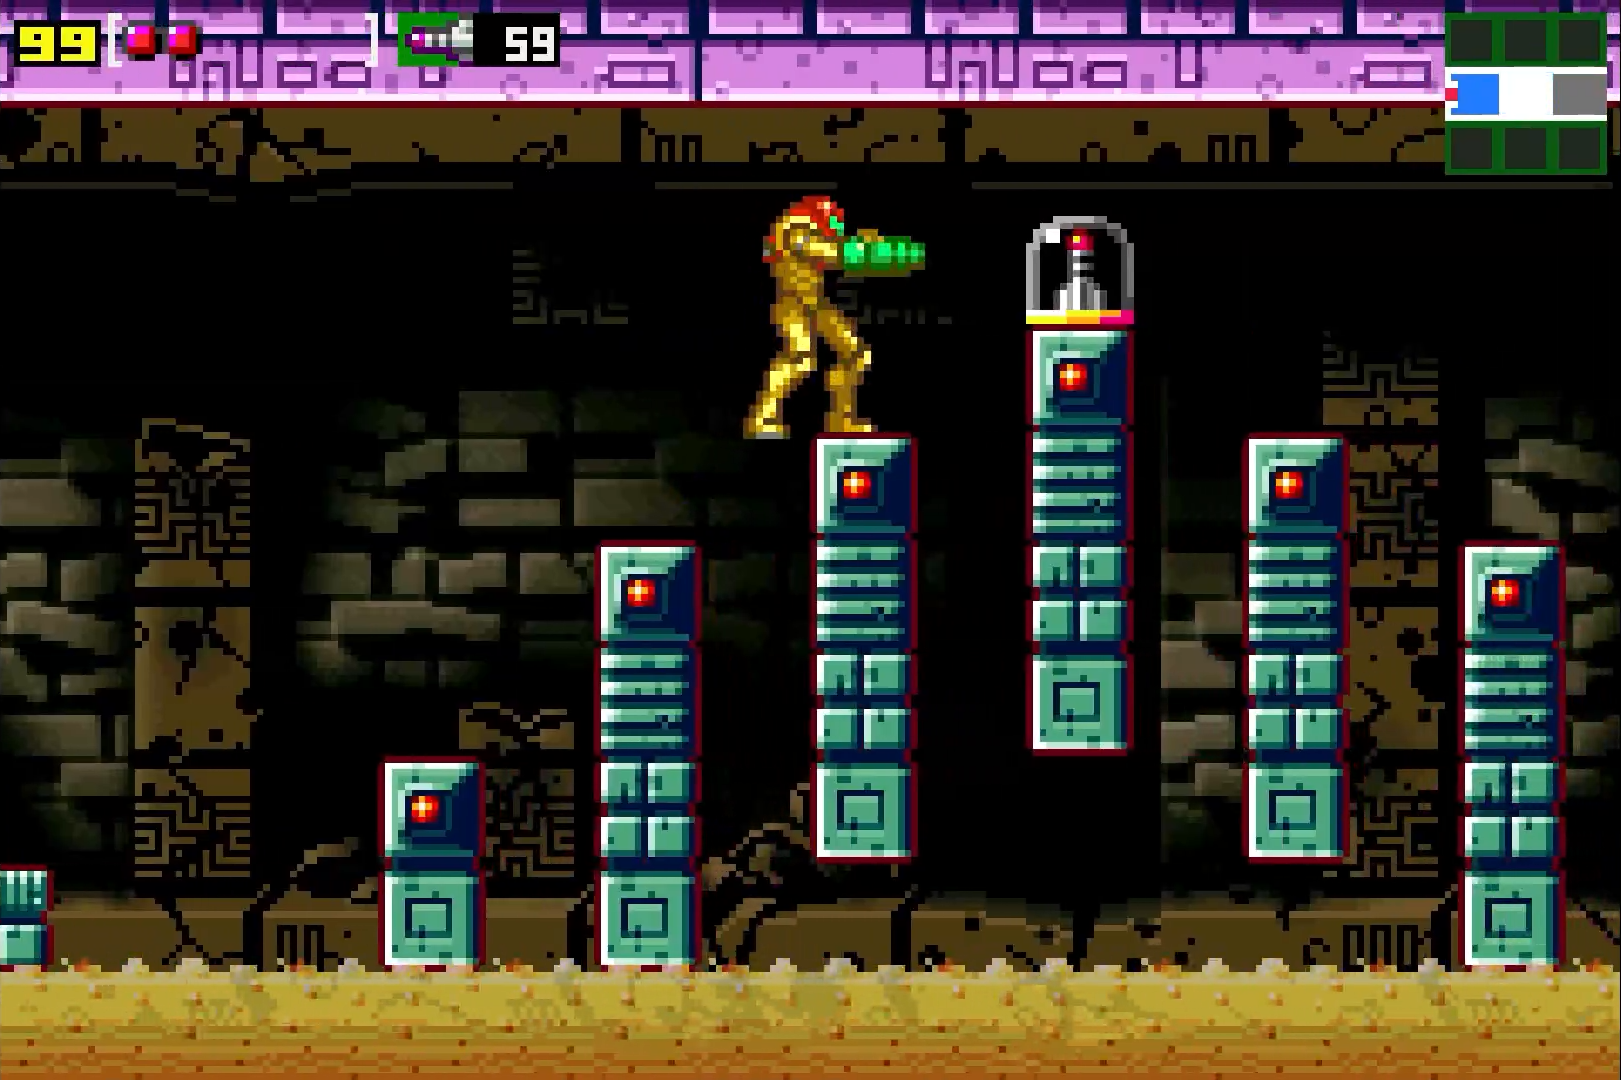
Once you’re at the bottom of Brinstar, head through the door. You’ll see that the room is shaking. Uhohhh… Nevertheless, press forwards and on a pillar over some lava, you’ll see MISSILE EXPANSION #1 just sitting there, waiting for you! Rock on!

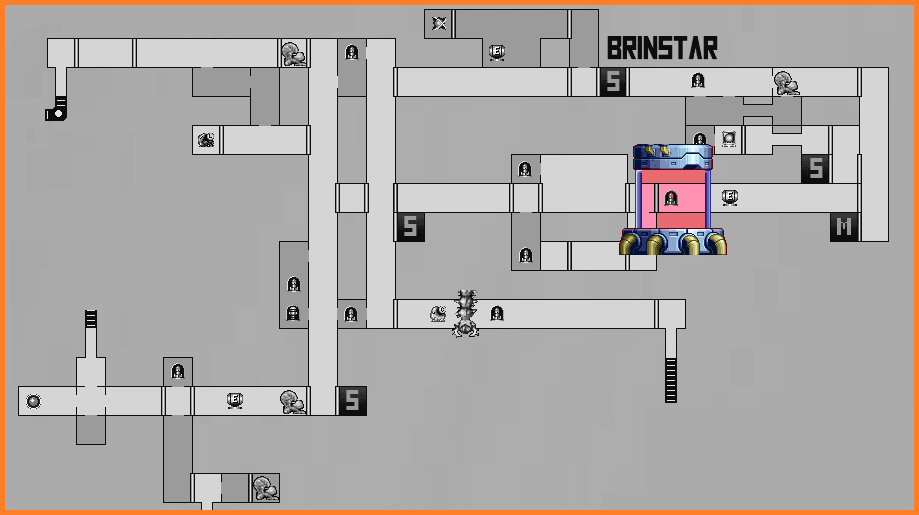
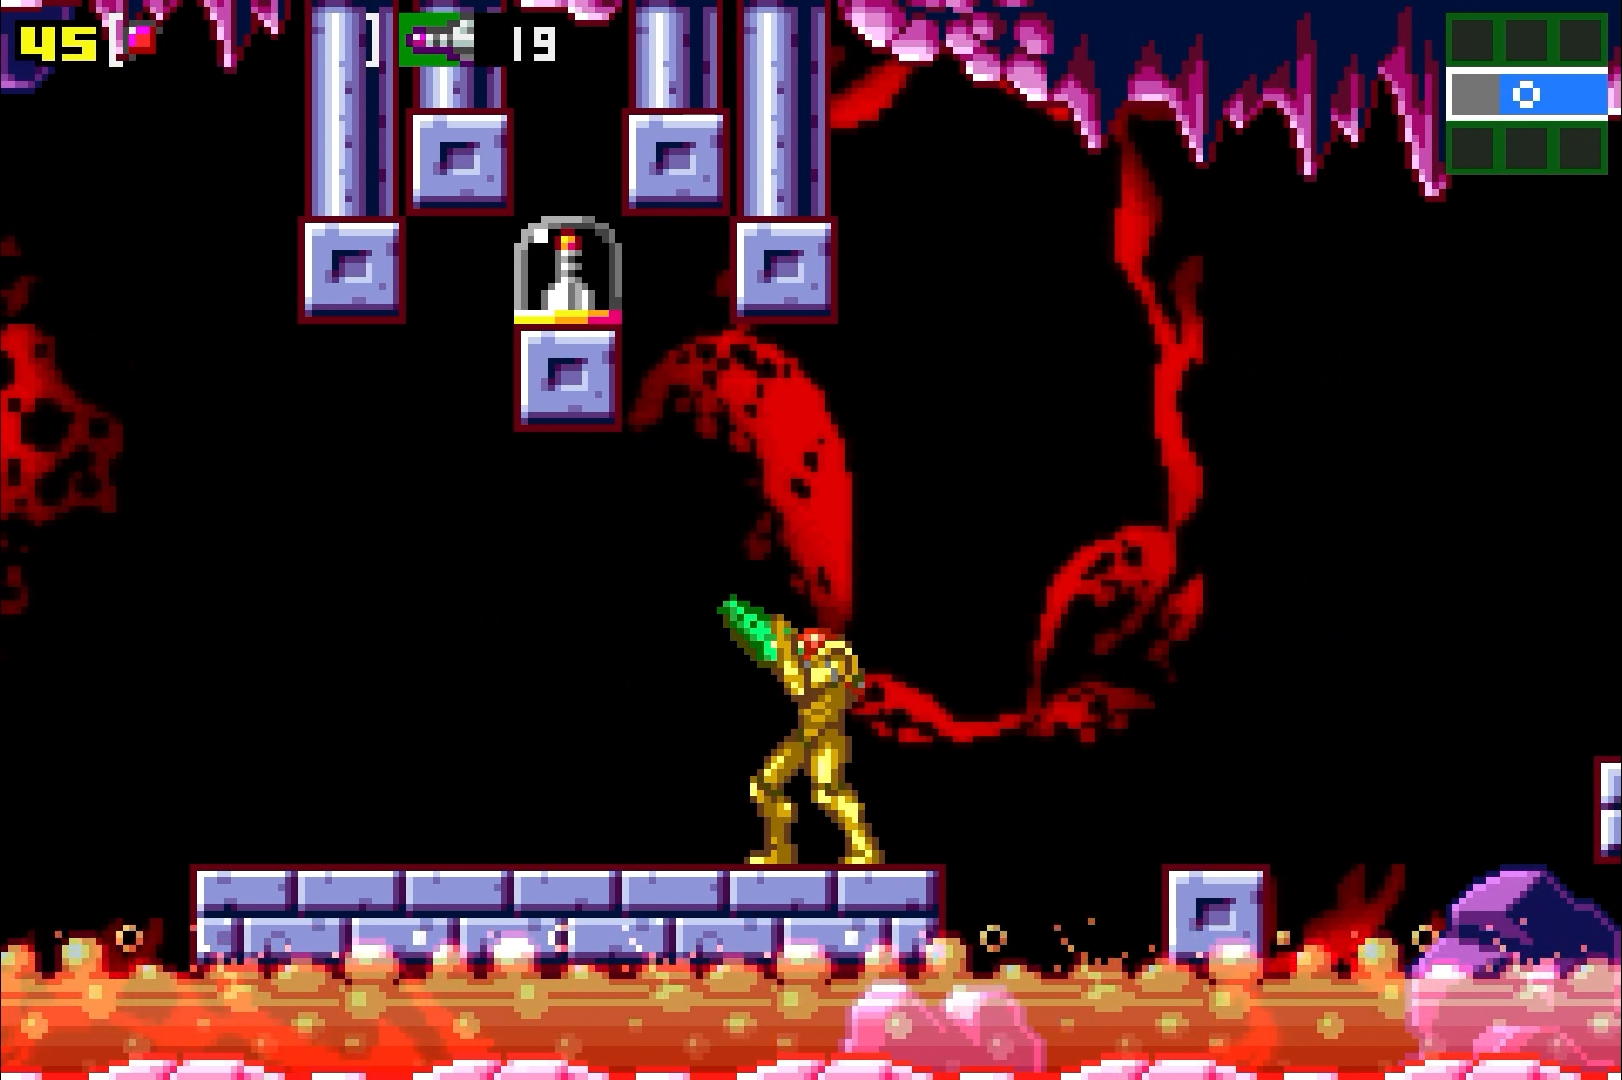
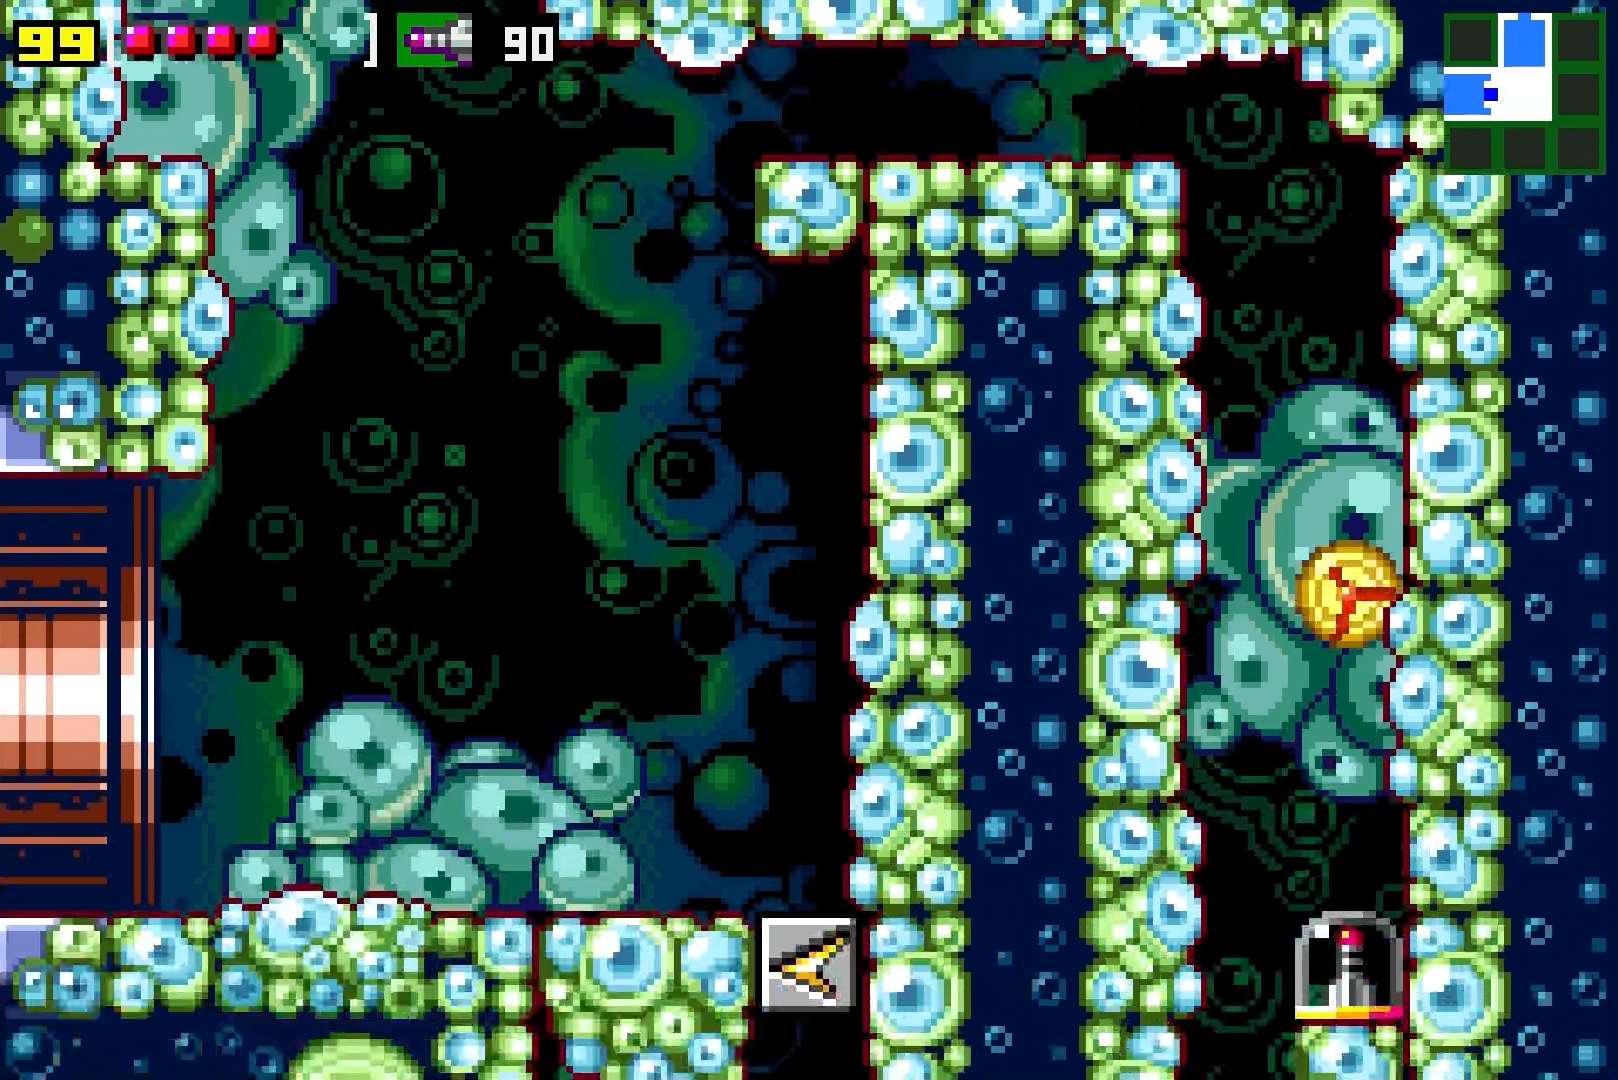
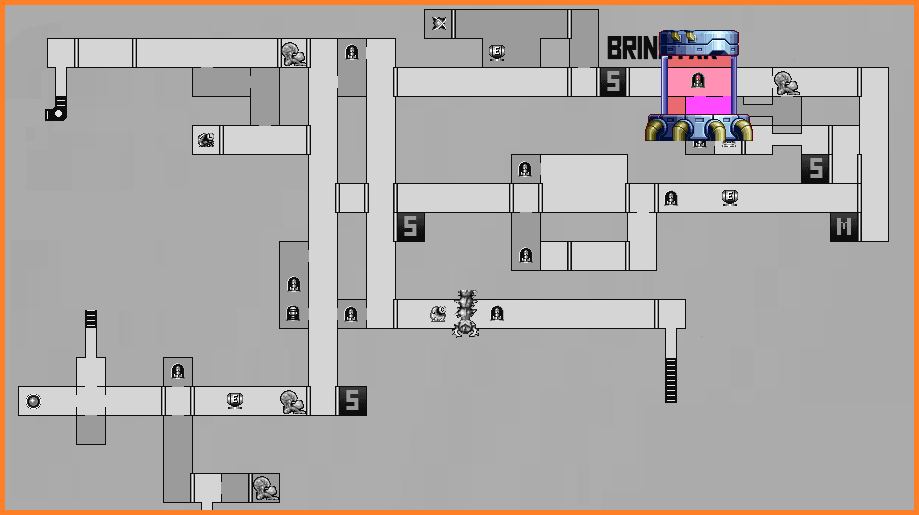
Missile Expansion #2
Location: Brinstar
Requirements: Missiles
Jump up on the ledge, and you should see a small nook on the upper left side of the wall. Jump up and then run through the wall; you’ll see one of the purple hive things, so destroy it and grab MISSILE EXPANSION #2.
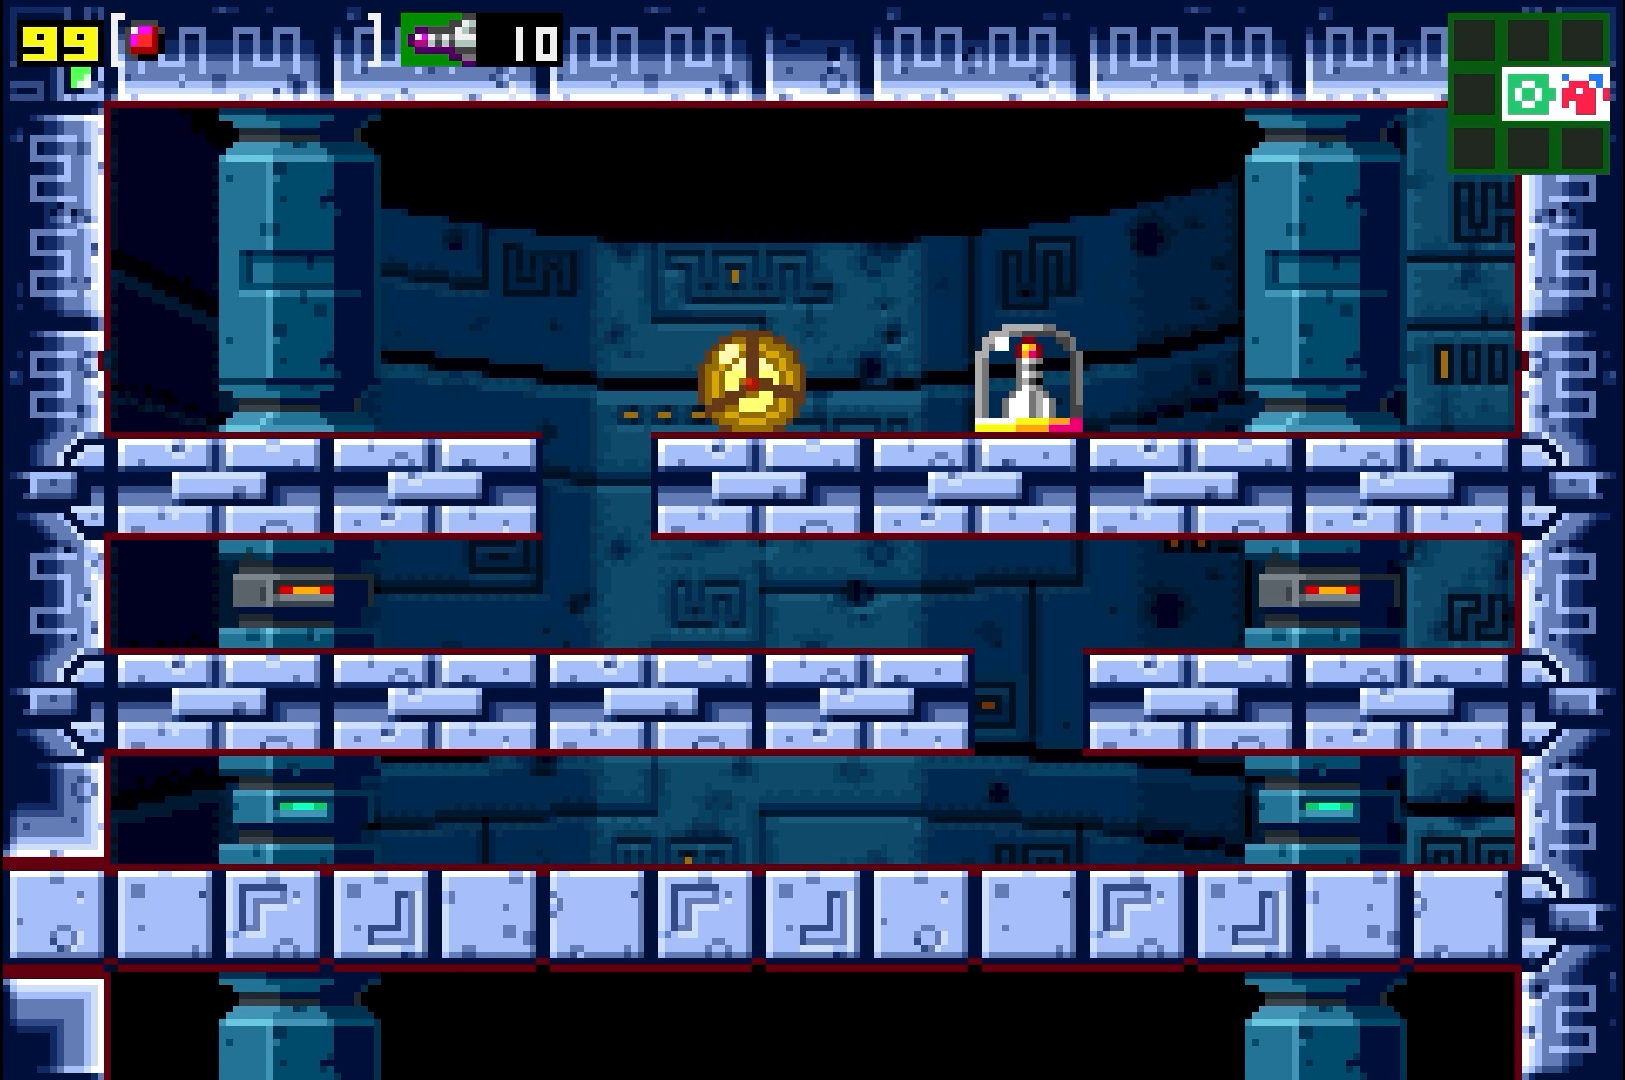
Missile Expansion #3
Location: Brinstar
Requirements: None
Continue through another door and you’ll find yourself in a new room with a big wall seemingly blocking your progress. Shoot the wall and it will disappear, and as a special bonus, in the lower left portion of this wall, there’s MISSILE EXPANSION #3 waiting for you!
Missile Expansion #4
Location: Brinstar
Requirements: Bombs, Morph Ball
In the room where you acquire the Bombs, bomb the two blocks directly under the Chozo Statue and rolling into the room on the left. Lay some bombs and propel yourself upwards until you grab MISSILE EXPANSION #4

Missile Expansion #5
Location: Brinstar
Requirements: Morph Ball, Bombs
Go through the large room with the purple monsters and stop in the small room on the left side of it. Bomb the floor and you’ll drop down. There will be a ledge on the middle right-hand wall. Get yourself on top of it, get into Morph Ball form, and drop down, bombing the block guarding the expansion. Quickly make your way back up, Morph Ball and fall, but press right once you drop and you’ll tuck into the ledge, grabbing MISSILE EXPANSION #5.

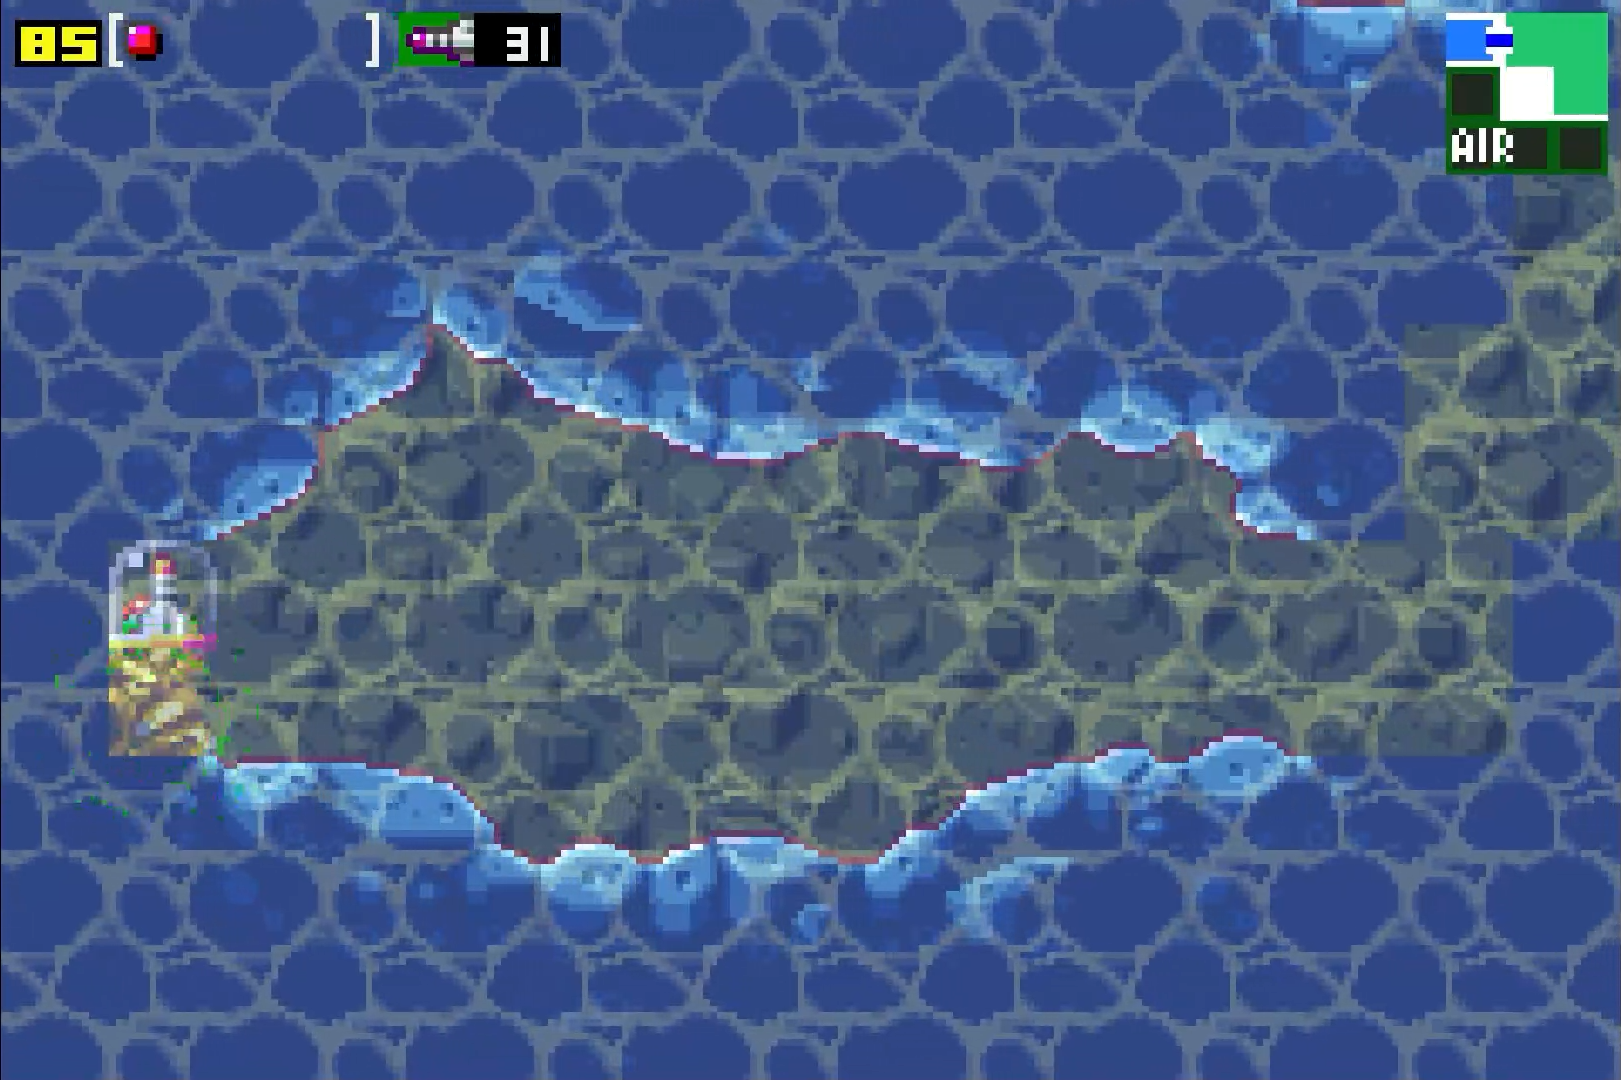
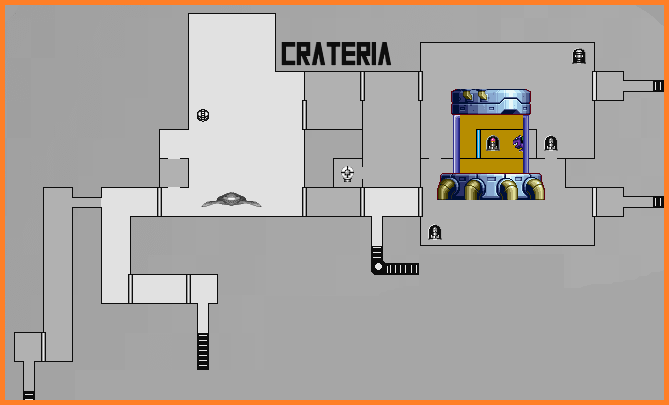
Missile Expansion #6
Location: Crateria
Requirements: Bombs
Head into the water and shoot the walls and ground on your lower left and you should see the walls give out. Keep bombing and shooting until a little nook opens up. Shoot the left wall and you’ll see that it houses MISSILE EXPANSION #6.
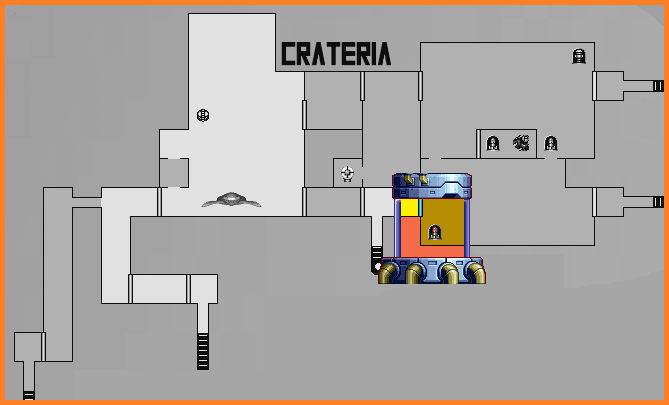
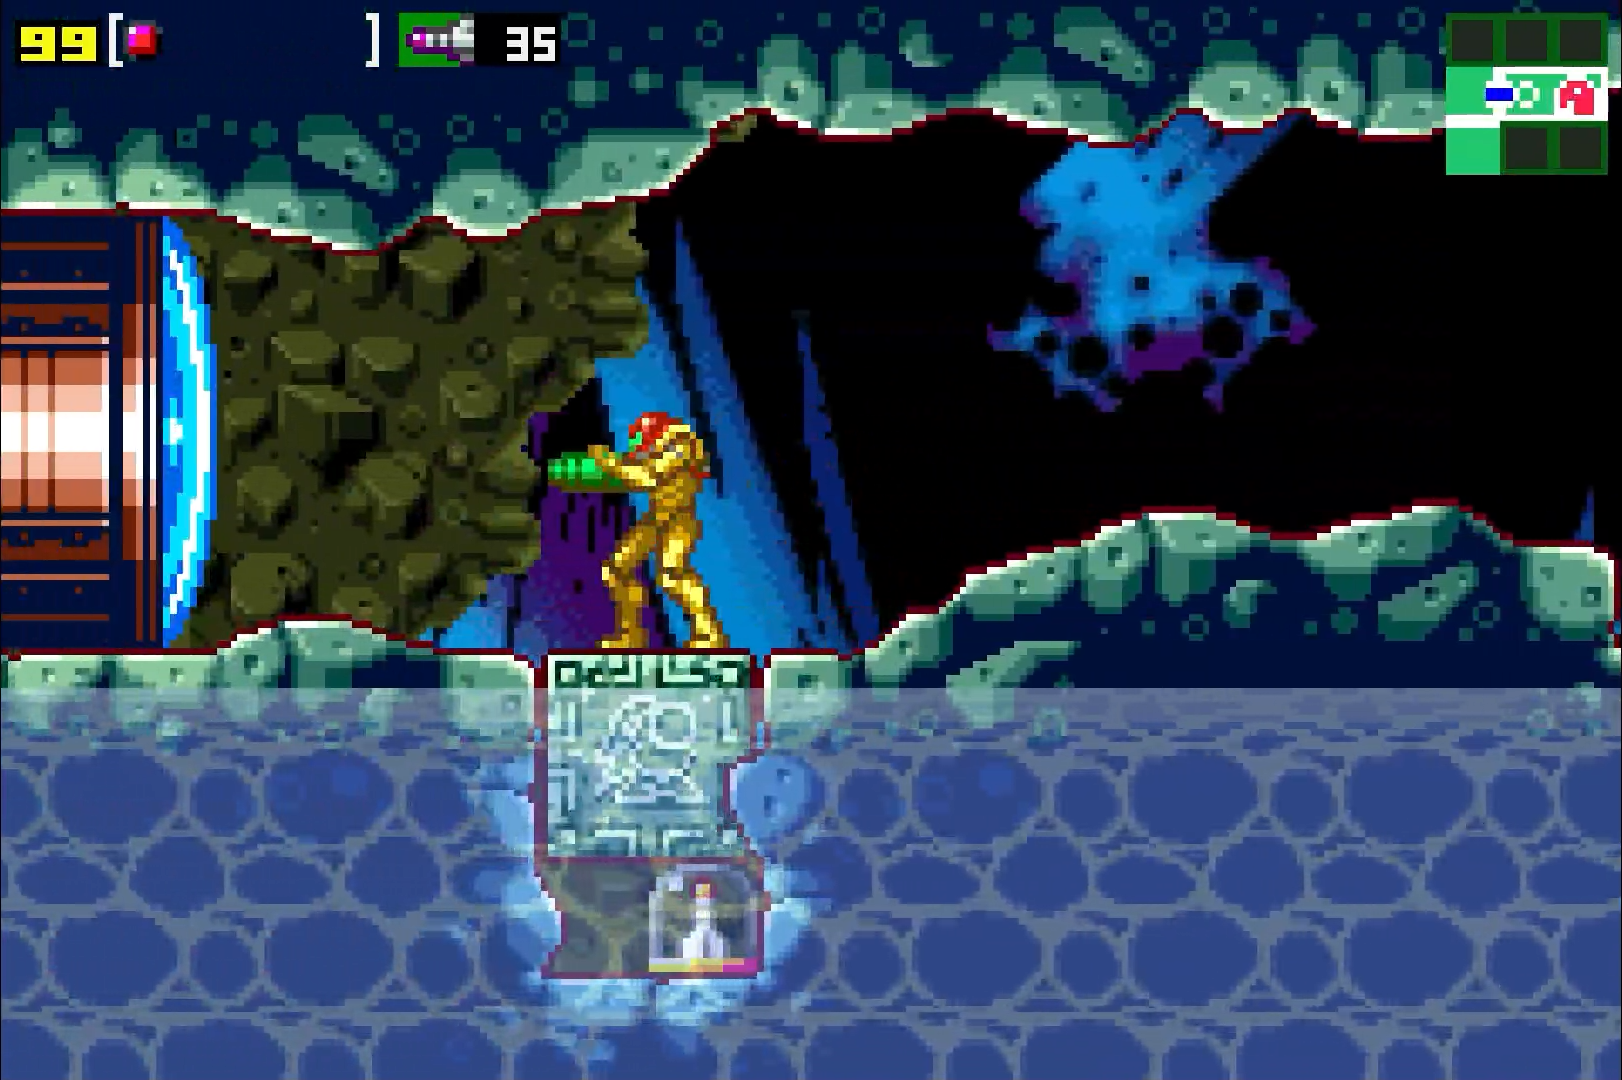
Missile Expansion #7
Location: Crateria
Requirements: Unknown Item (Plasma Beam)
Immediately after acquiring the unknown item, those weird blocks from before can at least be destroyed now (you’ll see them flashing, so shoot or bomb them to get rid of ‘em). Destroy the block closest to the door, drop down and get MISSILE EXPANSION #7.
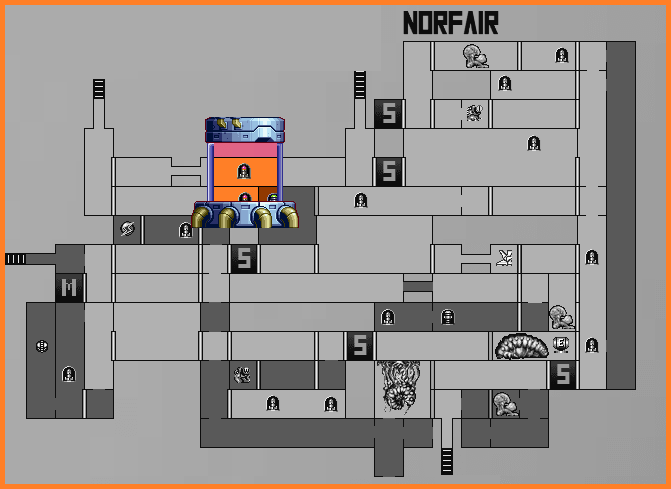
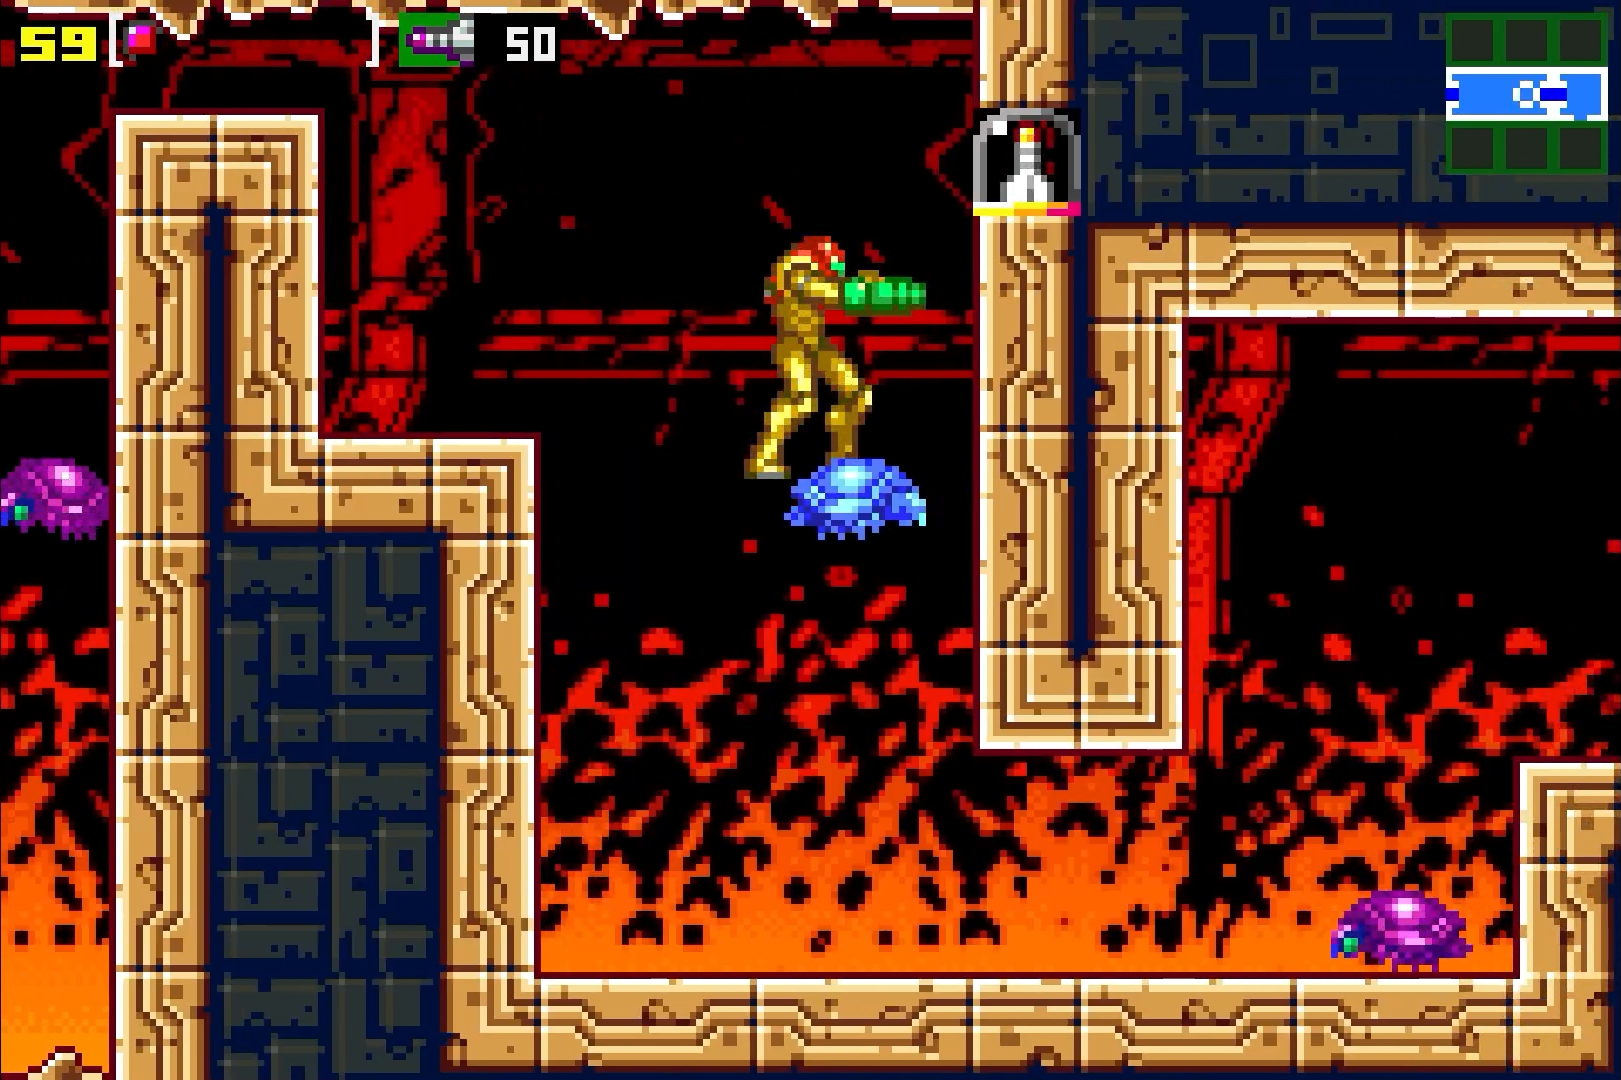
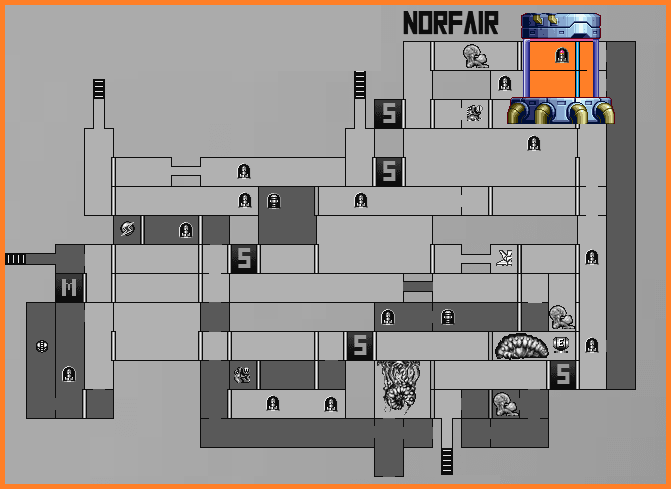
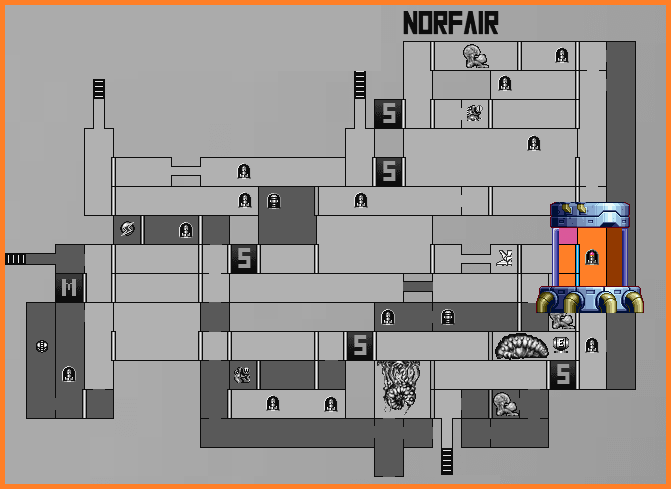
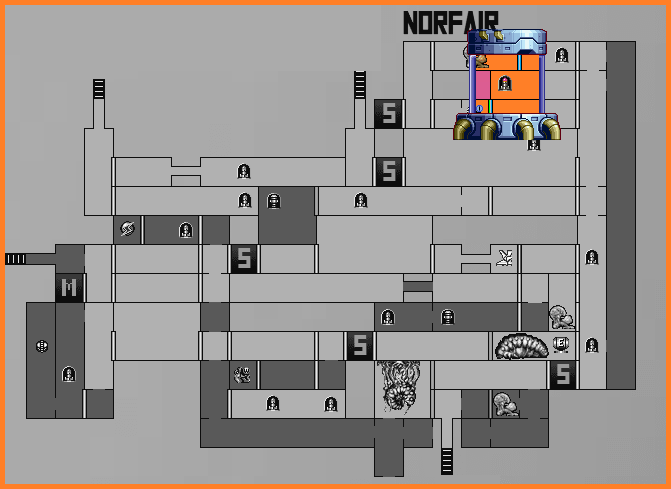
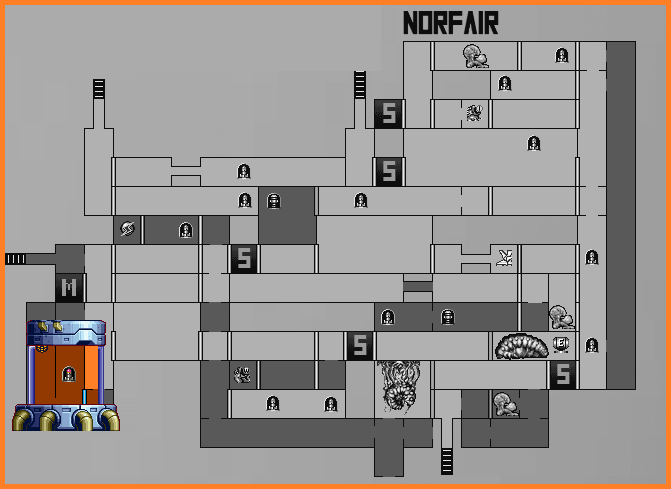
Missile Expansion #8
Location: Norfair
Requirements: Power Grip
Once you get off the elevator, use your Power Grip to pull yourself into the small ledge in the middle left side of the room, and fall down, taking the door on the right. Press forward in this room, jumping and blasting away enemies, and you’ll run right into MISSILE EXPANSION #8!

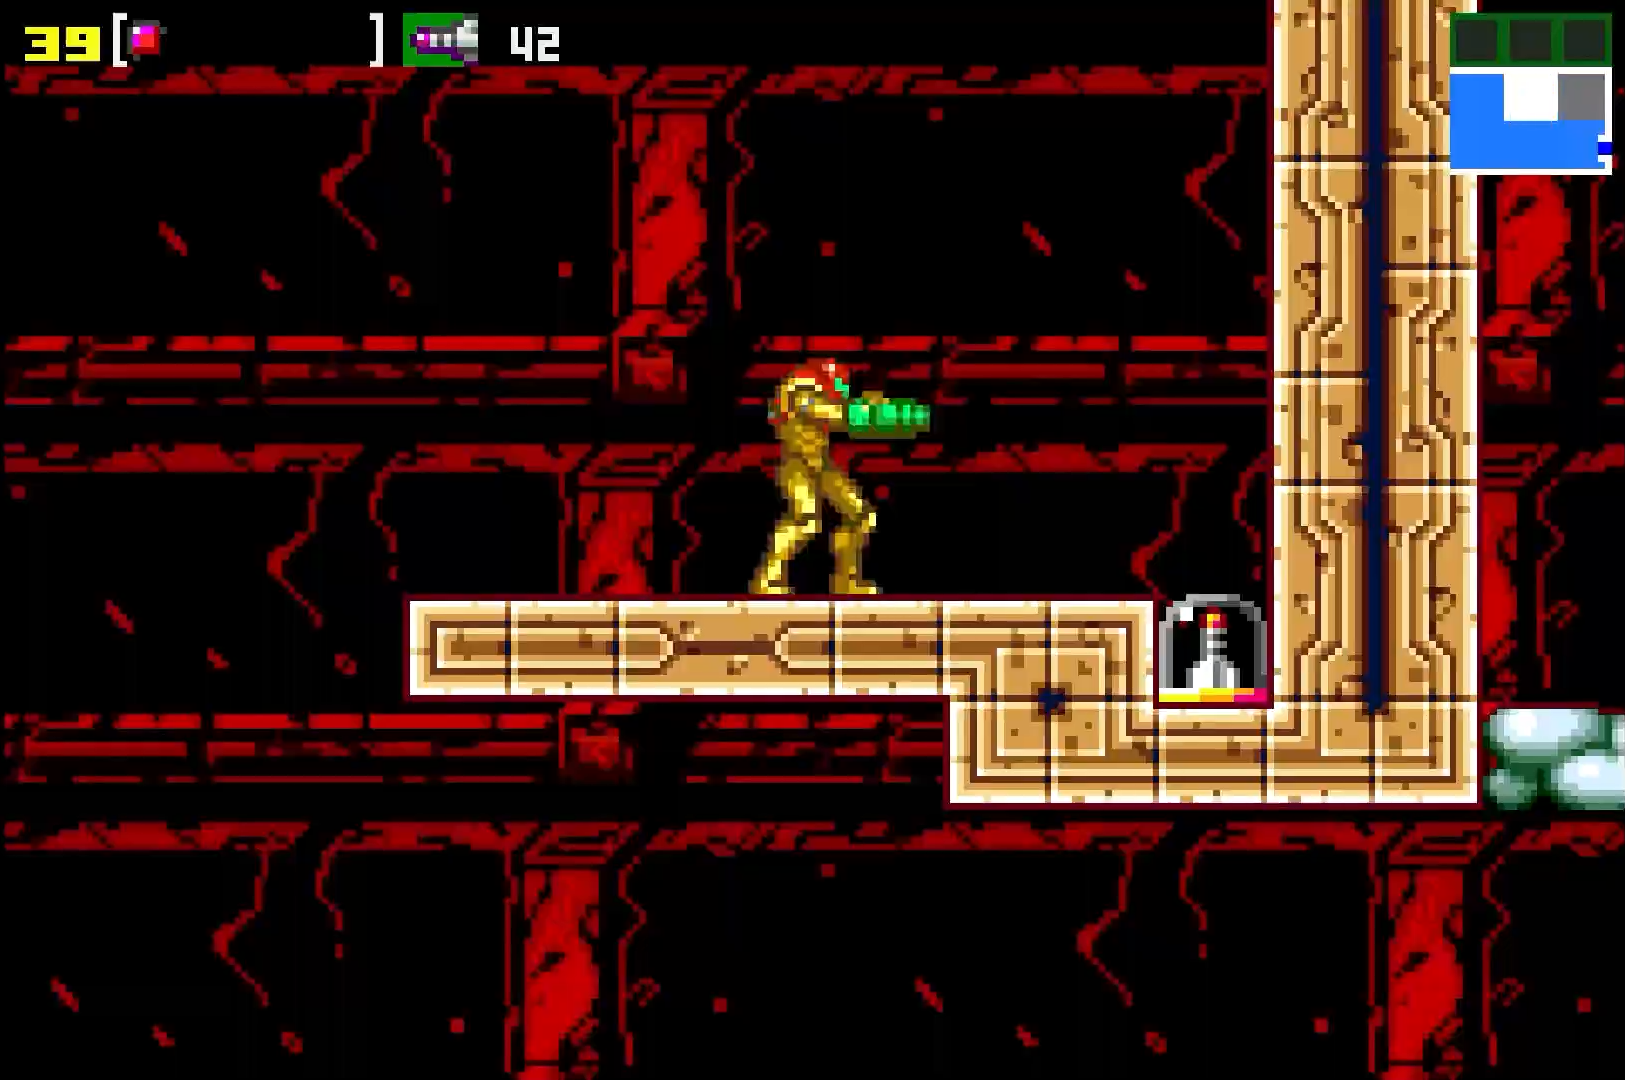
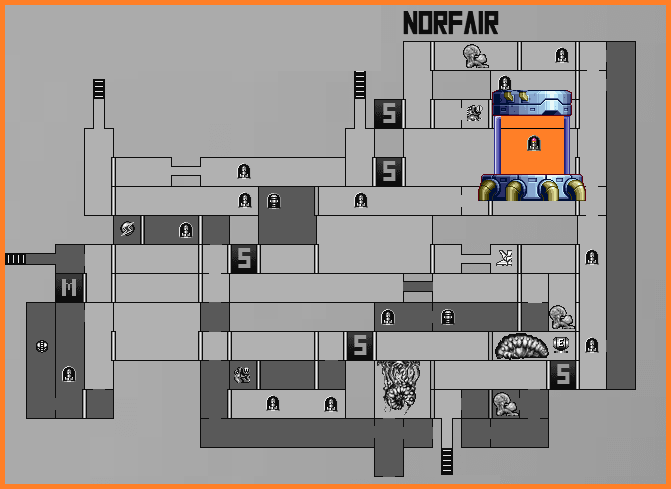
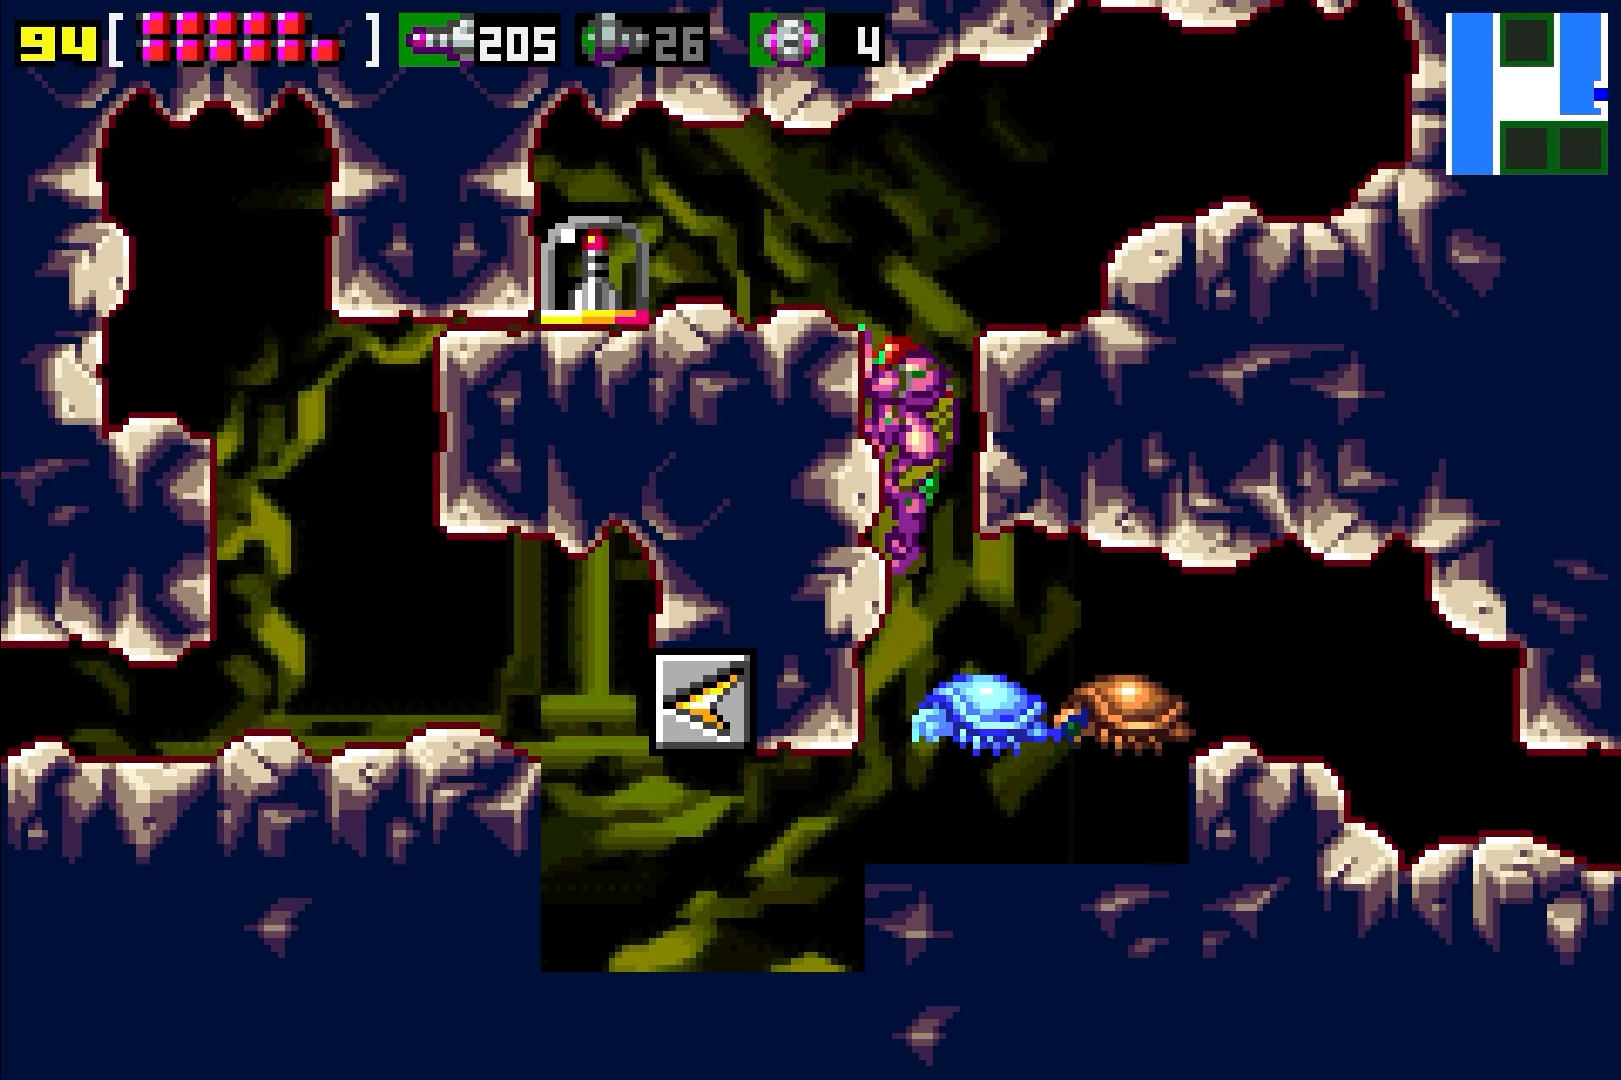
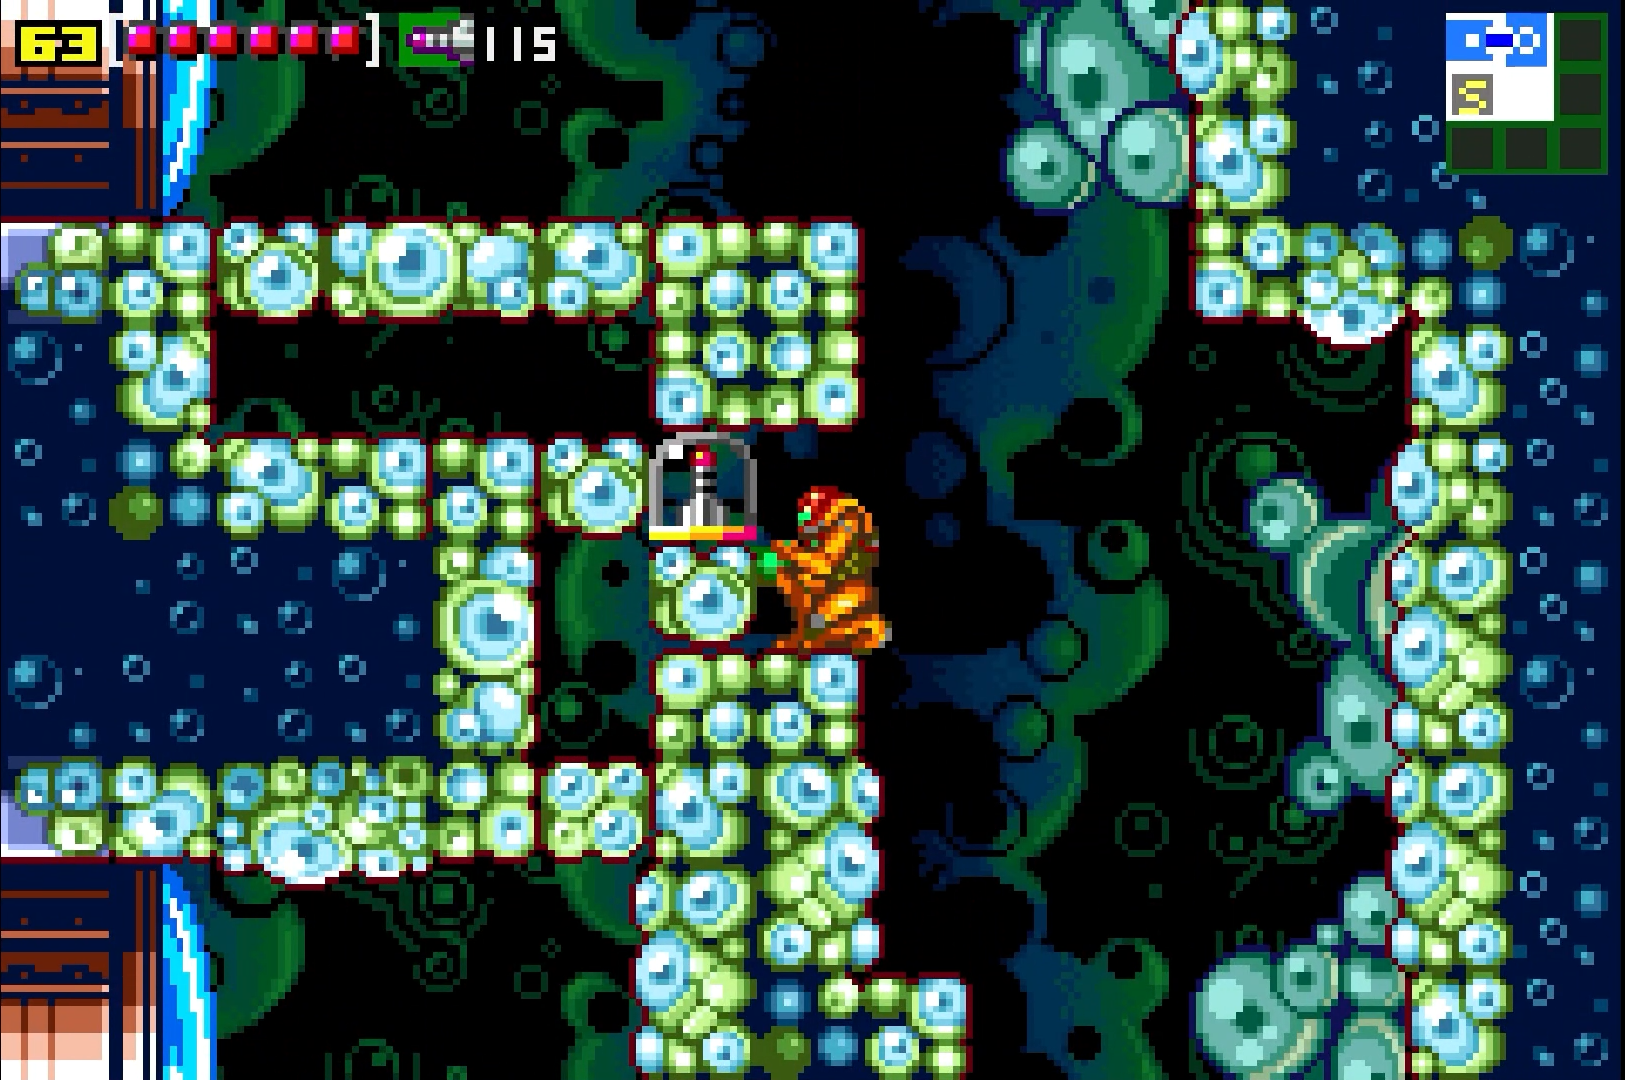
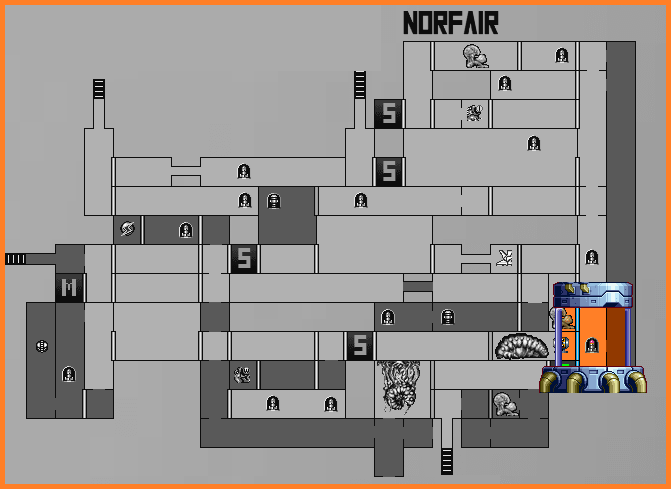
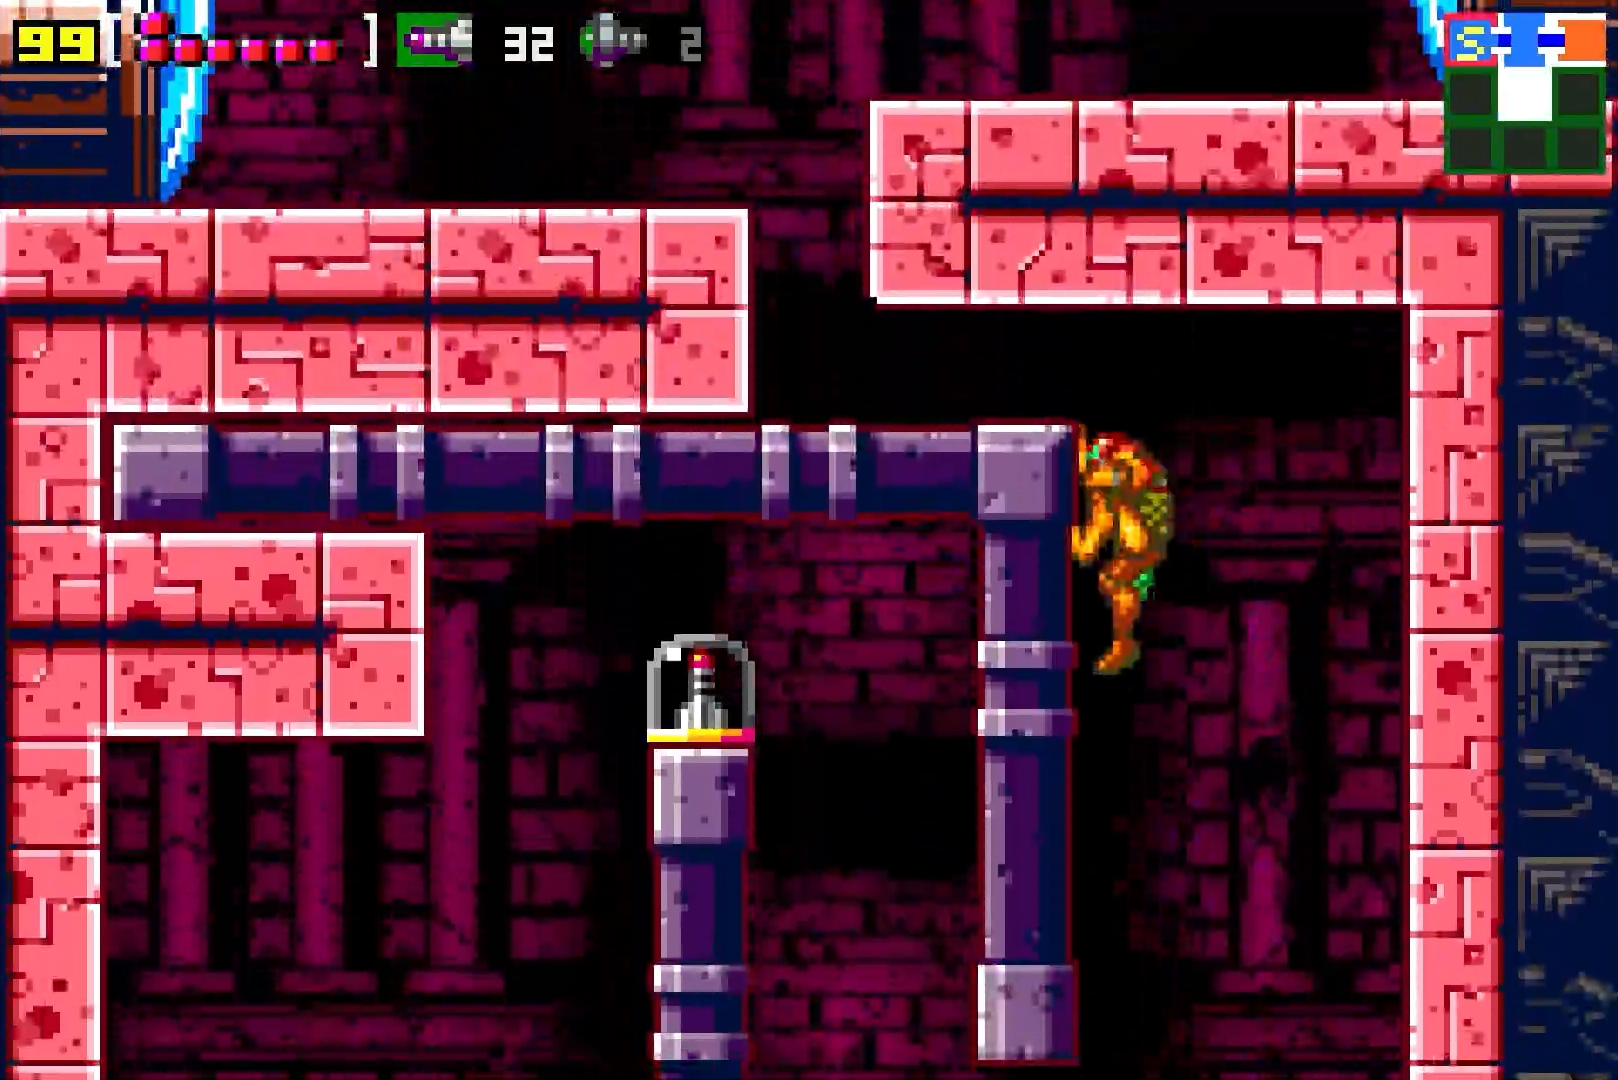
Missile Expansion #9
Location: Norfair
Requirements: Power Grip
From the elevator room, take the middle right-hand door and press forward. Using the Power Grip, we can jump up and grab MISSILE EXPANSION #9 easier than you can say ‘free candy’!
Missile Expansion #10
Location: Norfair
Requirements: Ice Beam
From the Chozo Statue, head through into the next room. Work your way across, stopping when you get to the middle of the room where one Ripper is flying around higher up and one is flying closer to the ground. Shoot the one higher up so it’s close to the wall, and then shoot the wall itself (you’ll want to aim for the second tile down from the top). You’ll see MISSILE EXPANSION #10 exposed, so go jump and get it!
Missile Expansion #11
Location: Norfair
Requirements: Ice Beam, Bombs
Make your way back into the large room with platforms and lava, the one next to the Save Station. You should see an enemy trapped under some blocks. Bombs the blocks and then freeze the enemy at the apex of its jump; climb on top of it and grab MISSILE EXPANSION #11.
Missile Expansion #12
Location: Brinstar
Requirements: Ice Beam, Power Grip
Work your way left from the elevator room until you’re back in the super tall vertical hallway. Climb ALL THE WAY to the top, freezing the Rippers at the peak and grabbing into the ledge, which will pull you into a secret room where MISSILE EXPANSION #12 is waiting for you!
Missile Expansion #13
Location: Brinstar
Requirements: Bomb, Ice Beam, Power Grip
From Missile Expansion #12, bomb your way down and you’ll now find yourself in another tall vertical hallway. Drop down until you see a ledge with a Ripper flying under it. Freeze the Ripper and just onto the ledge; bomb the block and roll through. Take out all the enemies, keep dropping down, and grab MISSILE EXPANSION #13.
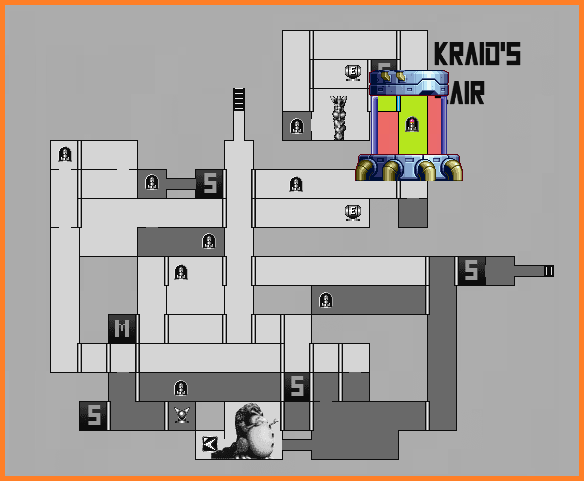
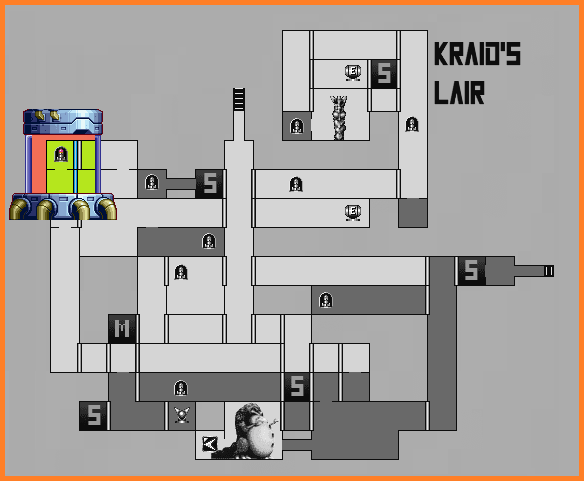
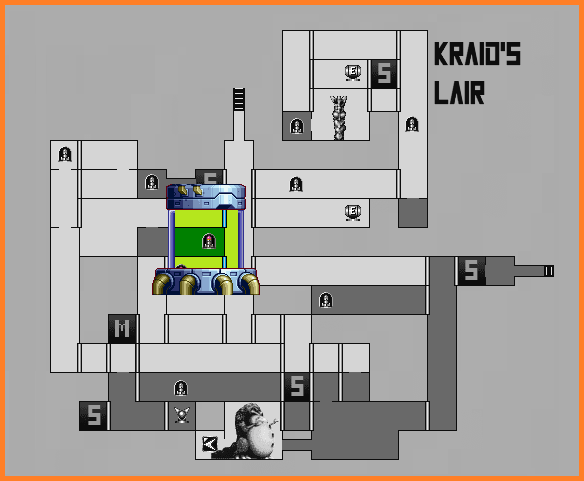
Missile Expansion #14
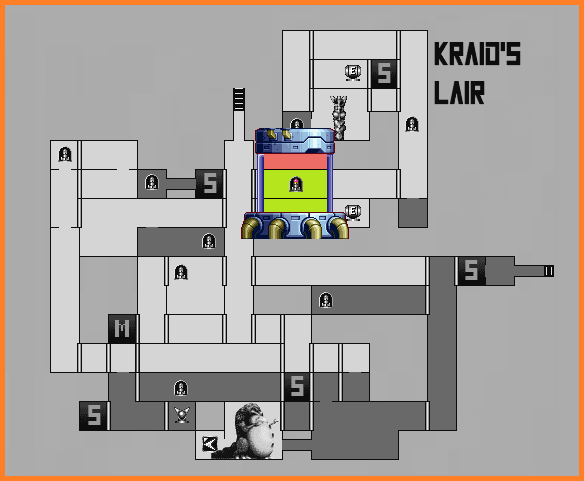
Location: Kraid’s Lair
Requirements: Morph Ball, Bombs
From the elevator, drop down and use the Save Station on the topmost door on your left. Inside the Station, press up against the left-hand wall, turn into a ball and lay a bomb. Press left while you’re being shot up and you’ll slide into a secret tunnel. Jump over and grab MISSILE EXPANSION #14.

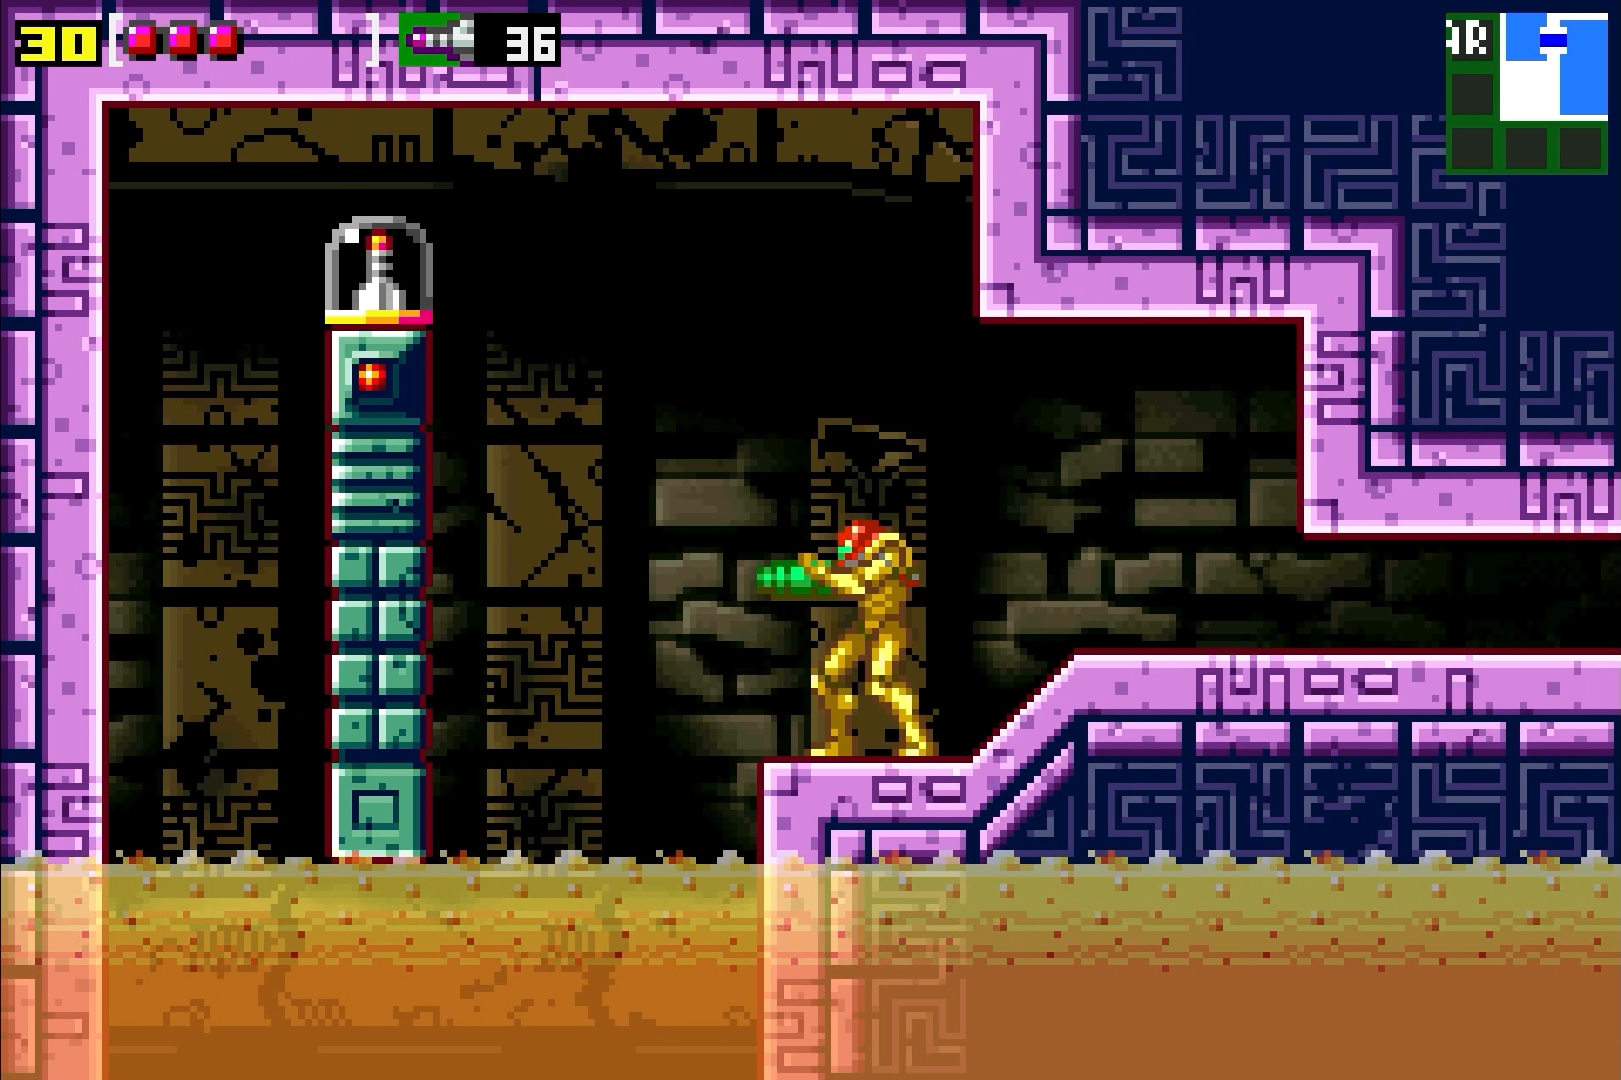
Missile Expansion #15
Location: Kraid’s Lair
Requirements: None
Go through the red blast door directly across from the Save Station by the elevator. Press forward a short distance and MISSILE EXPANSION #15.
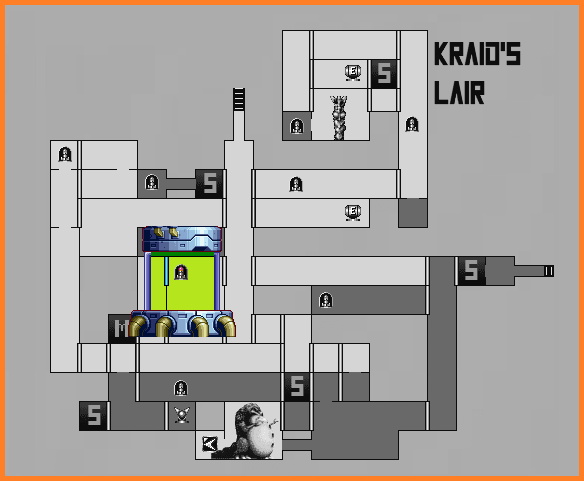
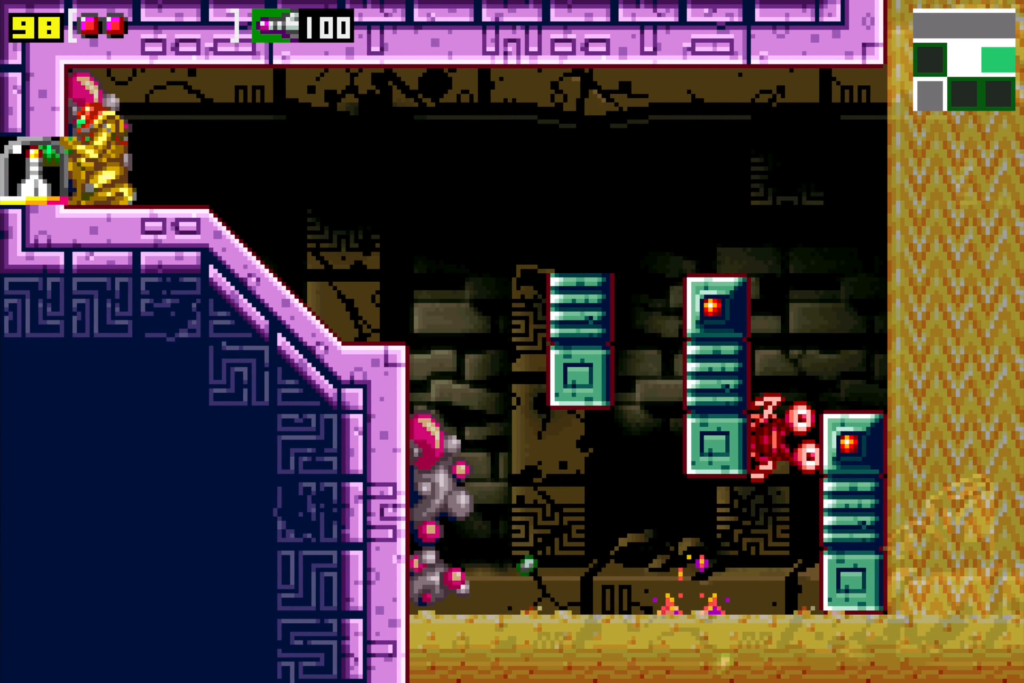
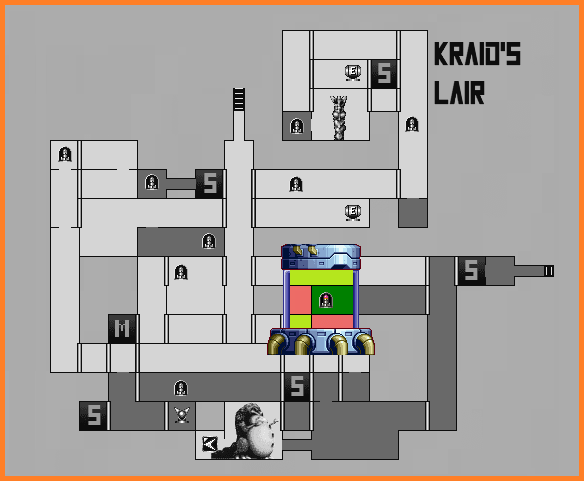
Missile Expansion #16
Location: Kraid’s Lair
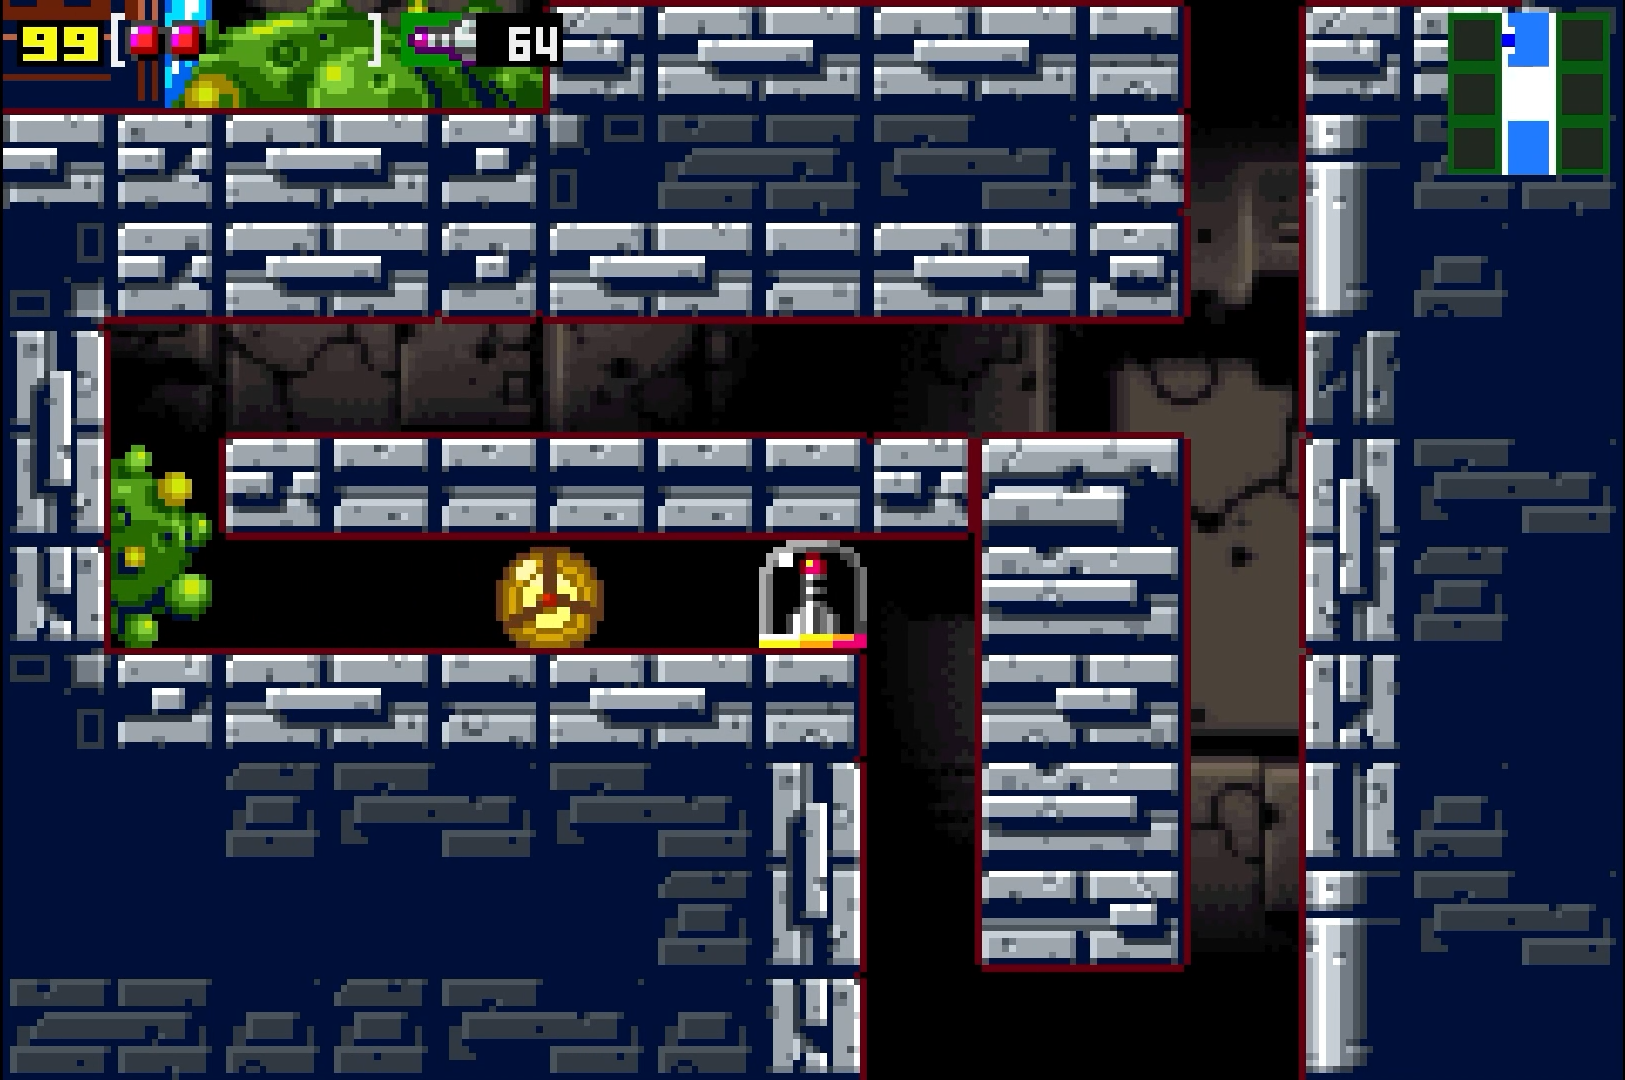
Requirements: Morph Ball, Bombs
Get in the room with the glass tube towards the far side that’s crawling with Rippers. Bomb the floor next to the tube and you’ll find a Morph Ball Launcher. Get inside, lay a bomb, and hold on tight! You’ll be blasted straight up, BUT HOLD ON! You’ll bonk a platform and start to fall down; IMMEDIATELY push towards the left and as you fall, you’ll tuck into a tunnel, which you can follow to grab MISSILE EXPANSION #16!
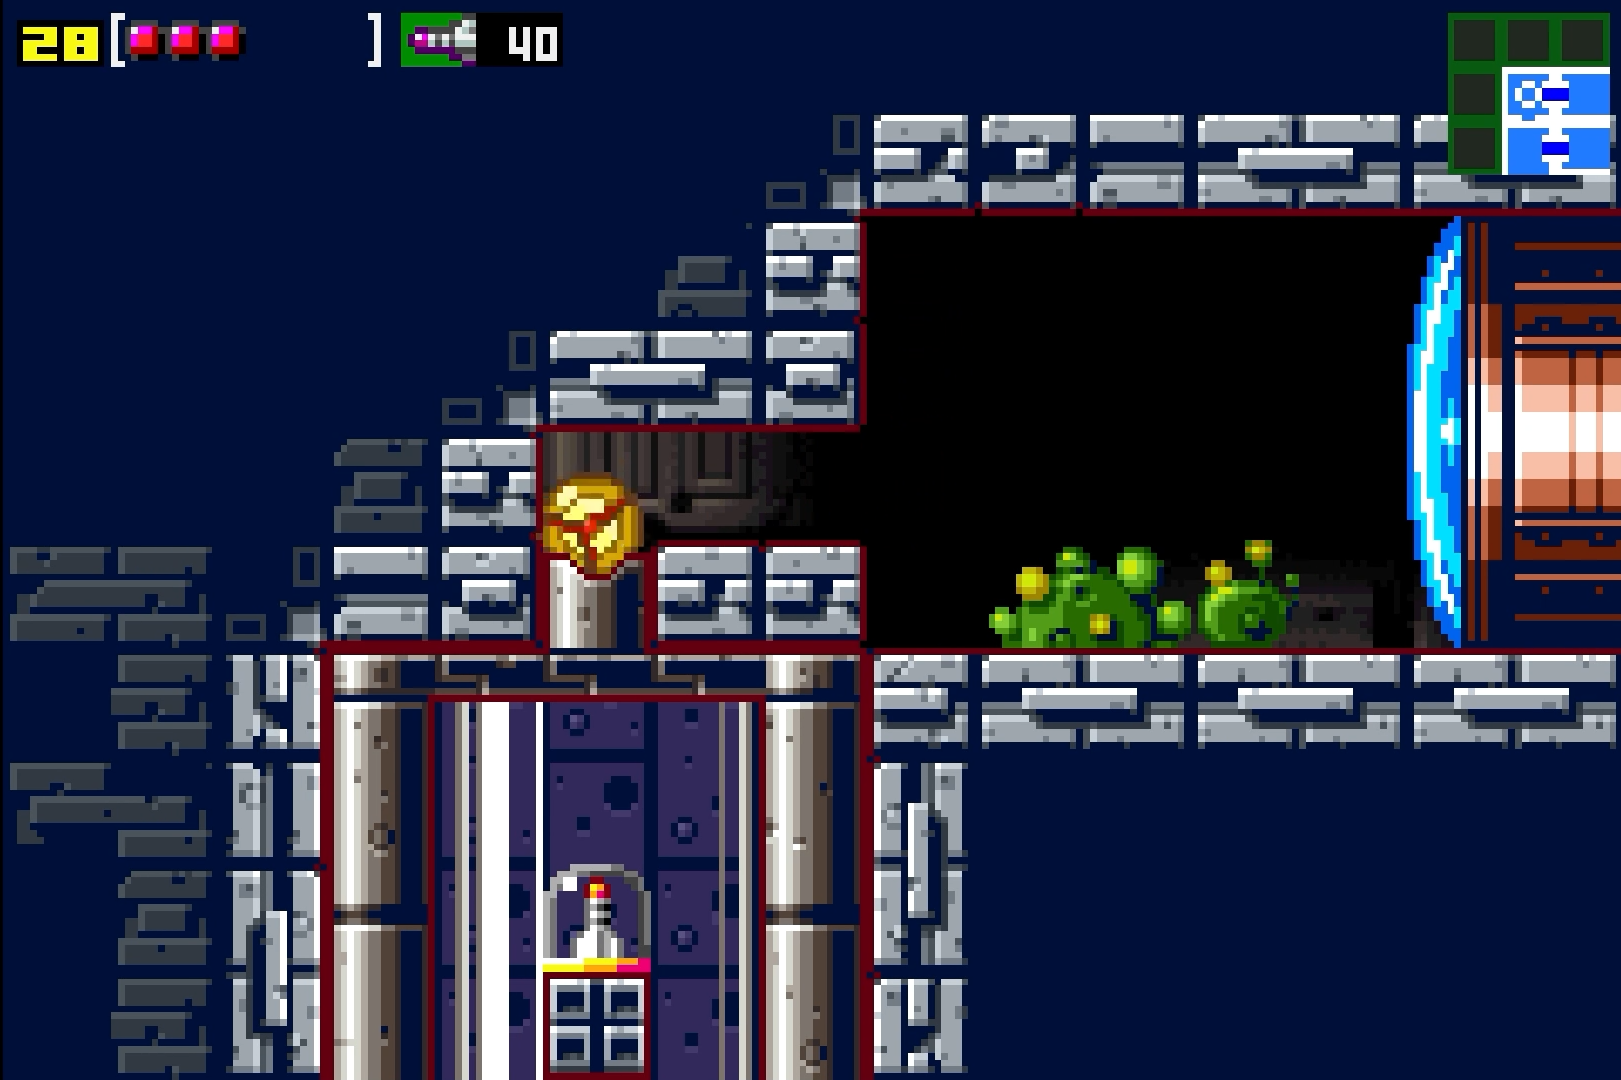
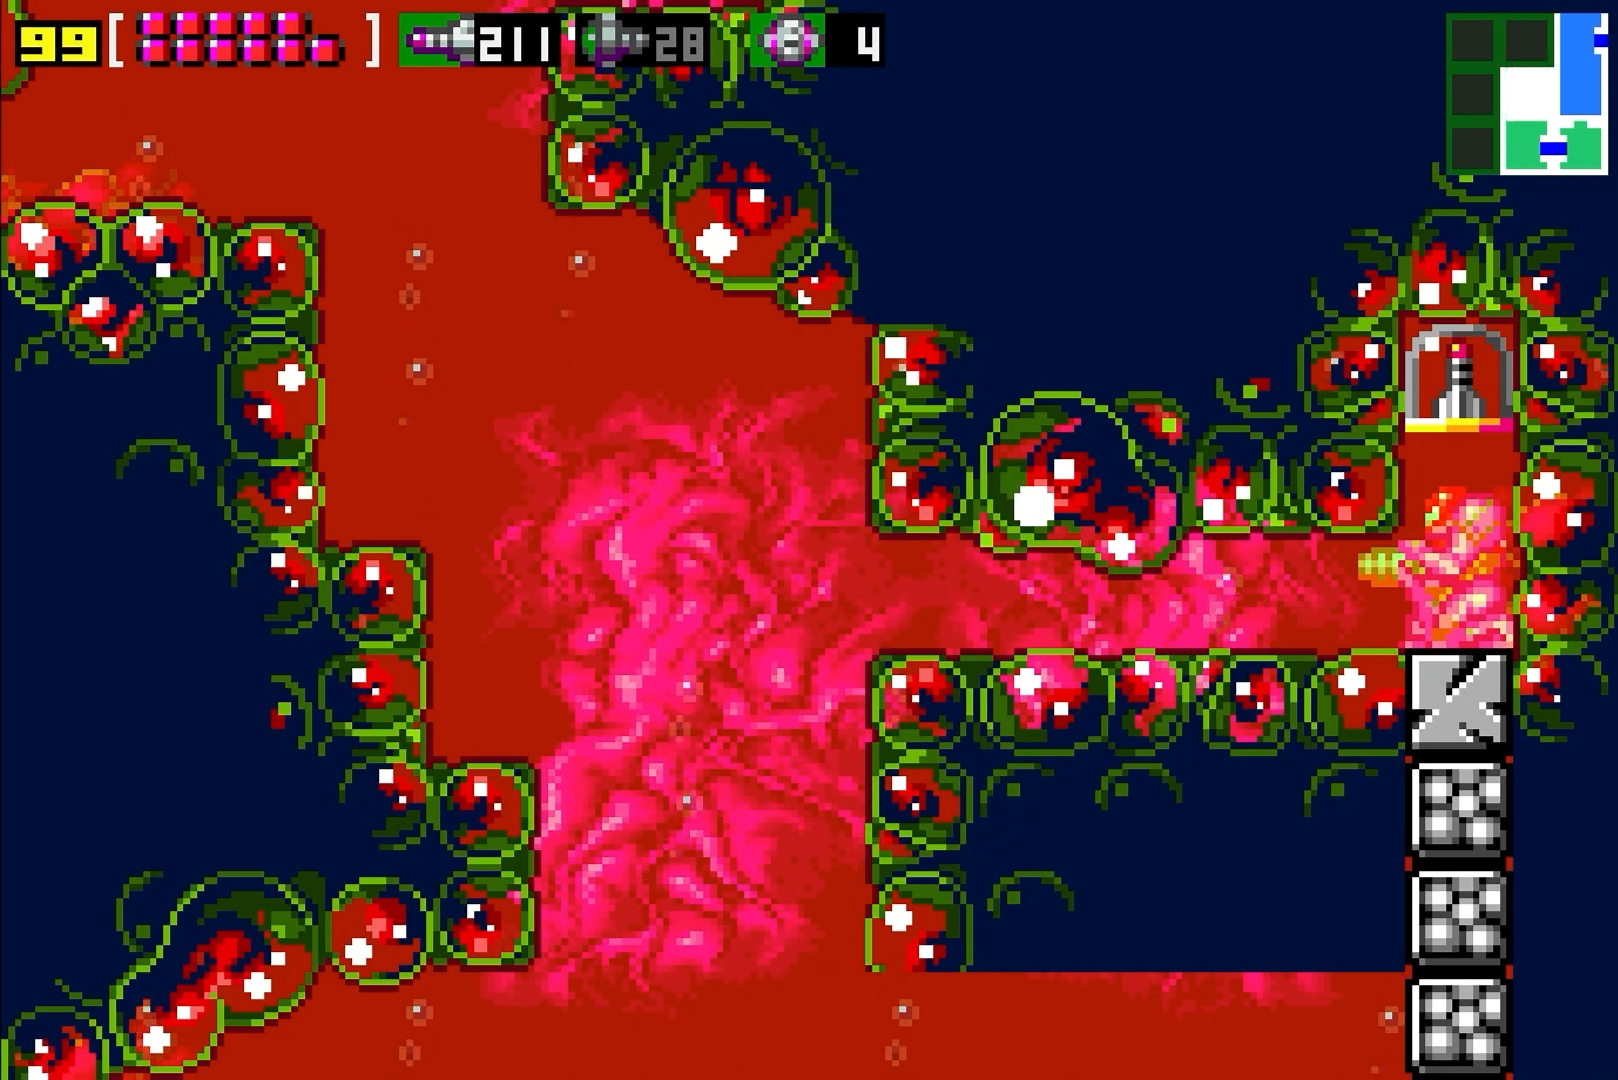
Missile Expansion #17
Location: Kraid’s Lair
Requirements: Defeat Acid Worm, Bombs, Morph Ball
Once you’ve defeated the Acid Worm, in the boss room, drop down the the centre of the room and lay some bombs, dropping down a little further to a small tunnel underneath the battlefield. Jump towards the left and shoot the upper leftmost wall and a small tunnel will appear. Roll into this new room and grab MISSILE EXPANSION #17

Missile Expansion #18
Location: Kraid’s Lair
Requirements: Bombs, Morph Balls
You’ll be in a new room now, staring at a missile expansion sitting in a couple pillars raised off the ground. Drop down to the bottom of the room and blast away all the Sidehoppers and then get yourself up to the middle platform with the zipline switch. This might take a few tries to get the timing right, and it’s worth noting that you can blast the zipline switch while you’re on top of it by either laying a bomb or jumping and shooting, but what I’ve found the easiest strategy is to get the zipline so it’s on the right side of the room. Lay a bomb on the switch, and then roll over to the right and lay another bomb. The first bomb will activate the zipline so it’s moving towards the right, and ideally, the second bomb should propel you upwards into a grip of the zipline. Even if it takes a few tries, keep at it until you get it, and then ride the zipline over, dropping down over MISSILE EXPANSION #18!
Missile Expansion #19
Location: Kraid’s Lair
Requirements: Morph Ball
Squeeze through the tunnel and claim MISSILE EXPANSION #19.
Missile Expansion #20
Location: Kraid’s Lair
Requirements:
You’ll be able to see a missile expansion to the left of the room, but no way to reach it. Hmm. Head over to the right side and you’ll see a bunch of purple Ripper’s ripping around. You’ll also see some blocks attached to the ceiling, blocking the zipline from taking you to the expansion. Worry not, because if you bomb the floor under each block hanging from the ceiling, you’ll see a Morph Ball Launcher that will blast you straight up, destroying the blocks! Do this three times, and then call the zipline over to the right-side and use the fourth Morph Ball Launcher to blast you straight up into the zipline’s loving embrace. You’ll be driven straight into MISSILE EXPANSION #20.

Missile Expansion #21
Location: Kraid’s Lair
Requirements: Speed Booster, Bombs
Get to the corner under the Chozo Statue in the Kraid boss room and start running towards the right. Soon enough, your Speed Booster will kick in, so just keep firing in front of you to open all the doors you need, and eventually after a few rooms, you’ll crash through some blocks and be in a long vertical hallway. Start climbing up, and you’ll see three doors at the top. The door on the top right leads to a Save Station, so hit that up if you want. Take the lower door on the left and press forward across the platforms and falling acid until you hit the wall. Lay a bomb and MISSILE EXPANSION #21 will reveal itself!
Missile Expansion #22
Location: Brinstar
Requirements: Morph Ball, Defeat Kraid
Once you’re back in Brinstar, you’ll see a wall crumble and a path to a Chozo Statue will open up. Check that out, and then head left. Once you go through the door into the vertical hallway, get in Morph Ball form and start rolling on the platform. You should fall into a Morph Ball Launcher. Blast away, and push towards the right when you start to fall. You’ll tuck in a little nook close to the top that will give you MISSILE EXPANSION #22.
Missile Expansion #23
Location: Norfair
Requirements: Hi-Jump Boots
In the vertical hallway beside the room you acquired the Hi-Jump Boots in, use your new Air Jordan’s to jump high and grab the ledge, letting you continue your descent down, and also grabbing MISSILE EXPANSION #23
Missile Expansion #24
Location: Brinstar
Requirements: Speed Booster, Morph Ball
Once you’re back in Brinstar, head left into the hallway we fought Deorum in earlier. Once you get to the flat part of the room (this will line up to where the dot on the left side of your map is), start running and shooting. Your Speed Booster should activate right after you go through the blast door. As soon as your Booster kicks in, CROUCH! You’ll have about 3 seconds to act, so move quickly! Head back through the blast door into the room you came from and head down that little slope. Quickly turn around, fire the door open, get into Morph Ball form and activate your Shinespark. Head to the left and you’ll go crashing through a wall into a secret room which will house MISSILE EXPANSION #24! See Shinespark Puzzles for video.
Missile Expansion #25
Location: Brinstar
Requirements: Varia Suit
After getting the Varia Suit, head back, drop down and go right until you’re in the top-most Save Station. Continue pushing ahead and you’ll run right into MISSILE EXPANSION #25.
Missile Expansion #26
Location: Norfair
Requirements: Varia Suit
Once in Norfair, make your way to the long vertical hallway on the right and head up. There was a door that we’ve skipped past so far on the left side that’s directly in the middle of blast doors above and below it – time to check out what’s inside! Carefully jump across the platforms, eliminating any enemies in your way, and you’ll see MISSILE EXPANSION #26 sitting there for the taking!
Missile Expansion #27
Location: Norfair
Requirements: Speed Booster
In the Kiru Giru larva room (not the ensnared Kiru room), head to the left again and run through the door, using your Speed Boost. Once the floor breaks, grab MISSILE EXPANSION #27.
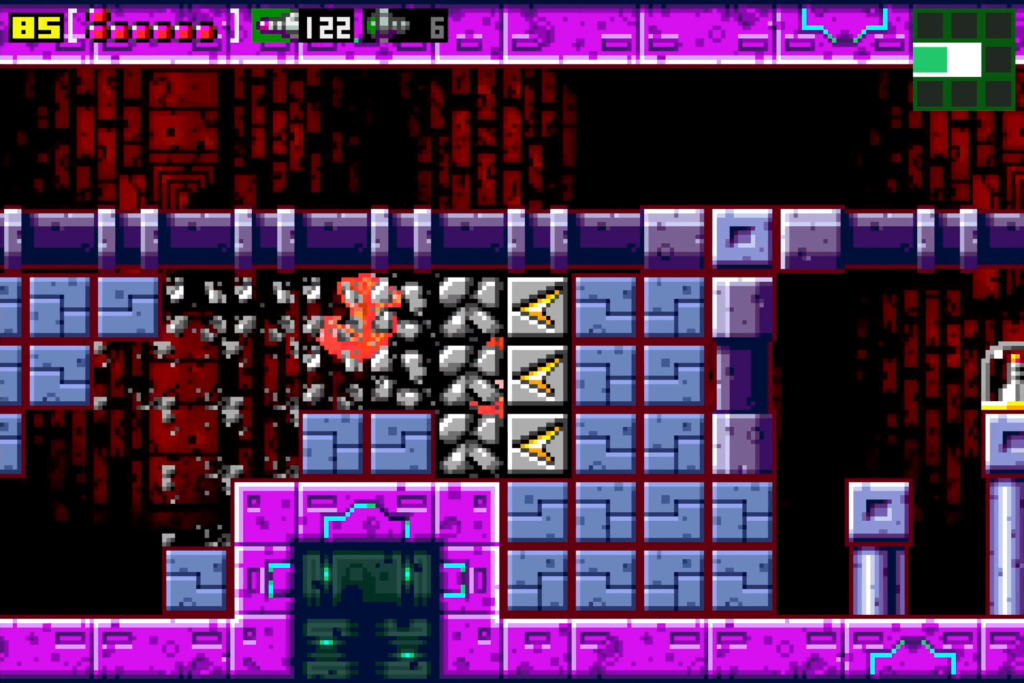
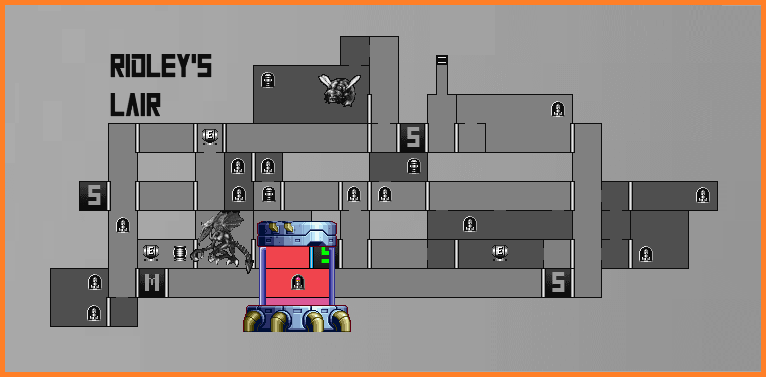
Missile Expansion #28
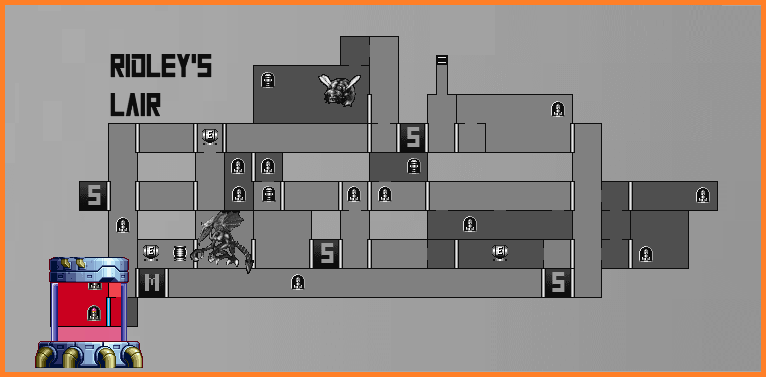
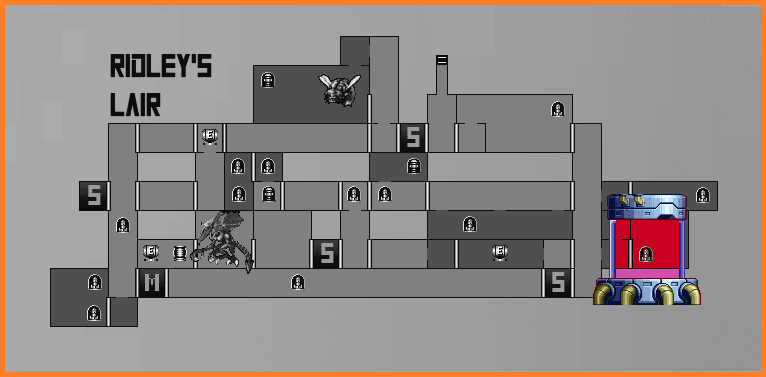
Location: Ridley’s Lair
Requirements: None
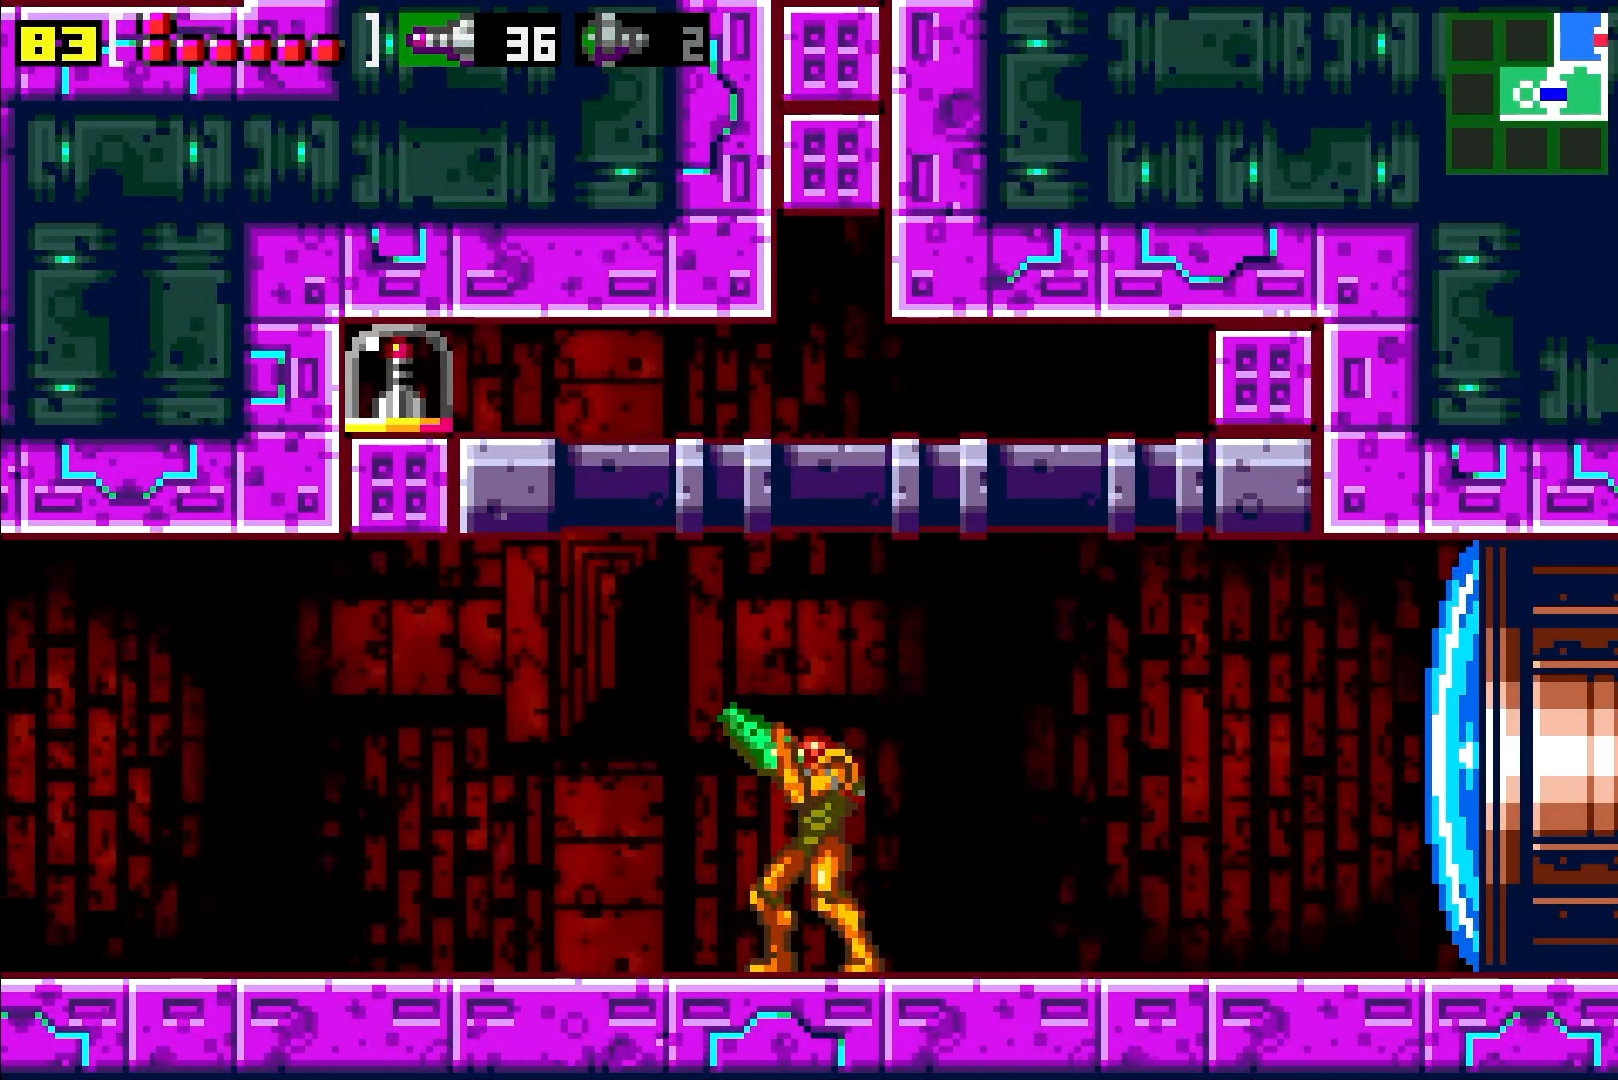
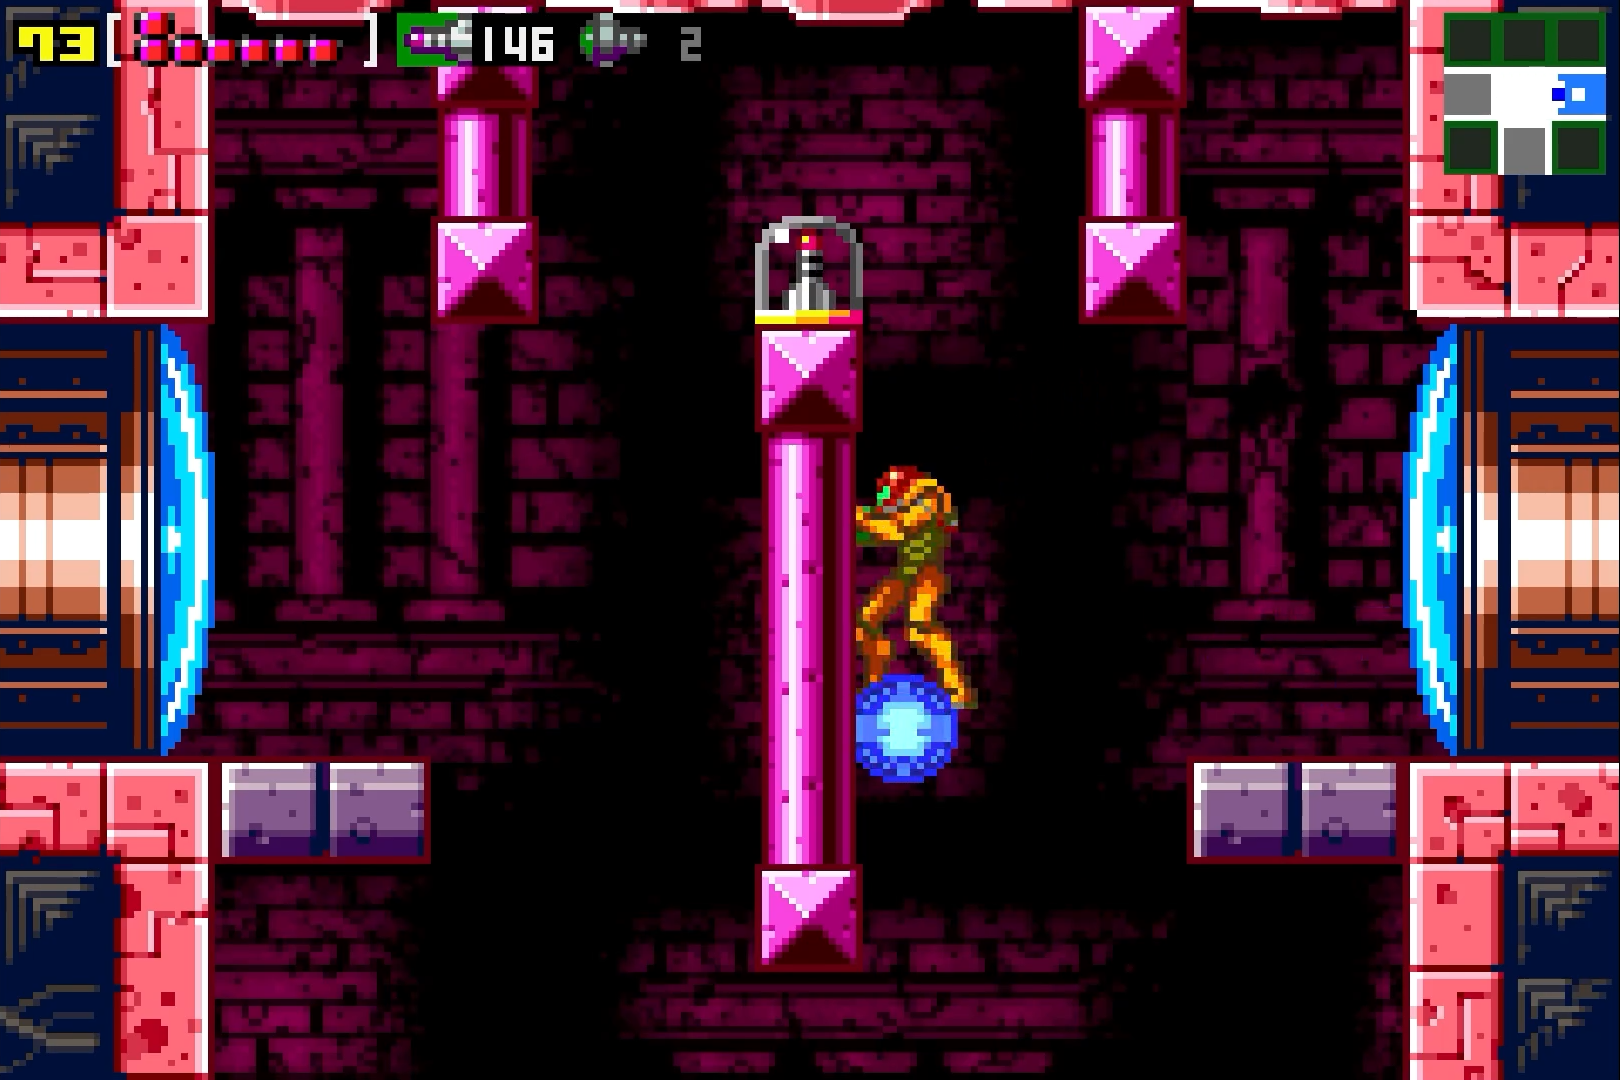
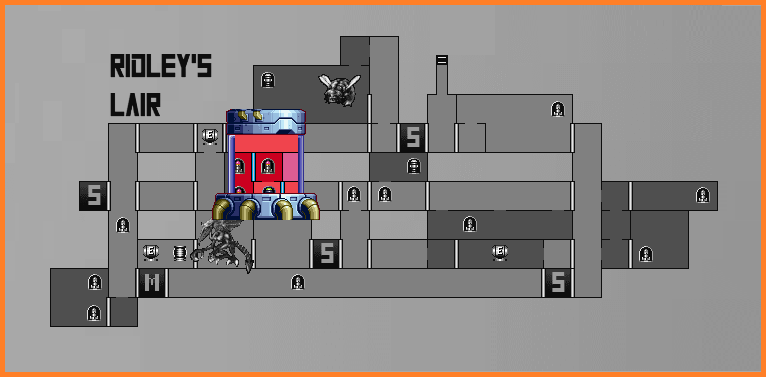
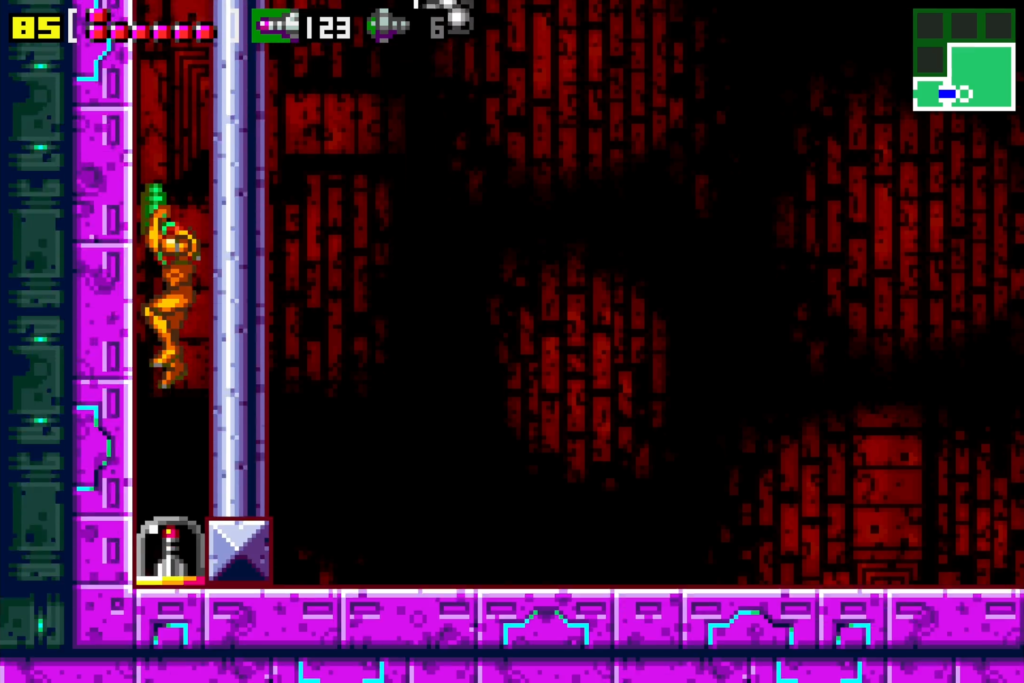
From the left most Save Station, drop down, and sitting directly in your way is MISSILE EXPANSION #28, an expansion so suspiciously easy to acquire that I always feel like there’s something about to pop out and grab me every time I get it.

Missile Expansion #29
Location: Ridley’s Lair
Requirements: Speed Booster, Morph Ball, Power Grip, Missiles
See Missile Expansion #30 for full details.
Missile Expansion #30
Location: Ridley’s Lair
Requirements: Speed Booster, Morph Ball, Power Grip, Missiles
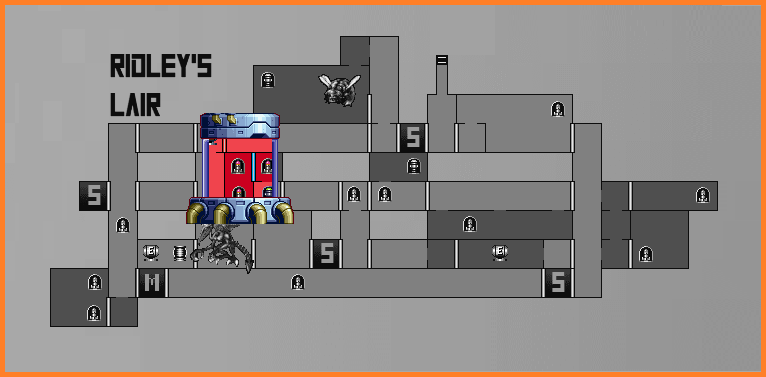
From the Map Station, go right into the super long hallway. You’ll see that the ceiling is quite low, making this a fairly tight fit, but you’ll also notice that above the tight corridor is an opening behind some mesh or something. Shoot out the walls and you’ll see that there’s a space big enough for you to fit in. Get into that upper section, press forward a bit, and then start running back towards the Map Station. Charge your Shinespark and then quickly drop down. Get to the slope right in front of the blast door leading to the Map Station, open the door, and release your Shinespark so you start running towards the left. Blast open the door in the Map Station and keep running left, and the ground will give out as soon as you get into the new room. There’s some more fake lava, so drop down and enter the door. This was the easy part.
The hard part will be getting both expansions in this room. Get beside the door and start running to the left. Shinespark straight upwards and grab the ledge at the top. Get into Morph Ball form, drop down, and tuck in the opening. Now, be quick – quickly drop down and then immediately get out of Morph Ball form and jump up and grab the ledge! This pitfall block will give you about a second to make your move before it dissolves, so act quickly. Worth noting – most pitfall blocks dissolve immediately, but some (like this one) take a second; we’ll call these ones Slow Pitfall Blocks. From the top platform, fall down, and as you’re falling, get out of Morph Ball form! Do this and press towards the left ledge, and if done right, you should grab it. Blast a missile in front of you and then jump over into this new slot. There will be a rectangular path that you can follow; ignore the expansions for now, since you can’t grab them as of yet. Instead, roll over to the right bottom side and you’ll hit a pitfall block. As you fall, get ready to grab the ledge on the left. This is tricky and might require a few tries, but when you grab it, you should be able to roll over and grab MISSILE EXPANSION #29. We’re not done yet.
After grabbing the expansion, immediately roll back towards the right so you stay in this tunnel. In the middle of this tunnel is a slow pitfall block. This will be tricky; roll over to the centre, quickly pop up and quickly fire a beam shot to dissolve the blocks, and then make sure you grab the ledge when the slow pitfall block dissolves so you can pull yourself back up. Once the blocks are gone and the pitfall block has regenerated, quickly fire a missile above you and jump up. Getting rid of the first missile block is key, since what you can now do is stand on the regular blocks. Even if you fall and have to retrace your steps, the missile block won’t respawn, so get rid of that. Either way, stand on the regular blocks, keep firing missiles above you to destroy the blocks, and eventually you’ll grab MISSILE EXPANSION #30!

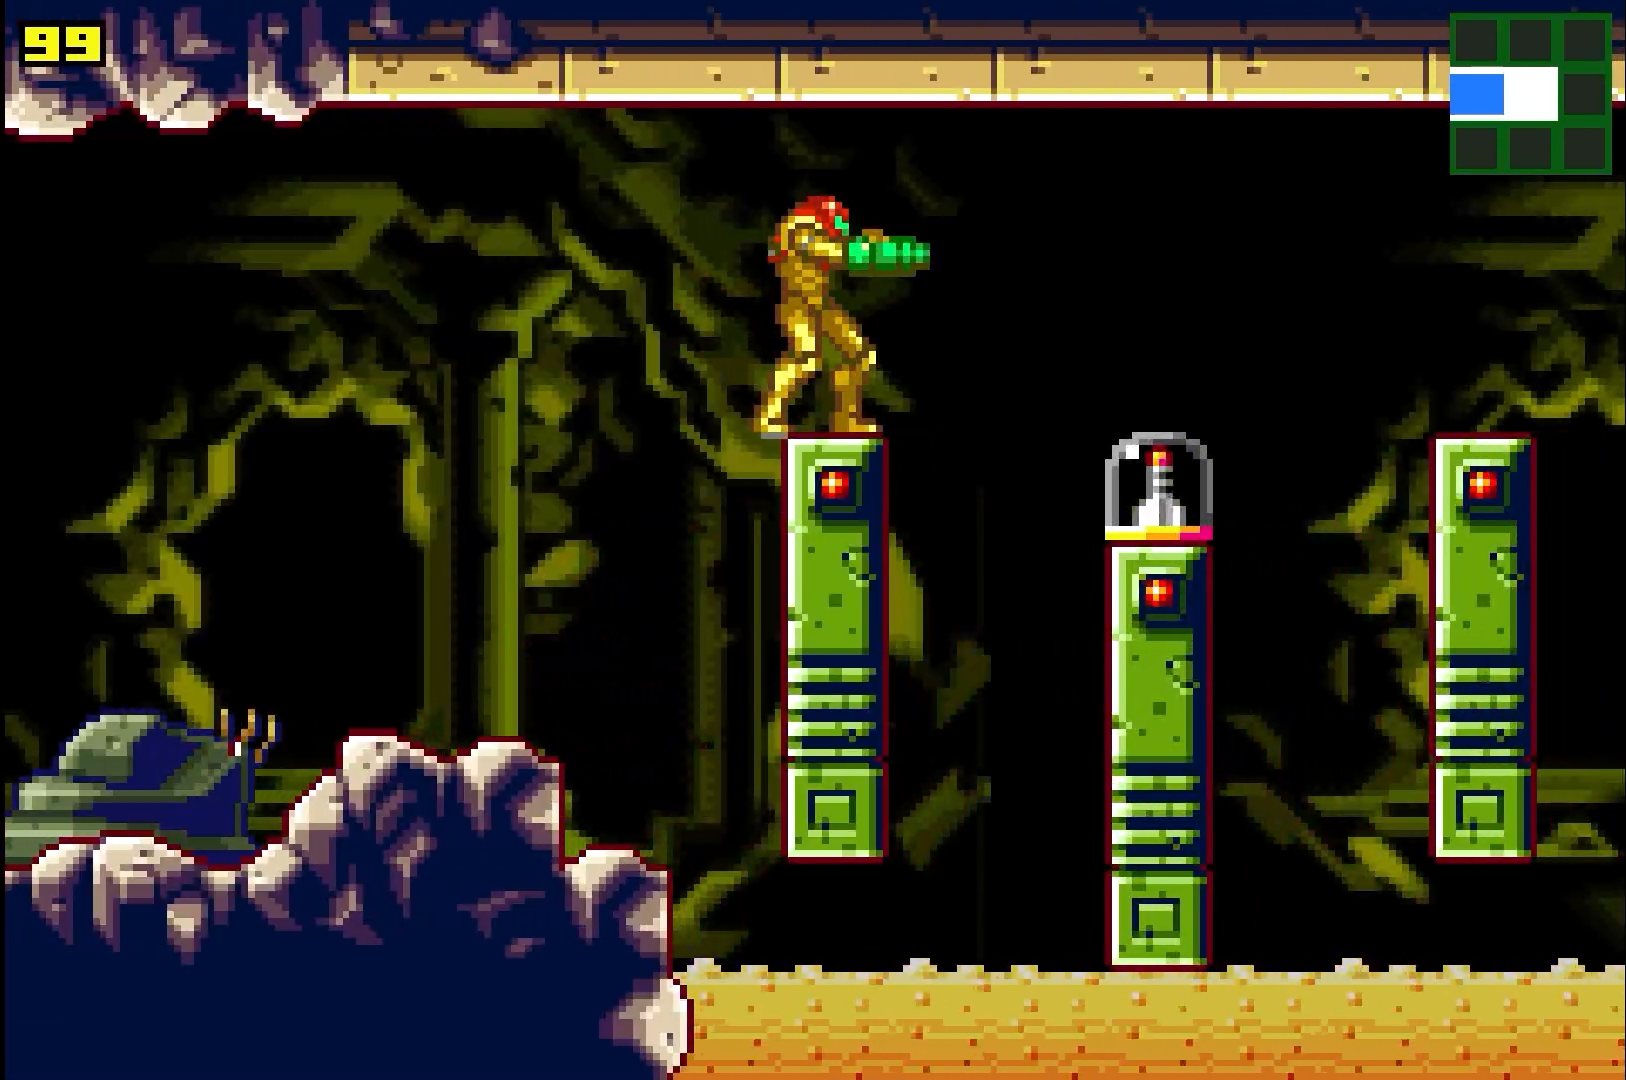
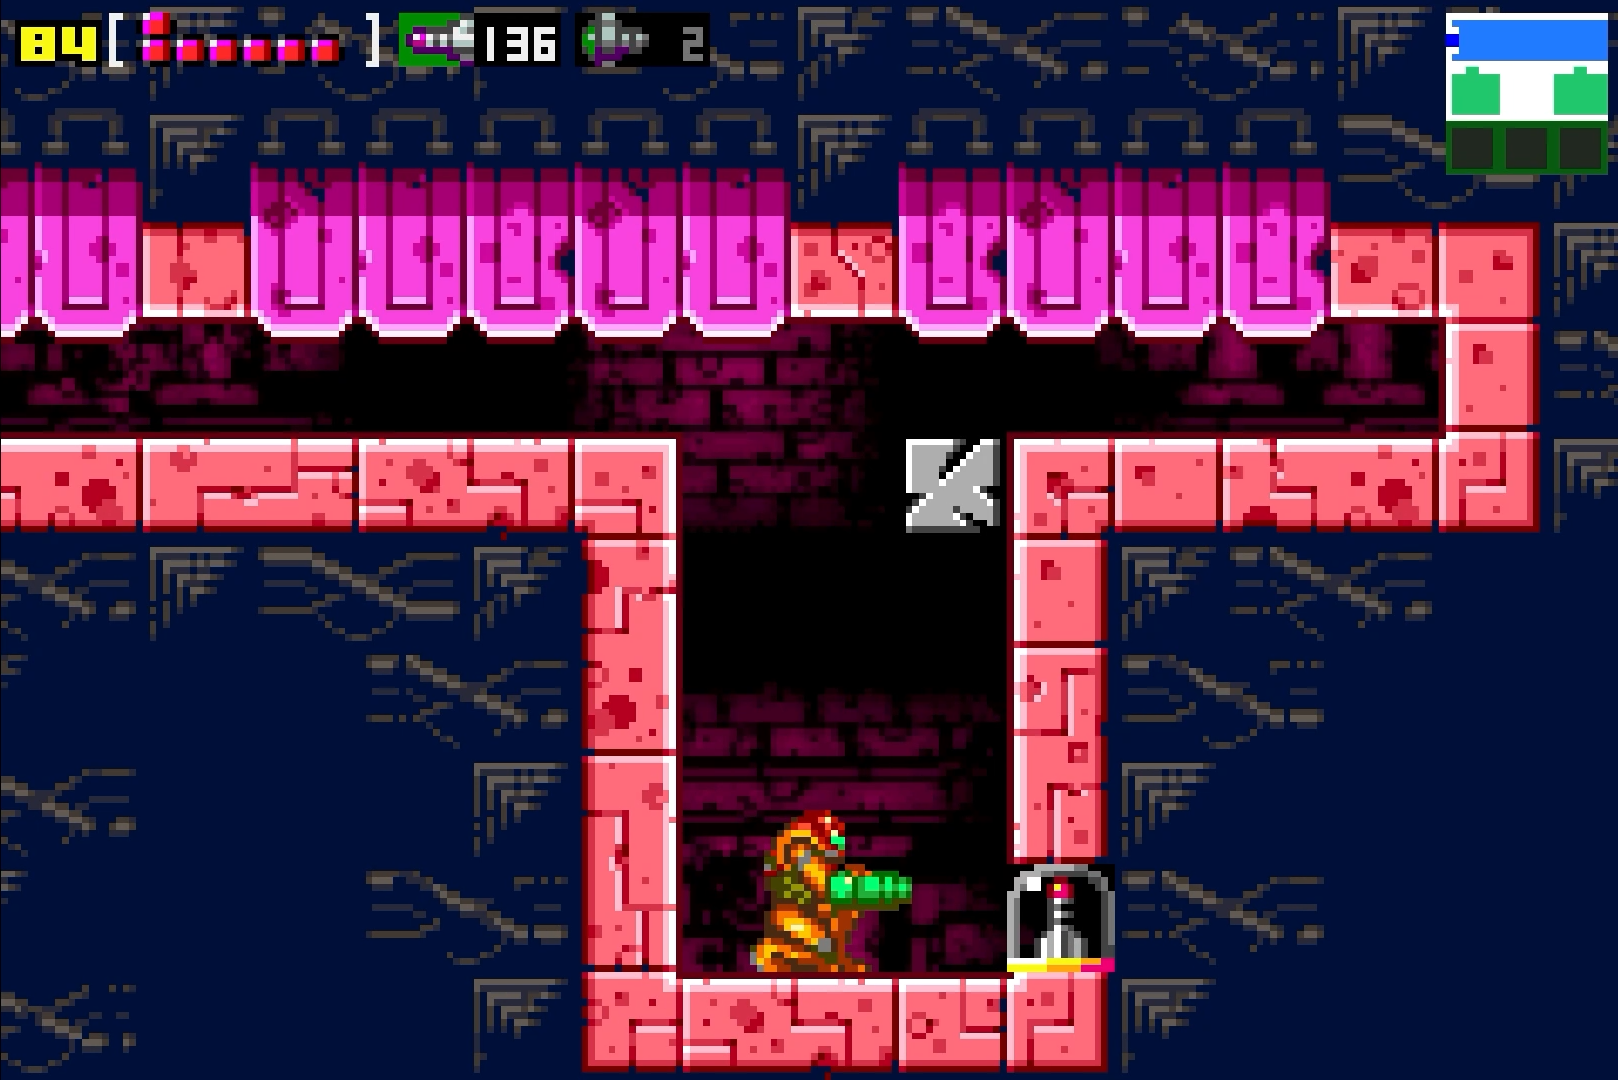
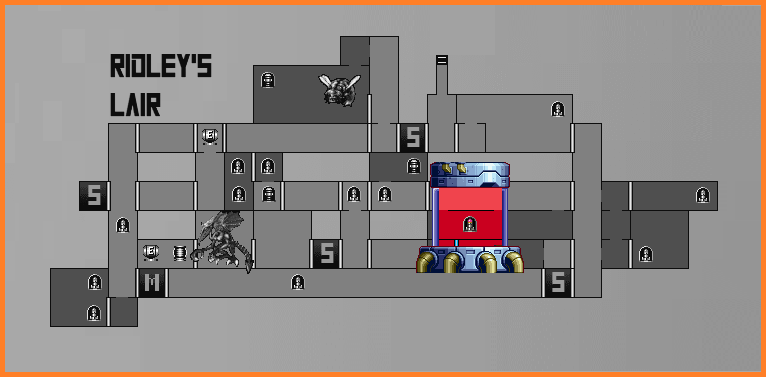
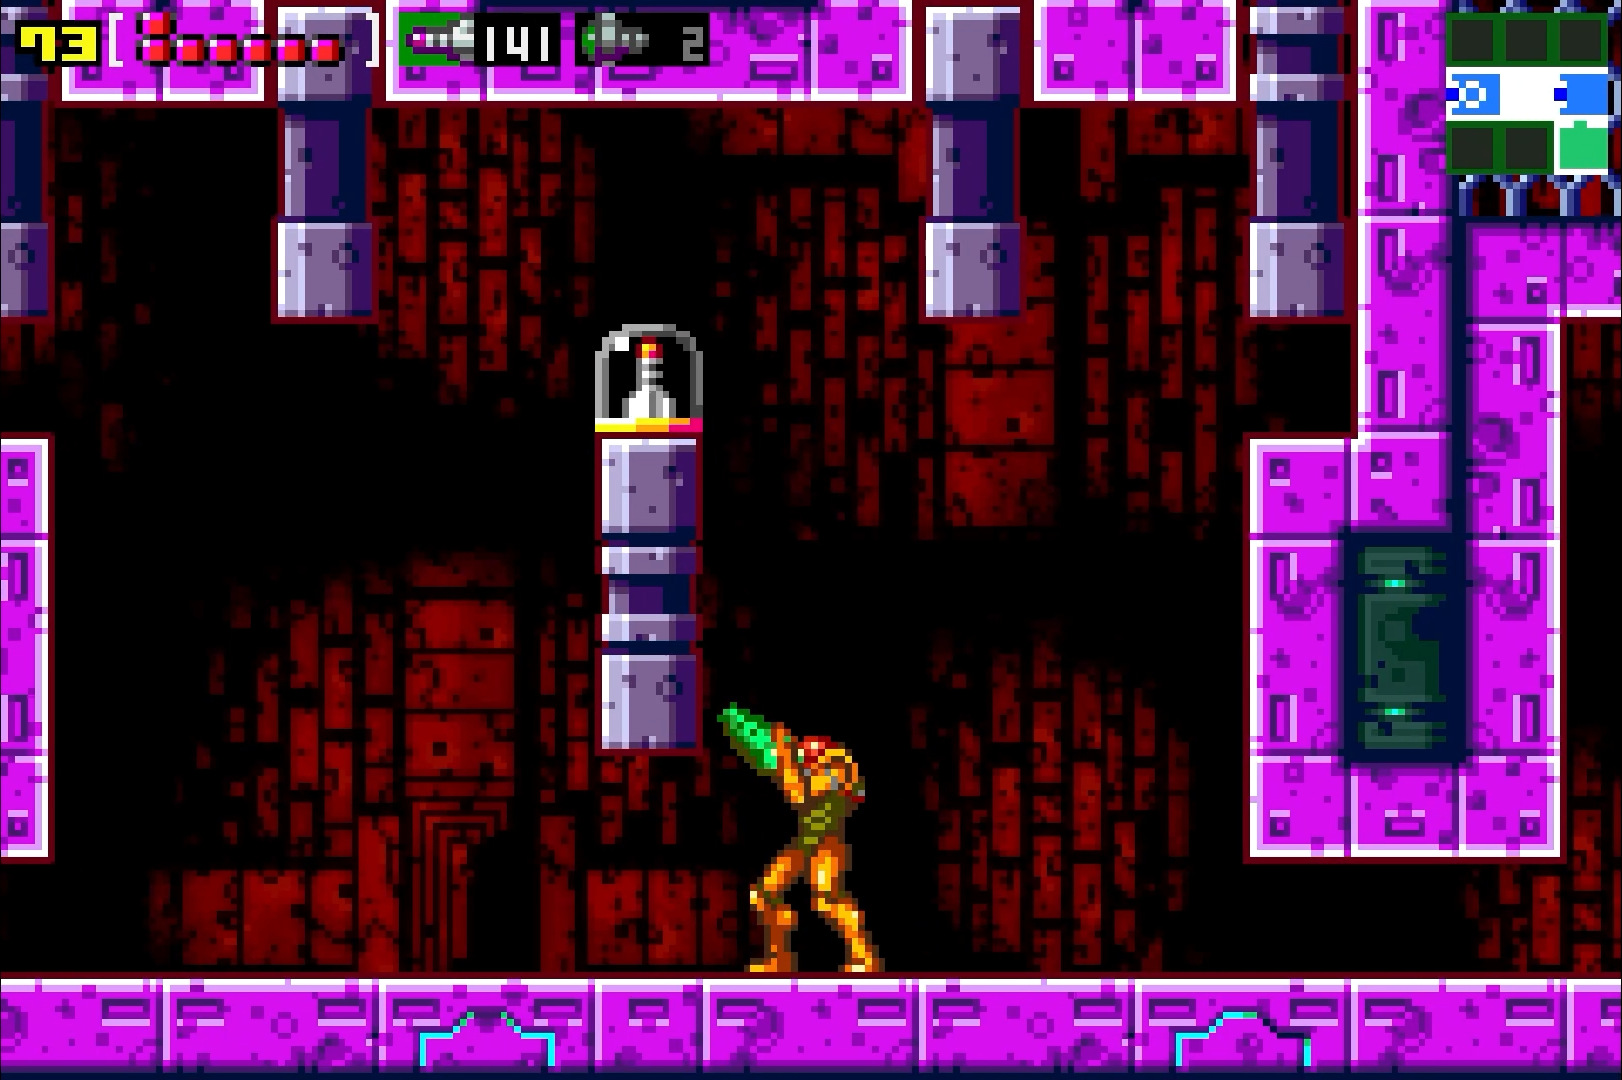
Missile Expansion #31
Location: Ridley’s Lair
Requirements: None
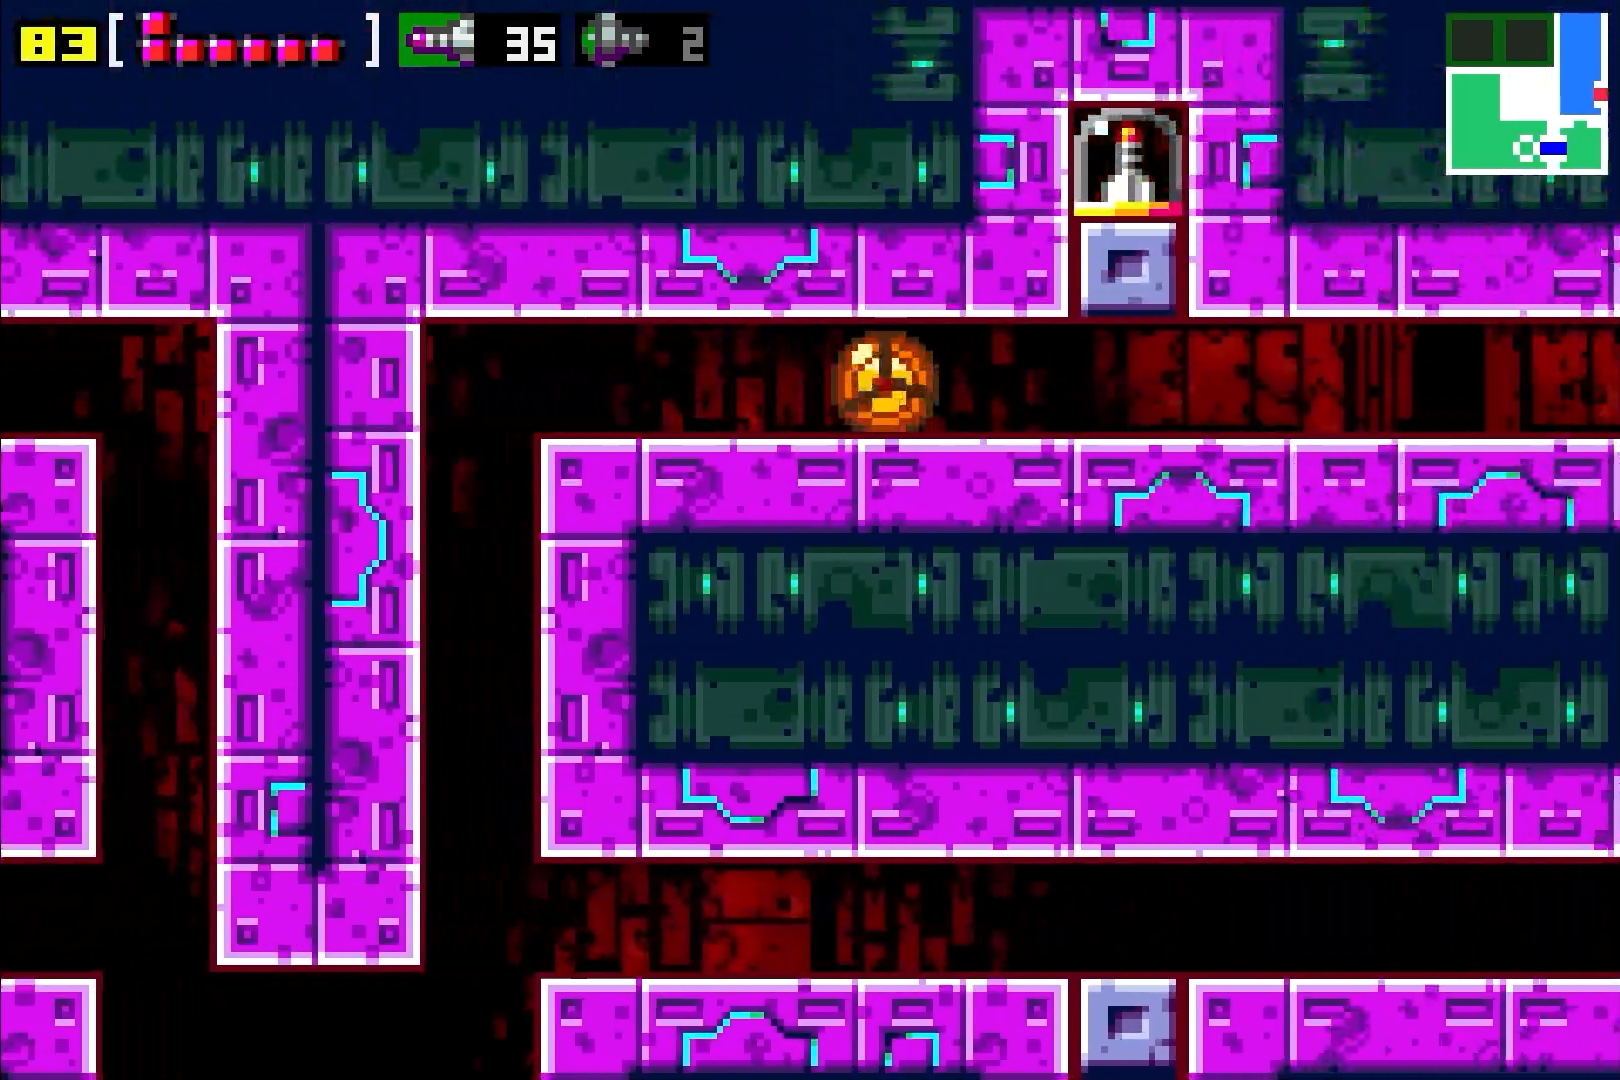
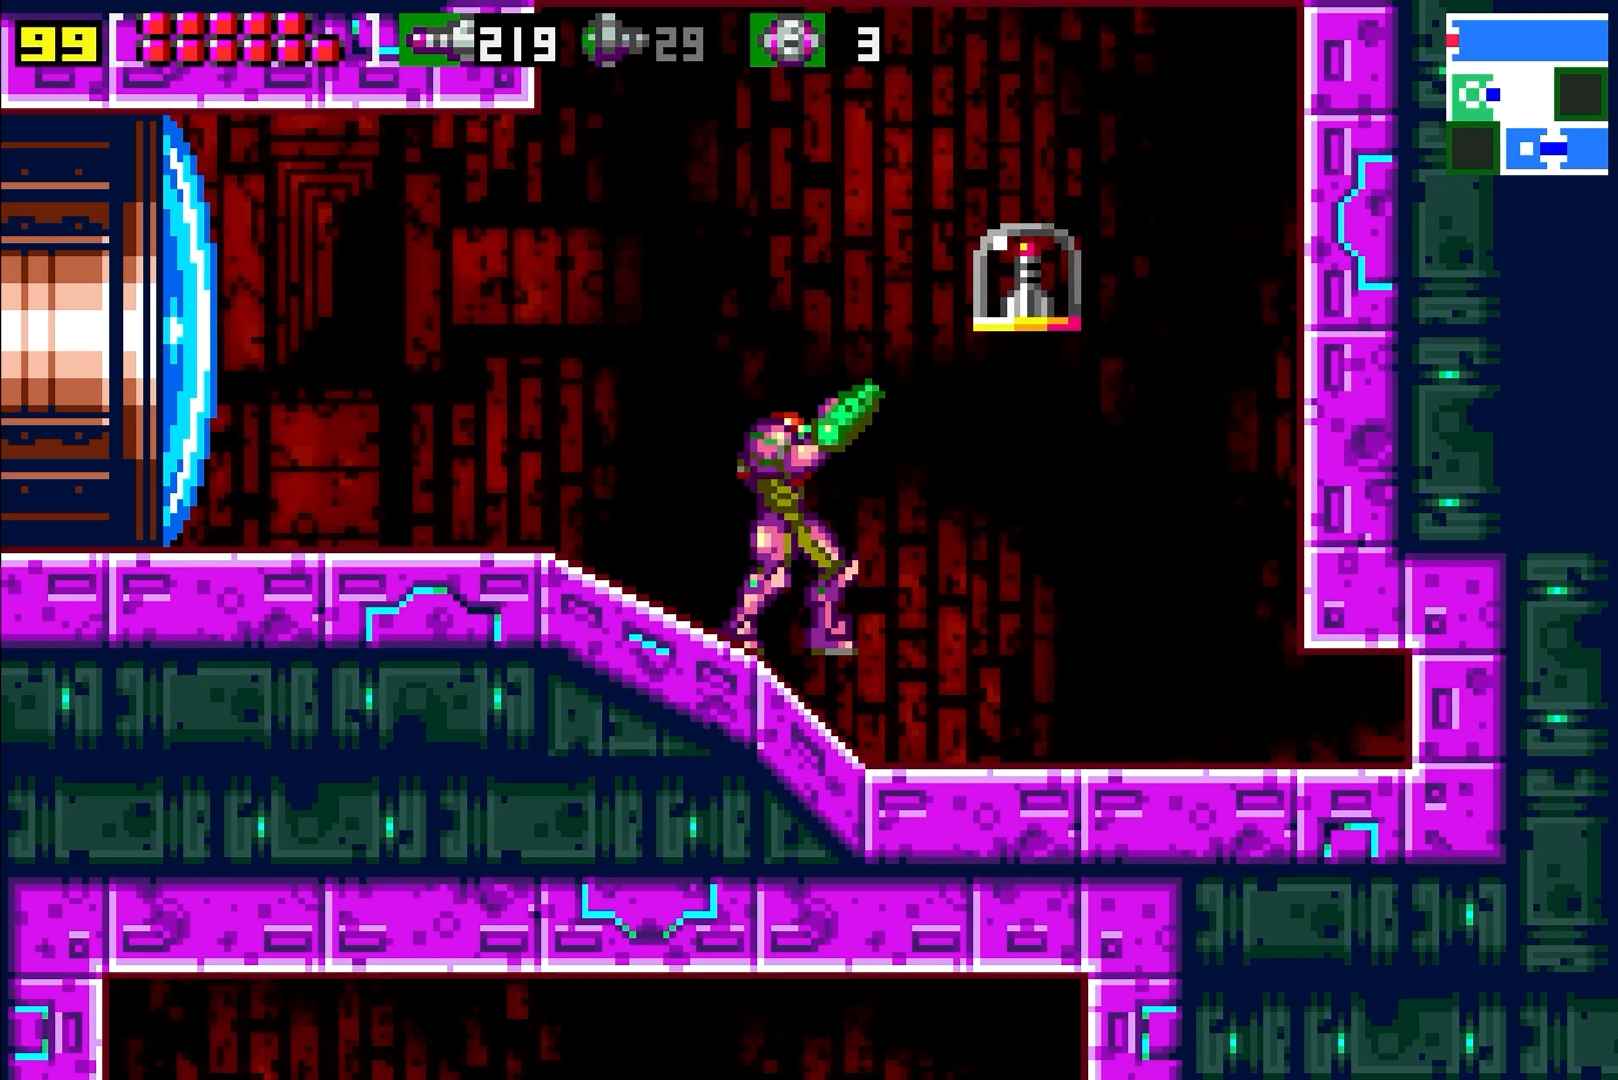
From the Map Station, head through the right door and press forwards through this loooong hallway. Around the middle of the hallway, you’ll see MISSILE EXPANSION #31 just sitting there.
Missile Expansion #32
Location: Ridley’s Lair
Requirements: Bombs, Morph Ball
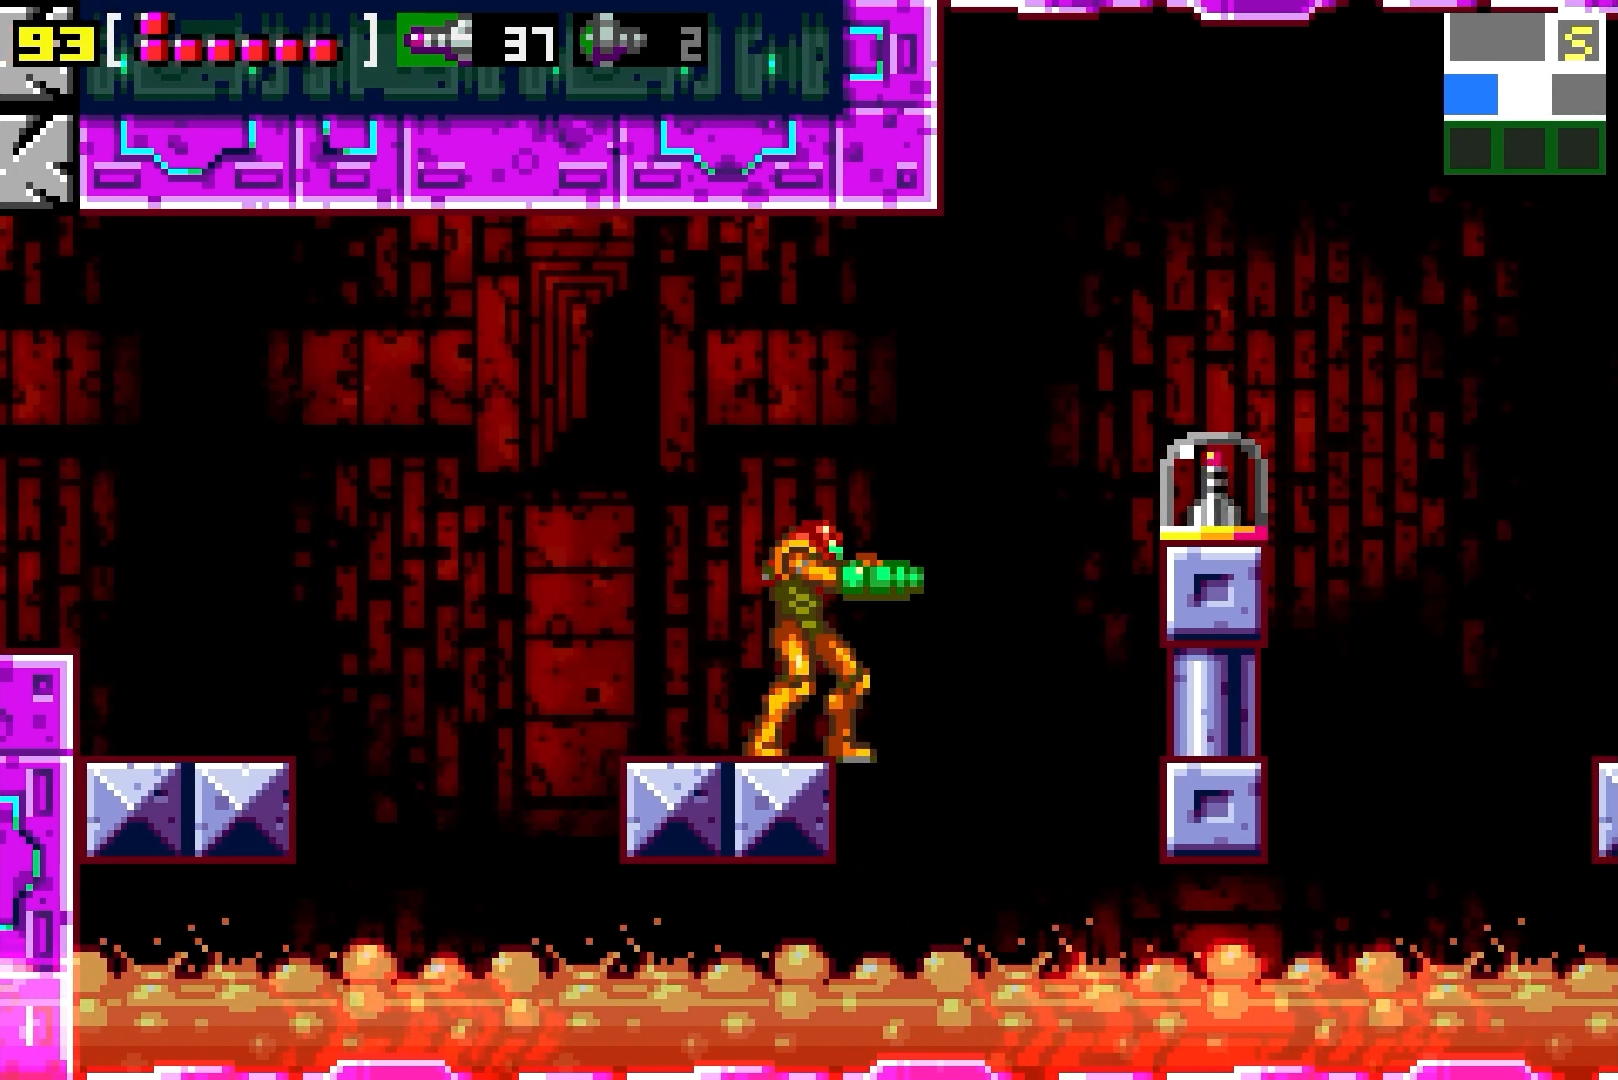
You’ll be in a room with a ton of Sidehoppers and other annoying enemies. There will also be some blocks that serve as bridges between platforms which will dissolve as soon as they’re shot, so proceed carefully. When you get to the third “bridge”, shoot it out and drop down, avoiding the lava if you can, and grab the ledge. Roll through the tunnel and lay some bombs on the blocks above the pool of lava. They’ll blow up, and wouldn’t you know it, we have more fake lava (what’s up with this stuff!?). Drop down into this shallow little pit and lay a bomb in the lower right corner to reveal MISSILE EXPANSION #32!
Missile Expansion #33
Location: Ridley’s Lair
Requirements: Bombs, Morph Ball
Roll in the tunnel on the bottom of the floor and lay a bomb. Deal with all the enemies and jump up and grab MISSILE EXPANSION #33.
Missile Expansion #34
Location: Ridley’s Lair
Requirements: Ice Beam
Wait until one of the enemies is in a lower position along the middle platform, shoot it to freeze it, jump on it, and then jump up to grab MISSILE EXPANSION #34.
Missile Expansion #35
Location: Ridley’s Lair
Requirements: Morph Ball, Bombs
Get into Morph Ball form and jump to the top-right corner of the room. You’ll be in a little invisible tunnel now; roll up and out and you’ll see a single block suspended in the air. Bomb it and grab MISSILE EXPANSION #35.
Missile Expansion #36
Location: Ridley’s Lair
Requirements: Morph Ball, Power Grip
There are two expansions in this room, and the room has a big floating platform at the top, a platform at the bottom that’s connected by some blocks, and a Morph Ball Launcher at the bottom in case you fall. To start, roll through the crevice, un-morph and Power Grip the ledge leading to the next tunnel. Instead of entering the tunnel, jump away from the wall and back to reach the top and grab MISSILE EXPANSION #36. Once you’ve obtained that, fall back down and shoot your beam facing right. You’ll destroy a block if you do so, which will allow you to press towards the right and grab the right-side ledge, which in turn will let you roll over and grab MISSILE EXPANSION #37.
Missile Expansion #37
Location: Ridley’s Lair
Requirements: Morph Ball, Power Grip
See Missile Expansion #36 for full details.
Missile Expansion #38
Location: Ridley’s Lair
Requirements: Ice Beam, Power Grip
In the room with the tube in the centre that those annoying little bugs fly out of, stand on the left side of the platform where the tube is, and as the bug is flying out, wait for it to be by you on the left, shoot it to freeze it, jump on top of it, and use it as a nice stepping stool to grab the upper ledge. Pull yourself over to grab MISSILE EXPANSION #38.

Missile Expansion #39
Location: Norfair
Requirements: Screw Attack
Immediately after acquiring the Screw Attack, head back to the previous room and shred those Rippers like grated cheese, jump up, and grab MISSILE EXPANSION #39!

Missile Expansion #40
Location: Norfair
Requirements: Varia Suit, Ice Beam, Power Grip, Space Jump (optional)
This new room will have a platform with lava underneath. Press forward and you’ll be able to see an expansion that’s not in jumping distance, but worry not! Behind you, you should have walked over a tube that spews out bugs. Lure one of the bugs to the left, and then when it flies over you and to the left over the lava, freeze it and jump on it (be careful not to destroy it with your Screw Attack though!). Using the frozen bug as a platform, you’ll be able to jump over and grab SUPER MISSILE EXPANSION #4! BUT WAIT! There’s more! Don’t move from atop the pillar where the Super Missile was. This next move is tricky, but what you’ll want to do is aim downwards to the left-hand wall and as soon as the bug unfreezes and starts flying towards the left, shoot it and freeze it again! In the upper left corner of the wall is a hidden tunnel; what you’ll want is to freeze the bug once to get up to the Super Missile platform, and then freeze it again to use it as a platform to get to the hidden tunnel. This is tricky and if you want to come back later with the Space Jump, I don’t blame you. But if you can pull this off, you’ll be able to roll through this secret tunnel to grab MISSILE EXPANSION #40.
Missile Expansion #41
Location: Norfair
Requirements: Varia Suit
The very last pillar in this room is hiding a secret! Shoot the top most block and you’ll see MISSILE EXPANSION #41 revealed!
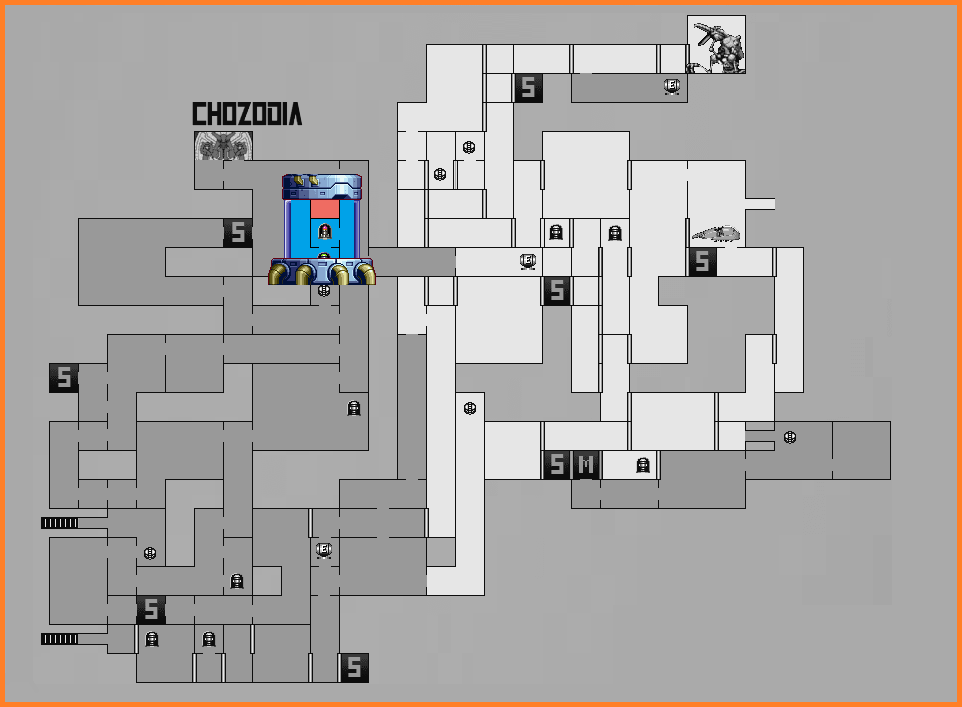
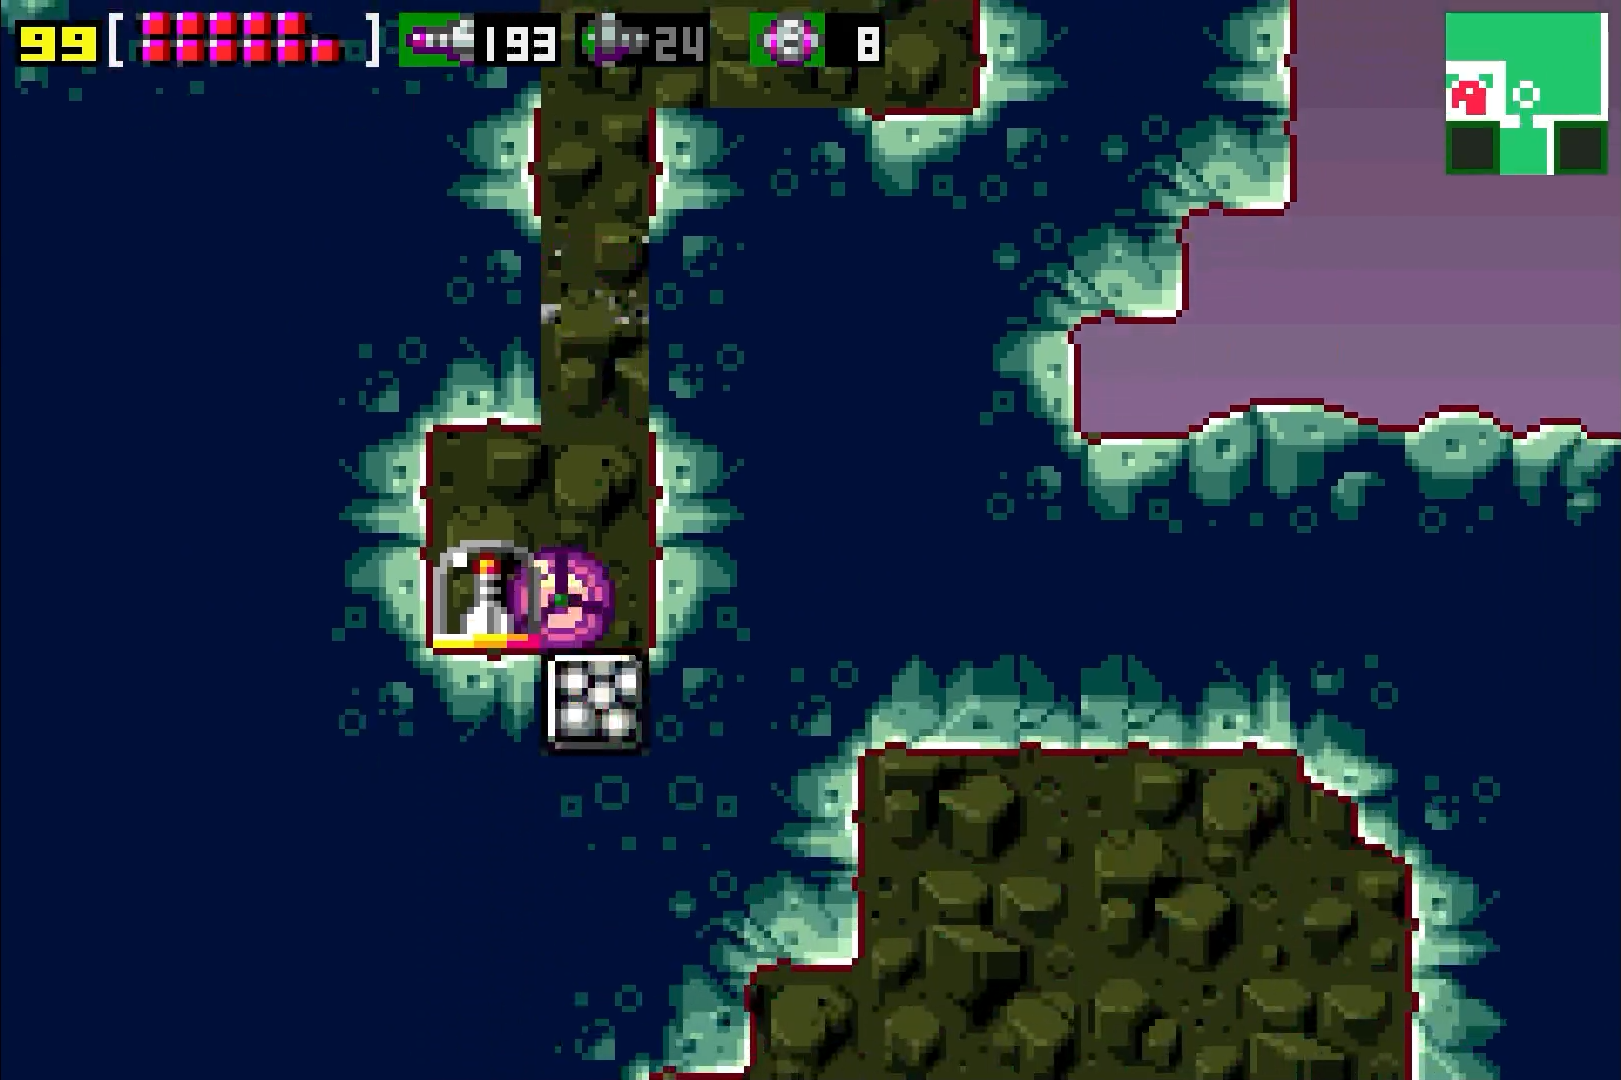
Missile Expansion #42
Location: Chozodia
Requirements: Missiles, Morph Ball
Go to the little alcove in the vertical hallway. Fire a missile in the top left corner of the alcove and a small tunnel will appear. Roll through to grab MISSILE EXPANSION #42.

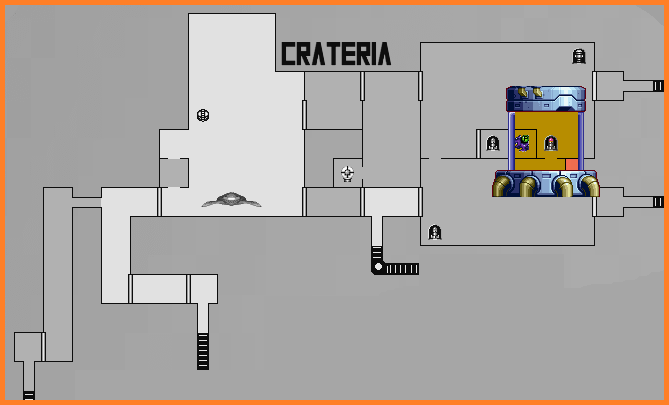
Missile Expansion #43
Location: Crateria
Requirements: Speed Booster, Morph Ball, Power Bombs
Make your way to the top right portion of the area, referred to as the Chozo Ruins. About halfway up the far right wall is a blast door inside the mouth of a Chozo Statue. We’re going to refer to this door as the Chozo Door. Head back towards the Chozo Door, and let your Speed Boost charge up. Crouch as soon as you go through the door and, while your Shinespark is charging, drop down to the platform directly below the Chozo Door. Get into Morph Ball form and release your Shinespark to the left, and you should go crashing into MISSILE EXPANSION #43! As always, see Shinespark Puzzles for video.
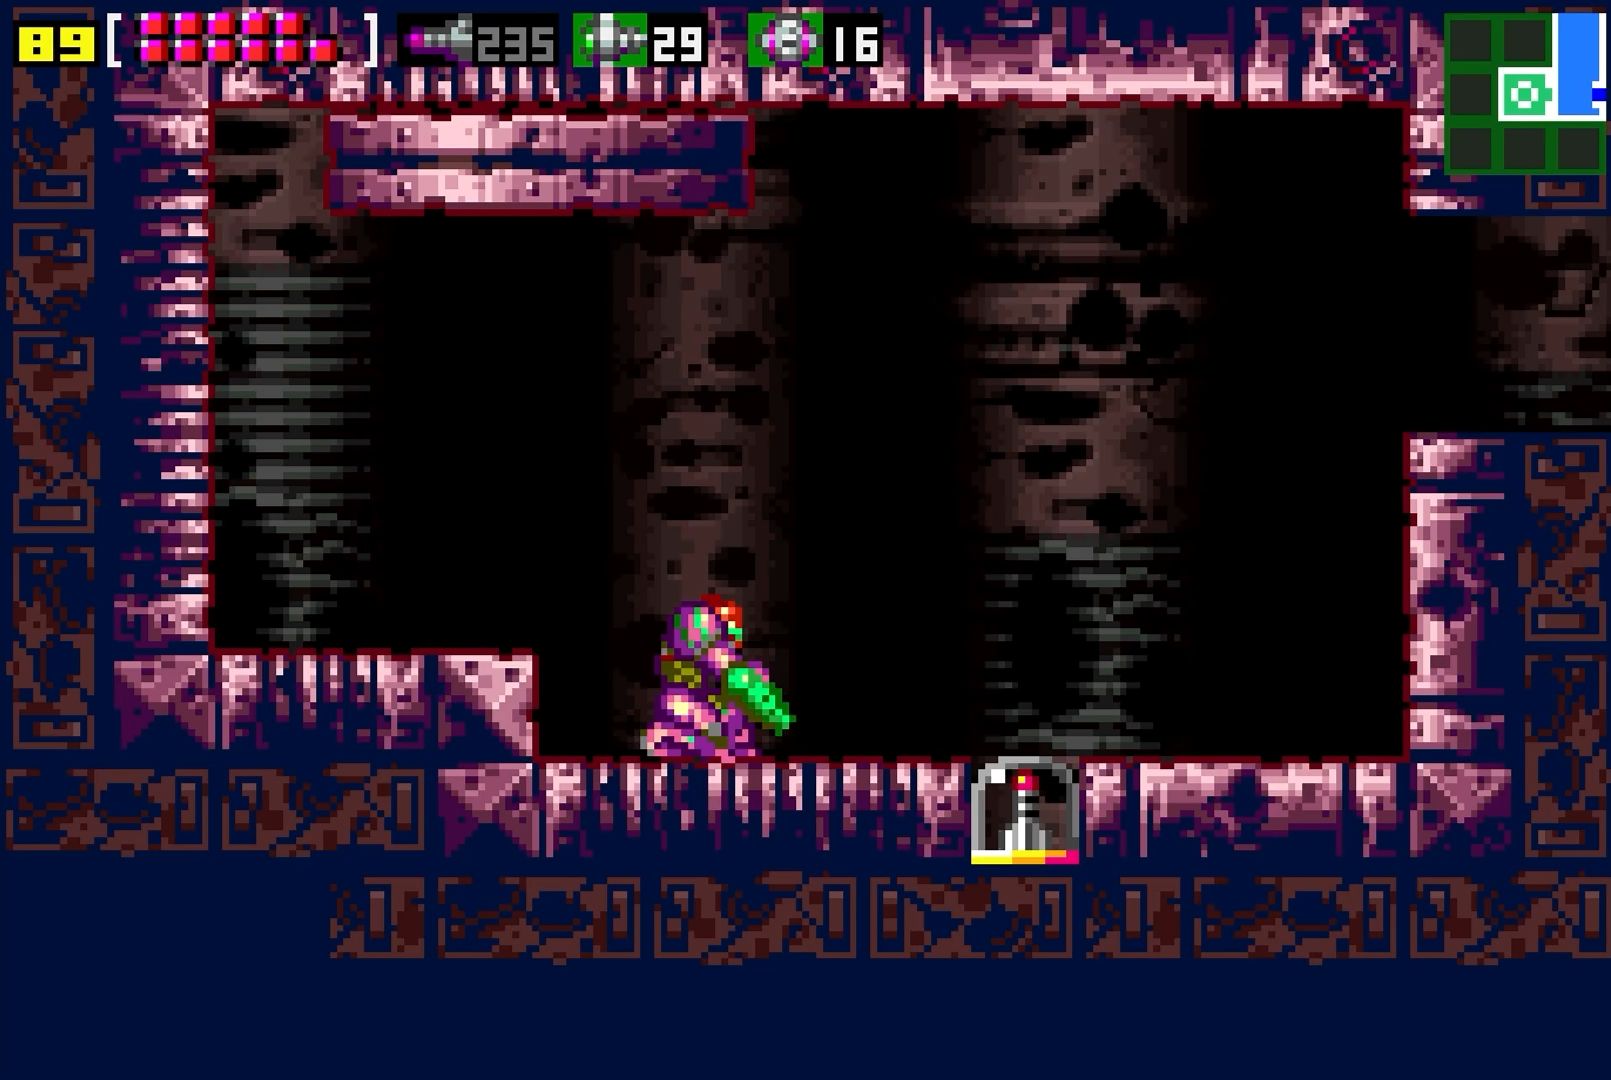
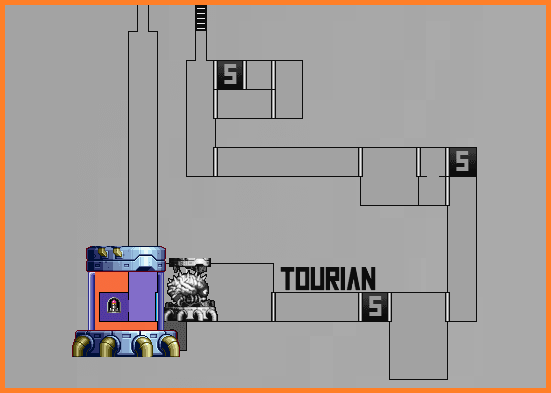
Missile Expansion #44
Location: Tourian
Requirements: Speed Booster
Make your way into the hallway to the right of the Mother Brain room (and to the left of the Save Station) and get to the far right side. Start running towards the left, crouch and charge your Shinespark, and get back into the Mother Brain room. Above you and almost directly above the blast door, you’ll see a block in the ceiling. Jump up so you’re level directly underneath the block and release your Shinespark to the left. You’ll have to jump high to get the spot right, and it’s tricky to describe, so this might take a few tries (check out Shinespark Puzzles), but once you get it, you should go crashing right into a room with a bunch of debris. Get rid of it and soon enough you’ll see MISSILE EXPANSION #44.
Missile Expansion #45
Location: Kraid’s Lair
Requirements: Speed Booster, Gravity Suit, Morph Ball
From the main elevator, take the second blue blast door down on your left hand side. You should see a bunch of lava Pits on the floor. Press towards the left, and when you see the third lava pit, drop down and destroy the blocks so you fall, fully submerged. Destroy all the blocks in front of you and start running towards the right. When your Speed Boost kicks in, get your Shinespark ready, go to the left side of the little slope in the ground, Morph down, and release your Shinespark to the right. You’ll go crashing into MISSILE EXPANSION #45. As always, check out Shinespark Puzzles.
Missile Expansion #46
Location: Norfair
Requirements: Gravity Suit, Morph Ball, Missiles
Get yourself to the vertical hallway that connects to the Map Station. Once there, drop all the way down to the bottom of the shaft, into the lava. Once you’re on the lava floor, lay a few bombs and you’ll see a Missile block on the ground that you can destroy to drop down even farther. Do so and take the door on your left.
You’ll be in a room full of lava now, but no big deal. Start climbing up and about halfway through the room, there will be a little alcove on the right side of the room with an expansion in plain site. You’ll need to roll over and bomb the block below the Expansion; as it gives away, you’ll drop down, and unfortunately, all the blocks below it are Pitfall Blocks. You should have enough time as you’re falling to quickly blast a missile above you, destroying the missile block directly under the Expansion. Finish dropping, quickly roll back and jump up to get MISSILE EXPANSION #46.
Missile Expansion #47
Location: Norfair
Requirements: Varia Suit
From here, work your way to the room directly under where you picked up the Wave Beam. The temperature of this room was too extreme before, but now it poses no threat at all. Head right in the room; you’ll find MISSILE EXPANSION #47 hidden in a spire hanging from the ceiling about halfway in; continue towards the right and you’ll run straight into the unmissable MISSILE EXPANSION #48.
Missile Expansion #48
Location: Norfair
Requirements: Varia Suit
See Missile Expansion #47 for full details.
Missile Expansion #49
Location: Ridley’s Lair
Requirements: Speed Booster, Power Grip, Bombs, Morph Ball, Space Jump (optional), Power Bombs (optional)
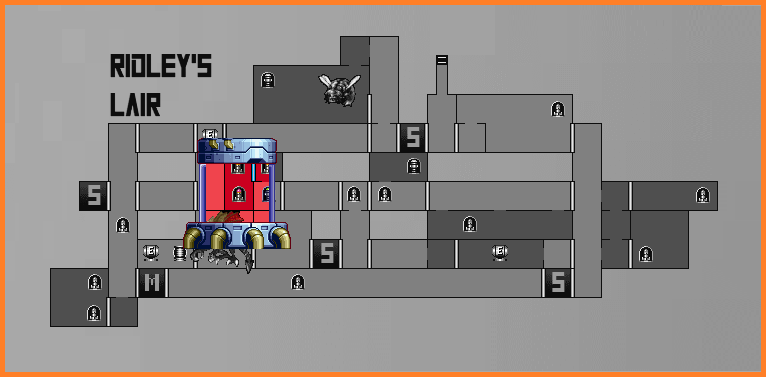
Make your way to the bottom right Save Station, the one next to the ginormous hallway on the bottom of Ridley’s Lair. Get into said hallway, and towards the ceiling of the hall, you’ll see a small platform behind some mesh that’s just big enough for you to fit inside. Get in there and start running towards your left. What you’ll want to do is go far enough for your Speed Boost to kick in, and then turn around and start running back towards the Save Station. Just before the platform runs out, crouch and quickly run into the Save Station. Release your Shinespark in the actual Save platform and run through the right door. Crouch again and quickly jump up to either of the small platforms that are level with the blast door. Release your Shinespark to the right and you’ll be in a new room.
That’s only half the fun, though. Back up a bit and start running towards the right, through the door. You’ll be in a new room, running fast towards the right. When you’re about to hit the little spire sticking down, crouch and charge your Shinespark. Roll under the spire, and then stand up, face left, and Shinespark straight up. You’ll grab a ledge which you can roll into.
Now, depending on what point in the game you’re attempting this puzzle at will change up how to approach it. If you are doing this during your first trip to Ridley’s Lair, this will be one of the most difficult expansions in the game. It requires fast timing, photographic memory and a mastery of wall jumping. Lay a bomb to the left of the crevice you entered to start a chain reaction that will quickly destroy all the blocks around you. Hug the wall so that as soon as the first block explodes you’re already off to the races! Keep rolling left until you pass a pillar-looking ceiling fixture, then quickly un-morph and use a wall jump on that same ceiling fixture to get yourself back to the top floor. Next, run left and jump right before the ground below you explodes and the chain reaction will destroy the wall blocking you mid-jump. As you descend, quickly use the Power Grip to grab the newly exposed section. Quickly climb back up before the chain reaction reaches you and jump towards the 2 vertical blocks above. These are both crumble blocks, the first one being a slow block and the one beneath being an instant block. As soon as the first block crumbles, roll left, un-morph and begin somersaulting towards the left wall. By the time you reach the wall, the chain reaction should have destroyed the blocks blocking the exit. Start performing “single wall” wall jumps the moment you hug the newly exposed surface to make your way to the opening above and drop down into MISSILE EXPANSION #49.
However, as mentioned previously this is just one way to get the expansion. This is the quickest method because it means you won’t have to return to Ridley’s Lair during the 100% cleanup, but it’s far from the easiest. If you don’t mind revisiting the lair during the cleanup, this puzzle becomes pathetically easy in what I’ve dubbed the “cheese” method. It’s pretty satisfying to take one of the hardest puzzles in the game and reduce it to a joke. For this method, we repeat the same Shinespark mentioned as outlined previously, but this time when we reach the start of the puzzle, we also have 2 key items: The POWER BOMBS and SPACE JUMP. Instead of dropping a bomb to start the chain reaction, lay a Power Bomb at the top right of the room where you land. For whatever reason, the Power Bombs won’t obliterate all the bomb blocks in its radius, allowing you to safely travel to the level directly below. Drop a bomb to take out that path and safely land at the bottom. Since that path you bombed is disconnected from the rest, you won’t have to worry about outrunning a chain reaction! Continue on the path until you reach the top left side of the room just past the ceiling fixture. Go all the way left until you’re hugging the vertical blocks and lay another Power Bomb. This will take out every bomb block in the way EXCEPT for 3 right below us which we’ll conviniently land on. From here, simply Space Jump to the exit and directly into MISSILE EXPANSION #49.
Whew. That was a lot to take in, so as always, I recommend you check out Shinespark Puzzles to see the entire sequence in video.
Missile Expansion #50
Location: Ridley’s Lair
Requirements: Speed Booster, Missiles
Immediately after dropping down to the floor after nabbing Missile Expansion #49, get yourself to the right-hand side of the room and start running towards the left. Once you pass through the door, you’ll see a little nook in the ceiling that’s just begging to be destroyed via Shinespark. Oblige the ceiling and go crashing upwards. You’ll land on a new platform with a door to your right. Go through it and start running.
This will be tricky. There’s no Shinesparking here, only precise Speed Boosting. You should enter this room running, with your Speed Boost kicking in shortly. While you’re running, you’re also going to need to shoot two sets of blocks in front of you; doesn’t seem like a big deal, except that the second set of blocks has a missile block in the centre, so you’ll need to switch from your beams to your missiles while Speed Boosting. Don’t worry, you don’t need to change your aim to hit the block, just remember to use missiles before you get too close.
As if all this wasn’t enough, you’ll need to perform a fairly precise jump from left to right while Speed Boosting to break all the Speed Boost blocks. Imagine the top half of a circle; that’s the shape and curve you’re going for. If you did all of that right, then you’ll land right beside MISSILE EXPANSION #50! See Shinespark Puzzles for the full video.