


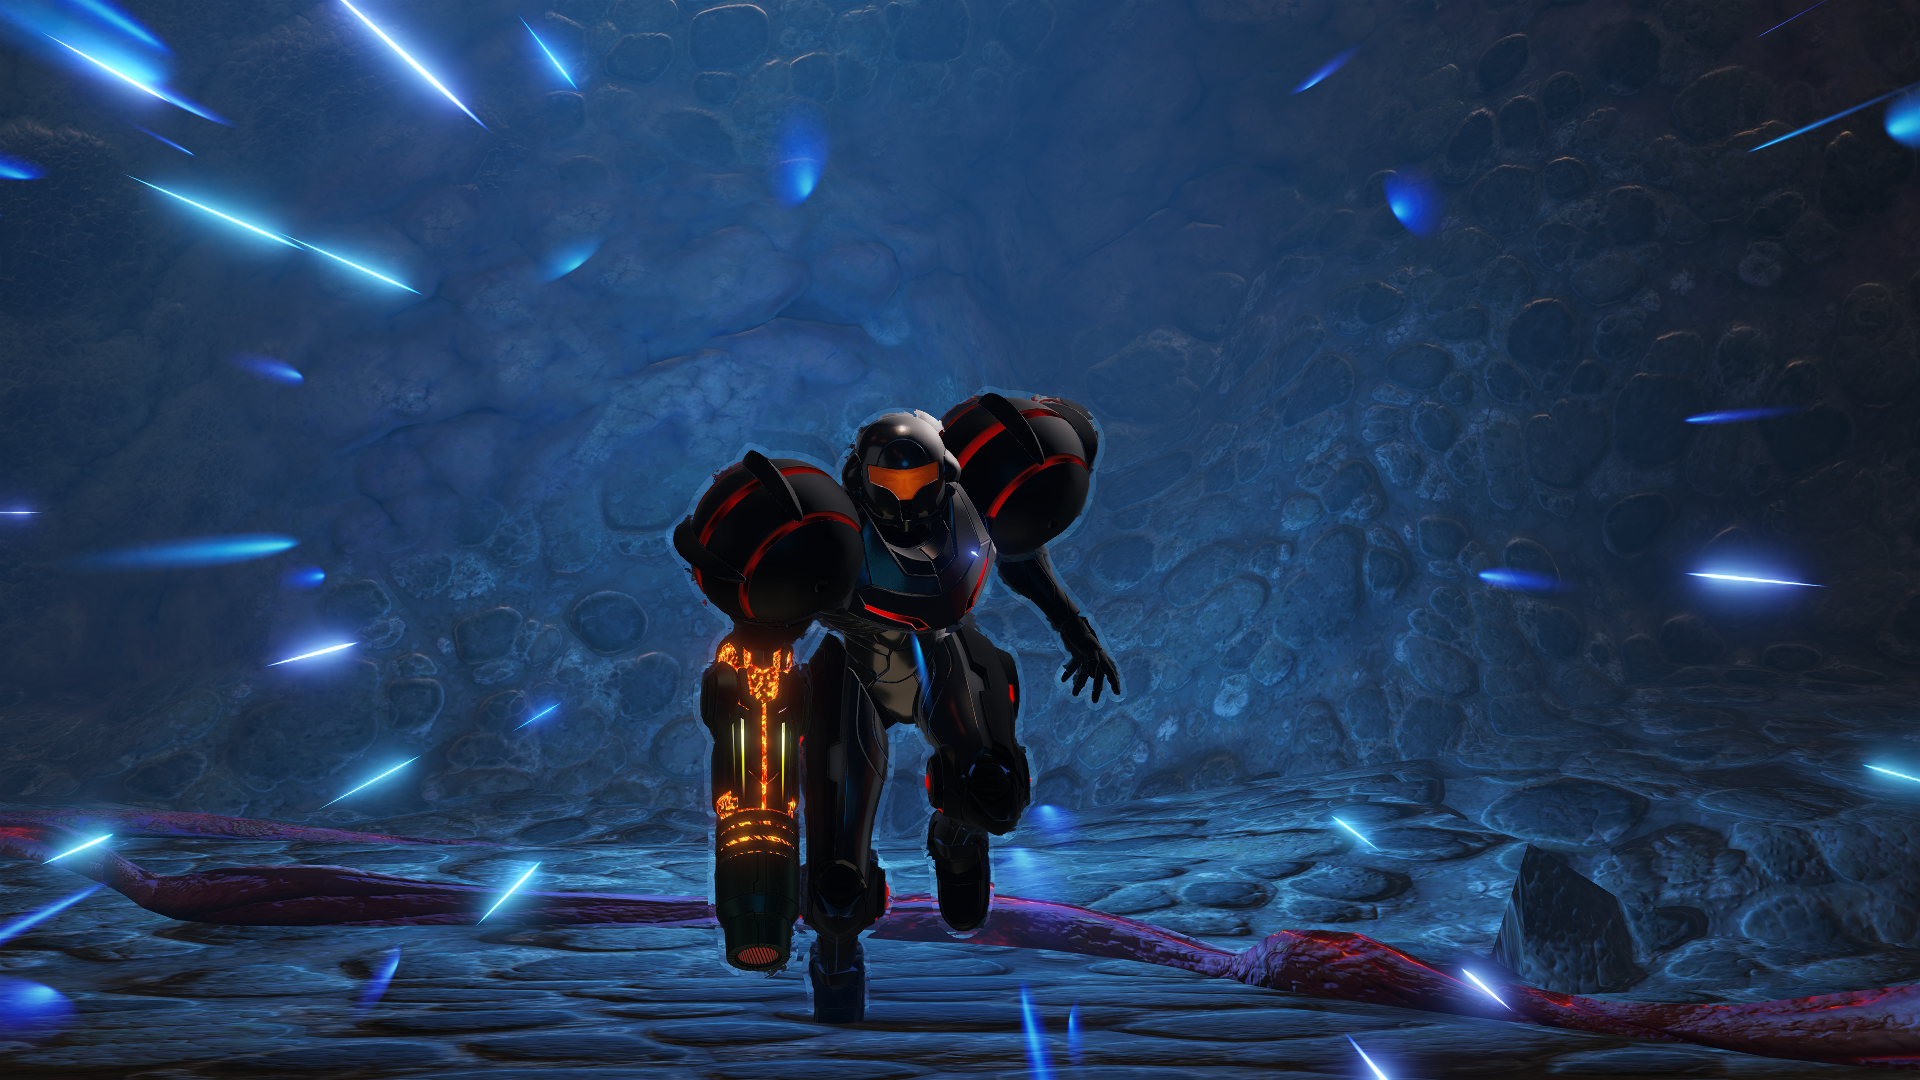
Metroid Prime Walkthrough – Bosses
Here you’ll find a detailed list of strategies, information, and tips in fighting the many bosses of Metroid Prime.
Parasite Queen
The PARASITE QUEEN might look absolutely massive and daunting, but don’t let its looks intimidate you – the main purpose of the Parasite Queen is to teach new players how to circle strafe in first person. If you don’t scan it, you’ll target its stomach when you lock on. However if you do scan it there will be a note about its head being the most vulnerable spot and your lock-on will default to the head from that point forward. This is the only boss in the game which has a feature like that which is kind of weird, but a cool detail nonetheless.
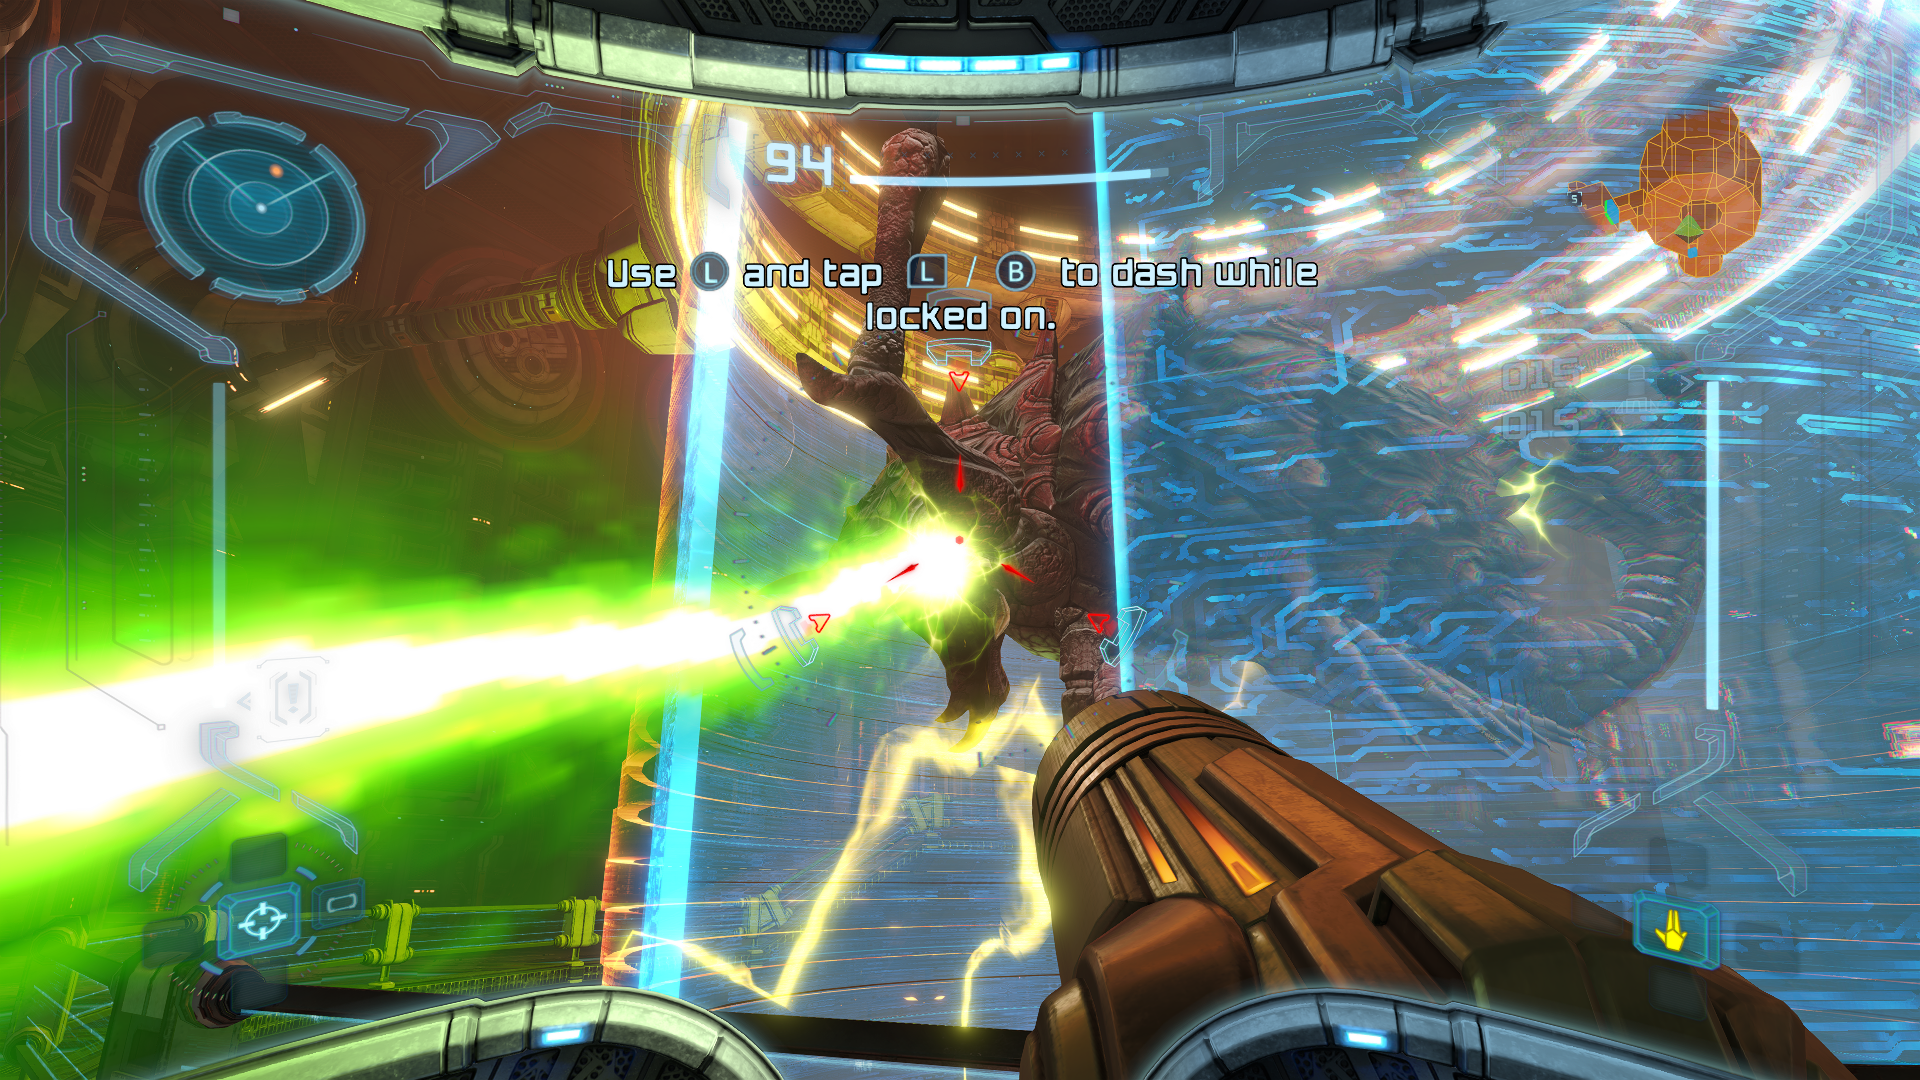
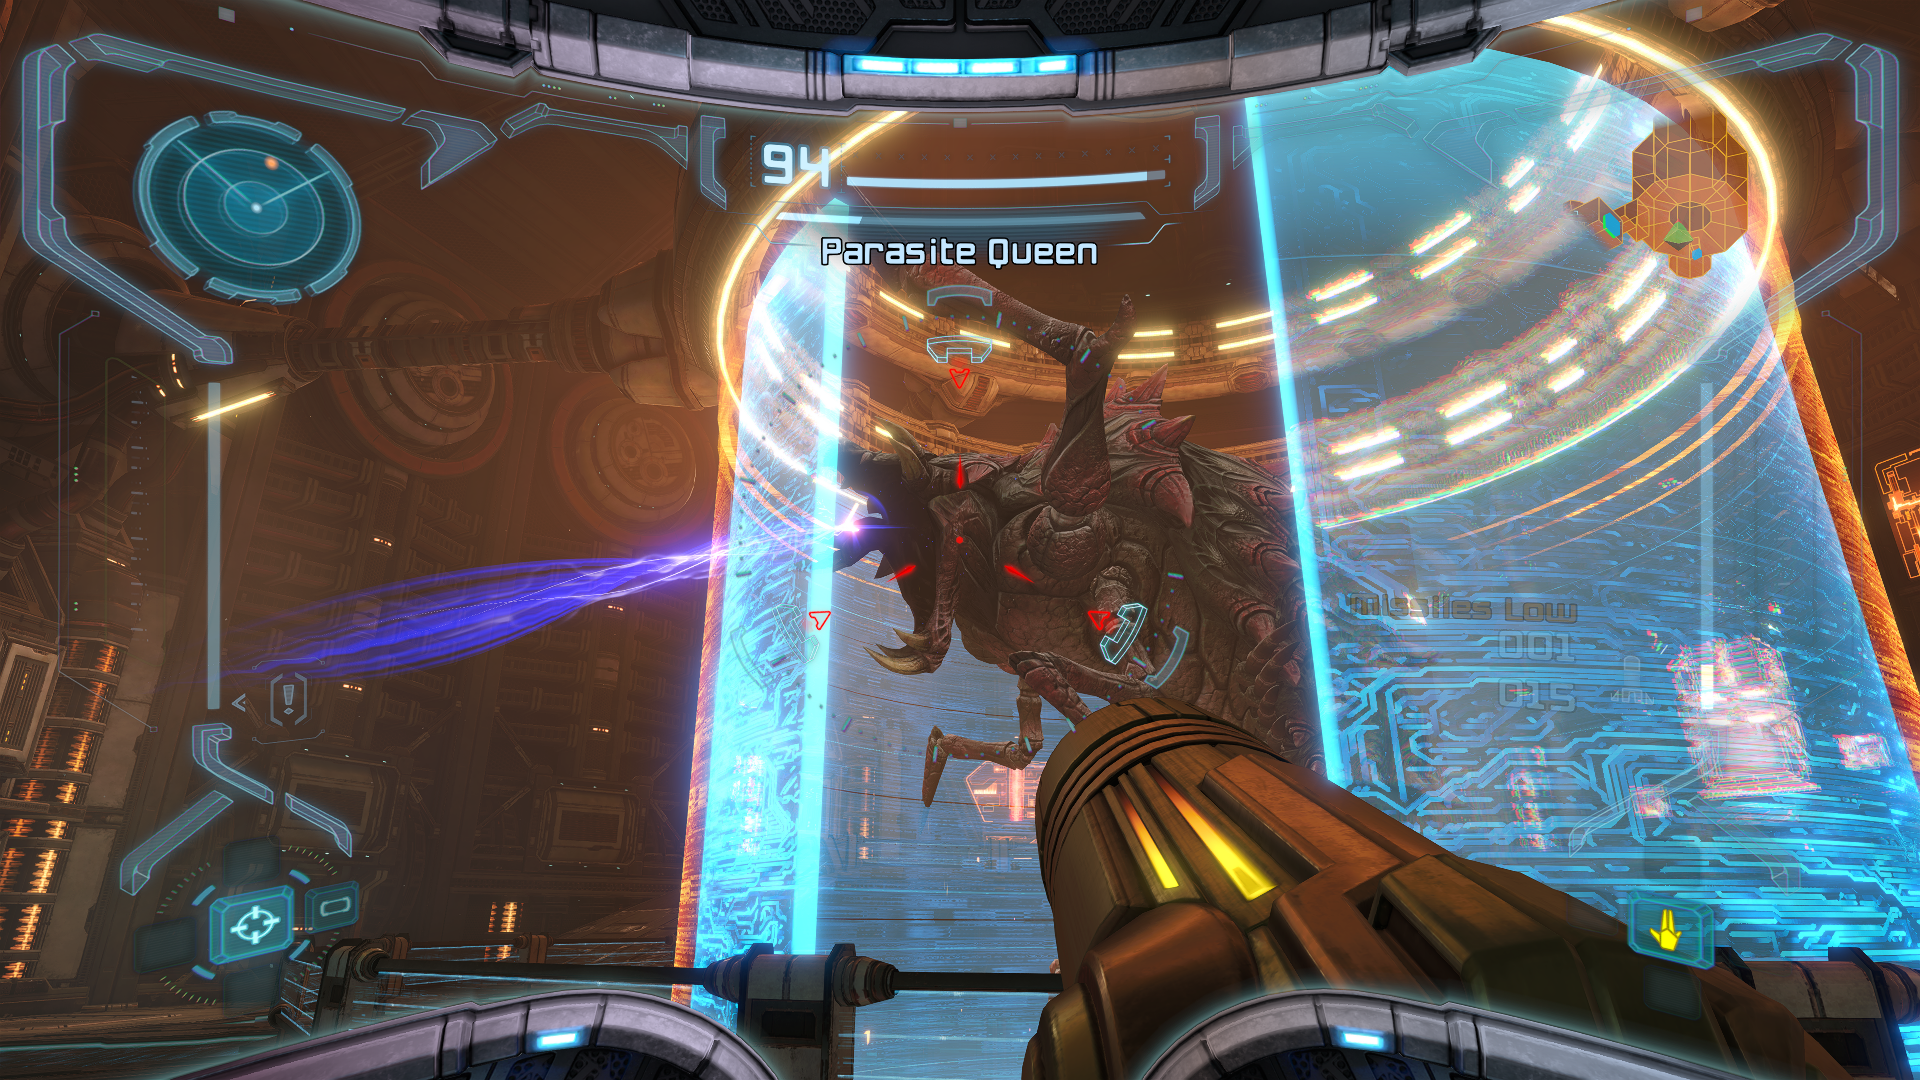
It’s pretty straight forward from here. To defeat the Parasite Queen, shoot at it until it dies. Use your dash to get out of the way of its acid breath and to realign yourself with the reactor force field if you find it blocking your shots.
ADVANCED STRATEGIES: This is actually something you can use throughout the game moving forward, in both general combat and boss fights. The firing rate of the Missile Launcher is pretty slow, and I’ll bet you wanna pump those numbers up, right? Well if you press the button to fire a regular shot from your arm cannon immediately after firing a missile, the configuration will automatically reset. This will let you fire off a second missile instantly. The key here is to find your groove so you can repeat this over and over again for consistent rapid-fire missiles. You get this technique down, and that Parasite Queen is pulverized!
Hive Mecha
The Chozo of Tallon IV abandoned most of their technology in the time before they vanished, but pockets of it can still be found in their ruins, such as the HIVE MECHA. Be sure to scan it, along with the RAM WAR WASPS, that it deploys. Luckily, this fight is pretty simple; just shoot all the wasps in the arena and the Hive Mecha will expose a weak point for you to shoot. Do this 3 times and get a free MISSILE LAUNCHER for your trouble. To keep track of all the wasps in the later phases, use your radar so you know exactly where to shoot when they do their attack wind-up.
Beetle Colony
We’ve disturbed a nest of Beetles, and they don’t take kindly to us trespassing on their territory, so the only way to move forward is to squash the bugs! It might feel overwhelming at first to have so many enemies swarming you in such a small location, but much like the Parasite Queen fight, it’s just a basic lesson in circle strafing. Target lock one Beetle at a time and keep moving to the left or right, avoiding any attacks as best as you can. Keep firing and make sure to change your lock after each confirmed kill.
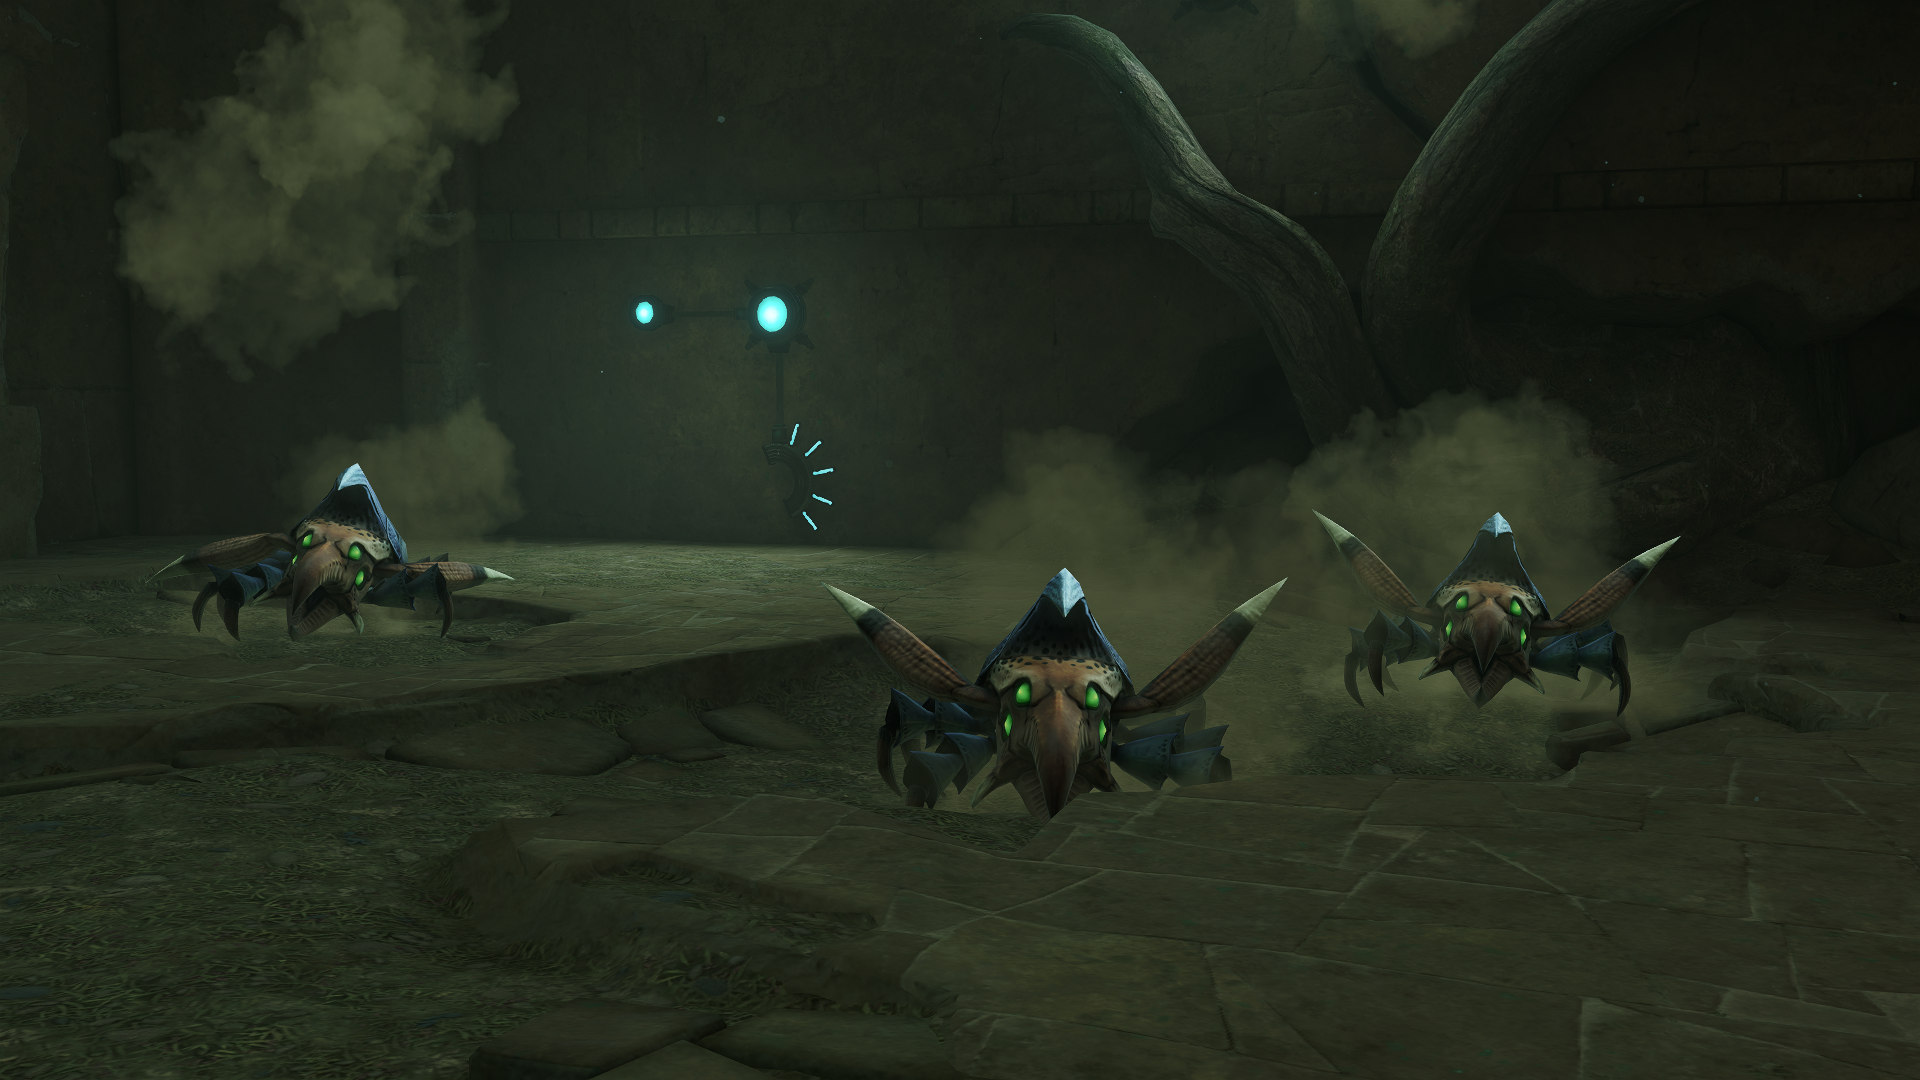
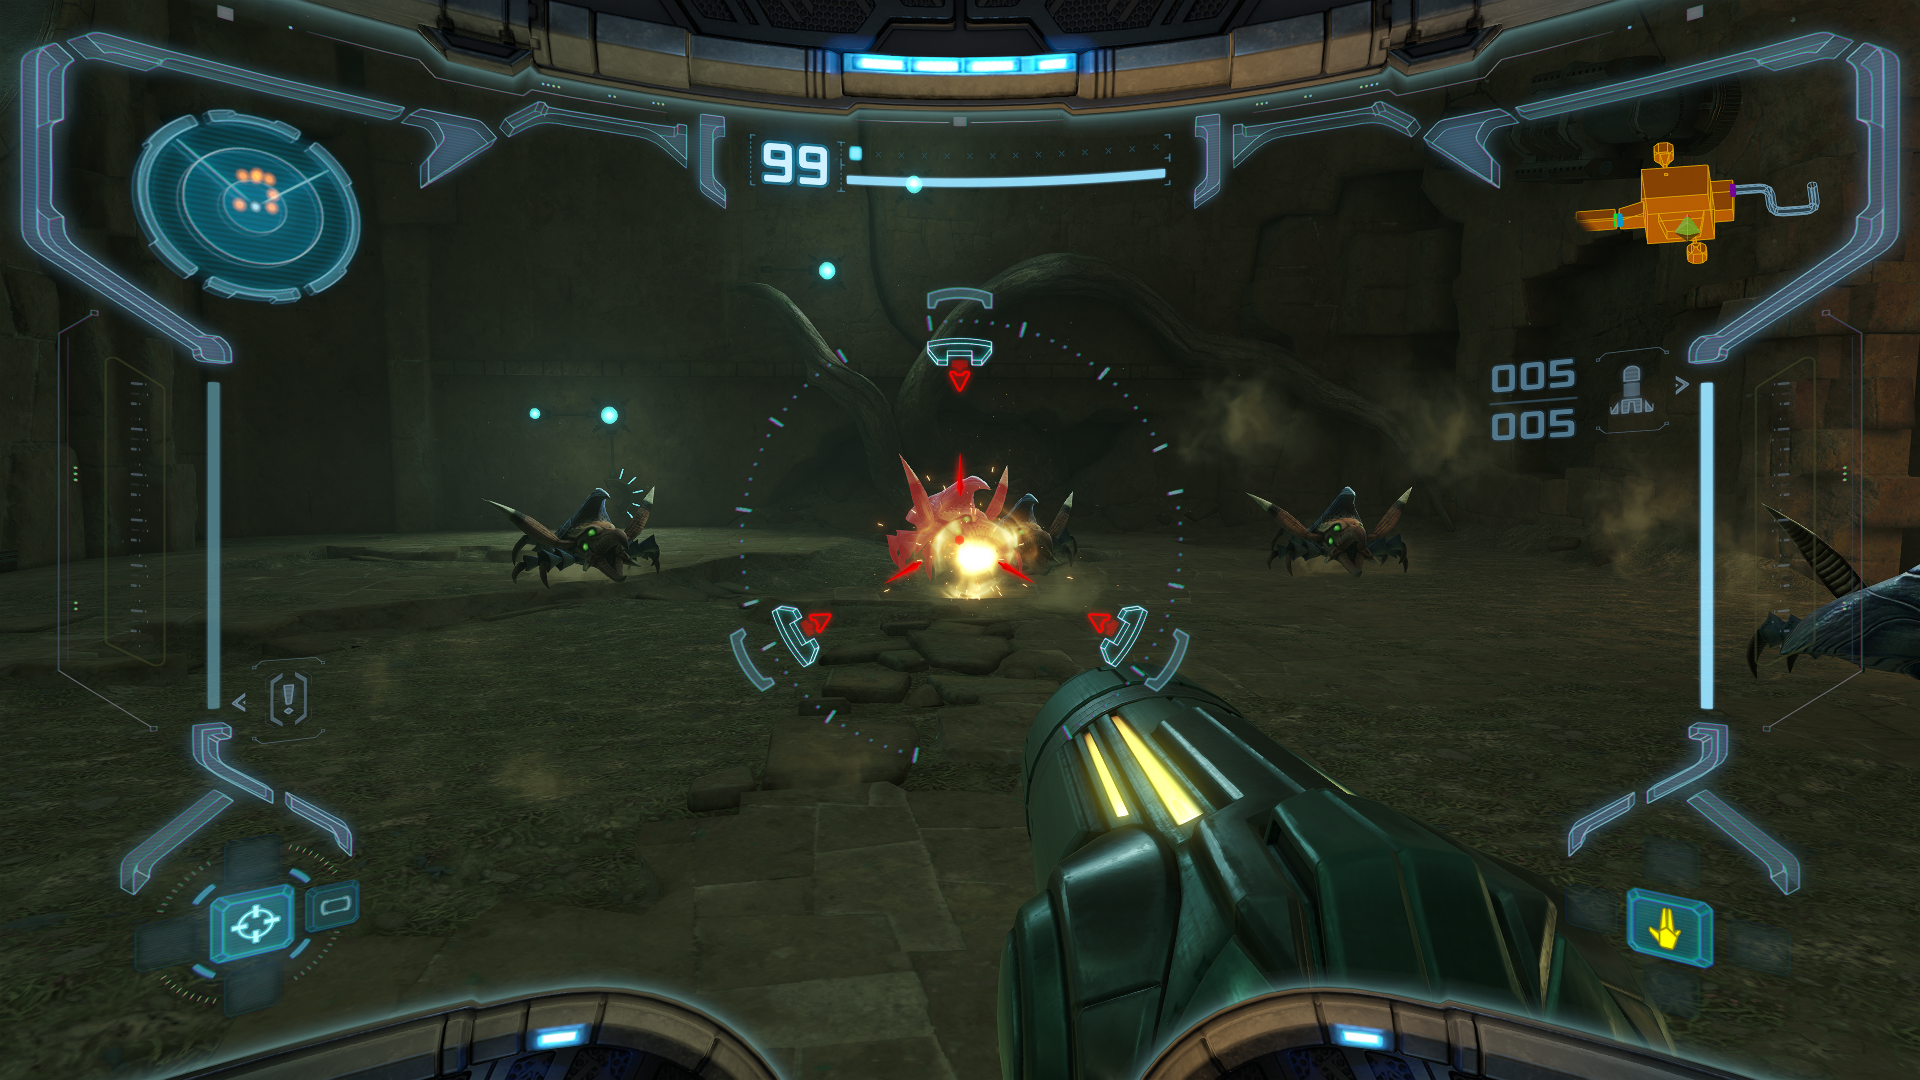
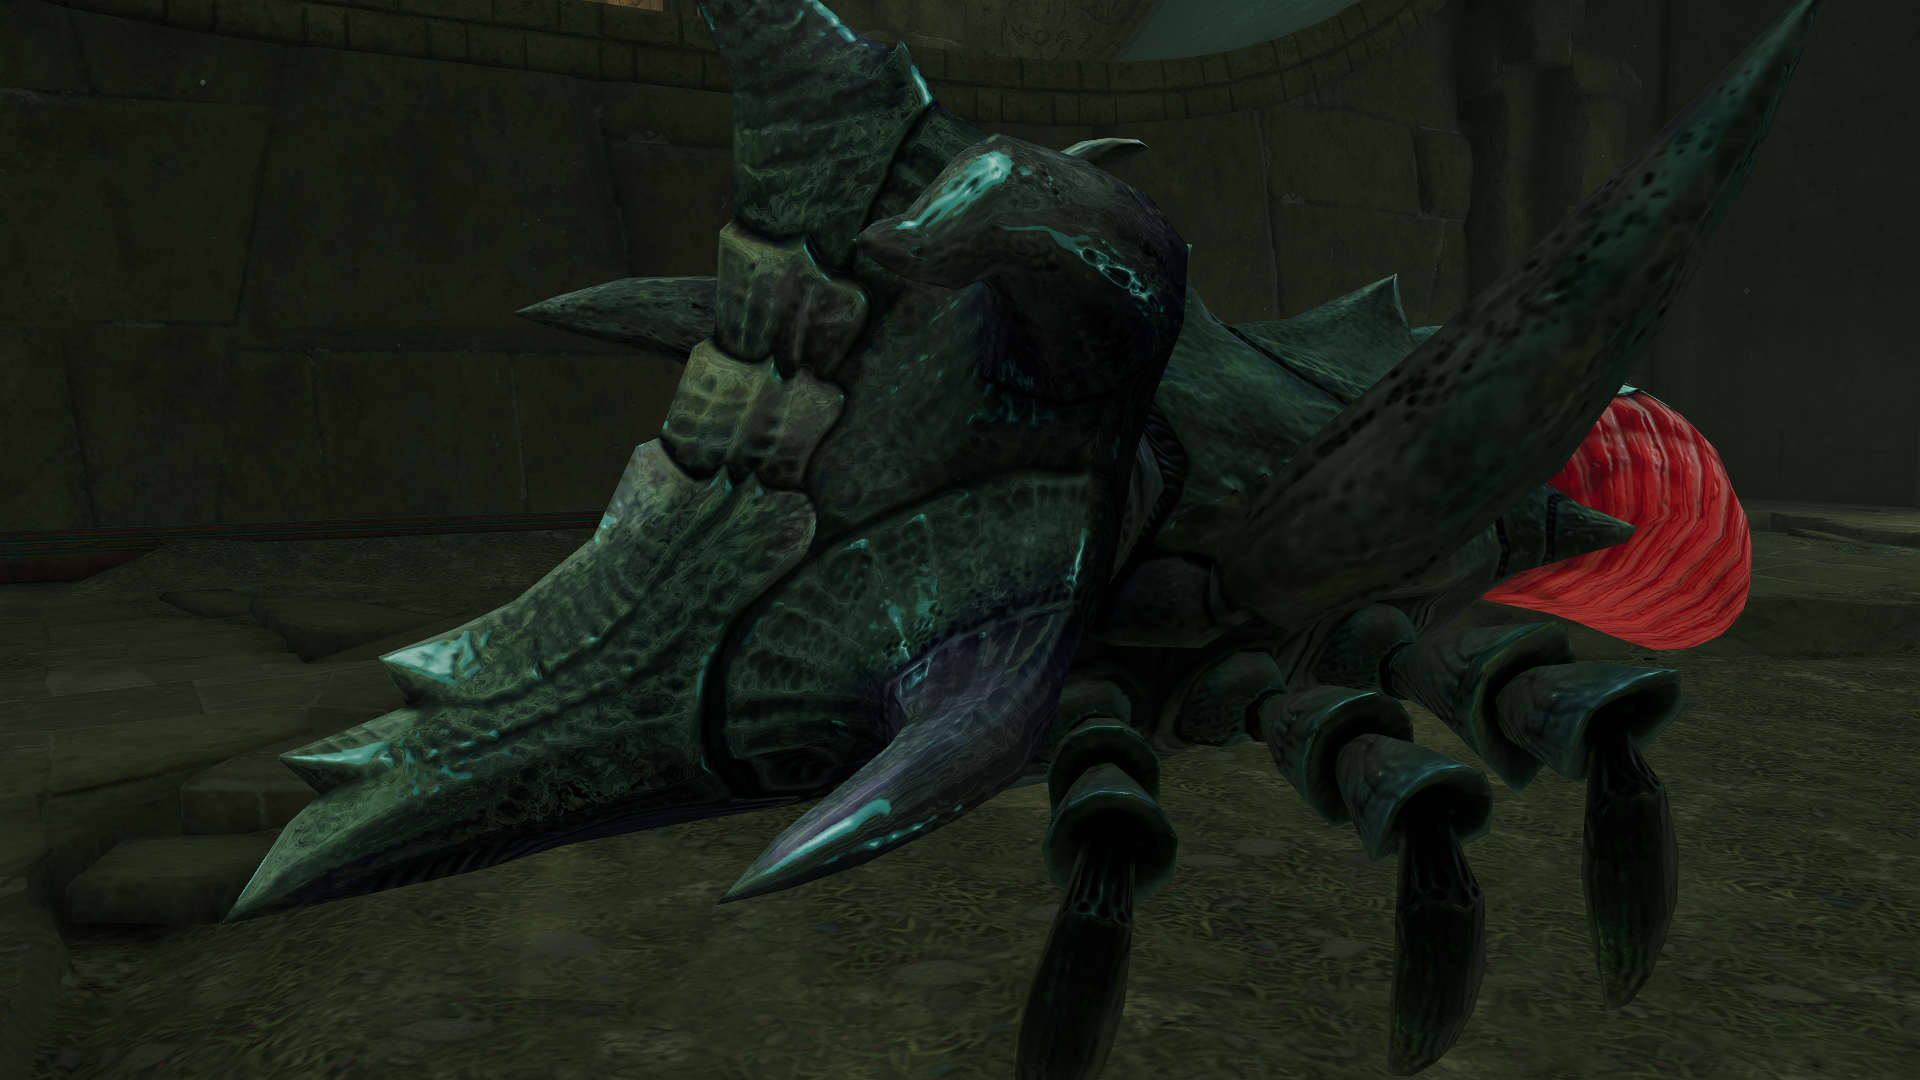
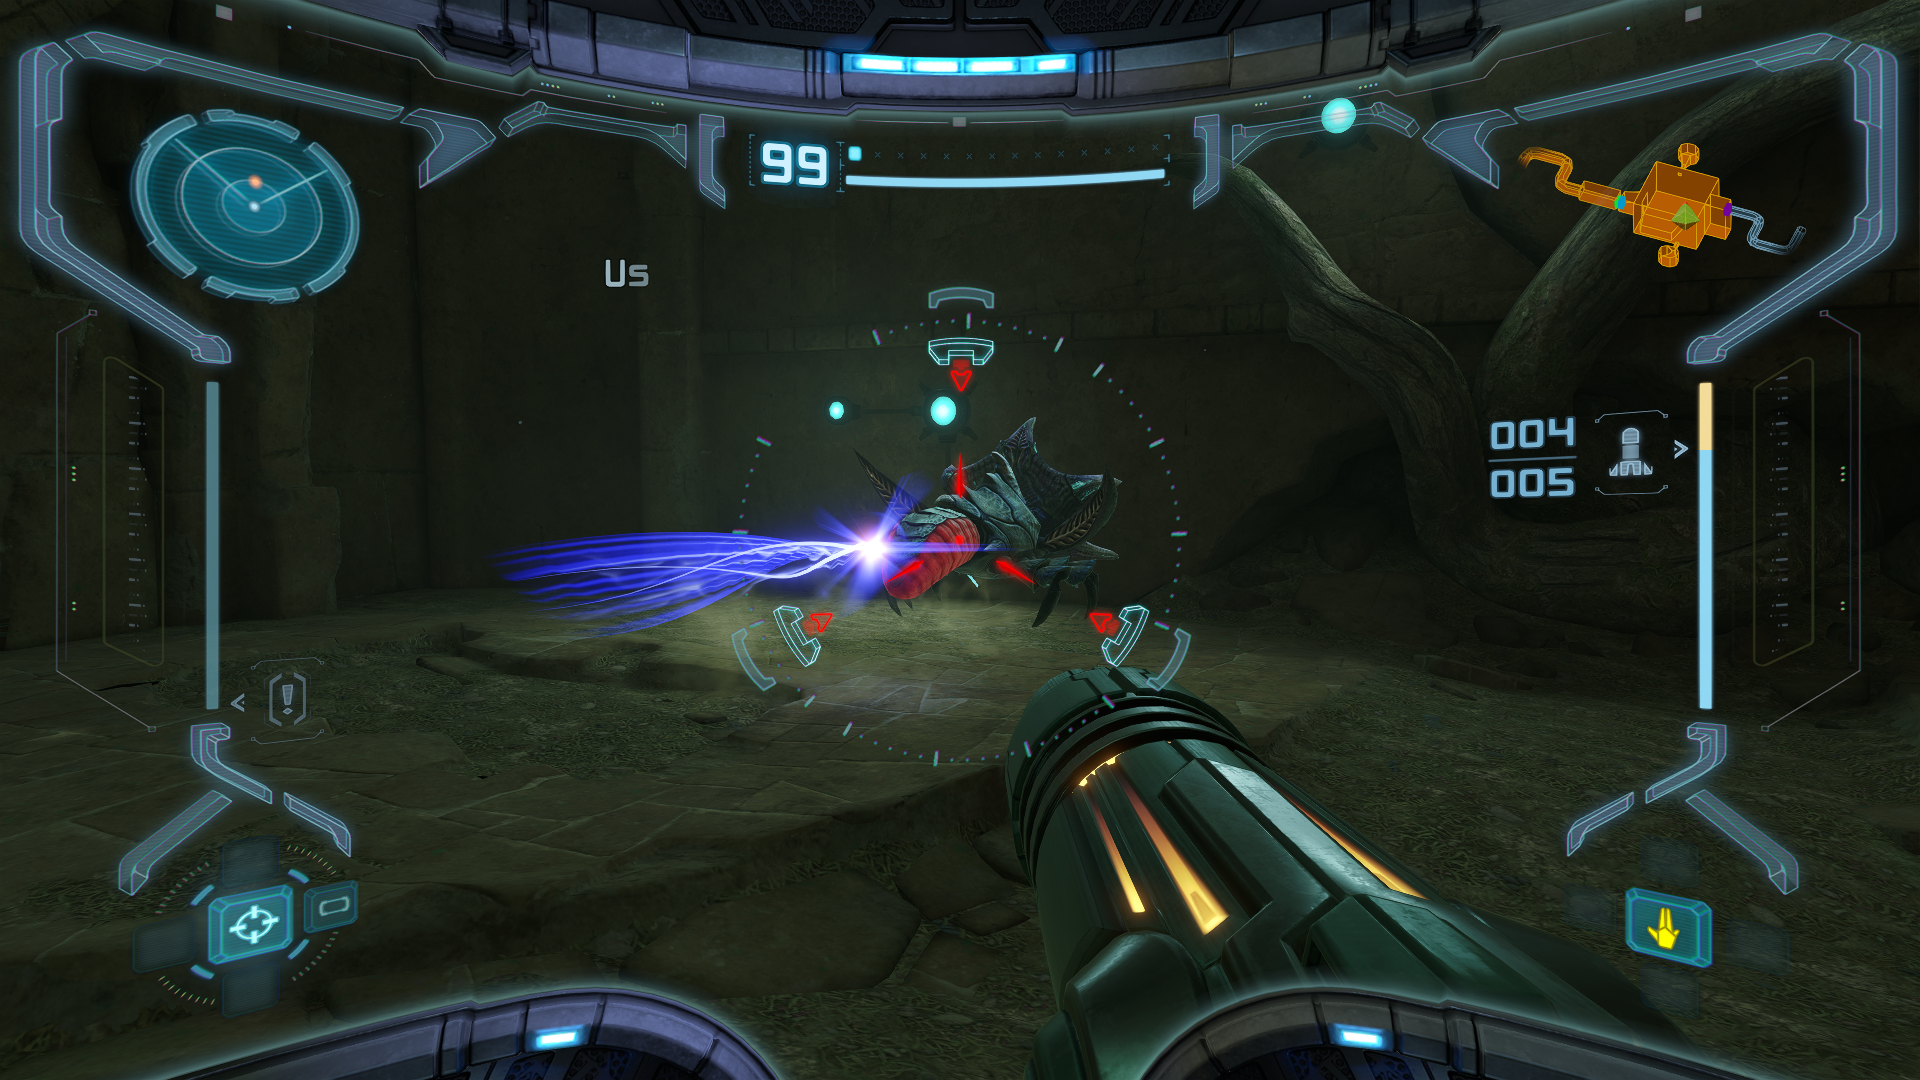
After you take out all the Beetles, a PLATED BEETLE will emerge from the ground. This thing looks MEAN with its hard plated head and red aposematic abdomen, but its aggression is about to be its own worst enemy. Once you’ve scanned it, wait for it to lunge after it does its two side steps, then quickly dash to the side and fire a missile. Do this two times and the Beetle will be no more.
Incinerator Drone
The Chozo left us another present behind – a mechanism called the INCINERATOR DRONE. The drone is a stationary, upright machine with a couple of “arms” attached to it that spew out flames. Scan it, and the drone will now start to rotate, bringing a whole new meaning to the phrase ‘ring of fire’. Dodging its flamethrowers is easy enough, as you can roll under the fire, but just be alert – occasionally the arms will be angled diagonally, with the overhead one not hitting you at all and the underhand one needing to be jumped over. Eventually, the Incinerator Drone will reveal its “head” (read: weak spot) out of the kindness of its programming for you to shoot at, so blast away!
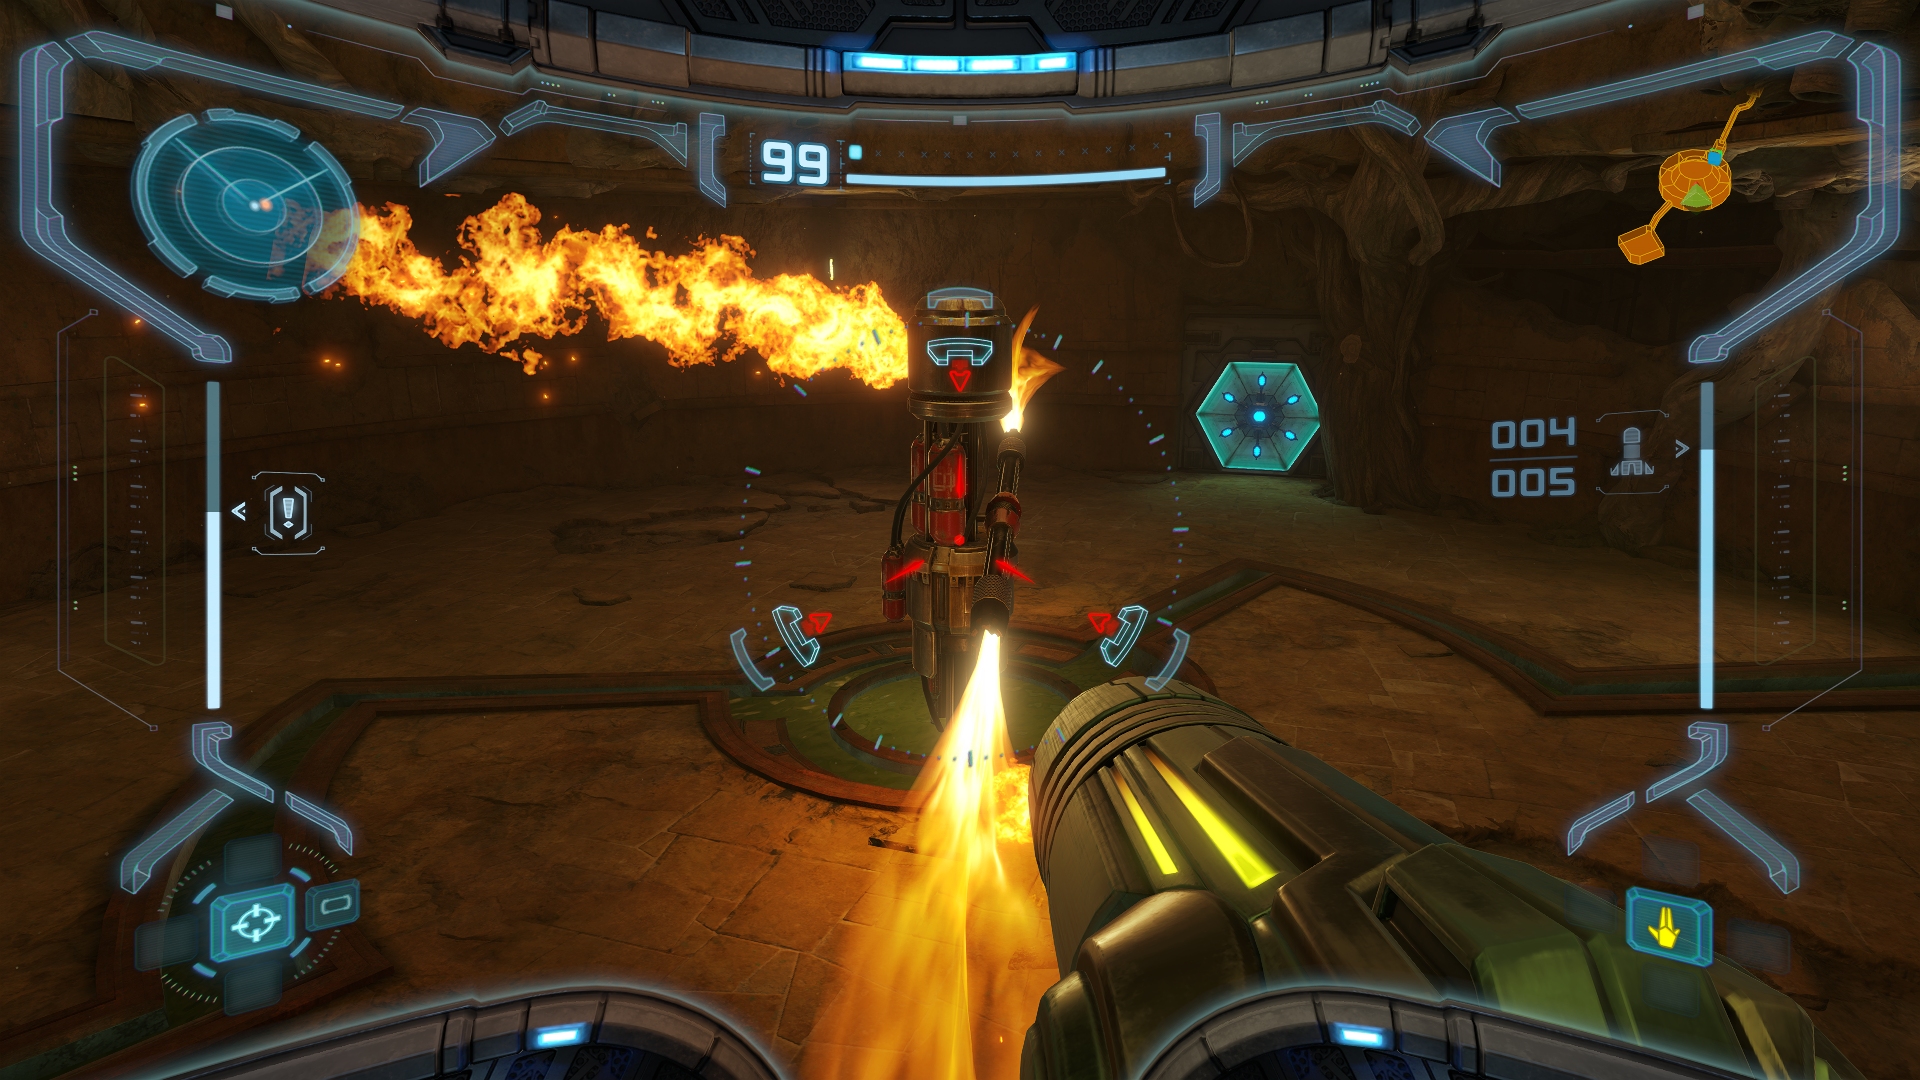
After enough damage, the Drone will glitch out and shoot one of its flamethrowers up at a nest of BARBED WAR WASPS, leading these wasps to leave their nest and join the fight. Make sure you scan them as well, as they are a one-time scan only found in this fight! You’ll notice that the wasps can actually fire their stingers as projectiles and regenerate them quickly, so watch out. The wasps infinitely respawn, but they’re easy enough to destroy. Concentrate fire on the Incinerator Drone, dodge the flamethrowers, and after three more phases of fighting, this drone will be… incinerated.
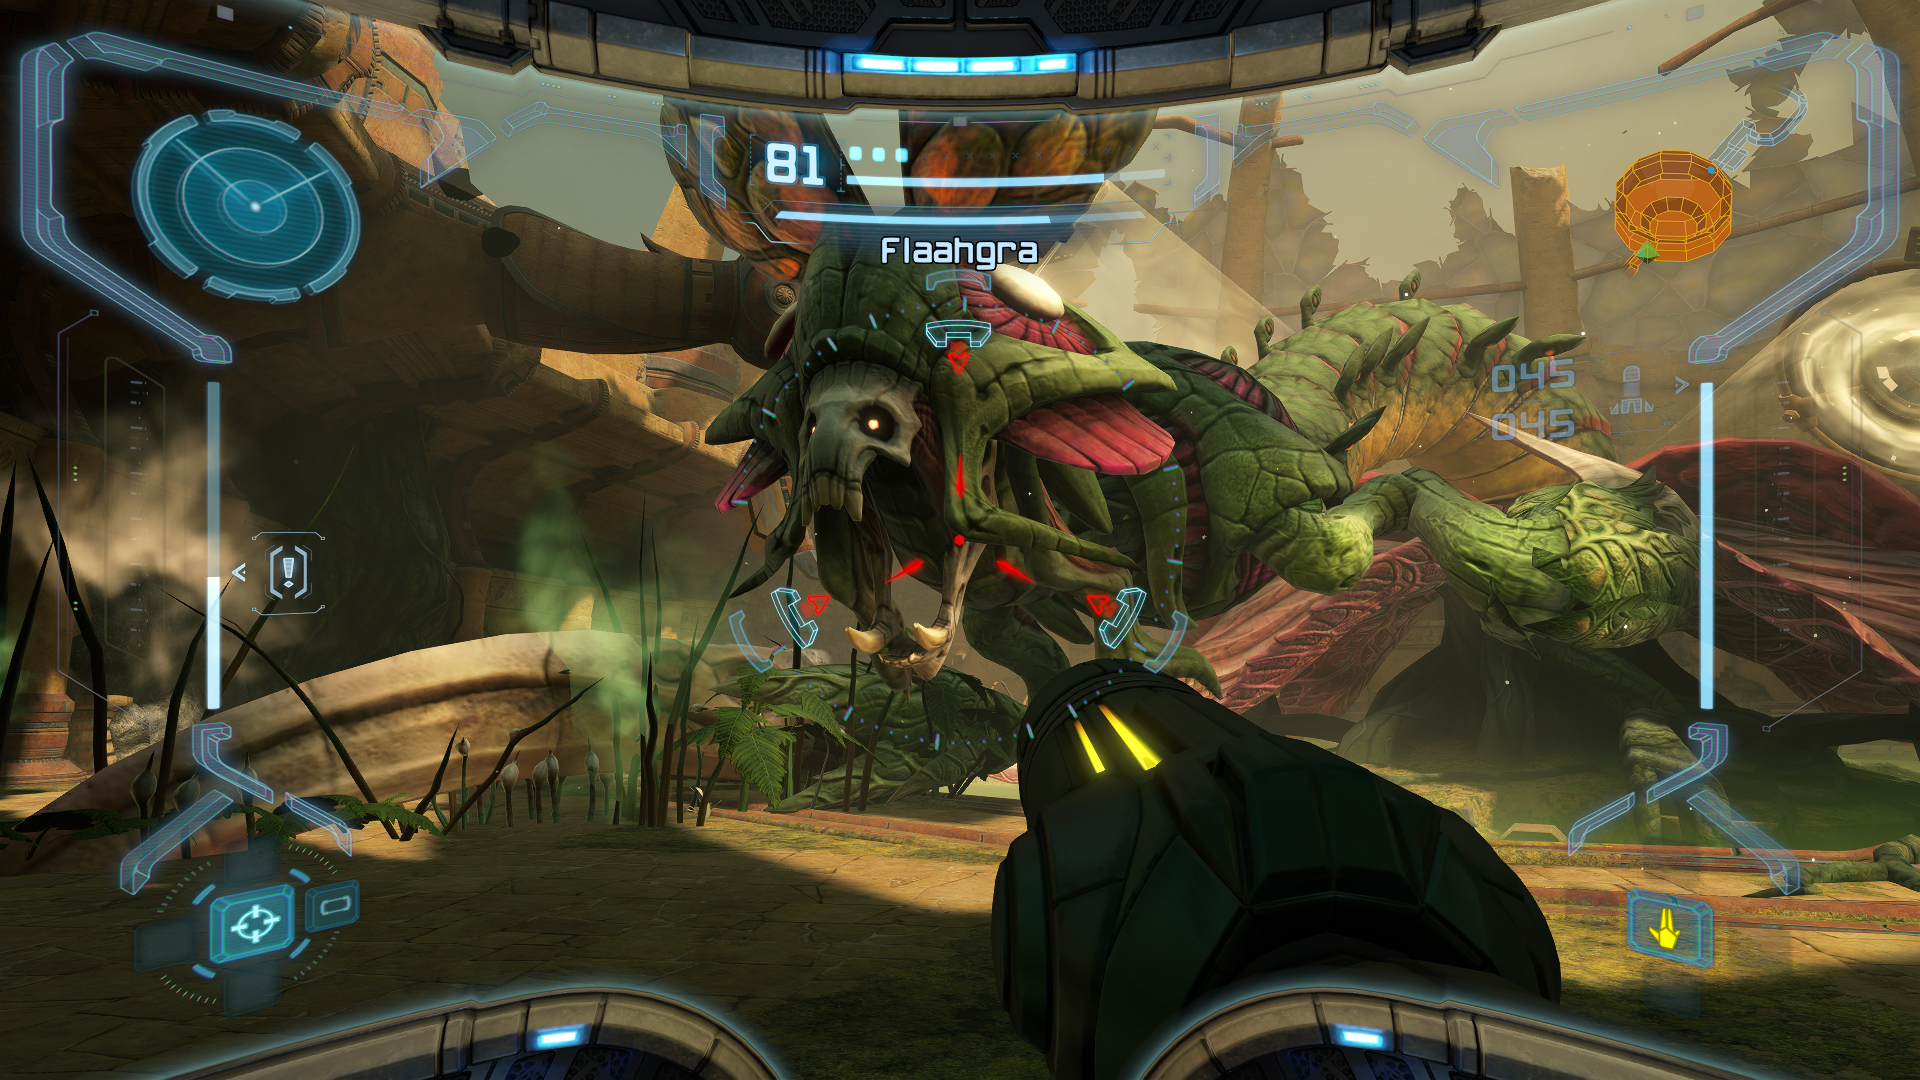
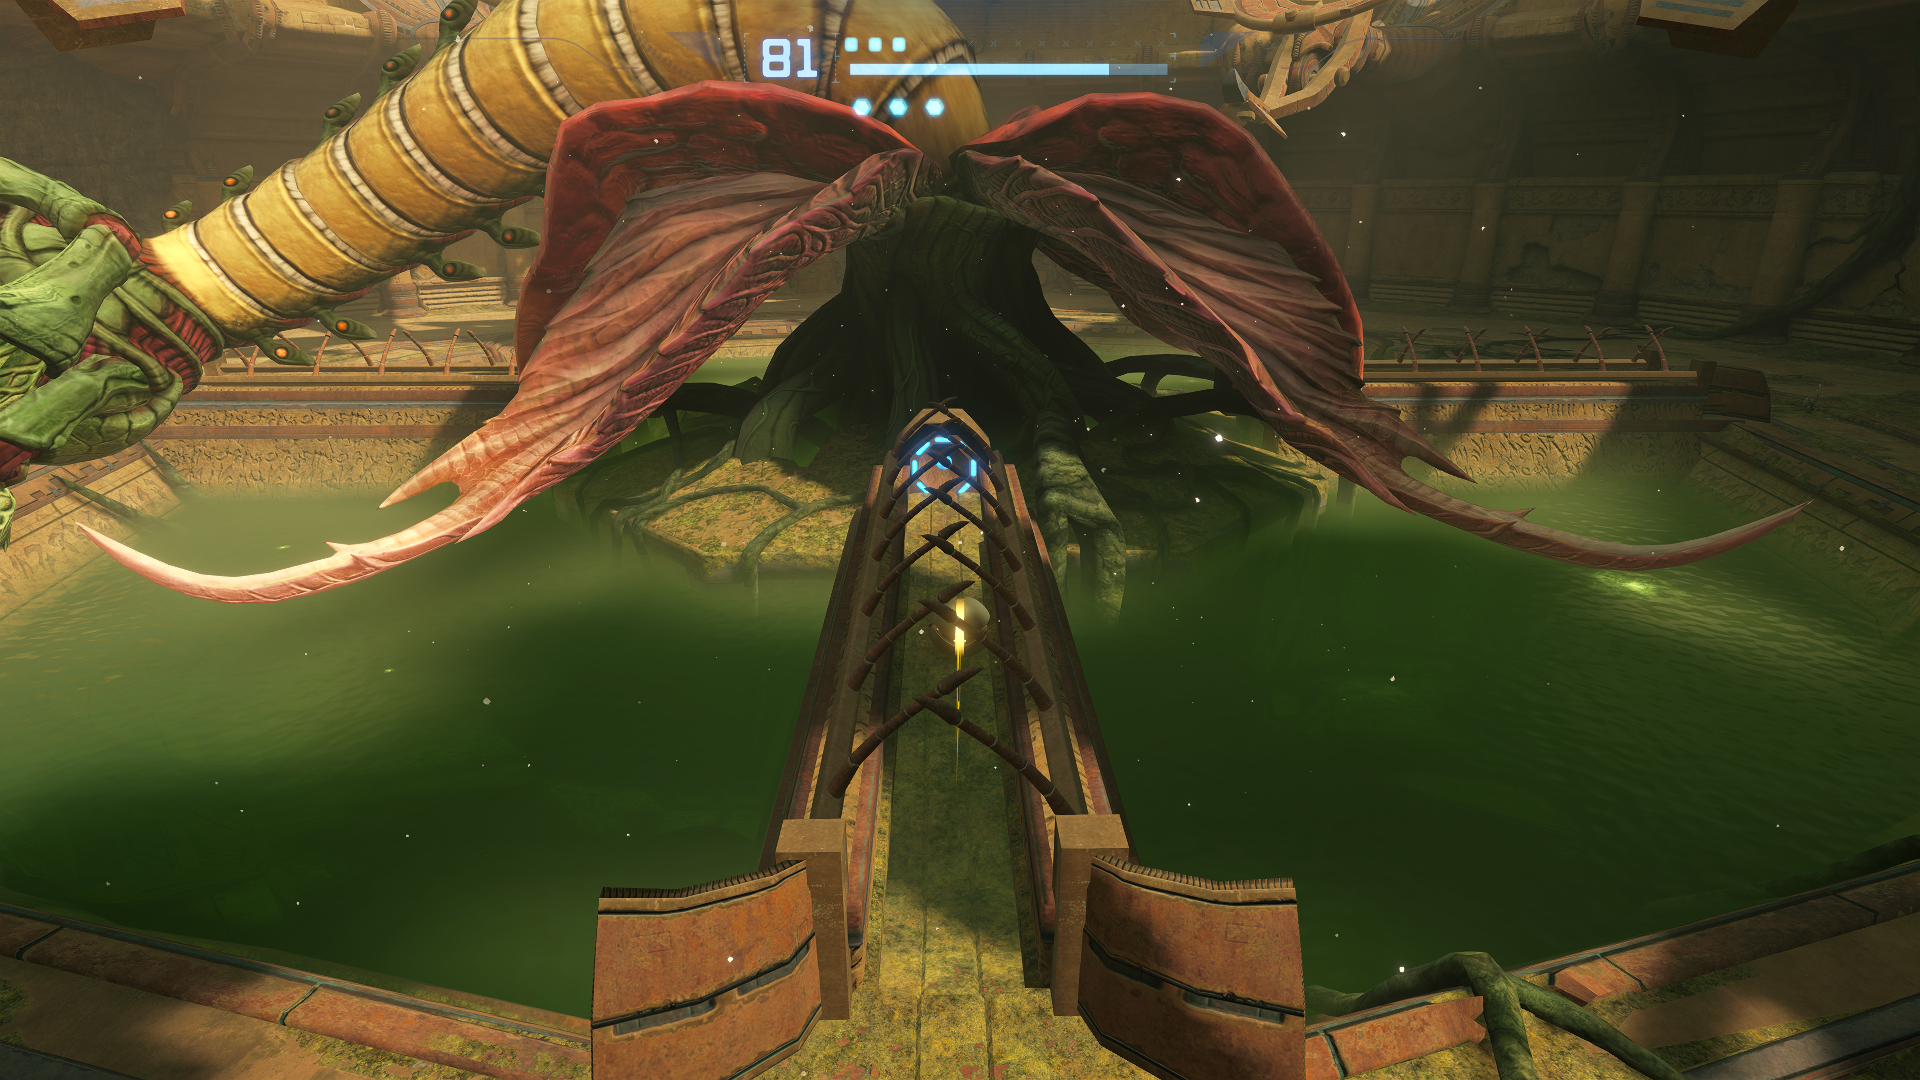
Flaahgra
So, first things first: make sure that you scan FLAAHGRA AND one of the FLAAHGRA TENTACLES! These count as two separate scans, and this is your only chance to get it! Lots of people miss out in this scan, so make sure that you’re not one of them.
Now that that bit of business is out of the way, let’s set the table. Flaahgra is a giant mutant plant that is responsible for poisoning all of the water in the Chozo Ruins. Nesting inside a giant flower cocoon, Flaahgra is also nigh-impervious to conventional weaponry, so at face value, this looks and sounds like it will be tough. Fortunately for us, Flaahgra falls more into the “boss-as-a-puzzle” category than it does as an intense fight, so as long as you can dodge its attacks and damage it when the opportunity arises, you should be just fine.

Let’s start off with those attacks first. Flaahgra is stationed at the center of the arena, but its reach is still pretty long. The most standard attack will be Flaahgra shooting balls of acid at you; as long as you’re moving, you should be okay – just make sure that you’re locked on and always moving.
In Flaahgra’s later phases, the attacks start to ramp up. Flaahgra will slam its body down towards you, but as with the acid shot, as long as you’re moving, you should be able to avoid this. The only thing you’ll want to be careful of is the foliage that’s left in Flaahgra’s wake. It will poison you, so just watch out. Lastly, the big plant will also use some good old fashioned melee attacks, so watch out for its giant pincers.
Now that we know what we’re dealing with for attacks, how do we actually beat this thing?
You have surely noticed the four giant solar panels surrounding Flaahgra, bathing it in sunlight. These are what powers the grotesque plant, and this is the weakness that we’ll exploit to attack. While avoiding Flaahgra’s attacks, you’ll want to position yourself behind the mirrors and lock on to the Red center of the lower panel. Shoot it with a charge shot or missile to blast the array upwards and stop the stream of sunlight to Flaahgra. Once the mirror is facing upwards, Flaahgra’s tentacles will fall over, revealing a Morph Ball tunnel that you want to get into as fast as you can. Roll to the end and enter the bomb slot; lay a bomb and you will do massive damage.
Now, the first hit is pretty easy, but you’ll notice after that two, and then three, and finally four solar panels are going up and shining light on Flaahgra. The premise is the same – shoot the backs of the panels so they are pointing skyward. Once every panel is up, attack! But be warned – Flaahgra will not just sit there and let you shoot its energy source away. It will actively knock the panels back down unless you stun the creature. Fortunately, a charged shot or missile right to its face will have the big weed stunned, allowing you precious time to run towards the next panel and hit it up.
Take your time and stun Flaahgra in between panels and as soon as the tentacles fall, hustle into that Morph Ball slot. Four bombs will do the job. Follow the strategy, avoid its attacks, and you’ll send this giant plant to the compost bin in no time.
ADVANCED STRATEGIES: While the game WANTS us to be directly behind the solar panels when we shoot them, that’s not actually necessary. The solar panels aren’t physics based, meaning that no matter what angle we hit them from they’ll always flip over. This means we can practically stand in place and instantly hurl charge shots and missiles at all 4 panels! Couple this with fast missiles and you have yourselves a very quick kill indeed.
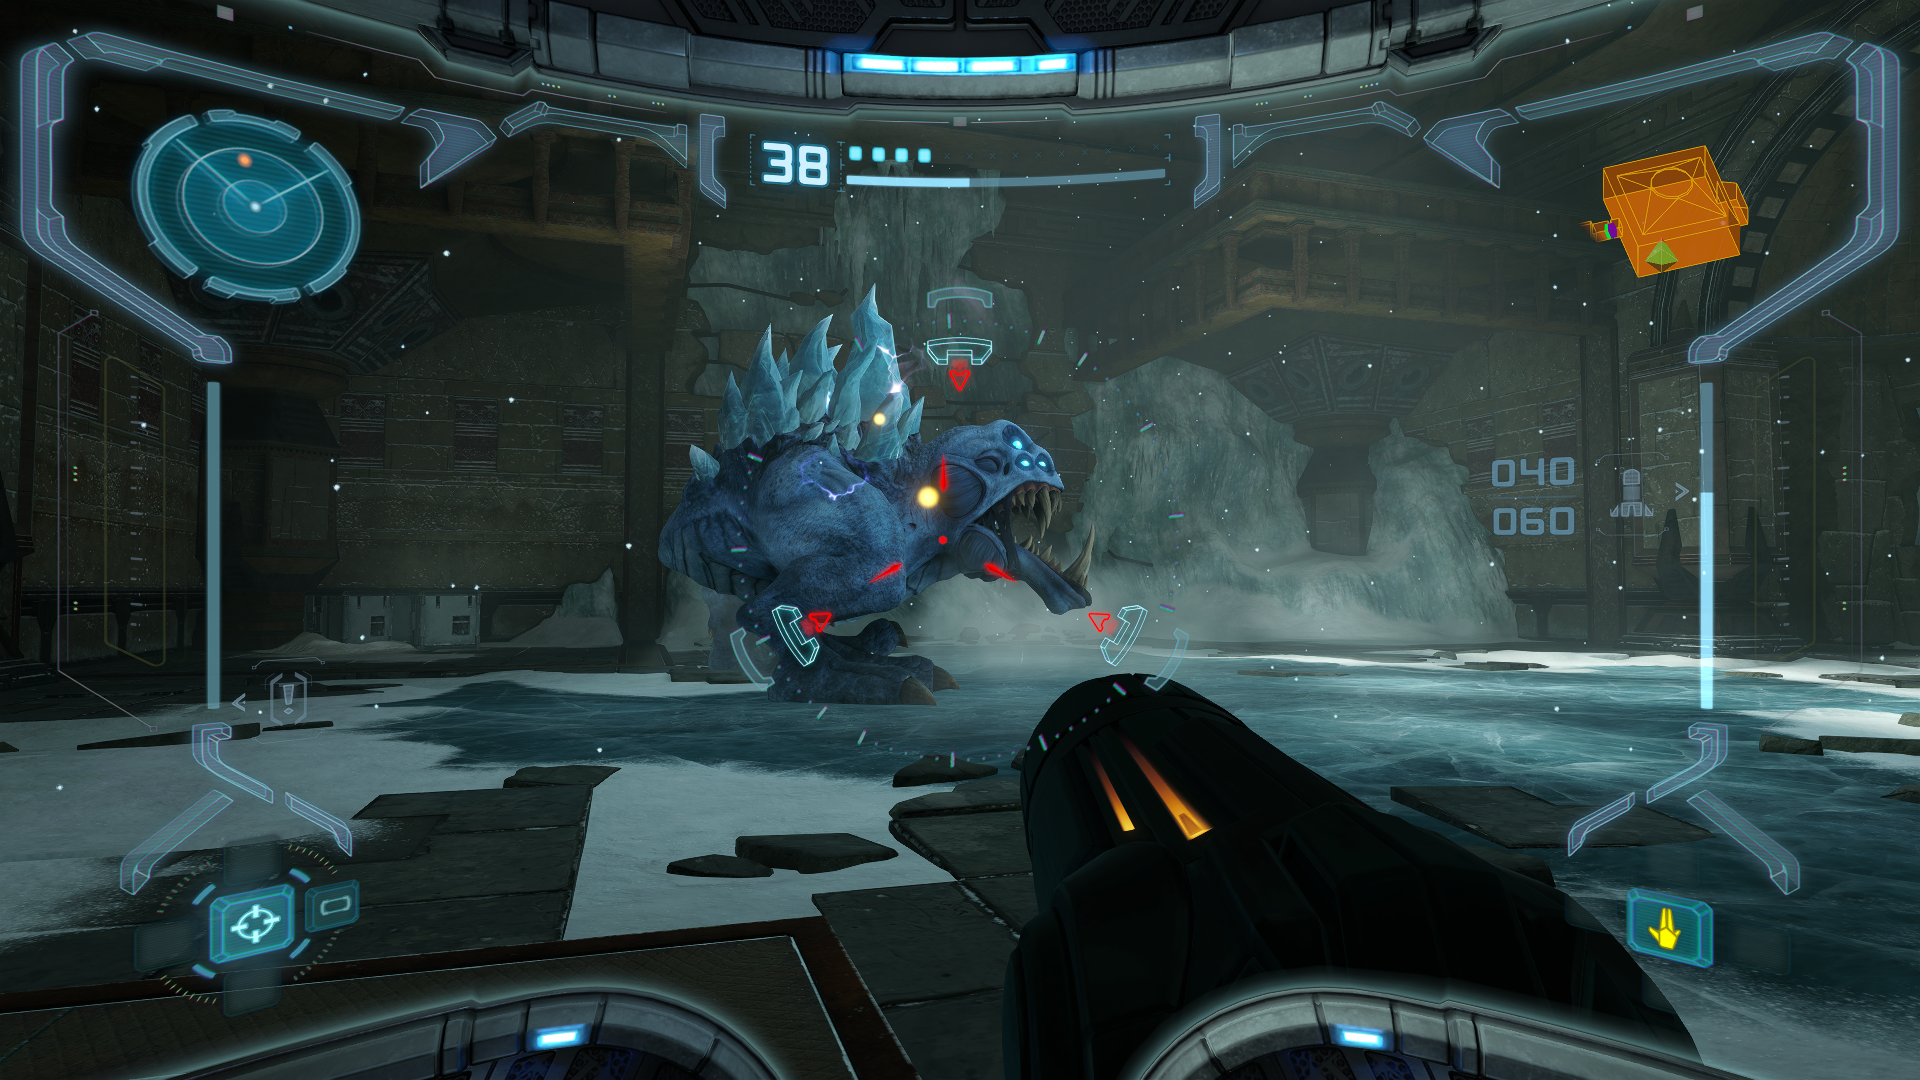
Sheegoth
The first part of this fight just involves taking out four Baby Sheegoths; you’ve fought enough of these by now so this is pretty self-explanatory. The REAL purpose of this section is for what comes after, the adult SHEEGOTH. Firing our Power Beam is useless as all of our shots get pulled into the Sheegoth’s back to be absorbed. If it absorbs enough, it will fire back that energy with its own attack. For its other attacks it can occasionally try to ram you, which does more damage than a Baby Sheegoth, but is also slower and easier to avoid. The next two attacks are important, though, and we’ll get to why in a minute. At long range, Sheegoth will hurl ice projectiles at you from its mouth, while at close range it uses its ice breath to freeze you. These attacks are important because, after the attack has ended, the Sheegoth will hyperventilate – this is our queue to open fire! While they’re hyperventilating, fire missiles or drop bombs by its mouth to bring on the pain! If you start running low on missiles, you can also shoot the crates scattered around the arena for more ammo. Keep up the pressure until the beast is slain!
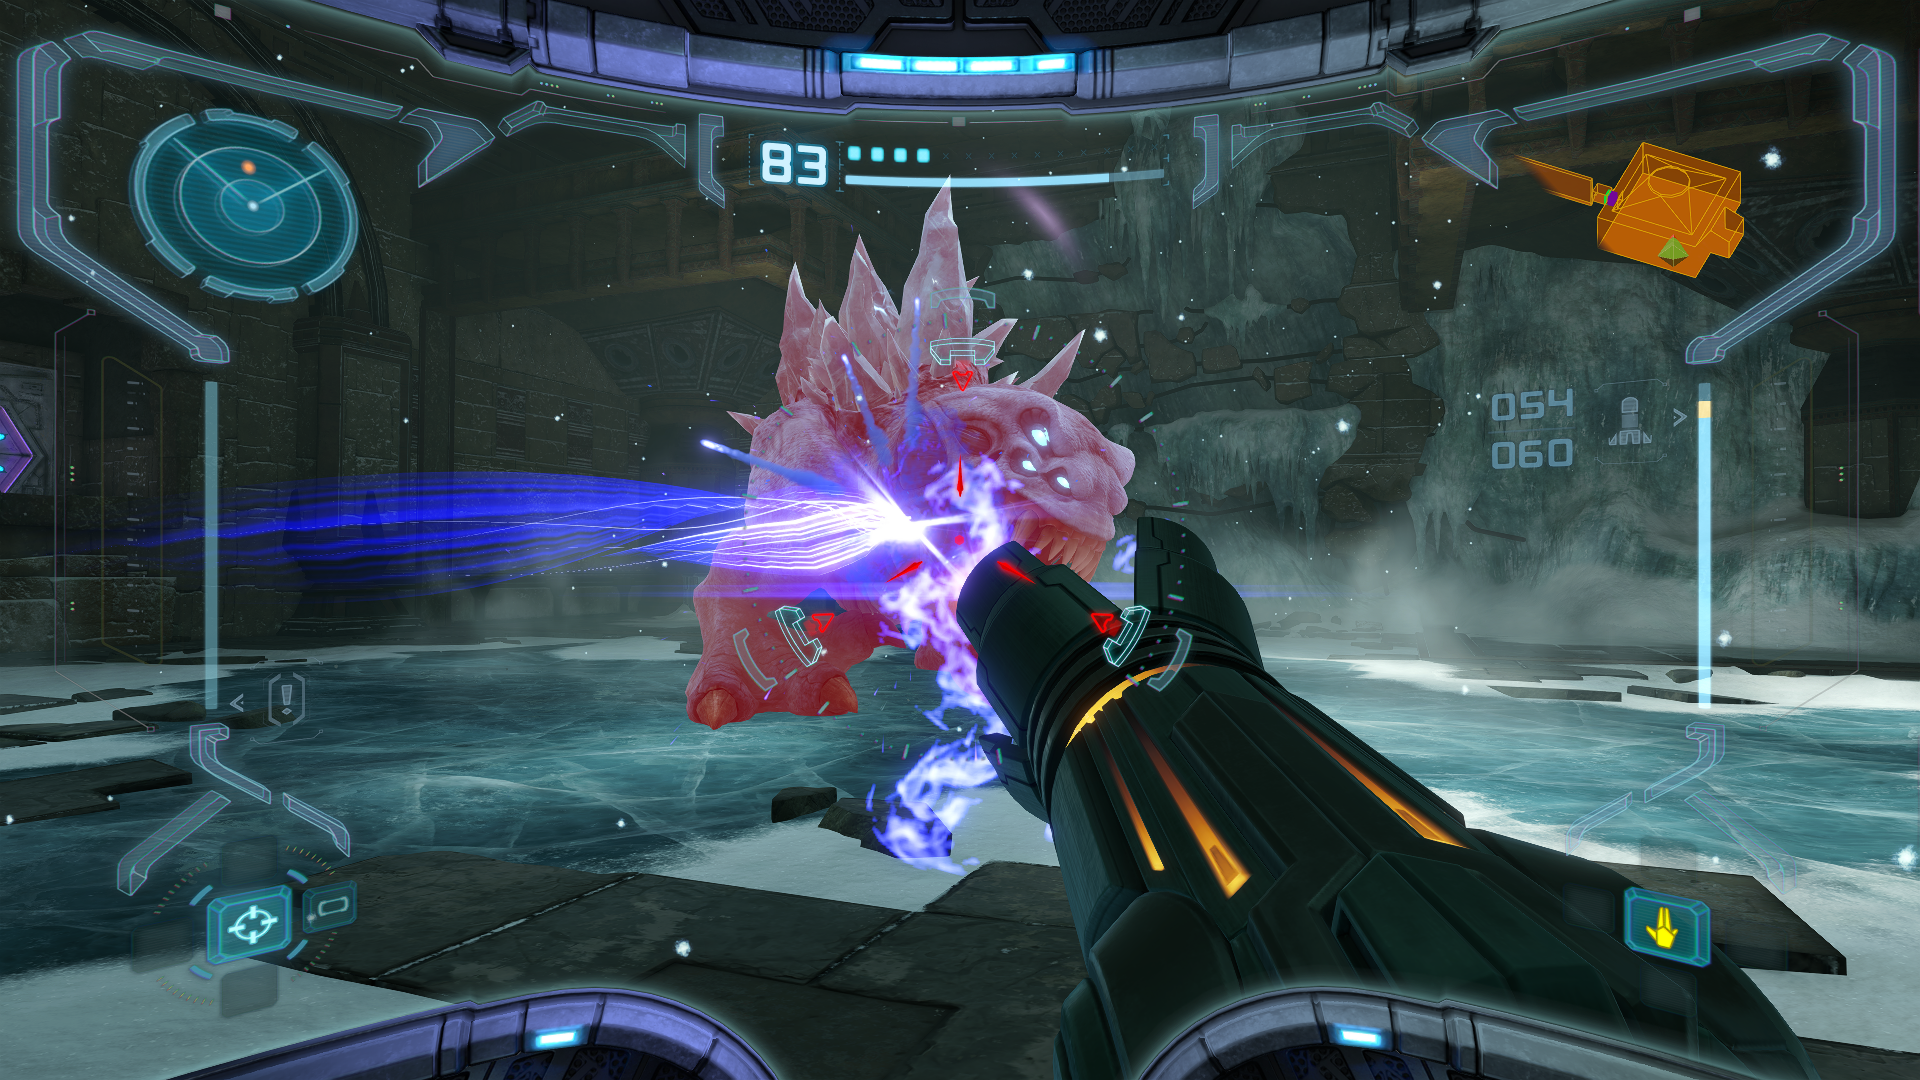
ADVANCED STRATEGIES: I’m highlighting the fast missile technique again because of the substantial amount of time you’ll save by using it here. Not only can they take out Baby Sheegoth shells quickly, it will absolutely obliterate the adult Sheegoth while it’s hyperventilating. You can easily cut a 5+ minute encounter into less than a minute.
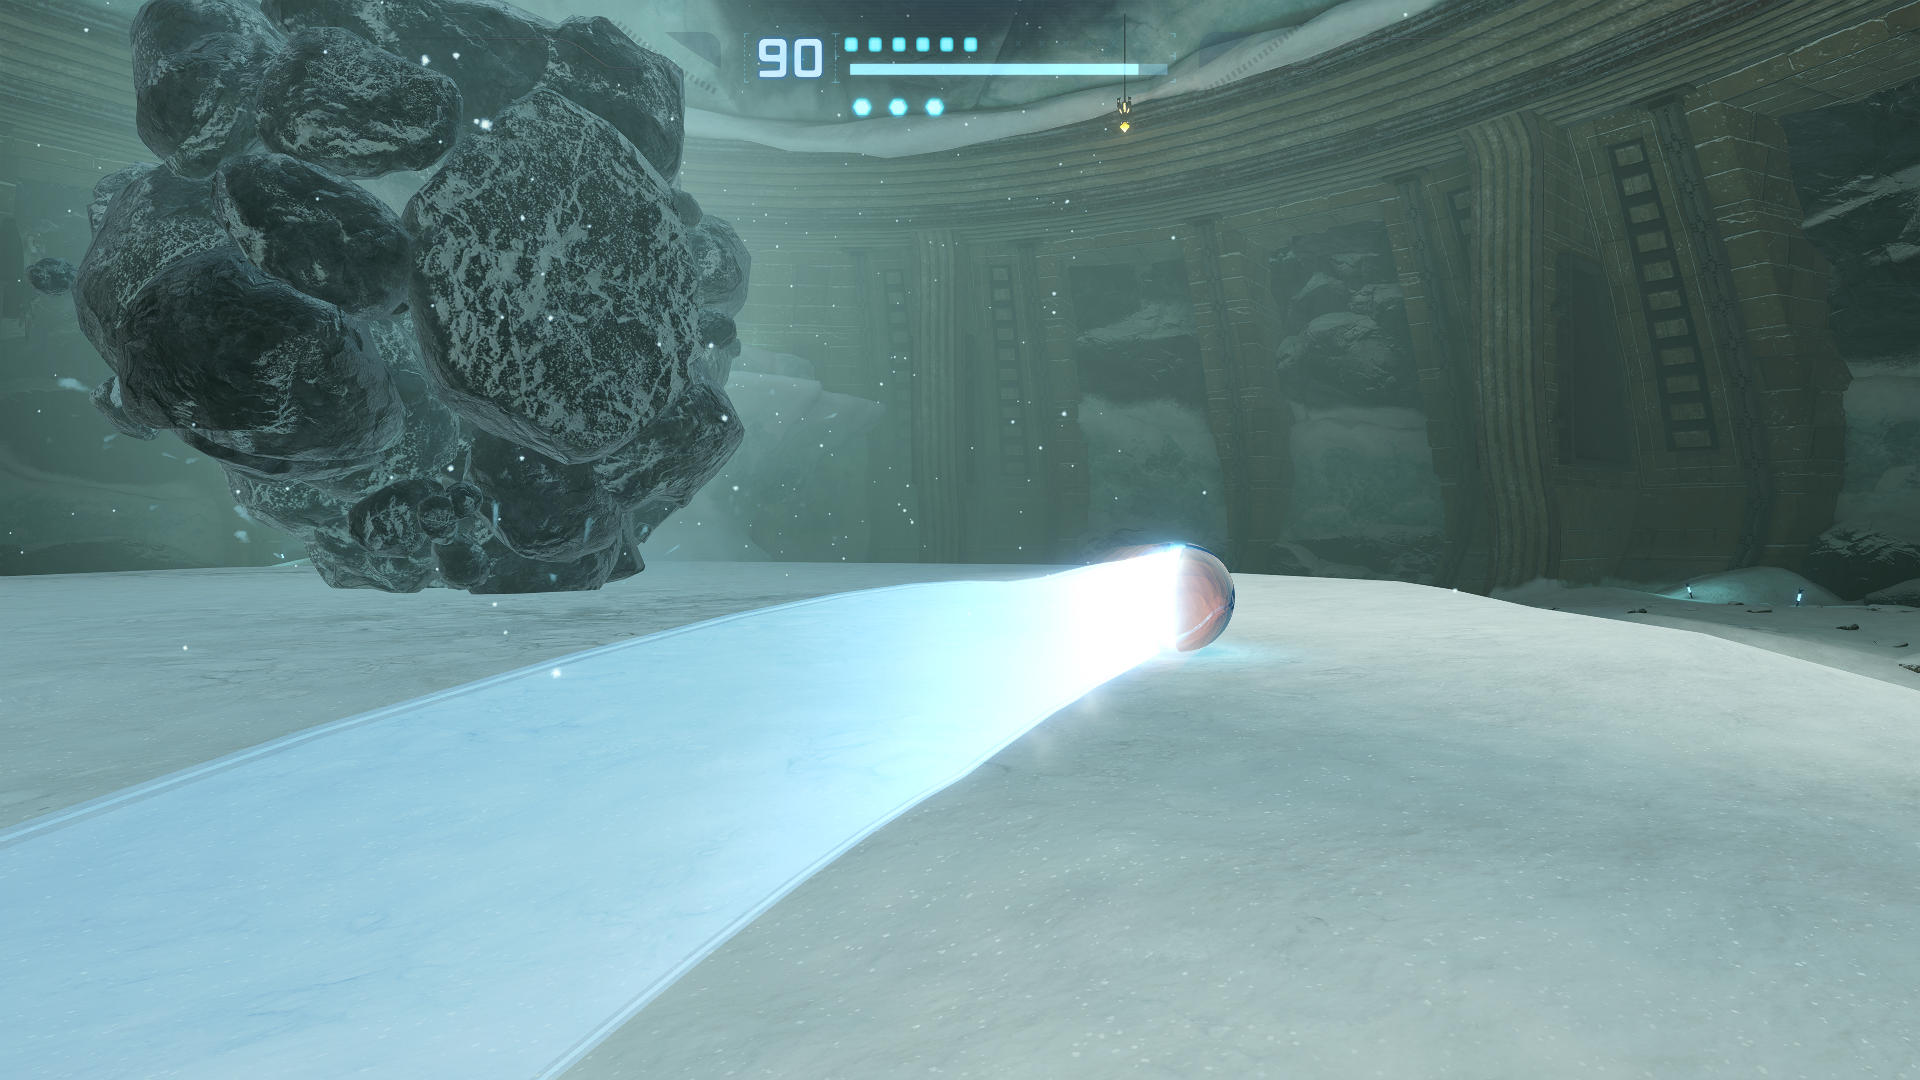
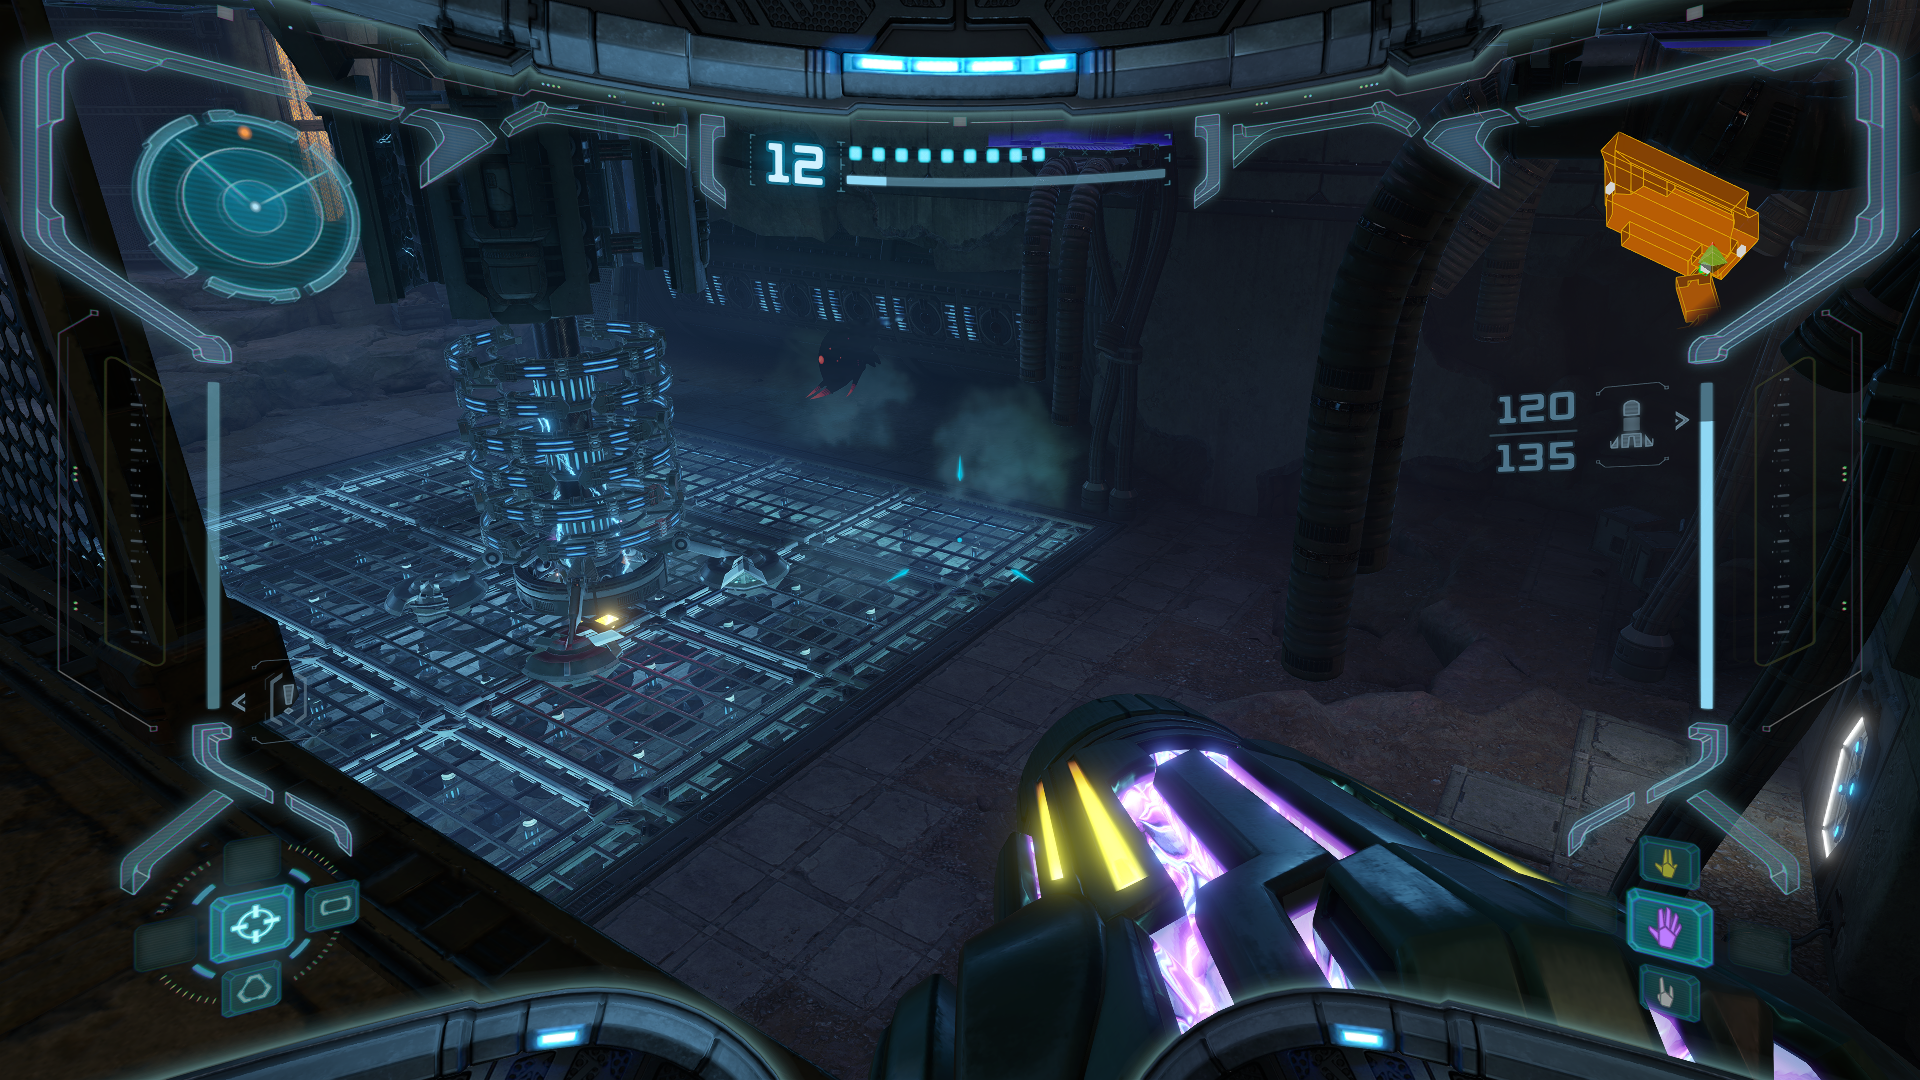
Thardus
As always, start the battle off by scanning THARDUS. This is a one time scan, so don’t forget!
Get ready, because Thardus will be a step up from every boss you’ve faced so far. As you can see, Thardus is absolutely massive, being made up of a bunch of… Phazon-infused rocks. Riiiight….

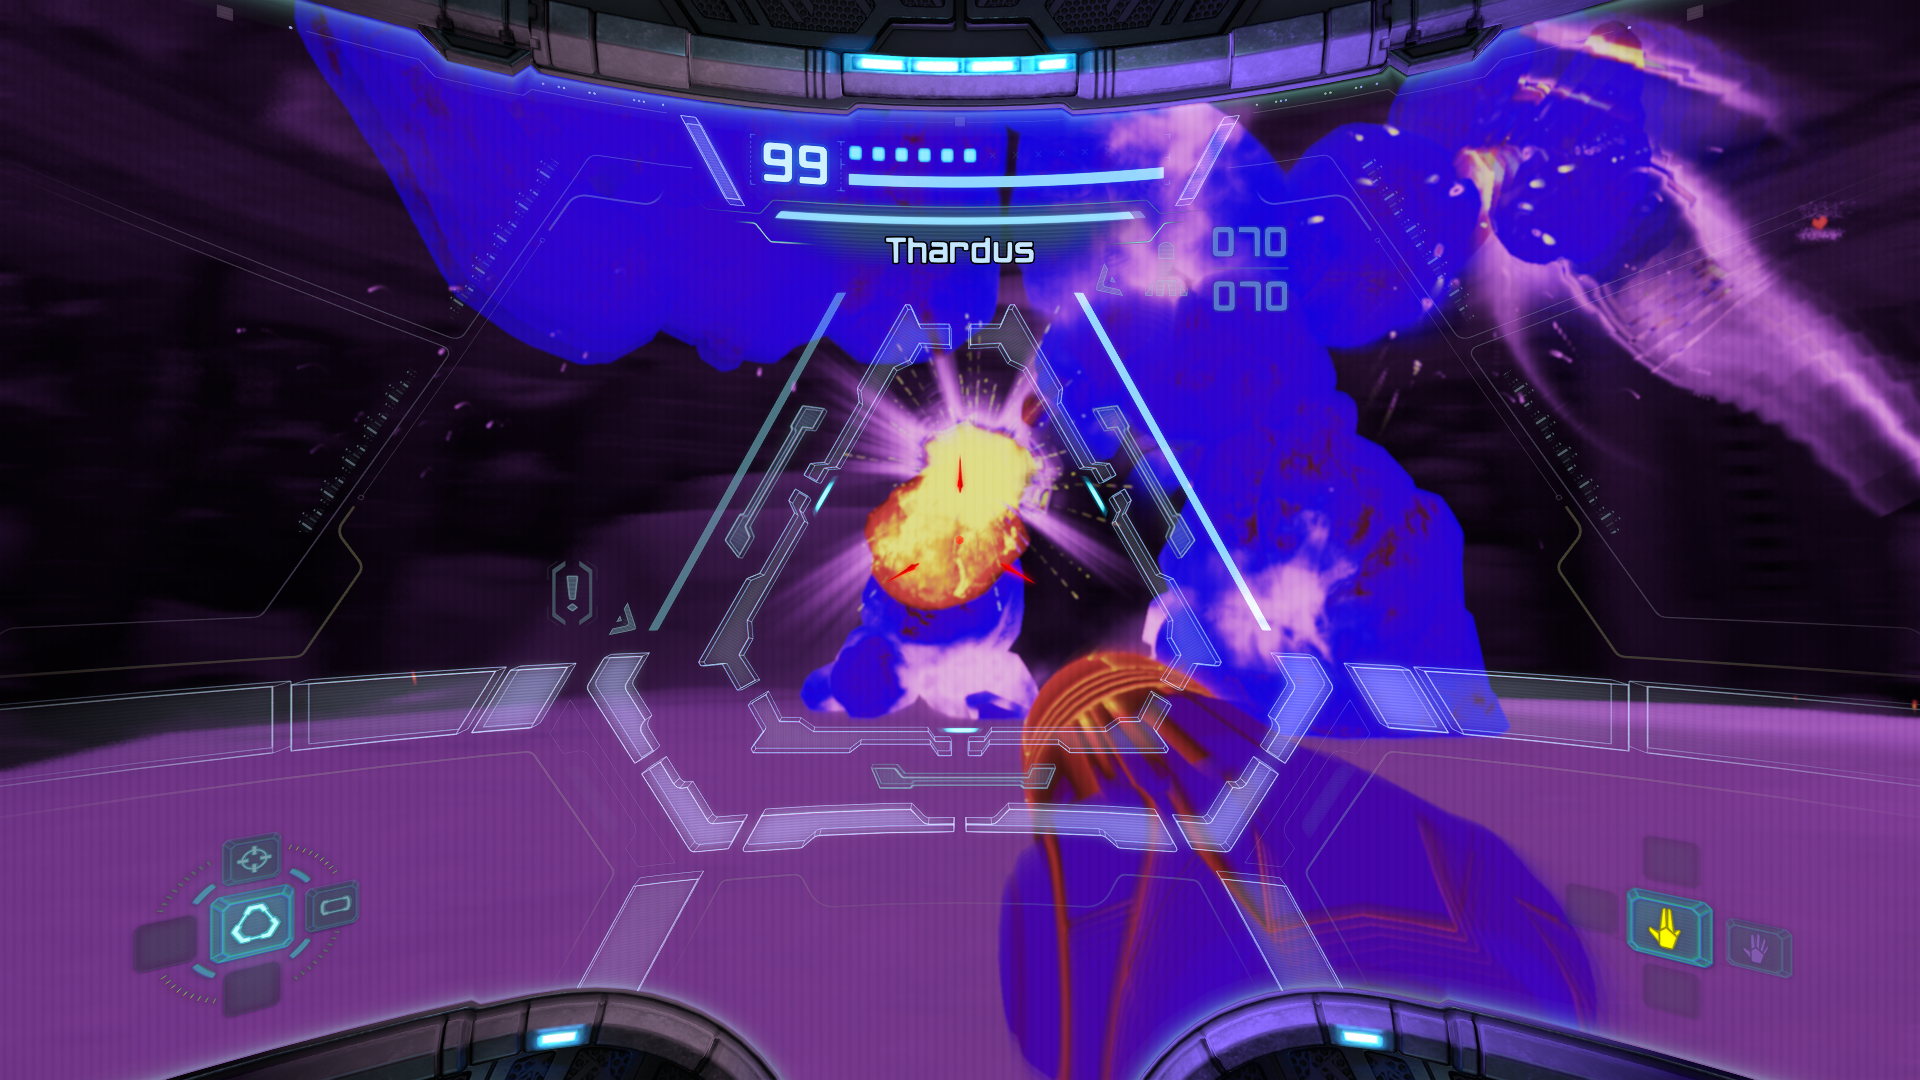
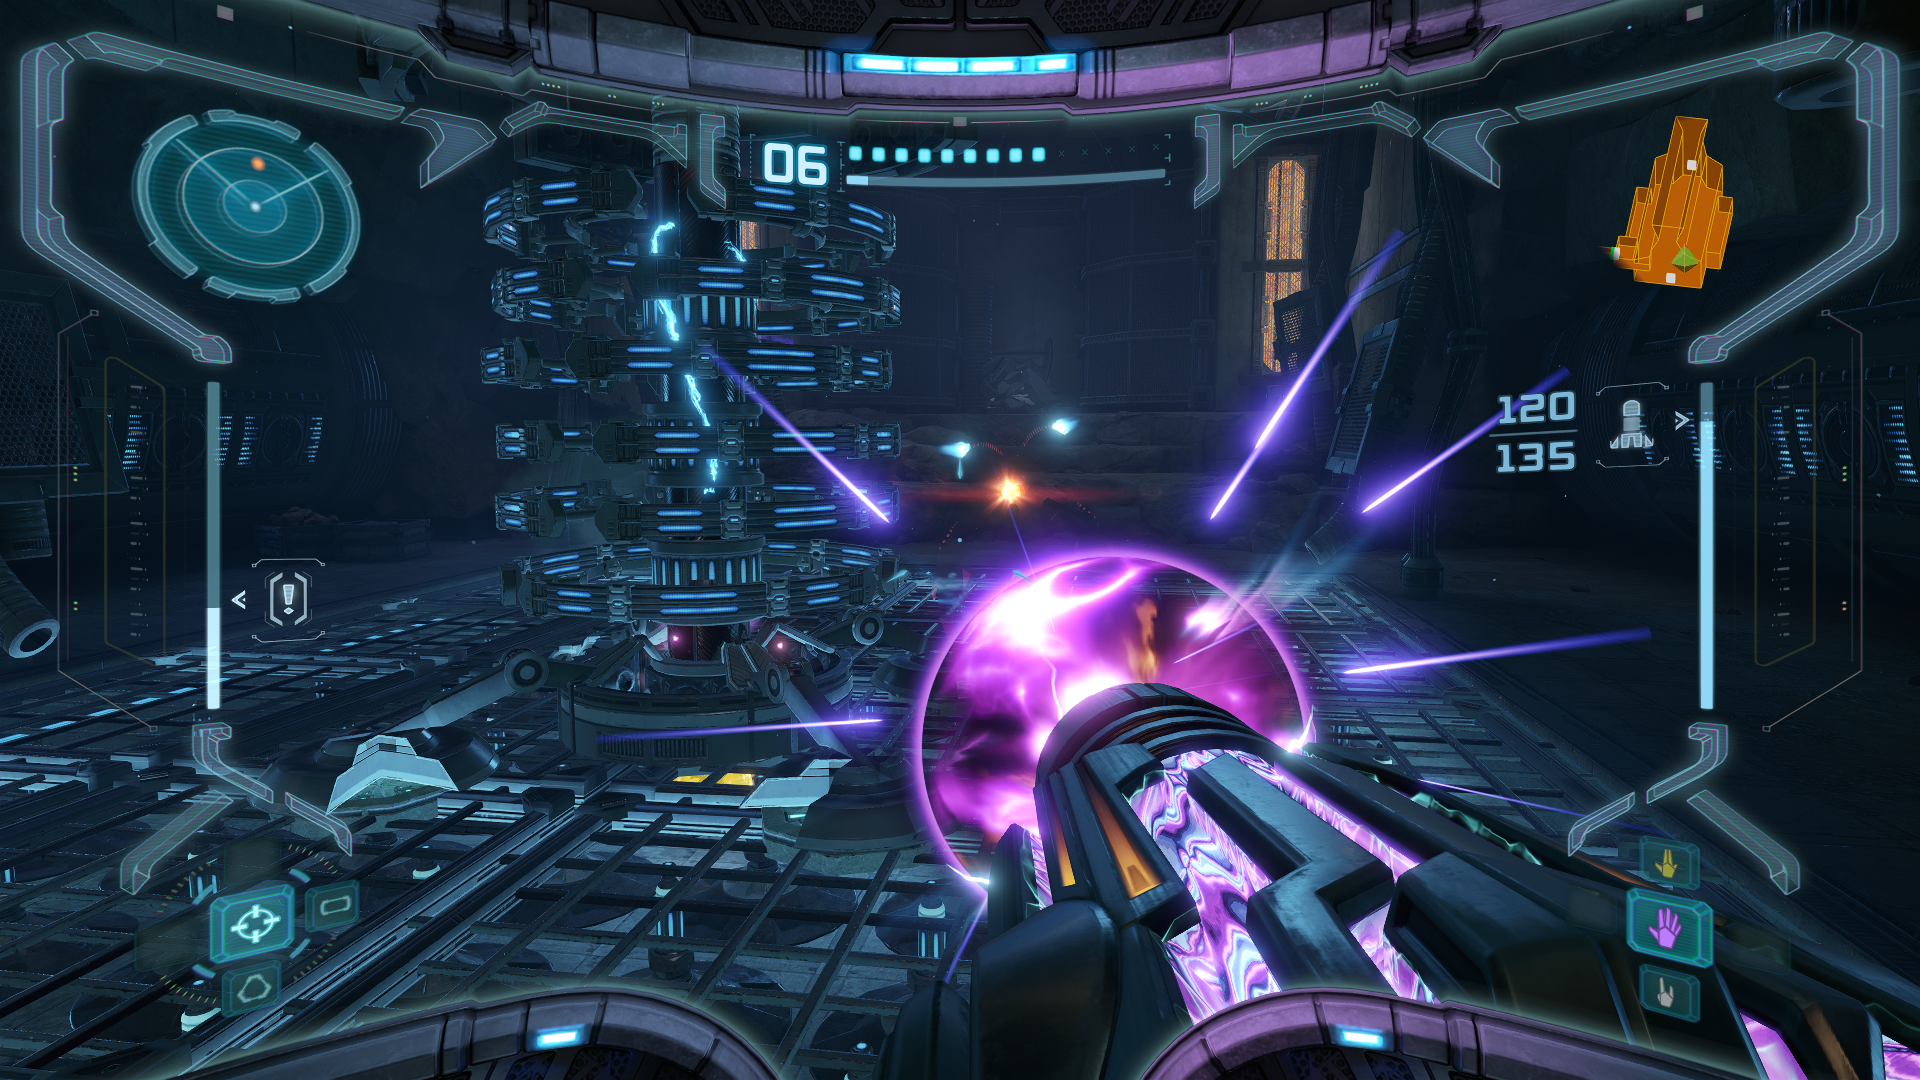
You’ll notice when you start the battle that you won’t be able to lock on to any part of Thardus, and that it won’t give you much time to yet your bearings. Thardus doesn’t have a whole plethora of attacks, but the few weapons in its arsenal hurt a lot. Its standard attacks will involve slamming its fist down on the ground, which can A) smash you like a pancake, and B) send an ice-shockwave pulsating through the ground which can freeze you like a popsicle. Not great. Strafe and jump to avoid these attacks. Thardus will also summon up some random boulders and stones and hurl them your way, but if you’re fast and target lock these small rocks, you can blow them up for ammo and health.
Thardus’s meanest, nastiest attack, however, is when it decides to go into “Morph Ball” mode. Thardus will curl into a ball and start rolling around, damaging you big time if you happen to be in its way. Crude, but effective – who says the simple stuff doesn’t hold up? There’s not really a science or specific method involved to dodging this attack; use whatever you can to make sure you’re not in the way. The Boost Ball works fine, a healthy distance is always good, whatever – just make sure you’re not getting flattened!
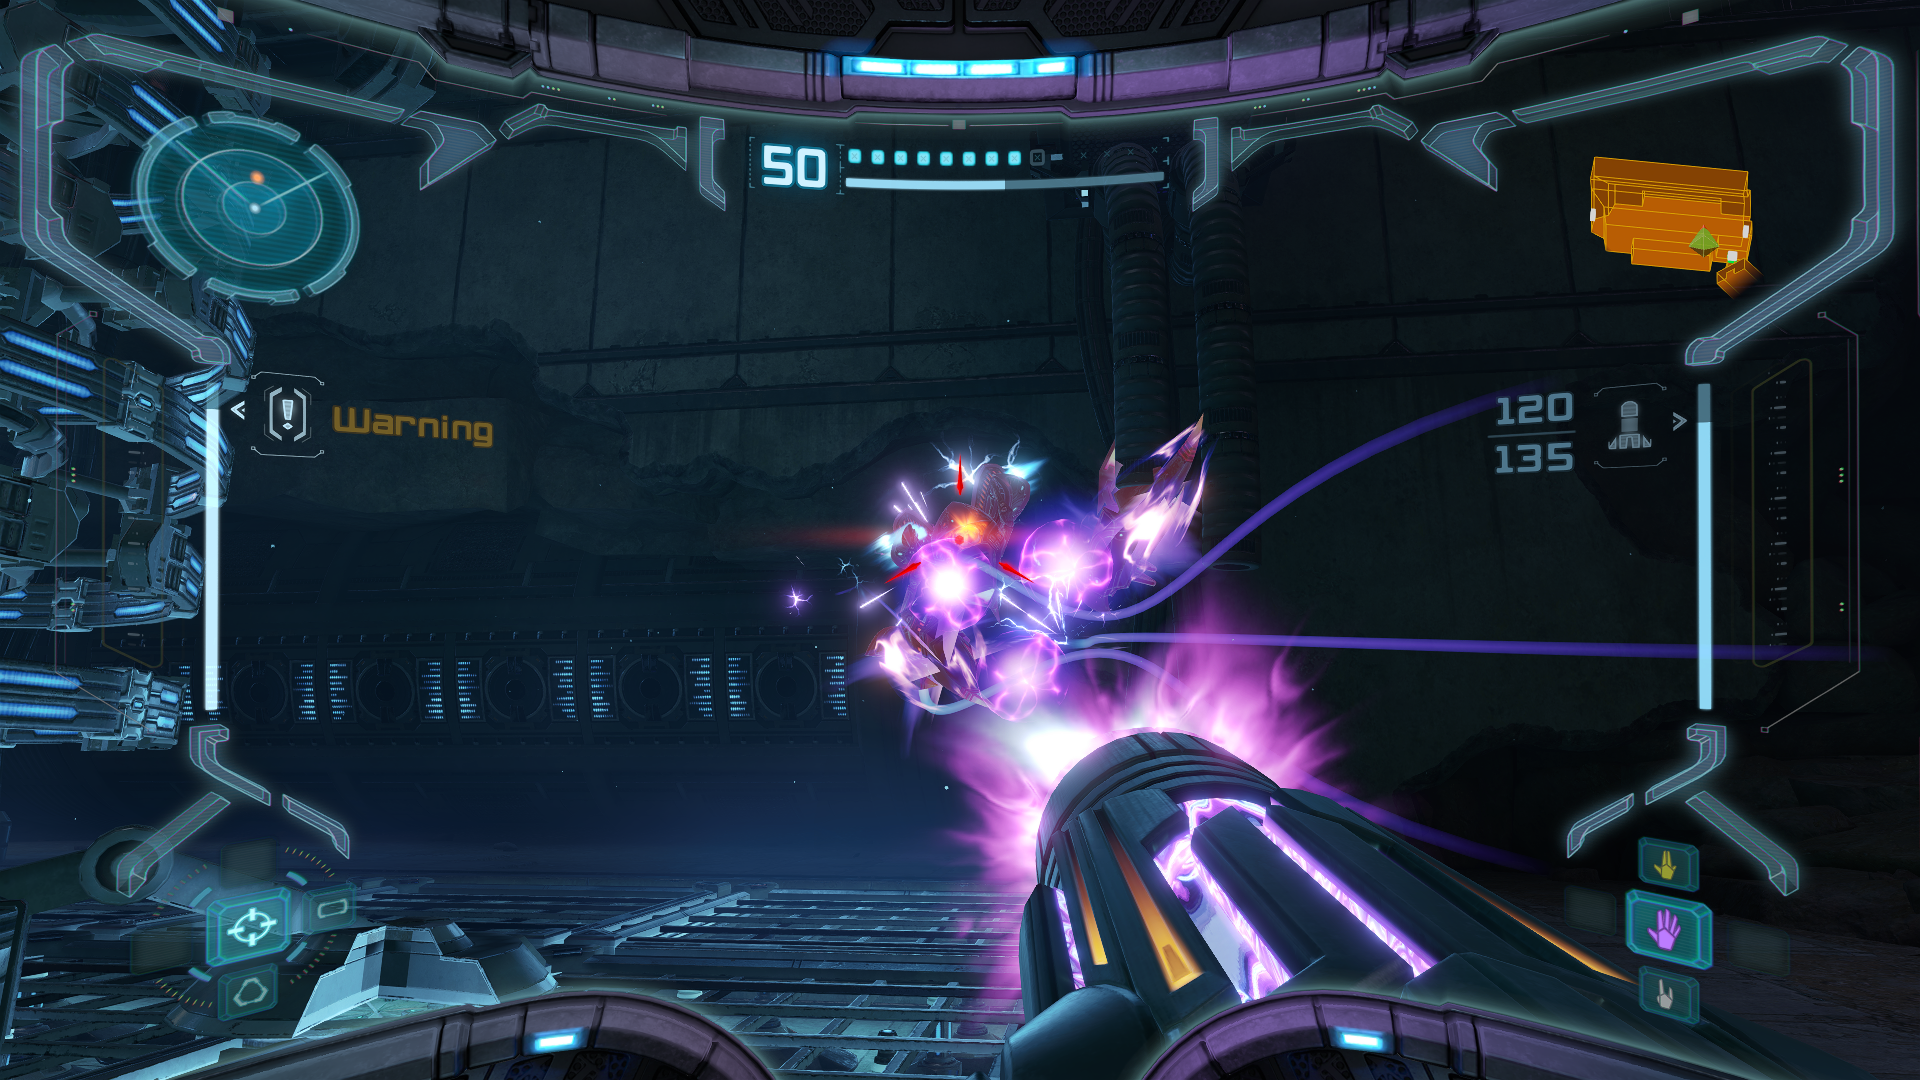
So now to actually damage it. You may not be able to lock on to Thardus with your Combat Visor, but your Thermal Visor will pinpoint his weak spot quite nicely. Switch over to Thermal and lock on to whatever limb happens to be highlighted. Launch a Super Missile when you have a shot and you’ll break the stone casing around the limb, leaving the inner core Phazon exposed. Switch quickly back to your Combat Visor, and launch one more Super Missile shot. This should break the appendage and damage Thardus greatly.
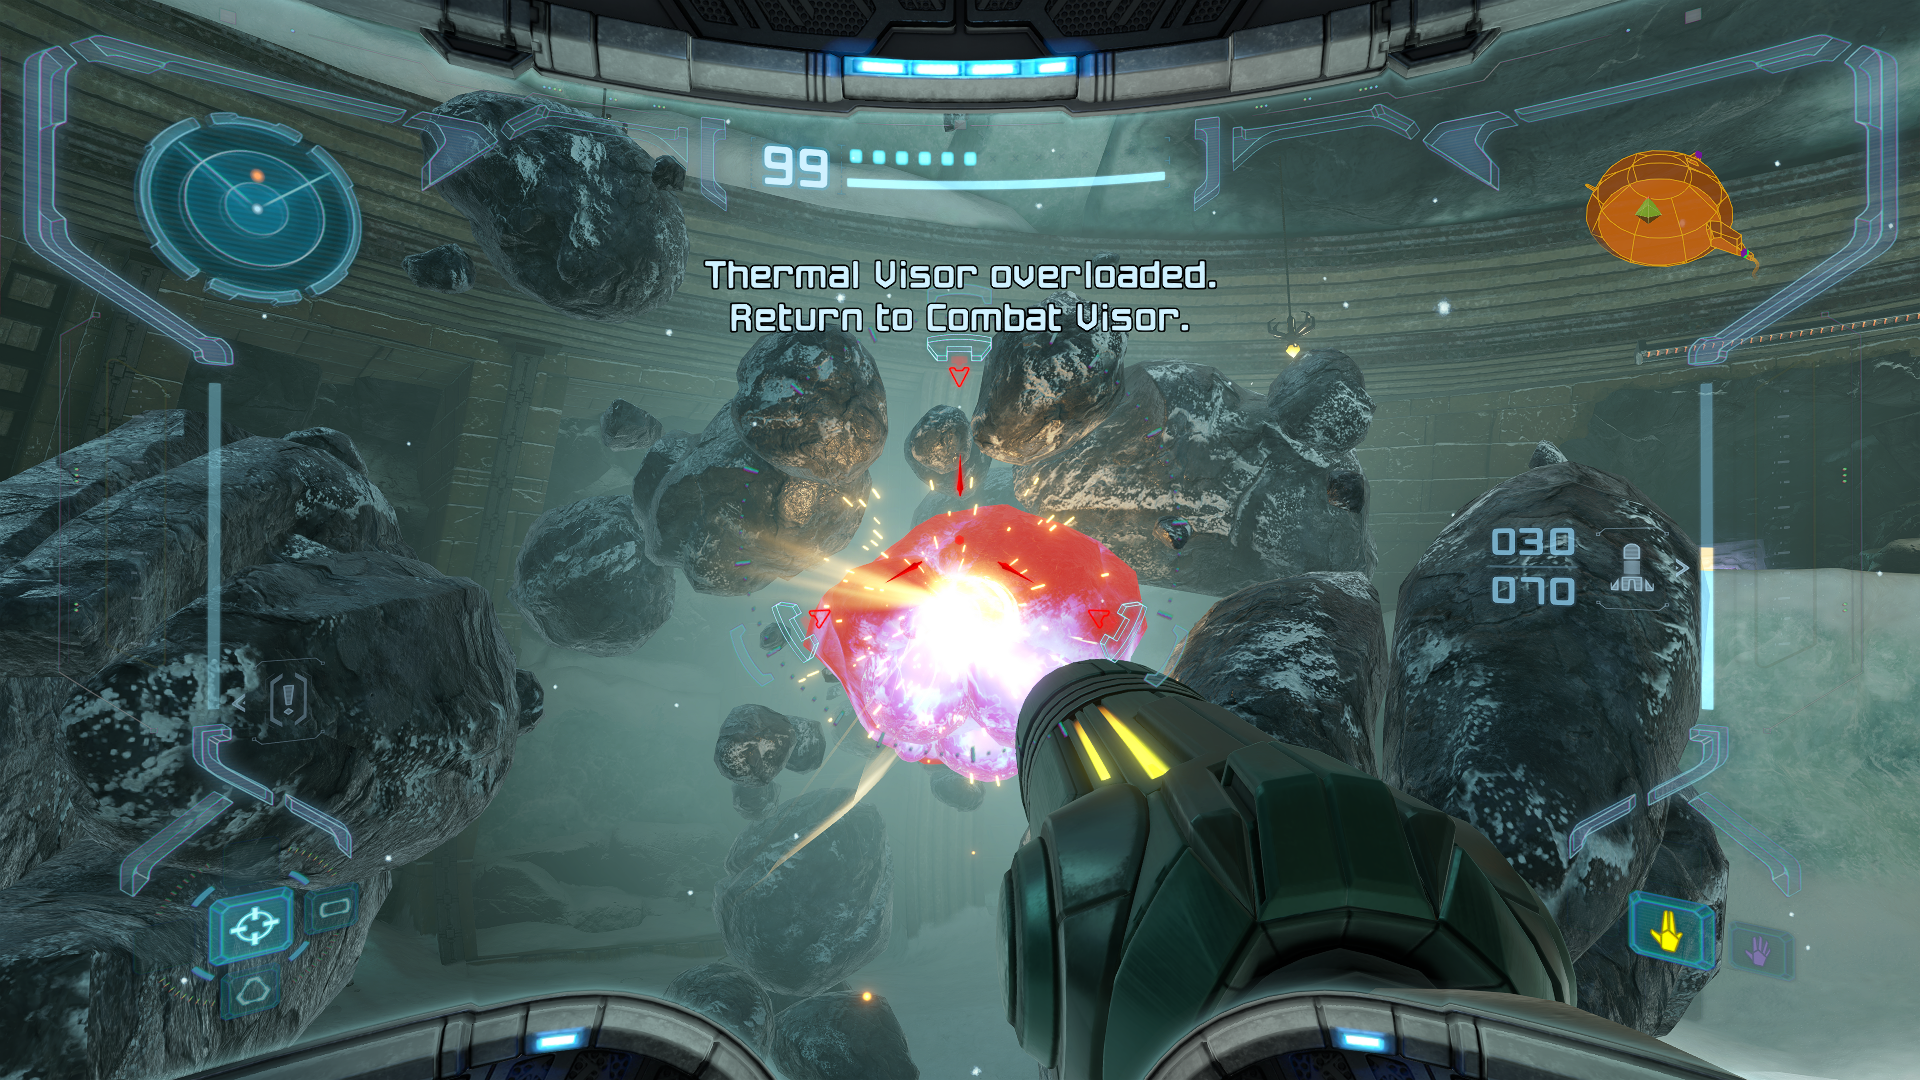
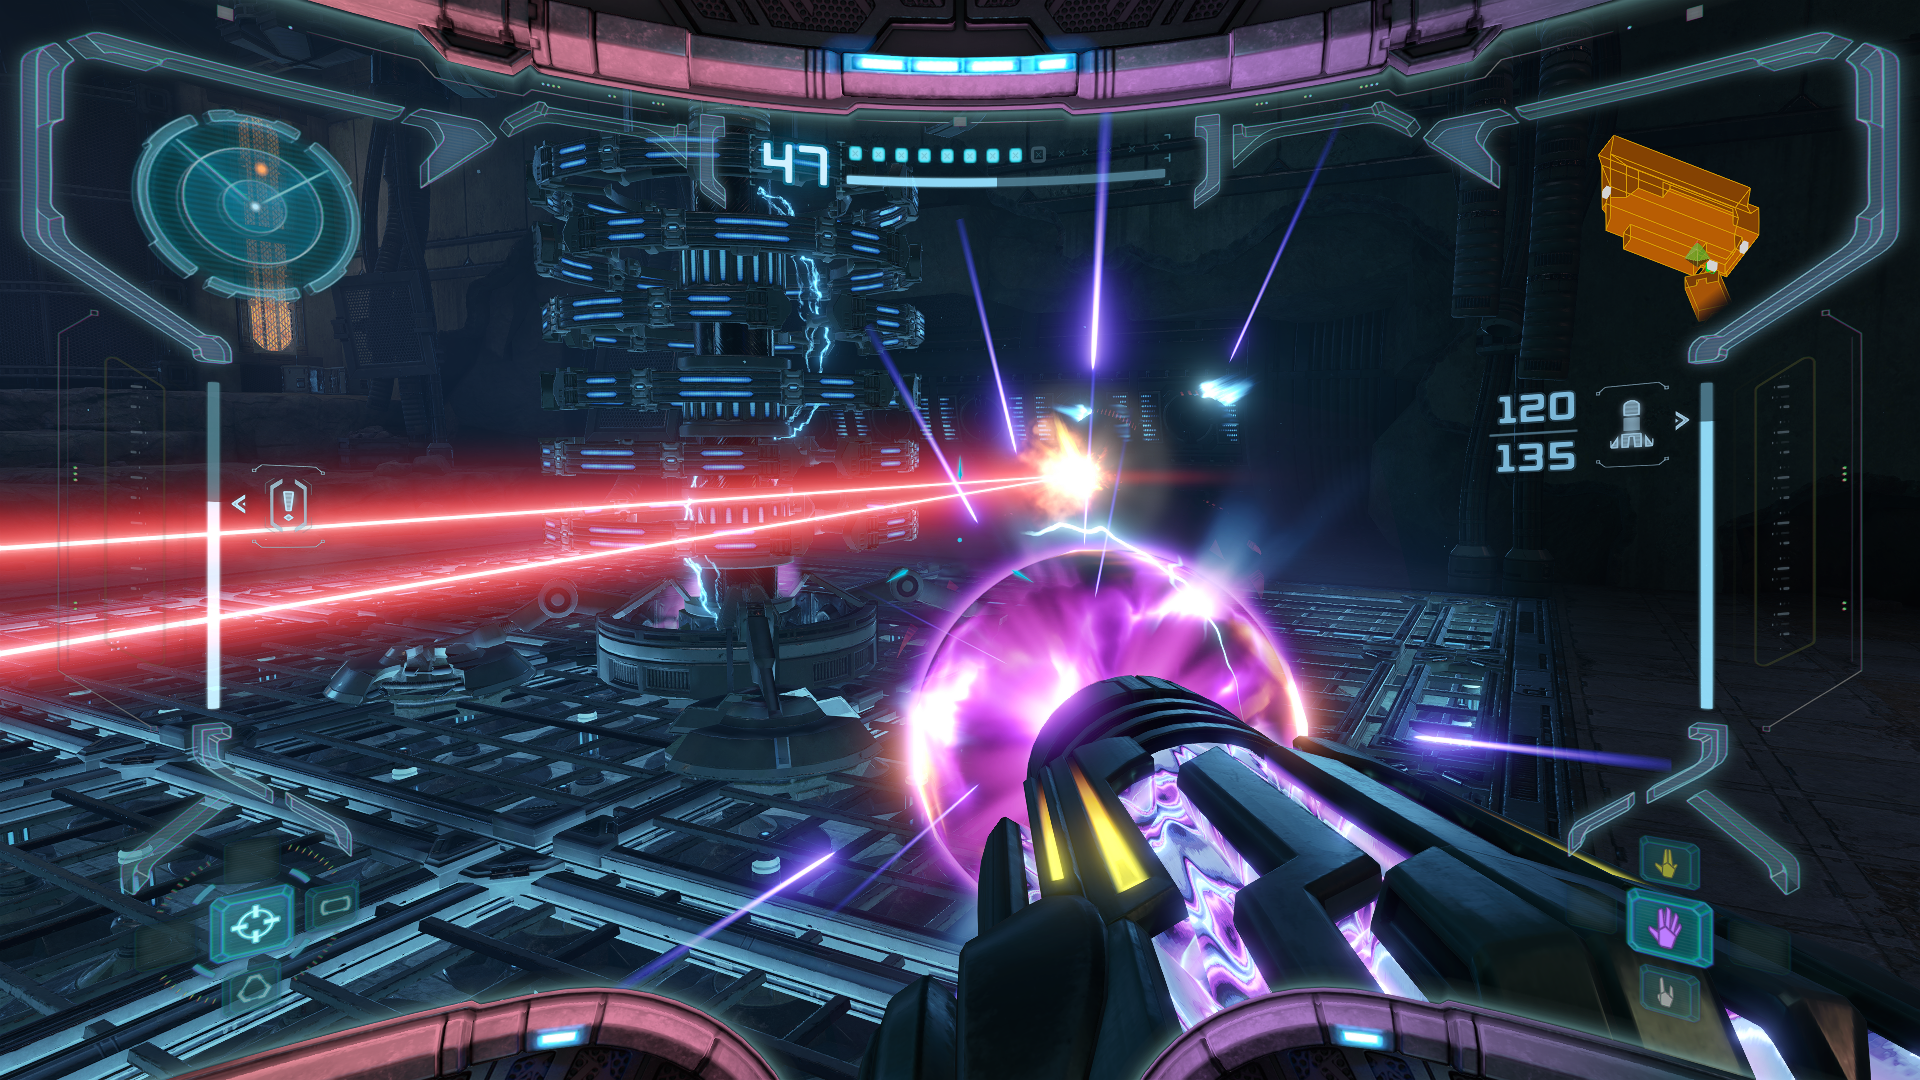
After hitting Thardus a couple times, it will start to shriek and summon lightning bolts around it. Stay clear and wait it out; soon enough, you’ll be able to lock on again. Around this time, visibility with your Combat Visor will be quite poor and the arena will be covered in fog. Just keep locked on and avoiding Thardus’s attacks, attacking as usual.
Keep up the pressure and remember, if you run out of missiles, charged Wave Beam shots will damage Thardus effectively. The fight and attack will mostly remain the same from start to finish, so just keep chipping away at the big rock’s health and, eventually, Thardus will fall.
Elite Pirate
Honestly, this Pirate is more mini- than -boss, but nevertheless, let’s make taking him out easy for all. Scanning the ELITE PIRATE reveals that it comes equipped with an energy-siphon system that absorbs beam weapon shots. Concussive weapons are still on the table, but this will be our biggest obstacle. Its main attacks are some ground pound shockwaves and a cannon on its back it will fire occasionally. If you get too close, it will do serious melee damage so it’s best we keep our distance or have some cover between us. You can use the Thermal Visor to target the cannon specifically so that it can’t be used, but honestly, you can probably end the fight a lot sooner than the time it will take you to destroy the cannon. Elite Pirates go down after three Super Missiles, so just fire one off whenever it doesn’t have its energy-siphoning device active. It’ll be over before you know it.
Cloaked Drone
This Sentry Drone has a cloaking device that limits its visibility and prevents us from locking on, which not only means we have to use manual aiming, but takes away our dash ability. It’s also one of the few enemies in the game that CANNOT be scanned, so you don’t need to worry about that. The drone won’t attack you until you either drop down or fire at it, but we can use this to our advantage to get the first shot.
If you took the time to get the Wavebuster earlier in the game, use it now! The beam will hit the drone, allowing you to bypass the lack of lock-on ability in this fight, and after a couple of seconds, it will completely destroy it, making this encounter easy-peasy. If you do not have the Wavebuster, this fight will be a little more involved.
Dual analogue and motion control users will have a much easier time with this fight, but classic tank controls will definitely have the biggest hurdle, needing to stop in place to adjust aim. This is another rare exception where the Wave Beam is the best weapon to use here. Normally we would still opt for fast missiles, but without our lock-on and the need to manually re-adjust our aim, it’s not as viable here for most users. The Wave Beam does extra damage and momentarily stuns mechanoids, which is why we’re using this as our default choice for this fight.
Try to keep yourself moving as much as you can. When the drone activates its laser, step to the side and then jump over as it tries to sweep it into you. You’re gonna take damage no matter what, but by moving you can avoid a few of the shots which saves precious health. Keep a level head and just continue pumping damage into the bot until it finally explodes.
ADVANCED STRATEGIES: Before jumping down, a well-timed Super Missile will destroy the Cloaked Drone in one hit (Normal Mode only), allowing you to bypass the fight entirely! If you miss, you’ll have to take it down the old fashioned way. You’ll want to compensate for the moving target, firing delay and projectile velocity by leading your shot just a bit.
Omega Pirate
Get ready for a brawl. The hulking Omega Pirate will be the toughest challenge you’ve come across yet, and this brute has a lot of tricks up its sleeve that will make your life extra difficult, particularly if you’re challenging Hard difficulty.
First things first, as with every boss battle, make sure you scan the OMEGA PIRATE to record him to your logbook. Once you’ve done that, target him and start the battle.
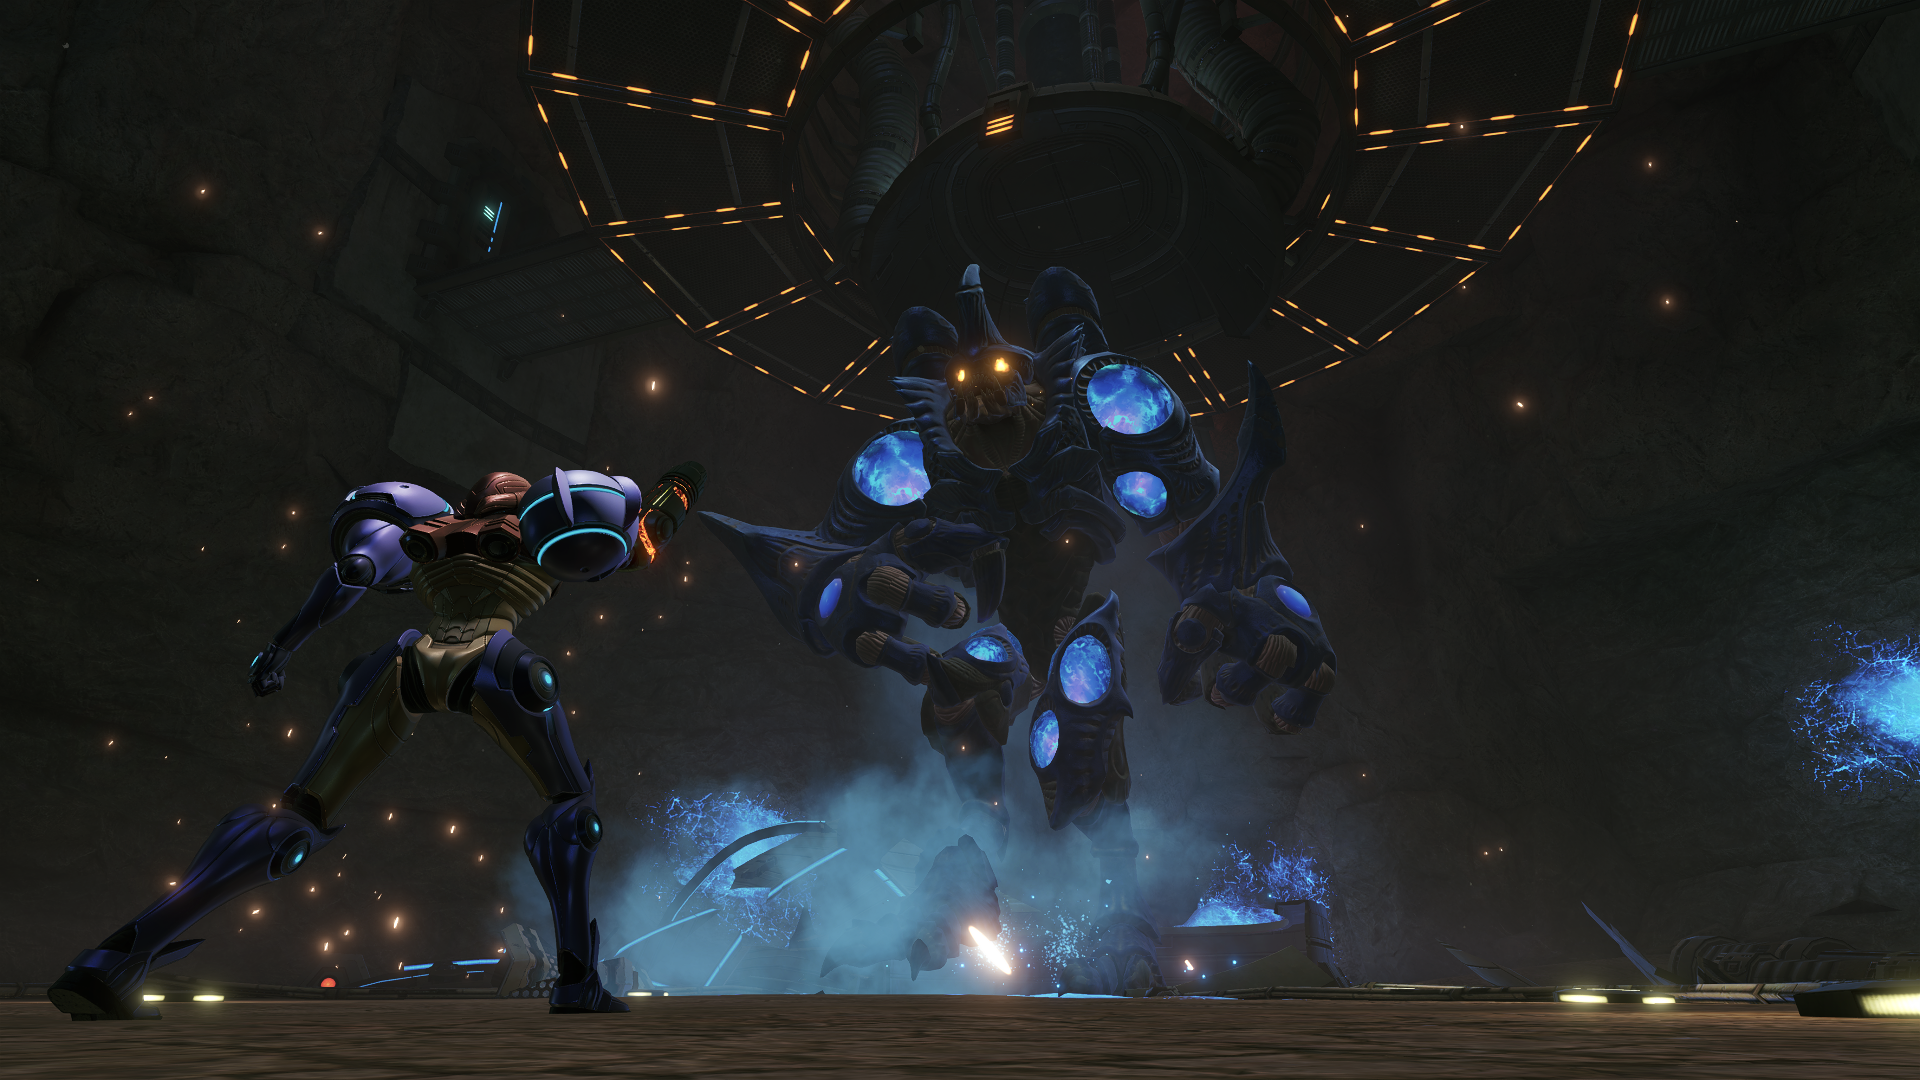
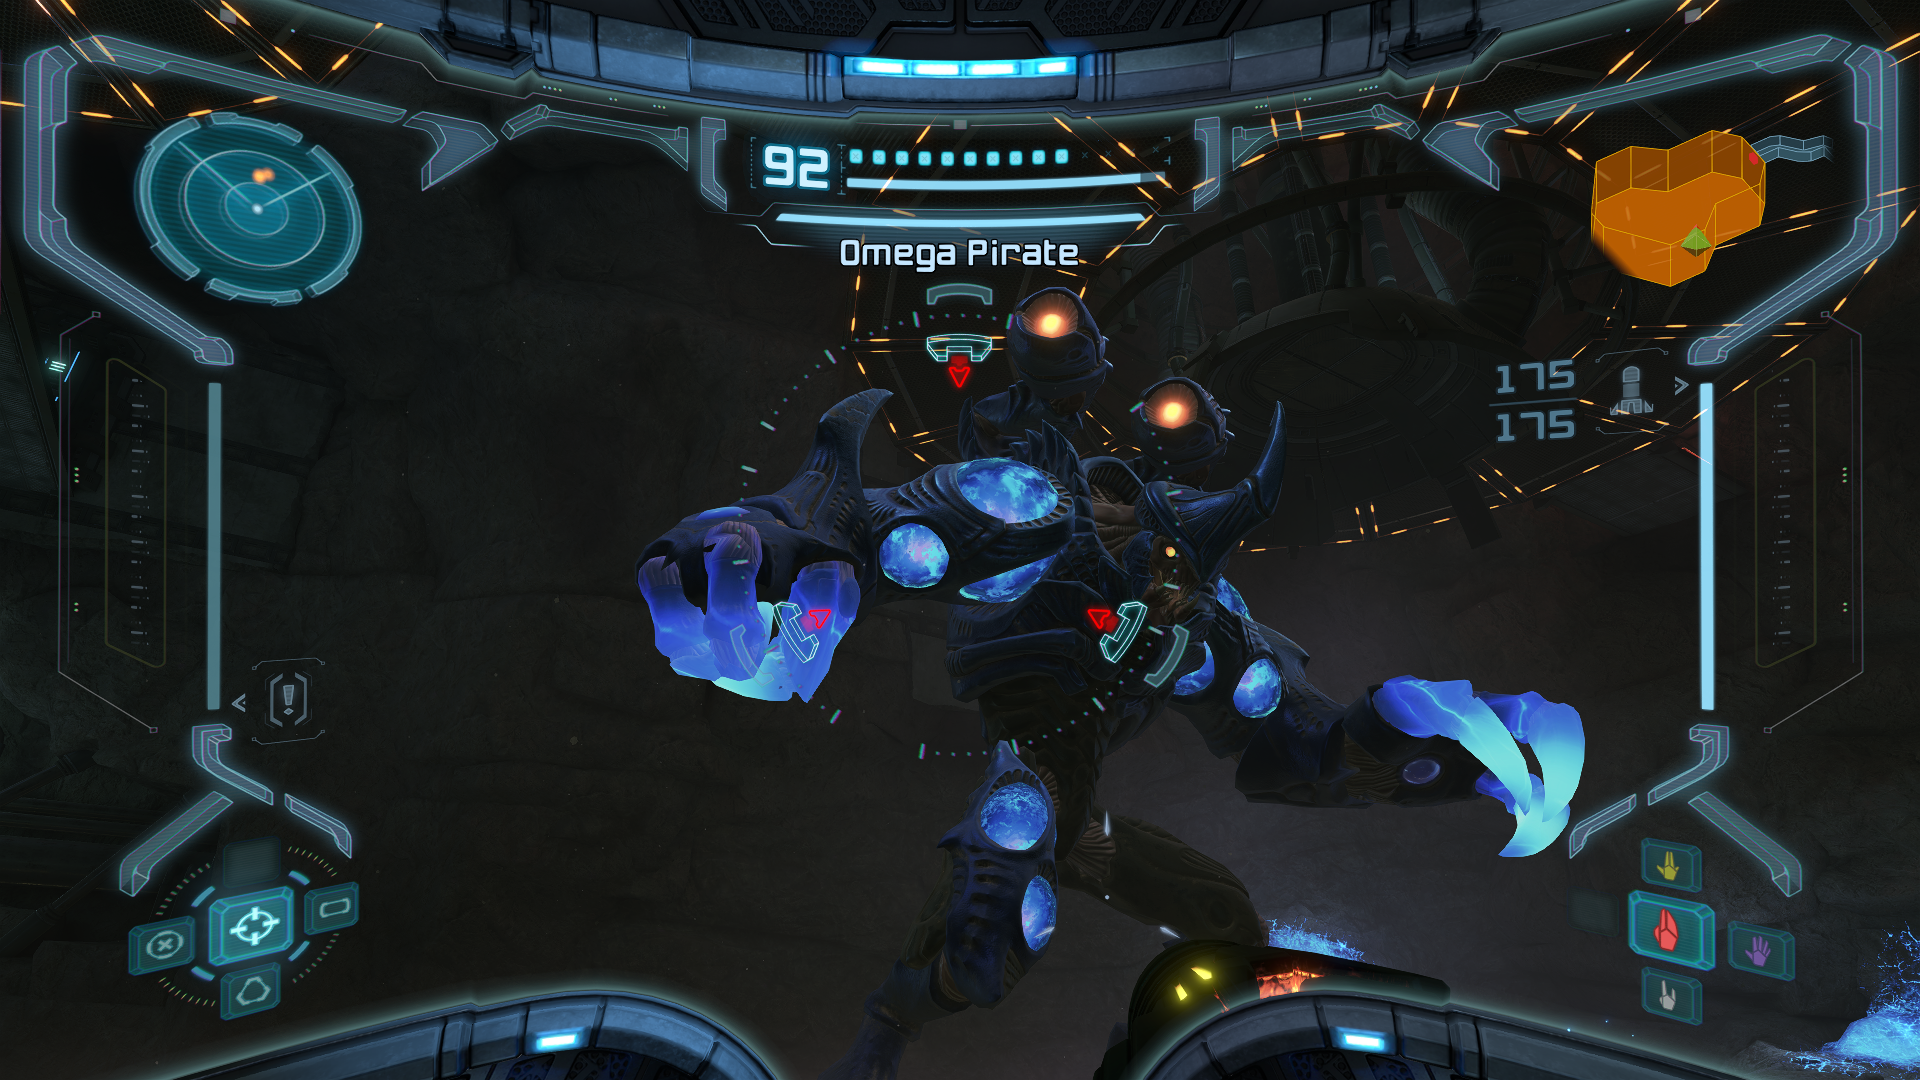
You’ll immediately notice some similarities between the Elite Pirates you’ve fought so far and the Omega Pirate. Omega will use the same ground-pound attack, so just be sure to jump over the shockwaves and stay out of battering vicinity. Omega also has the same energy absorbing hand as his little brothers, so you’ll have to pick and choose your moments to strike versus firing relentlessly. Furthermore, you’ll have to contend with the turrets mounted to the Pirate’s back; it will shoot out Energy orbs at you that you either avoid or shoot down. Worth noting too – there are pools of Phazon laying around the arena, so be careful not to step on one.
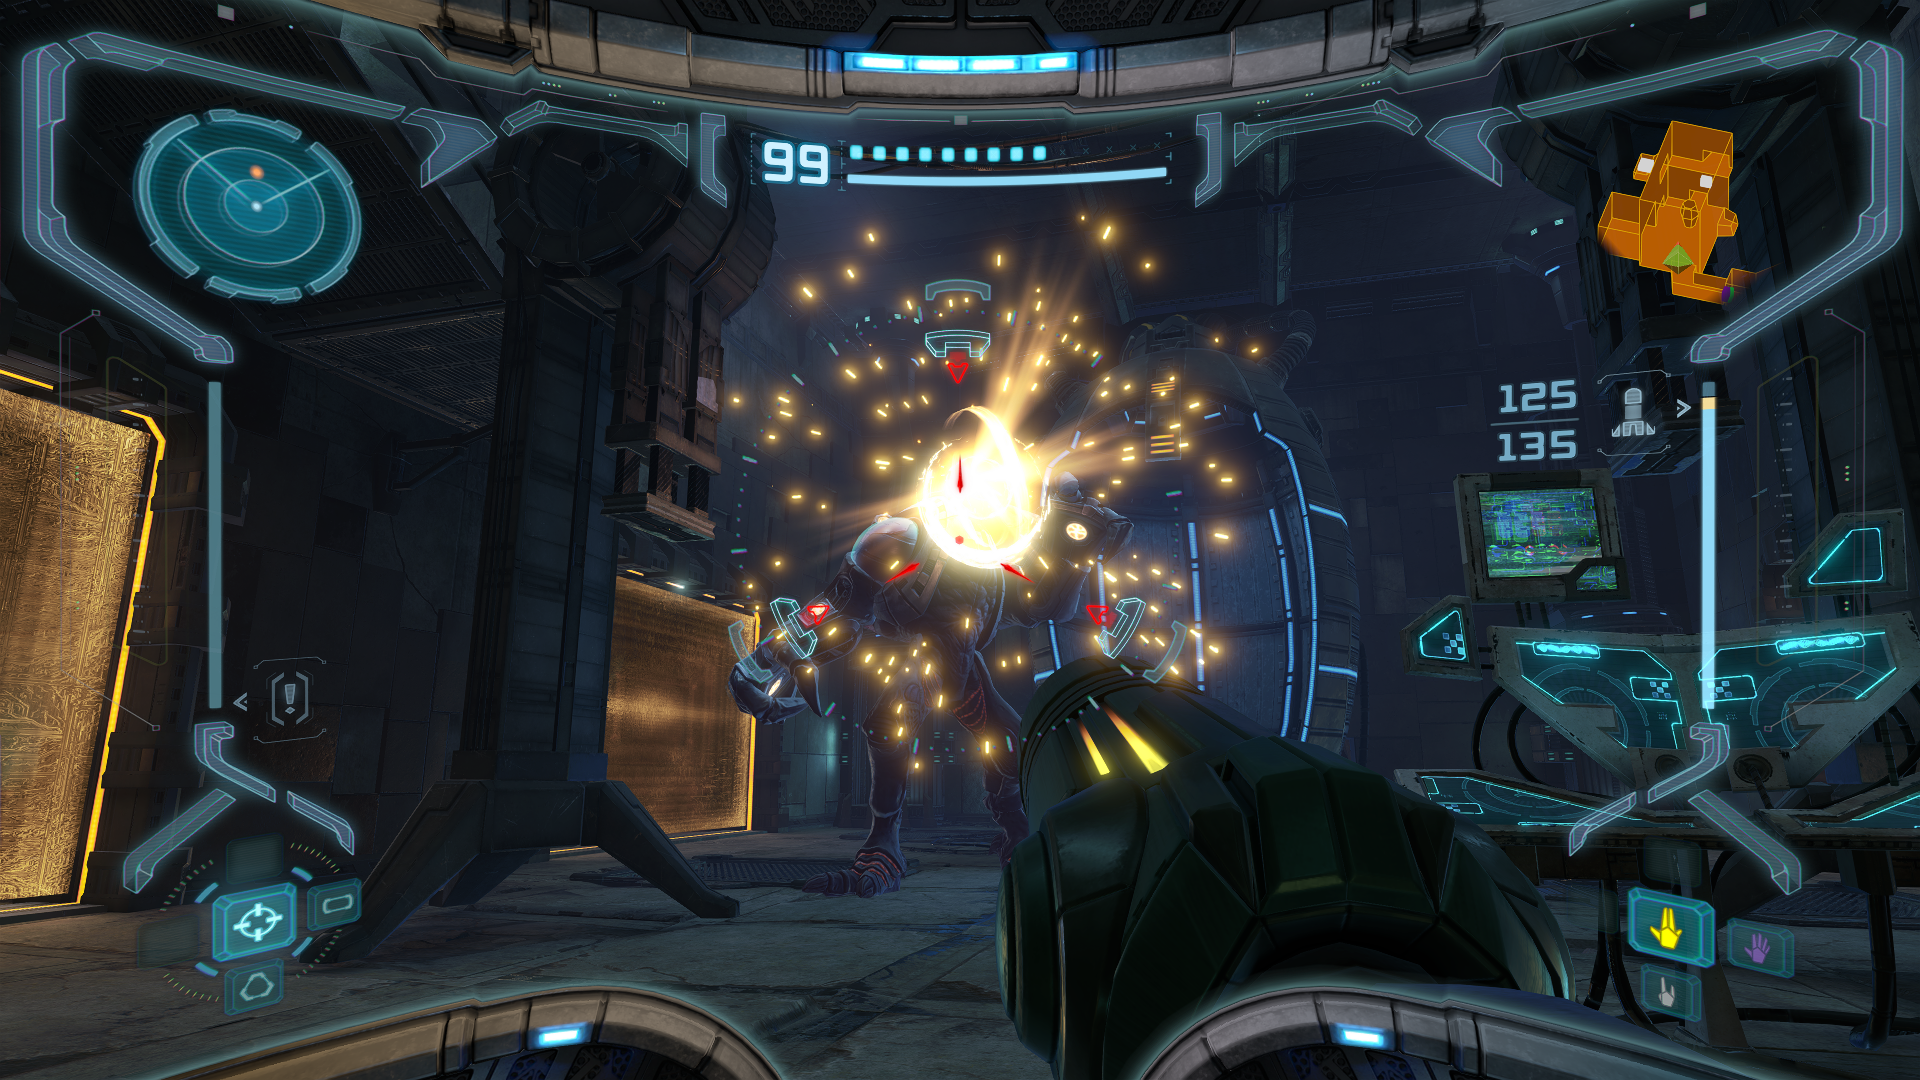
If this sounds like a lot, don’t worry – there’s more! For now, you’ll want to target the Omega Pirate’s various limbs and blast them when you can. You’ll have a good opportunity to hit him when he’s standing still, firing his cannons at you OR when he’s in the middle of (or just after) a ground pound. Super Missiles or charged Plasma shots will do the trick nicely, so keep firing until several of his limbs have been destroyed.
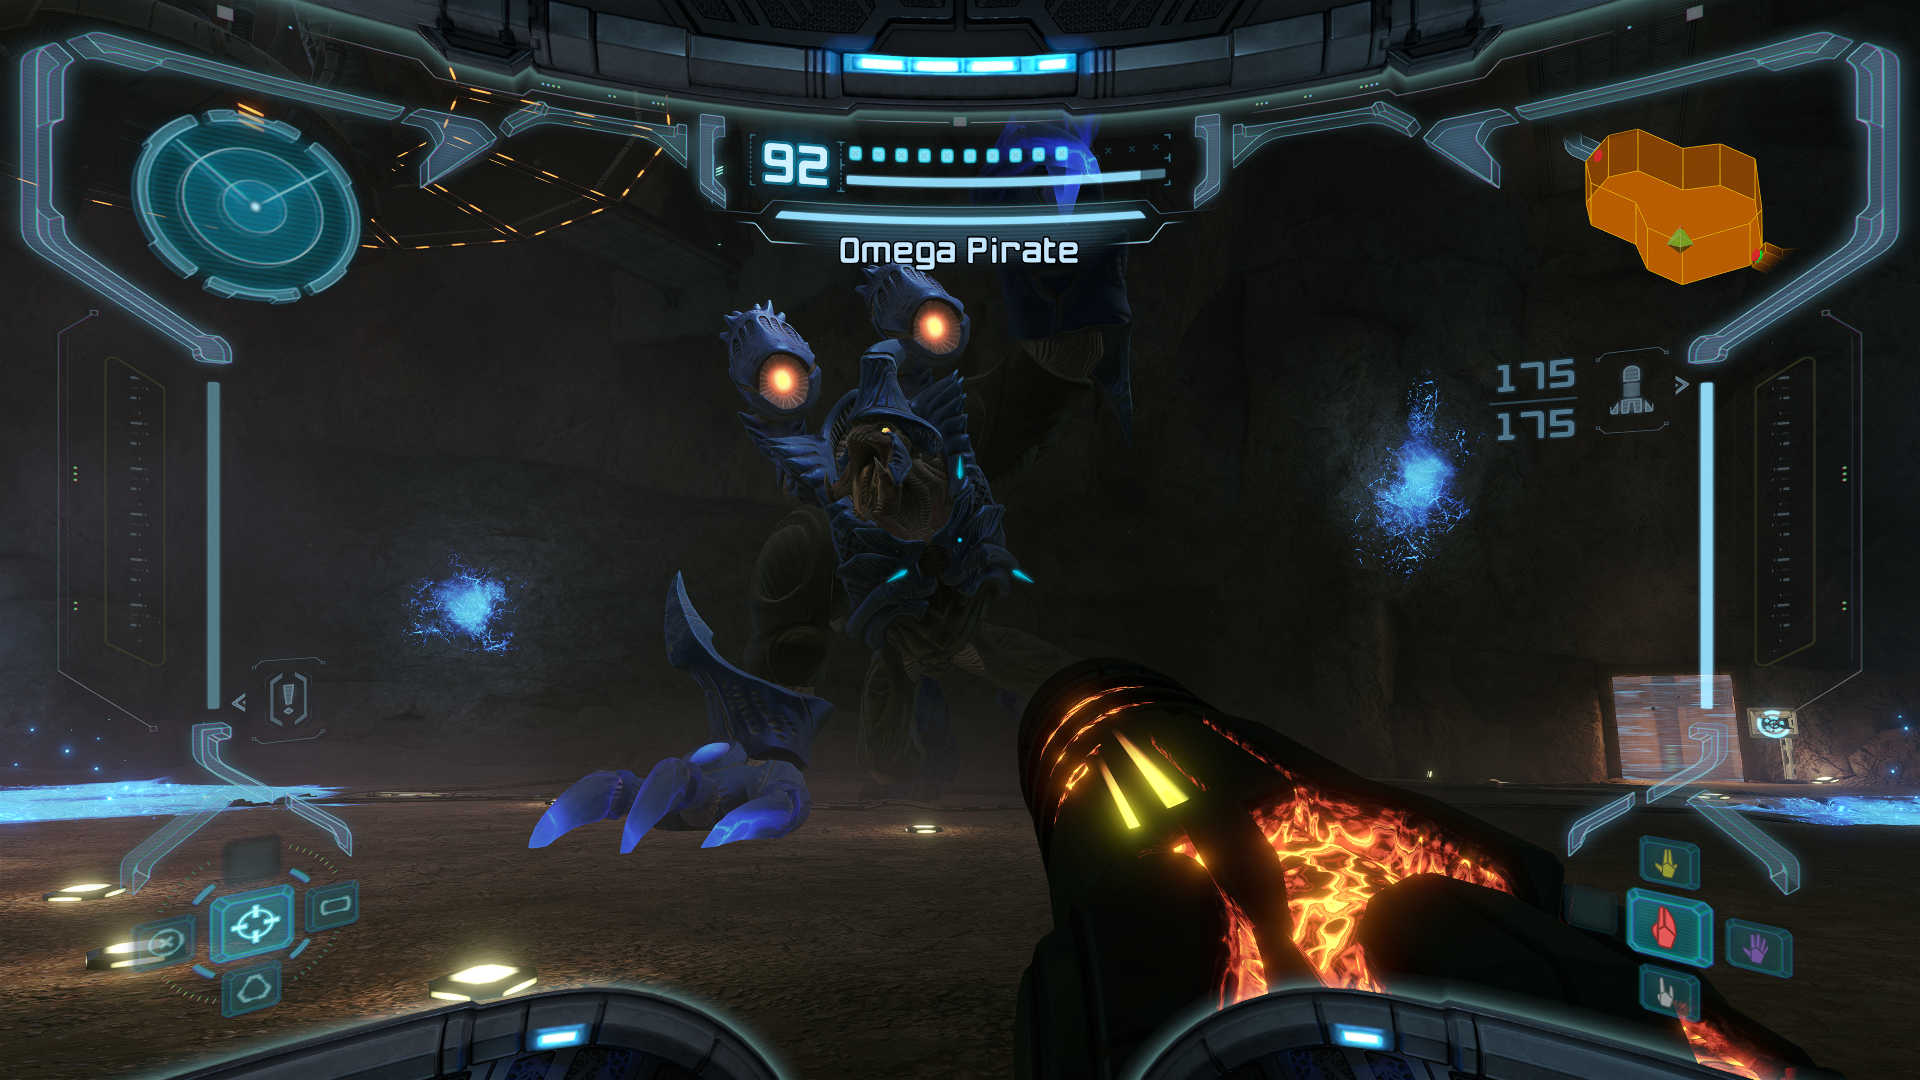
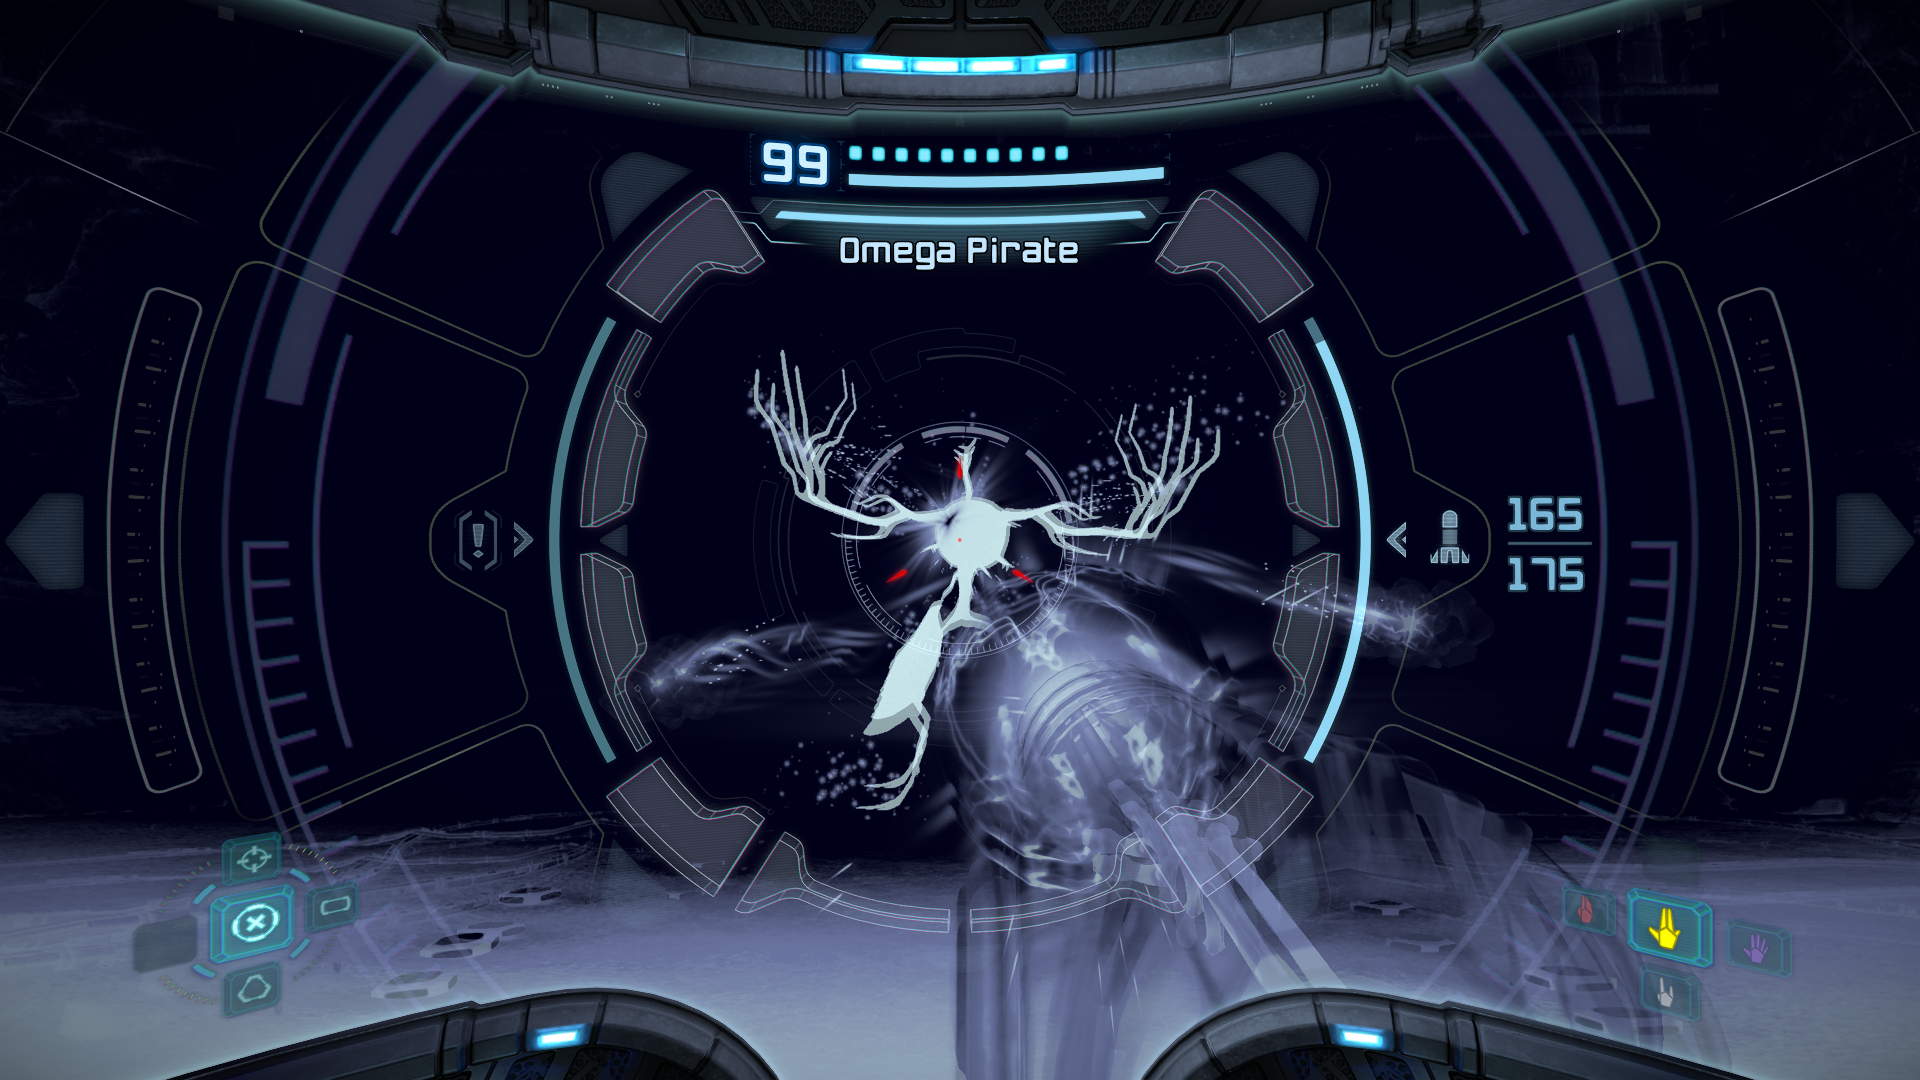
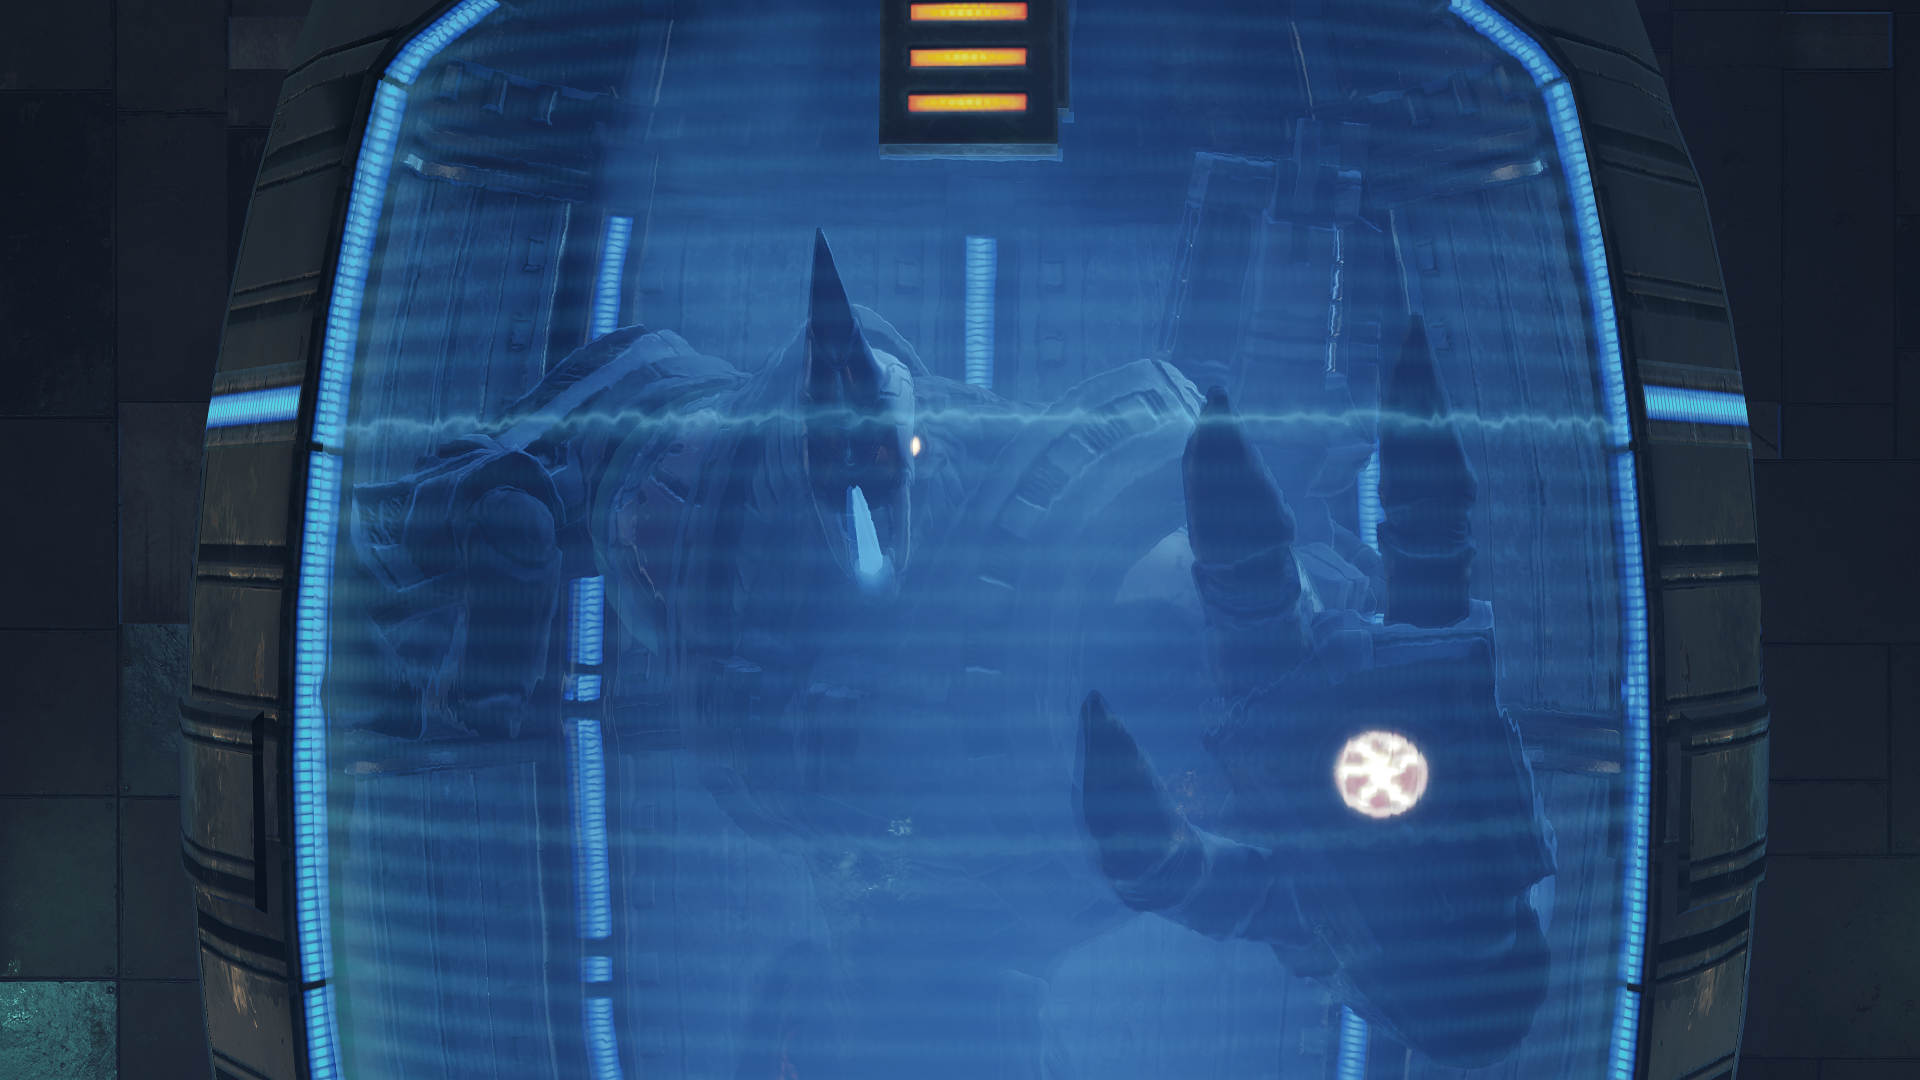
The Omega Pirate will go down, but this fight is far from over. Omega will call a couple of Beam Troopers in for backup. Switch to whatever Beam you need to in order to deal with the Pirates, but don’t get too hung up on them. After a second, Omega will start to recharge his health, BUUUT he will be invisible to the naked eye. Switch over to your X-Ray Visor and blast him with a Super Missile shot or two while he’s regenerating. This will do massive damage. If you’ve still got Beam Troopers on your tail, finish them off (lay a Power Bomb if there are multiple). You’ll get health and ammo from them, which is probably needed.
Rinse and repeat the process of destroying the limbs, combating the regular Pirates, and blasting Omega’s heart with Super Missiles, and soon enough, the Pirate will fall.
ADVANCED STRATEGIES: As soon as the fight starts, activate the Morph Ball and rush directly at the Omega Pirate at full speed. As you’re about to collide with him, use the Spring Ball to jump in the air. At the apex of your jump, drop a Power Bomb to instantly destroy ALL of the Omega Pirate’s armor in the blast.
During the healing phase where reinforcements are sent to protect the Omega Pirate, if you’re fast enough with your Super Missiles, you can finish him off completely in the FIRST PHASE! Take out the first wave of beam troopers but don’t bother with the rest that spawn in. When the Omega Pirate is healing, it’s best to rapidly spin around so you can easily find which of the spots he spawns in at. You can also use the audio of him re-appearing to determine the direction he’s at based on your current position if you listen close enough (headphones make this a lot easier too). Each successful Super Missile will resort in a shorter healing phase each time, so you’re gonna have to be quick on the trigger for the last couple of pulls! Four Super Missiles to the chest will be enough to send this behemoth packing.
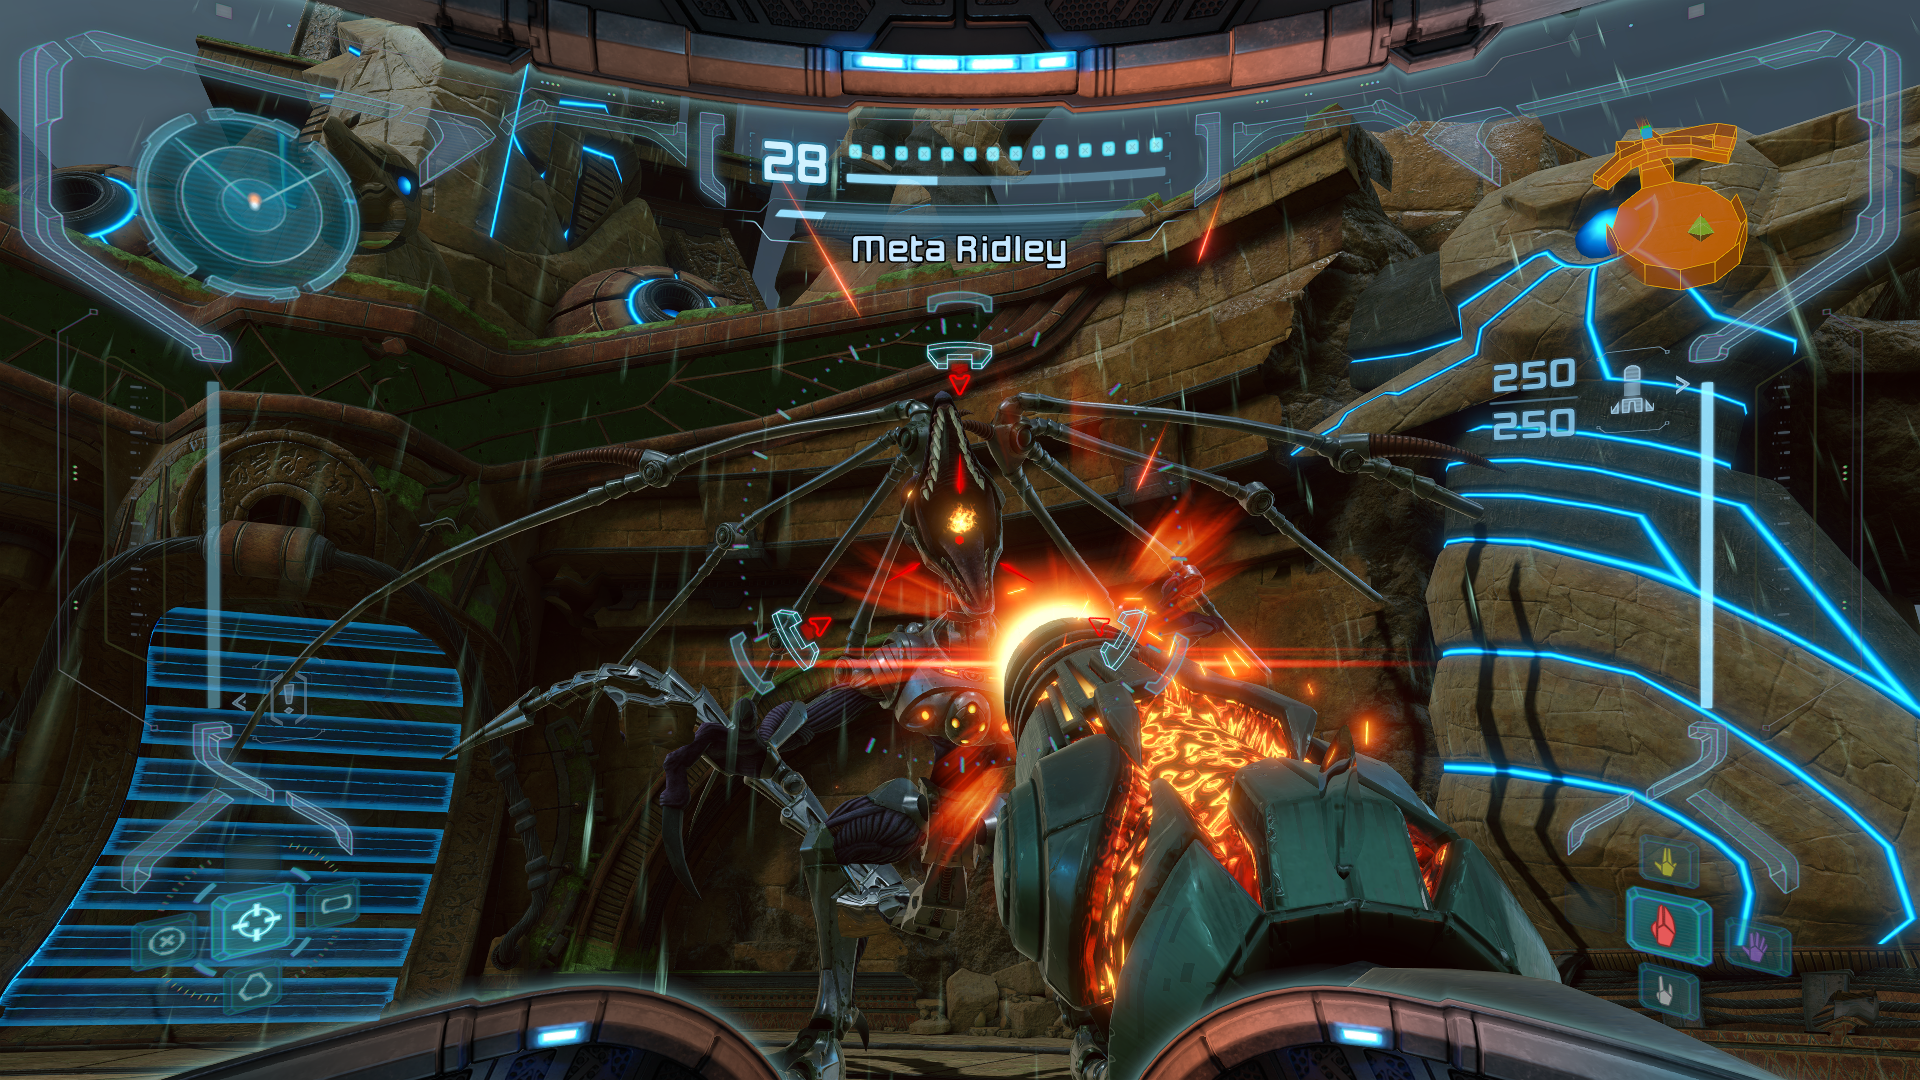
Meta Ridley
It’s the battle you’ve been waiting all game for. Samus squares off against her oldest foe in a cinematic clash at the Artifact Temple, but this Ridley is unlike any Ridley you’ve fought before. Meta Ridley is equipped with all sorts of upgrades and weapons that make him the most dangerous version of Ridley that you’ll have faced yet.
As with every battle, the first thing you’ll want to do is scan META RIDLEY. Once that’s taken care of, switch to your Combat Visor and get ready to fight.
Meta Ridley has a single weak spot: his chest. Your job will be to continuously fire either charged Plasma Shots or Super Missiles at it; by now, you should have 100% items, so put all those missile expansions to good use. Knowing where Ridley’s weak spot is and actually staying alive long to exploit it, however, are two different things. You’ll have to pick your spots carefully.

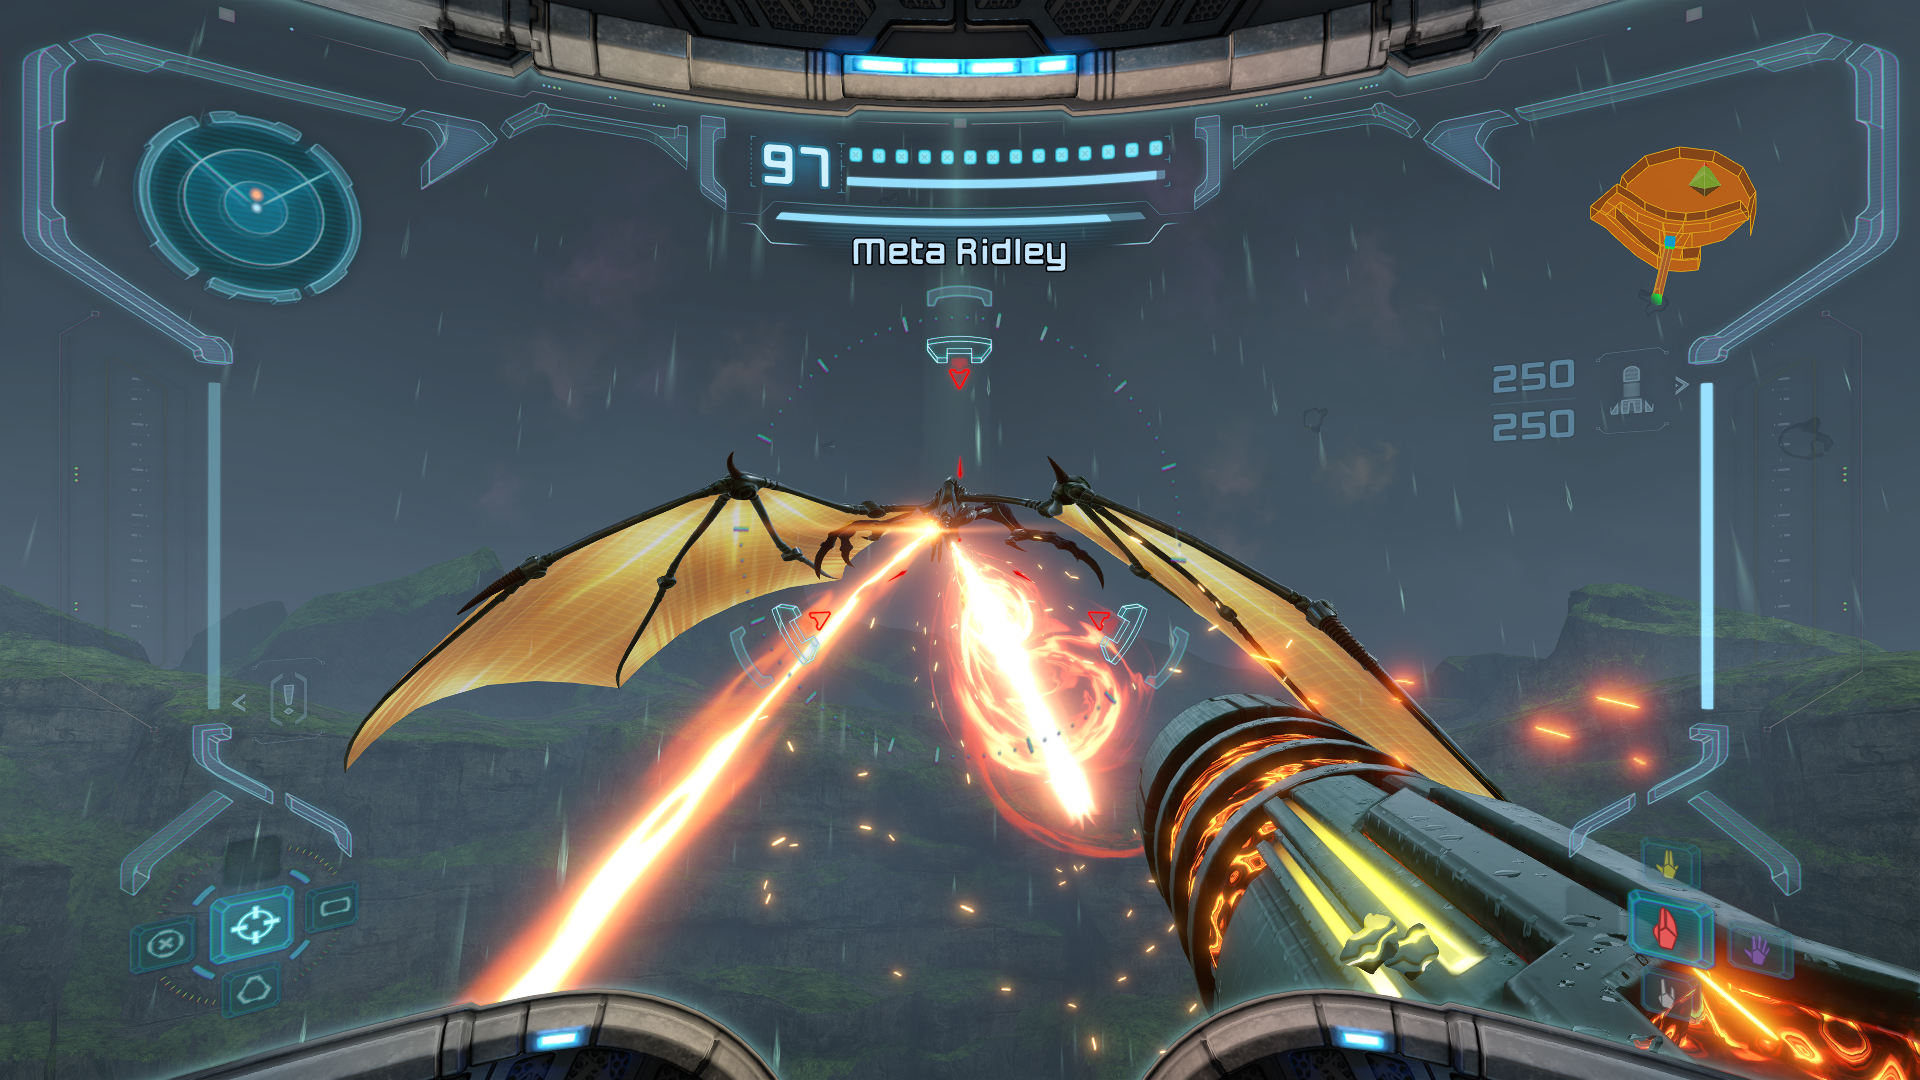
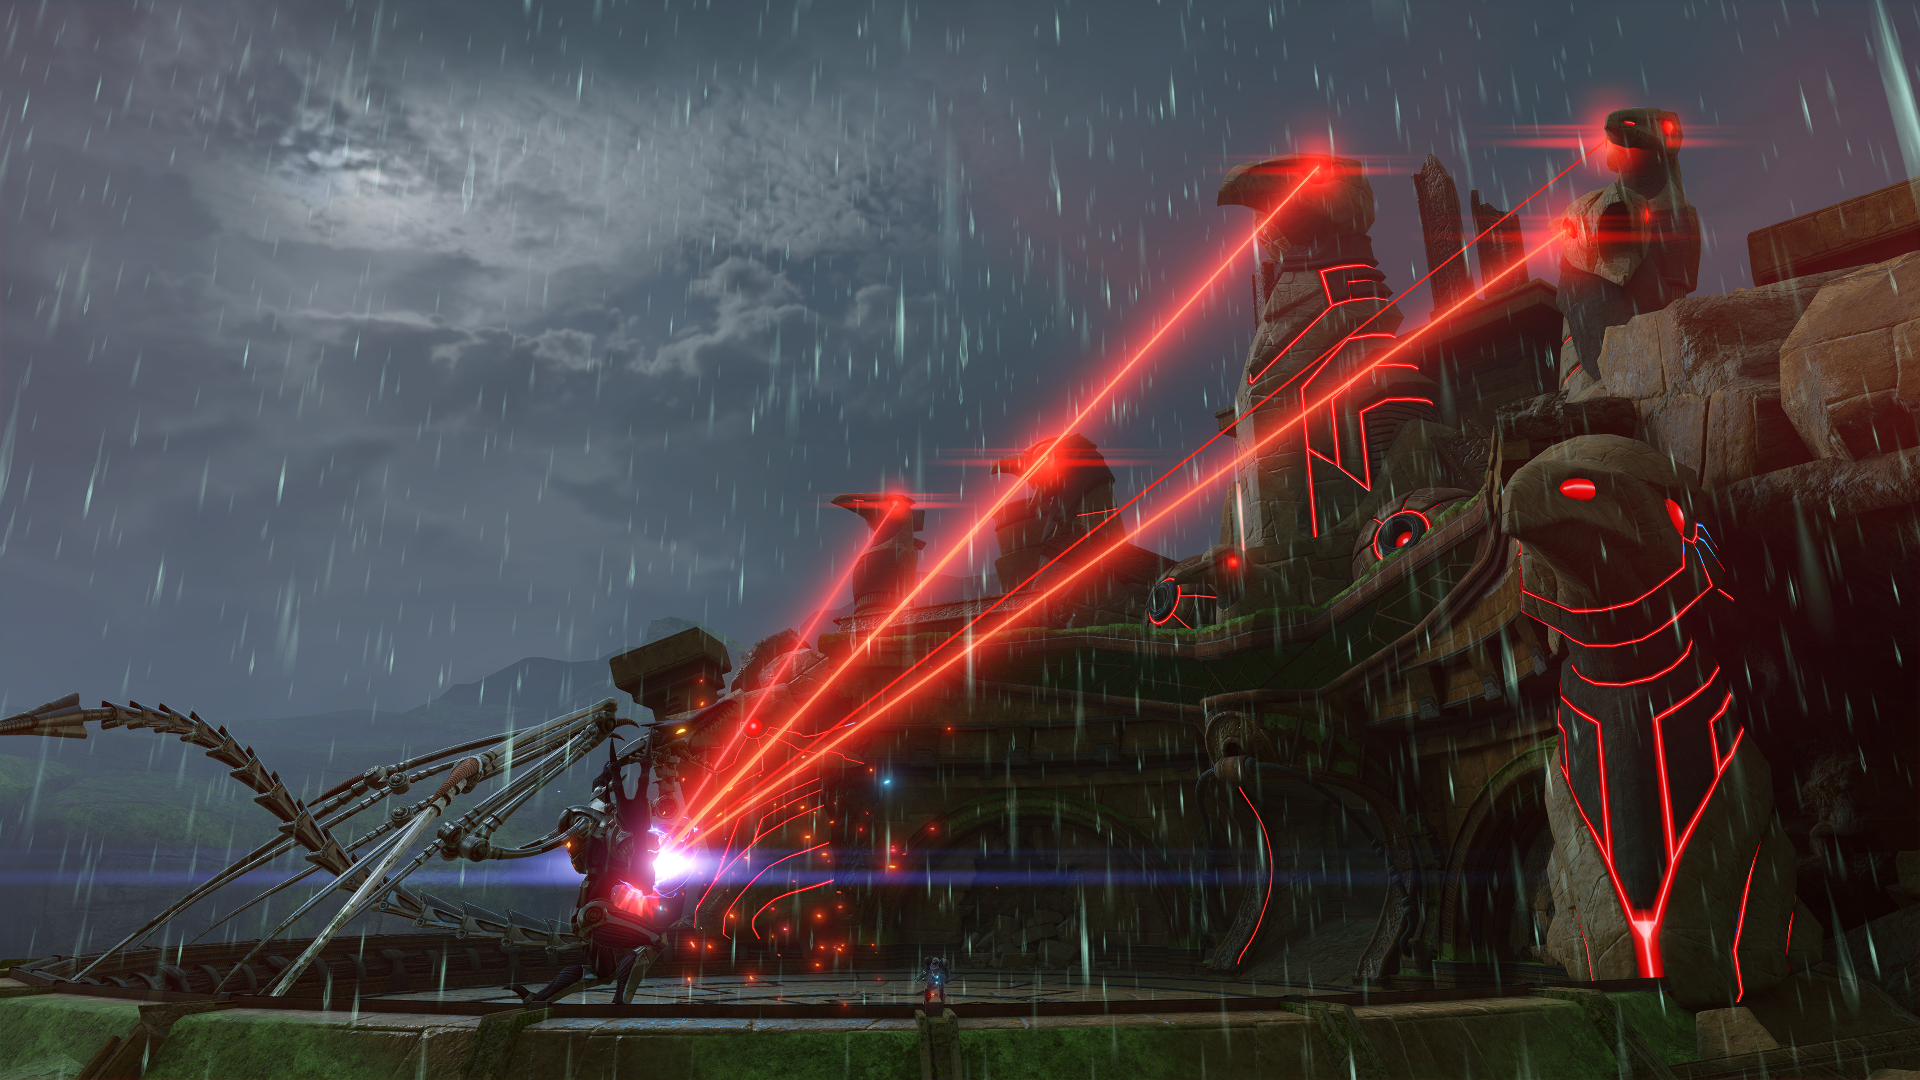
Ridley will start the battle by engaging you from the air; he has a plethora of incredibly dangerous attacks, including a laser beam he will shoot out of his mouth at you. This is simple enough to either avoid or jump over, but Ridley will bust it out frequently, so just watch out. He also has an attack where he will wrap himself in his wings, expose his chest, and fire multiple Missiles at you; this is a great opportunity to pelt the Space Dragon with some offense, provided you can sidestep Ridley’s missiles.
Meta Ridley’s next attack is by far the most annoying, not because it hits all that hard, but because he does it all the time and it takes foreeeever. Ridley will just… fly away and do a couple circles around the temple, and then after what seems like forever, fly over you and drop some bombs. The actual bombs are pretty easy to avoid, so as long as you didn’t fall asleep waiting for Ridley to come back, you should be fine. When he starts to get a bit lower on health, Ridley will fire his laser breath at you in addition to the bombs, so just watch out.
That’s not all though! Ridley will also do what can only be described as a ground pound (his feet will literally start glowing) and slam straight down onto you. Needless to say, this hurts and is a bit trickier to avoid. Not only that but there will be a shockwave when Ridley hits the ground that you want to look out for. Basically, as soon as you see him get close, start putting some distance between yourself and Ridley.
Just keep on avoiding Ridley’s attacks and firing at his chest, and with enough damage, phase two of this battle will begin.
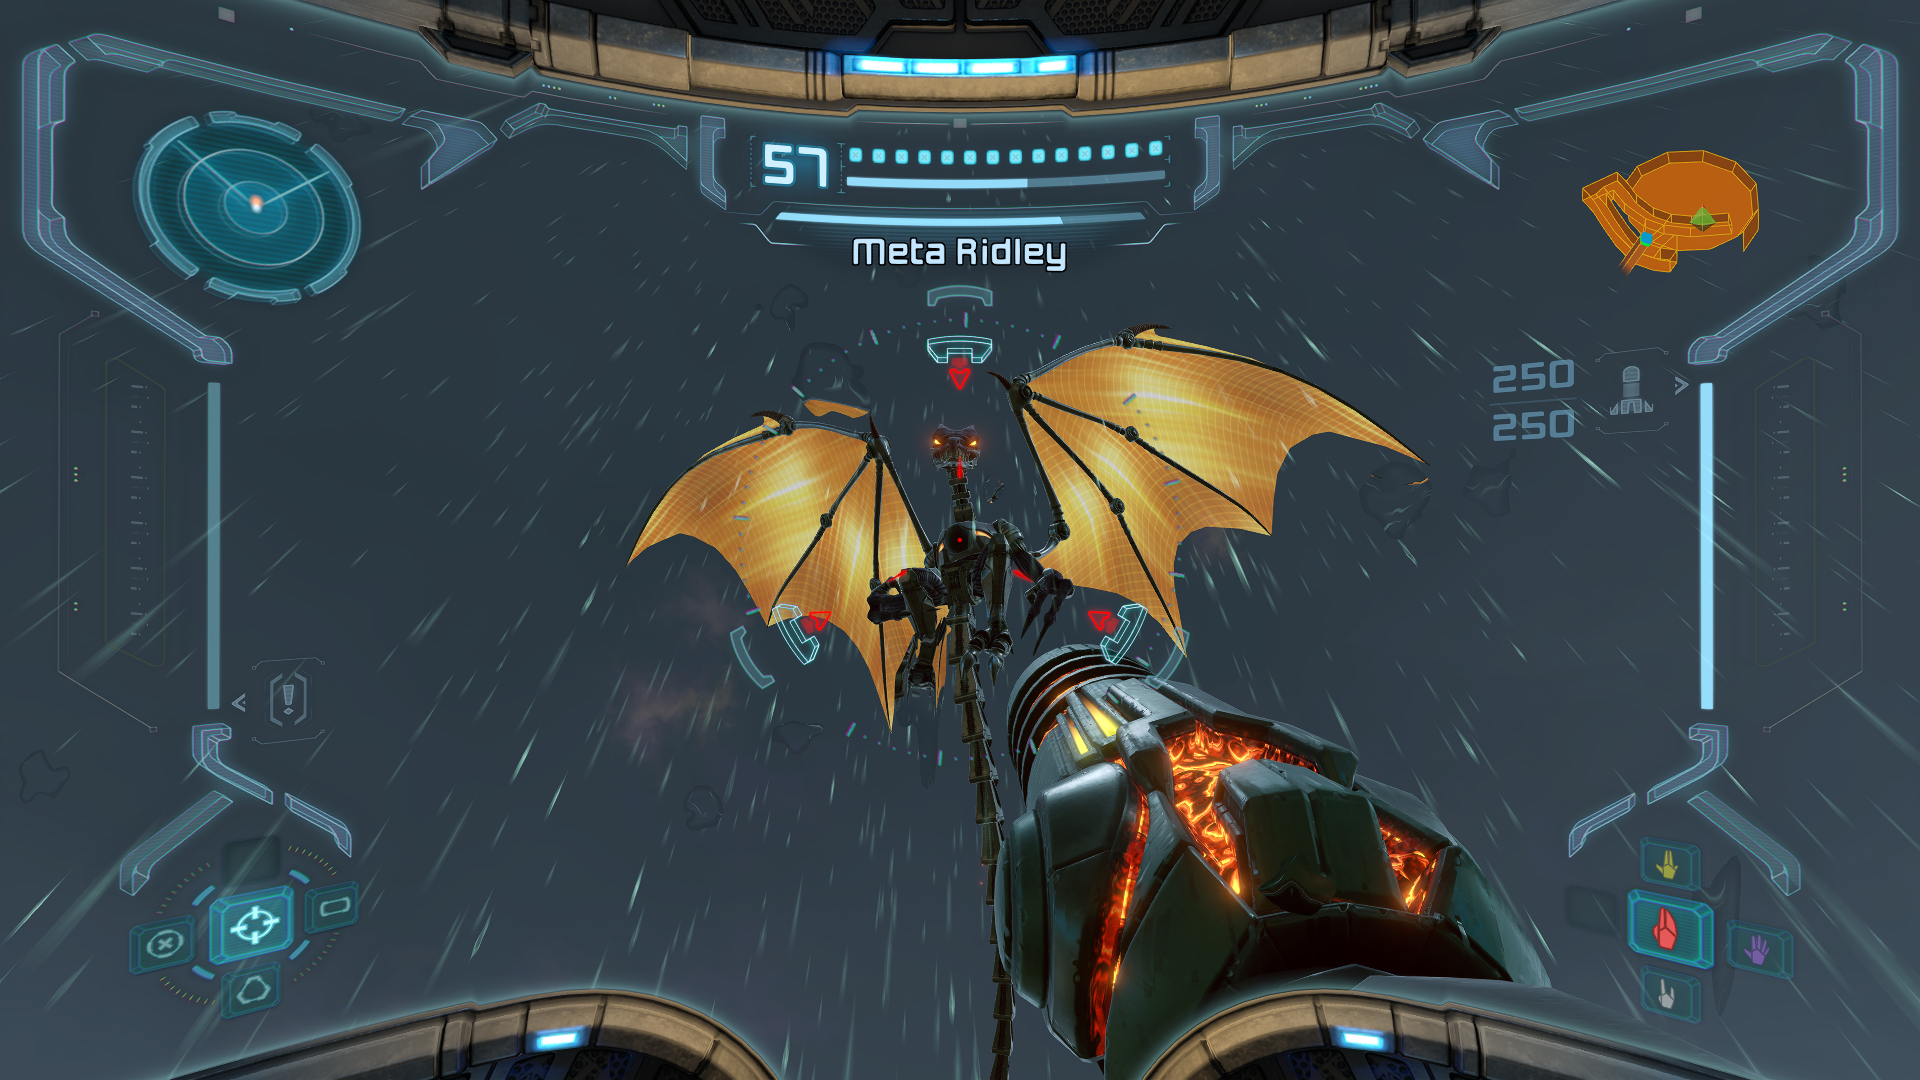
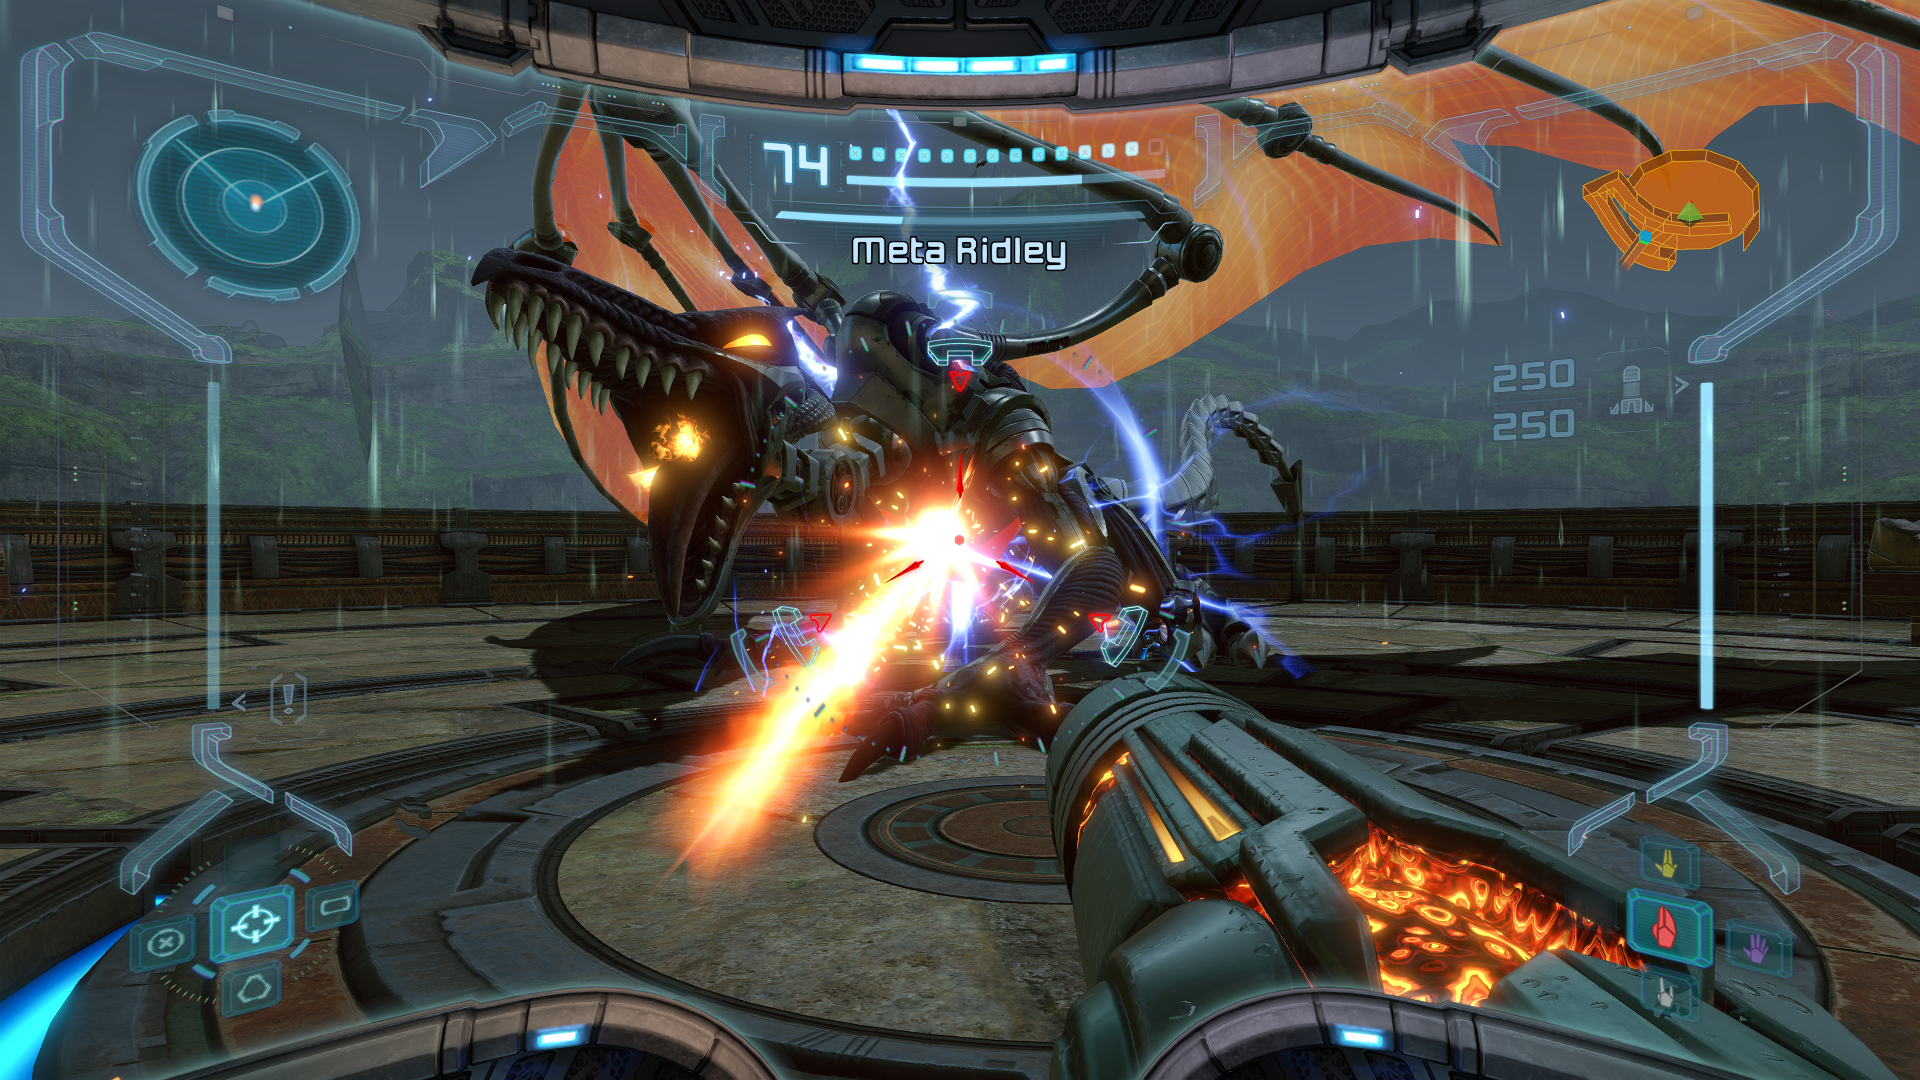
You’ll be able to see when this second phase starts when Ridley loses his wings. This is both good and bad – good, because this portion of the battle will be much quicker; bad, because this portion will also be much more dangerous since you’ll need to fight the Space Pirate enforcer at close quarters. Luckily, once Ridley is grounded, his mouth will become an additional weak spot that you can target. Much like before, however, you’ll need to pick your spots carefully.
Ridley’s attacks will be more melee focused, although he will still launch his laser breath at you; same as before, just jump over it or avoid the laser all together. Ridley’s ground pound will also return, same as before. This may seem like obvious advice, but remember to check where you are. It’s easy to target Ridley and then jump backwards, only to realize you just jumped right off the Artifact Temple. There’s pretty much no more humiliating death than that, do just be aware.
You’ll see Ridley slowly start to cock his arm backwards; this is your queue that he’s about to lunge at you, which, as you probably suspect, does major damage. Now, there’s a risky play you can try here. Right before Ridley lunges, he’ll open his mouth to yell for a second. If you’re fast, you can fire a charged shot/Super Missile at his mouth that will both damage Meta Ridley and stop him in his tracks. If you miss, you’ll find yourself on the receiving end of Ridley’s claws, so judge carefully. Note: if you happen to avoid the lunge, put some distance between you and Ridley, since Ridley will sweep his giant tail around after the attack, doing pretty big damage to any who touch it.
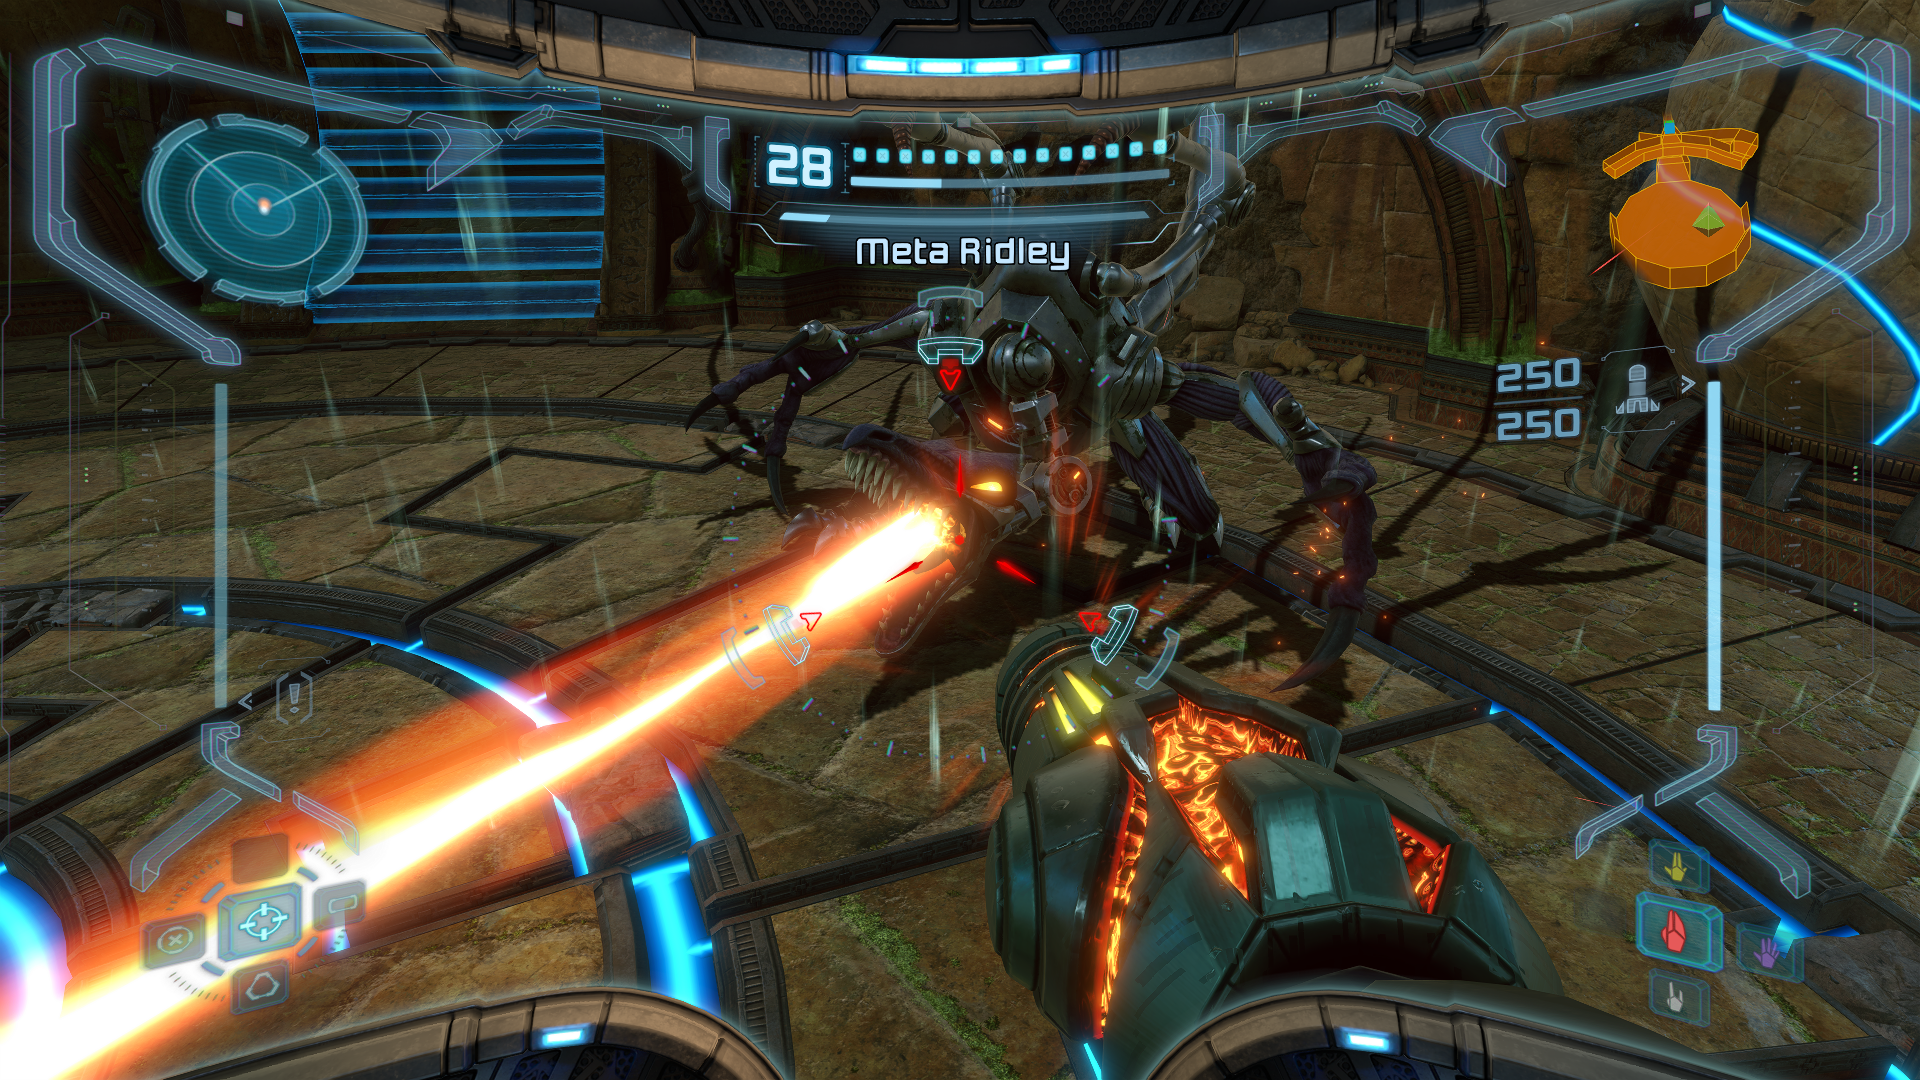
There will be moments where Ridley will just stick his head out and scream, and this is your biggest opportunity to do damage. Blast his mouth and Ridley’s whole head will go flying back, exposing his weak chest. Fire fire fire as many times as you can!
Keep up your offense, be patient, pick your spots, and eventually, Meta Ridley will fall. With a little help from the Artifact Temple’s security systems, Tallon IV will finally have a measure of revenge against the Space Pirates who desecrated their planet.
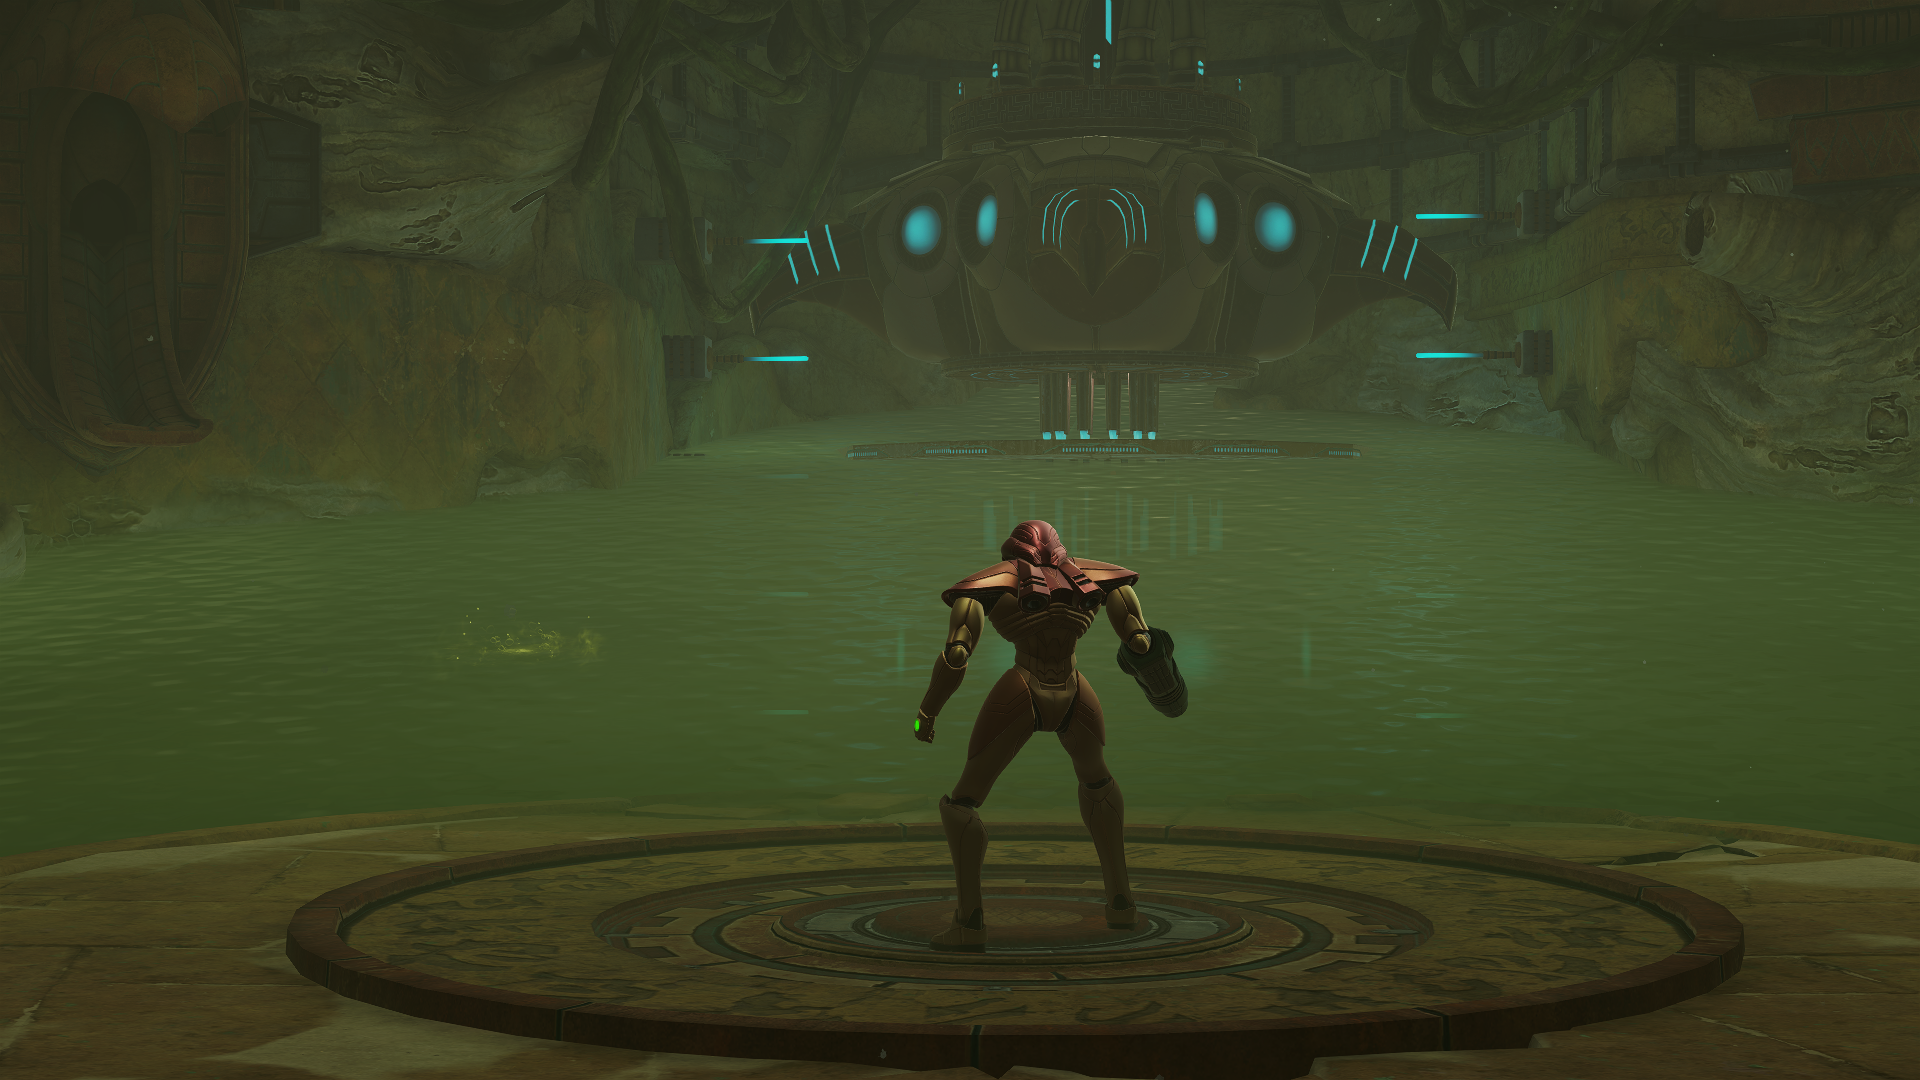
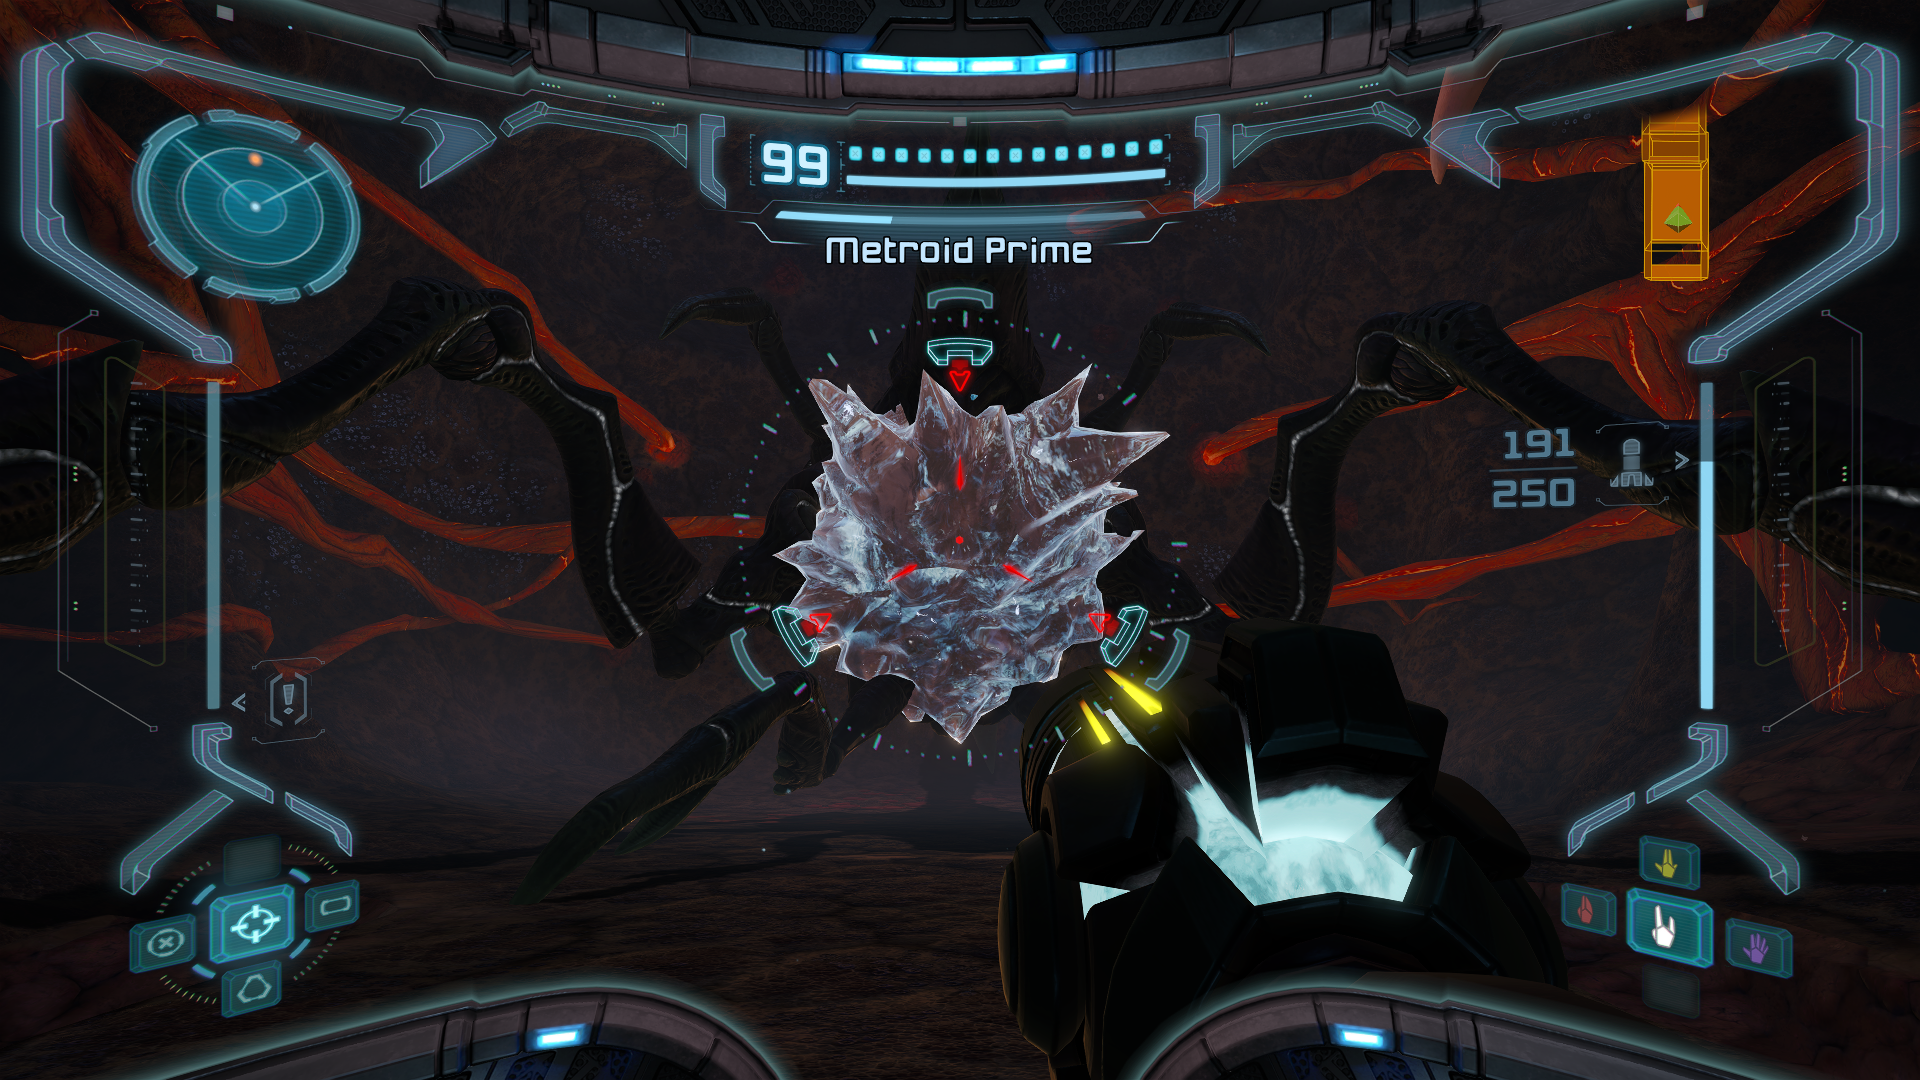
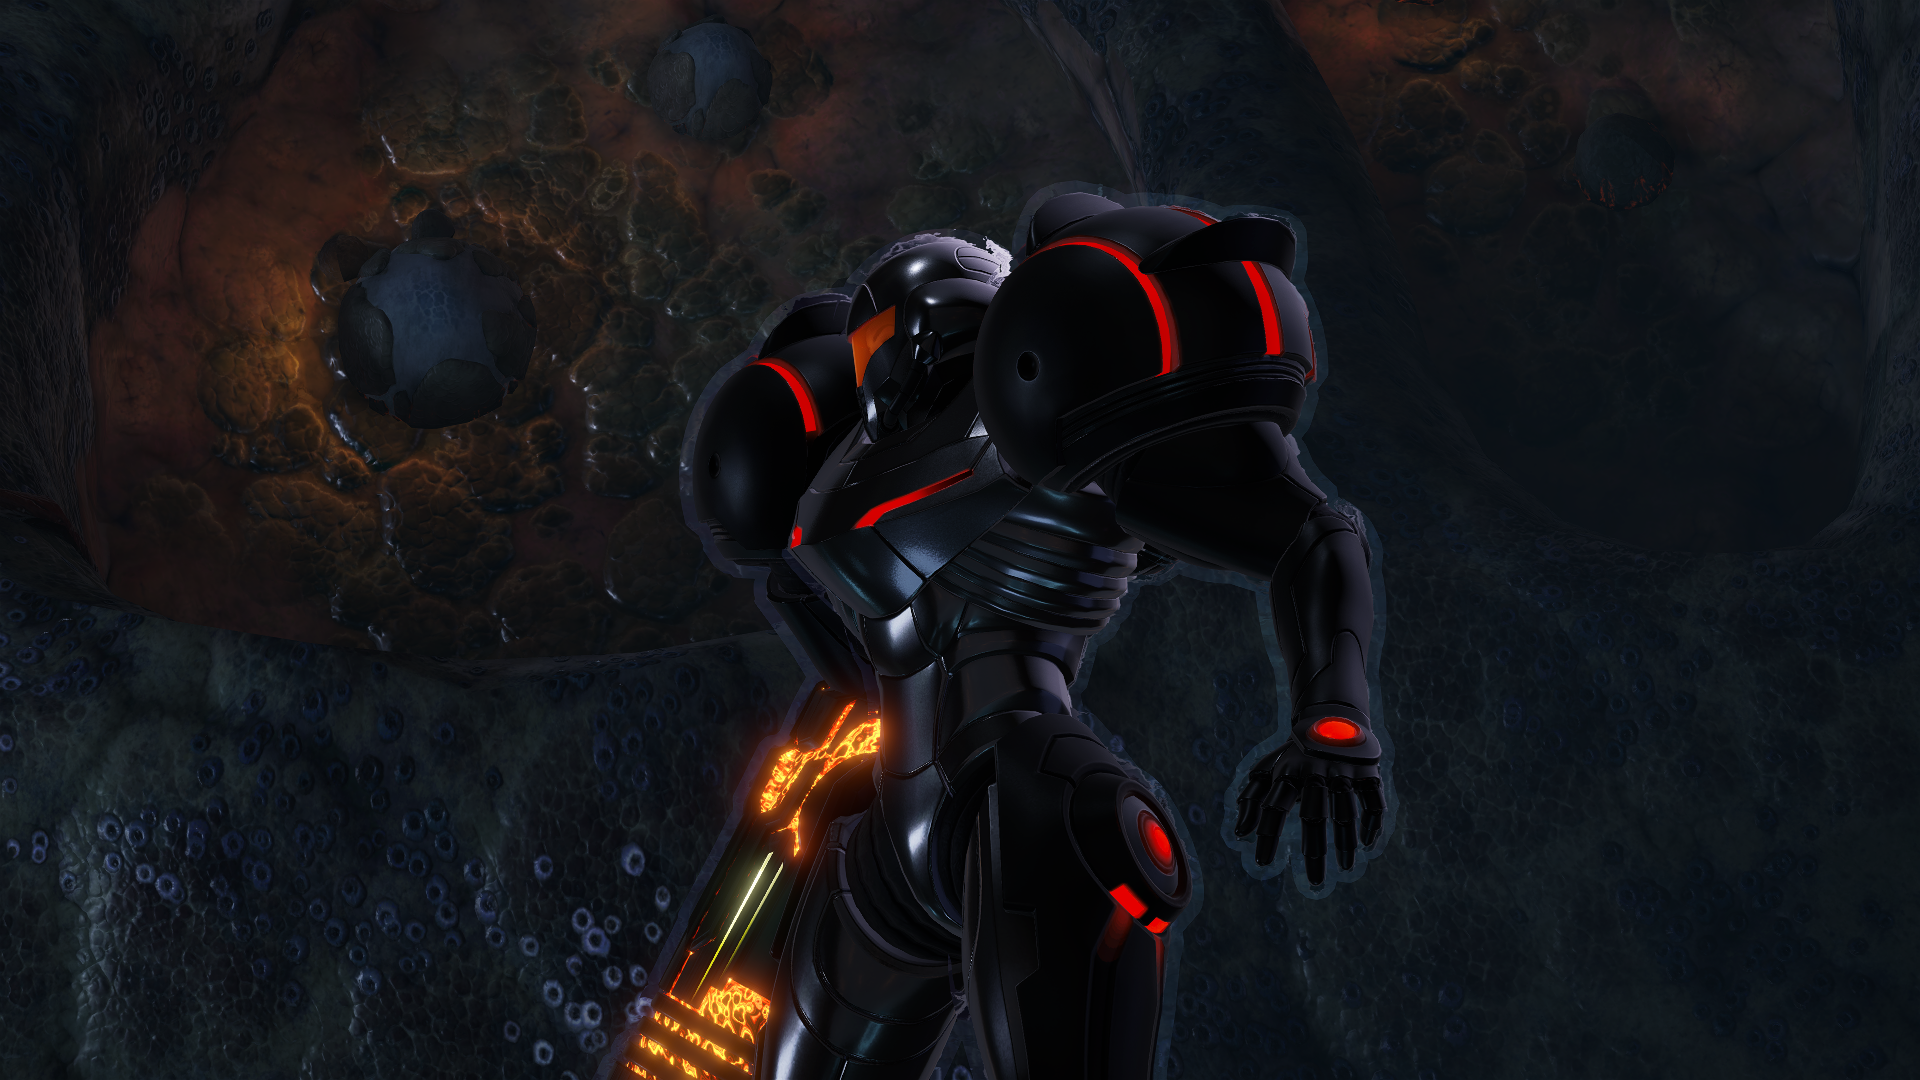
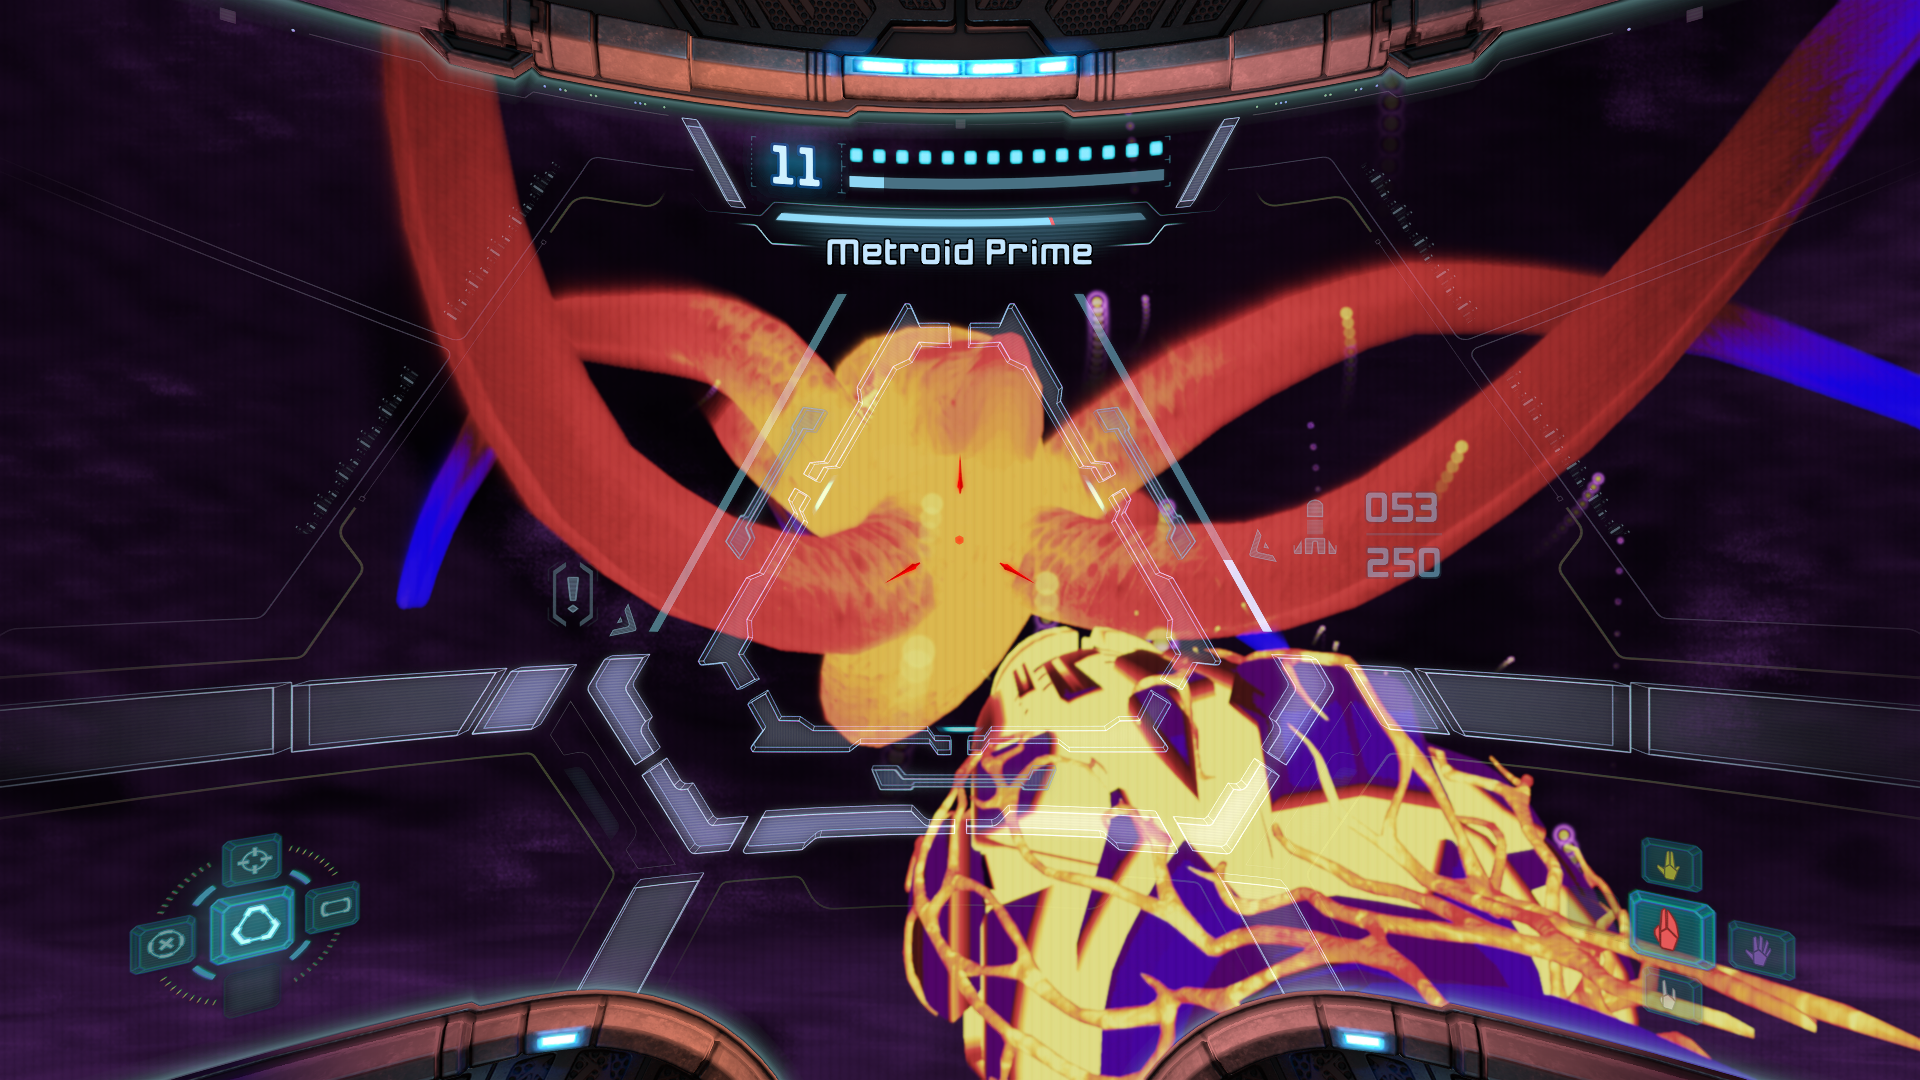
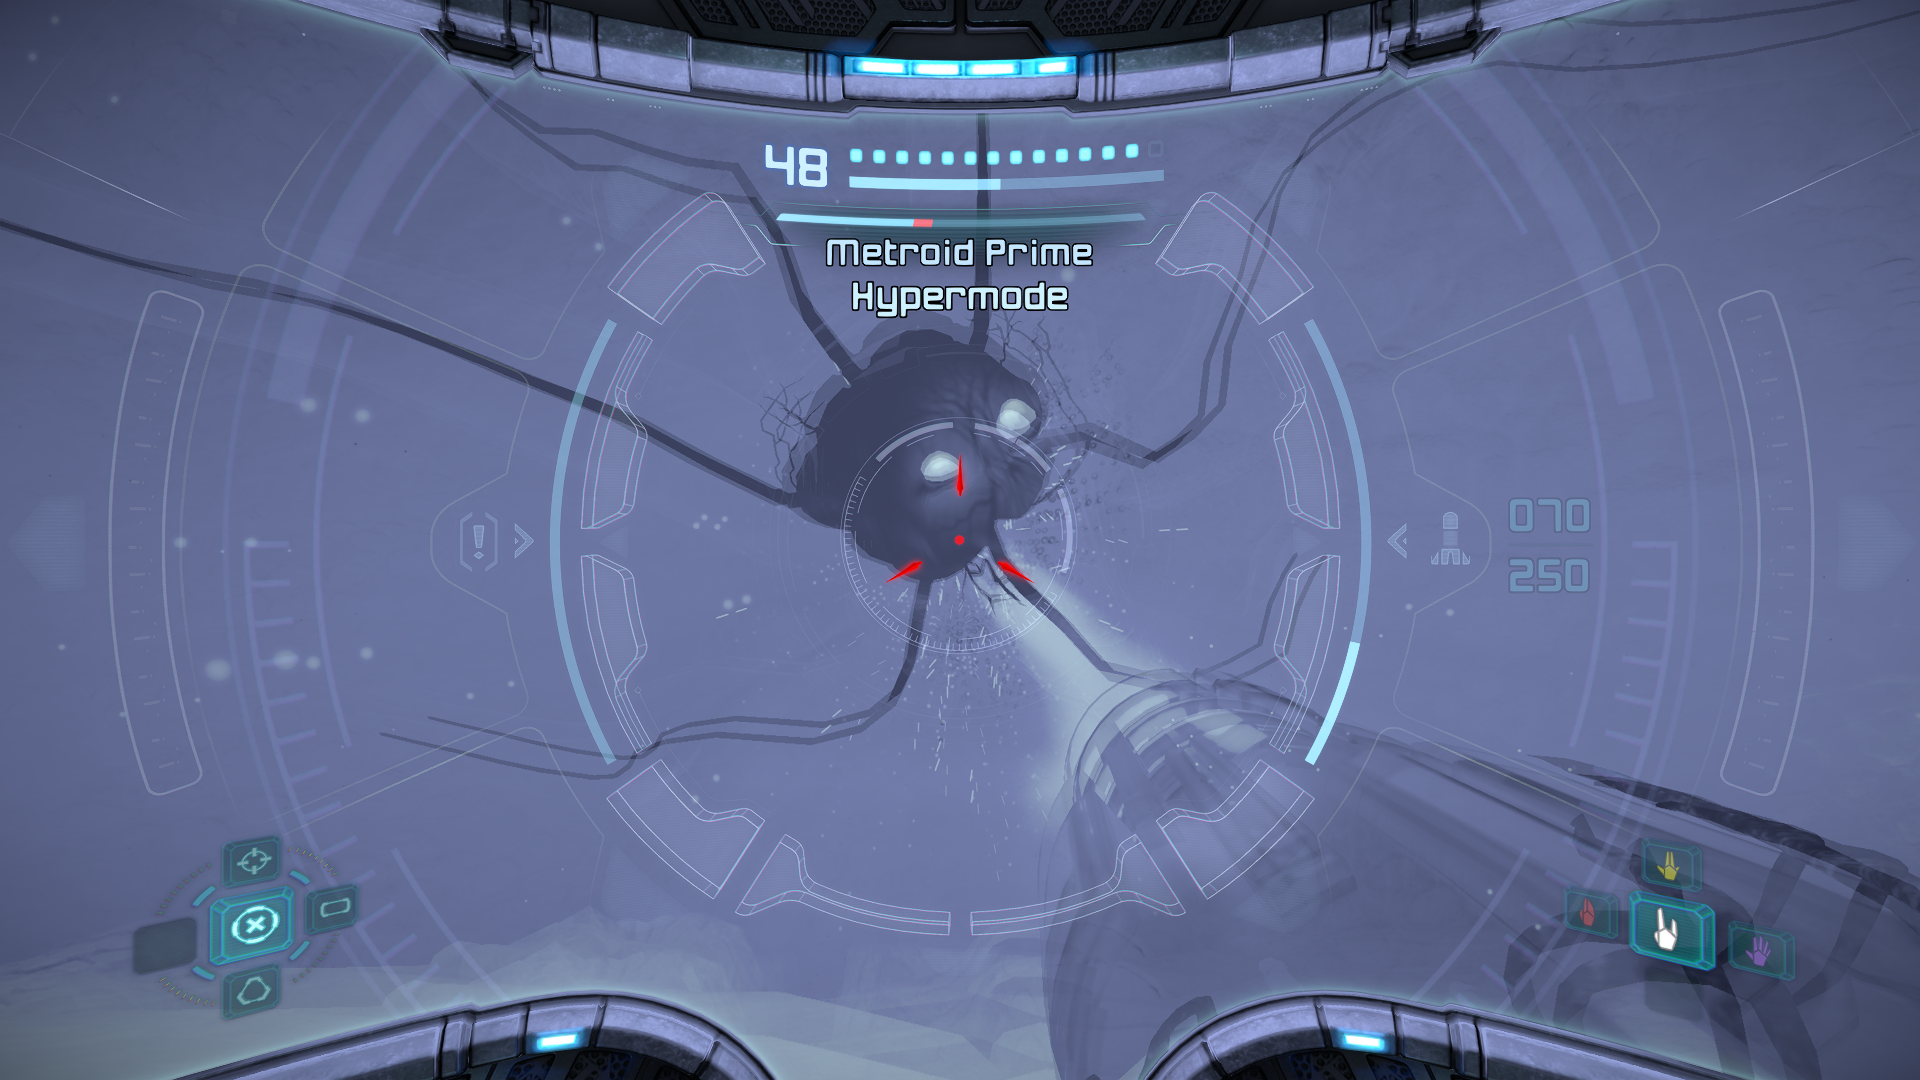
Metroid Prime

This is it. The final battle. Your entire adventure on Tallon IV has led to this moment. Take a second to soak in the music, the atmosphere, the big fight feel, and once you’re ready, step forward to fulfill the Chozo Prophecy and eliminate the Worm once and for all.
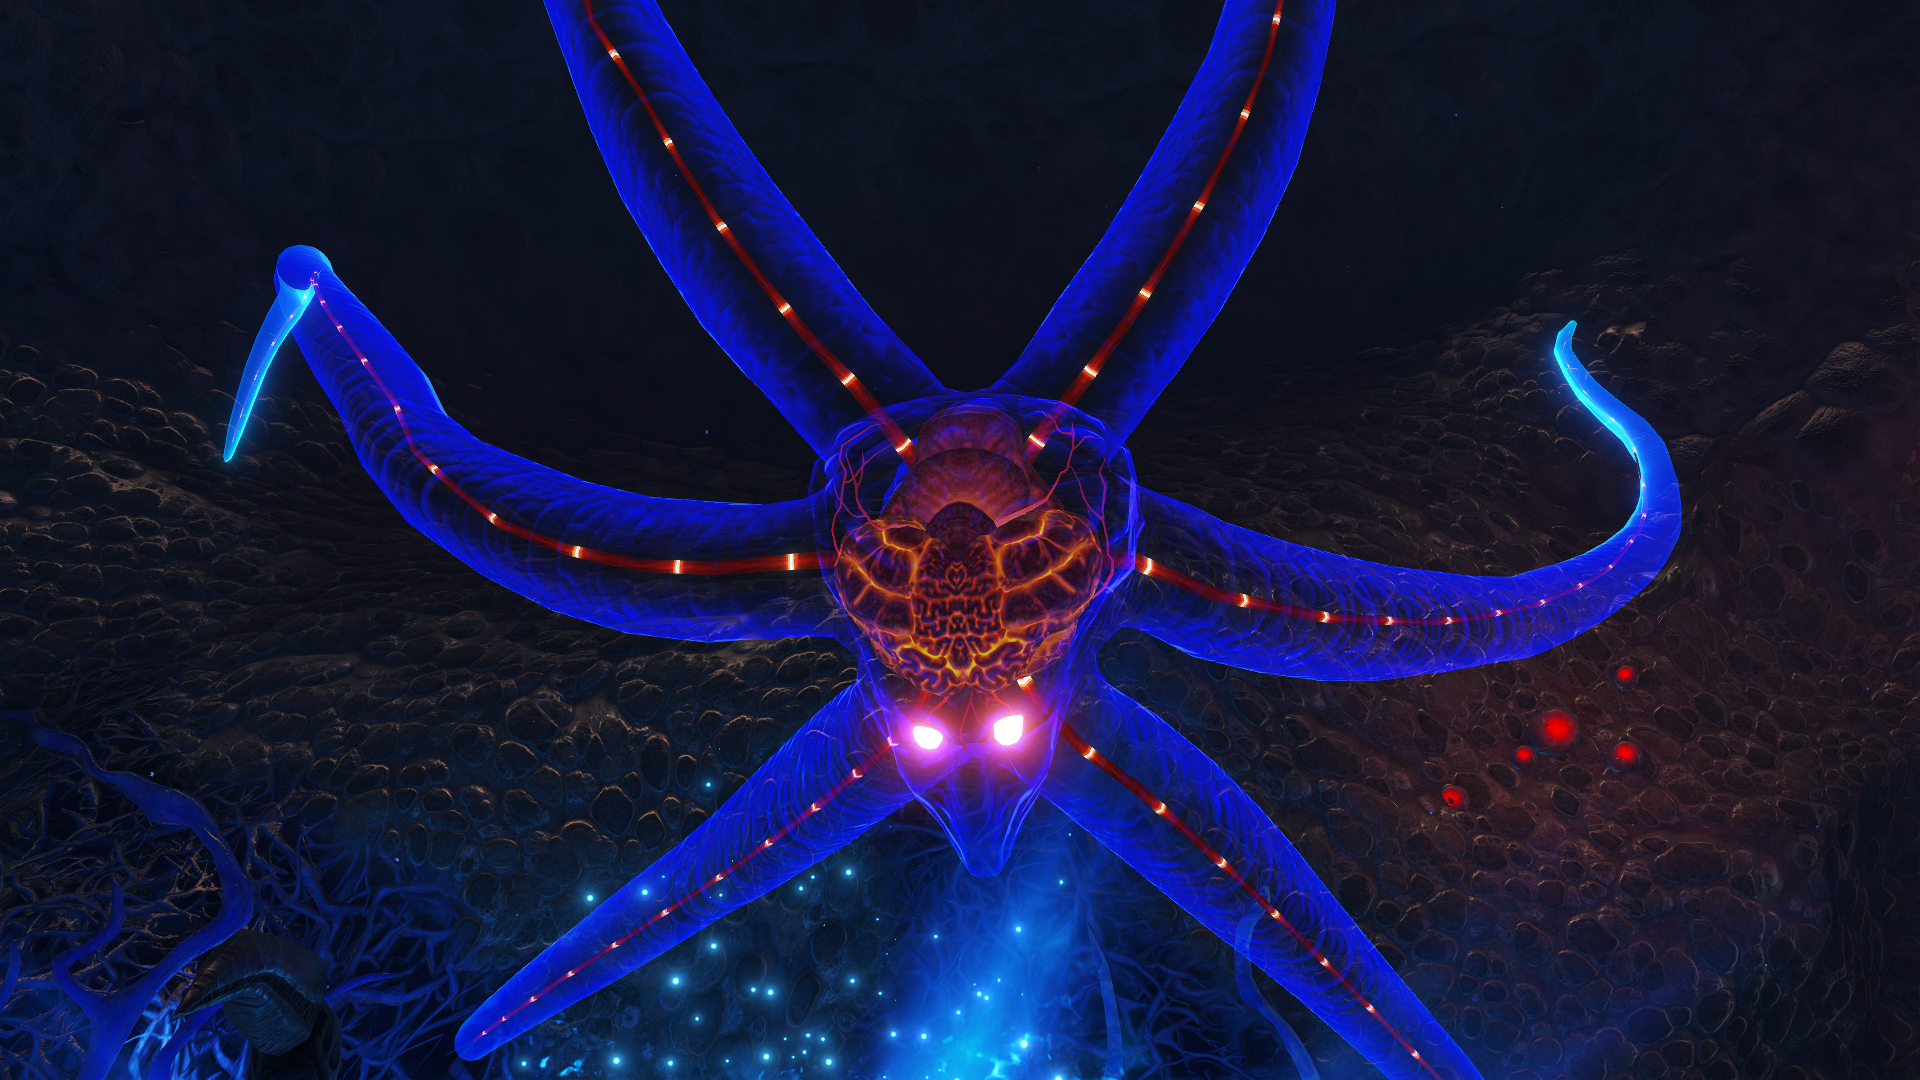
Metroid Prime is the giant creature the game has hinted about, and the source of the Phazon poisoning the insides of Tallon IV. Evil has been found; now it’s time to finish the fight.
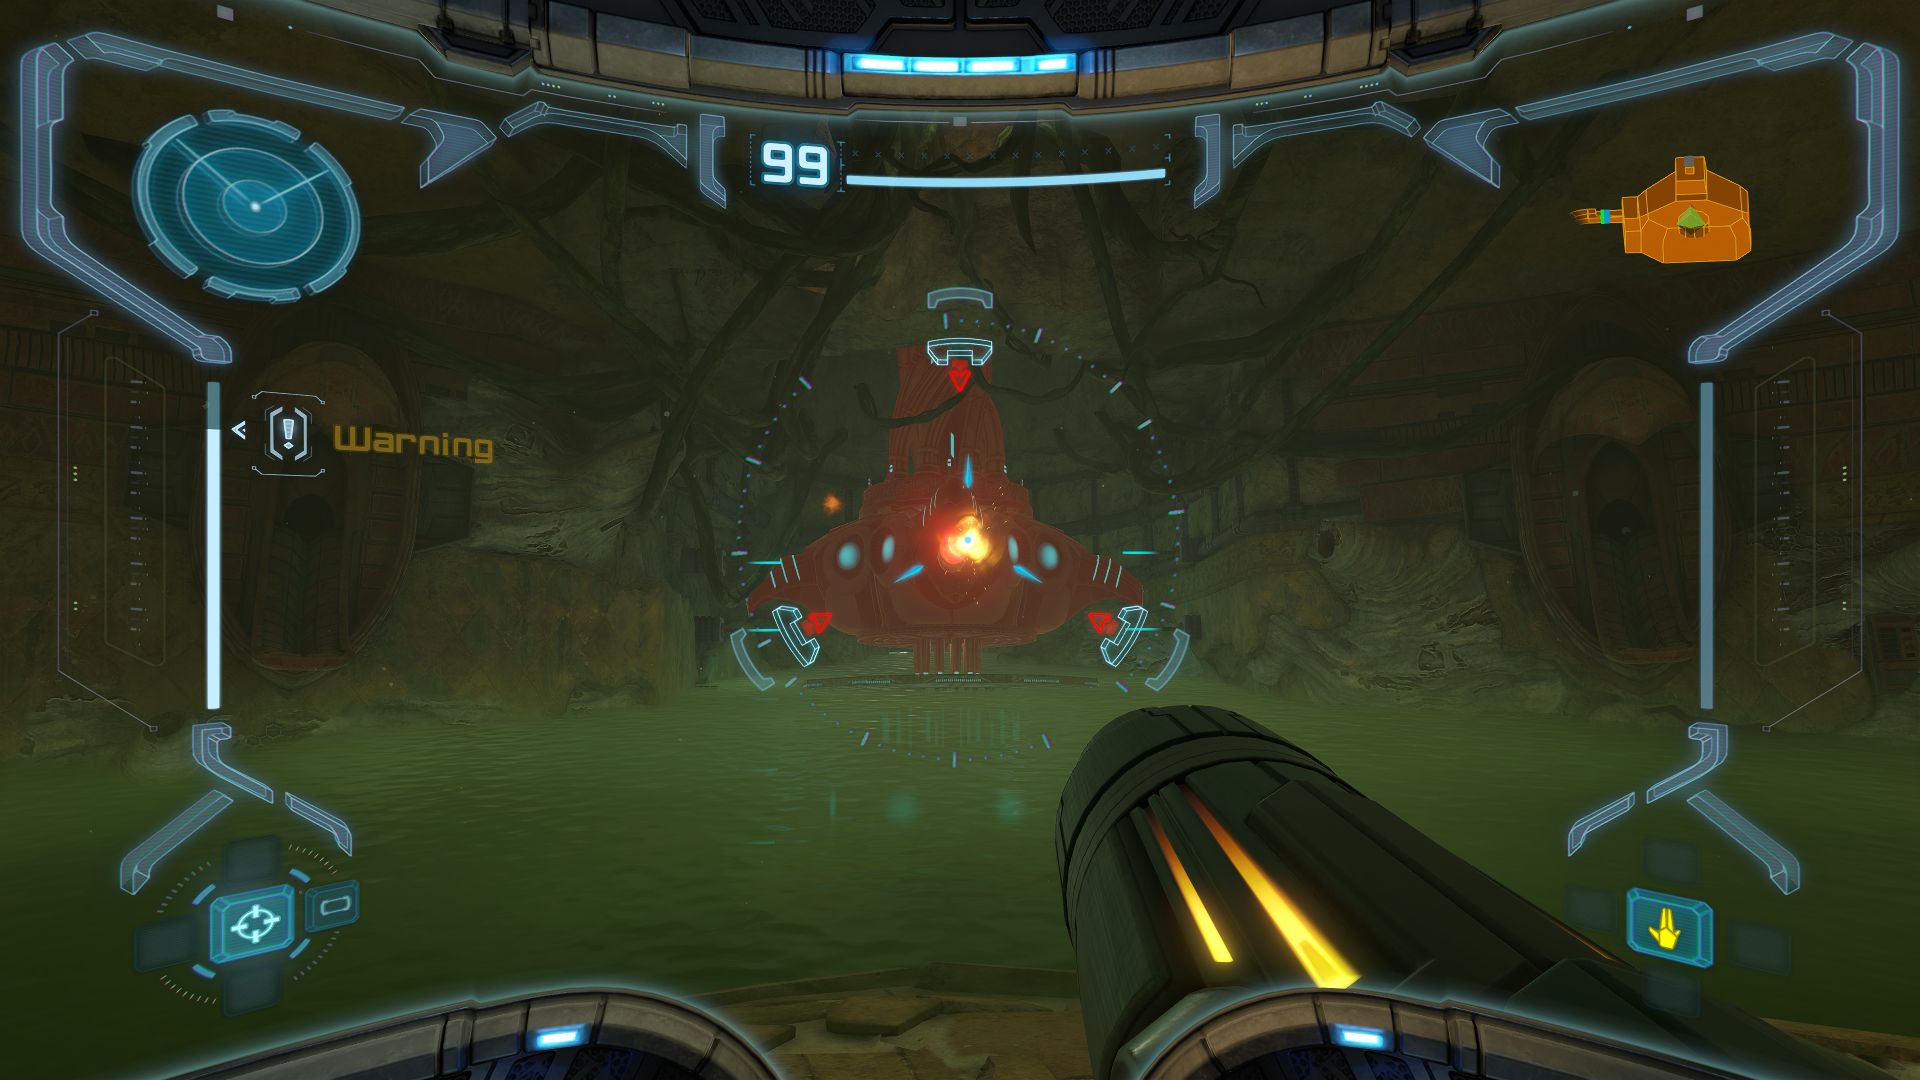
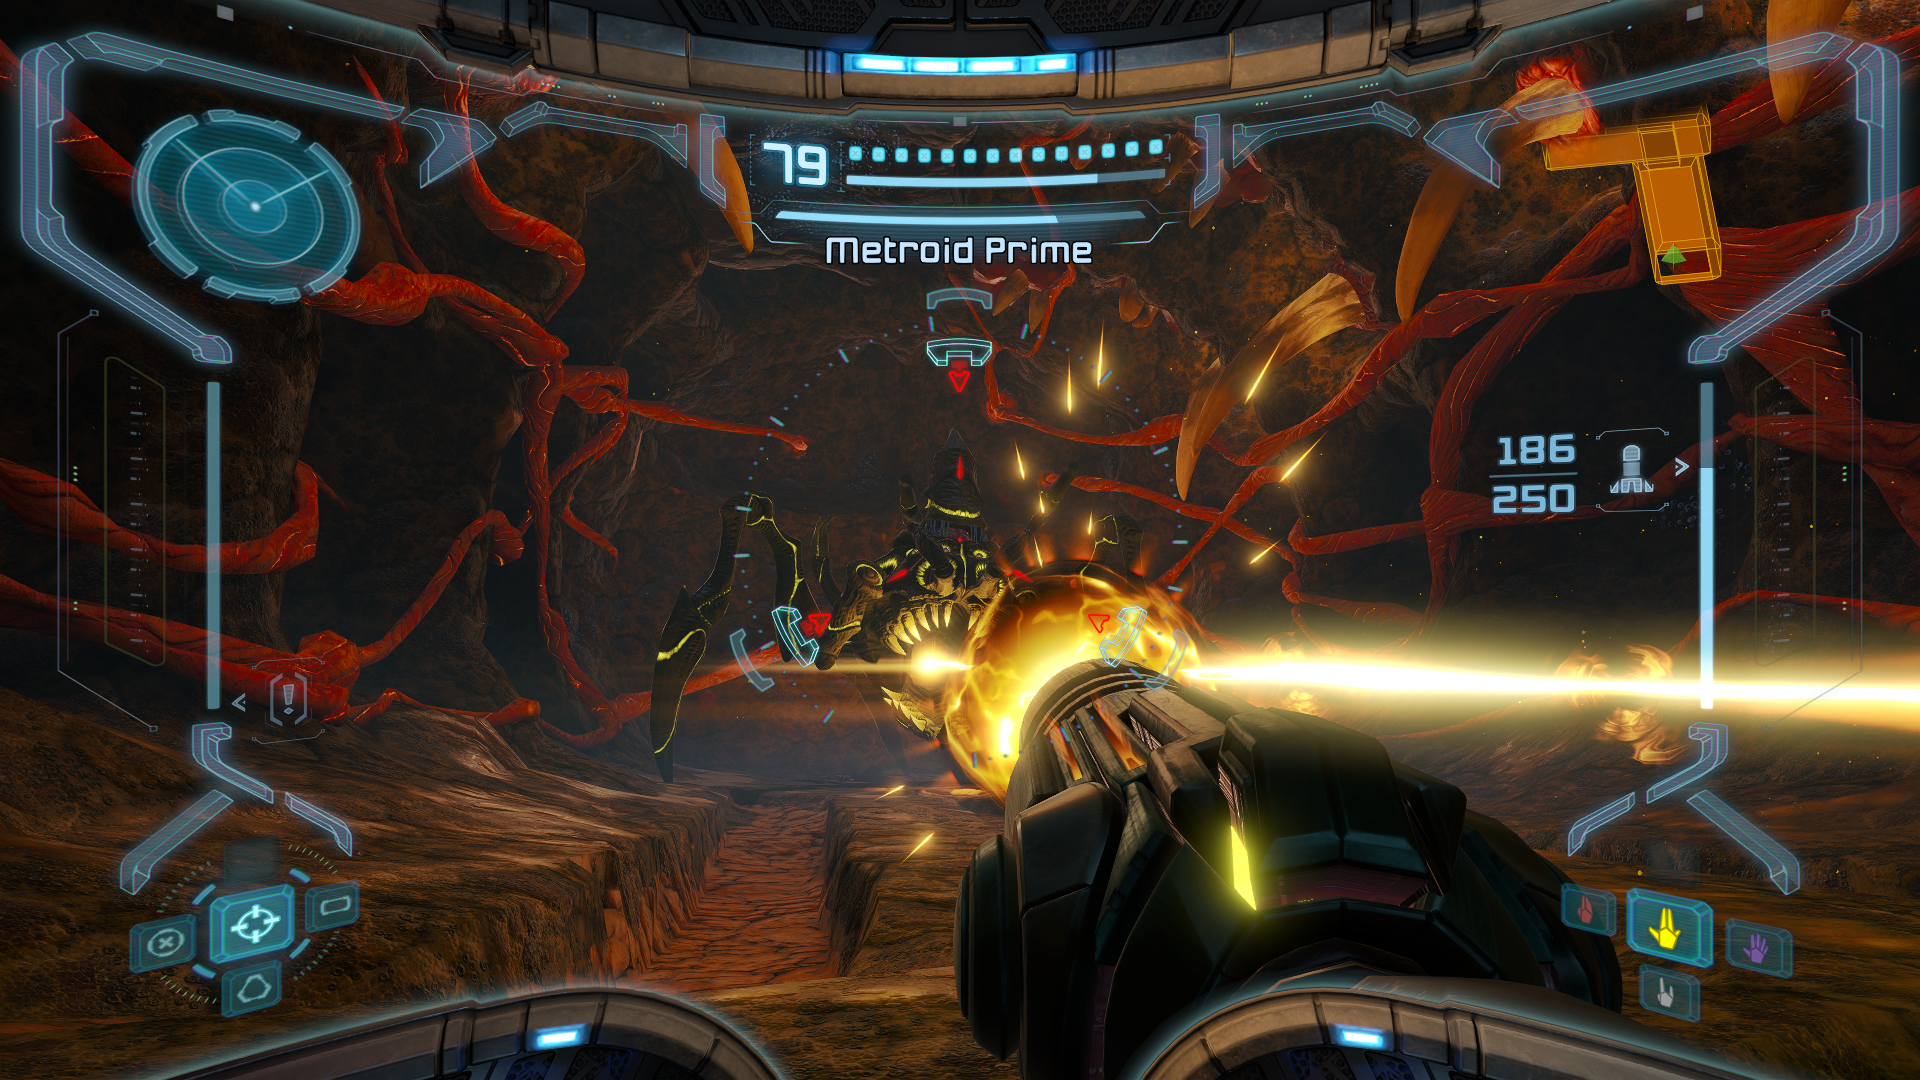
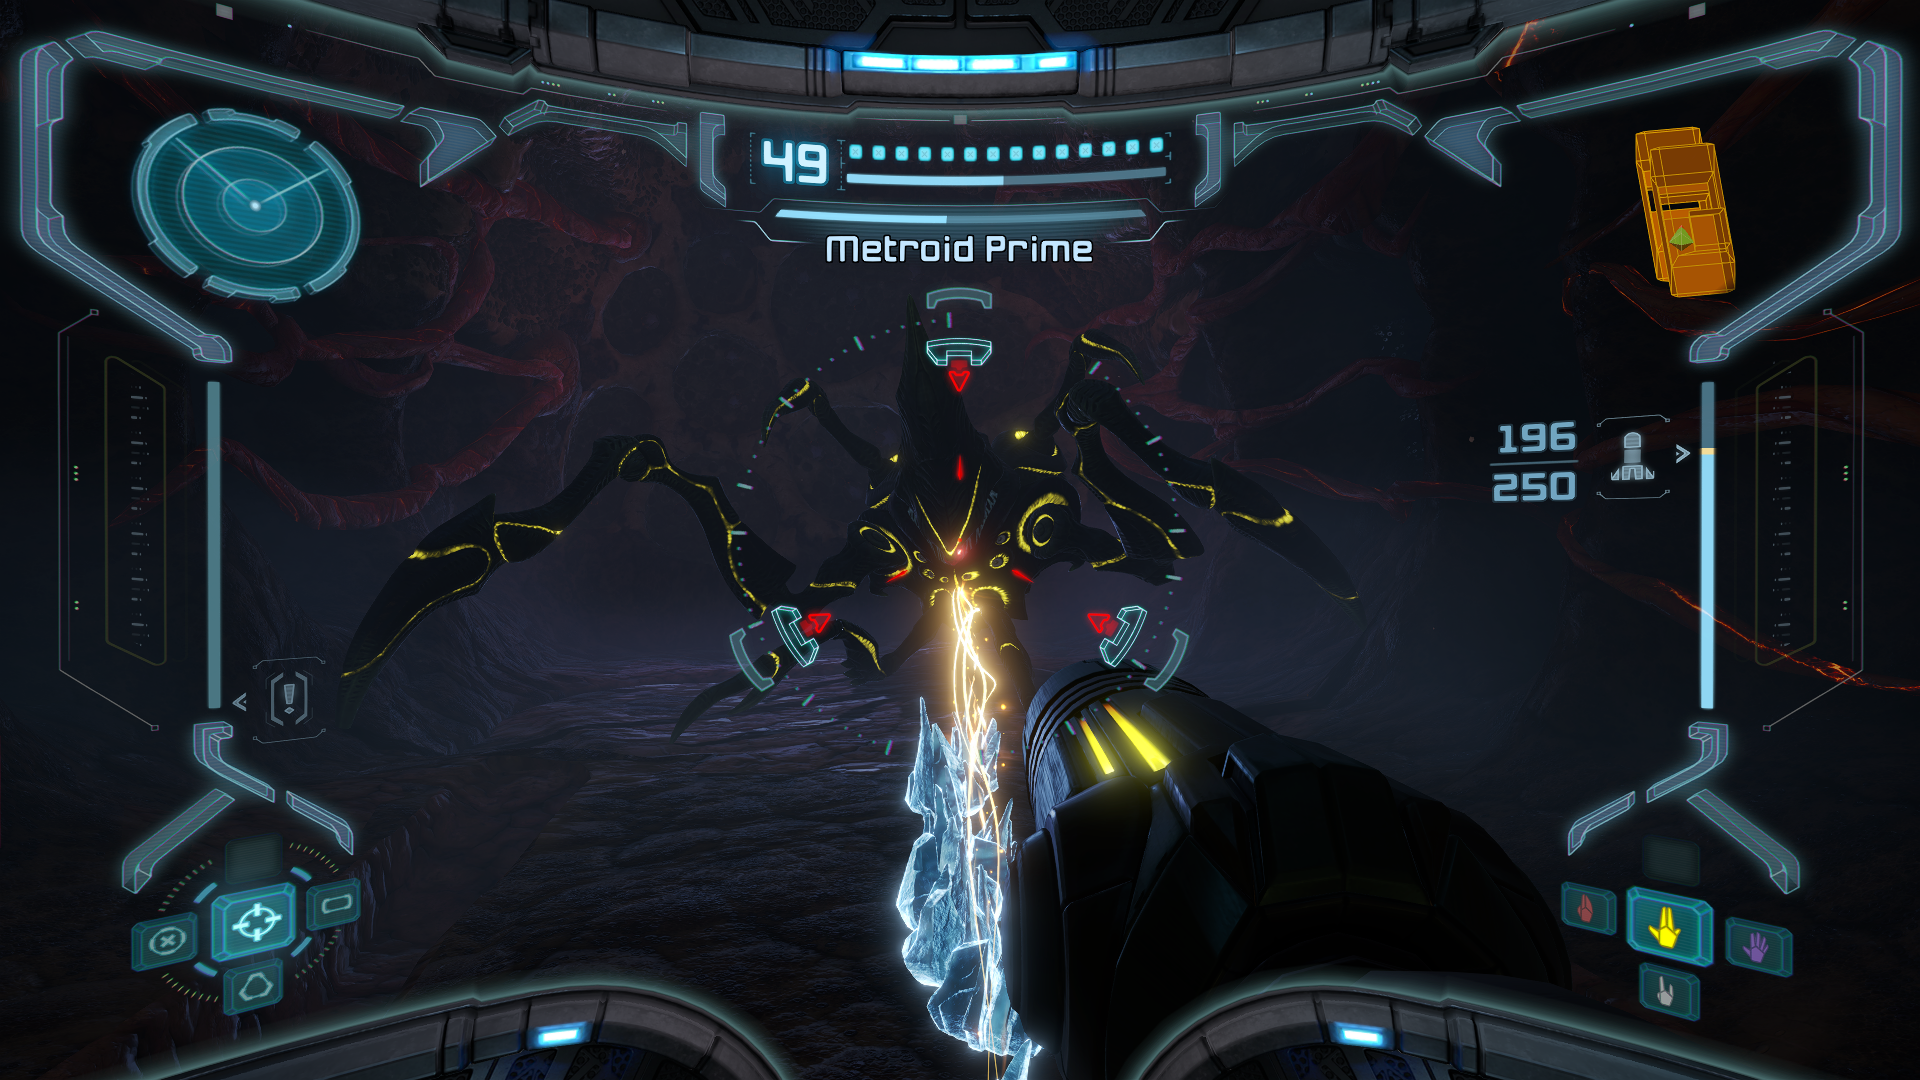
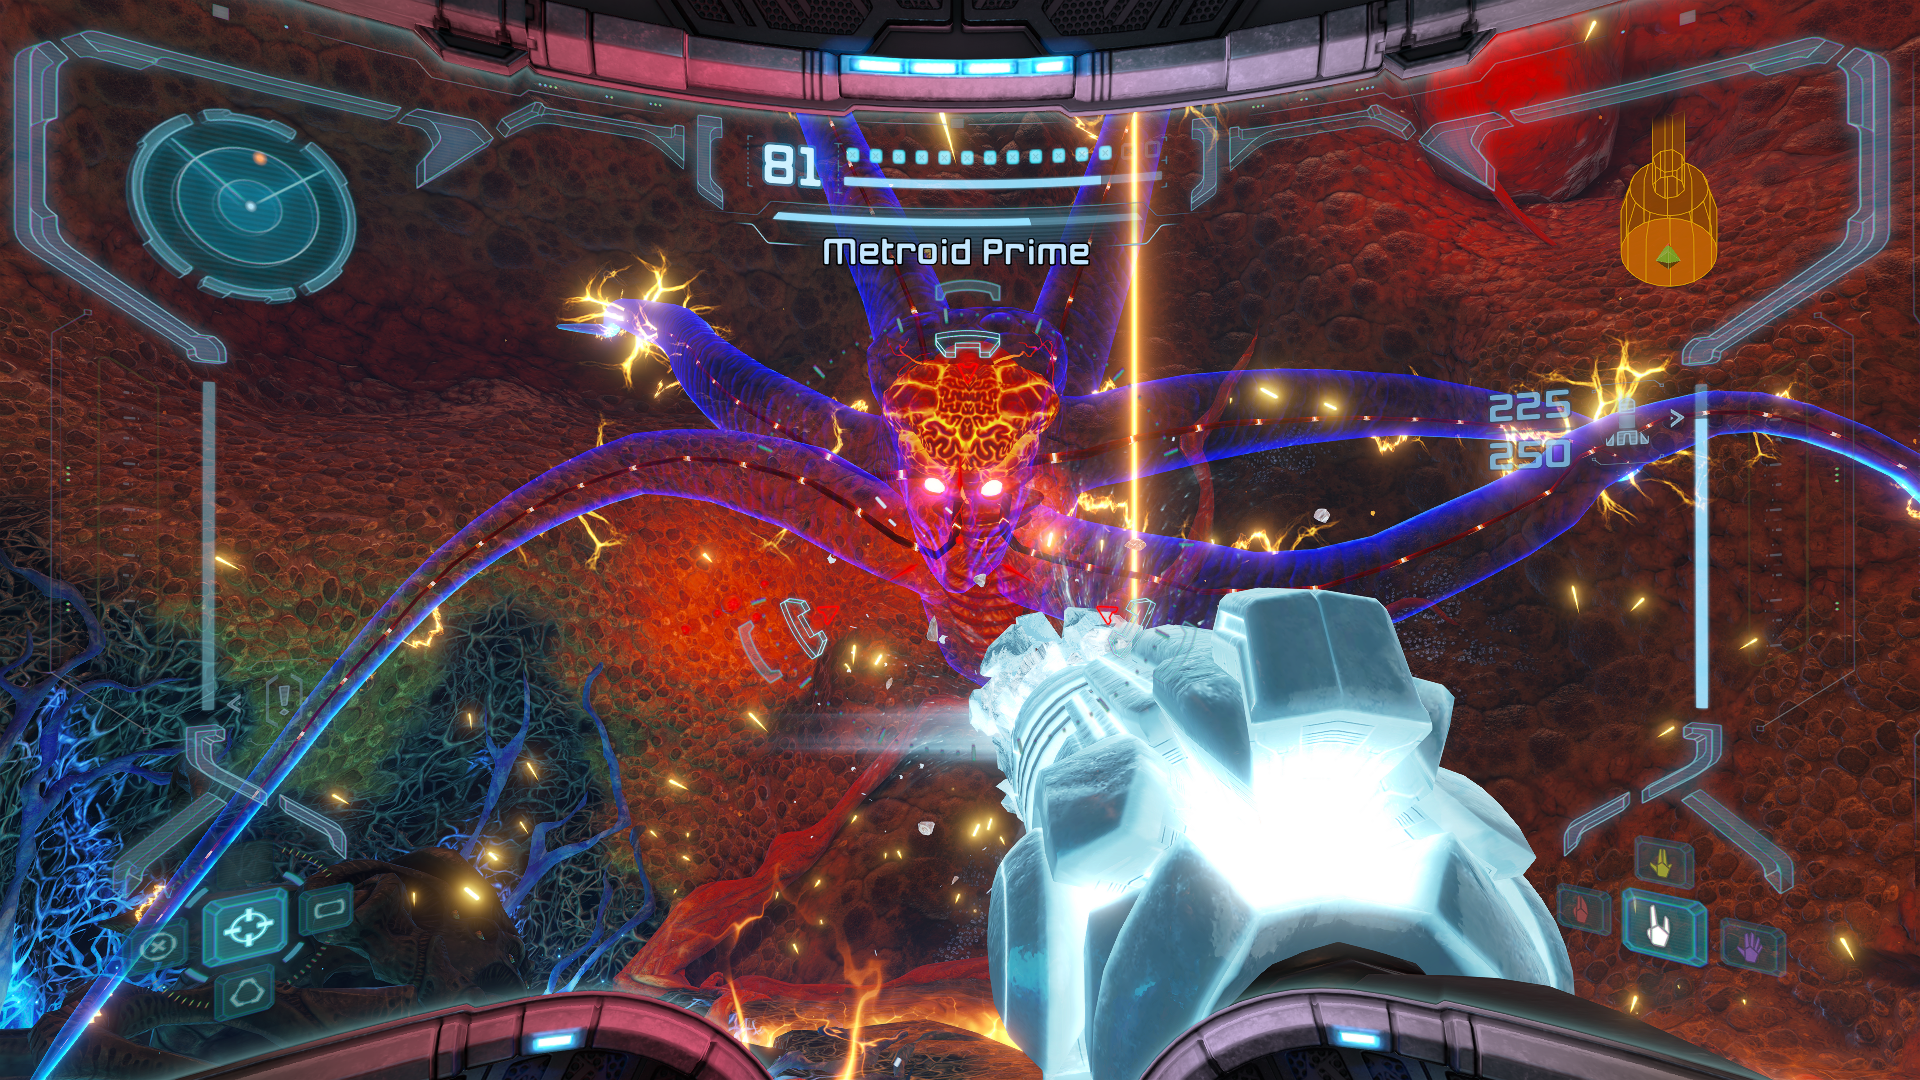
You’ll run after Metroid Prime as it burrows deeper and deeper into the Impact Crater. As always, make sure you scan METROID PRIME. You’ll need to pay special attention to the color of Prime’s body; it will change weaknesses throughout the fight, with the color corresponding to which Beam you’ll need to use to damage it. This should be obvious by now, but Yellow = Power Beam, Purple = Wave Beam, White = Ice Beam, and Red = Plasma Beam. It’s important to note that, for example, if Prime is Yellow, you can use not only your Power Beam, but your missile combo. You’ve acquired all these missiles, and now is the time to let them fly.
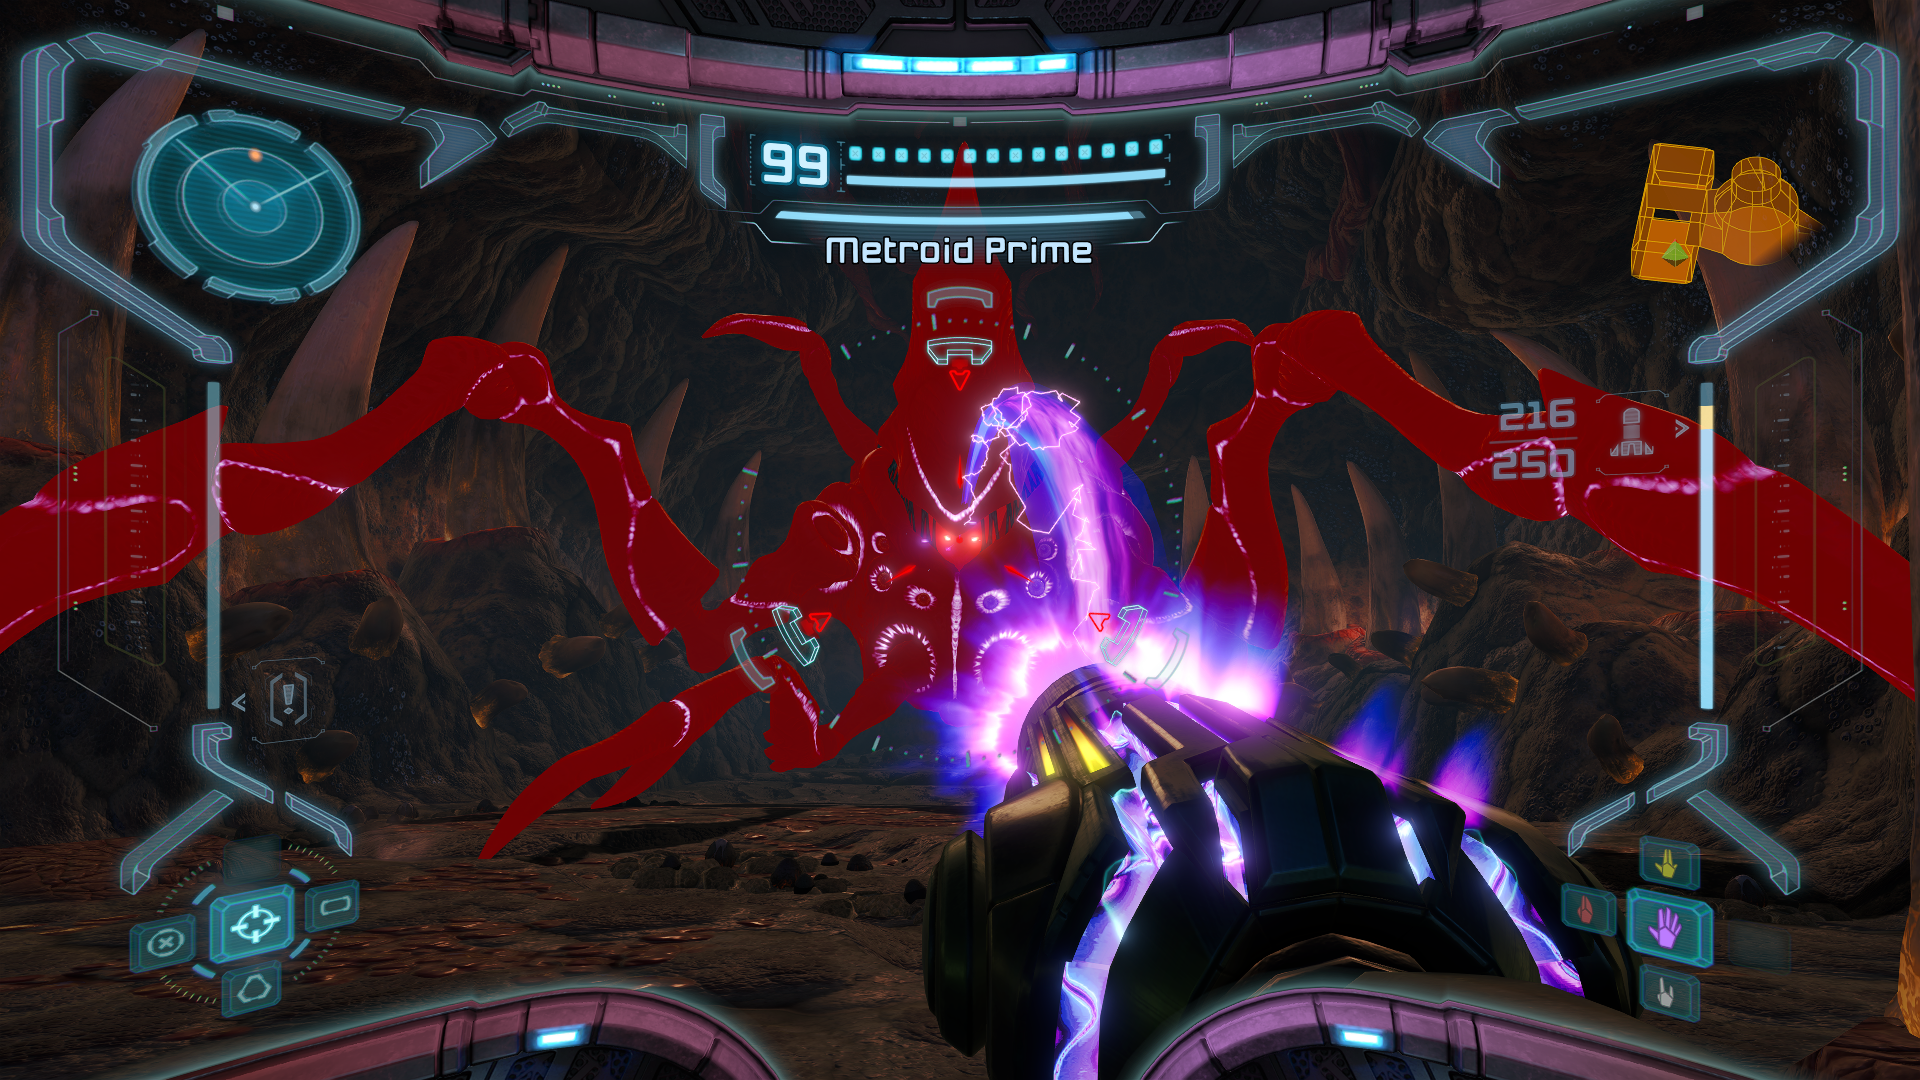
I would recommend target locking Prime and continually jumping, strafing, and moving around. Prime has an abundance of attacks depending on its form, but most can be avoided if you’re moving around. Even so, let’s run down a few of the attacks that will be coming your way.
Firstly, as if it wasn’t painfully obvious by the ginormous, hulking frame of this abhorrent creature, but getting into a fist fight with Metroid Prime is strongly discouraged. Keep as much distance as you can, because Prime’s melee attacks hit mega hard.
Second, there will be some variation of a laser beam that Prime will shoot out, no matter what form you’re in. Similar to Ridley’s laser breath, you just want to sidestep this as best you can. Prime will also shoot out multiple acidic missiles, again, similarly to Ridley, so step aside when those start to fly as well. Be careful of the poisonous residue they leave behind.
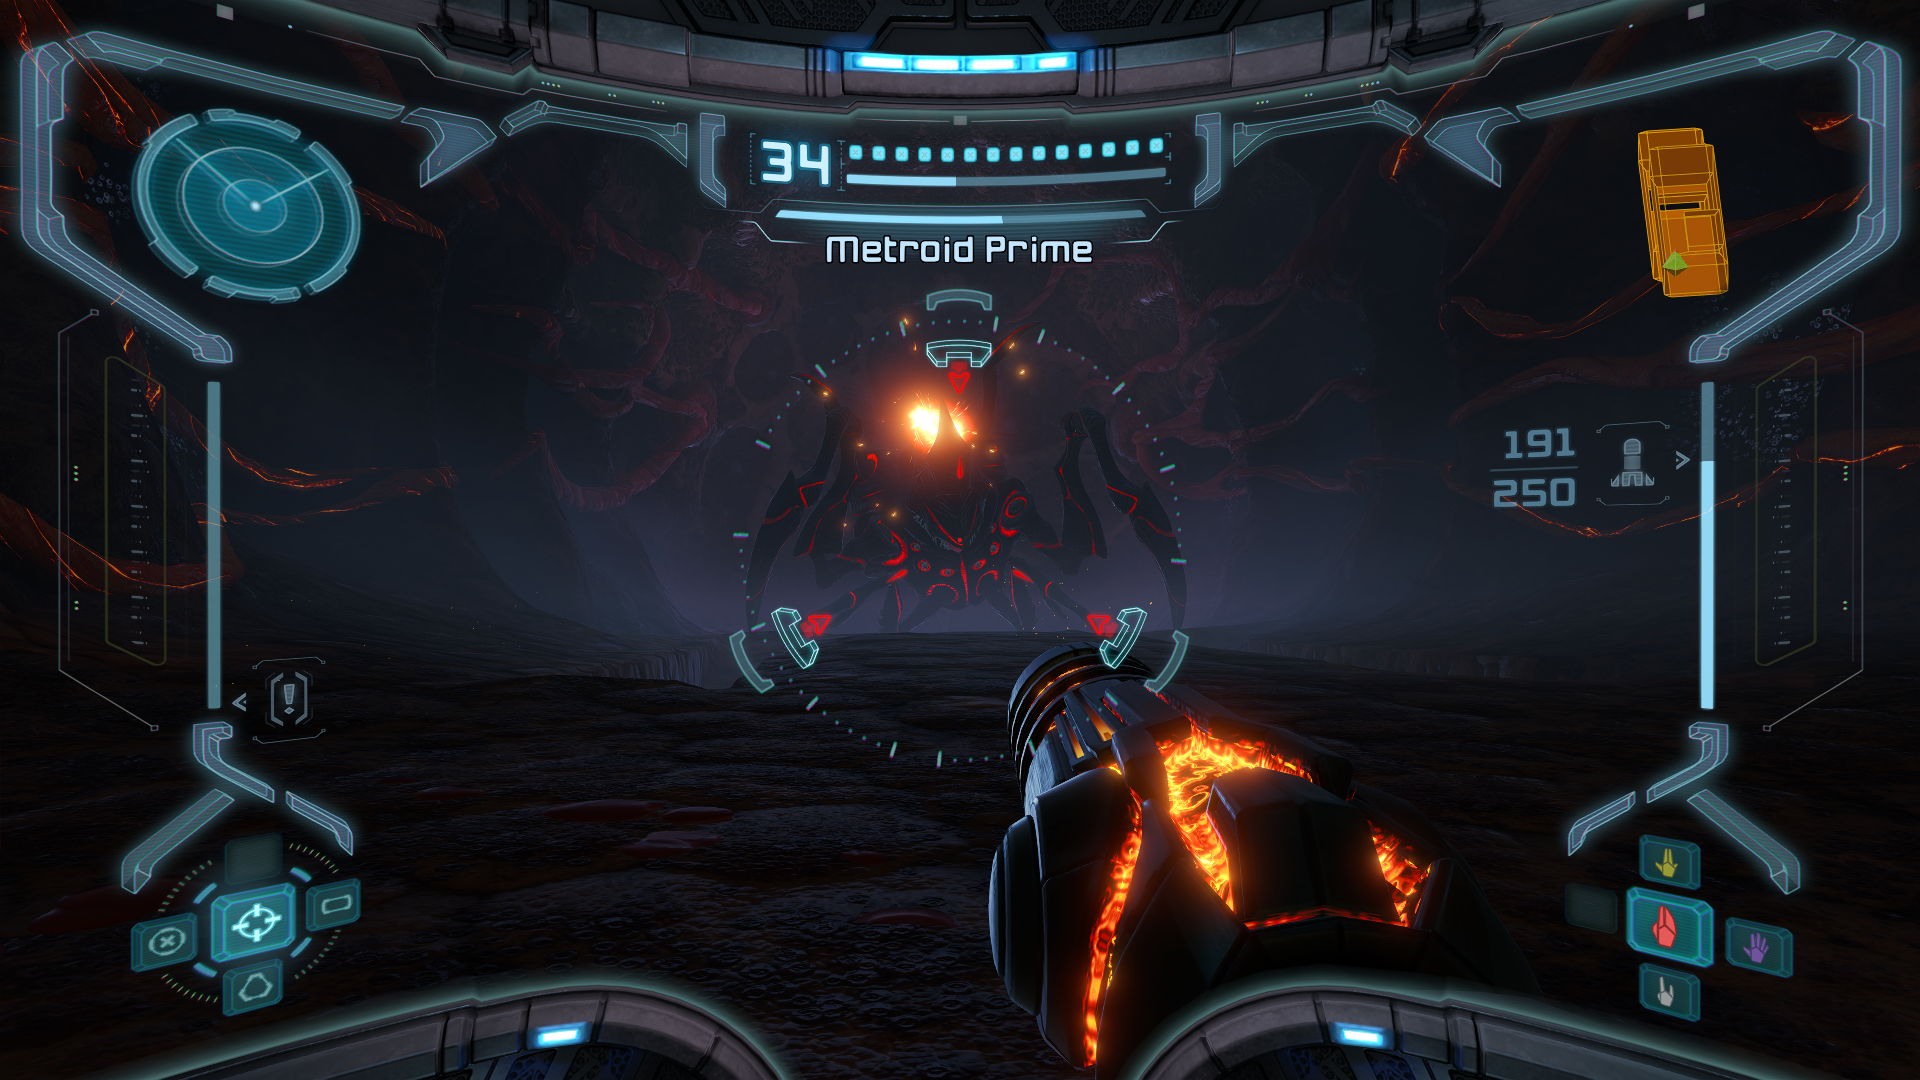
Metroid Prime also has some color specific attacks. When it’s Purple, there will be a pulse wave that will disrupt your Visor functions; when White, Prime will shoot its frigid breath at you, freezing you.
Once you’ve damaged Metroid Prime enough, it will retreat to the lower level. When you follow, you’ll see that there are rivets in the ground. Use them! When Prime takes enough damage, it will recoil and then start to charge straight towards you. Get into Morph Ball form and roll into the rivets to get to the other side. Prime will stampede right over top of you; be careful not to be too fast though, since its back legs can still do pretty heavy damage if they clip you.
Eventually, Prime will also start shooting out two balls of energy that will correspond to whatever color the mutated Metroid happens to be. These are actually pretty welcome, since they move slowly and drop health and ammo once destroyed. Just don’t forget to shoot them!
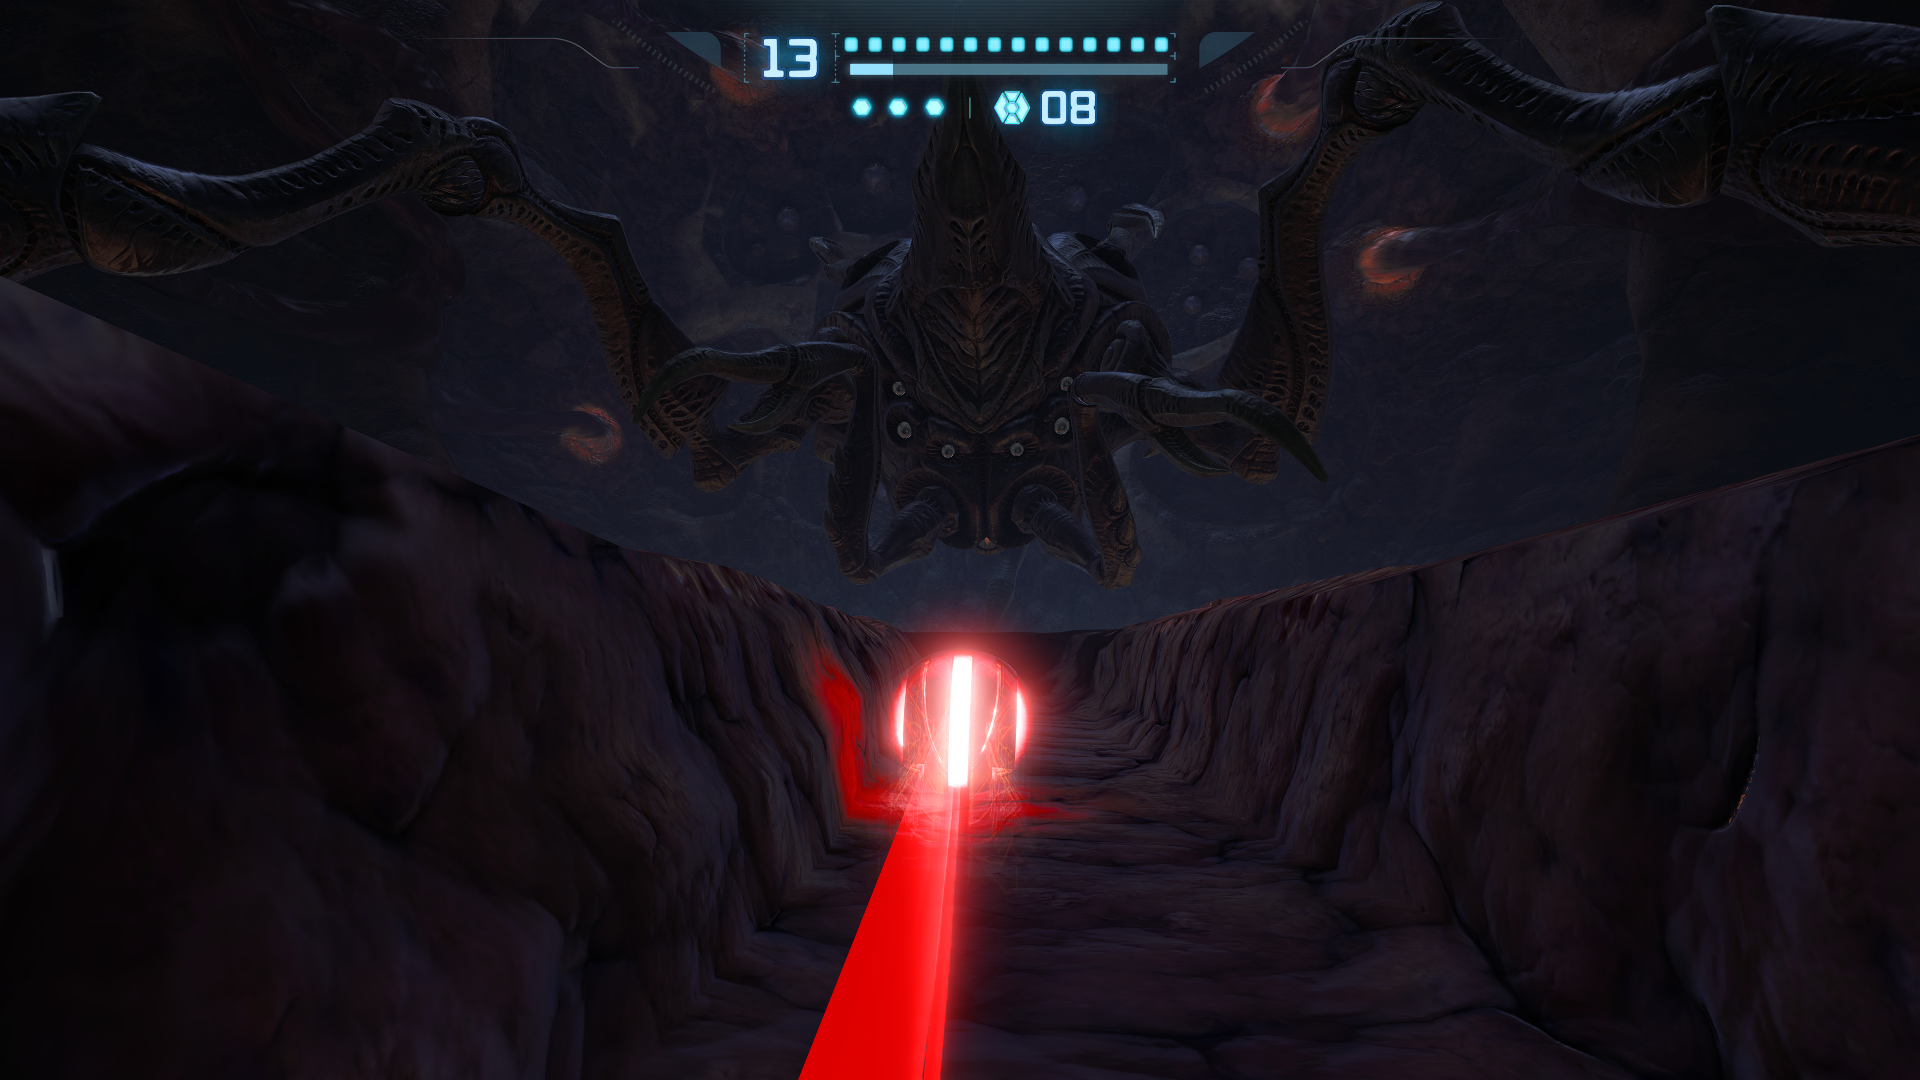
There’s even more attacks in Prime’s arsenal, unfortunately, and the lower on health Prime gets, the more desperate it becomes. Probably the single worst attack that Prime will bust out is its Snare Beam. This will entrap you and pull you towards the head of Prime, with a switch clothesline waiting for you if you don’t escape. Escaping is tough too, since the only way out is to Morph down and use your Boost Ball to get away. This is tricky, but doable. Luckily, Prime uses this attack more sparingly than others.
Metroid Prime hits devastatingly hard, but keep moving and strafing. As its health lowers, Prime will become more sporadic with how often it changes color and how soon it lunges from side to side. Remember, missiles are worthless after this fight, so let the Super Missiles fly, and don’t be afraid to use the Wavebuster and Ice Spreader too (I’ve found the Flamethrower isn’t very effective).
Continue to avoid its attacks and just keep hammering it with everything that you’ve got, and eventually, you will send Metroid Prime to the depths of Tallon IV. Don’t get too comfortable yet, though – this fight is far from over.
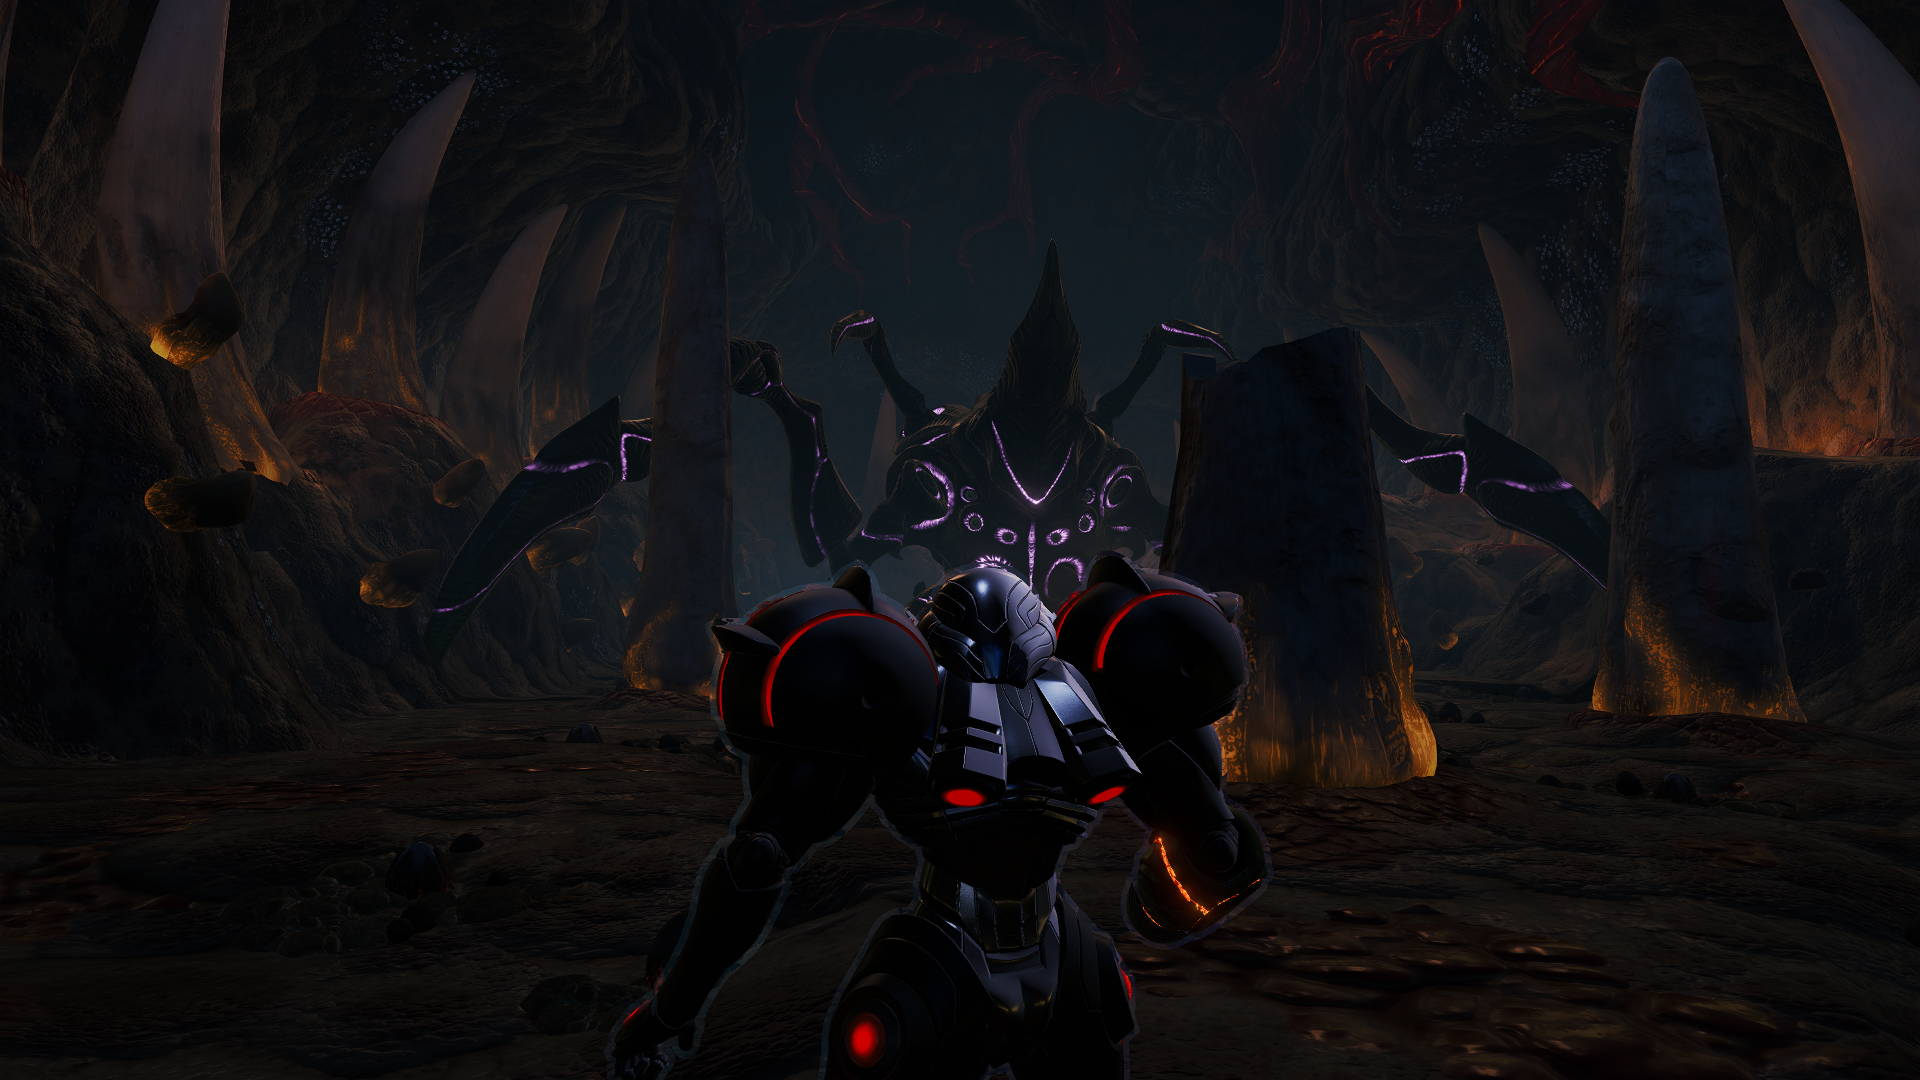
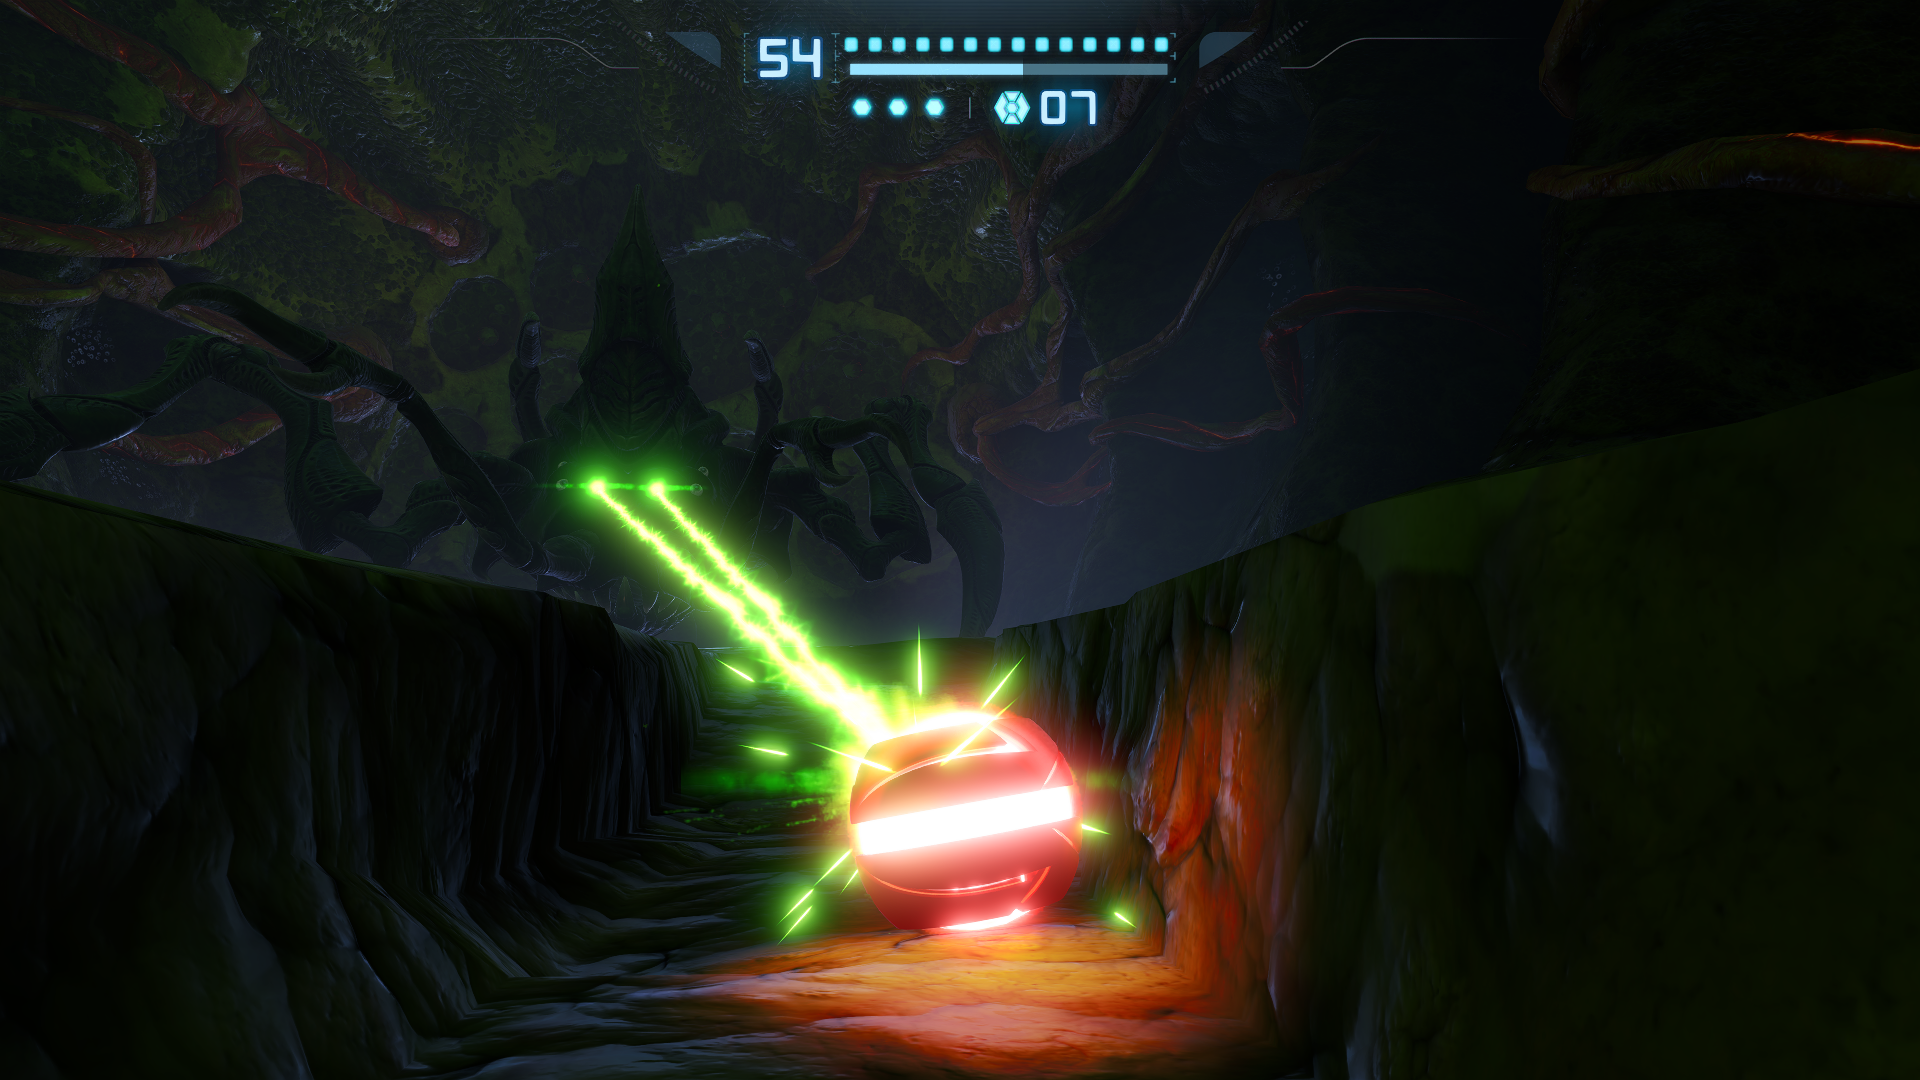
Metroid Prime (Core)
Finally. The final battle.
Emerging from the destroyed husk of Metroid Prime is a new evil – the core essence of Metroid Prime. This entity is entirely made up of pure Phazon, so don’t worry about using your beams or missiles to do damage – they’re no use here anymore. The only thing that can kill this monstrosity is Phazon itself.
Before we do anything, make sure to scan METROID PRIME (CORE), the final creature entry needed to 100% your logbook! This battle is actually not as tough as the first phase in my humble opinion, but that doesn’t mean we shouldn’t proceed with caution.
The Core really only has one offensive attack, which is a ground pound shockwave, similar to the Elite and Omega Pirates. This is simple enough to jump over; just don’t get cocky and forget! Similarly to the first phase, it’s good to keep your distance from Prime, since close quarters combat will still have you taking some major lumps.
Jump over a few shockwaves and eventually, Prime will create a pool of Phazon on the ground and disappear. Rush over to that pool of Phazon; when standing on it, you’ll enter Hypermode and be firing off beams of pure Phazon. These beams are the only thing that can damage the Core. Switch to either your Thermal or X-Ray Visor and lock on to Metroid Prime; as soon as you see it, fire and keep holding until.the Phazon runs out! Prime will freely switch its visibility, so keep your fingers on the visor switch and be ready to change visors at a moment’s notice.
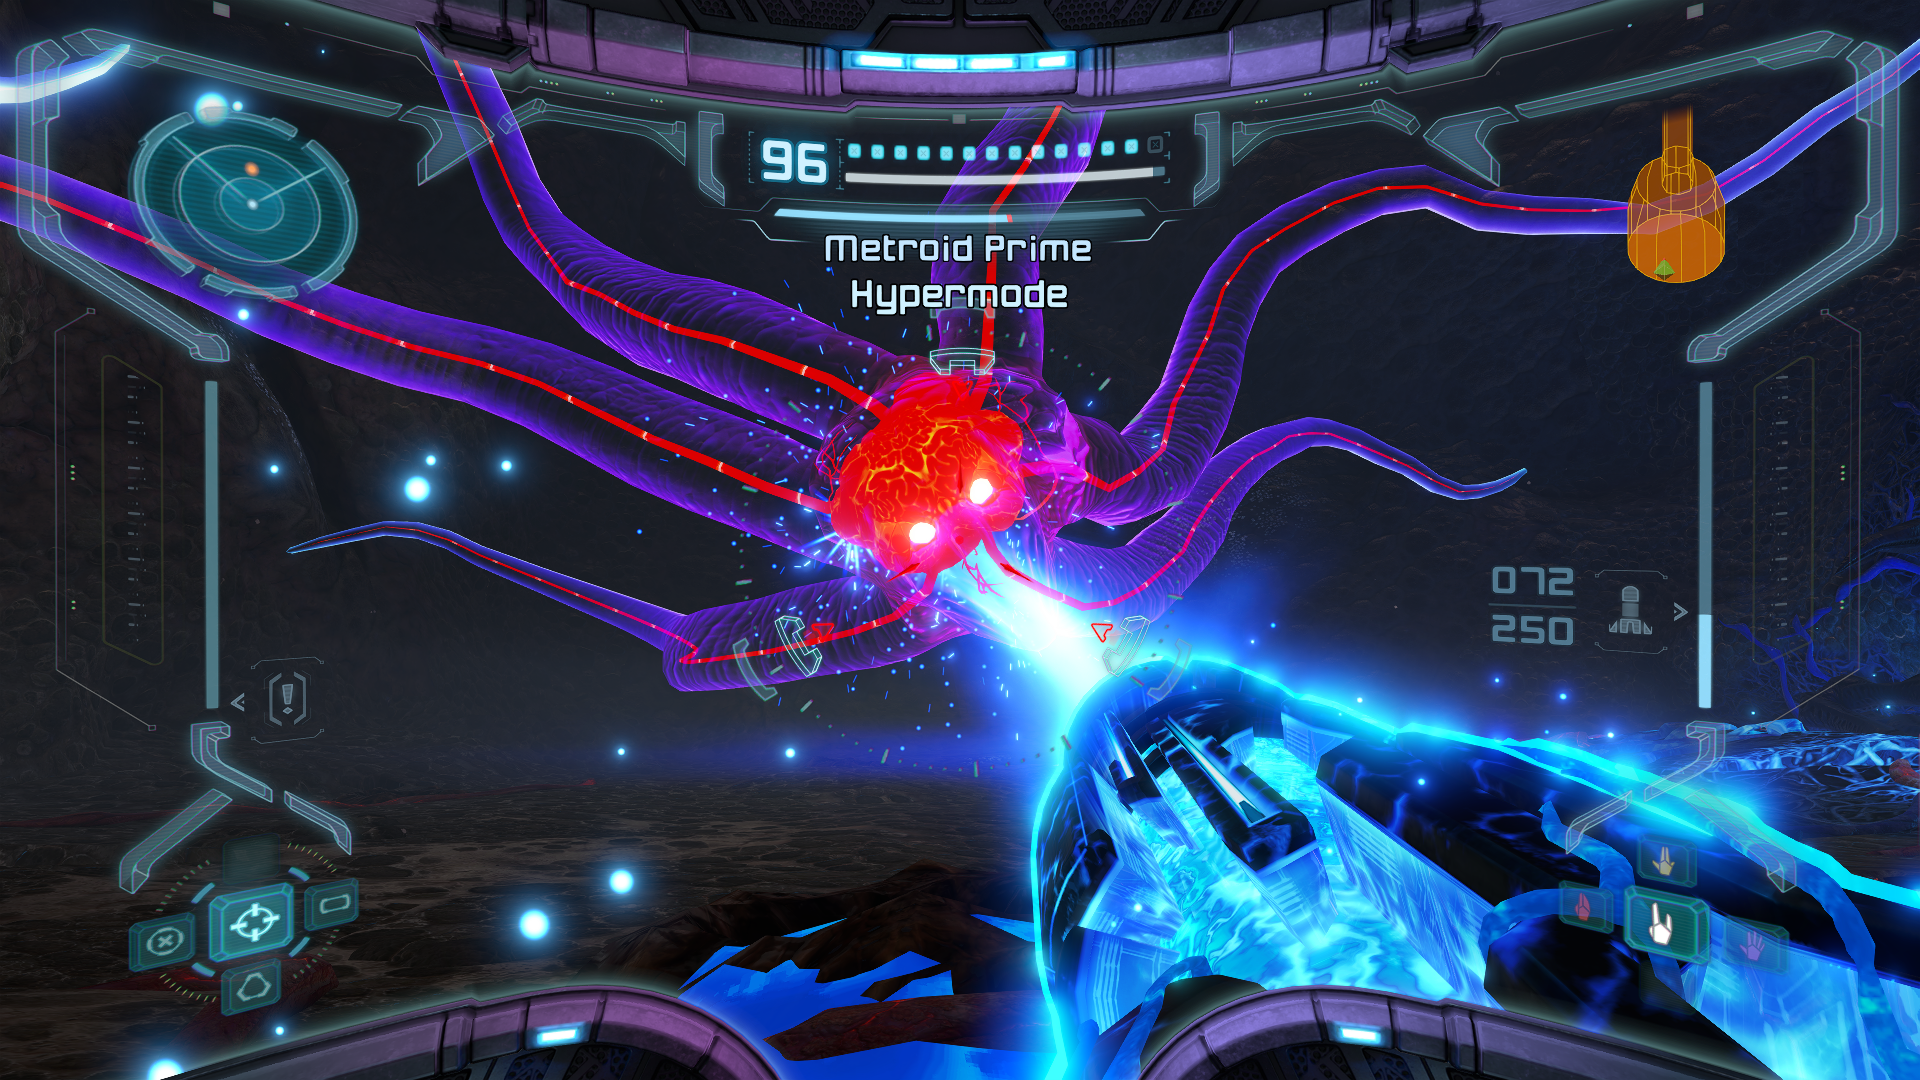
Once the Core reaches about 75% health, it will start summoning Metroids when it creates the Phazon pools. It will start off by summoning Tallon Metroids, introducing Hunter Metroids into the mix as more health is drained and bringing in Fission Metroids as well when its health is critical. Use charged Plasma Beam shots for the Tallon Metroids and the Ice Beam + Missile Launcher for Hunter Metroids. When Prime starts summoning Fission Metroids, you can either lay a Power Bomb to destroy them or race to the Phazon pool and use your Hyper Beam to get rid of them. Do not engage in a regular Beam fight with them, as it takes too long and is too distracting.
That’s really all there is to it. Avoid the shockwaves, destroy the Metroids as soon as they appear, and keep attacking the Core with your Hyper Beam. The Core of Metroid Prime will be destroyed and you will have officially beaten Metroid Prime the game. Congratulations!