Metroid Prime Walkthrough – The Ruins Come Alive
WALKTHROUGH
- Frigate Orpheon
- Planet Tallon IV
- The Ruins Come Alive
- Fire & Ice
- Phazon Laboratory
- Ghosts & Gravity
- Space Pirate Assault
- The Entrusted One
- Artifacts in the Wild
- The Great Poison
Bombtrack
Scans in This Section
Chozo Lore: Purification
Creatures: Shriekbat, Reaper Vine, Venom Weed, Stone Toad
Research: Locked Door *missable*
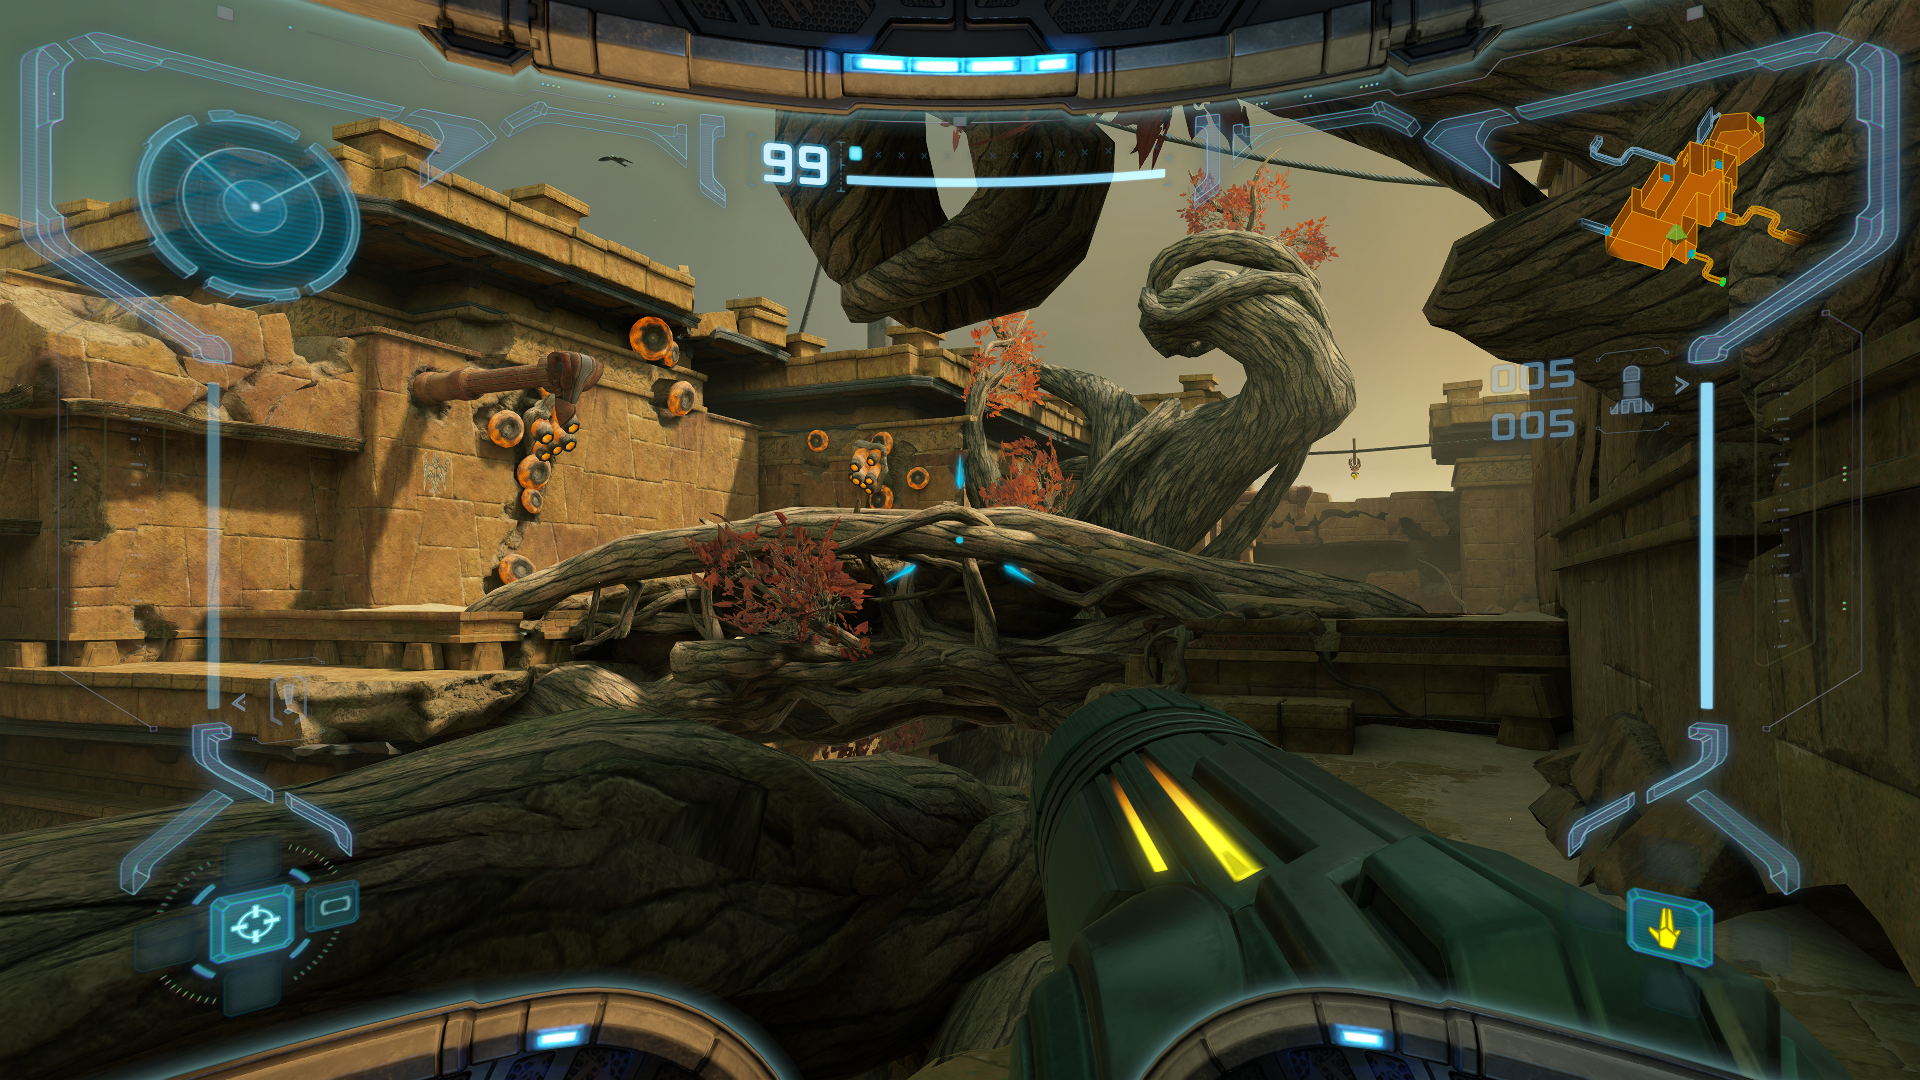
After arriving at the Chozo Ruins, go to the Main Plaza and make your way up to the door leading to Ruined Fountain Access. The path to get there begins near the door by Nursery Access. At the Ruined Fountain, scan the Chozo Lore, “PURIFICATION”, located just behind, appropriately enough, a ruined fountain. Enter the Arboretum Access and SLOWLY turn the corner leading into the hallway. On the ceiling opposite of you is a pack of SHRIEKBATS. Scan them while they’re still docile – it’s much harder to get the scan when they’re dive bombing you. In the Arboretum, scan the REAPER VINE directly to your left as well as the VENOM WEEDS just above that. Reaper Vines can’t be destroyed with our current weapons, but we can force them to retract back into the walls by shooting them in the eye (seems a bit excessive if you ask me). With this in mind, make your way around the large tree until you reach the Blast Shield. Pop it off and move forward.
At the Gathering Hall, destroy the Blast Shield to your right to gain access to a Save Station. Do your business and then climb up the room dealing with a combo of Blastcaps and Shriekbats until you make it to the top. After entering the Energy Core, scan the LOCKED DOOR on the other side of the room. These are usually only active during combat encounters, so this is a great time to get that scan in when you don’t have other priorities to worry about. Take the left path, but just before entering the Morph Ball tunnel, look right and scan the STONE TOAD off to the side. Don’t worry, he’s just vibing! Enter the Burn Dome and get ready for another mini boss!
Incinerator Drone
Scans in This Section
Creatures: Incinerator Drone *missable*, Barbed War Wasp *missable*
The Chozo left us another present behind – a mechanism called the INCINERATOR DRONE. The drone is a stationary, upright machine with a couple of “arms” attached to it that spew out flames. Scan it, and the drone will now start to rotate, bringing a whole new meaning to the phrase ‘ring of fire’. Dodging its flamethrowers is easy enough, as you can roll under the fire, but just be alert – occasionally the arms will be angled diagonally, with the overhead one not hitting you at all and the underhand one needing to be jumped over. Eventually, the Incinerator Drone will reveal its “head” (read: weak spot) out of the kindness of its programming for you to shoot at, so blast away!
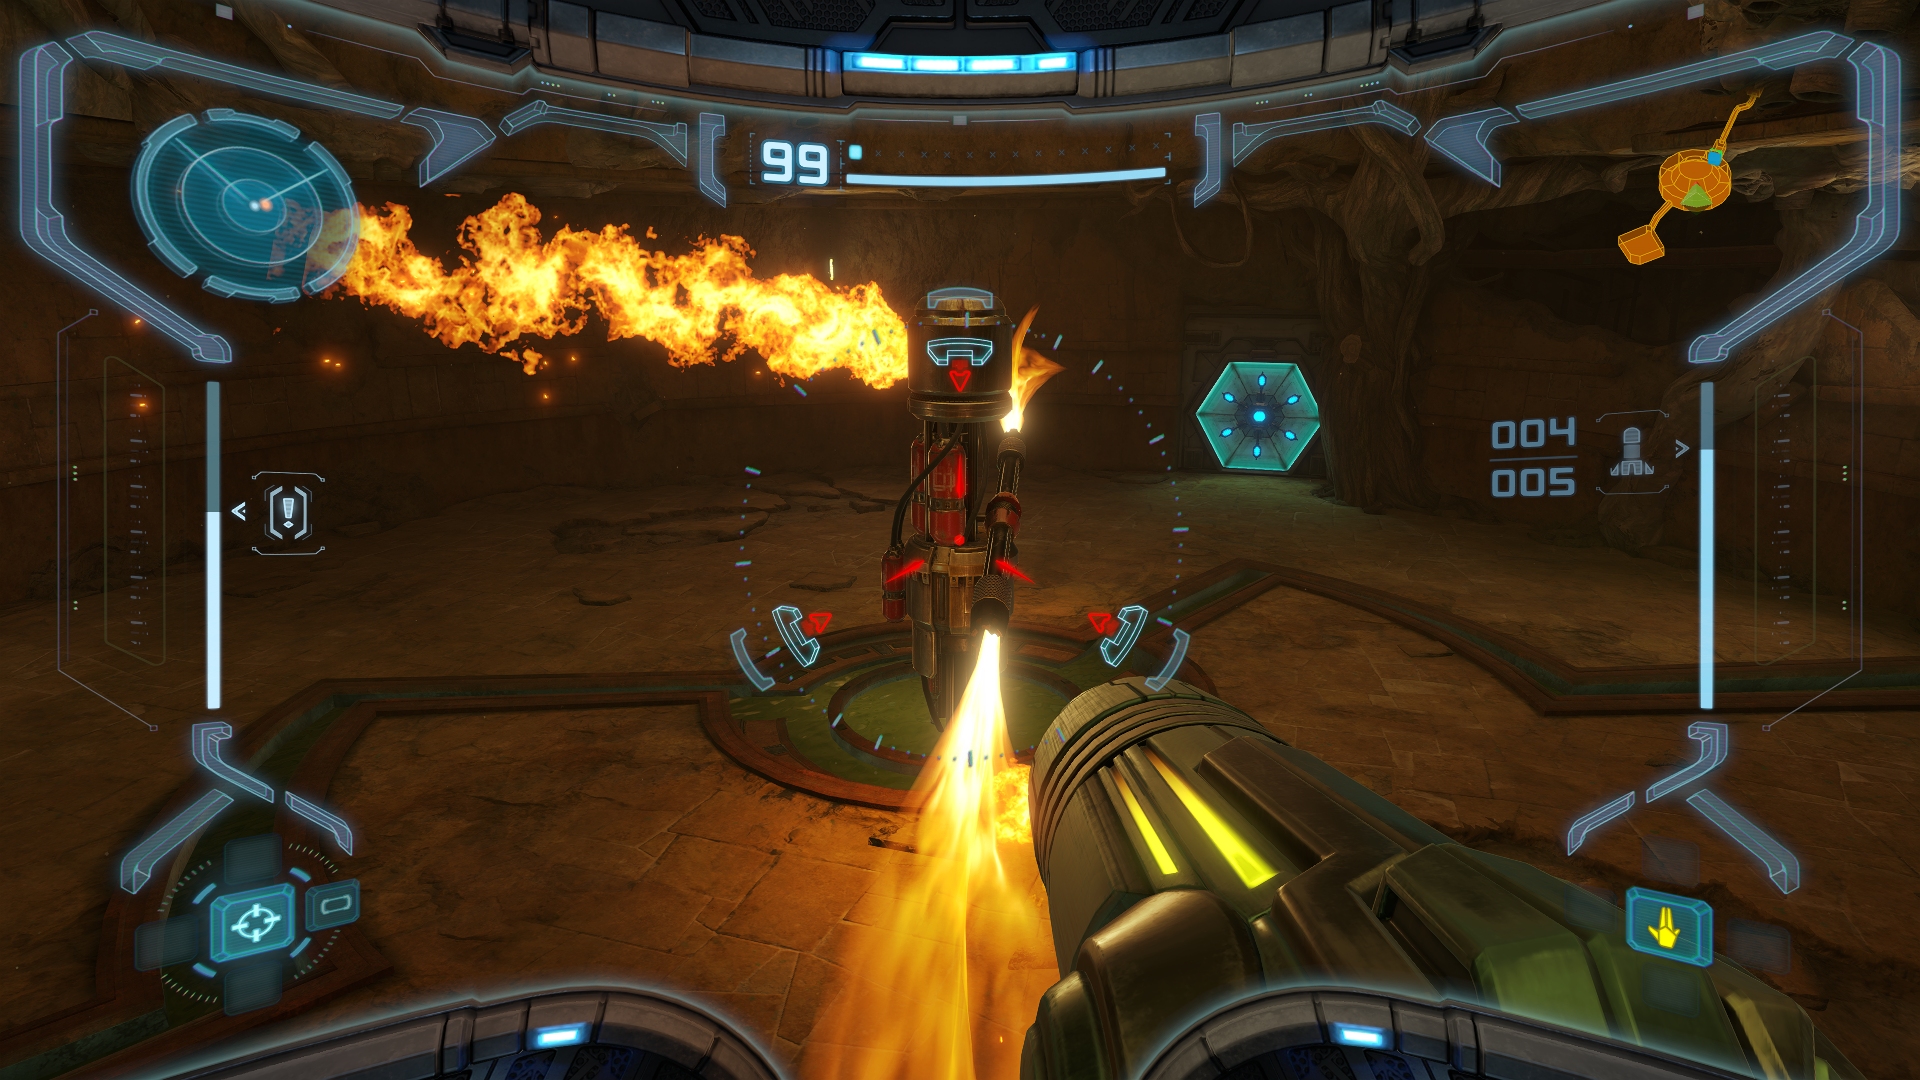
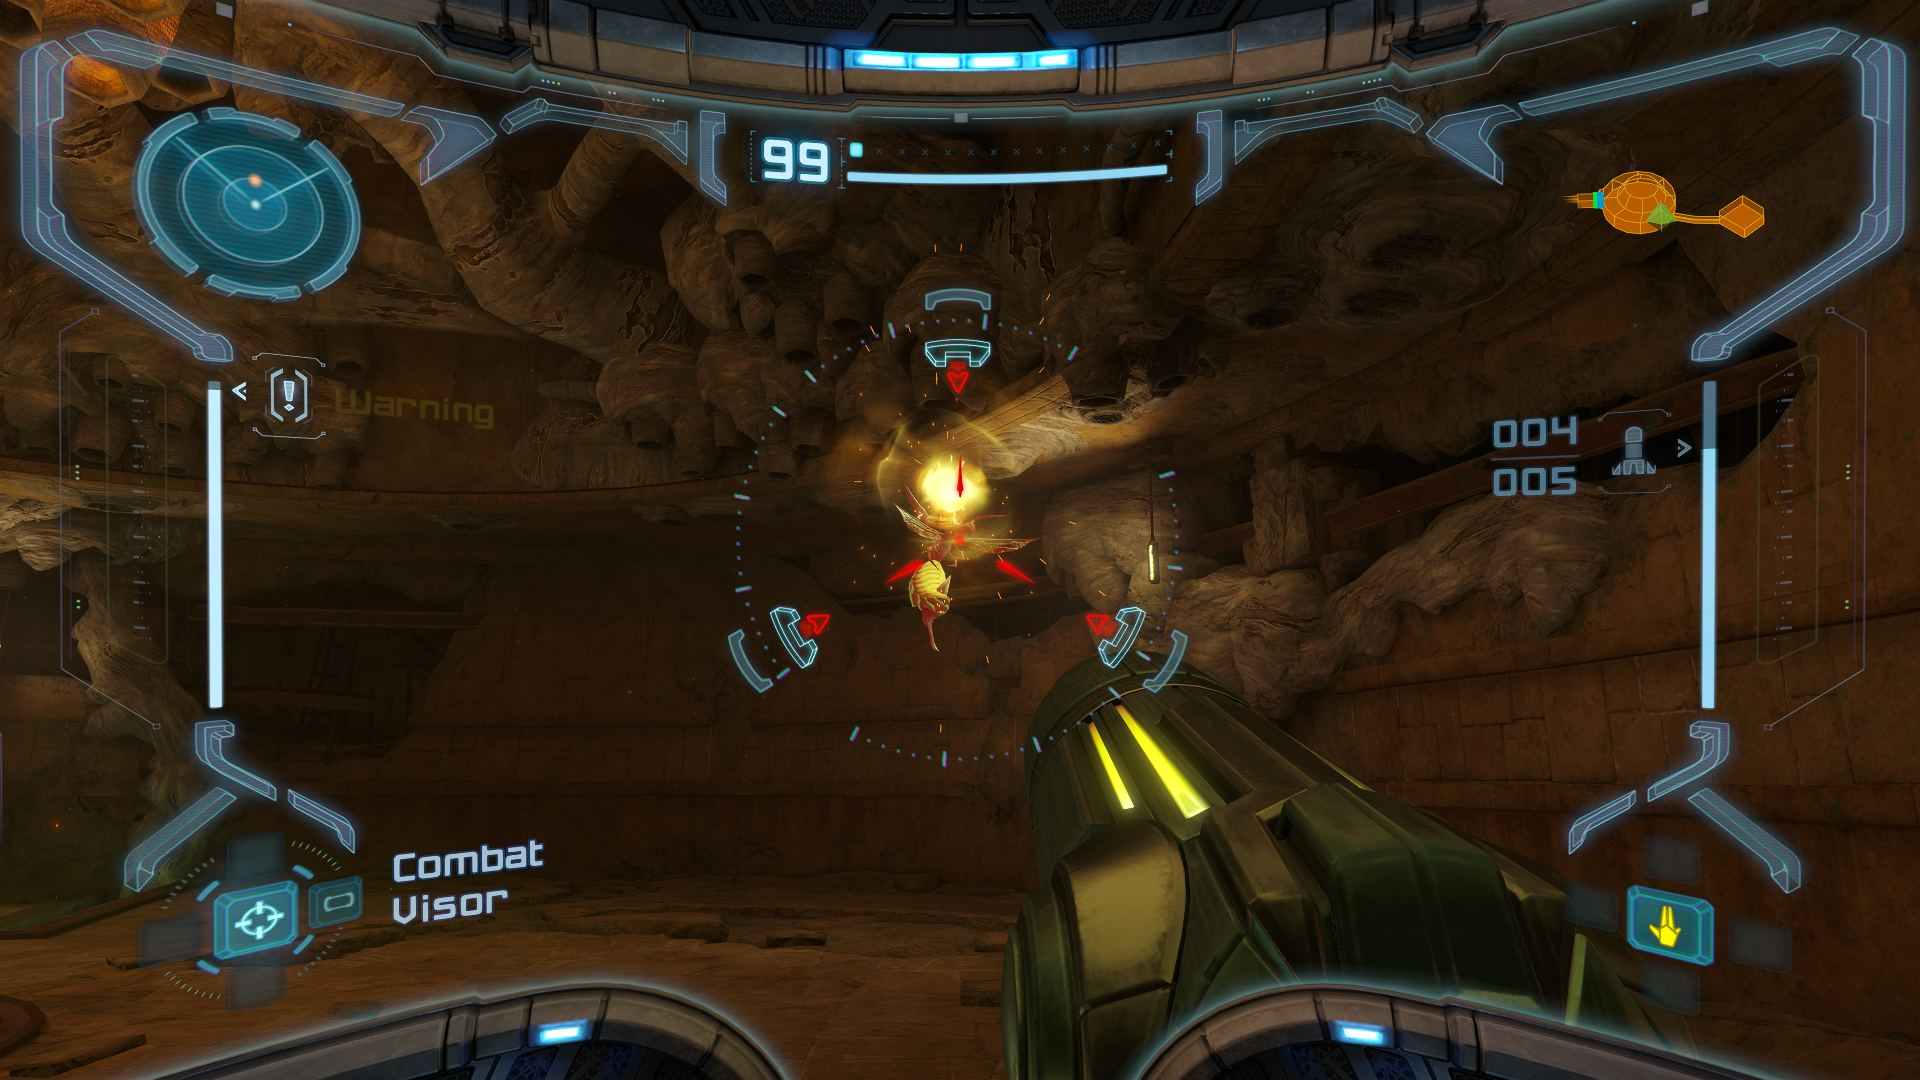
After enough damage, the Drone will glitch out and shoot one of its flamethrowers up at a nest of BARBED WAR WASPS, leading these wasps to leave their nest and join the fight. Make sure you scan them as well, as they are a one-time scan only found in this fight! You’ll notice that the wasps can actually fire their stingers as projectiles and regenerate them quickly, so watch out. The wasps infinitely respawn, but they’re easy enough to destroy. Concentrate fire on the Incinerator Drone, dodge the flamethrowers, and after three more phases of fighting, this drone will be… incinerated.
The Charge Beam
Scans in This Section
Chozo Lore: Meteor Strike
Research: Large Missile Ammo, Morph Ball Slot
Right after grabbing the Morph Ball Bomb, use your reclaimed explosive to blow up a hole located at the opposite end of the small water way to collect MISSILE EXPANSION #3. Then shoot the crates and you should get a LARGE MISSILE AMMO drop (replenishes 10 missiles) that you can scan even if you’re full. Head back to the Energy Core and talk to our friend, the Stone Toad from earlier. By “talk”, I of course mean get into Morph Ball form, let him eat you, and then bomb him from the inside to get through (Samus really needs to work on her manners). On the other side you’ll see a MORPH BALL SLOT, a new device you can interact with by going into Morph Ball form and laying a bomb. Scan the device before using it, and then get ready to run.
Now before we begin this puzzle, let’s cover a really cool hidden feature of the bombs: the Spring Ball! Normally, while in Morph Ball form, you have to use bomb jumps to propel yourself in the air. The Spring Ball however, gives you a single free jump to use instantaneously and makes navigation a lot quicker and easier. Unfortunately, if you’re playing any of the GameCube releases of Metroid Prime, you won’t have access to the Spring Ball, as it wasn’t a feature that was introduced until Metroid Prime 3: Corruption. The good news is if you’re playing either the Wii release of Metroid Prime in Trilogy or Metroid Prime Remastered for Nintendo Switch, you’ve got yourself the Spring Ball! On the Wii, you can activate the Spring Ball by flicking the Wii remote up, whereas in Metroid Prime Remastered, this can be done by either pressing the Y button or right bumper, depending on where you have missiles mapped. Now with that preamble finished, let’s get to work on this puzzle.
This whole puzzle is on a timer, so our actions have to be quick. After bombing the first slot, the corrosive water in the middle of the room will be lowered, allowing us to safely cross unharmed. Where the pool previously was filled, now sits another Morph Ball Slot that we have to get to. Luckily there’s a hole in the wall to the left that we can use as a shortcut to get there rather quickly. This along with the Spring Ball makes navigating the bumpy surfaces a piece of cake. After reaching the second slot and laying a bomb, a series of mechanical platforms will rise from the floor that lead to an opening on the left. Quickly get out of Morph Ball form and follow the platforms to the opening and keep following the path until you reach the third and final slot. This permanently leaves the platforms raised, the water lowered, adds another set of platforms leading to the locked door and finally unlocks the door itself. Follow the new path until you get to a Morph Ball tunnel located in the Furnace. This will lead you right to ENERGY TANK #2. There’s nothing else we can do here at the moment, but keep the Furnace in the back of your mind. We’ll be back here much later to uncover its secrets.
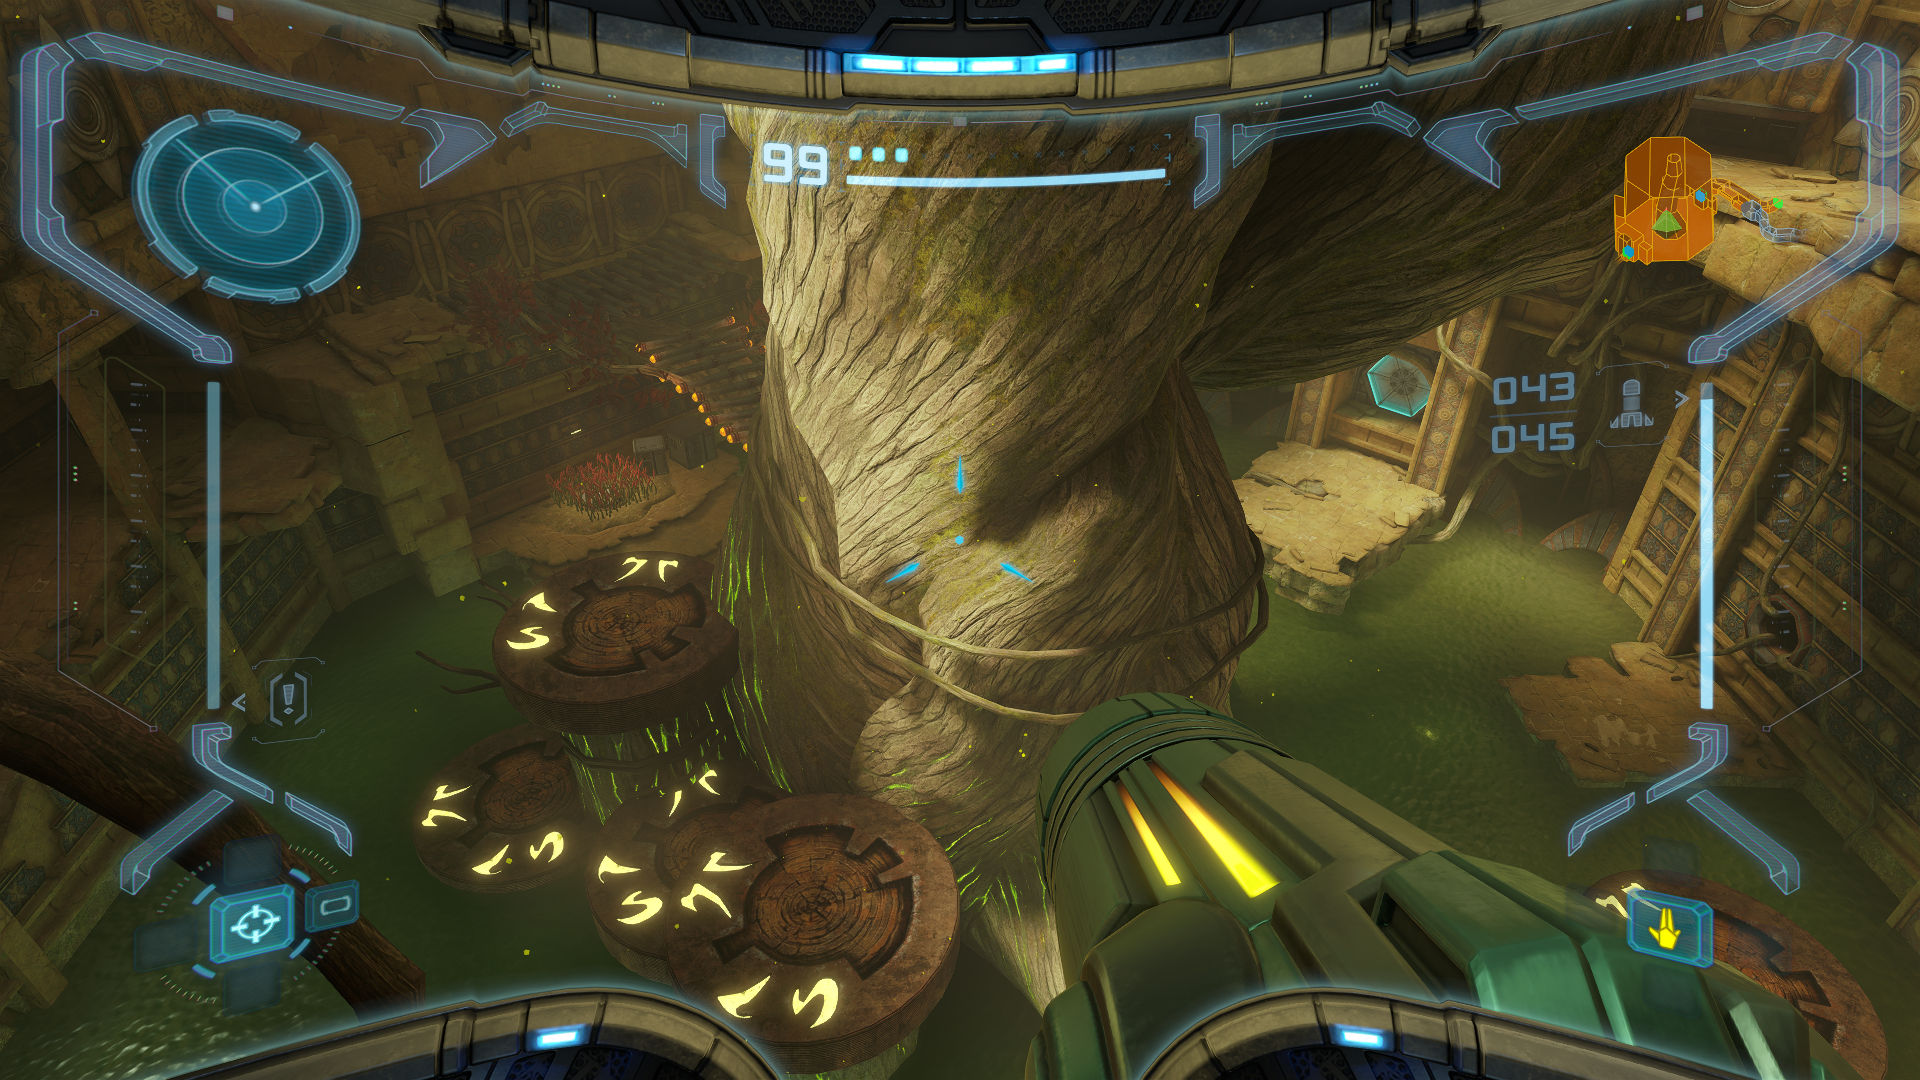
Make your way back to the Gathering Hall and save your progress. From the Save Station, enter the door directly across as it’s the only path from this room that has yet to be explored. In the middle of the Watery Hall Access between the two slopes, blast the wall on the left with a missile to reveal MISSILE EXPANSION #4. The following room, Watery Hall, is home to a runic symbol puzzle (a favorite of the Chozo Ruins as you’ll come to see). Essentially you have to find four runic symbols scattered throughout the room and scan them to unlock a gate. The first of these is located to the left at the very back from where you entered. The second symbol is located on the ground platforms hidden underneath a group of Blastcaps. Destroy them to reveal the symbol. The third symbol is located at the end of the ground platforming section on the wall directly in front of you. The final symbol is at the very end of the top platforming section to the right of the gate. After scanning the four symbols, a fifth symbol will be revealed on the gate itself. Scan it to lower the gate and reveal the CHARGE BEAM along with a new piece of Chozo Lore, “METEOR STRIKE”. The Charge Beam is important not just as an offensive weapon, but as a defensive weapon too. While charged, any health and ammo pickups in the vicinity will be drawn towards you. It’s not only great for getting pickups out of reach, but as a way to replenish resources while fighting multiple enemies. The game tells you this in the tutorial, but I’ve seen so many newcomers play through this and miss it completely that I wanted to point it out again. It’s such a vital mechanic in the gunplay.
After collecting the Charge Beam, a series of Eyons will activate blocking the exit. As you can probably guess, the Charge Beam will actually take them out rather than just forcing their eyes shut momentarily. It’s still not powerful enough for Reaper Vines though, so you’ll have to remain comfortable with continuing to stun them in the meantime. Before jumping off the platform though and calling it a day, bomb the weakened blockage in the wall to open up a tunnel. Roll through and make your way to the Dynamo. To the right is a gate you can blast away with a missile to reveal MISSILE EXPANSION #5.
Praise the Sun
Scans in This Section
Chozo Lore: Fountain
Before we progress to the next part of the game, we’re going to circle back and grab some more expansions that we have access to thanks to the new items we’ve been adding to our repertoire. First make your way back to the Main Plaza. We’re going to both start and end here on our quick item run. Our first stop is the Ruined Nursery. There’s been a Morph Ball puzzle taunting us since the first time we stepped in, but now we can finally complete it with bombs! From the ground level, enter the lower Morph Ball track and bomb the Sandstone block supporting the metallic block. From there, go to the upper level, enter the track and bomb all of the Sandstone blocks in your way until you reach MISSILE EXPANSION #6.
Next stop is the Ruined Gallery, which holds a couple of expansions. First, there’s a Brinstone wall located behind some Blastcaps that can be destroyed with a missile to reveal MISSILE EXPANSION #7. Then to the right you’ll find a hole in the wall which you can hop into and collect MISSILE EXPANSION #8 from within. From here we make our way back to Transport Access North where we can finally check out that Morph Ball tunnel that eluded us after getting the Missile Launcher.
You’ll find yourself in the Transport to Magmoor Caverns North, but we’re going to ignore the elevator as the temperature down under is a bit spicy for us with our current equipment. Instead, go through the door to your right and keep moving through each room until you reach the Vault. To the right is another piece of Chozo Lore, “FOUNTAIN”. Scan that and then unlock the vault by bombing each of the 3 locks on the other side. The final lock requires a double bomb jump and I would recommend using the Spring Ball as your initial ground bomb if you have that option. After unlocking the vault, grab MISSILE EXPANSION #9 inside. Go through Plaza Access, taking out the Beetles along the way and soon you’ll find yourself back at the Main Plaza greeted by ENERGY TANK #3. That concludes our mini item hunt, now let’s make our way back to the Arboretum and start making some more progress!
Not only do we have a bit of a vertical climb ahead of us, but we also have another runic symbol puzzle. You definitely do not want to miss one and have to backtrack all the way down so pay attention to your count and make sure you have four by the time you reach the top. The first symbol is located underneath some Venom Weeds. You should see it just to your right as you first enter the room but you won’t be able to scan it from that angle. Find a good perch once you’re above it and then get that one done. The second symbol is in VERY close proximity to the first. Go to the wooden bridge as if you were heading to the Gathering Hall, but instead turn around and face the tree when you get on the bridge to find the second symbol. The third symbol will be just after the first Morph Ball wall passage with the Sandstone blocks on your left just before the raised platform. It can be tricky to make out and it blends very easily with the wall’s architecture. The final symbol is at the very top, opposite of the gate and tied to the tree. After the gate opens, drop a bomb at the Sandstone blockage to reveal a tunnel.
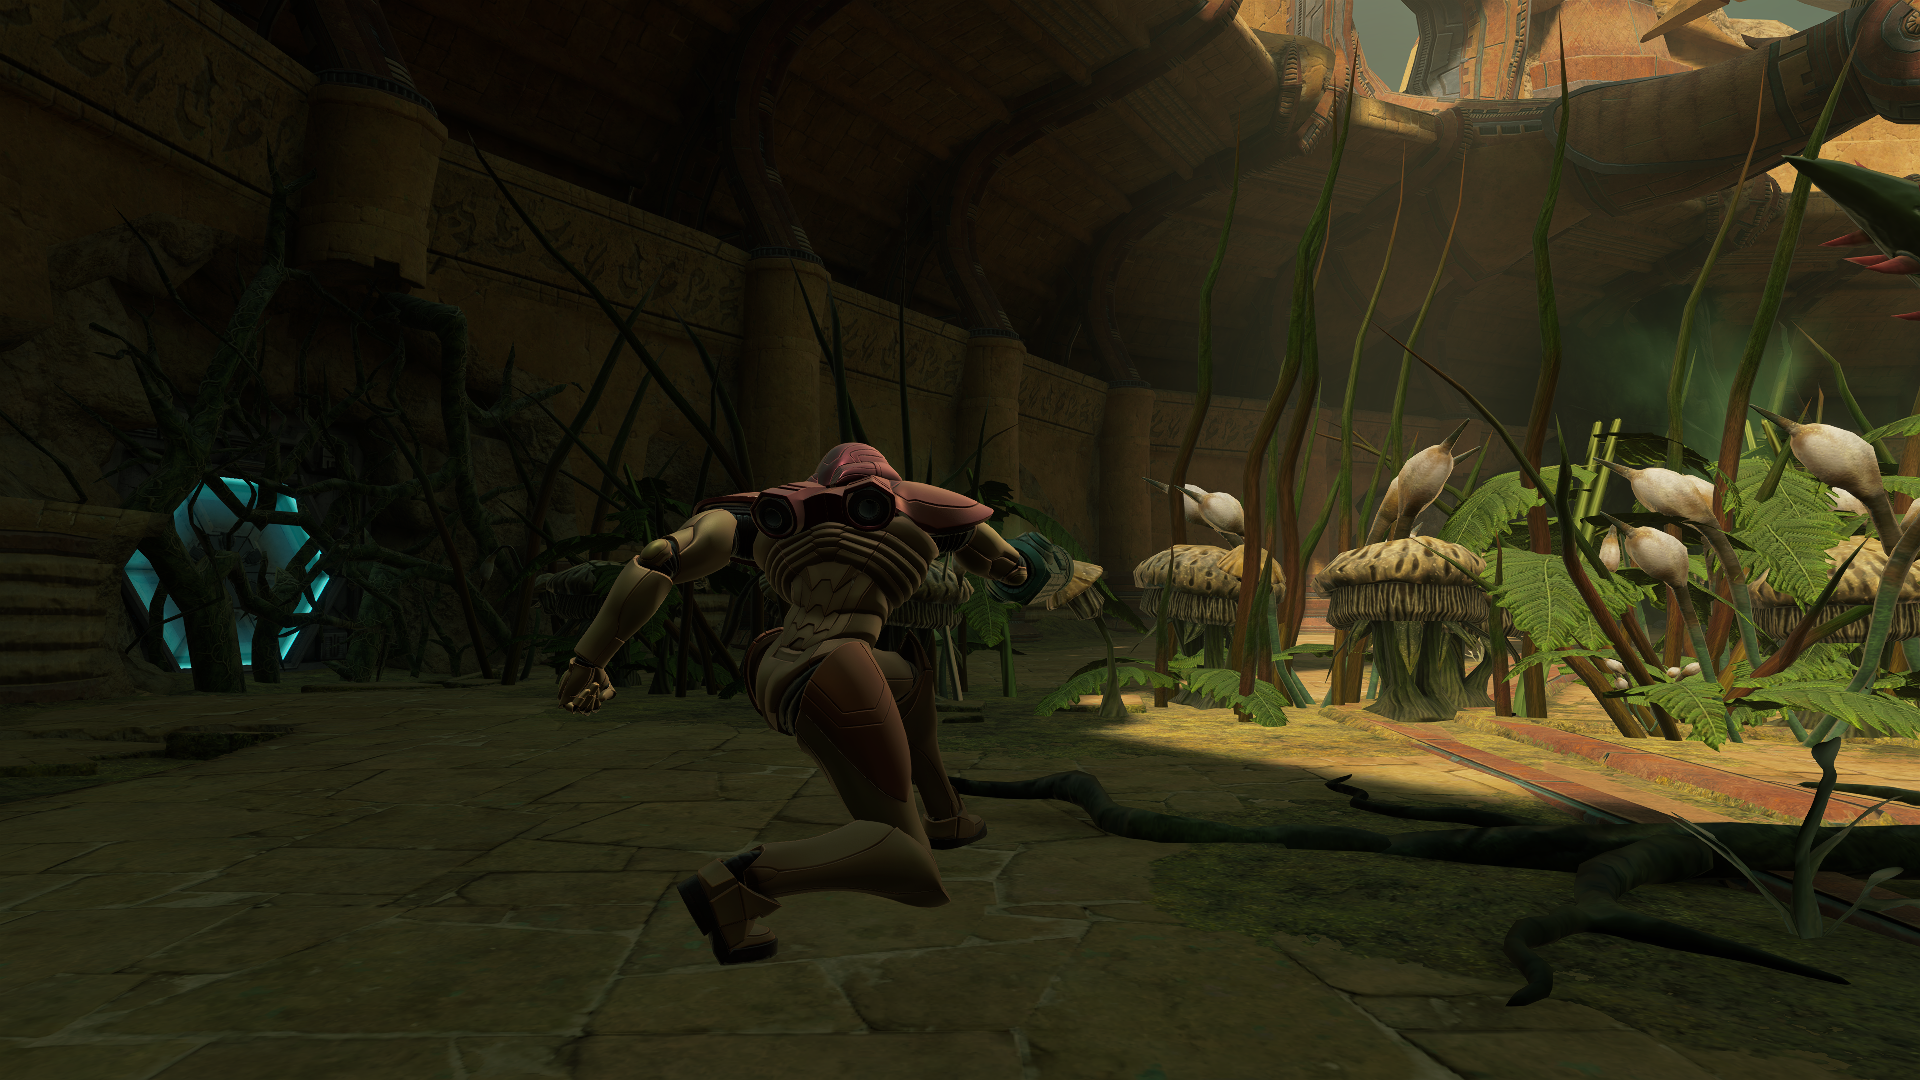
The next two hallways feature a combo of Venom Weeds and Reaper Vines. They shouldn’t pose too much of a threat unless you try to tank your way through it, so just take your time making sure you’ve stunned everything before moving forward. At the end of Sunchamber Access, you’ll find two crates by the door you can use to refill health and ammo. It’s possible for an Ultra Energy drop to spawn here, but again it doesn’t appear every time and I’ll directly call it out again when we do get to a guaranteed spawn point.
Wait, health and ammo right before a large dome-shaped room? That can’t be good…
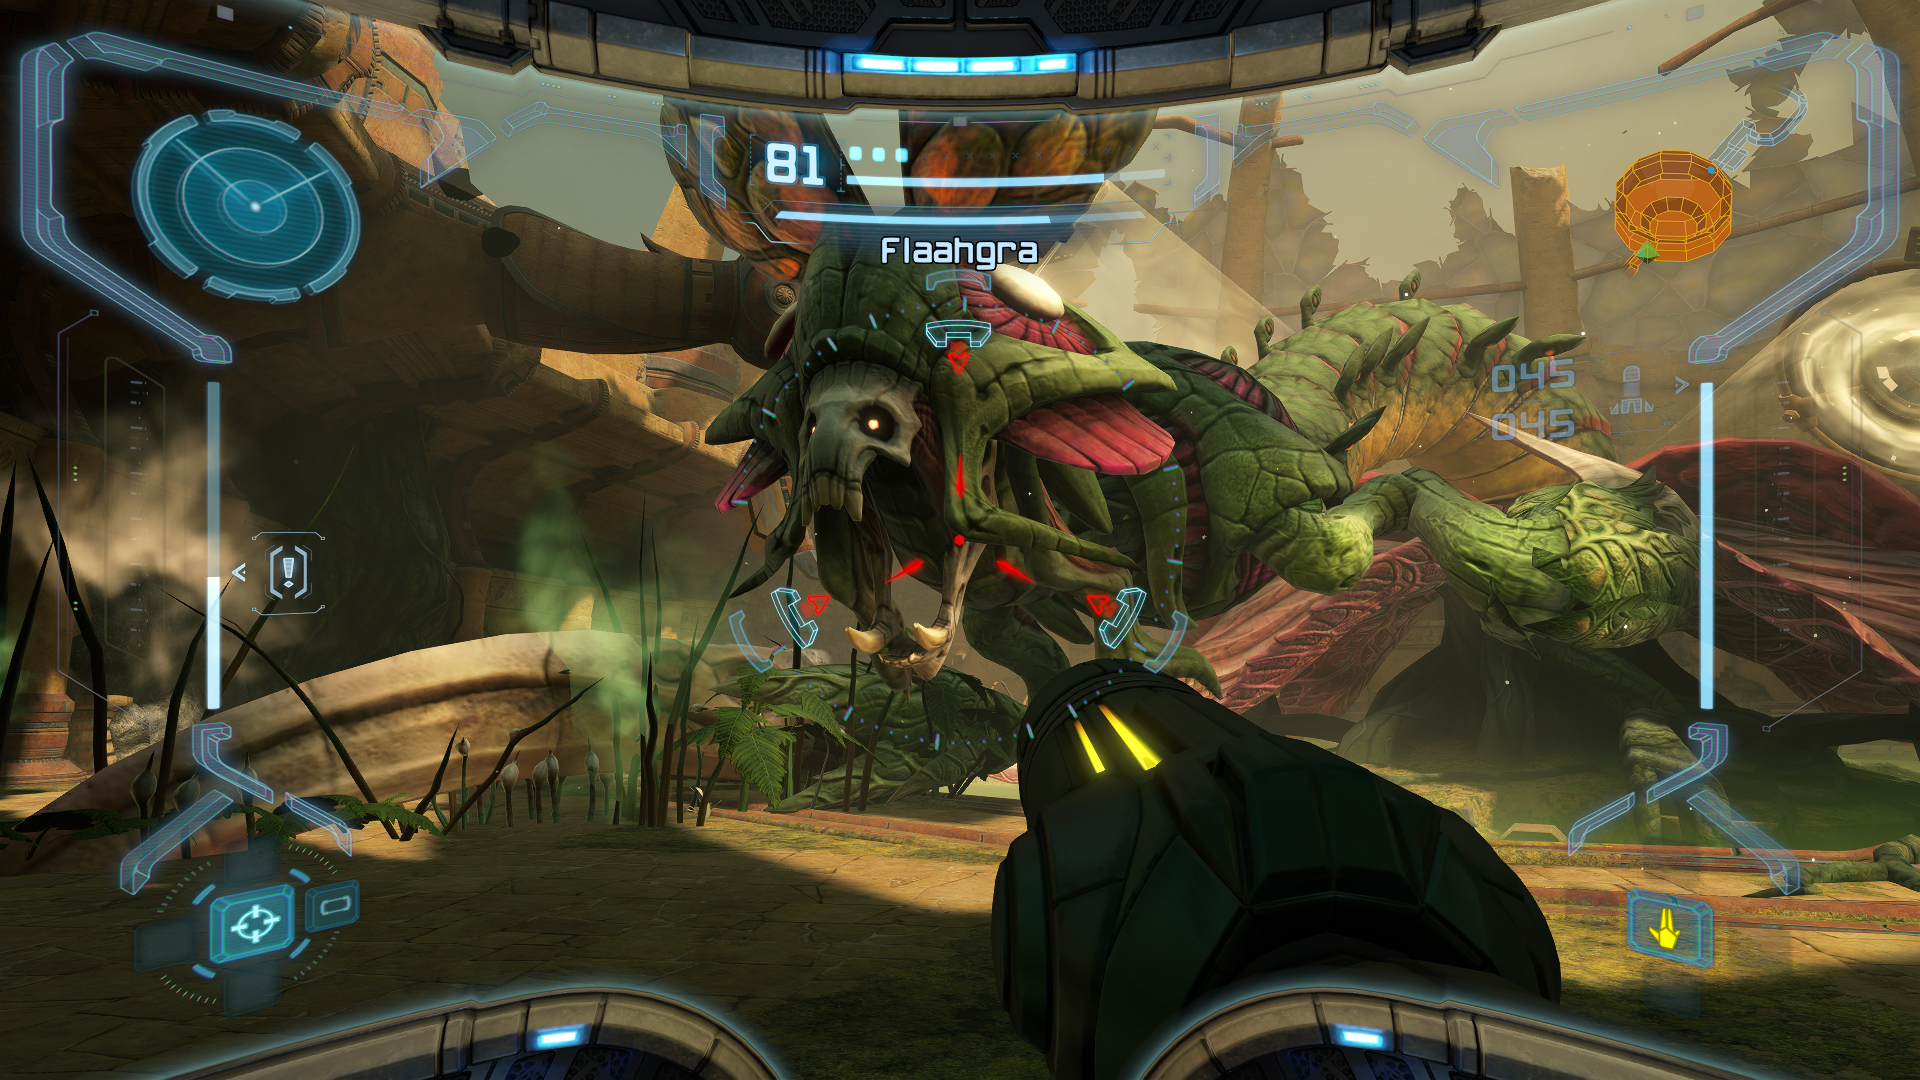
Flaahgra
Scans in This Section
Creatures: Flaahgra *missable*, Flaahgra Tentacle *missable*
So, first things first: make sure that you scan FLAAHGRA AND one of the FLAAHGRA TENTACLES! These count as two separate scans, and this is your only chance to get it! Lots of people miss out in this scan, so make sure that you’re not one of them.
Now that that bit of business is out of the way, let’s set the table. Flaahgra is a giant mutant plant that is responsible for poisoning all of the water in the Chozo Ruins. Nesting inside a giant flower cocoon, Flaahgra is also nigh-impervious to conventional weaponry, so at face value, this looks and sounds like it will be tough. Fortunately for us, Flaahgra falls more into the “boss-as-a-puzzle” category than it does as an intense fight, so as long as you can dodge its attacks and damage it when the opportunity arises, you should be just fine.

Let’s start off with those attacks first. Flaahgra is stationed at the center of the arena, but its reach is still pretty long. The most standard attack will be Flaahgra shooting balls of acid at you; as long as you’re moving, you should be okay – just make sure that you’re locked on and always moving.
In Flaahgra’s later phases, the attacks start to ramp up. Flaahgra will slam its body down towards you, but as with the acid shot, as long as you’re moving, you should be able to avoid this. The only thing you’ll want to be careful of is the foliage that’s left in Flaahgra’s wake. It will poison you, so just watch out. Lastly, the big plant will also use some good old fashioned melee attacks, so watch out for its giant pincers.
Now that we know what we’re dealing with for attacks, how do we actually beat this thing?
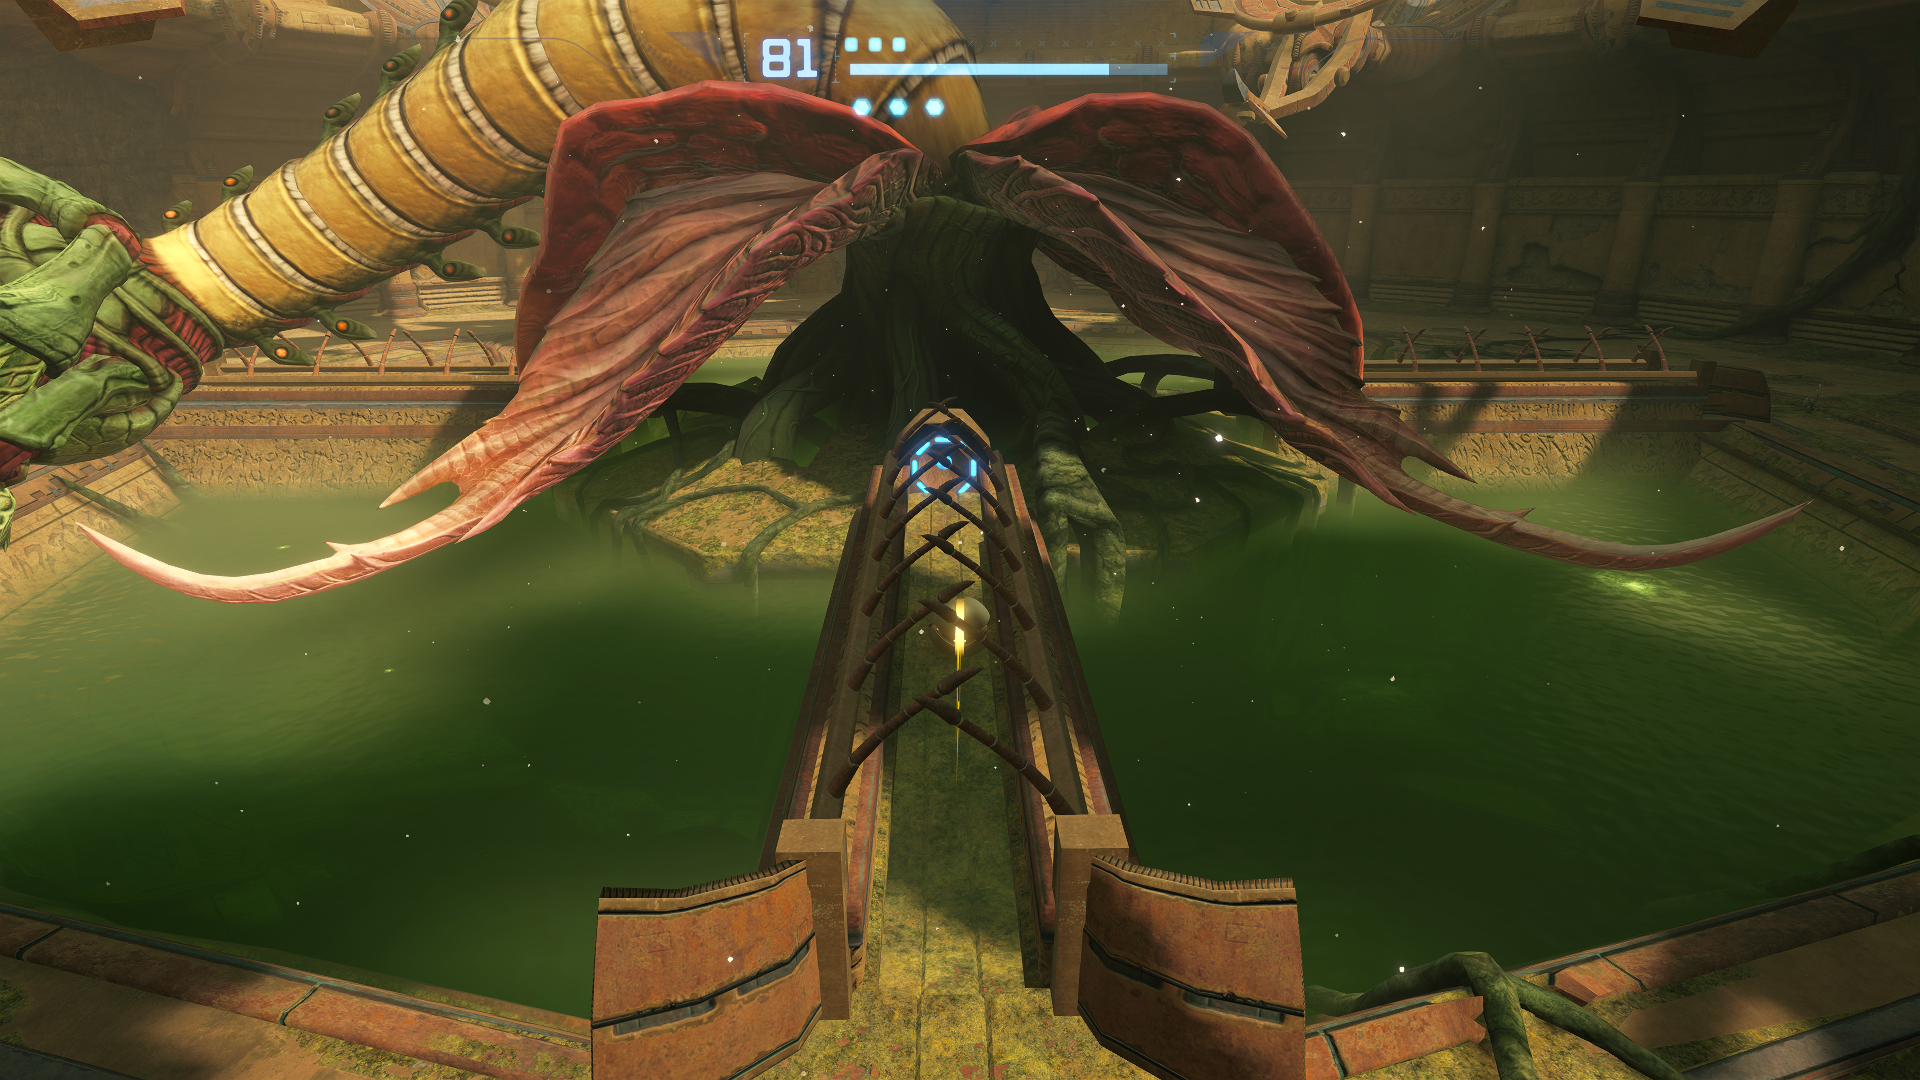
You have surely noticed the four giant solar panels surrounding Flaahgra, bathing it in sunlight. These are what powers the grotesque plant, and this is the weakness that we’ll exploit to attack. While avoiding Flaahgra’s attacks, you’ll want to position yourself behind the mirrors and lock on to the Red center of the lower panel. Shoot it with a charge shot or missile to blast the array upwards and stop the stream of sunlight to Flaahgra. Once the mirror is facing upwards, Flaahgra’s tentacles will fall over, revealing a Morph Ball tunnel that you want to get into as fast as you can. Roll to the end and enter the bomb slot; lay a bomb and you will do massive damage.
Now, the first hit is pretty easy, but you’ll notice after that two, and then three, and finally four solar panels are going up and shining light on Flaahgra. The premise is the same – shoot the backs of the panels so they are pointing skyward. Once every panel is up, attack! But be warned – Flaahgra will not just sit there and let you shoot its energy source away. It will actively knock the panels back down unless you stun the creature. Fortunately, a charged shot or missile right to its face will have the big weed stunned, allowing you precious time to run towards the next panel and hit it up.
Take your time and stun Flaahgra in between panels and as soon as the tentacles fall, hustle into that Morph Ball slot. Four bombs will do the job. Follow the strategy, avoid its attacks, and you’ll send this giant plant to the compost bin in no time.
ADVANCED STRATEGIES: While the game WANTS us to be directly behind the solar panels when we shoot them, that’s not actually necessary. The solar panels aren’t physics based, meaning that no matter what angle we hit them from they’ll always flip over. This means we can practically stand in place and instantly hurl charge shots and missiles at all 4 panels! Couple this with fast missiles and you have yourselves a very quick kill indeed.
Into the Fire
Scans in This Section
Chozo Lore: Spreading Evil
Creatures: Pulse Bombu, Oculus
Research: Ultra Energy
We finally got our beloved basketball shoulder pads back, thank you VARIA much! On top of this, by defeating Flaahgra, we also purified all of that gross toxic water all over the place, meaning it’s no longer a hazard! Make your way through Sun Tower Access and destroy the pile of crates. At least one of these crates is guaranteed to drop an ULTRA ENERGY pickup even at full health. If this hasn’t popped up for you yet, scan it right now. Immediately afterwards scan the PULSE BOMBU near the exit. In the Sun Chamber, jump straight to the bottom because Samus is too cool to take fall damage. Take out the War Wasps, then scan an OCULUS crawling just above the runic symbol gate. We don’t have the right equipment to open it up yet so we gotta let it be for now. Scan the Chozo Lore, “SPREADING EVIL”, before leaving the room and you’ll find yourself back at the Transport to Magmoor Caverns North. We couldn’t go before, but now with the heat protection courtesy of our Varia Suit, I think it’s time we finally paid this Magmoor Caverns a visit and see just what it’s all about.