


Metroid Prime Walkthrough – Phazon Laboratory
WALKTHROUGH
- Frigate Orpheon
- Planet Tallon IV
- The Ruins Come Alive
- Fire & Ice
- Phazon Laboratory
- Ghosts & Gravity
- Space Pirate Assault
- The Entrusted One
- Artifacts in the Wild
- The Great Poison
Infiltration
Scans in This Section
Pirate Data: Phazon Analysis, Parasite Larva, Mining Status, Security Breaches, Glacial Wastes, Contact, Phazon Program
Creatures: Shadow Pirate, Space Pirate
Research: Stalactite *missable*, Spinner, Zebes, Tallon IV
Our first new beam upgrade, the Wave Beam, allows us to open those purple doors we’ve encountered throughout the game. It also has the ability to momentarily stun enemies in combat. We can even use it to finally kill all those Bombus! All of that being said: I actually don’t recommend using the Wave Beam in 99% of the combat scenarios. Despite its stunning ability and powerful sound design, the Wave Beam actually has a much lower damage per second output than the Power Beam. Worse, the fast missile technique takes much longer while the Wave Beam is selected due to the additional animation involved. Unless you encounter an enemy that is ONLY vulnerable to the Wave Beam, like the aforementioned Bombus, this should really only be used as a glorified key. Anyways, leave the Chapel of the Elders and head to Ice Ruins West. You can use the Space Jump Boots to get straight to that level by jumping on to one of the hovering platforms and skip the entire Ice Ruins East section.
After reaching Ice Ruins West, jump into the structure to the right where you initially scanned the Chozo Lore. Get to the top with your Space Jump Boots, using the Crystallites to guide you in the right direction. You’ll come face to face with a STALACTITE. Scan it both to add it to your logbook and to reveal that firing a missile at its weak point will bring it down. Do so and you’ll create a platform leading to a different part of the area. If for some reason you did not scan the Ice Shriekbats from earlier, this is your LAST CHANCE.
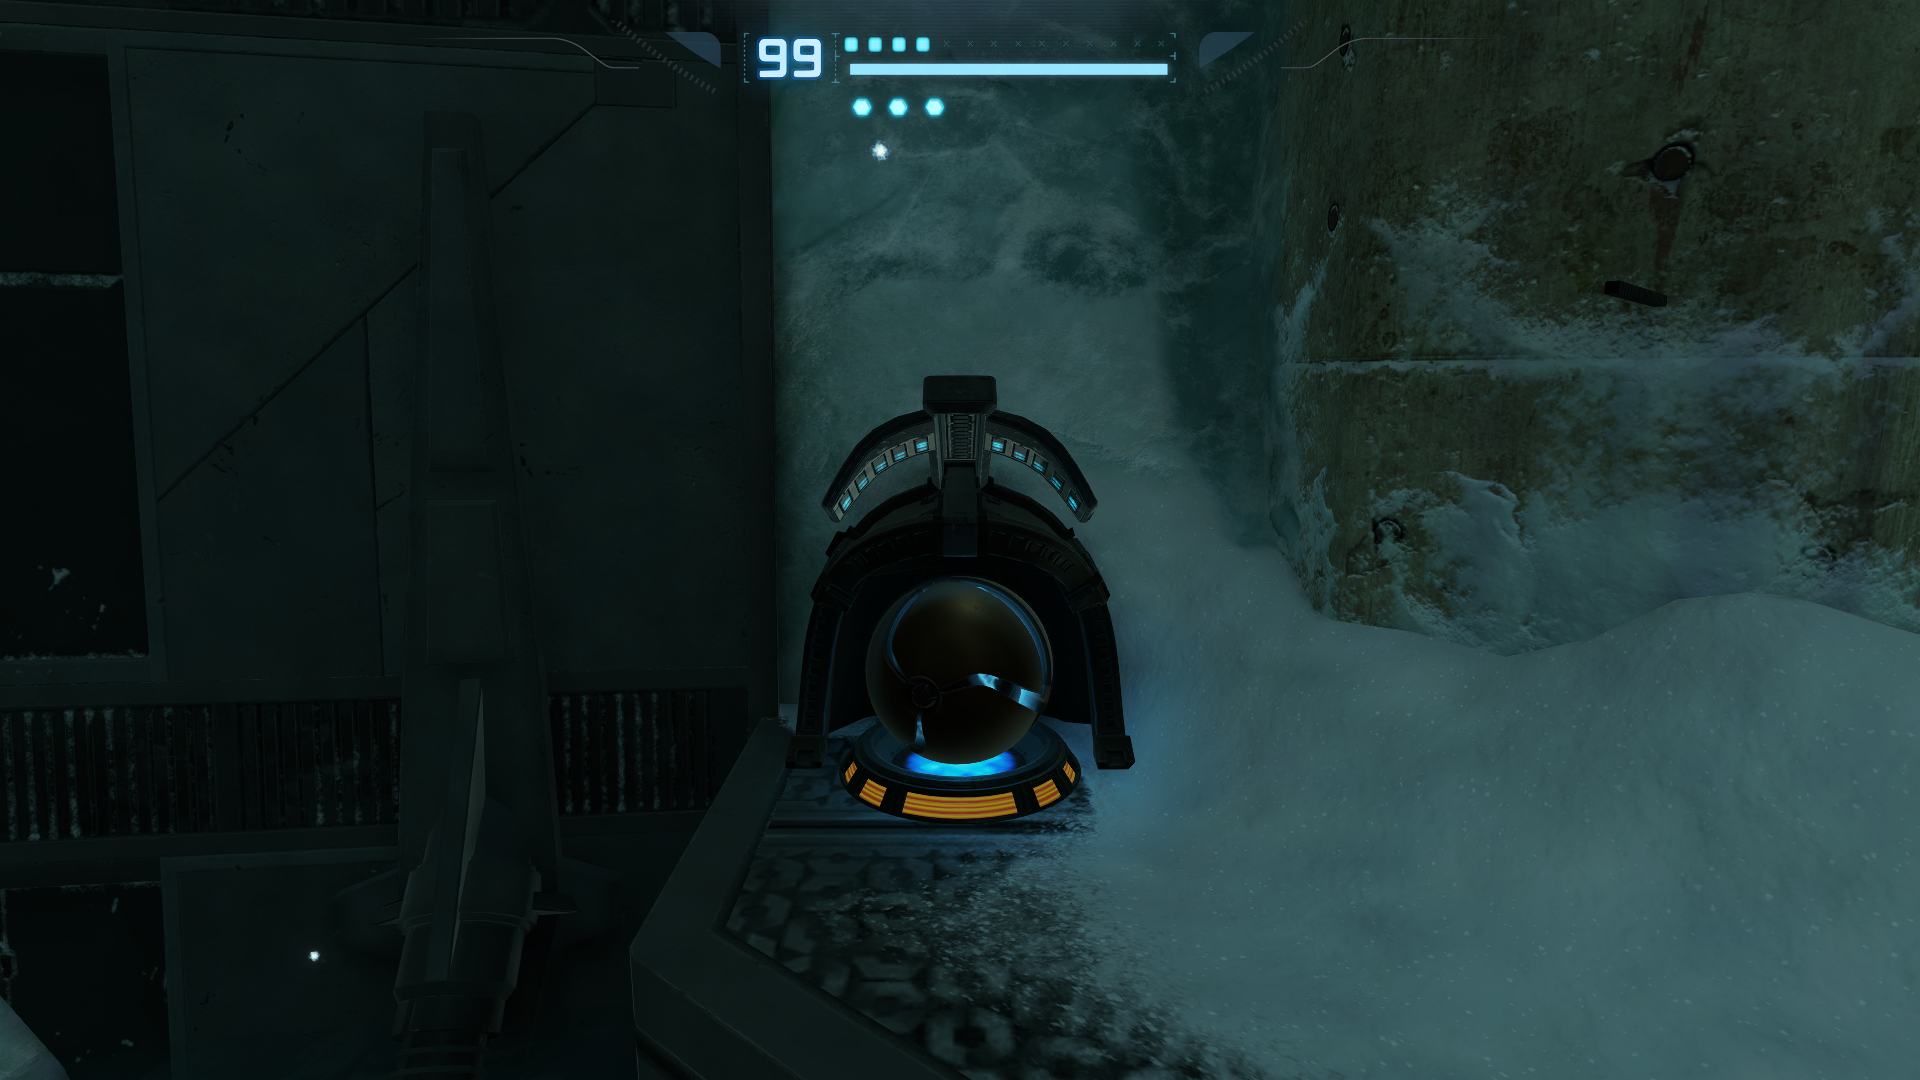
Keep platforming until you reach the Wave Beam door and move forward. When you reach the Ruined Courtyard, scan one of the SPINNER devices. Spinners are a lot like Morph Ball Slots, except they use your Boost Ball instead of bombs. Use both of the Spinners to power up some machinery on some overhanging Chozo architecture. Once both have been used, a Morph Ball Slot will activate. Take out the Flickerbats (trust me, it will make the next part less tedious) and then use the slot to fully activate the machinery, flooding the courtyard with water. The water will raise the ice to its surface turning them into platforms. Quickly hop across the platforms before the water lowers again and go to the glowing yellow hole on the other side of the room. Enter it and claim ENERGY TANK #5 as your own. Afterwards, go out the same hole you rolled through so that you can continue your climb. If you use the exit instead, you’ll have to flood the courtyard again to make it to the top of the room. After you jump onto the middle portion of the structure, turn right at the end to see another series of platforms that lead to the top. Pop open the Blast Shield and use the Save Station before you enter, because the next area is going to be our first major skillcheck in some time.
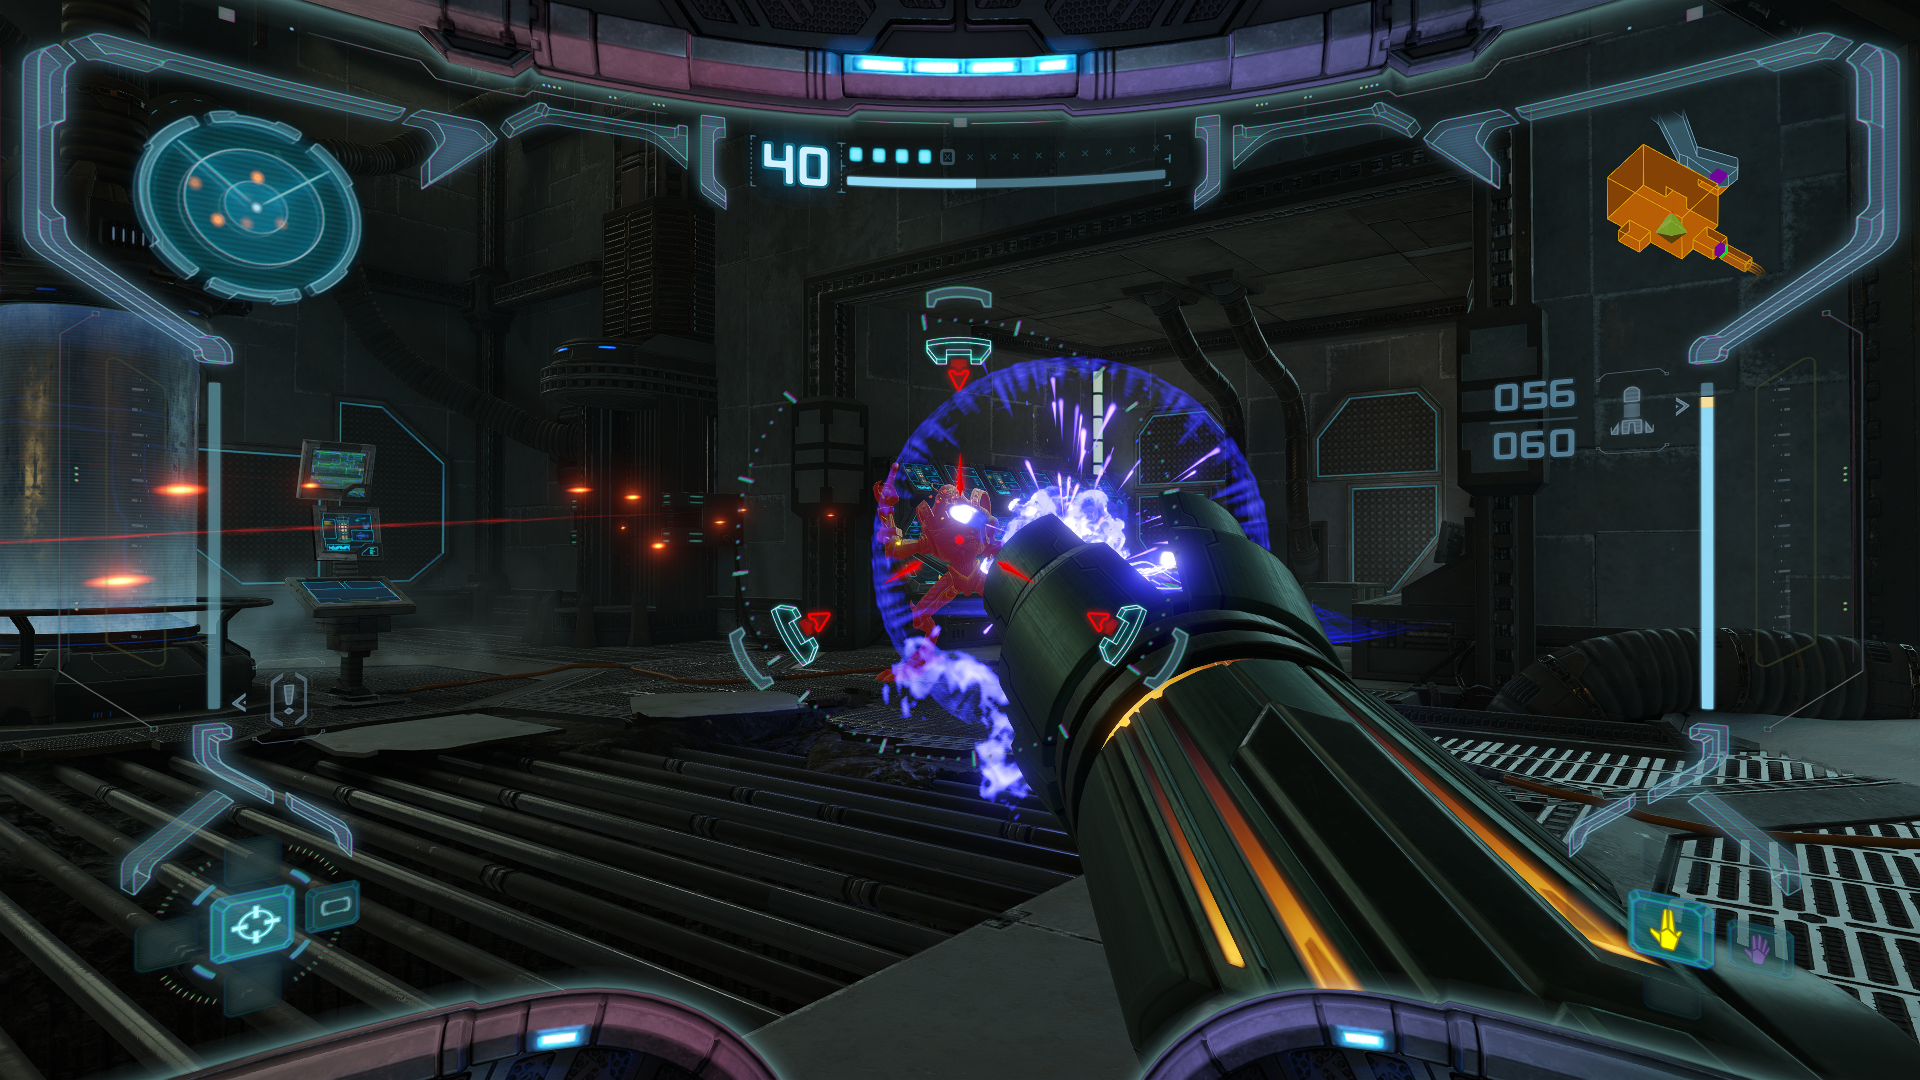
Open the Wave Beam door and immediately switch back to your Power Beam, as we have a turret pointing right at us. Take it out and quickly switch to your Scan Visor as now a SHADOW PIRATE will drop from above and directly sprint at you to trap you in the corner. Side tangent, why does a Shadow Pirate even spawn here when 1) standard Space Pirates are introduced in the very next room and 2) they aren’t even invisible due to the room’s lighting, completely negating the point of it being a Shadow Pirate in the first place?? Rant over.
In the next room, you’ll be re-introduced to the SPACE PIRATES, completely non-injured this time. Unlike the Shadow Pirates, which take three missiles to be defeated, standard pirates only take two. After taking out the pirates AND the Auto Turret hiding discreetly within the ceiling, go through the door on the right to get the map for Phendrana Drifts. In Research Lab Hydra, you’ll encounter more pirates to introduce to your missiles. Once they’re all finished, there’s A LOT of Pirate Data to scan. On the first floor there’s “PHAZON ANALYSIS”, “PARASITE LARVA”, “MINING STATUS”, and “SECURITY BREACHES”. On the third floor is a single entry, “GLACIAL WASTES”. In Observatory Access you’ll be greeted by three turrets the moment you enter the room, but you can back up to quickly get out of their firing range.
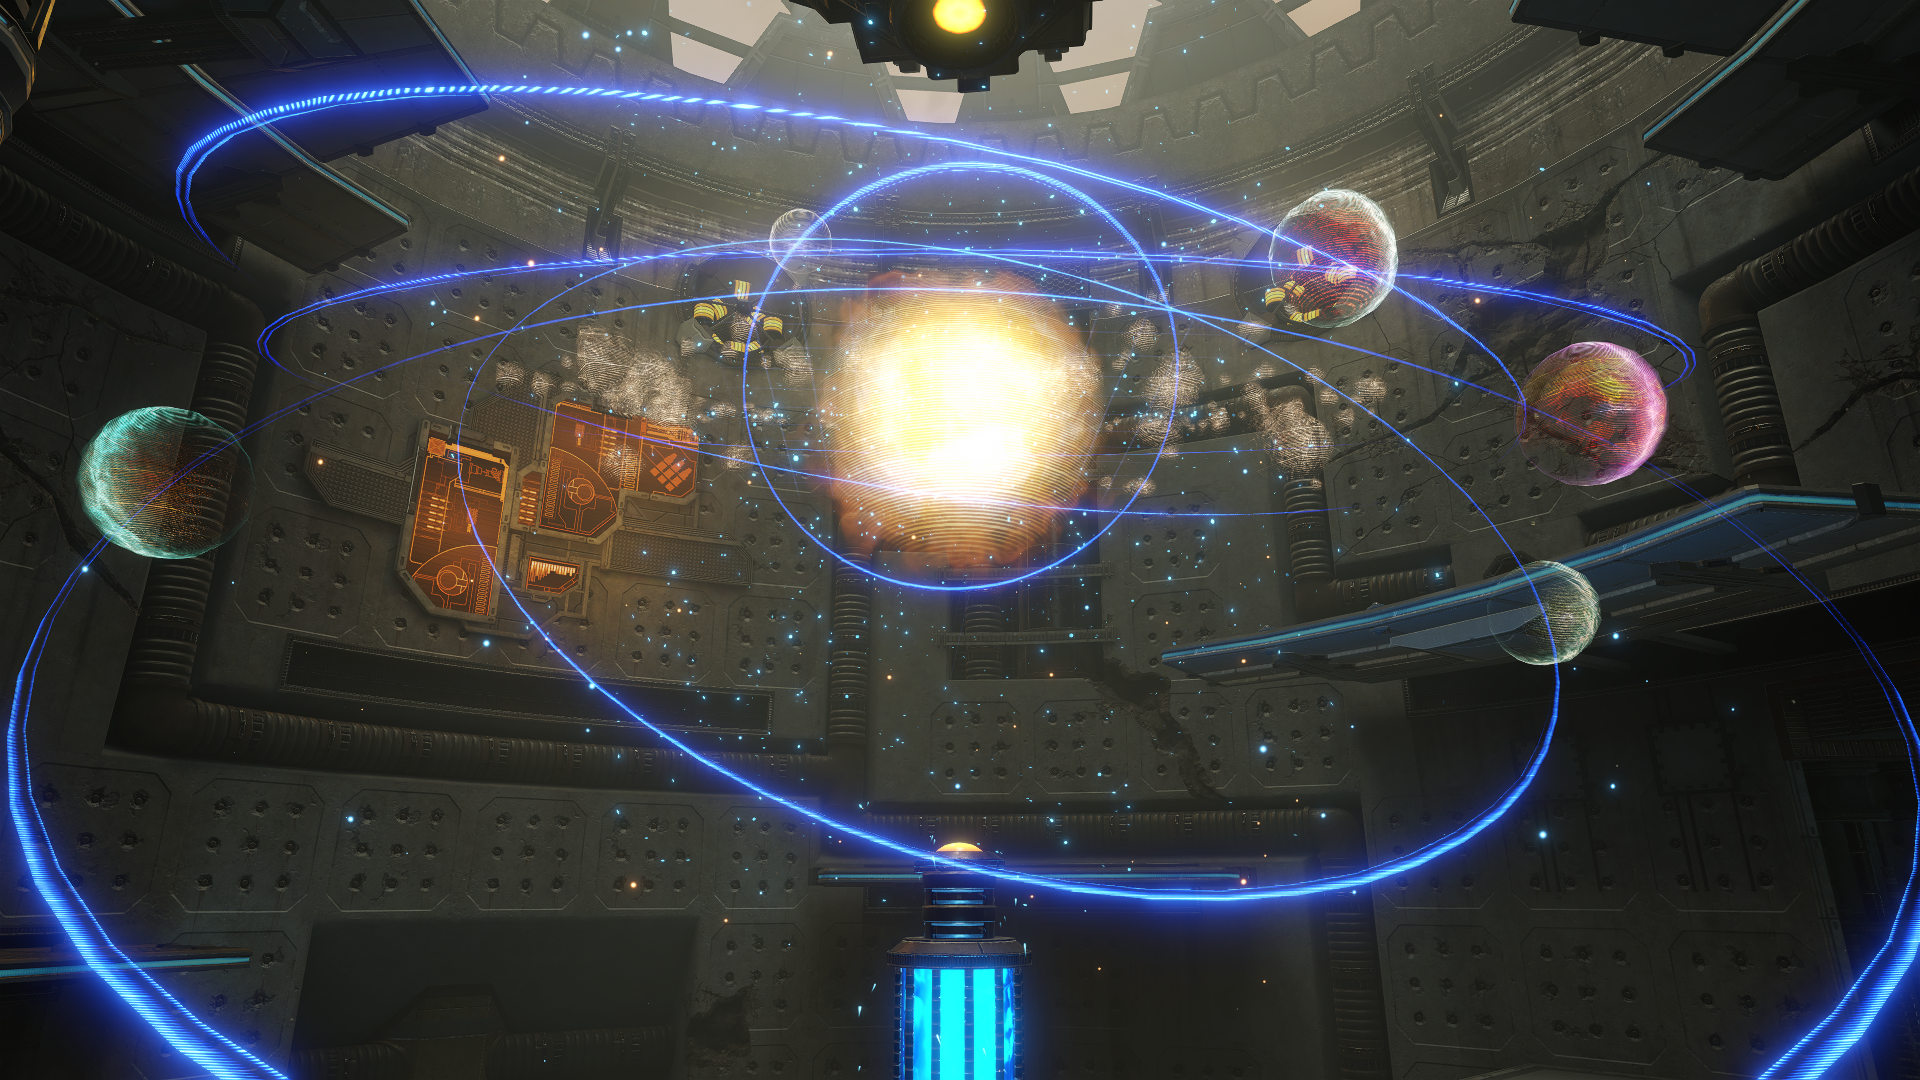
In the Observatory, a pirate will drop down right in front of you as you’re exiting the short hallway, but otherwise it’s the same fare. After dishonorably discharging the pirates, there’s a couple more Pirate Data entries to scan by the row of computer terminals: “CONTACT” and “PHAZON PROGRAM”. Once you’ve finished extracting the data, scan the blue symbol in the center of the terminals to activate a Morph Ball Slot on the left side from where you’re standing. Using this will activate another Morph Ball Slot on the adjacent side along with some pistons (sidenote: these pistons sound so freaking cool on a surround sound setup). After using the second slot, four Spinners will be powered up on the lower node. Activate all four to power up the projector and extend some platforms to get you to the top of the facility. Every single planet in the projector can be scanned to learn information about them, but only two are required for 100% scans: ZEBES and TALLON IV. But that’s not all! Once you reach the top, you’ll find the SUPER MISSILE just sitting out in the open without an ambush in sight! Claim your much deserved reward, and use the Save Station opposite from you.
The Ultimate Warrior
Scans in This Section
Pirate Data: Metroid Studies, Meta Ridley, Phazon Infusion, Metroid Morphology, Metroid Forces
Creatures: Flying Pirate, Tallon Metroid, Ice Beetle
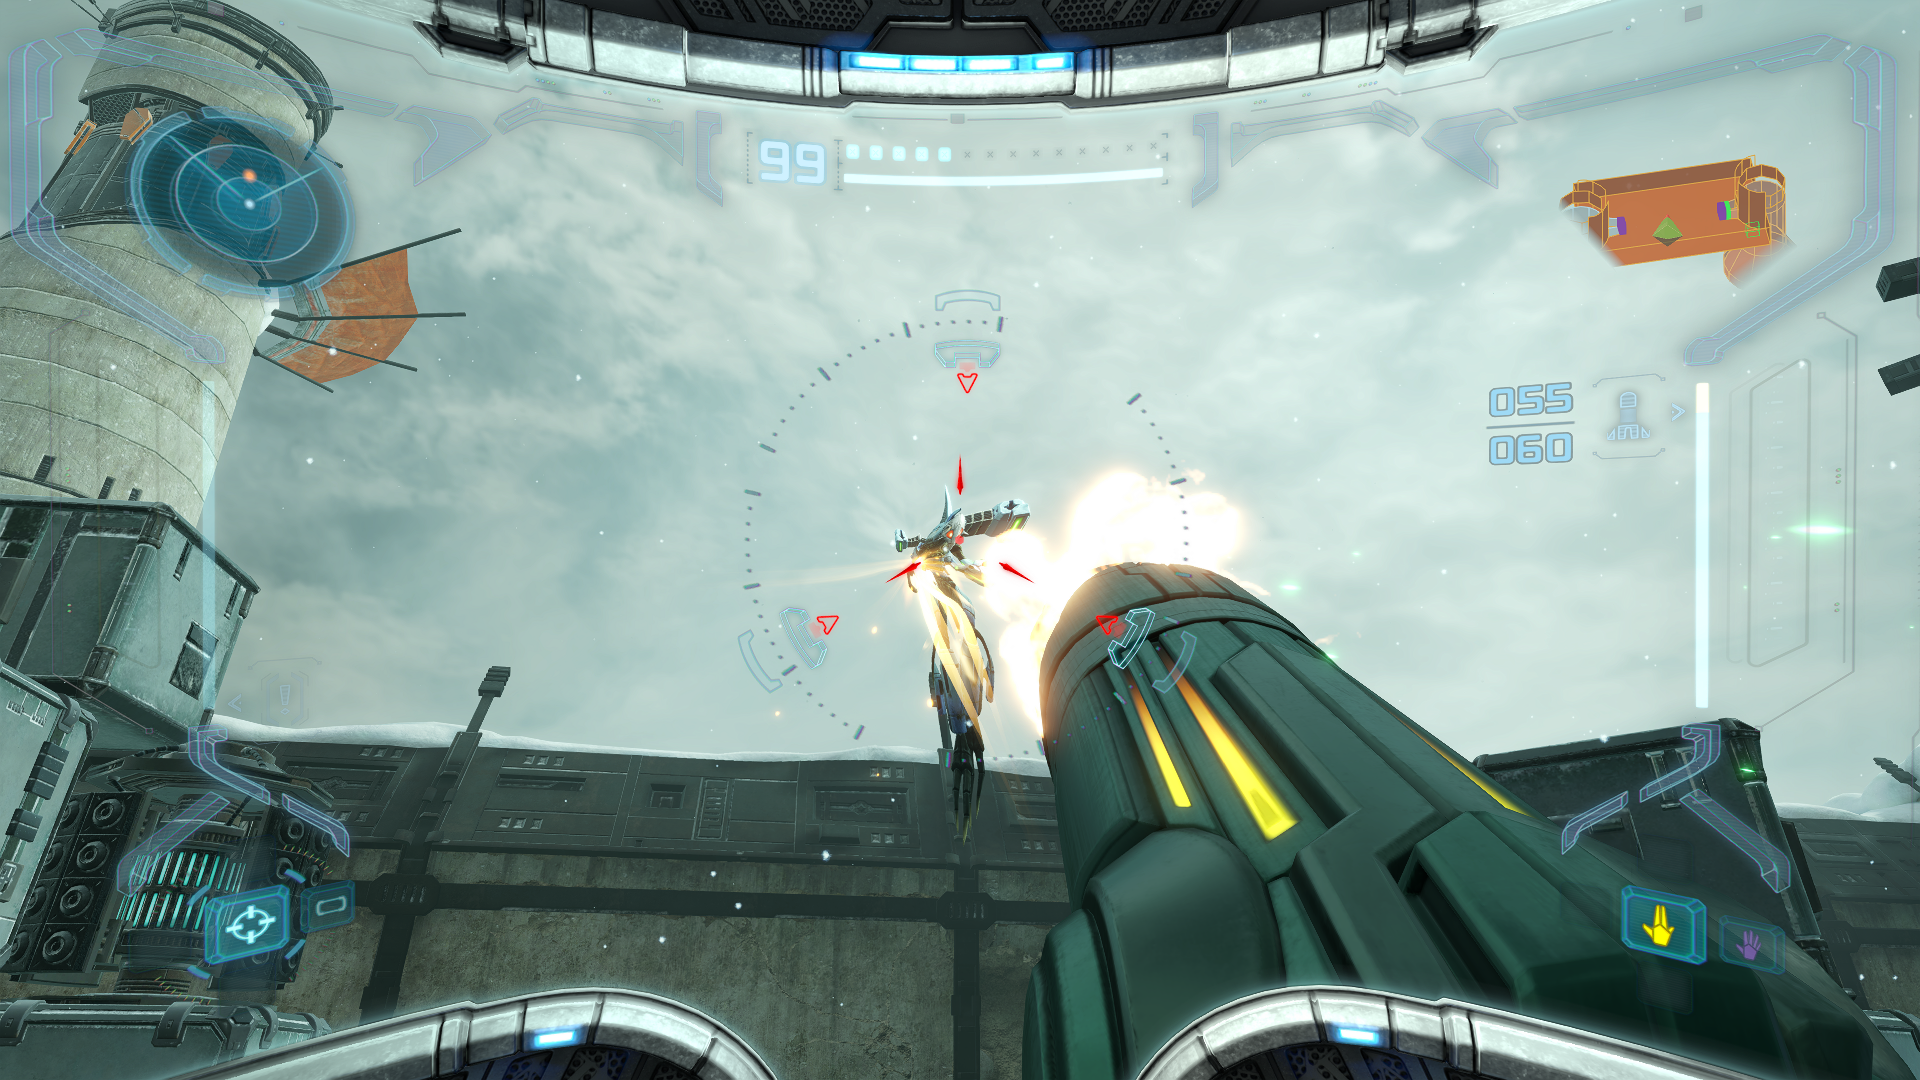
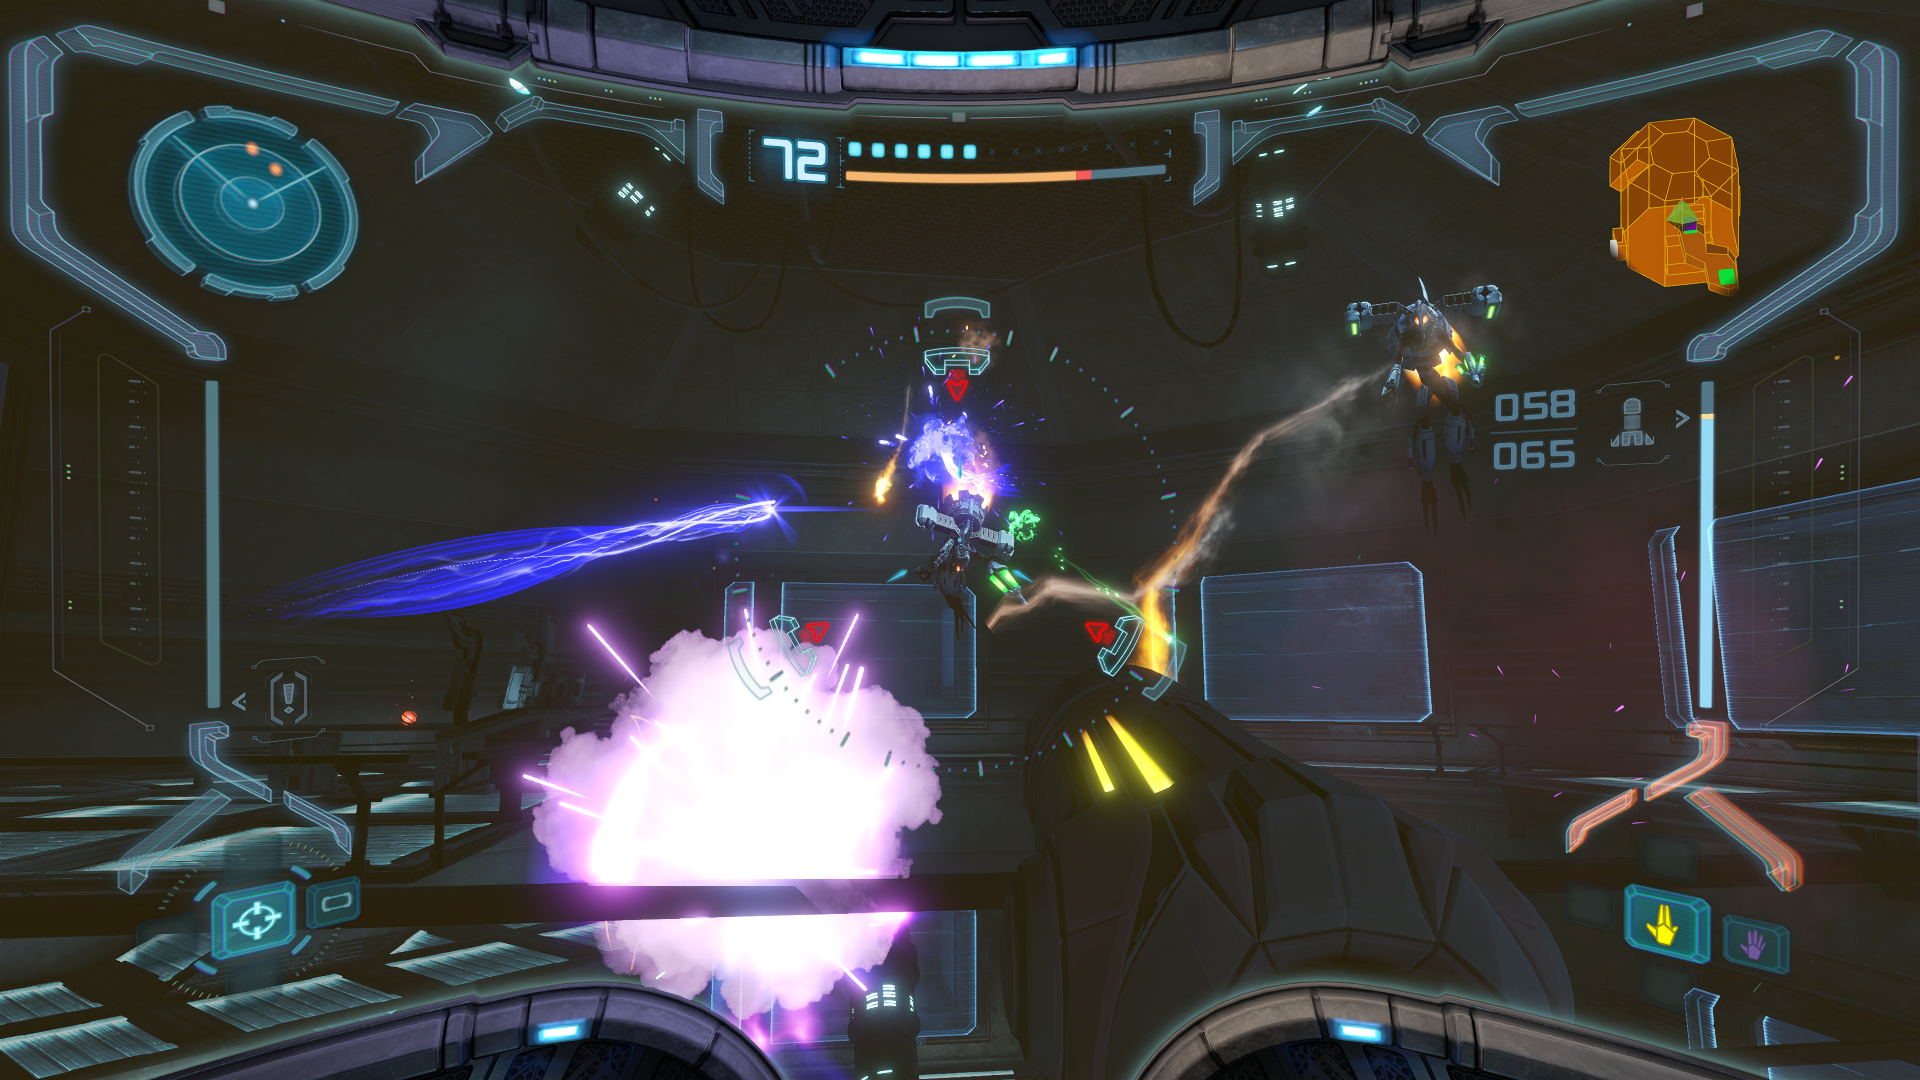
Make your way to the Control Tower and take out the Space Pirates in the area. After the first wave, a cutscene will pop up showing a new Space Pirate variant entering the arena, the FLYING PIRATE. Scan one then fight the squadron off. If you haven’t mastered the fast missile technique yet, your new Super Missile will take them out with a single shot at the cost of five missiles; otherwise, use fast missiles since they only need three to go down. If you’re on Hard Mode, I‘d recommend using Super Missiles regardless since it takes five regular missiles anyways. After the battle is won, continue on to Research Lab Aether.
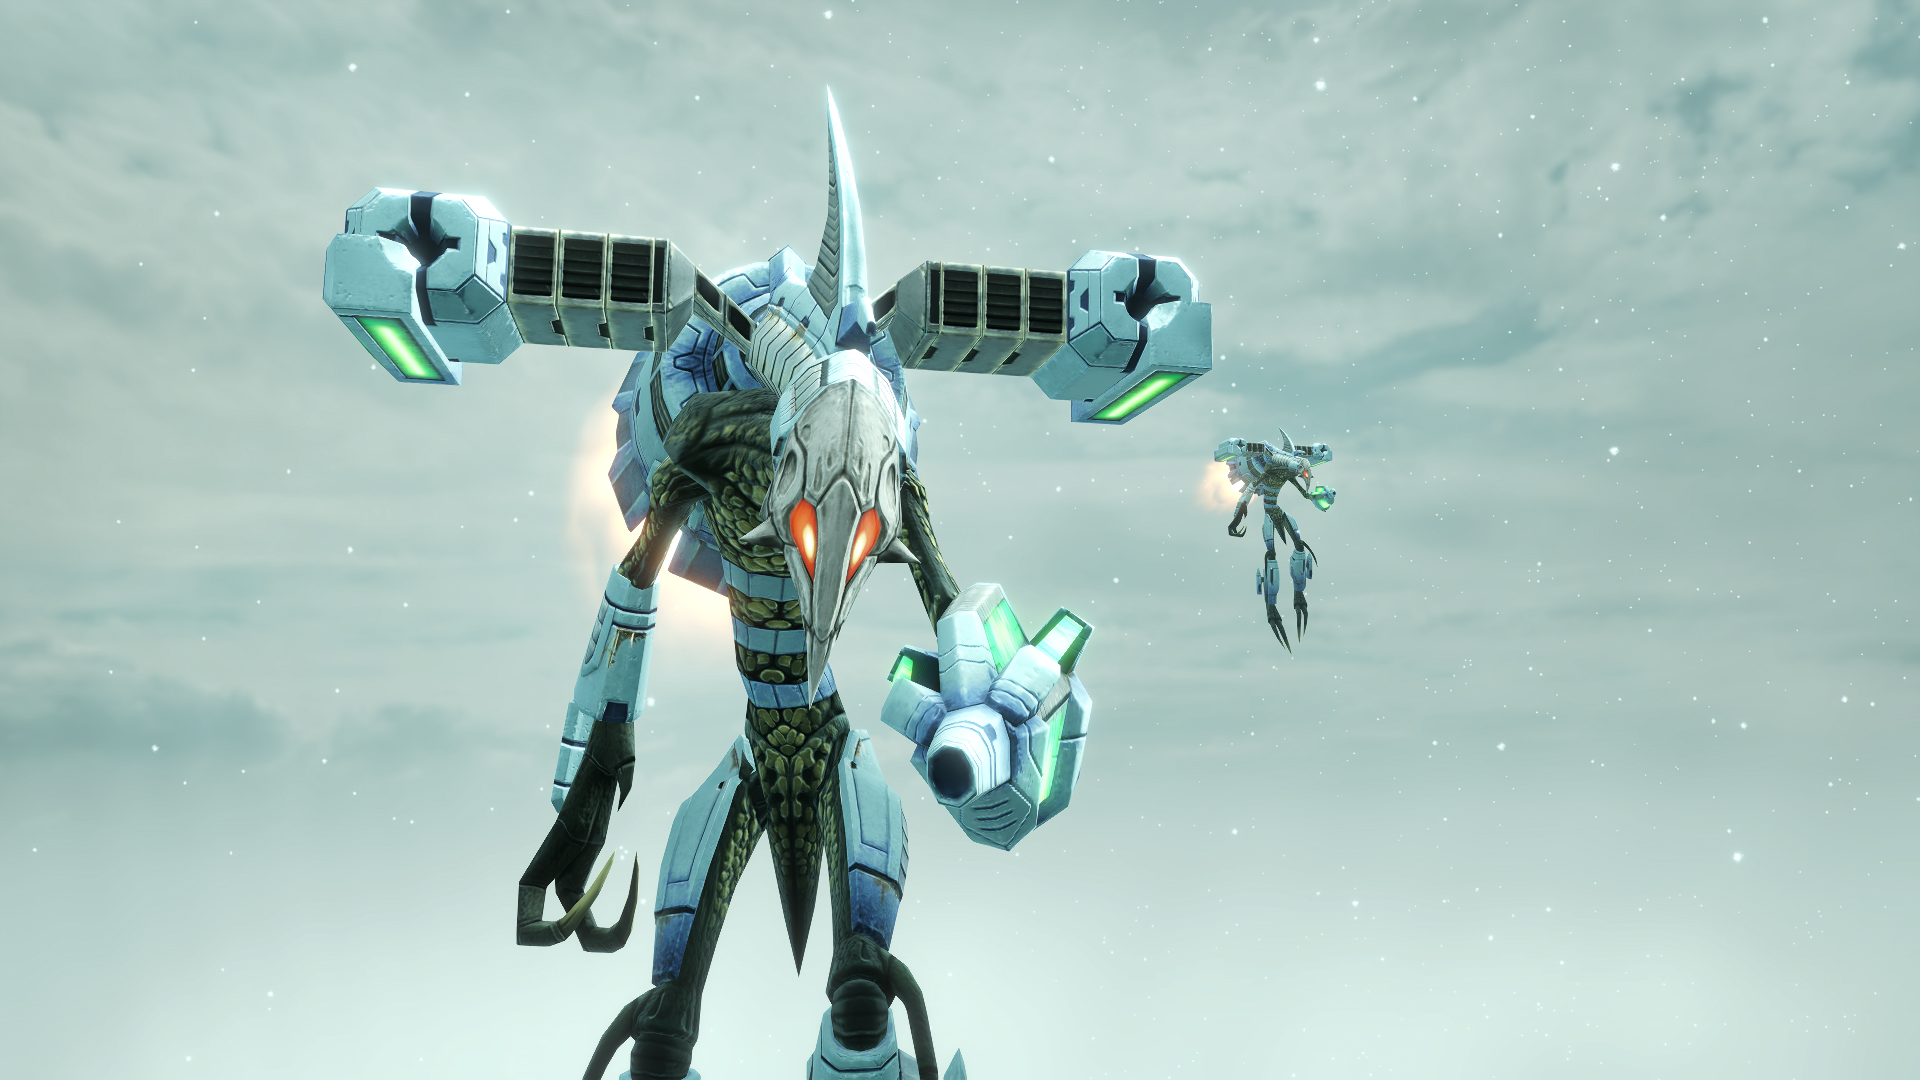
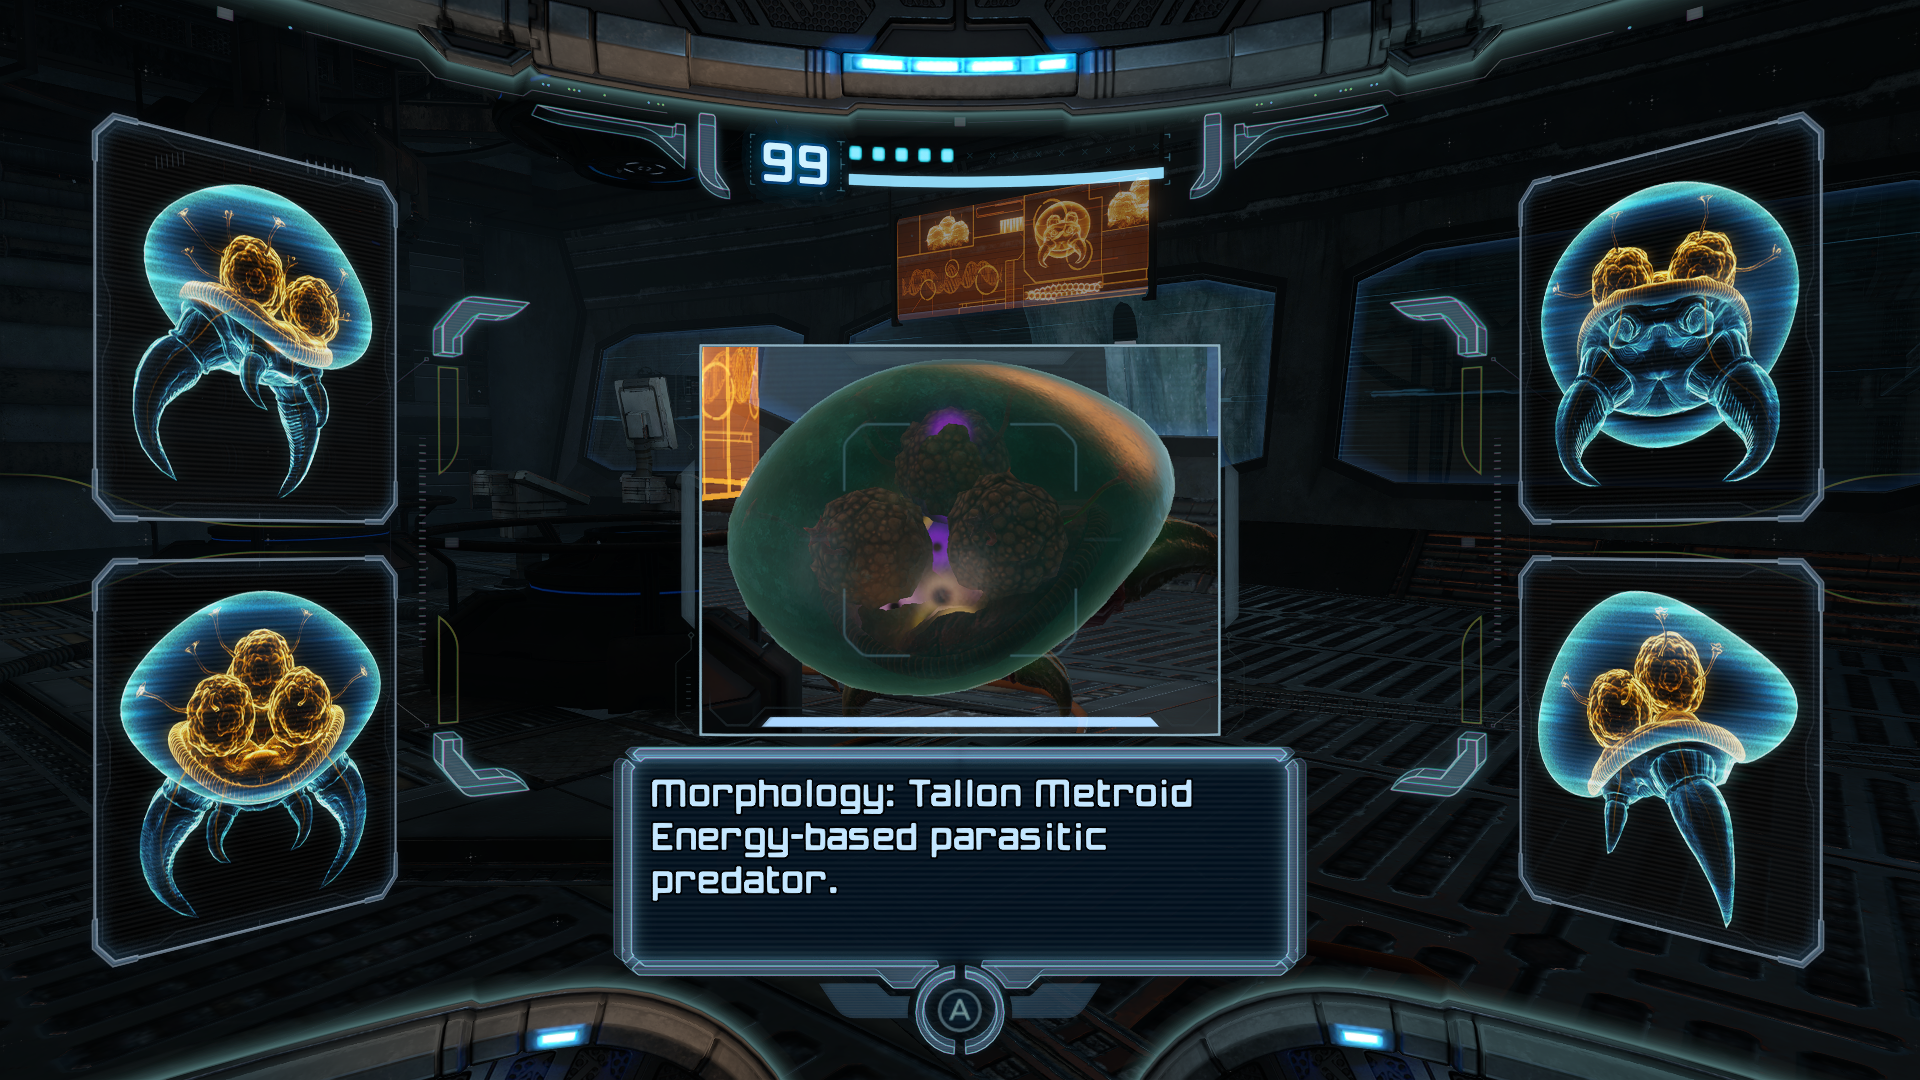
As soon as you enter Research Lab Aether, we stumble upon a major discovery: a live Metroid in the flesh protected by a stasis tank at the center of the lab. It was previously believed that the Space Pirate’s supply of Metroids had been completely eradicated on Zebes three years ago, but clearly, we were mistaken. Scan the creature to reveal that it isn’t your typical Metroid, but a TALLON METROID, an evolution of Metroids native to Tallon IV after radical exposure to Phazon (In all versions of Metroid Prime prior to Metroid Prime Remastered for the Nintendo Switch, these scans still show up as basic Metroids.). In practice, this evolution looks and functions nearly identically to a regular Metroid with the exception that it can momentarily absorb damage to heal itself, and it can also be defeated with non-ice based attacks (though they are very much still vulnerable to cold temperatures).
That’s pretty convenient for us, since right after scanning the Metroid, it breaks free, and we don’t have any ice attacks on us! Tallon Metroids look scary but go down pretty easily if you know what you’re doing. All you need to do is fire a couple of charge shots at it while it’s normal sized. If you try to damage it while it momentarily shrinks in size, it will soak up your damage and replenish its health. If a Tallon Metroid latches onto you, just like in previous entries, roll into the Morph Ball and lay a bomb to shake it off.
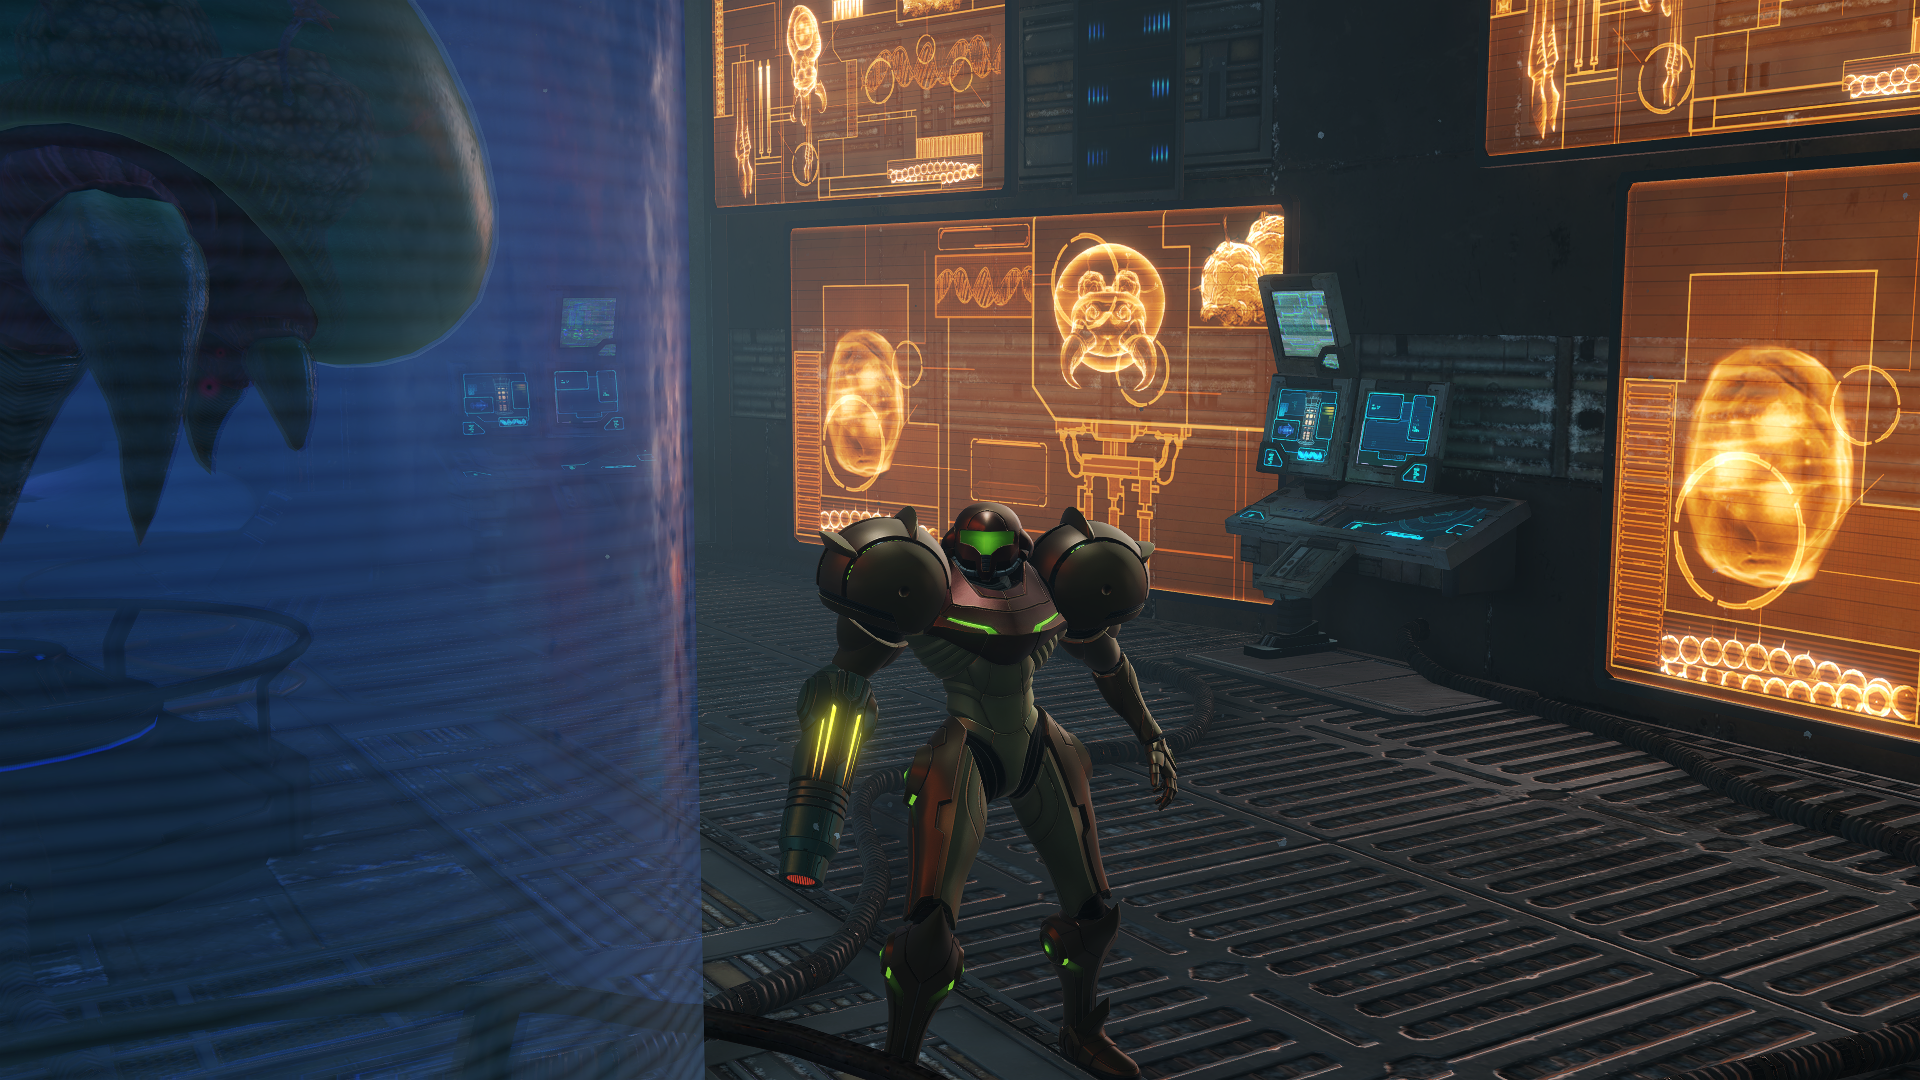
After you defeat the Tallon Metroid, a Space Pirate will burst through the window and attack. Take him down along with the rest of the pirates in the lab, but also lookout for some more Pirate Data. On the fourth floor, you’ll find “METROID STUDIES” and “META RIDLEY”. On the third floor right after jumping out of the window you’ll find “PHAZON INFUSION”. Finally, on the first floor of the lab, you’ll find “METROID MORPHOLOGY” and “METROID FORCES”. After taking out all enemy forces and grabbing those scans, there’s a couple items in this room we can grab! First off, you’ll see ENERGY TANK #6 sitting in a stasis tank just to the left of the scans on the first floor; Destroy the tank with a missile and claim your prize. There’s also a Missile Expansion accessible via the second floor. Go to the edge of the platform and look up to find a zig-zaggy piece of infrastructure with a bright blue line highlighting it. From the second floor, jump to the top of that and use your Morph Ball to SLOWLY navigate the narrow path and into MISSILE EXPANSION #13. That’s everything to do in this room, let’s keep moving forward!
In Research Core Access, scan the ICE BEETLE before leaving the hallway. In the Research Core, take out all the Space Pirate forces along with the turrets lining the walls. Along the way you need to scan three panels that disable the force field surrounding an unknown item at the center of the room. As you’re making your way down, stop at the computer terminals you see and scan anything with a red square. Once all the enemies are defeated and the shields are lowered, go up and grab your first new visor upgrade of the game, the THERMAL VISOR.
Lights Out
Scans in This Section
Creatures: Sentry Drone
As soon as you liberate the Thermal Visor from the Space Pirates, they will take extreme measures and cut the main power, casting the entire base into darkness. All of the pirates you face in areas with cut power will be Shadow Pirates, so if you didn’t scan the random one at the start of the facility (you see why I went on that rant now?) you’ll have plenty of opportunities to do so here. As you exit the Research Core, you’ll soon learn the cut power also results in weakened force fields allowing the Metroids to escape. Luckily they won’t break out until you approach, so you can take them on individually. Once you get back to the top of the core, you’ll notice the doorway isn’t receiving power. To activate the door’s auxiliary power, you need to use your Thermal Visor to find a conduit in the wall and fire your Wave Beam at it to give it a charge. Keep this in mind as several more puzzles in the game have this gimmick.
When you enter Research Core Access, the Ice Beetles from earlier will now be replaced with a pair of SENTRY DRONES. Scan them quickly because they do not mess around! Sentry Drones will cause static interference in your visor as you approach them; they also don’t emit heat signatures for your Thermal Visor, though you’ll still want to keep it active since the power is out and you won’t be able to see your surroundings without it. They’re vulnerable to the Wave Beam, but I only recommend using that if you haven’t mastered fast missiles yet. There’s not much new information to give as you make your exit, so for now make your way back towards Research Lab Hydra (NOT AETHER) near the front of the base.
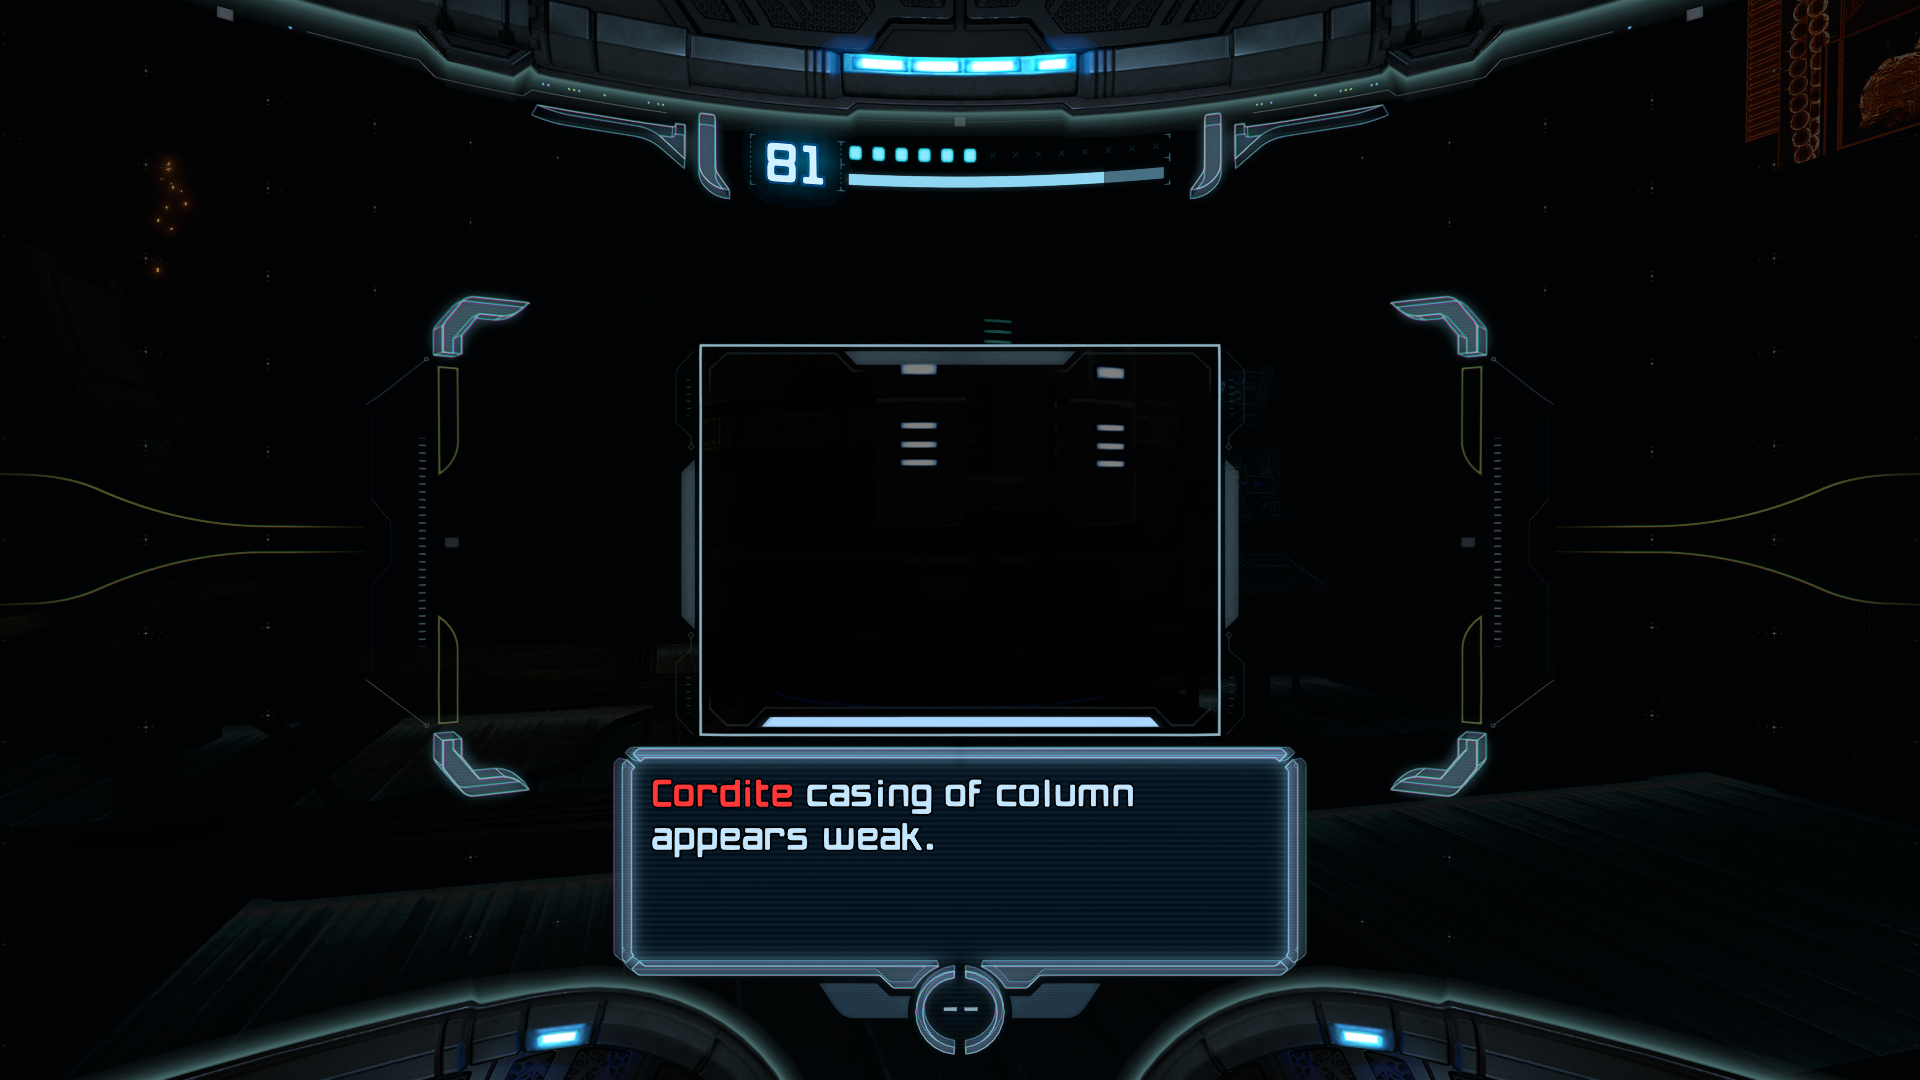
As soon as you enter, activate your Scan Visor and look for a Cordite column. Cordite is a material vulnerable to Super Missiles, so blow that column up to reveal MISSILE EXPANSION #14! That’s about it for now; exit the base and head to the Ruined Courtyard, making sure to save your progress at the Save Station outside. Do that before destroying the crates if you need to refill your missiles, as full health will highly increase the likelihood of missile drops. At the powered-off door, fire a Super Missile at the Cordite architecture above to reveal a conduit. Fire your Wave Beam at it to power on the door. Boost through the quarantine tunnels and get ready, because it’s time… to ROCK and roll.
Thardus
Scans in This Section
Creatures: Thardus *missable*
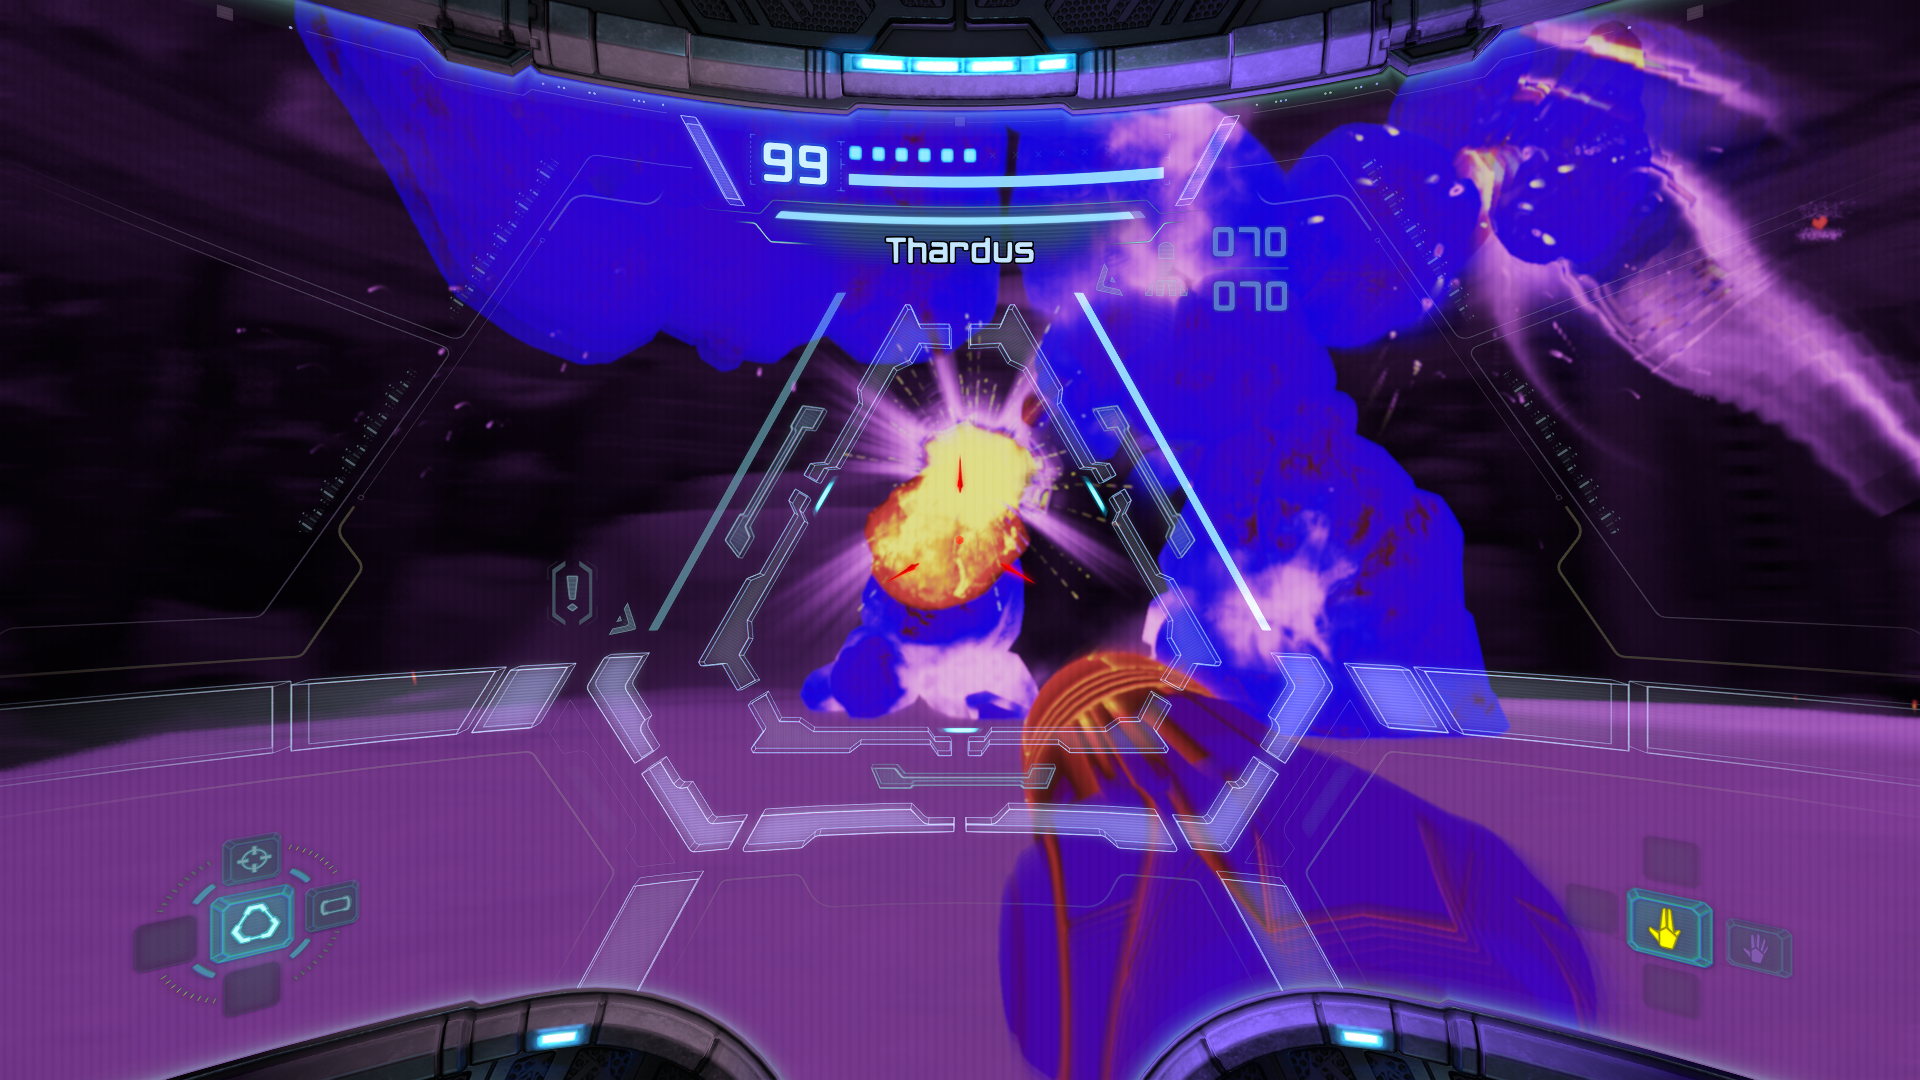
As always, start the battle off by scanning THARDUS. This is a one time scan, so don’t forget!
Get ready, because Thardus will be a step up from every boss you’ve faced so far. As you can see, Thardus is absolutely massive, being made up of a bunch of… Phazon-infused rocks. Riiiight….

You’ll notice when you start the battle that you won’t be able to lock on to any part of Thardus, and that it won’t give you much time to get your bearings. Thardus doesn’t have a whole plethora of attacks, but the few weapons in its arsenal hurt a lot. Its standard attacks will involve slamming its fist down on the ground, which can A) smash you like a pancake, and B) send an ice-shockwave pulsating through the ground which can freeze you like a popsicle. Not great. Strafe and jump to avoid these attacks. Thardus will also summon up some random boulders and stones and hurl them your way, but if you’re fast and target lock these small rocks, you can blow them up for ammo and health.
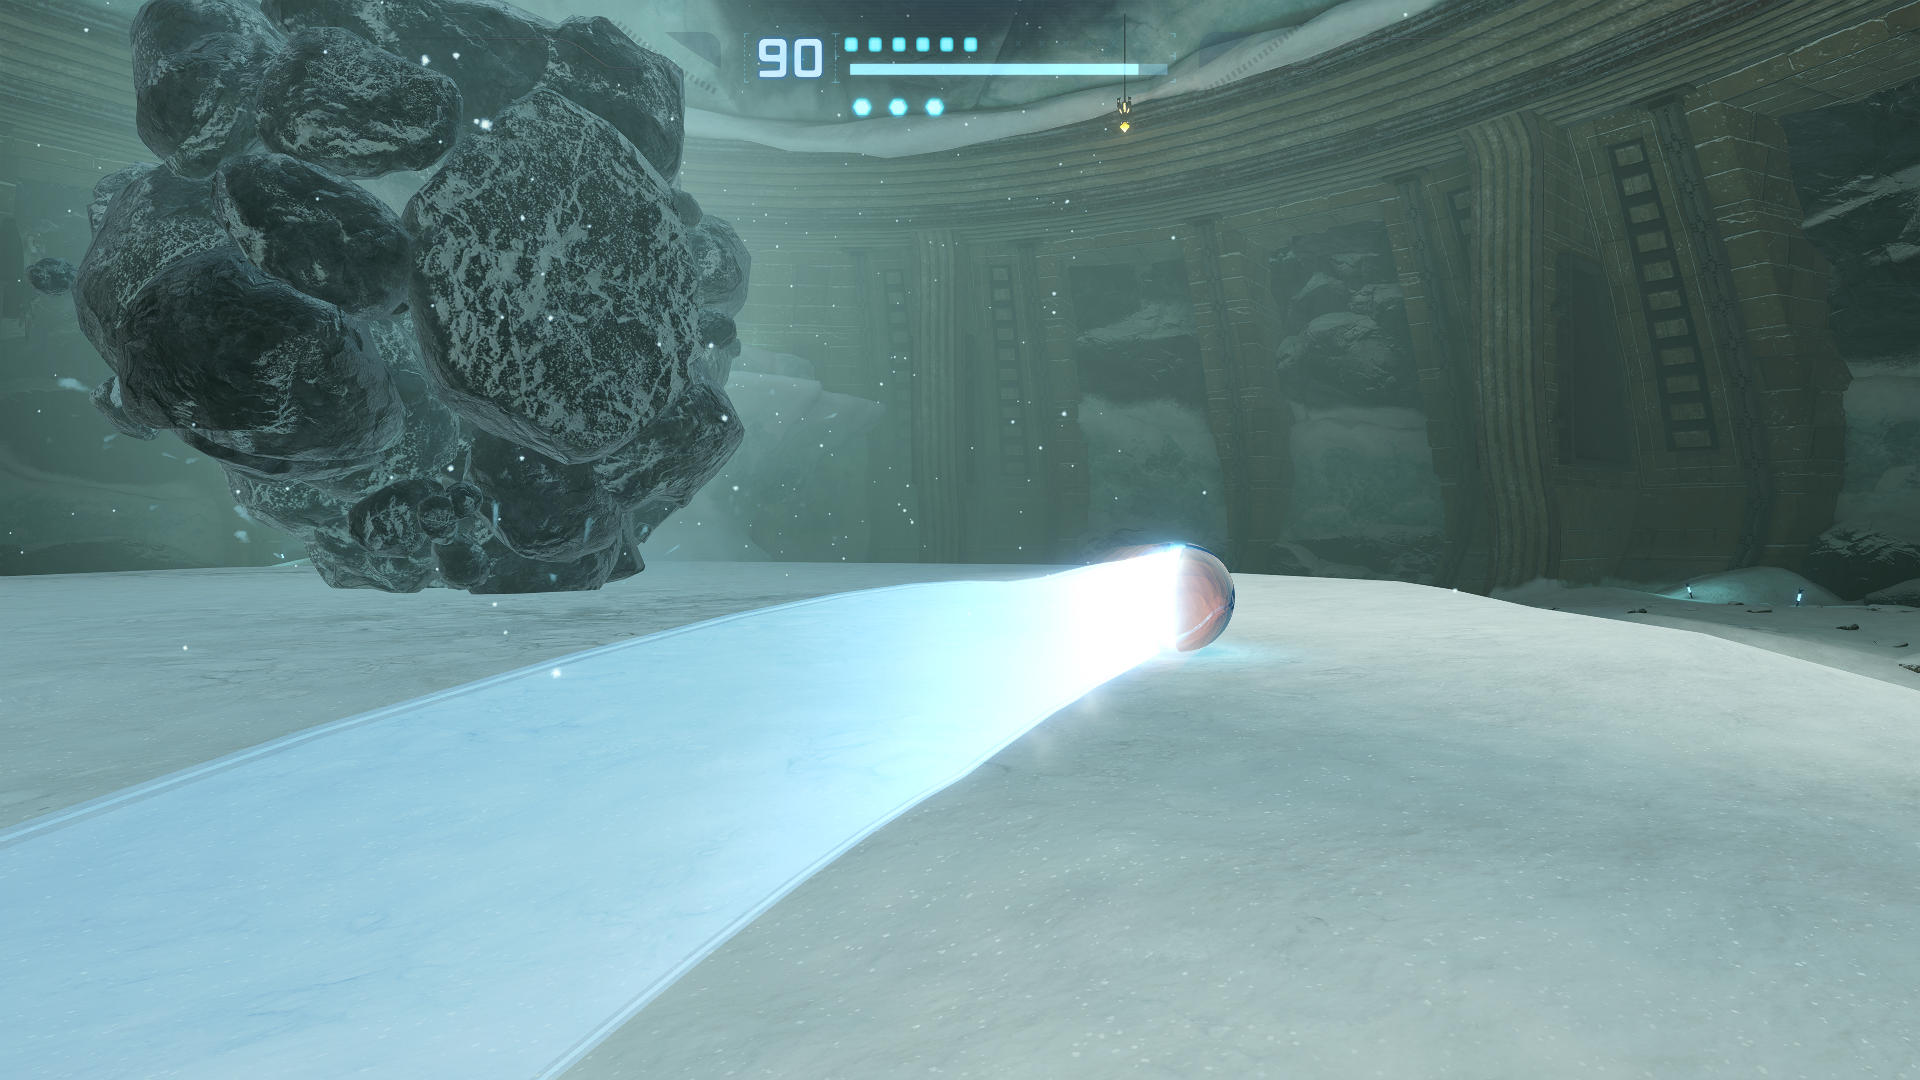
Thardus’s meanest, nastiest attack, however, is when it decides to go into “Morph Ball” mode. Thardus will curl into a ball and start rolling around, damaging you big time if you happen to be in its way. Crude, but effective – who says the simple stuff doesn’t hold up? There’s not really a science or specific method involved to dodging this attack; use whatever you can to make sure you’re not in the way. The Boost Ball works fine, a healthy distance is always good, whatever – just make sure you’re not getting flattened!
So now to actually damage it. You may not be able to lock on to Thardus with your Combat Visor, but your Thermal Visor will pinpoint his weak spot quite nicely. Switch over to Thermal and lock on to whatever limb happens to be highlighted. Launch a Super Missile when you have a shot and you’ll break the stone casing around the limb, leaving the inner core Phazon exposed. Switch quickly back to your Combat Visor, and launch one more Super Missile shot. This should break the appendage and damage Thardus greatly.
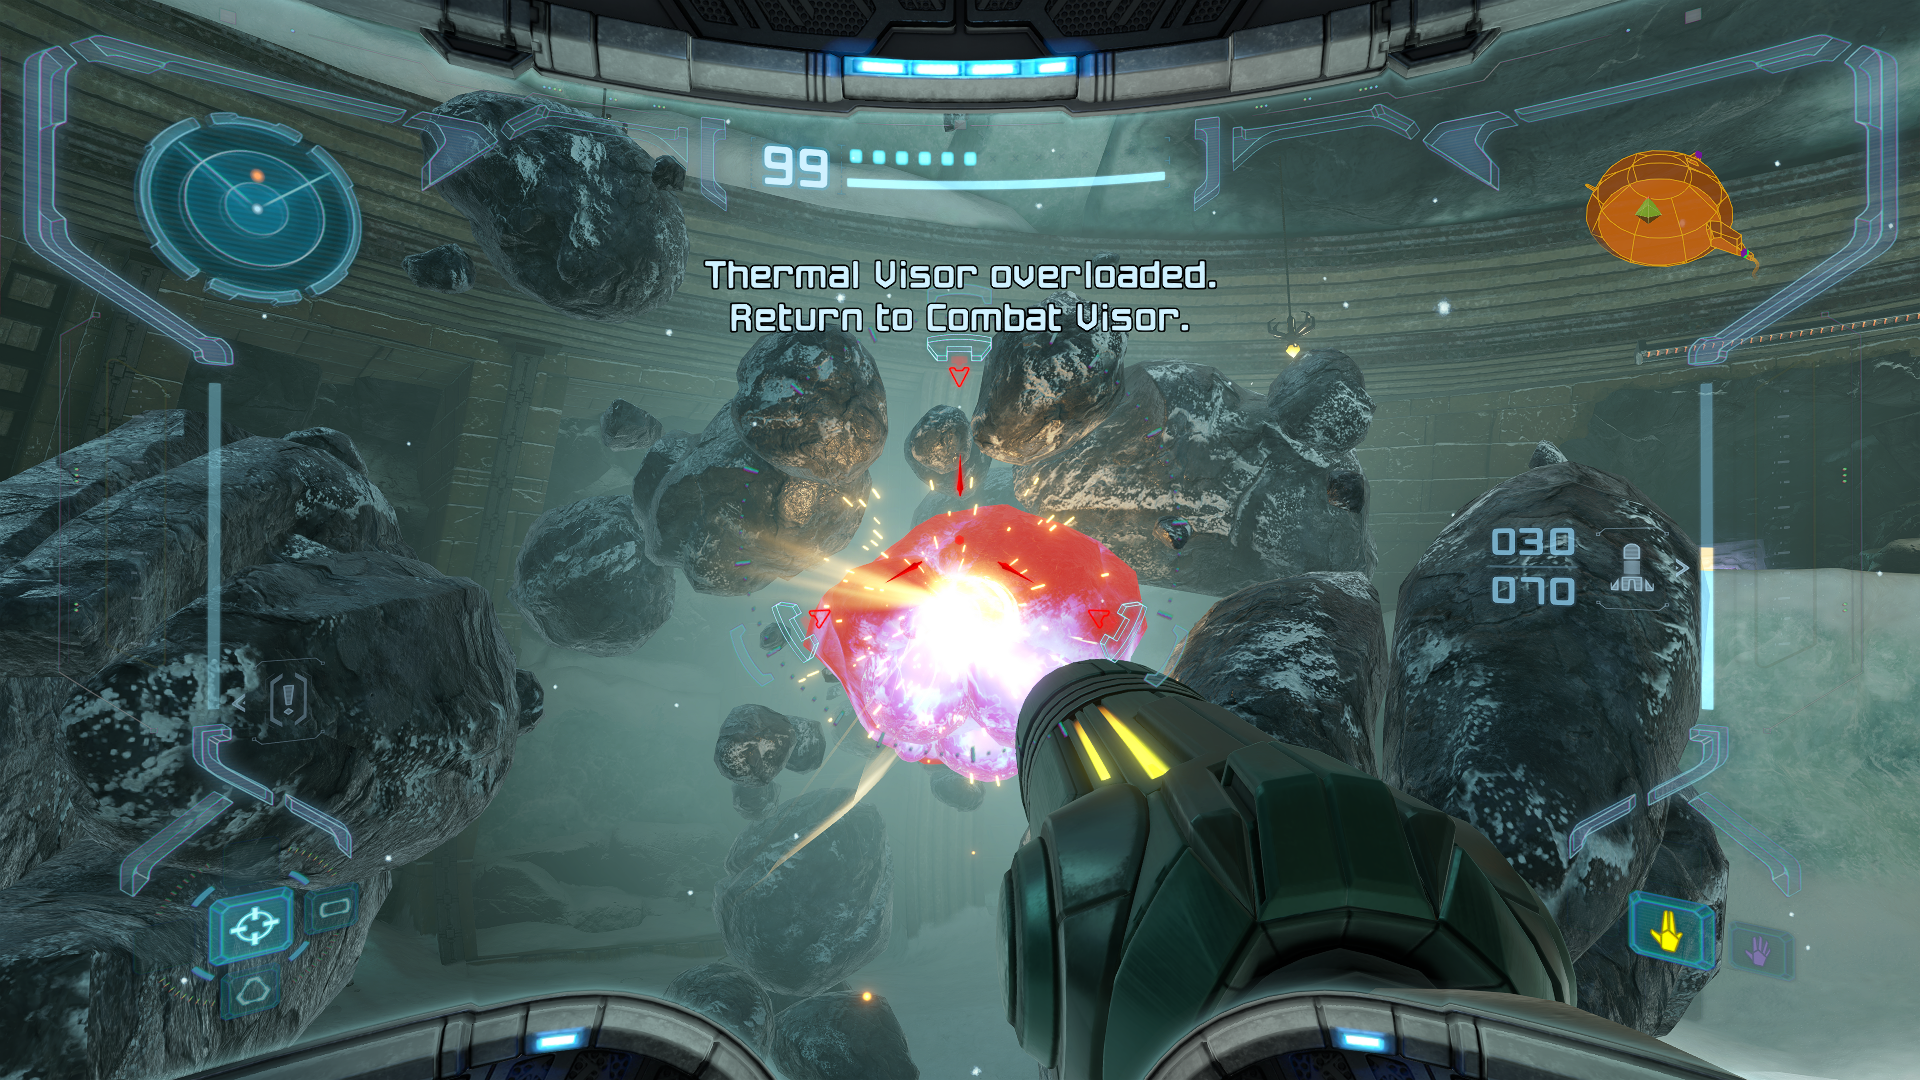
After hitting Thardus a couple times, it will start to shriek and summon lightning bolts around it. Stay clear and wait it out; soon enough, you’ll be able to lock on again. Around this time, visibility with your Combat Visor will be quite poor and the arena will be covered in fog. Just keep locked on and avoiding Thardus’s attacks, attacking as usual.
Keep up the pressure and remember, if you run out of missiles, charged Wave Beam shots will damage Thardus effectively. The fight and attack will mostly remain the same from start to finish, so just keep chipping away at the big rock’s health and, eventually, Thardus will fall.
Next Chapter: Ghosts & Gravity