


Metroid Prime Hunters Multiplayer Walkthrough – Control Setups
This guide will help you set up your desired control setups if you are playing on an emulator with your own dumped ROM from a legally purchased Metroid Prime Hunters cartridge. Playing via emulation is trickier due to the lack of touch screen controls, but we’ll help set you up with either mouse and keyboard controls, or if you prefer, mapping out each individual input to a controller. NOTE: for the controller method, you will need an active Steam account.
Mouse and Keyboard
To play with Mouse and Keyboard controls, follow this simple tutorial here:
1. Download the Metroid Prime Hunters specific Nintendo DS emulator called PrimeMelonDS. As referenced in the Online Play guide, you can find the links to do so here: Download | Instructions (scroll down a bit!) | FAQ
2. Load up PrimeMelonDS with your own dumped ROM from a legally purchased Metroid Prime Hunters cartridge. NOTE: You will need a North American Revision 1 cartridge, as none of the other versions currently support Mouse and Keyboard controls.
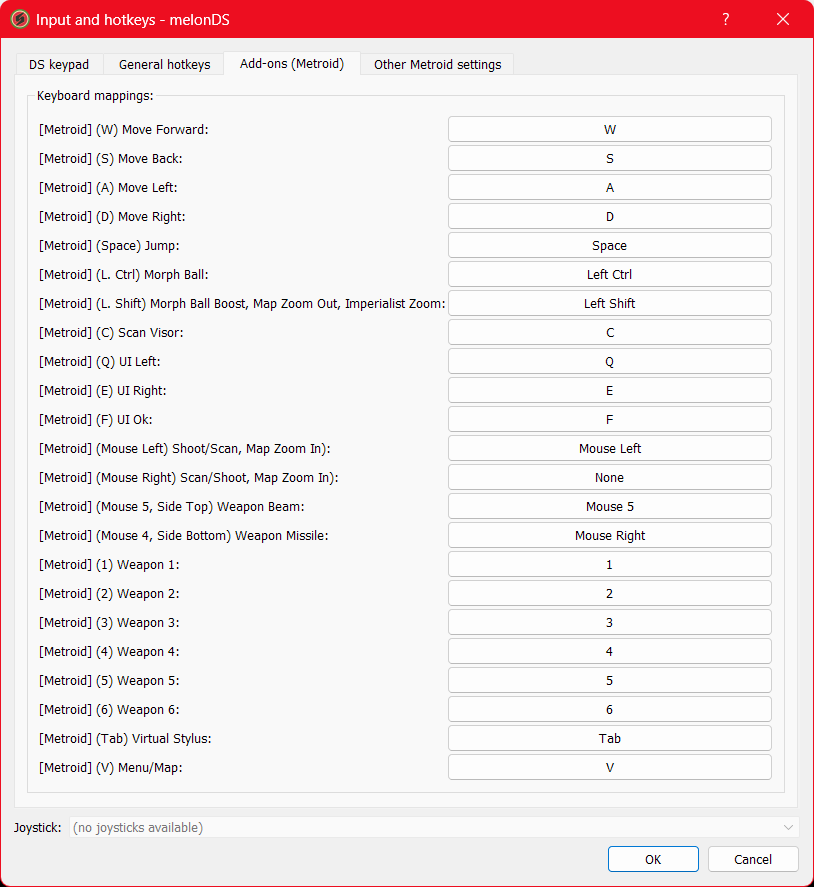
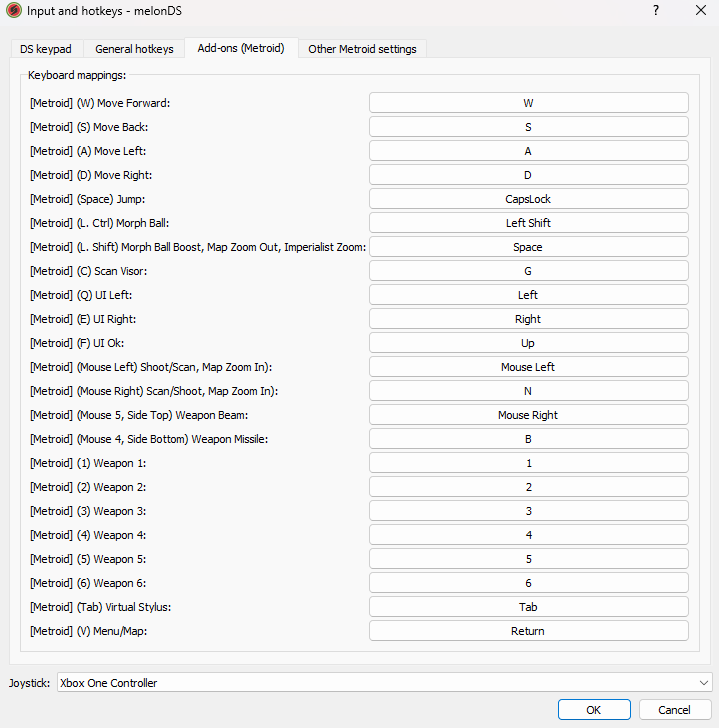
3. You should automatically be set up for mouse and keyboard controls from the get go! Of course, you’ll want to customize the layout to your preferred layout. I’ll post a picture of my settings – keep in mind, I have a standard two-button mouse, so you can really customize your layouts if you have a gaming-specific mouse!
Controller
To play with a controller, you will need to have both PrimeMelonDS installed, a legally dumped copy of Metroid Prime Hunters ROM, and a Steam account. We’re going to set something up called controller binding. Follow these steps:
1. Get a Steam account and install Steam if you haven’t already.
2. In Steam, go to Steam > Settings > Controller. If you’re using an Xbox, Switch Pro, or Playstation controller, enable Steam Input for it; otherwise, enable Steam Input for generic controllers.
3. Close the Settings menu.
4. Go to the Library tab, and click “Add a Game”, then “Add a Non-Steam Game…”.
5. Navigate to wherever you put PrimeMelonDS and pick the PrimeMelonDS executable.
6. Plug in your controller and select PrimeMelonDS in Steam. You should see a Controller box on the right with a button to “View controller settings”. We’ll be getting to that in a bit, but for now start PrimeMelonDS via Steam by clicking the Play button (do not launch the game directly). You will need to open up Hunters through Steam, always, in order for your controller setup to be recognized!
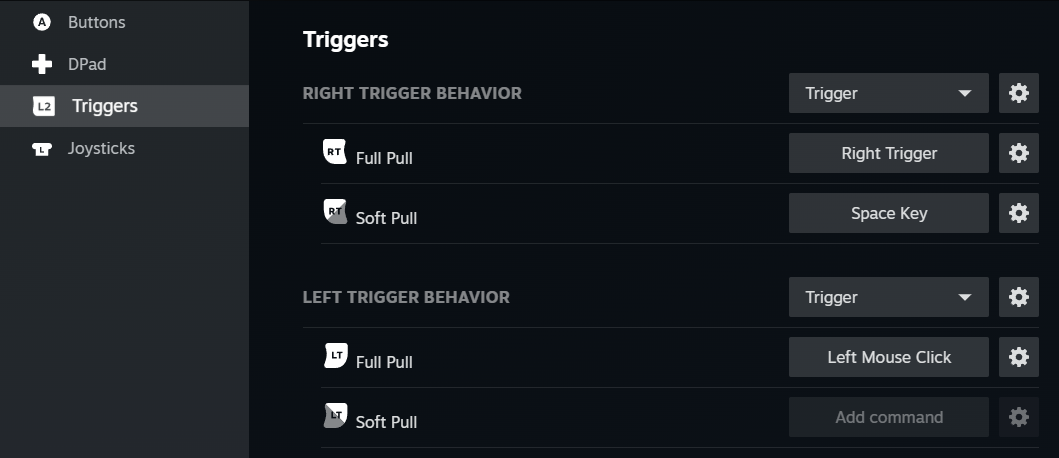
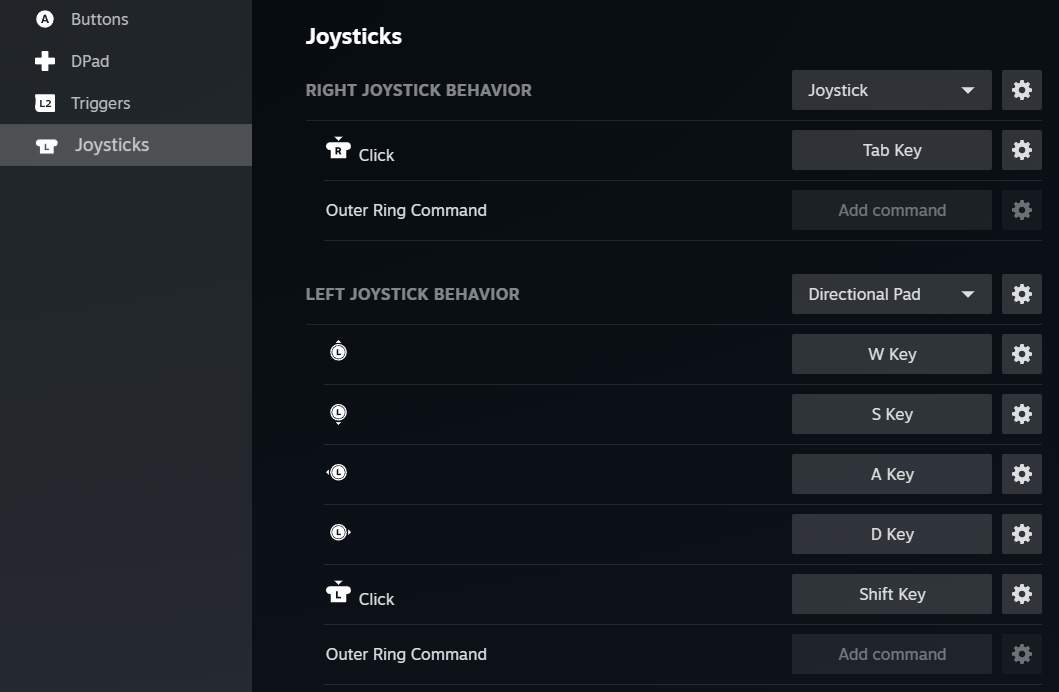
7. Go back to Steam and click that “View Controller Settings” button from before. Click “Edit Layout” and set the buttons to whatever your desired input is. You will want to make sure to set your controller settings first in Steam, and then make sure PrimeMelonDS match’s them.
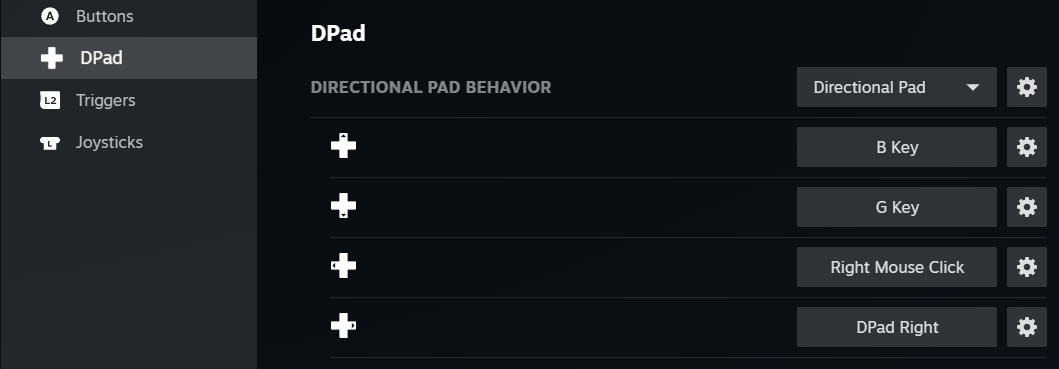
Feel free to customize this to your own preferences, but for reference, this is what I used (Steam first, and MelonDS last):

8. You should now be ready to start a game!
Very important! A few quick notes on how touchscreen controls work when playing with a controller:
- Any time you need to interact with the touch screen (this is most commonly done when using the Scan Visor to read log entries, though not exclusively) you’ll need to press the left joystick in (using my controller setup); you’ll see a circular cursor which be limited to just the touch screen. When you’re ready to exit, press the left joystick again. It’s not perfect, but it will do!
- You’re better off just using your keyboard if possible to switch weapons, even with a controller. You can still do it using the touch screen and controller, but it just takes longer. As a quick reference: Shock Coil = 1; Magmaul = 2; Judicator = 3; Imperialist = 4; Battlehammer = 5; Volt Driver = 6