Metroid: Samus Returns Walkthrough: Missile Expansions by Area
Here you’ll find the location for every Missile Expansion in Metroid: Samus Returns, as well as detailed explanations on how to get them and what powerups you’ll need. Expansions have been listed by area. For a list of expansion by game progression, click here.
Missiles by Area:
Surface Area
Missile Expansion #1
Location: Surface Area (First Visit)
Requirements: None
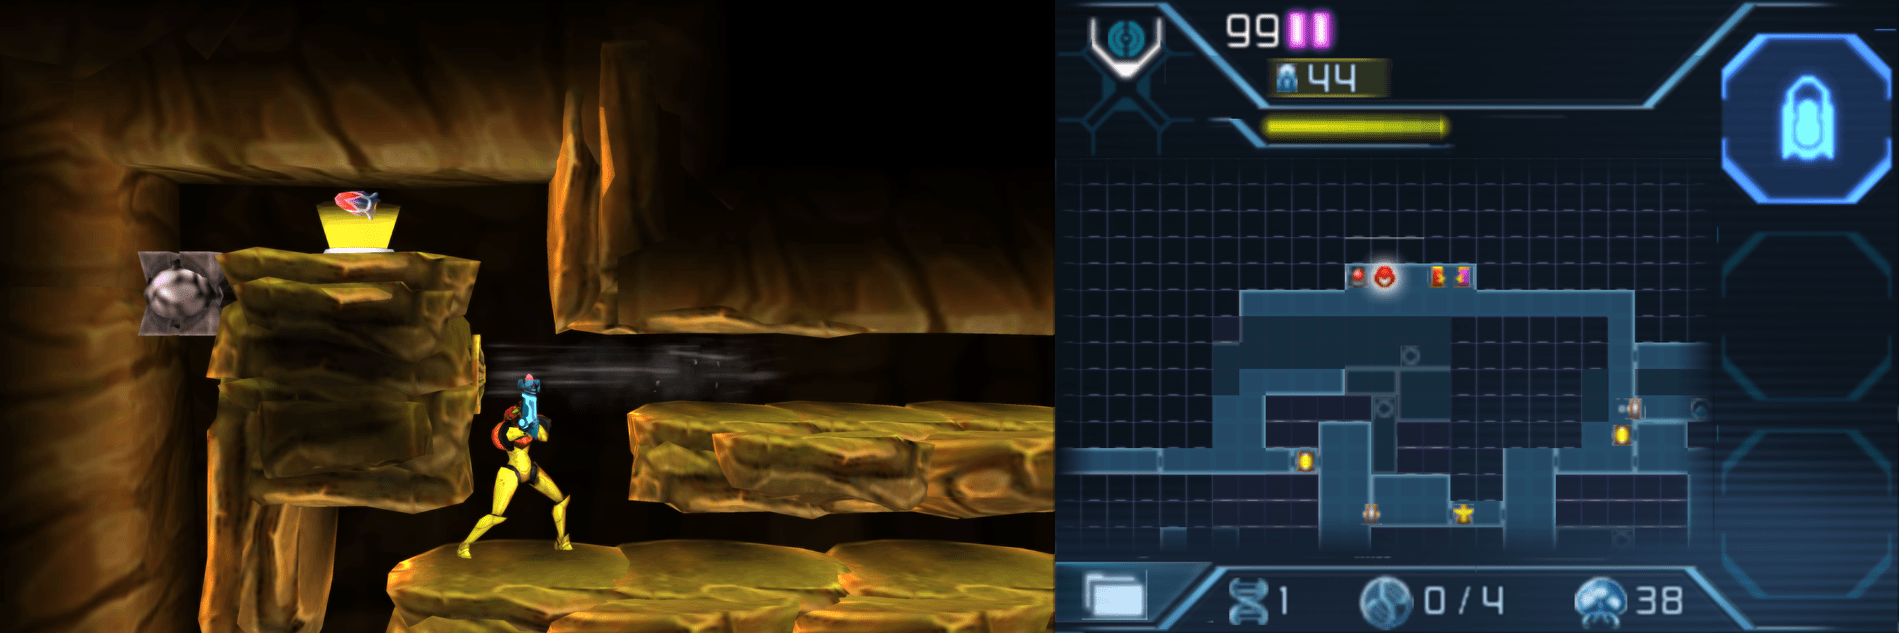
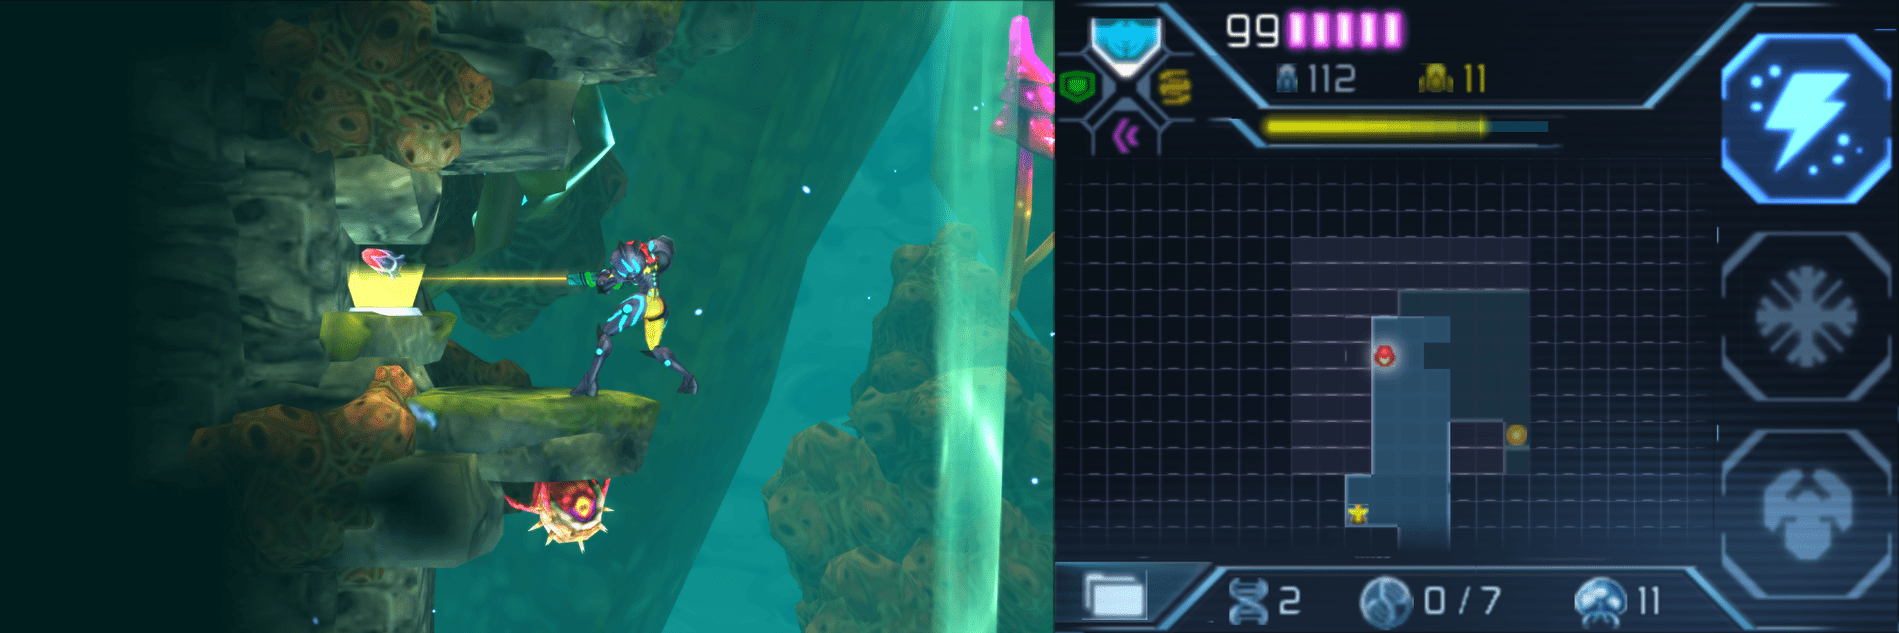
Once you’ve acquired the Scan Pulse, drop down to the bottom and shoot the two blocks to your left. Roll through the Morph Ball tunnel, destroy the enemies in front of you and jump up to grab the ledge on your left. Roll through, and you’ll see that the next ledge is out of your reach. What you’ll need to do is perform a wall jump, which is thankfully pretty easy! Jump towards a wall and, as soon as Samus hits the wall, hit jump again, and you’ll perform a second jump in the opposite direction! Practice this, this is another integral skill you’ll need to use on your journey.
Once you’ve wall jumped towards the upper ledge, deal with the enemies in front of you and then roll under the ledge – you’ll come face-to-face with MISSILE EXPANSION #1!
Missile Expansion #2
Location: Surface Area (First Visit)
Requirements: None
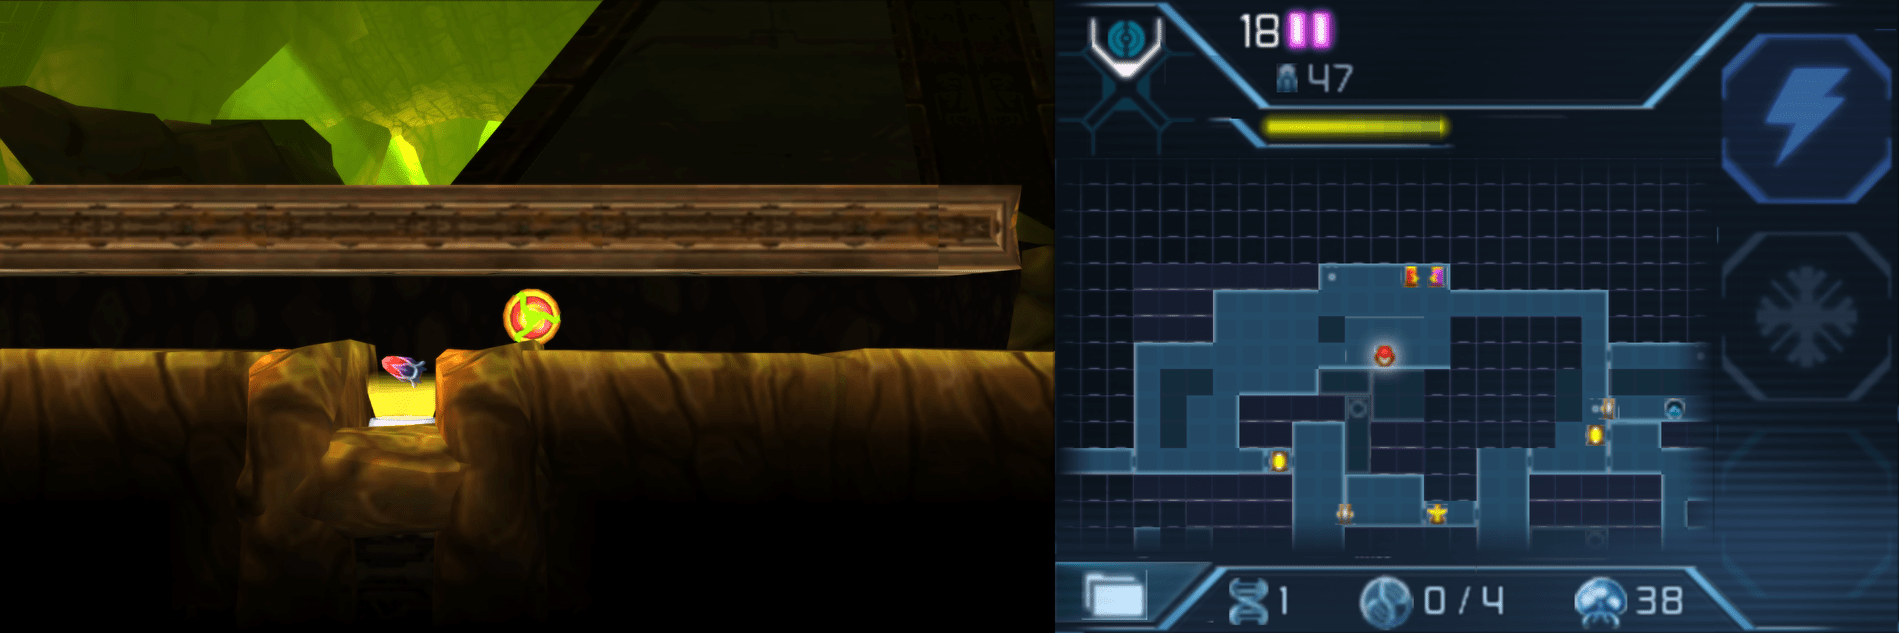
Continue down the pathway, and drop down the Morph Ball tunnels in a very specific way! From the top, roll down and follow the path. Roll down the LEFT side when you get the option go either way, and before you drop down, shoot the wall to reveal MISSILE EXPANSION #2 hidden in a small alcove.
Missile Expansion #3
Location: Surface Area (First Visit)
Requirements: None
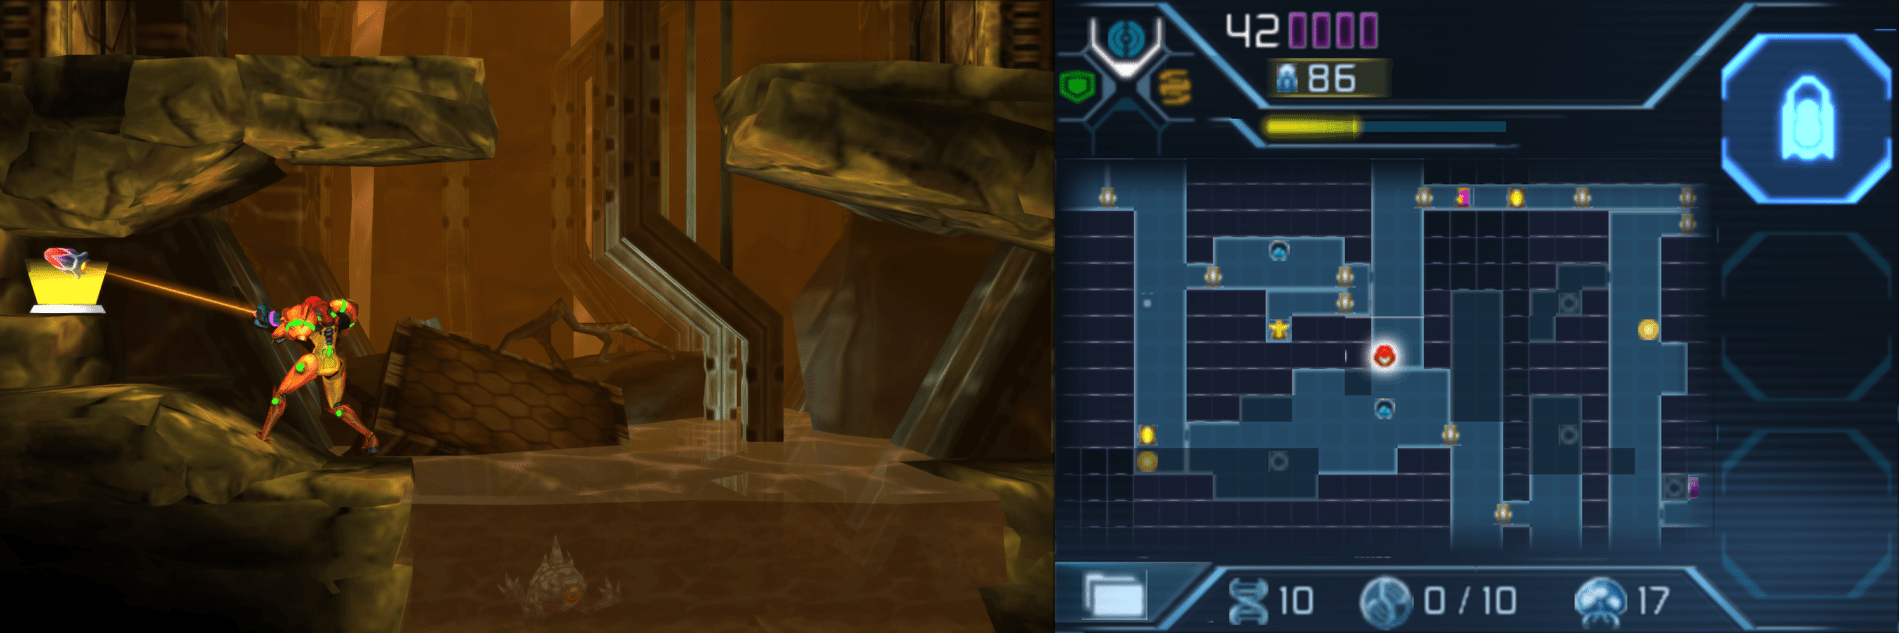
From the Energy Recharge Station, ignore the ledge above you and press towards the left. Defeat some enemies and eventually there will be a bit of a clearing with a Save Station in the bottom part of the room. Use it if you want, and then jump back up and shoot out the leftmost wall. Drop down, sweeping out any creatures in your path, and follow the passageway until you’re facing MISSILE EXPANSION #3.
Missile Expansion #4
Location: Surface Area (First Visit)
Requirements: Missiles
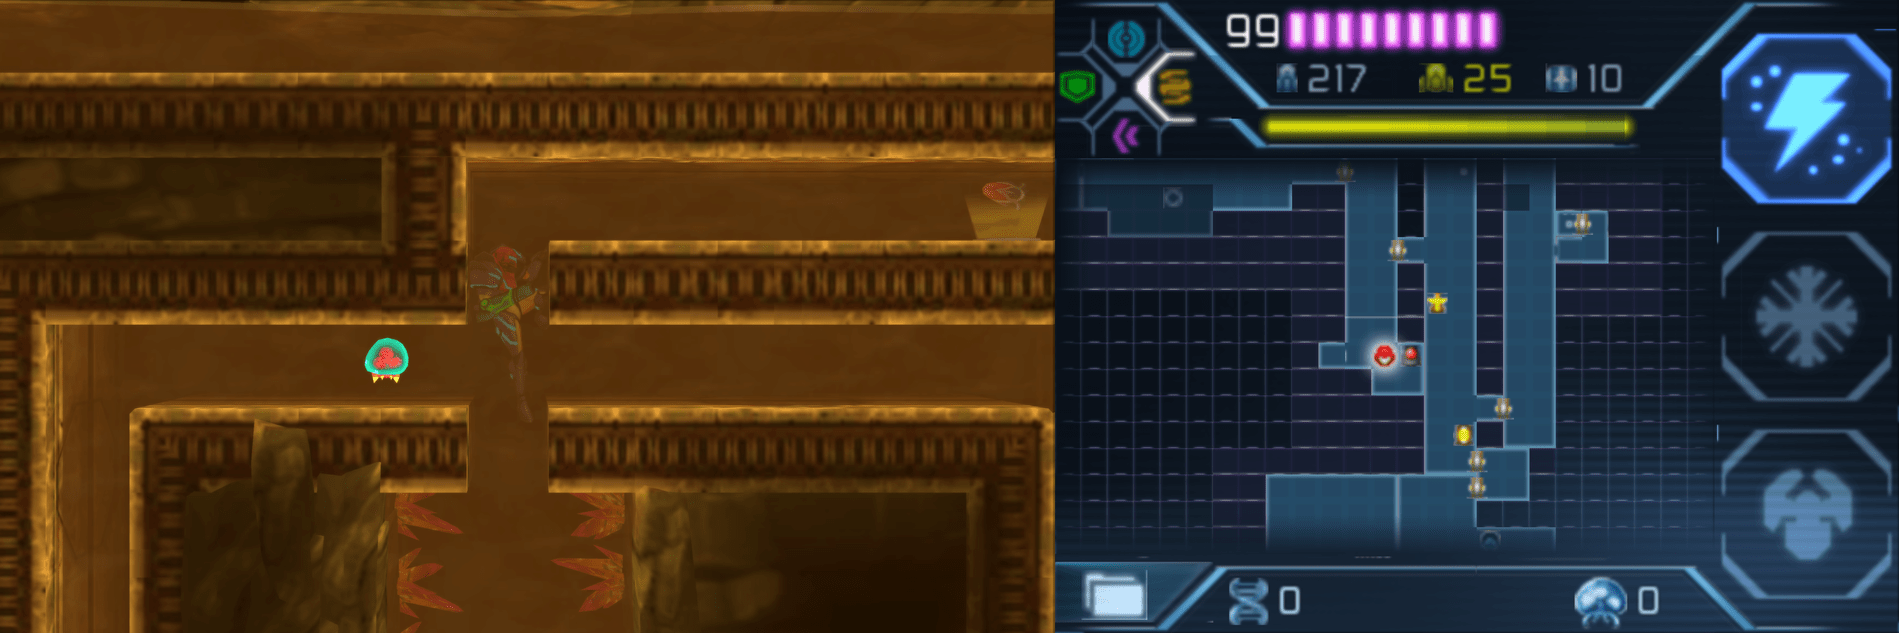
After you exit the room where you acquire the Charge Beam, start the climb back up, but when you get a couple of ledges up, stop and shoot a block in the lower right corner of the wall and a small tunnel will open up; roll through it to grab MISSILE EXPANSION #4.
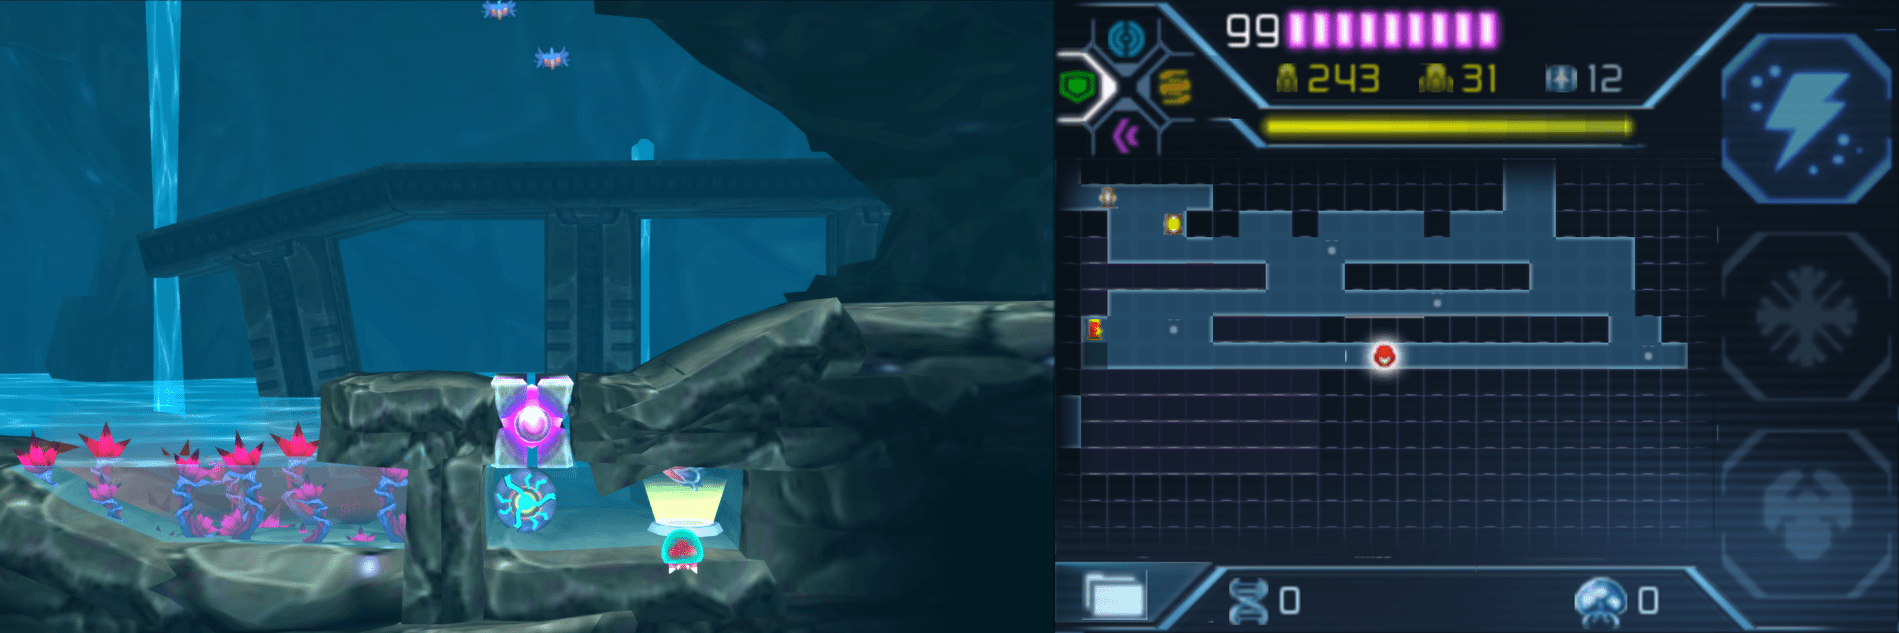
Missile Expansion #44
Location: Surface Area (Second Visit)
Requirements: Morph Ball
To the lower-right of the Teleportal is a Morph Ball tunnel; slip inside and roll to the end. Jump straight up and grab the ledge on the upper left; MISSILE EXPANSION #44 will be sitting right there for you!
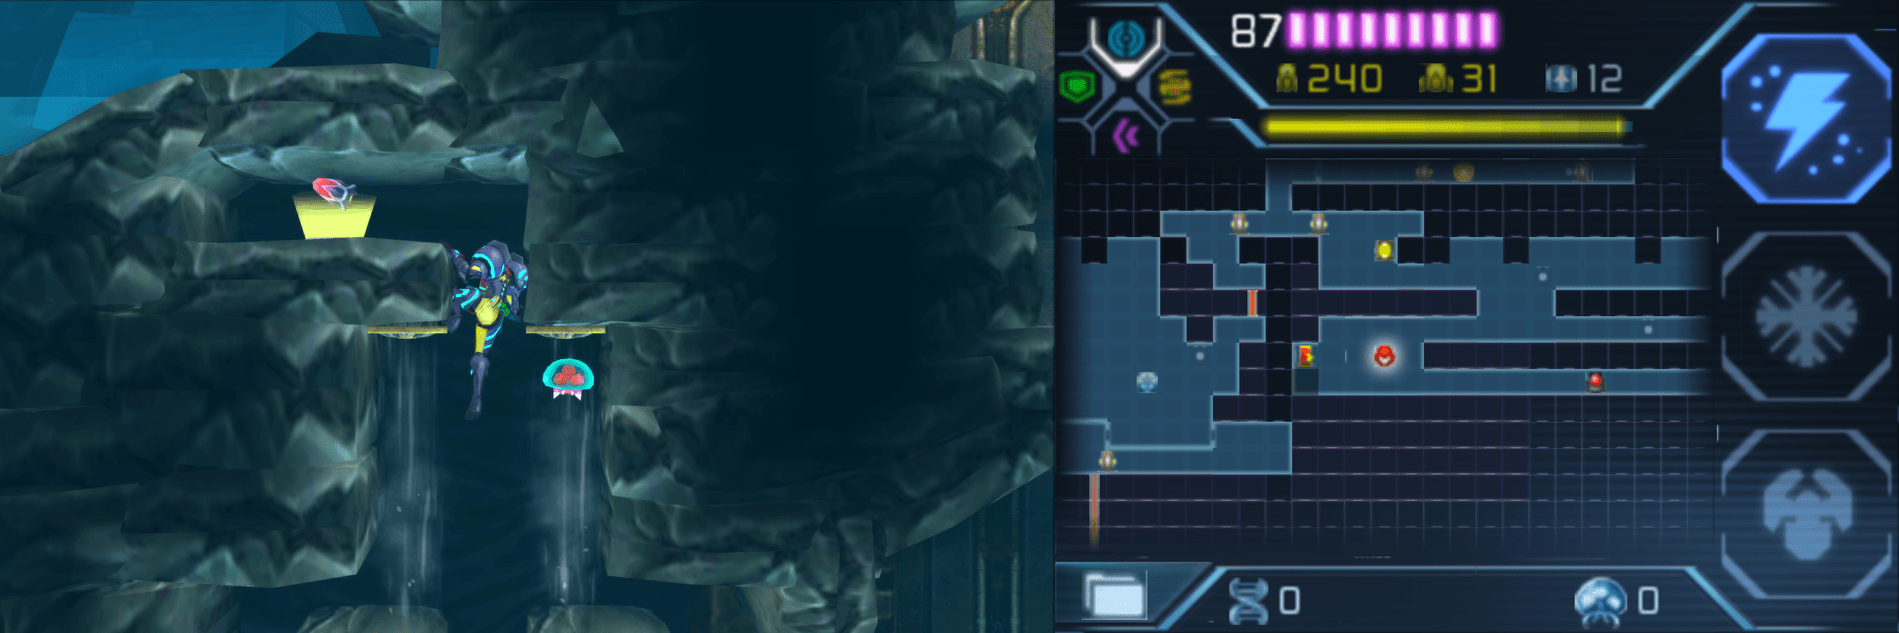
Missile Expansion #45
Location: Surface Area (Second Visit)
Requirements: Morph Ball
Enter the Morph Ball tunnel on the under-right side of the Teleportal. At the tunnels end, jump up and grab MISSILE EXPANSION #45.
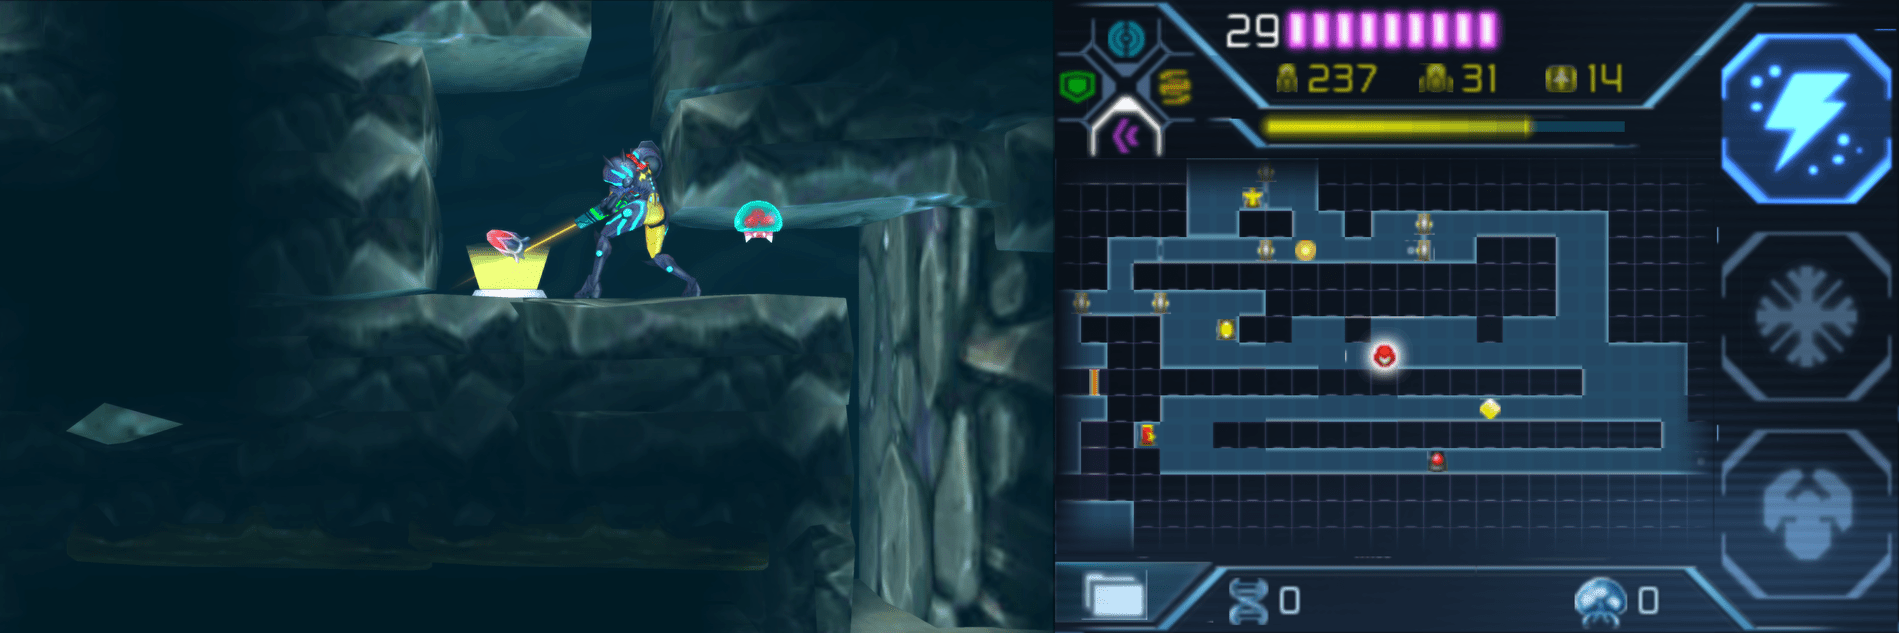
Missile Expansion #46
Location: Surface Area (Second Visit)
Requirements: Morph Ball
Make your way back to the Chozo Statue that gifted you the Morph Ball and exit out of the door on the left. You’ll see MISSILE EXPANSION #46 just begging to be taken in a small tunnel, so grab it!
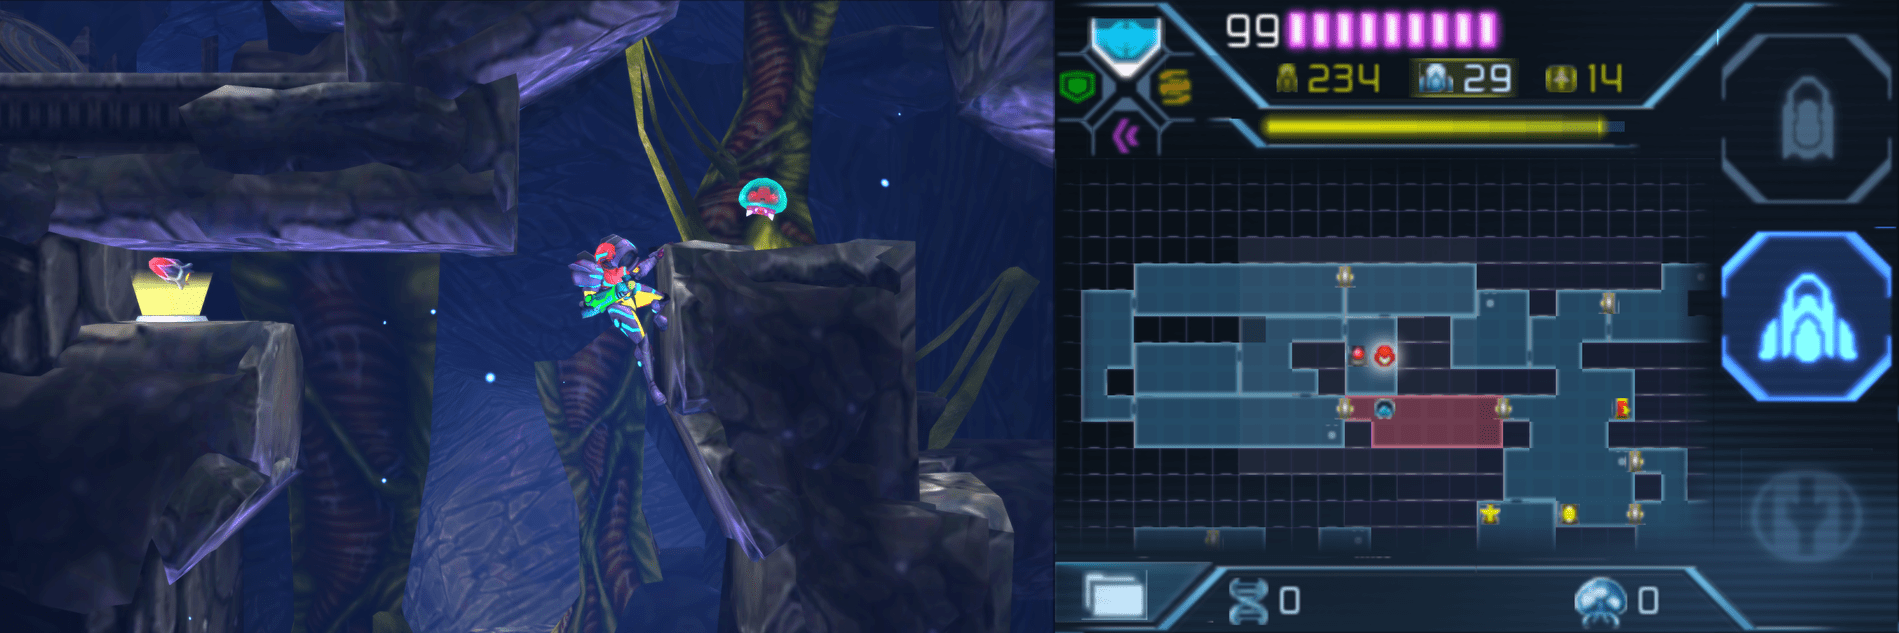
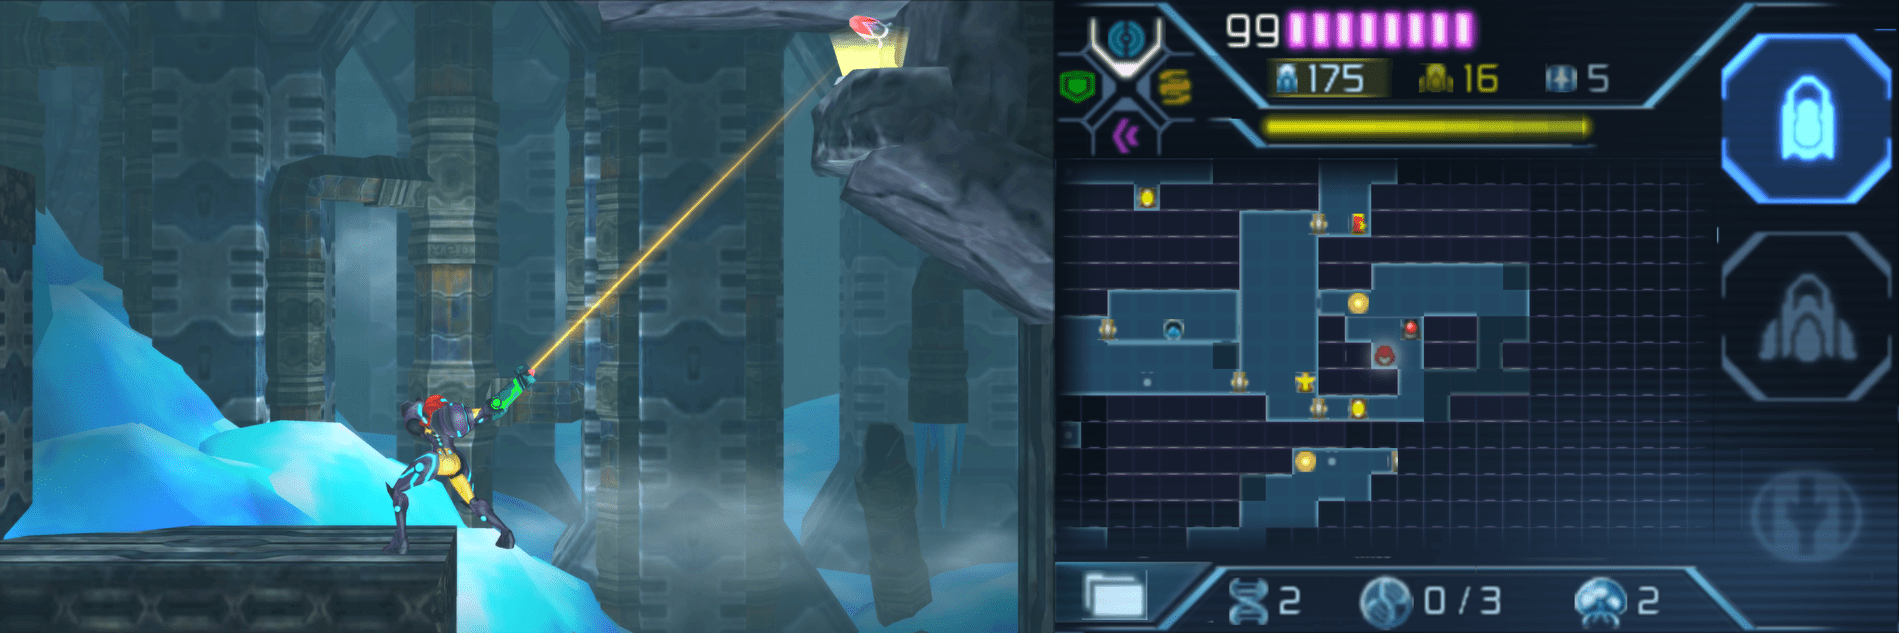
Missile Expansion #64
Location: Surface Area (Third Visit)
Requirements: Baby Metroid, Bombs
Follow the path from the Area 8 elevator, letting the Baby Metroid destroy the crystals along the way, until you get to the point where the floor is covered in red weeds and you see a little spire sticking out of the ceiling that’s surrounded by crystals. Spider Ball it up to the ceiling and let the Baby destroy the crystals; once it’s had its fill, bomb the spire and MISSILE EXPANSION #64 will appear.
Area 1
Missile Expansion #5
Location: Area 1 (First Visit)
Requirements: Bombs
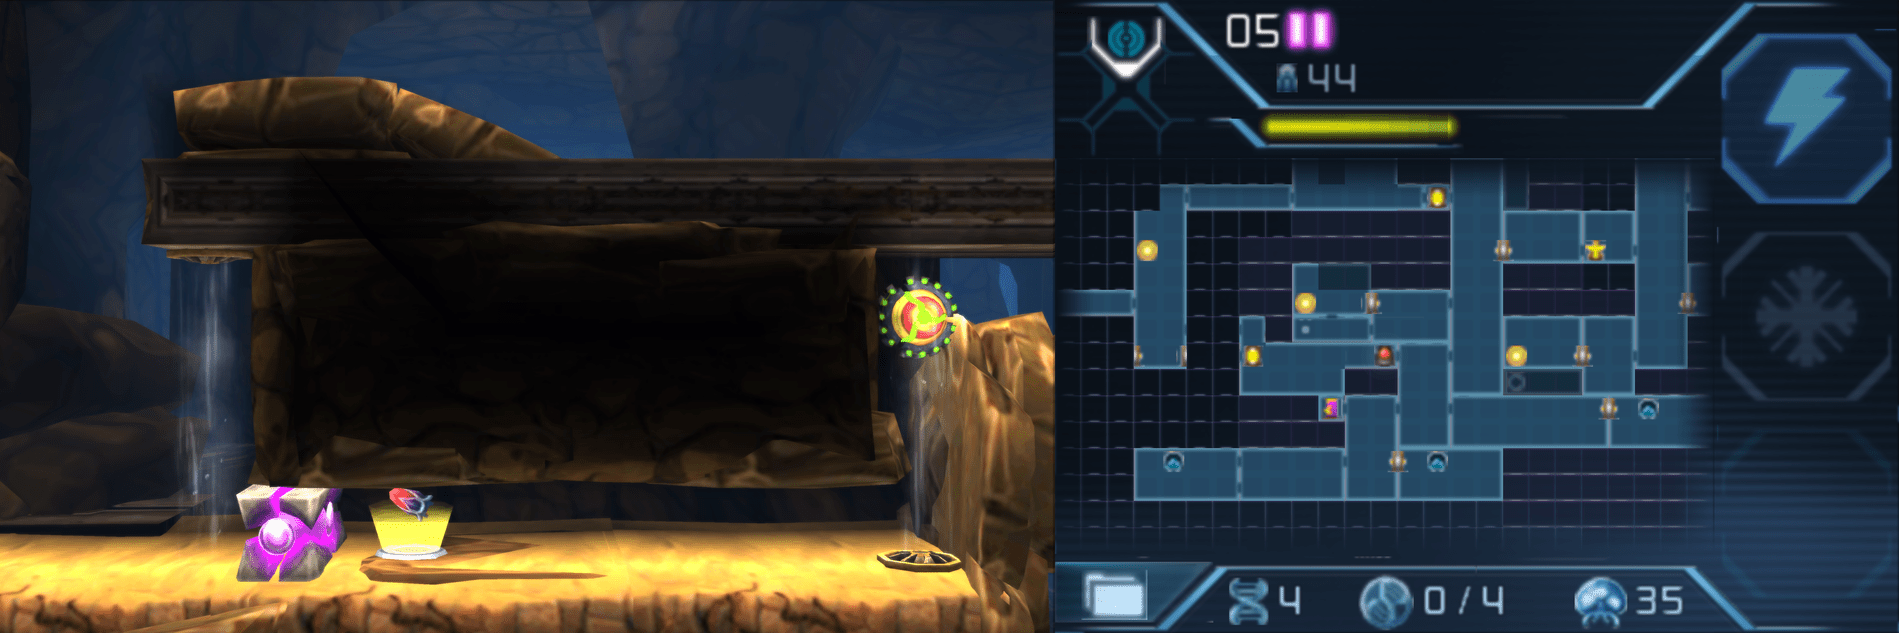
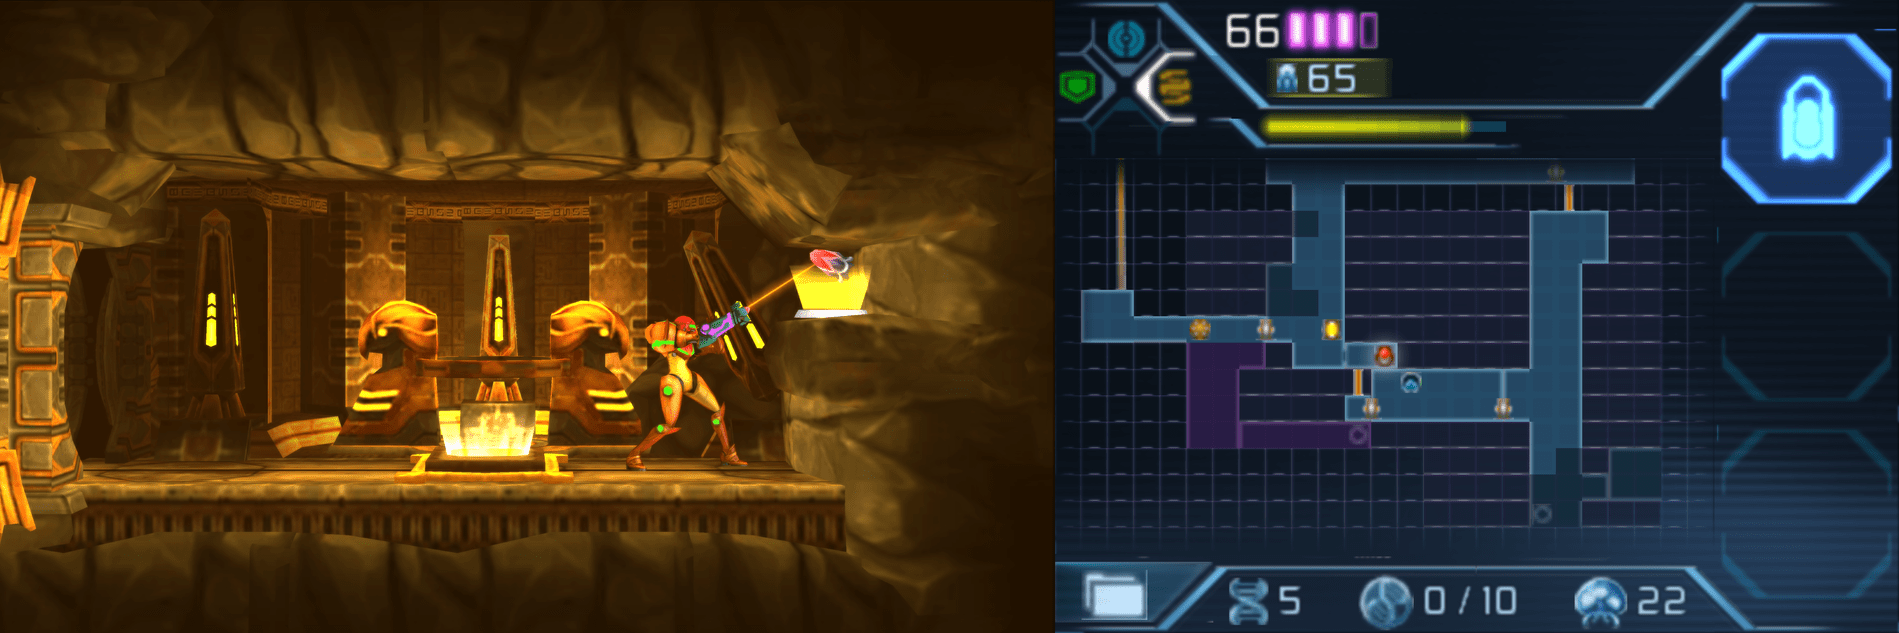
Immediately after grabbing Bombs, use your Scan Pulse and you’ll see a couple of blocks that can be destroyed on the floor in front of the Chozo Statue; use your bombs to get rid of them, drop down, and roll to the left to grab MISSILE EXPANSION #5!
Missile Expansion #6
Location: Area 1 (First Visit)
Requirements: Bombs, Charge Beam
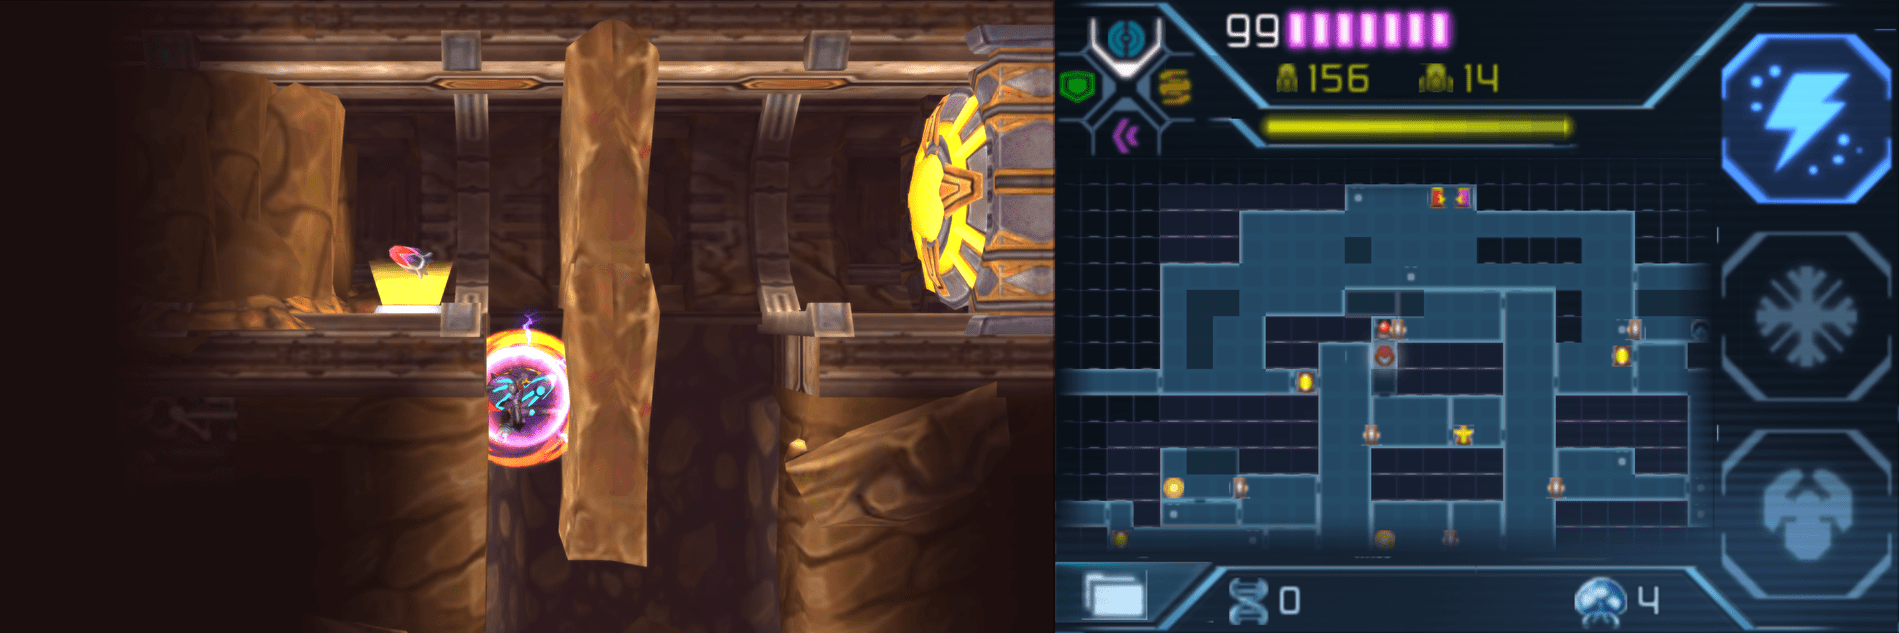
From the Teleportal, continue forward and you’ll find yourself in another long vertical shaft. Drop down and take the charge beam door on your right; destroy the collection of enemies, jump in the water, and then jump up and into the Morph Ball tunnel. Roll through, bomb one last block, and you’ll grab MISSILE EXPANSION #6.
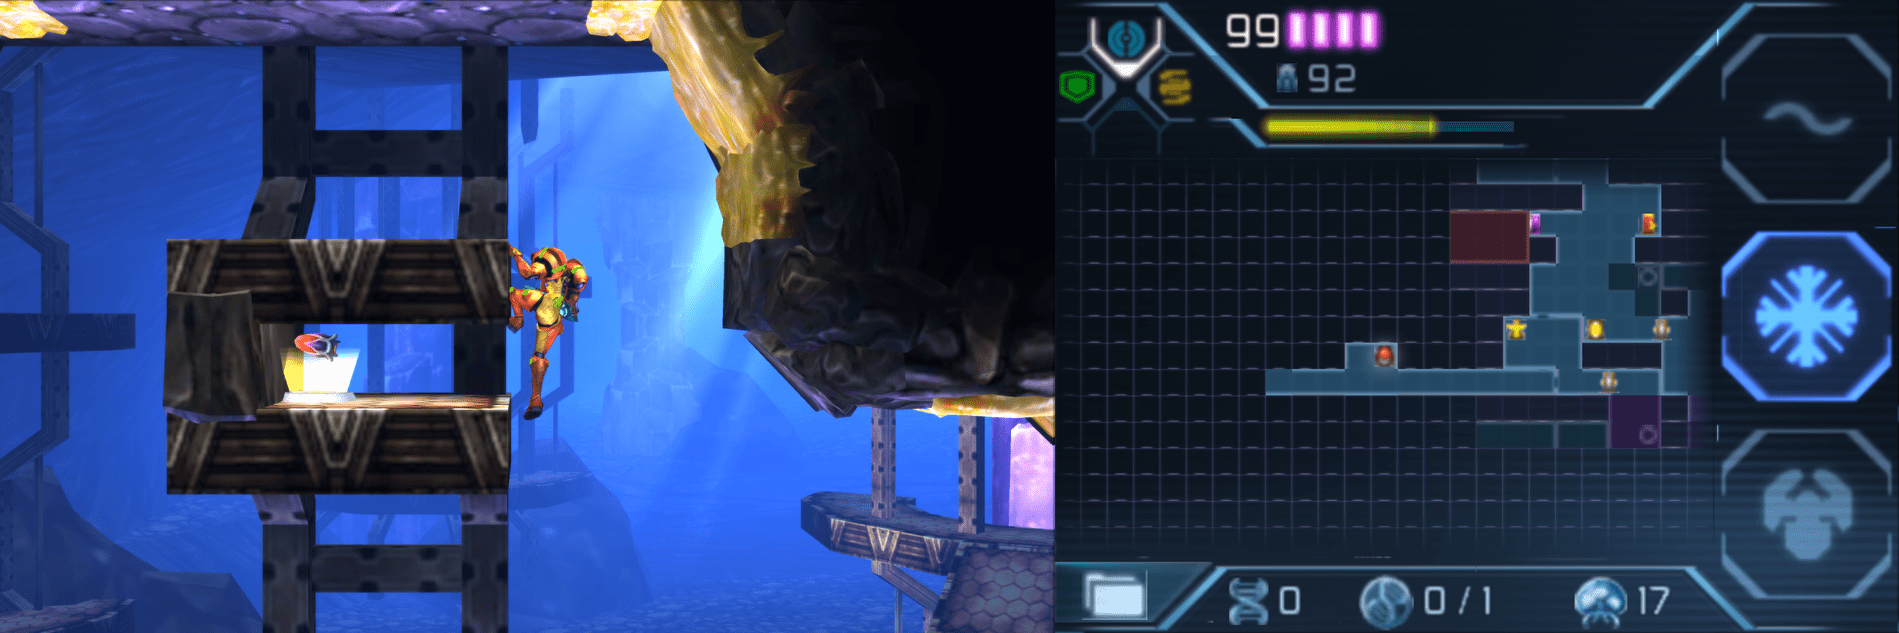
Missile Expansion #7
Location: Area 1 (First Visit)
Requirements: Spider Ball
Right after grabbing the Spider Ball, use it to get yourself back up the tunnel and back to the Save Station. Morph down, use your Spider Ball and roll up the wall to find MISSILE EXPANSION #7 tucked away in a little alcove above the Save Station!
Missile Expansion #8
Location: Area 1 (First Visit)
Requirements: Spider Ball, Bombs
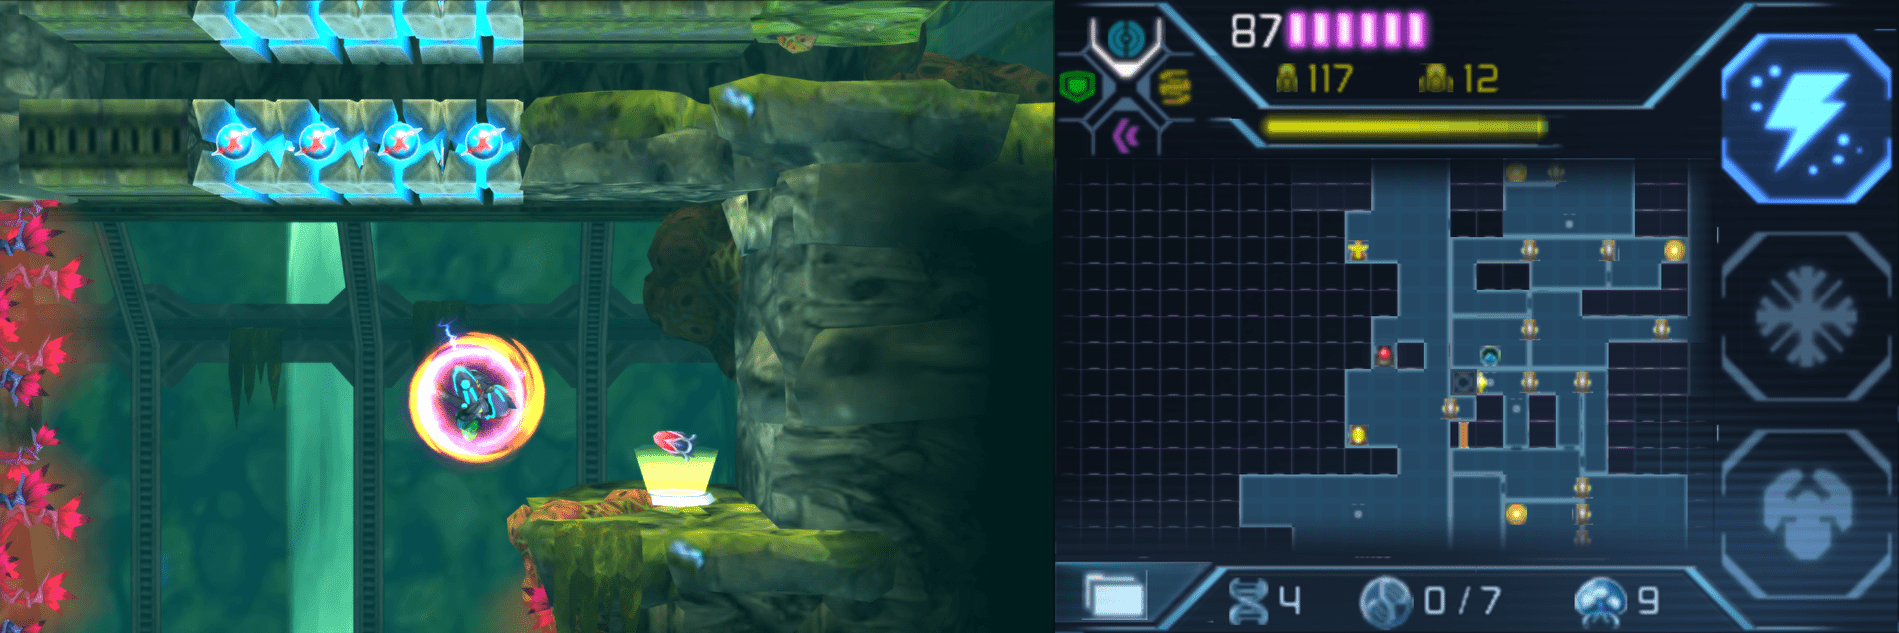
In the hydroelectric station room, use your Spider Ball to roll up and eventually once you hit the ceiling, roll towards the left. You’ll roll right on by both an Energy and a Missile Recharge Station! At the Missile Station specifically, use your Spider Ball to bomb the higher portion on the wall and slip through to a smaller room filled with small tunnels. There’s a fan blowing above, meaning that your bombs are going to be useless in that windy area, but fear not – in the middle tunnel, lay some bombs below the fan, destroying the blocks and letting you jump up to grab MISSILE EXPANSION #8.
Missile Expansion #9
Location: Area 1 (First Visit)
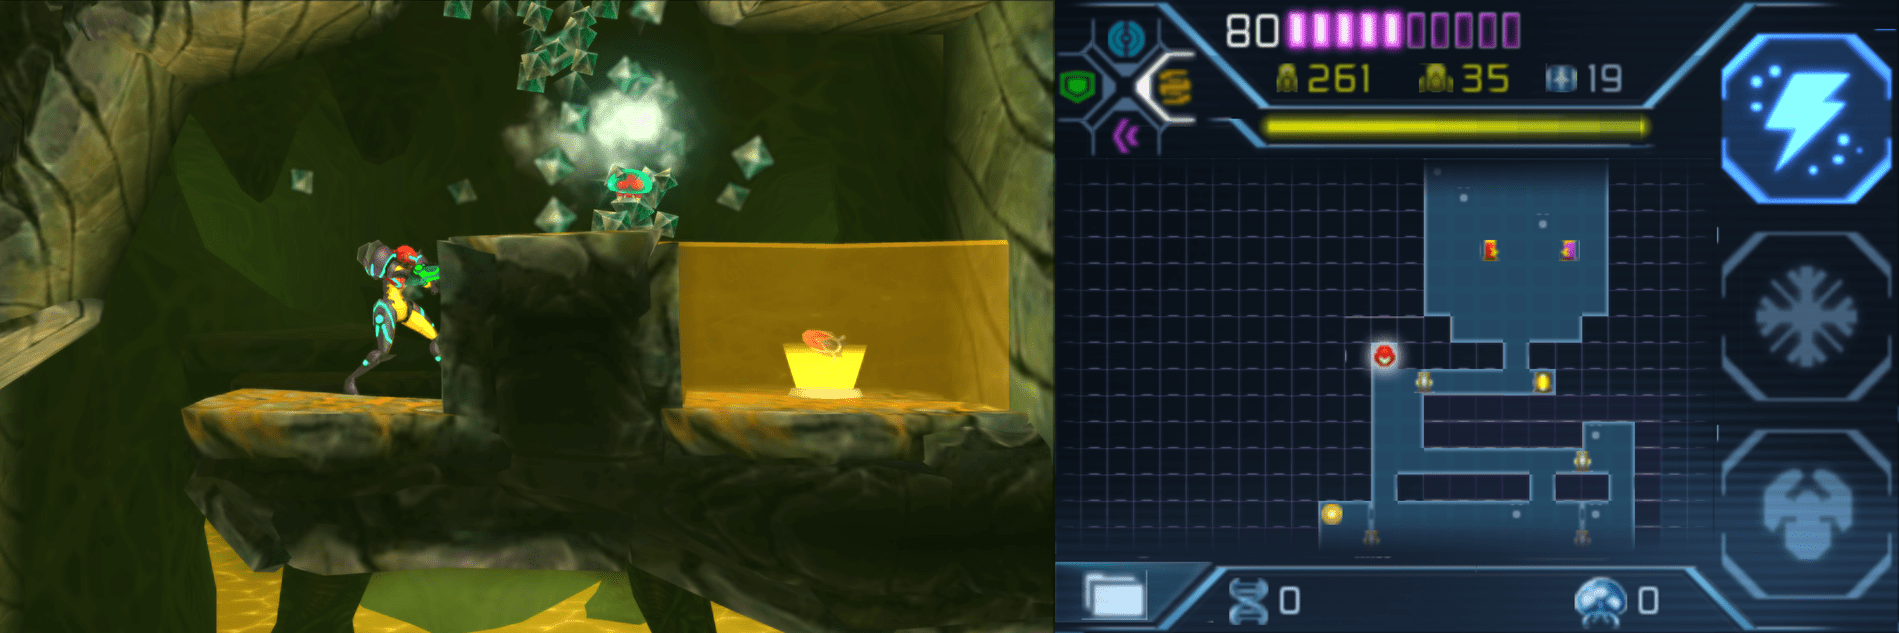
Requirements: Bombs
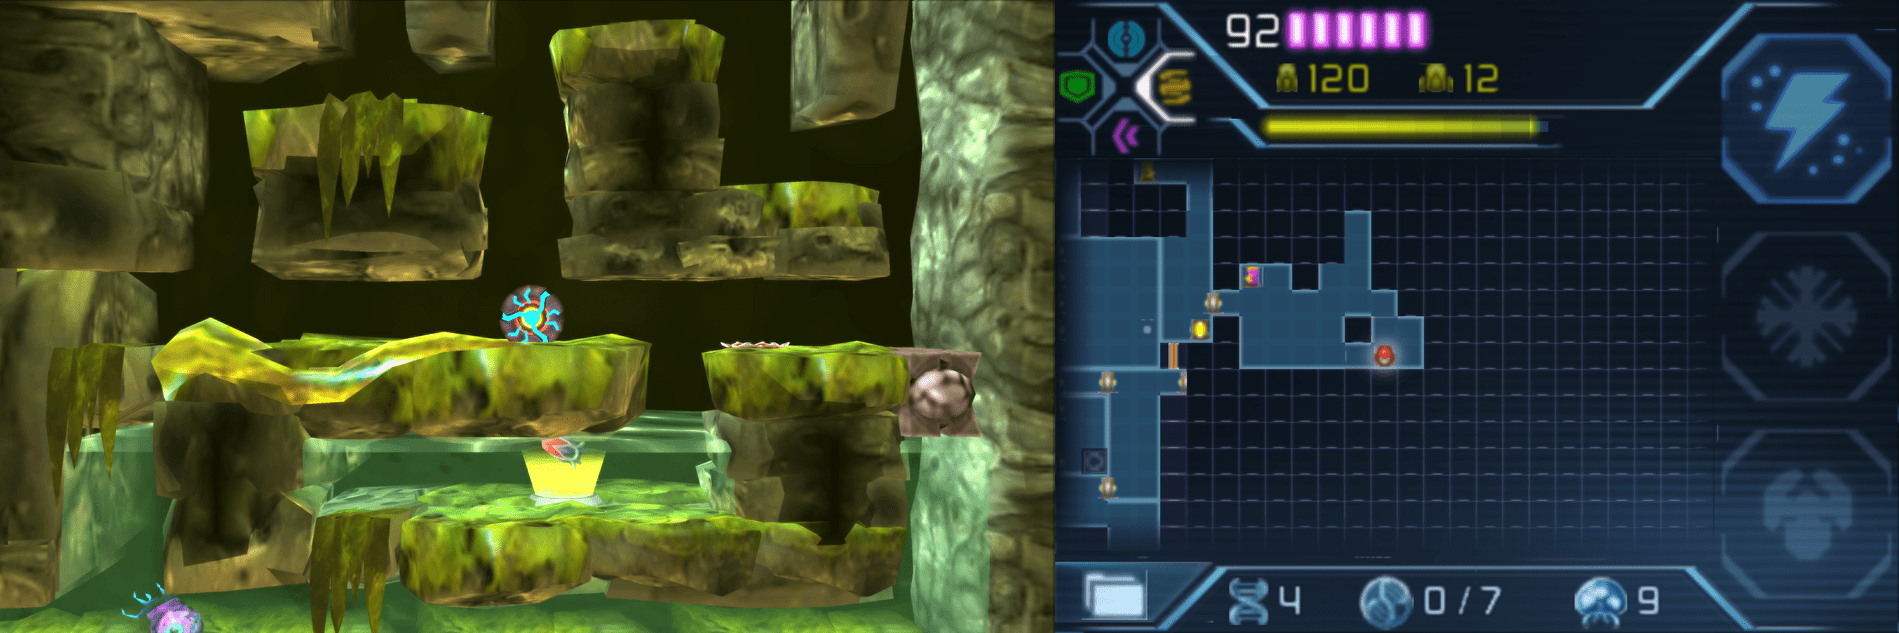
In the center of the uppermost part of the hydroelectric structure, underneath the middle platform, drop some bombs to reveal MISSILE EXPANSION #9 – use your Pulse Scan if you’re having trouble locating the exact spot you need to bomb.
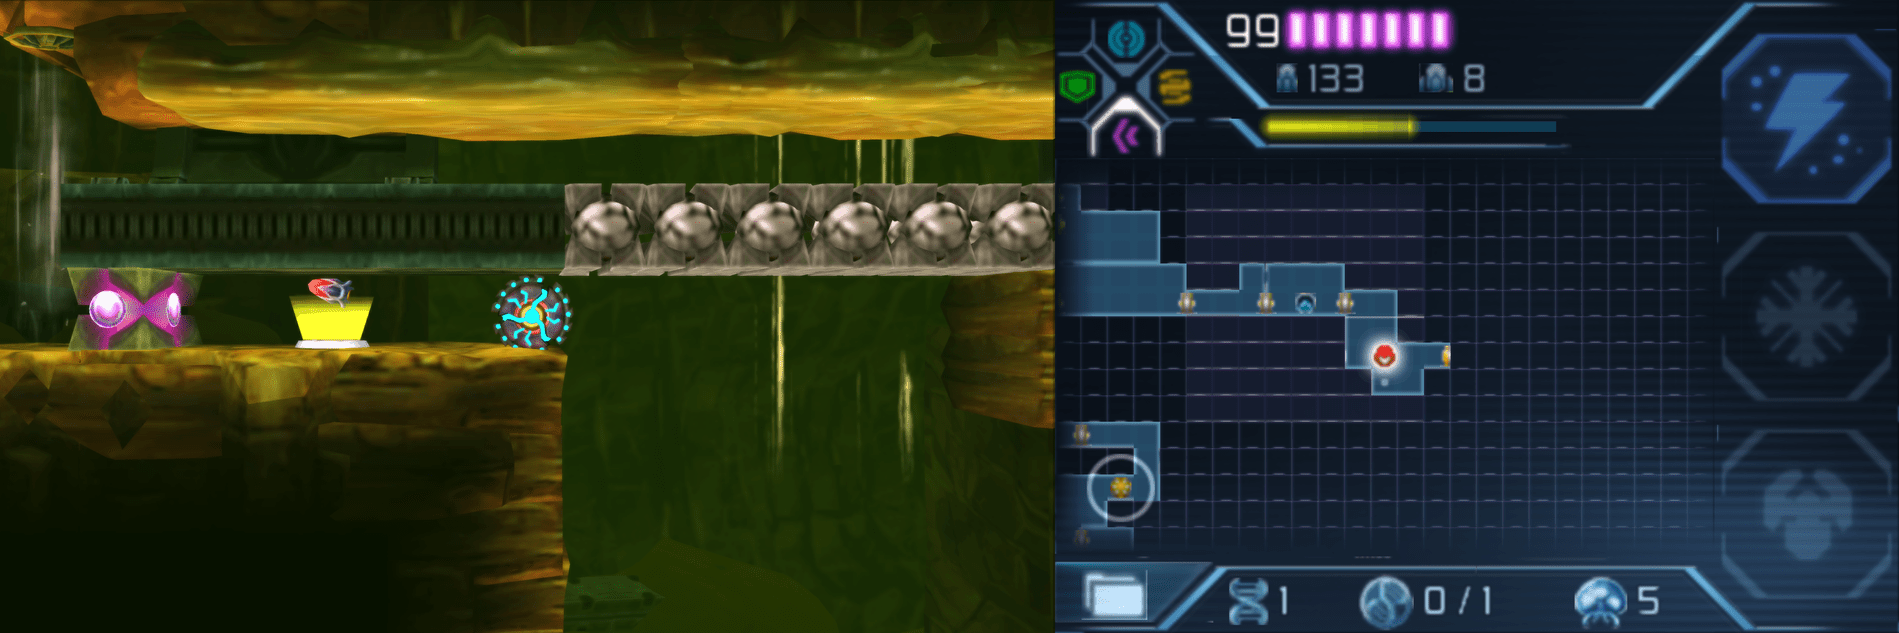
Missile Expansion #10
Location: Area 1 (First Visit)
Requirements: Bombs
In the starting room in the lower part of Area 1 where you’ll eventually branch off to defeat three Alpha Metroids, the one with the first red weeds just after the bomb blocks, make your way up. Use your Scan Pulse to magnify a block that you can bomb right underneath the ledge; lay a bomb and roll through the tunnel to grab MISSILE EXPANSION #10!
Missile Expansion #47
Location: Area 1 (Second Visit)
Requirements: Spazer Beam, Space Jump
From the Teleportal, head right into the long shaft and jump upwards, opening the door on the top left side. Enter this new room and go through the Spazer Beam door on the bottom side; Space Jump over to the other side of this room (don’t touch the floor, as the ground is made up of pitfall blocks) and grab MISSILE EXPANSION #47.
Missile Expansion #48
Location: Area 1 (Second Visit)
Requirements: Gravity Suit
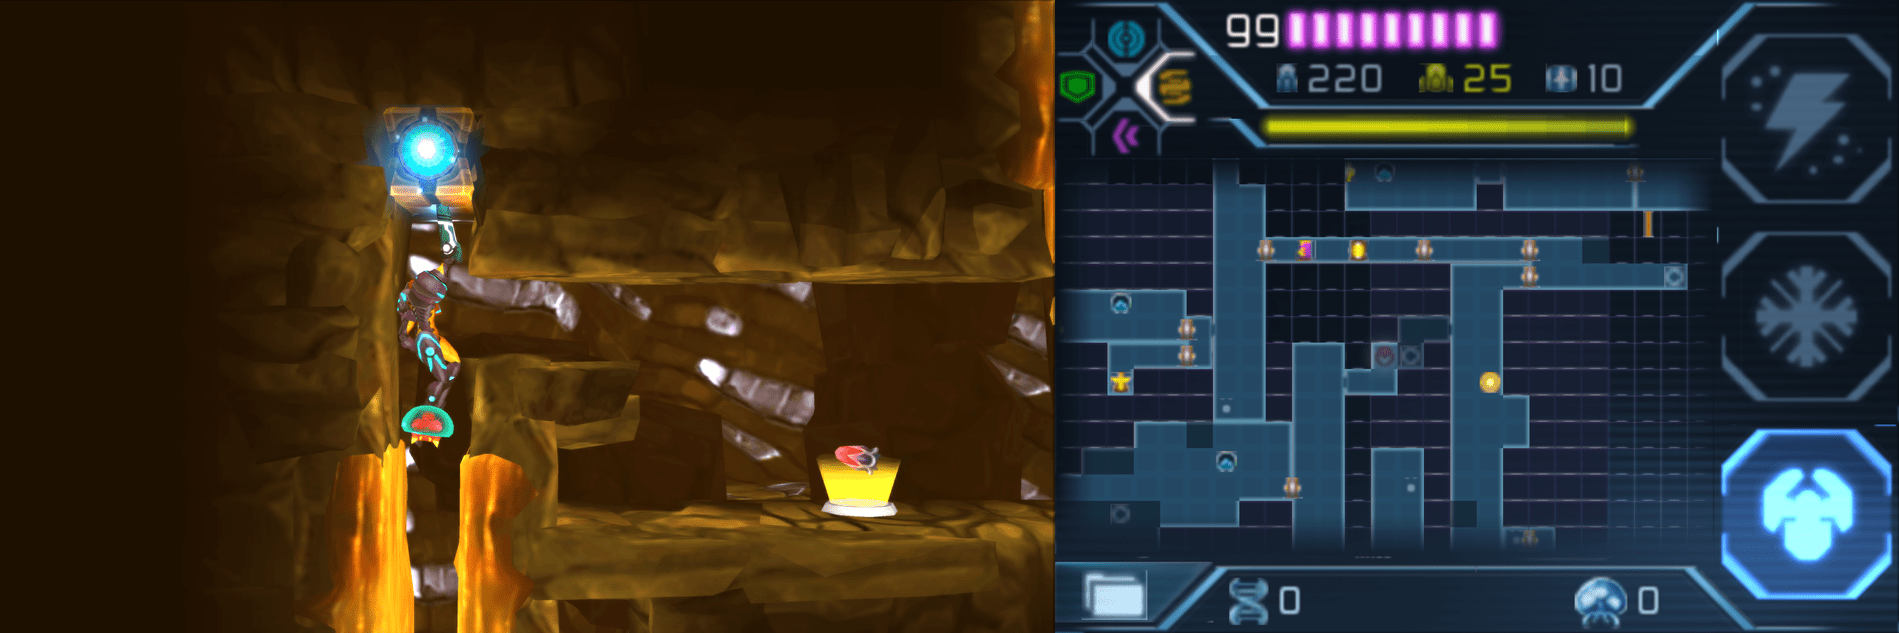
Enter the hot zone, jump in the lava, and jump upwards, where MISSILE EXPANSION #48 will be sitting on a ledge for you to take!
Missile Expansion #49
Location: Area 1 (Second Visit)
Requirements: Wave Beam, Bombs
Head to the Chozo Seal and drop down; eventually, you’ll come across a Wave Beam door on your right; use your Spring Ball to jump up and lay a bomb in the blocks surrounding MISSILE EXPANSION #49.
Area 2
Missile Expansion #11
Location: Area 2 (First Visit)
Requirements: Bombs
From the Teleportal closest to the Chozo Seal, continue to the left and follow the path up, and you’ll soon walk by a Metroid husk; use your Scan Pulse when you’re at the husk and you’ll see some bricks to the right of you glow up. Destroy them and slip into the Morph Ball tunnel; press forward, drop down, roll to the right and you’ll see MISSILE EXPANSION #11 sitting there for the taking!

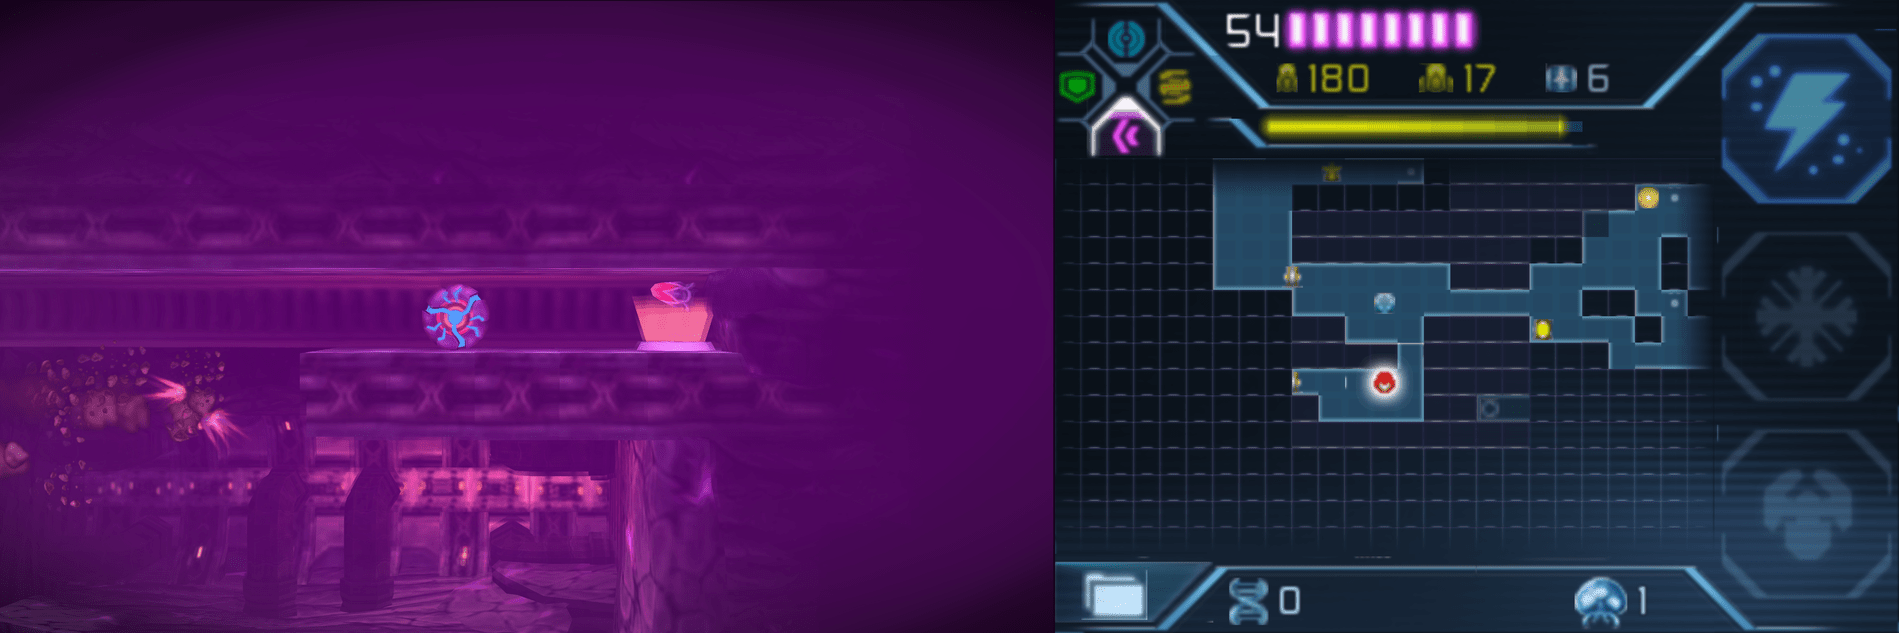
Missile Expansion #12
Location: Area 2 (First Visit)
Requirements: Lightning Armor, Bombs
Immediately after getting the Lightning Armor, head back into the room you just came from quickly; Spider climb up the right wall and lay a couple of bombs at the top. The wall will break, and you’ll be face-to-face with a scary looking purple beehive thing (sorry for the technical terminology) that would normally have you covered in nasty bugs that would drain your energy quicker than you can say “where’s my Speed Boost?”, but with our handy Lightning Armor, that won’t be a problem. Activate it, drop down, shoot the floor, drop into the water, and grab MISSILE EXPANSION #12. As a quick note – water kills these bugs, or at least makes them go away, so if you are covered in little purple gremlins and running low on Aeion, water is what you want.

Missile Expansion #13
Location: Area 2 (First Visit)
Requirements: Lightning Armor
Head back to the room you grabbed the Lightning Armor in and press forward, rolling through the statue and continuing your ascent on this room. You’ll see a pathway covered head to toe with red weeds, but that’s no problem! Activate your Lightning Amor and run up quickly to grab MISSILE EXPANSION #13.
Missile Expansion #14
Location: Area 2 (First Visit)
Requirements: Spider Ball
Starting from the Save Station in Area 2’s upper portion, scale downwards until you get to the entrance of the hydroelectric station, but don’t actually go in yet! Instead, jump up to the small ledge and start climbing the side of the station (use your Spider Ball if you need to!); eventually, you’ll get up to a small Morph Ball tunnel. Bingo! Slip inside and use your Spider Ball to keep following the tunnel upwards; avoiding all the dang bugs constantly dropping from the ceiling, lay a bomb once you get to the of the tunnel and the pathway to MISSILE EXPANSION #14 will open!
Missile Expansion #15
Location: Area 2 (First Visit)
Requirements: Varia Suit, Missiles
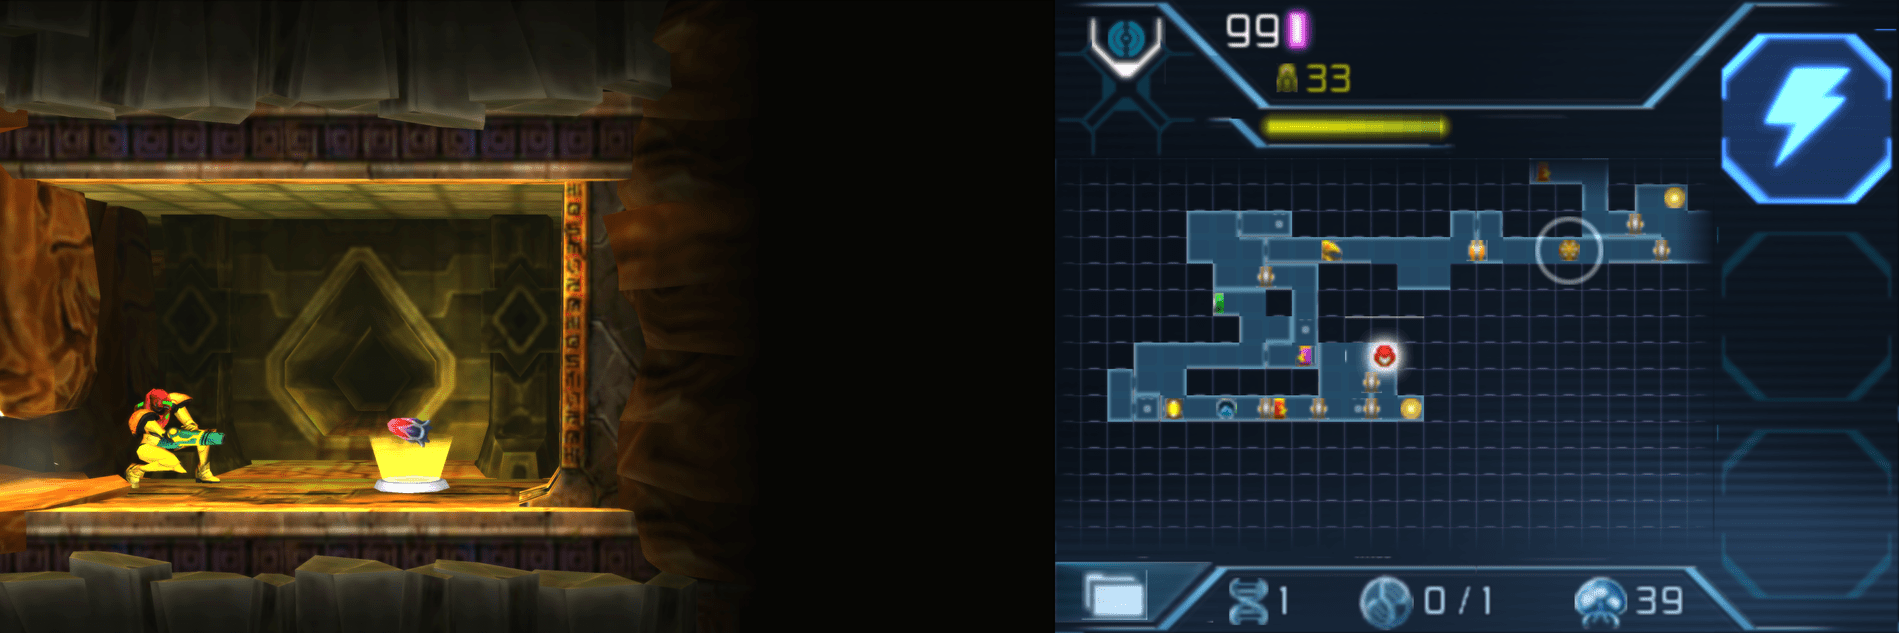
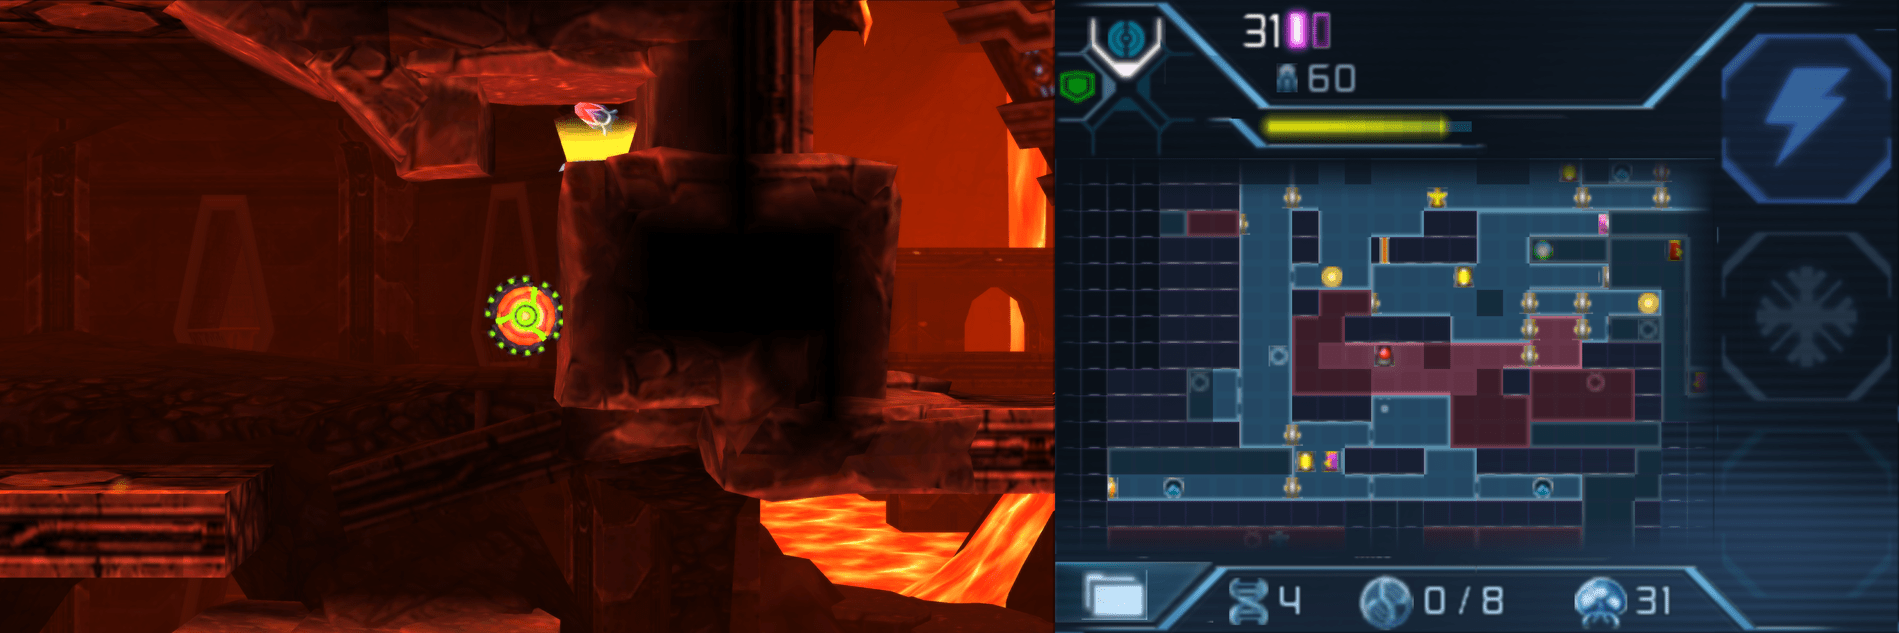
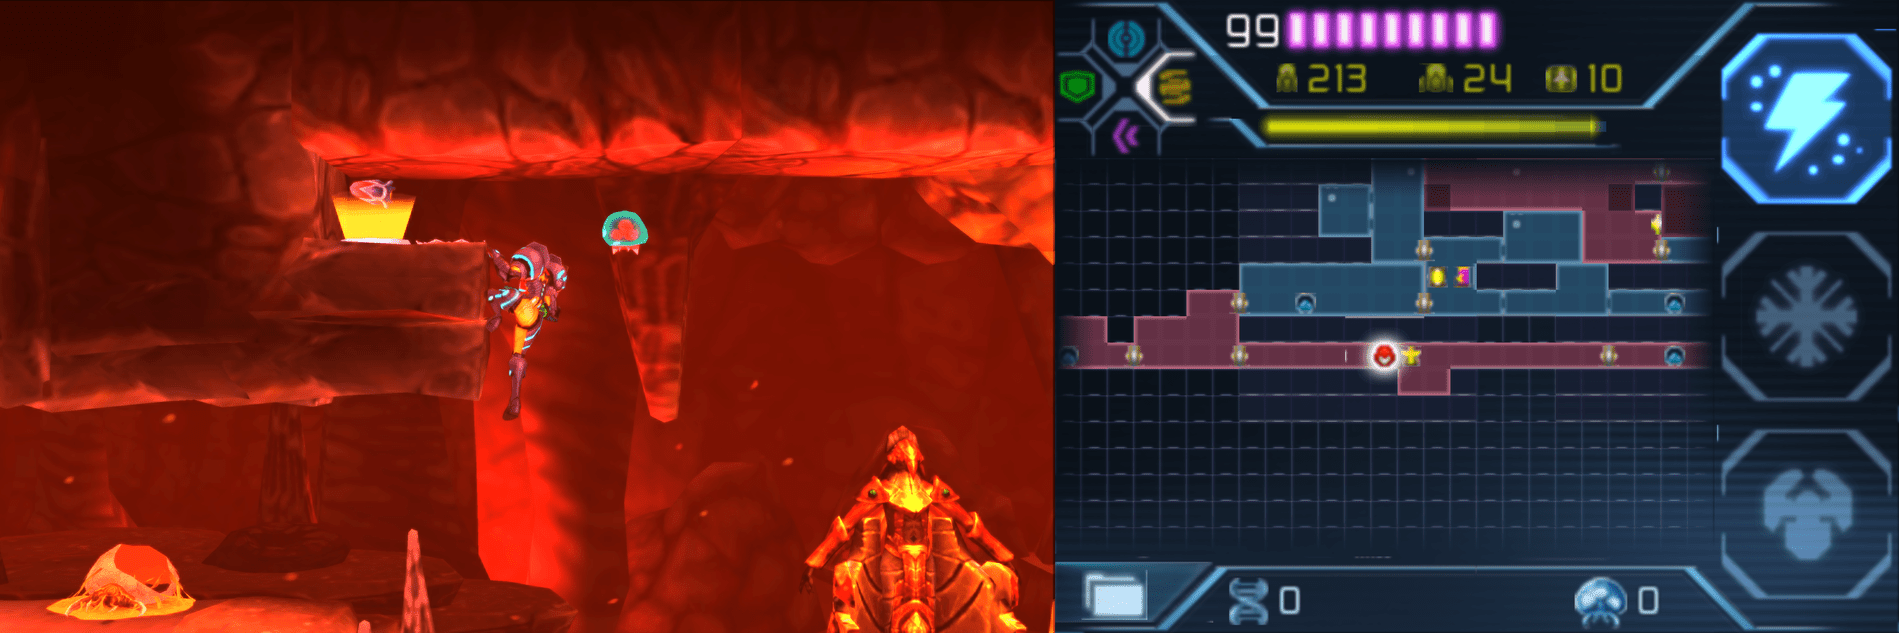
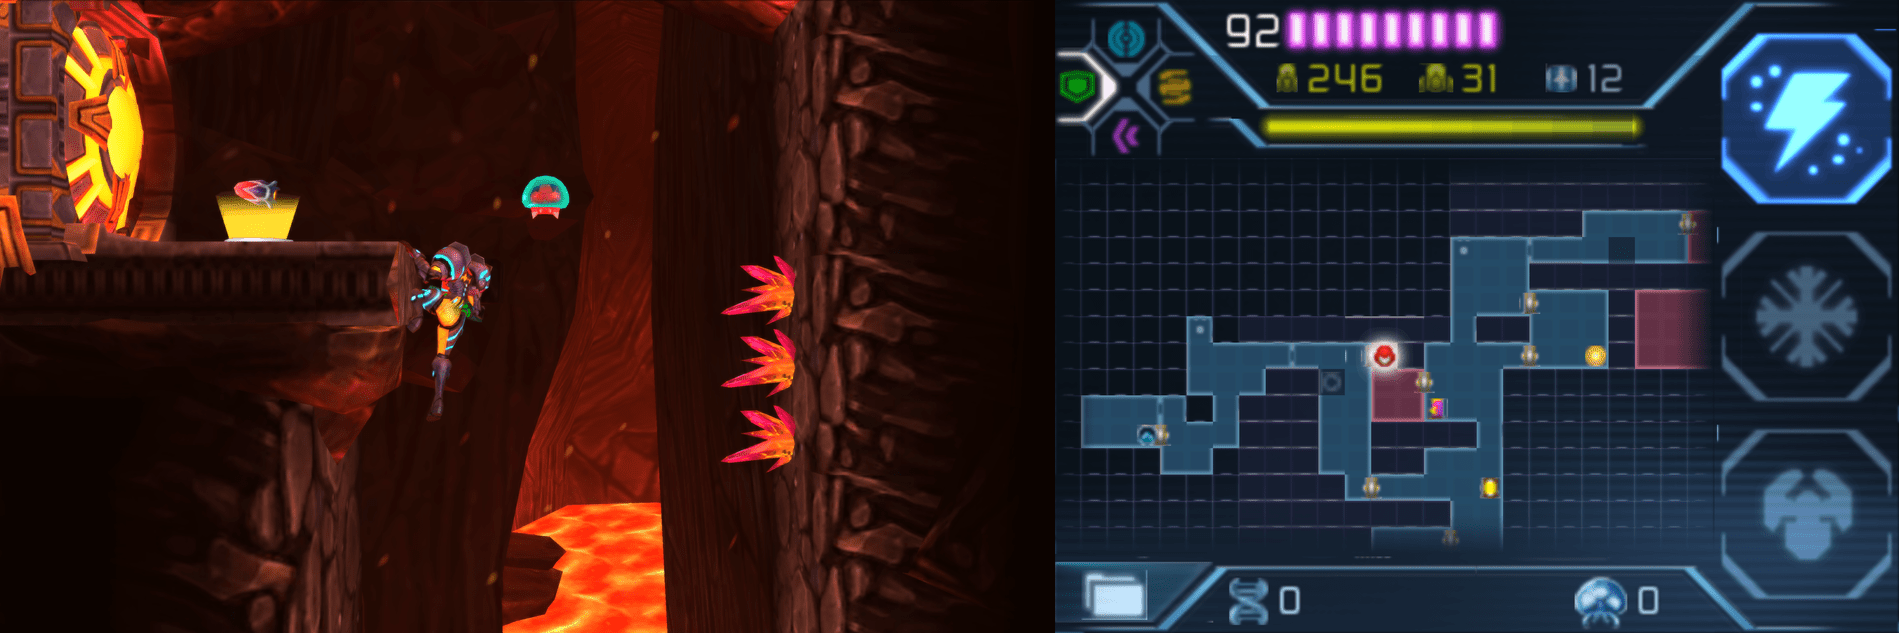
When you get to about the halfway point of the hot zone in the middle of Area 2, use your Scan Pulse and you’ll see some blocks start glowing right above a Wallfire. Destroy the Chozo machine with some missiles and use your Spider Ball to scale upwards and grab MISSILE EXPANSION #15!
Missile Expansion #16
Location: Area 2 (First Visit)
Requirements: High Jump Boots, Bombs
Immediately after grabbing the High Jump Boots, lay some bombs on the floor in front of the door (use your Scan Pulse if you need to see where exactly the bricks are) and drop down to a little hidden alcove. There’s a hidden tunnel on the left wall, so destroy the blocks and go through. Eliminate all of the Gullug’s in this room and use the High Jump Boots to jump up to the opening in the top right of the room. Follow the path to grab MISSILE EXPANSION #16.

Missile Expansion #17
Location: Area 2 (First Visit)
Requirements: Bombs
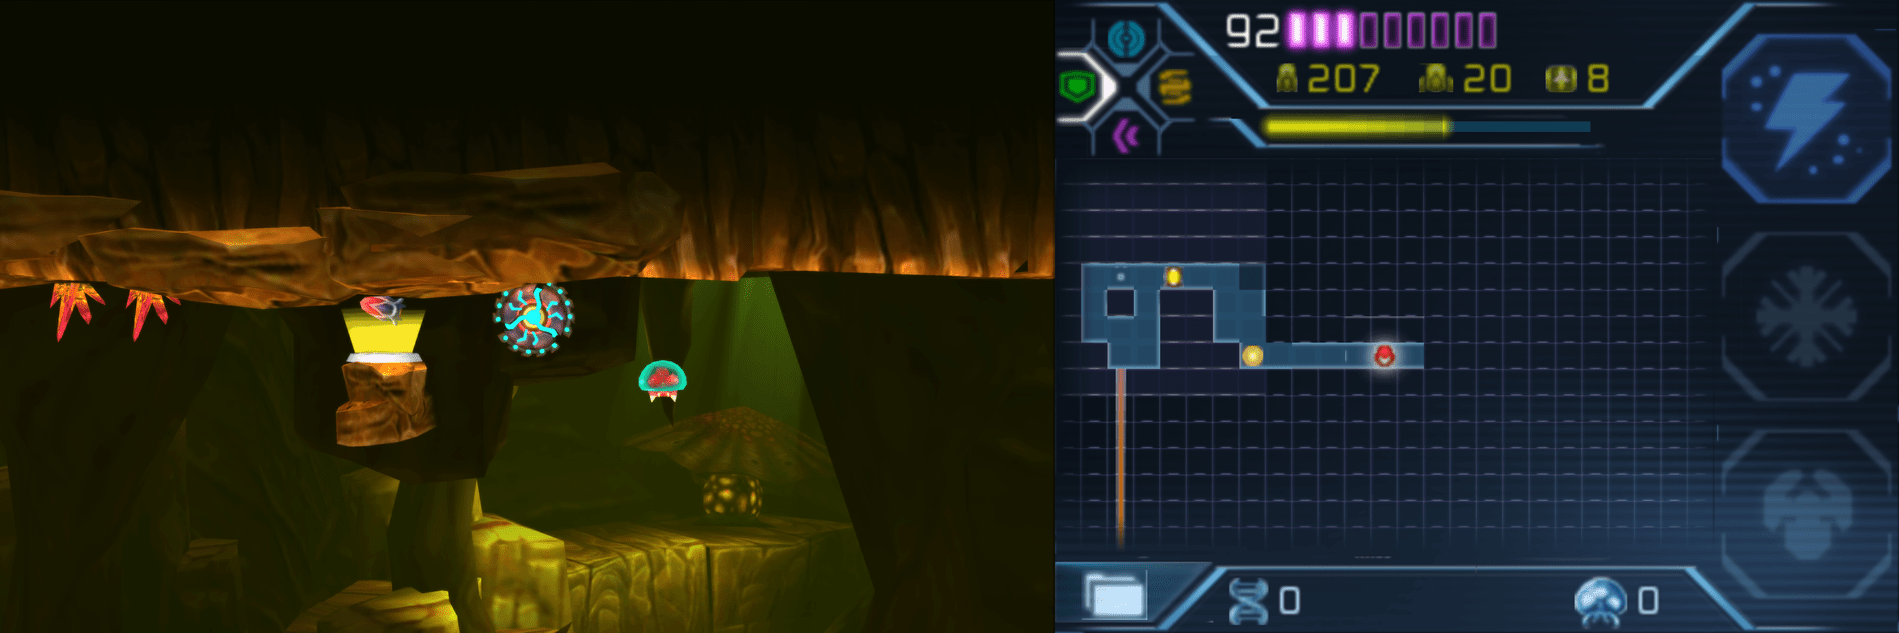
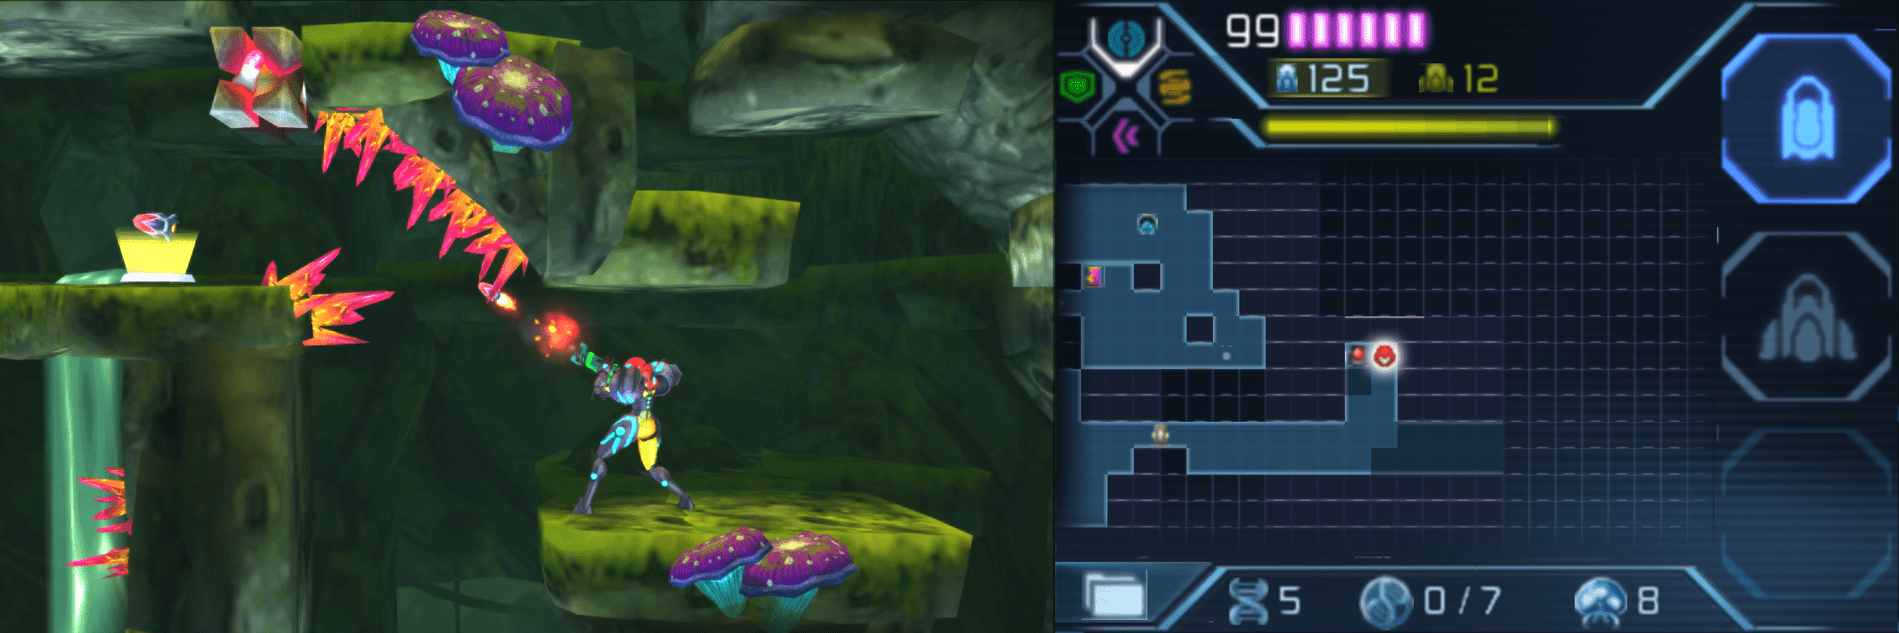
From the room that has a Metroid husk, a Save Station, and a Recharge Station, look to the ledge right above the Energy Recharge Station, bomb the wall and a Morph Ball tunnel will open up. Roll on through!
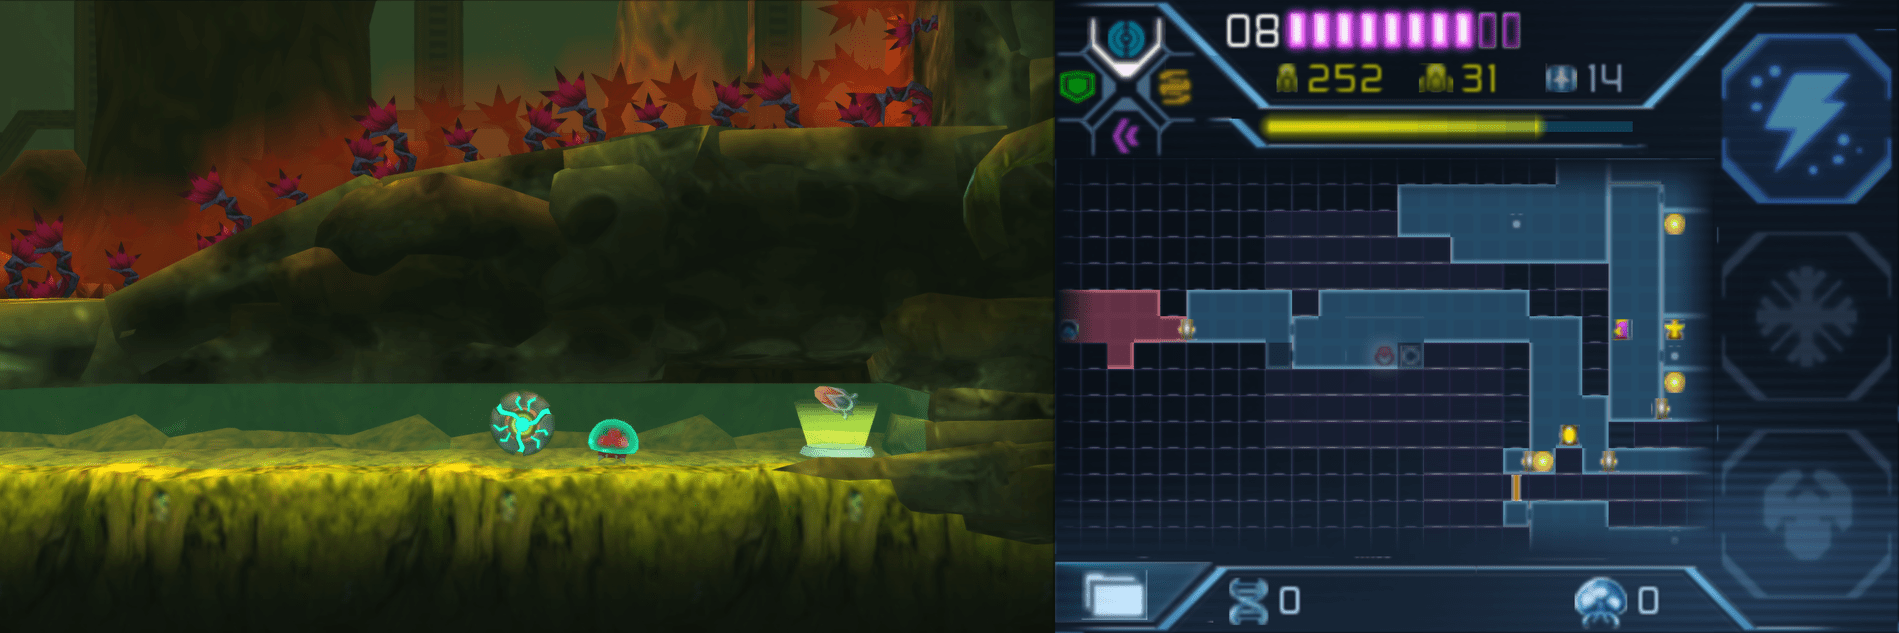
The good news is that this new room houses a missile expansion! The bad news is that it also is the first time – but certainly not the last – where you will be introduced to the Glow Fly, aka, the absolute worst enemy in this entire game. These little creatures move in a set path, usually in Morph Ball tunnels, from one burrow hole to another, and if you get too close to them, they will spontaneously combust. This explosion causes an insane amount of damage to you – usually a full energy tank, and that’s on regular difficulty, let alone Fusion difficulty. Needless to say, do everything in your power to avoid them. That being said, what you’ll want to do here is enter the Morph Ball tunnel, avoid these awful creatures, and roll to the top, where MISSILE EXPANSION #17 awaits you!
Missile Expansion #18
Location: Area 2 (First Visit)
Requirements: Lightning Armor, Area 2 Seal Unlocked
After releasing all the Metroid DNA to the Chozo Seal, wait for the acid to drop and then get to the right side of the room. You’ll see a small tunnel filled with red weeds; activate your Lightning Armor, follow the path, and grab MISSILE EXPANSION #18!
Missile Expansion #65
Location: Area 2 (Second Visit)
Requirements: Space Jump
Make your way up the elevator and into the room with the hydroelectric station in the middle (you fought Arachnus in this general area earlier). Space Jump straight upwards pretty much as soon as you get off the elevator and you’ll find MISSILE EXPANSION #65 tucked away in a little nook in the top right corner.
Missile Expansion #66
Location: Area 2 (Second Visit)
Requirements: Beam Burst, Varia Suit
Make the long journey to the hot zone in the very bottom left corner of Area 2! Press forward until you reach the Teleportal. Once you’re there, use your Beam Burst to blast away the grey mushroom just above and then jump into the nook it was covering. Lay a bomb and you’ll grab MISSILE EXPANSION #66.
Area 3
Missile Expansion #19
Location: Area 3 (First Visit)
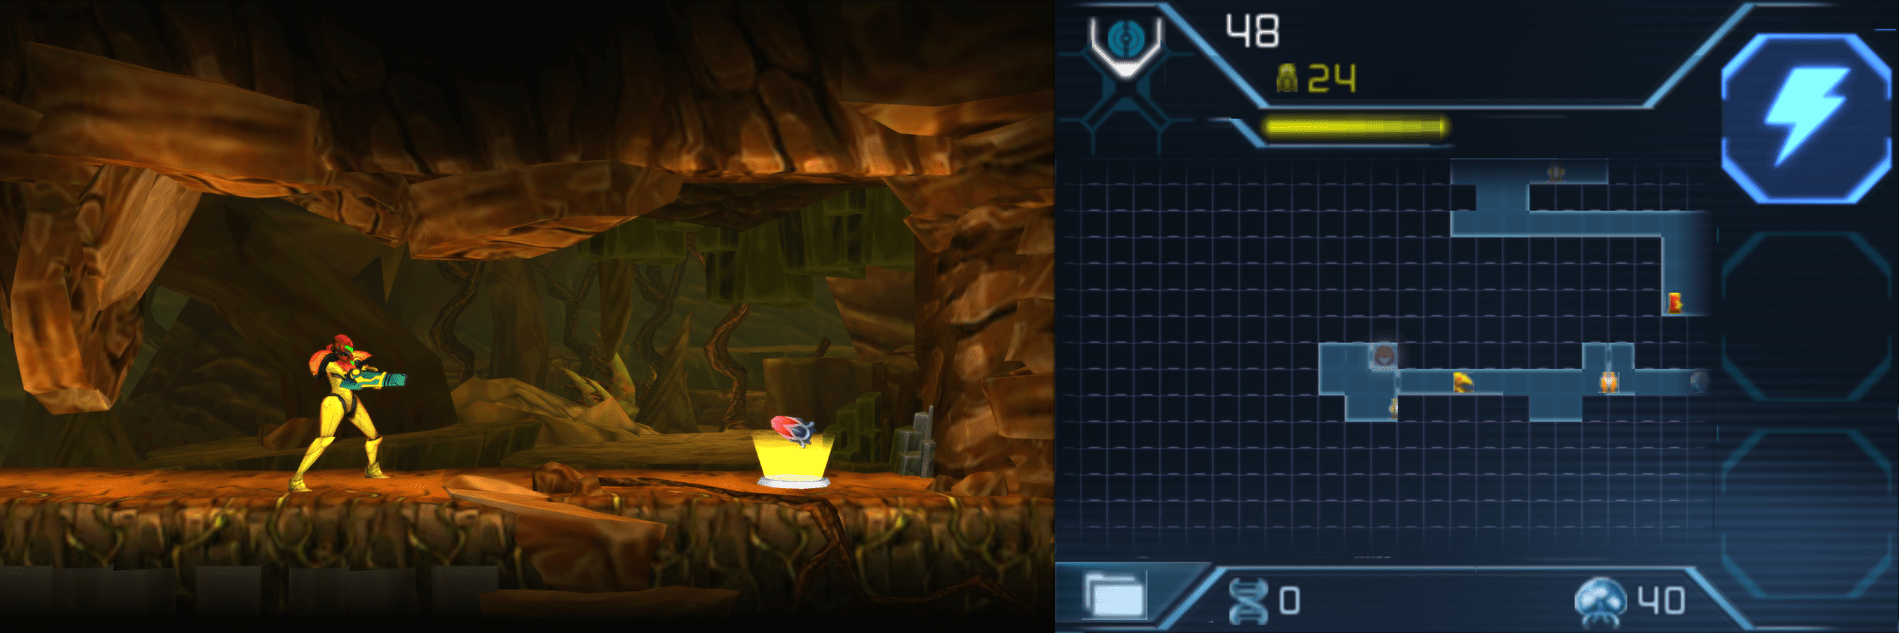
Requirements: None
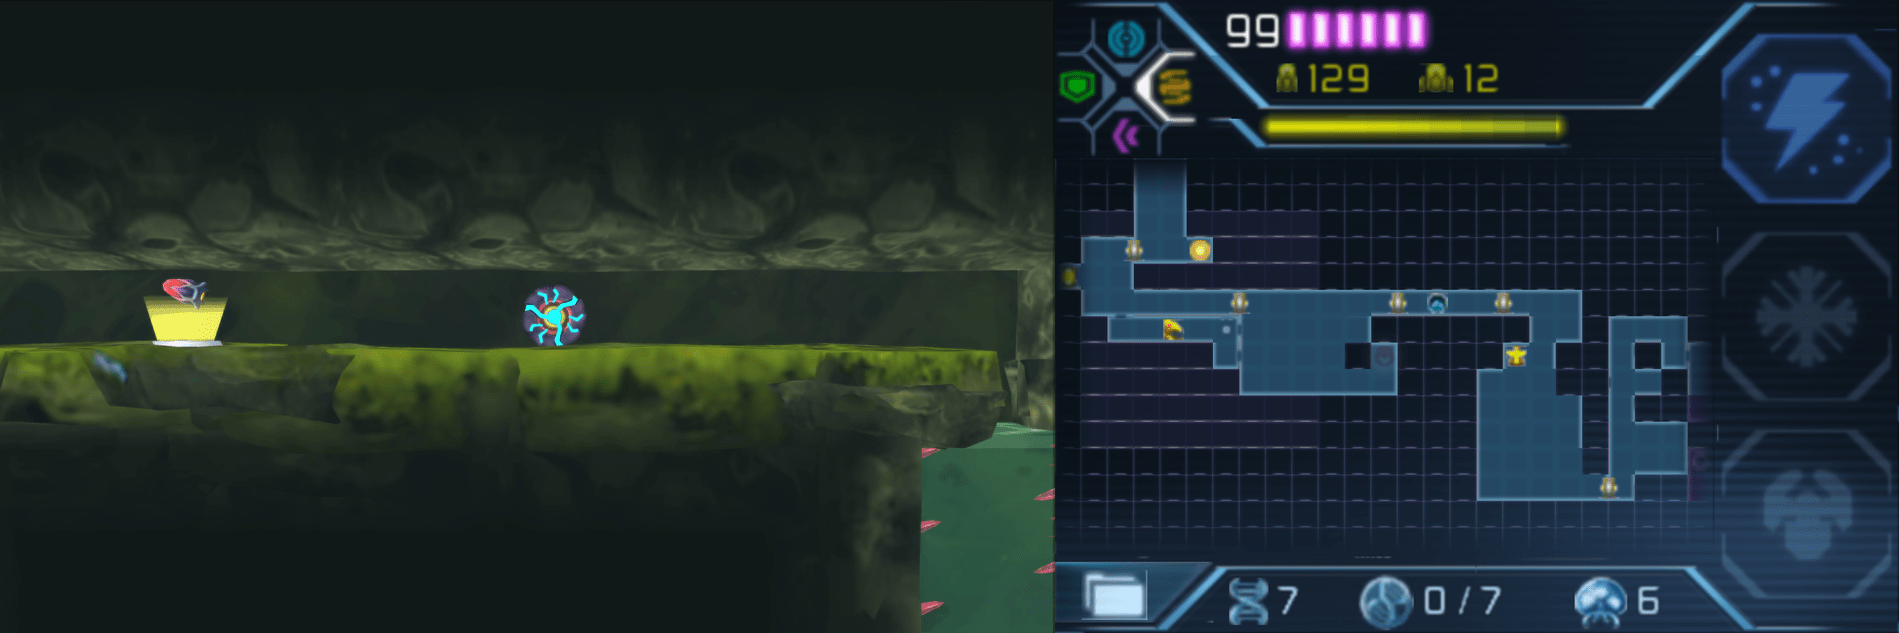
Once you’re at the top of the Mining Hall, use the Save Station and press towards the right. You’ll see another elevator coming up quickly, but don’t use it just yet. Keep pressing towards the right and then drop down the opening when you see it. Keep on dropping down until about the halfway point. You’ll see MISSILE EXPANSION #19 just kind of sitting around in a little alcove. Seems suspiciously easy, but let’s not look a gift horse in the mouth!
Missile Expansion #20
Location: Area 3 (First Visit)
Requirements: Missiles
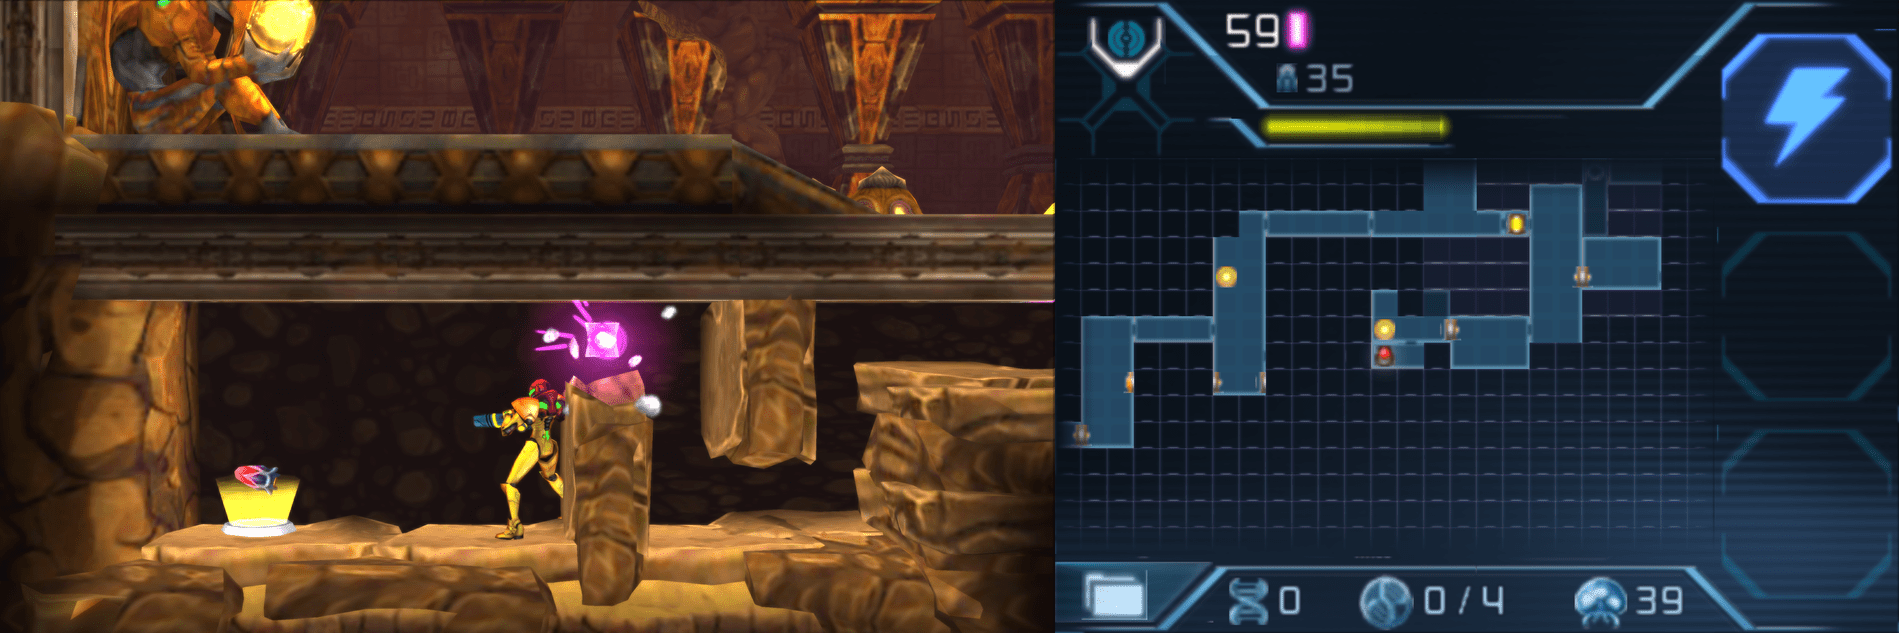
From the room you fought the Alpha Metroid in, go through the Blast Door on your left and then quickly ride up the elevator and shoot the door to your left. There’s also a hidden missile block in the righthand wall, so shoot it to grab MISSILE EXPANSION #20.
Missile Expansion #21
Location: Area 3 (First Visit)
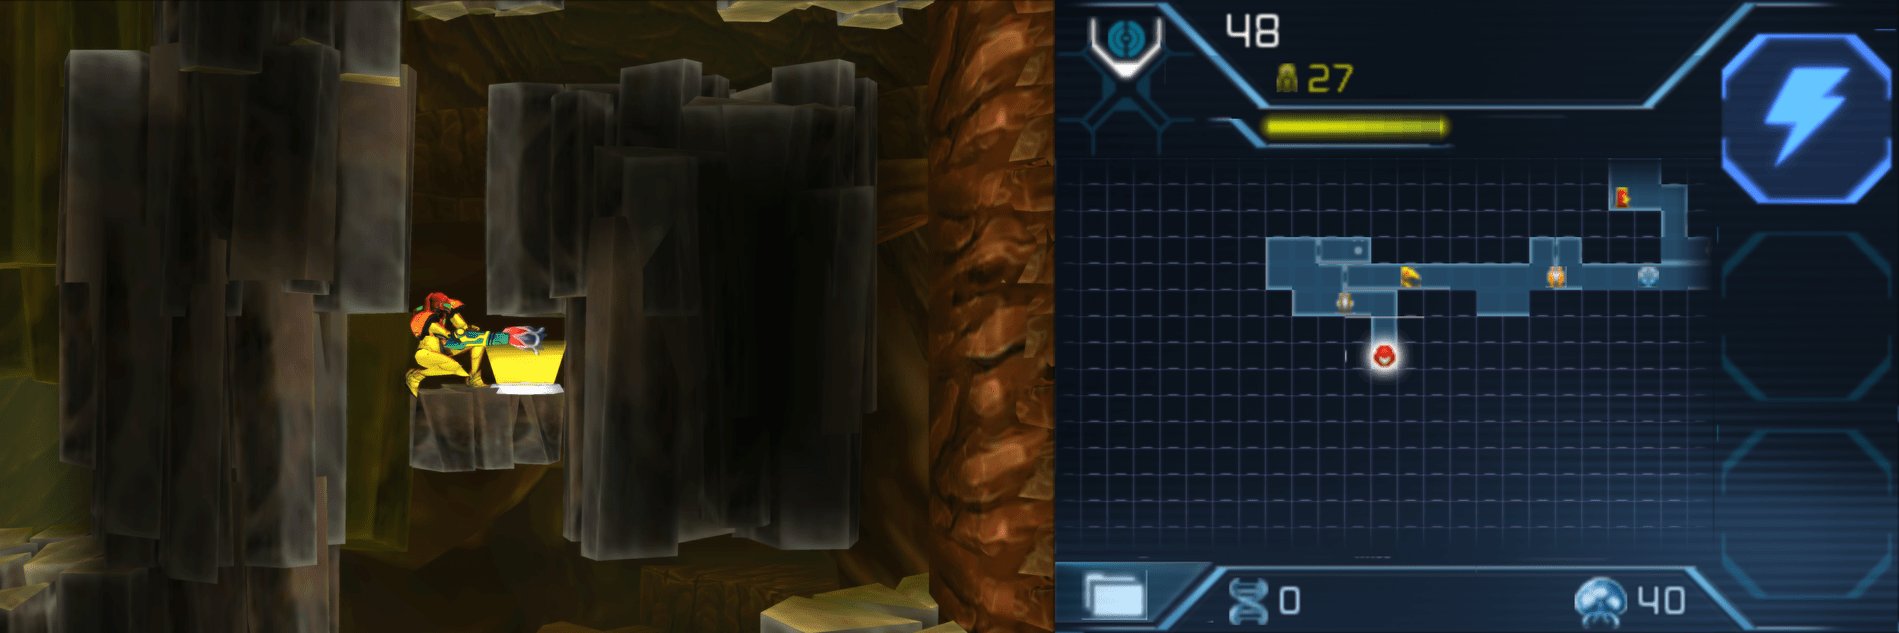
Requirements: Bombs
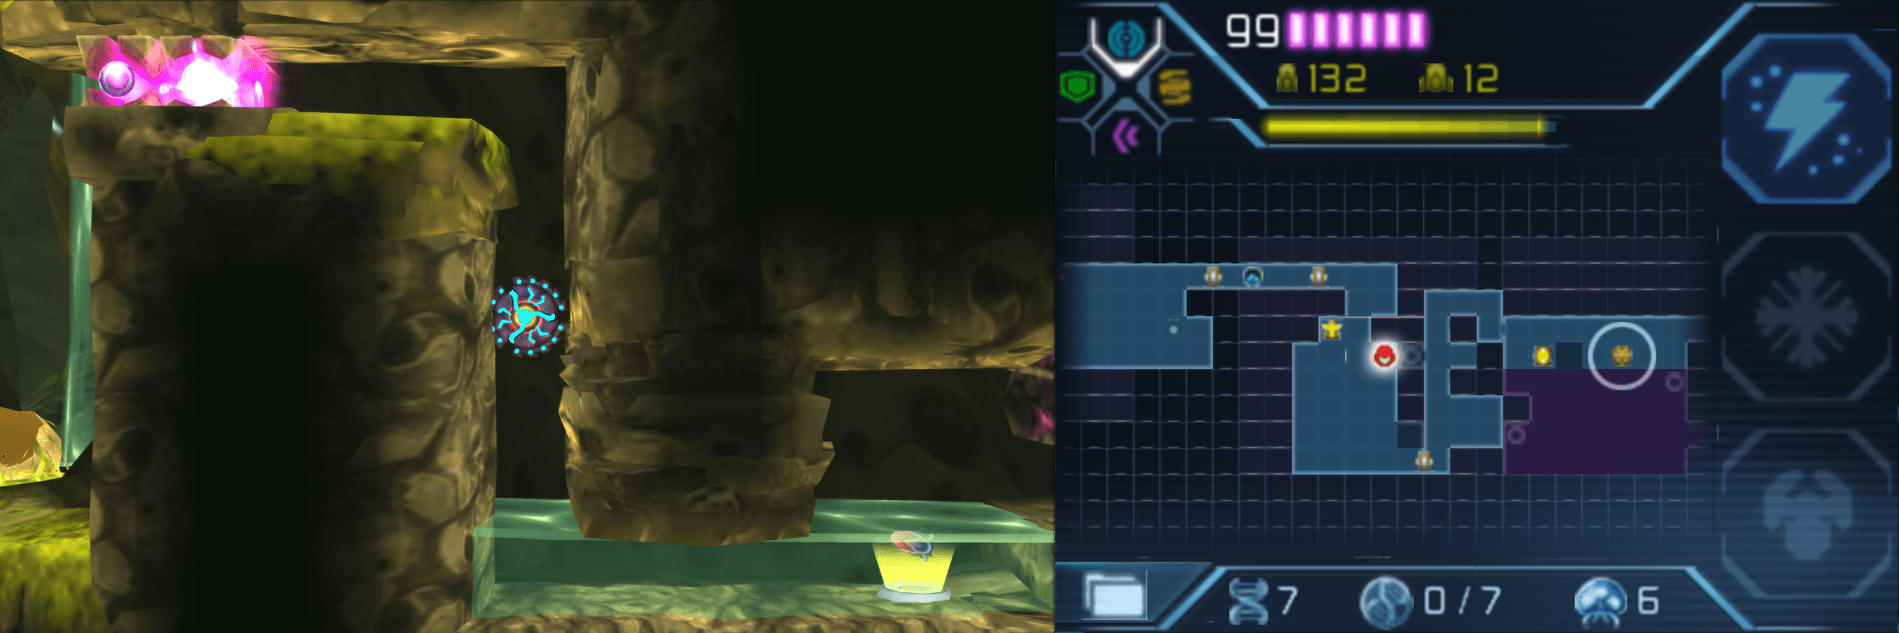
Continue your descent until you see a Metroid husk and a door on your right. Before you enter, though, drop down a bit to the crystal ledge; use your Scan Pulse and you’ll see a bombable block under the ledge of the center platform. Destroy it and grab MISSILE EXPANSION #21.
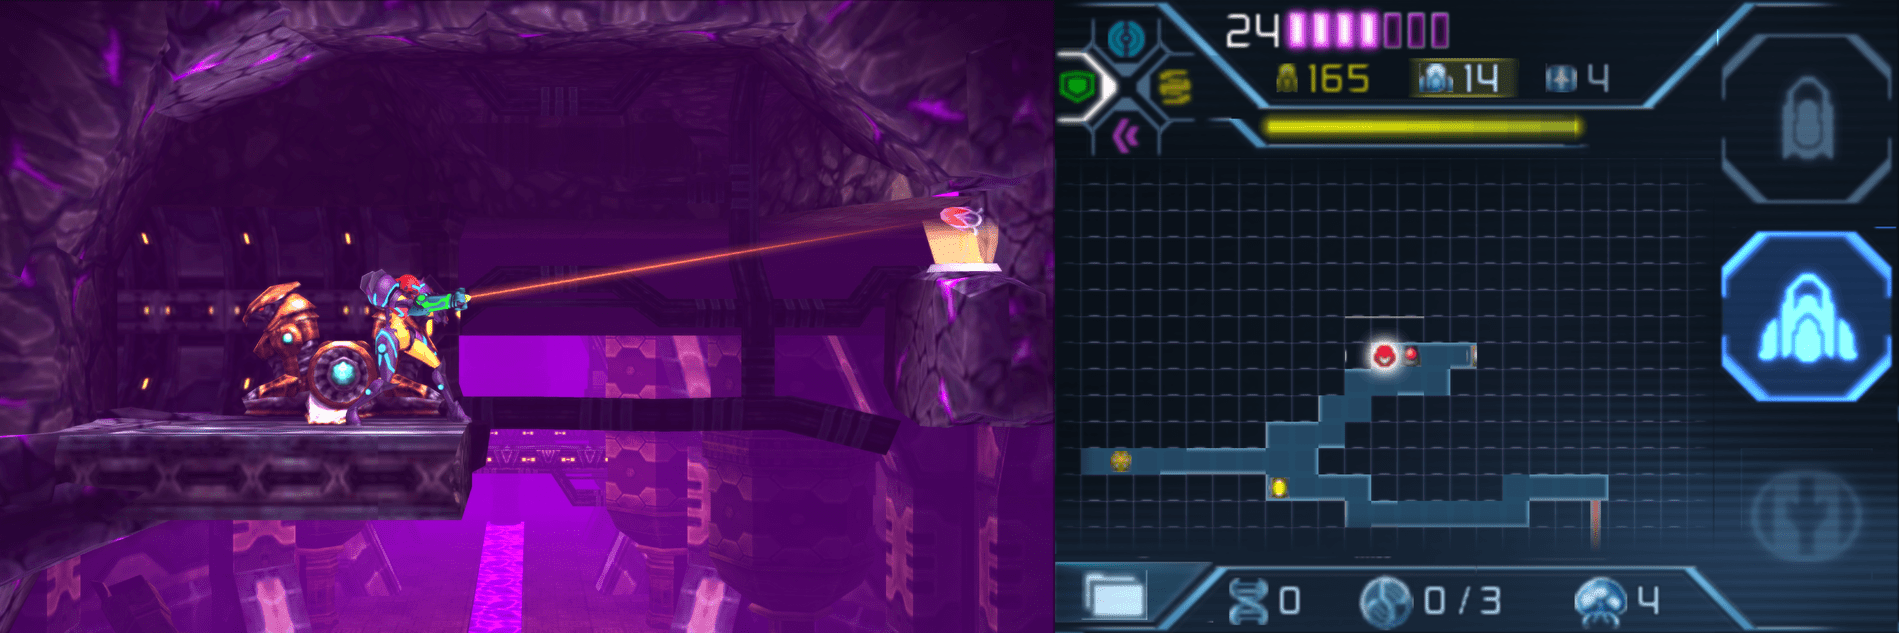
Missile Expansion #22
Location: Area 3 (First Visit)
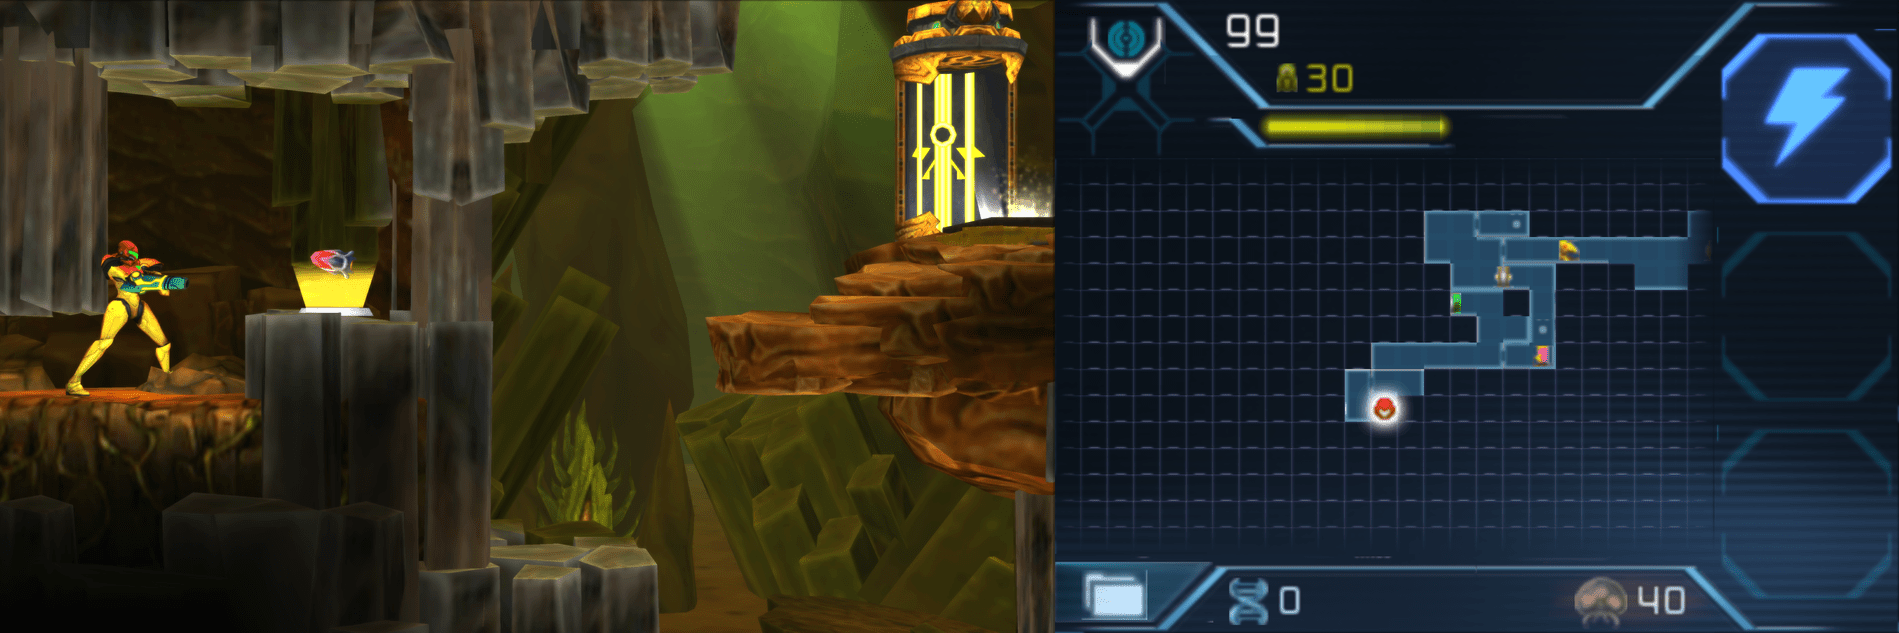
Requirements: Missiles
From the southwest Teleportal, head into the room next to it and destroy the red Grapple block in the righthand wall. Roll through and you’ll be in another long, vertical shaft. You’re coming in at about the midway point of the shaft, so to begin, descend to the very bottom, until you’re in a shallow pool of water. Get over the left ledge and fire a missile at the wall to reveal MISSILE EXPANSION #22!
Missile Expansion #23
Location: Area 3 (First Visit)
Requirements: Grapple Beam, Spider Ball, Area 3 Seal Unlocked
After all the Metroid DNA has been returned to the Chozo Seal and the acid has dropped, drop down a bit and take the Blast Door on your left. Eliminate all of the enemies you see, particularly the grey Gravitt’s with your Beam Burst, and work your way through the Morph Ball tunnel, destroying a red Grapple block along the way. Use your Spider Ball to roll into the now exposed tunnel and grab MISSILE EXPANSION #23.
Missile Expansion #24
Location: Area 3 (First Visit)
Requirements: Spider Ball, Area 3 Seal Unlocked
After all the Metroid DNA has been returned to the Chozo Seal and the acid has dropped, drop down a bit and then take the Blast Door on your right. STOP before going too far – you’ll notice three blocks making a bridge of sorts to the Morph Ball tunnel; don’t be fooled, as these are pitfall blocks that will send you tumbling down to the bottom of the cavern. Instead, use your Spider Ball to crawl across the ceiling into the Morph Ball tunnel. You’ll want to move quickly, as this tunnel is crawling with Glow Flies, the absolutely awful kamikaze bugs that explode at the first sniff of you. There’s small portions of the tunnel where the Glow Flies don’t venture, which is where you’ll want to hide out to avoid getting blasted. Navigate the tunnel quickly and you’ll roll right into MISSILE EXPANSION #24.
Missile Expansion #67
Location: Area 3 (Second Visit)
Requirements: Beam Burst
Make your way back to the Teleportal and keep climbing upwards in the shaft until you reach a few tunnels with two of those annoying indestructible grey mushrooms blocking on your way. Beam Burst their butts into oblivion and slip into the tunnel, going through and landing right bedside MISSILE EXPANSION #67.
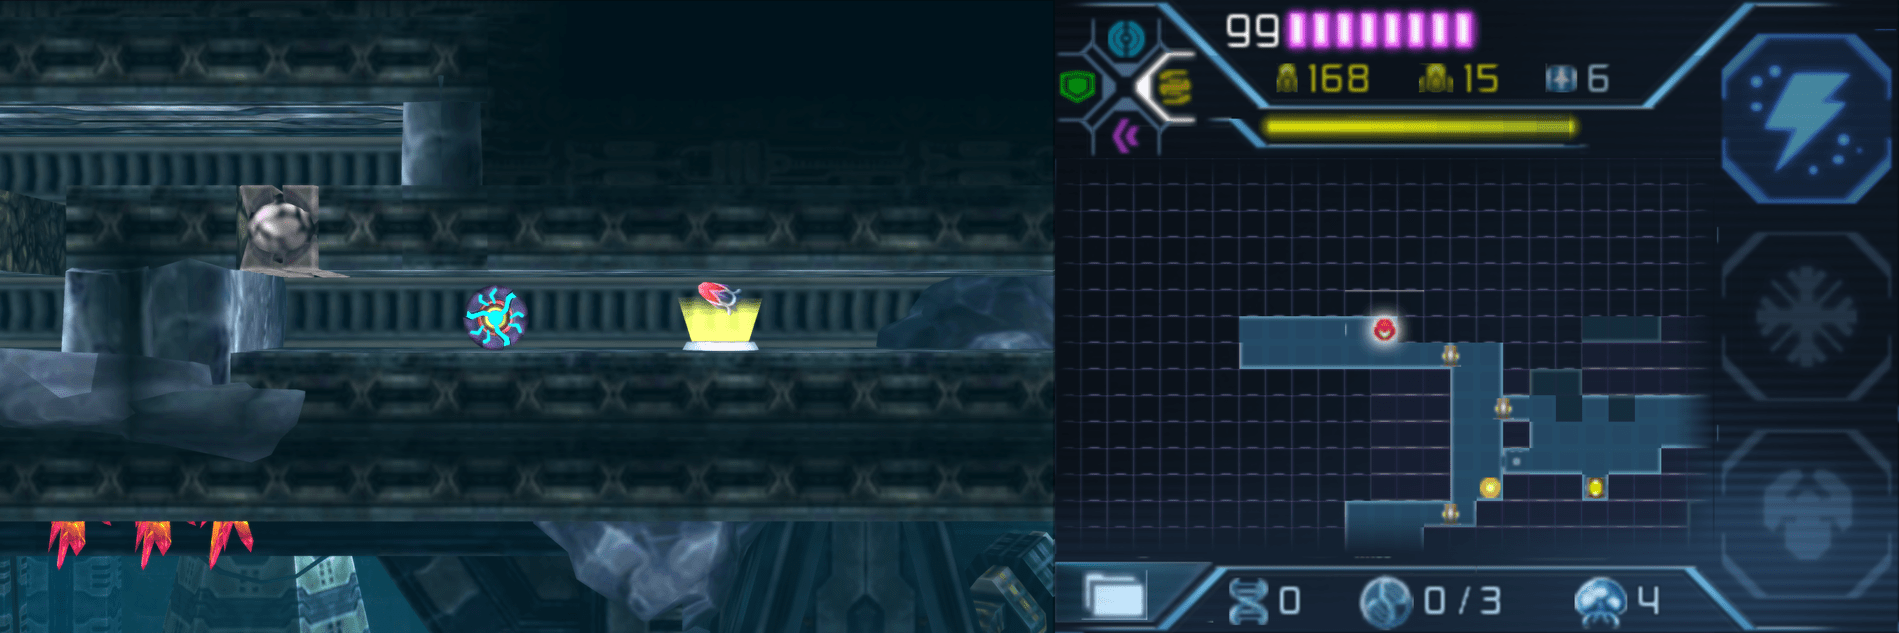
Missile Expansion #68
Location: Area 3 (Second Visit)
Requirements: Missiles, Spider Ball
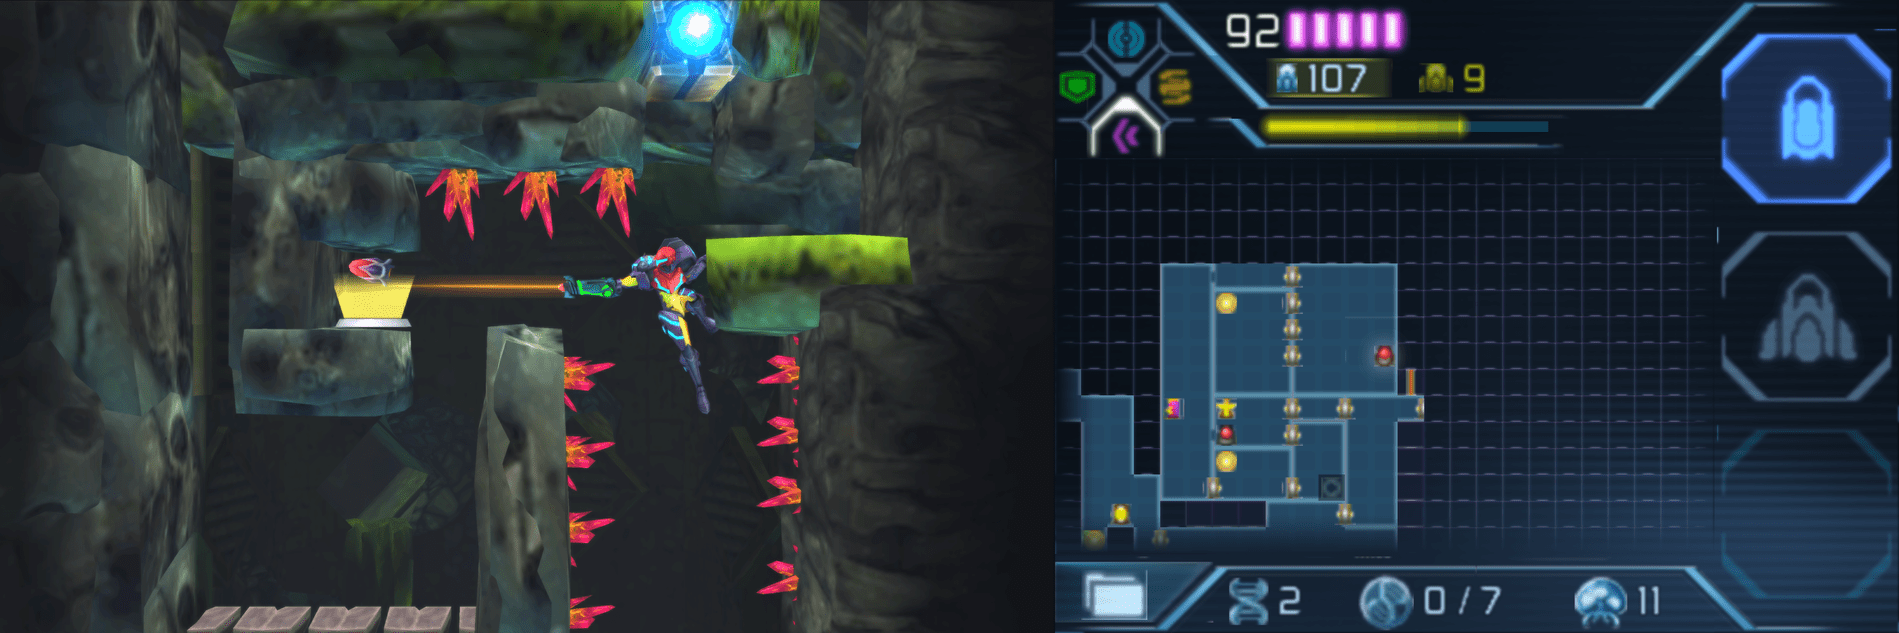
From where you grabbed Missile Expansion #67, drop down a bit and take the door on the left. In this new room – yet another long shaft – again drop to the very bottom and enter the Morph Ball tunnel in the water. Roll to the right and fall down, then use your Spider Ball to follow the path upwards; You’ll come to a clearing in the center with orange spikes on either side of you; fire two missiles directly above you to destroy some missile blocks and jump straight up to grab the ledge on the right. Now you’ll be able to roll in the tunnel and grab MISSILE EXPANSION #68.
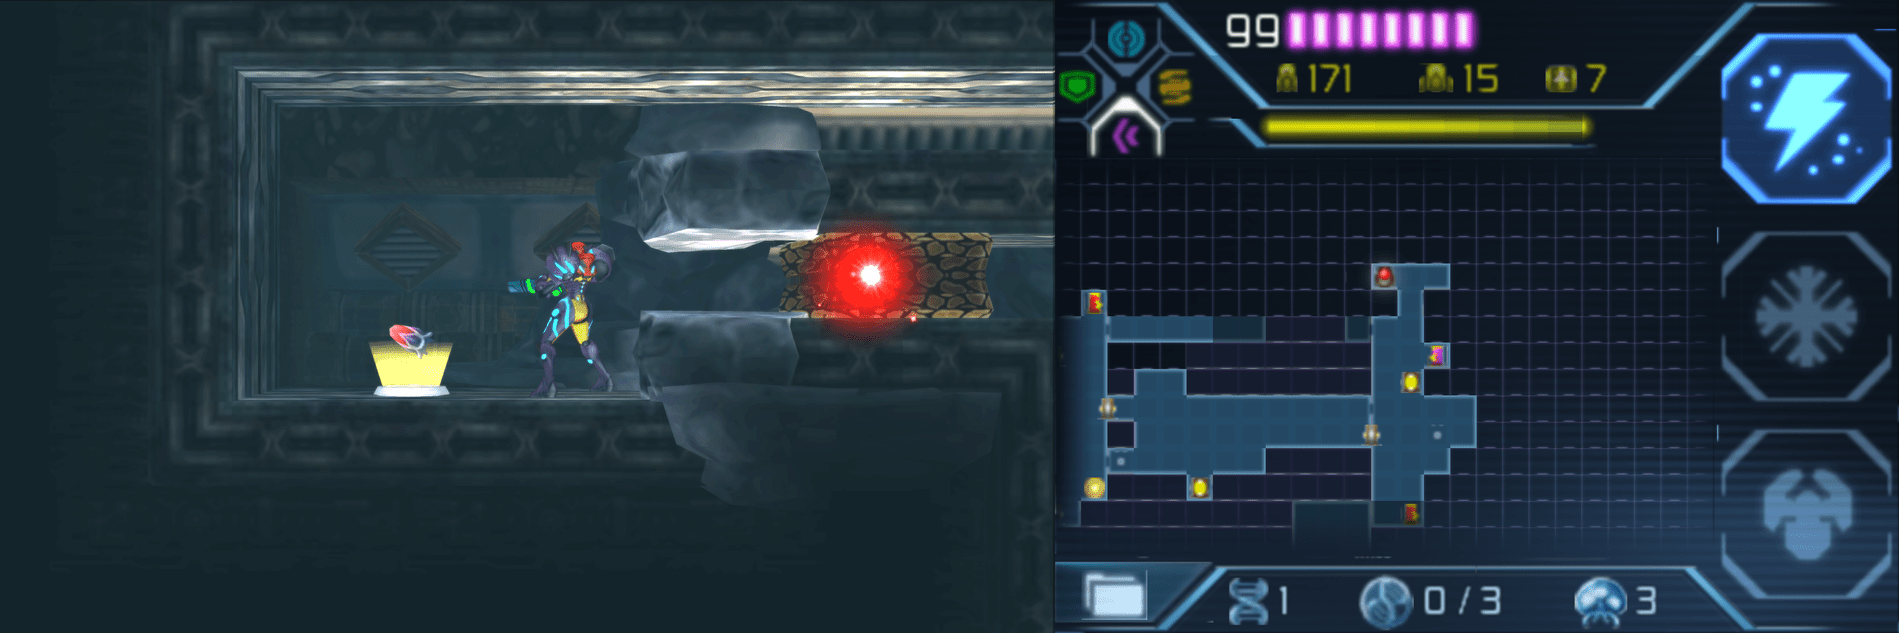
Missile Expansion #69
Location: Area 3 (Second Visit)
Requirements: Grapple Block, Missiles
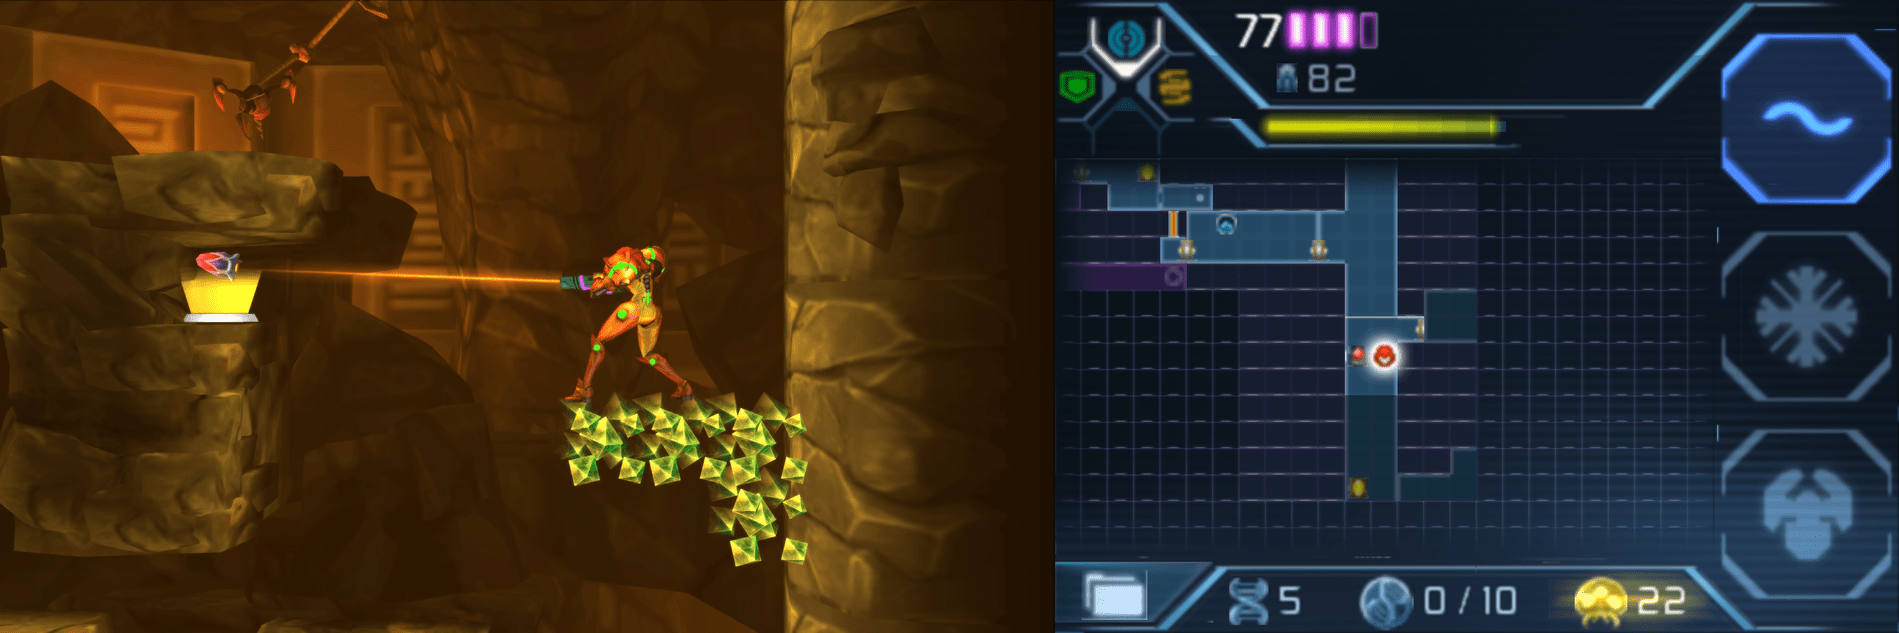
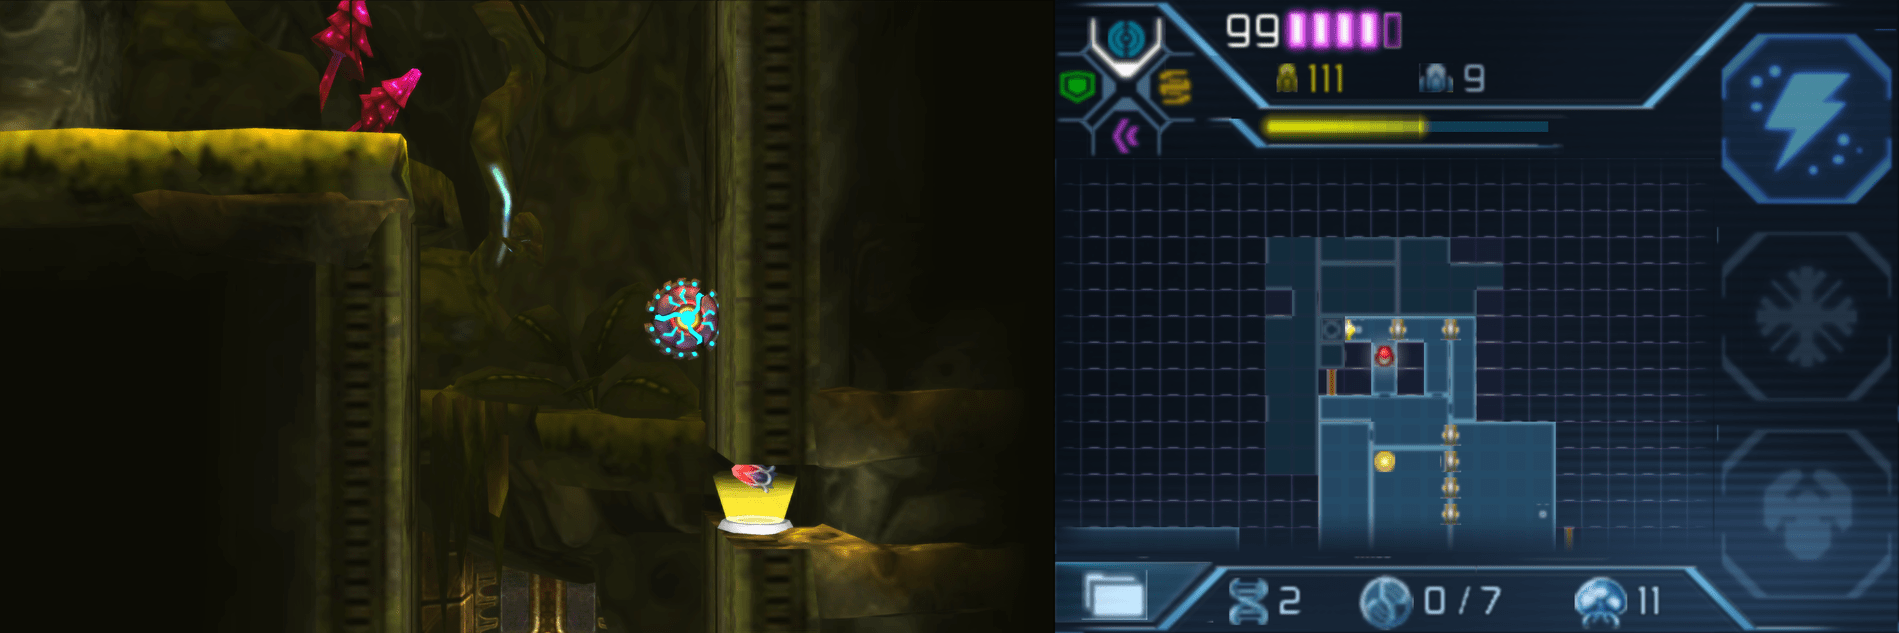
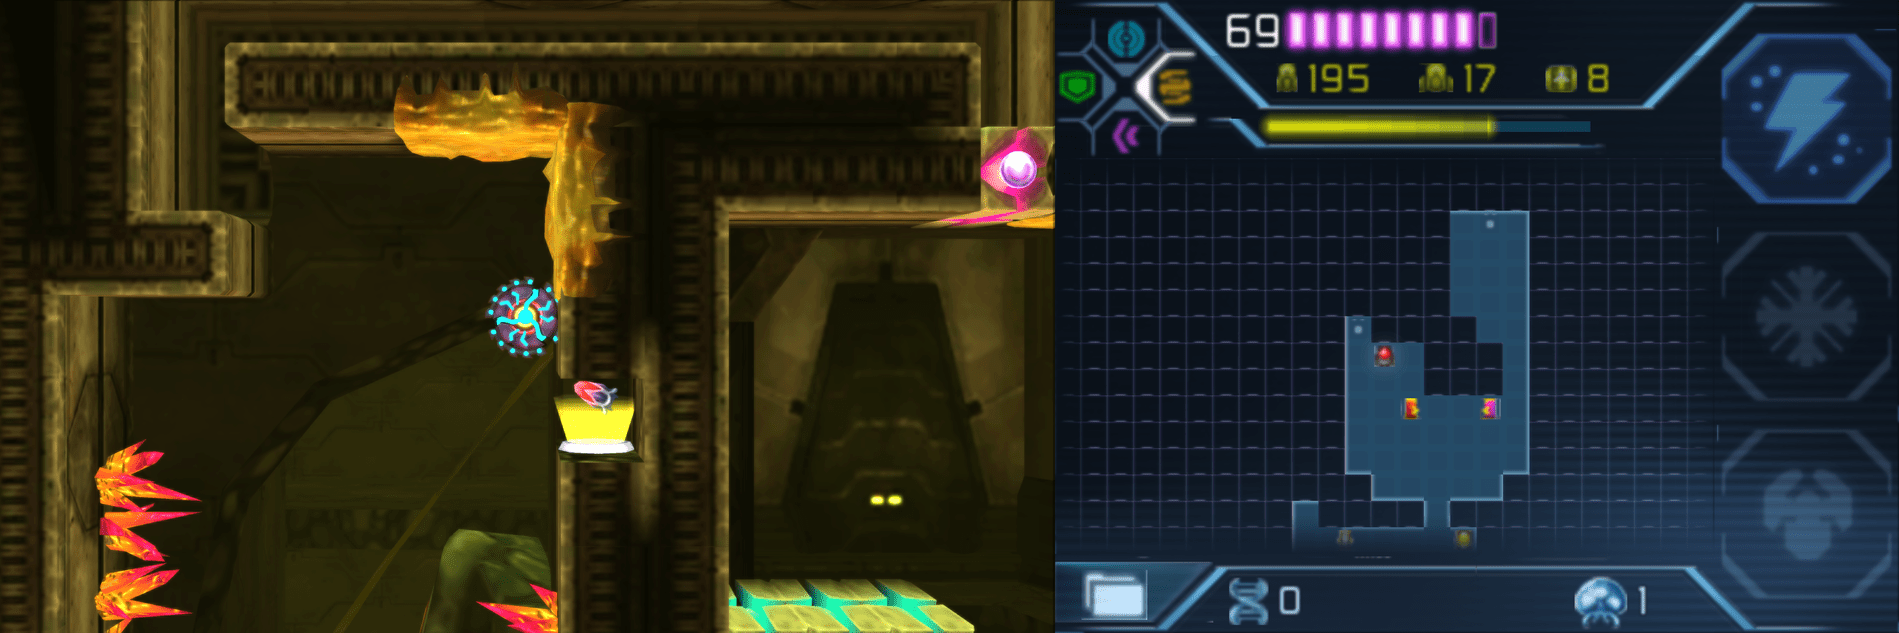
Immediately after grabbing Missile Expansion #68, get out of the water and start climbing the long shaft again, and this time, jump to the very very top! Once you’re at the ceiling, you’ll see a little nook that you can slip into that will land you in a small clearing; lay a bomb in the bottom corner and then slide into the new room. Once you’re in, keep rolling until you can stand in a narrow opening in between yellow gunk covered walls. Fire a missile straight above you, jump up and use your Grapple Beam to pull yourself higher. Grab the ledge on the right, and you’ll be able to roll over and grab MISSILE EXPANSION #69!
Missile Expansion #70
Location: Area 3 (Second Visit)
Requirements: Screw Attack, Missiles
In the northeastern room just before you fought a Gamma Metroid in, jump up to the very top of the room (mind the orange spikes!) and you’ll see a little alcove in the ceiling being closed off by two blocks. Your Screw Attack will make short work of those blocks, so tear through and jump around until the blocks respawn at the bottom. Land on them without breaking them and then fire a missile at the upper right wall. You’ll see MISSILE EXPANSION #70 reveal itself!
Missile Expansion #71
Location: Area 3 (Second Visit)
Requirements: Space Jump
In the Mining Hall room, Space Jump up, up, and up until you’re close to the ceiling. Direct your jumps towards the left and keep jumping for what feels like forever – this room is pretty dang massive. Eventually, on the furthest leftmost portion of the room, you’ll see a little nook in the top corner that MISSILE EXPANSION #71 is sitting in. No gimmicks, no tricks, just a long jump to get it.
Area 4
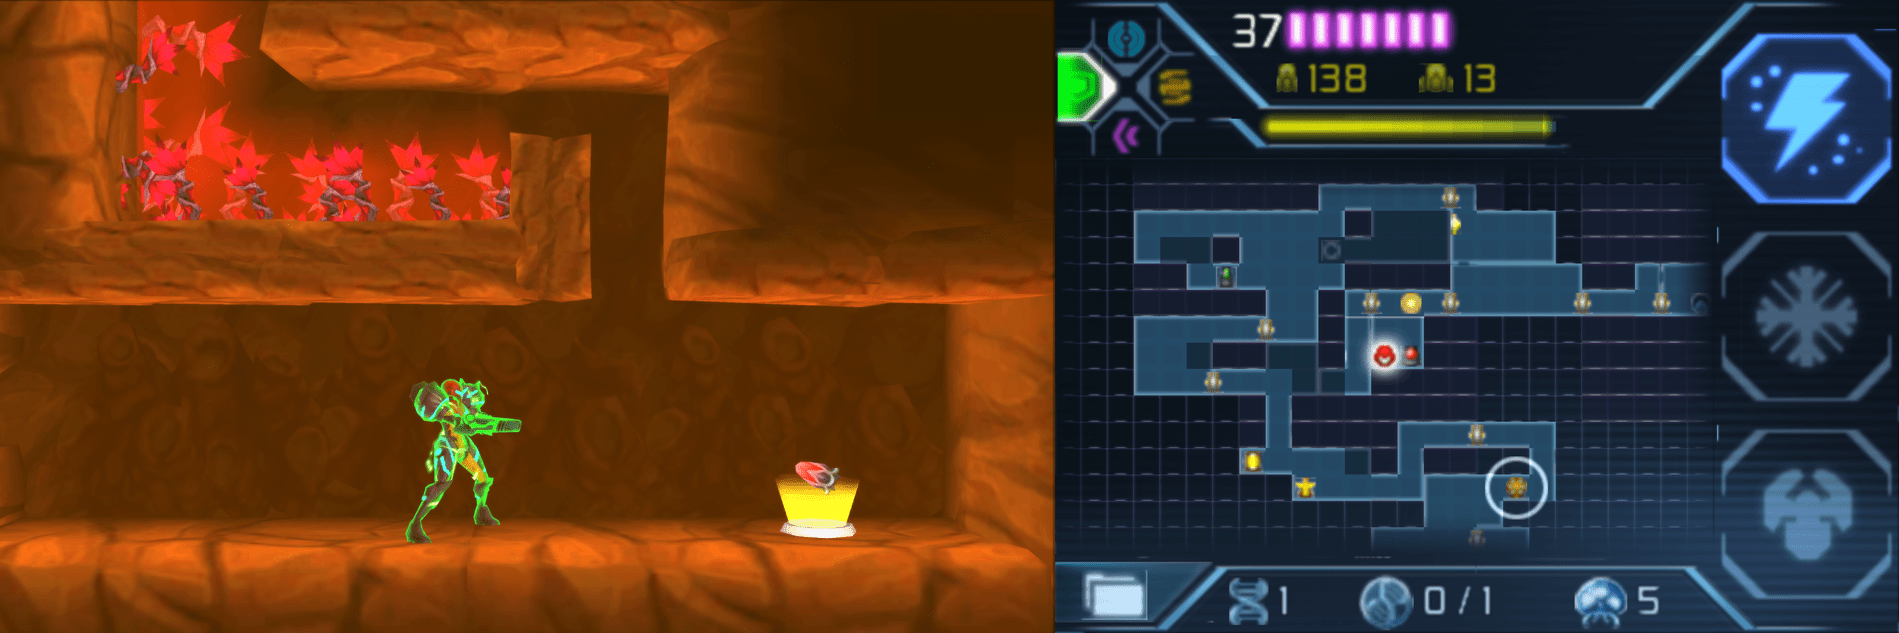
Missile Expansion #25
Location: Area 4 (First Visit)
Requirements: Ice Beam, Missiles
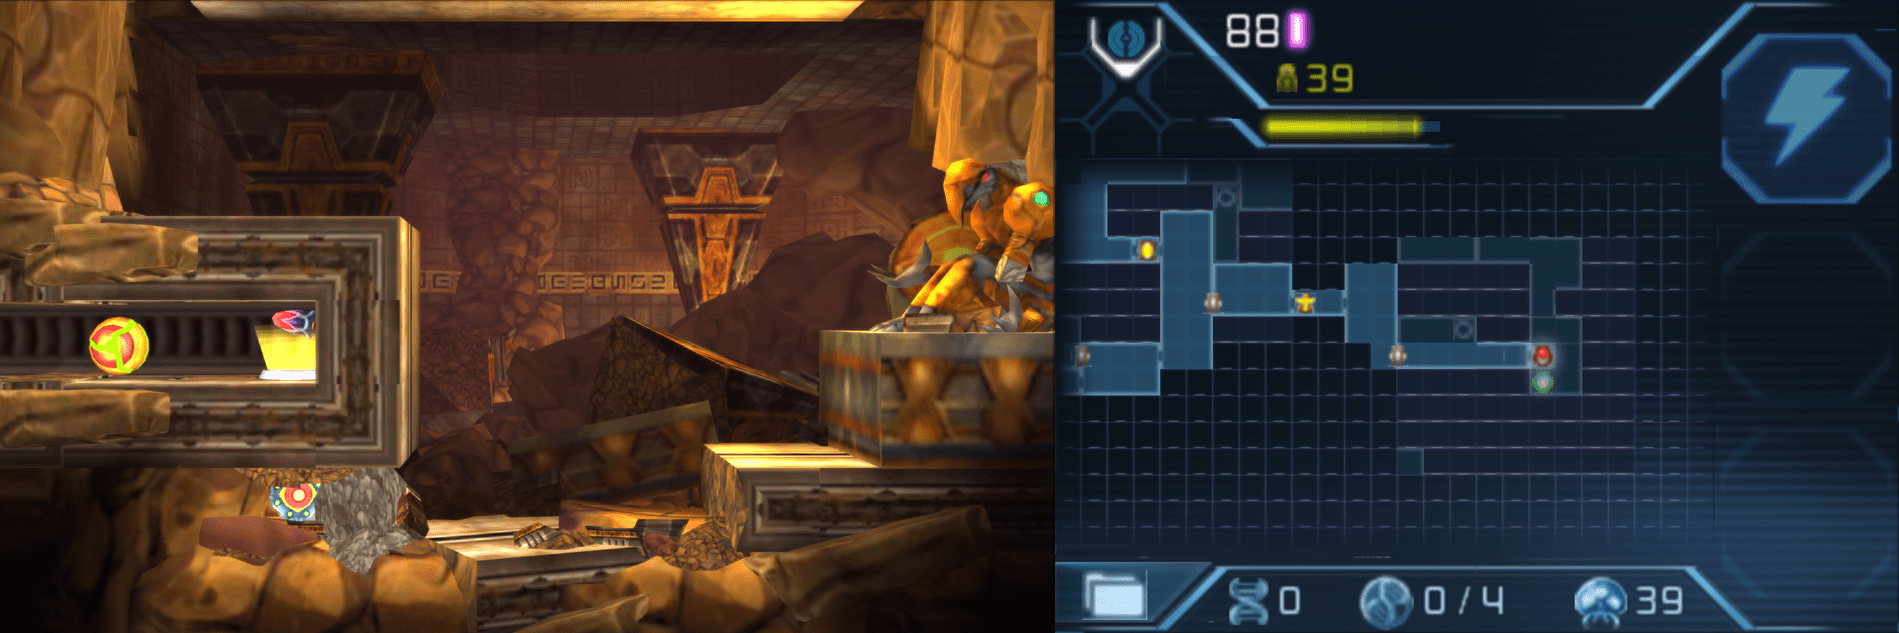
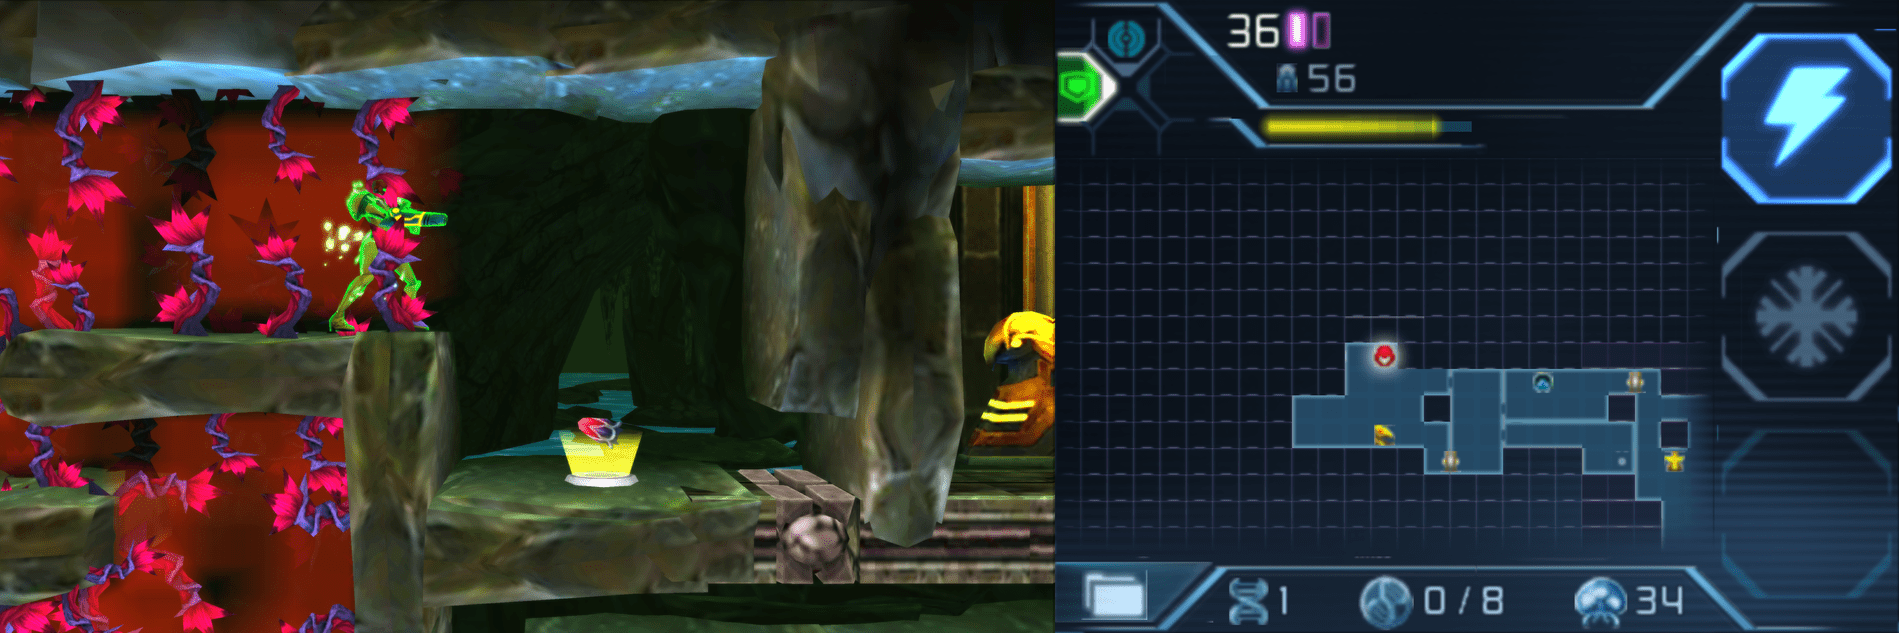
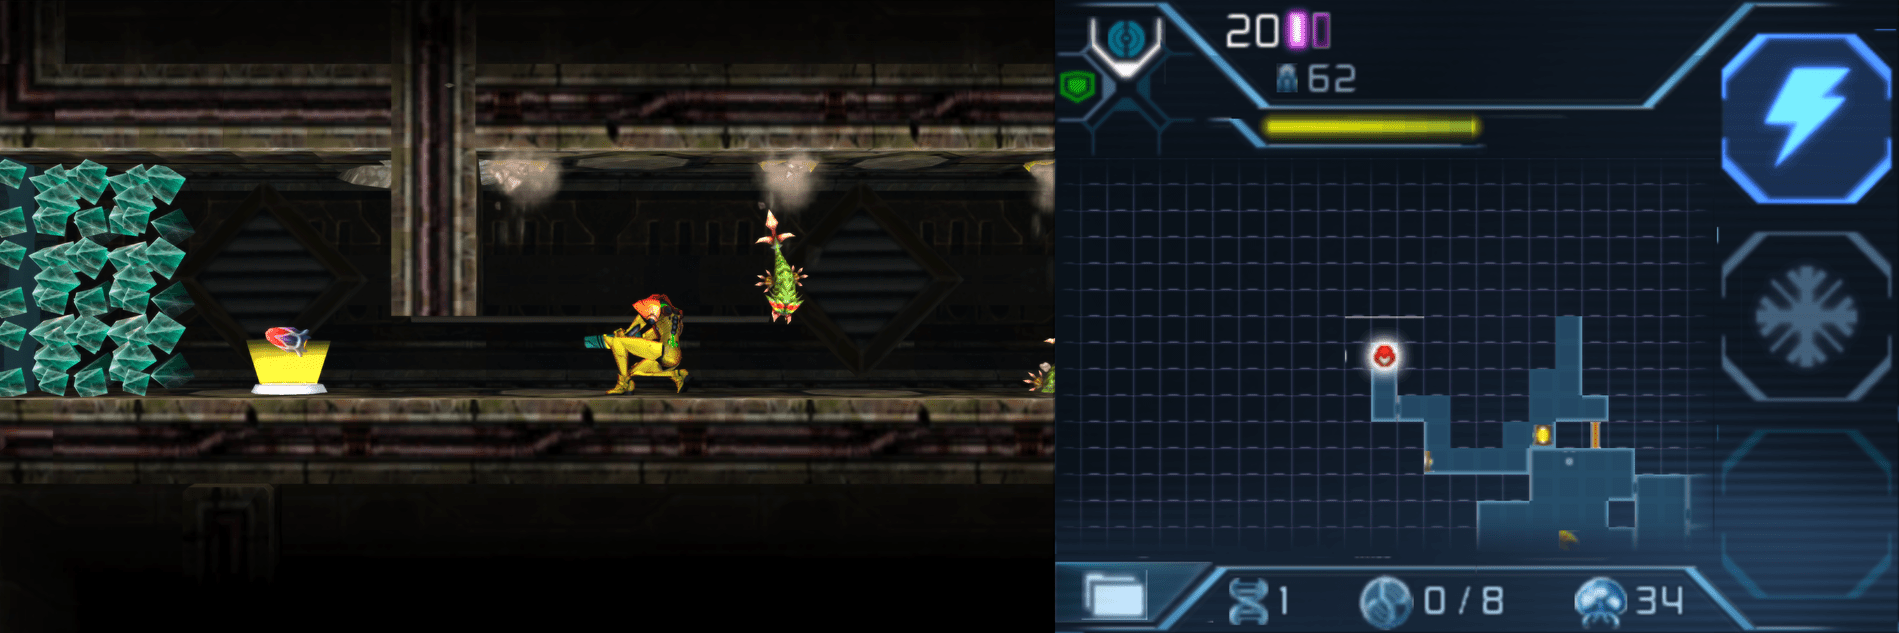
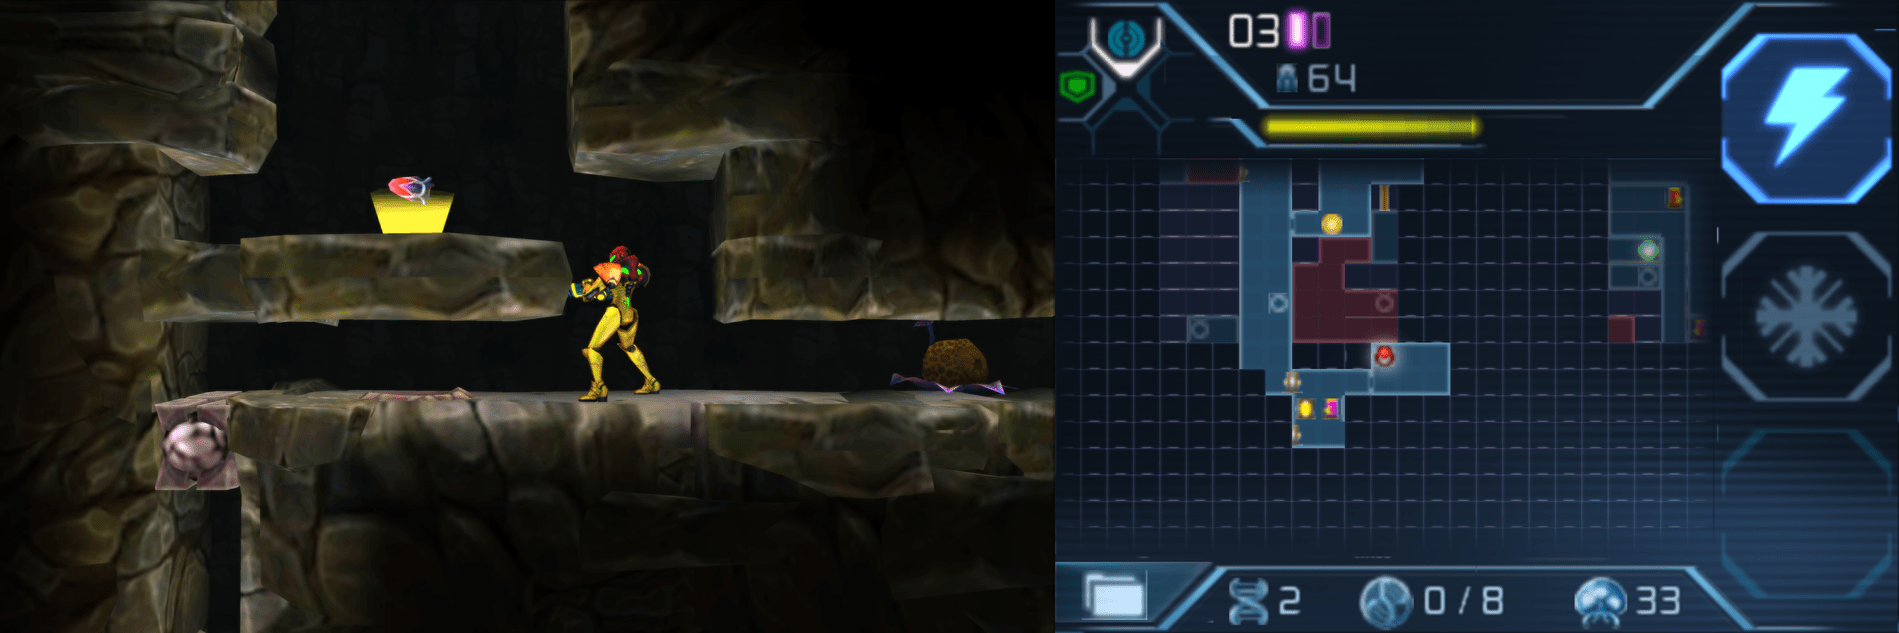
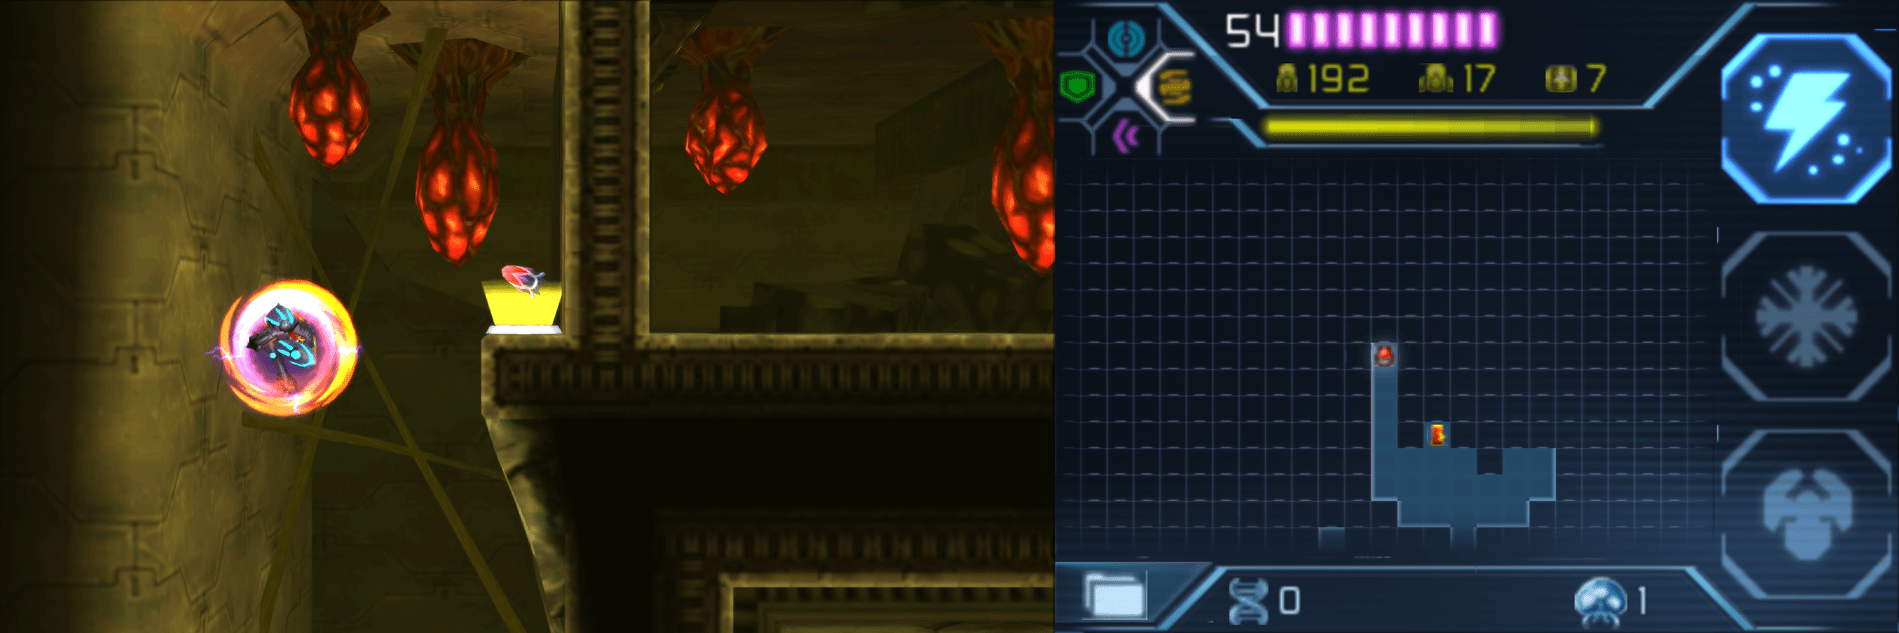
About halfway down the hallway in the room immediately before the Spazer Beam room, a green bug called a Gawron will pop up out of a hole in the ground; usually, we’d blast these away and continue on with our day, but this time, freeze the Gawron and use it as a platform to jump up to the box-like structure just floating in the air. In fact, before you even jump on the platform, use the frozen Gawron to fire a missile into the center opening of this platform; doing so will expose MISSILE EXPANSION #25.
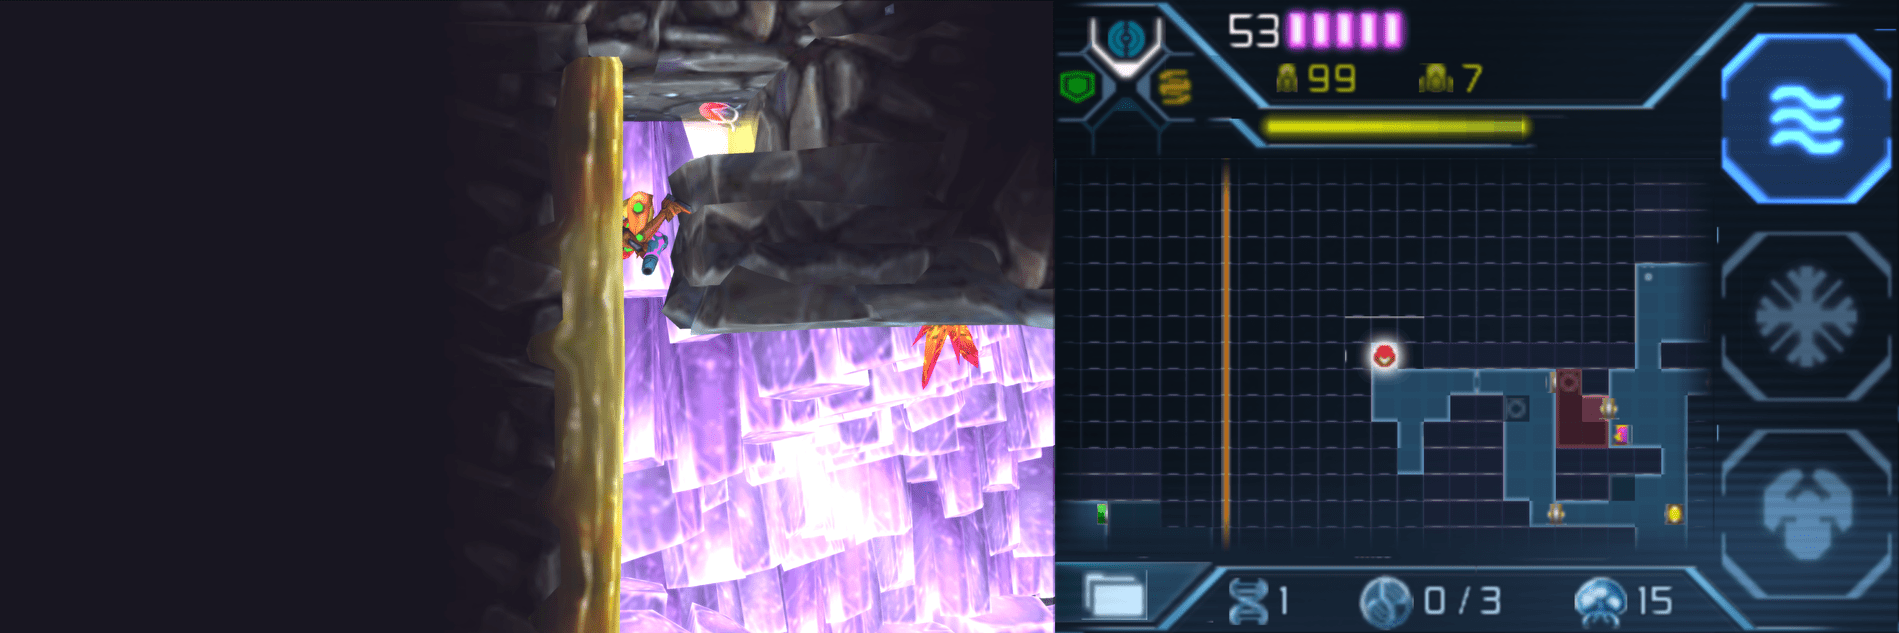
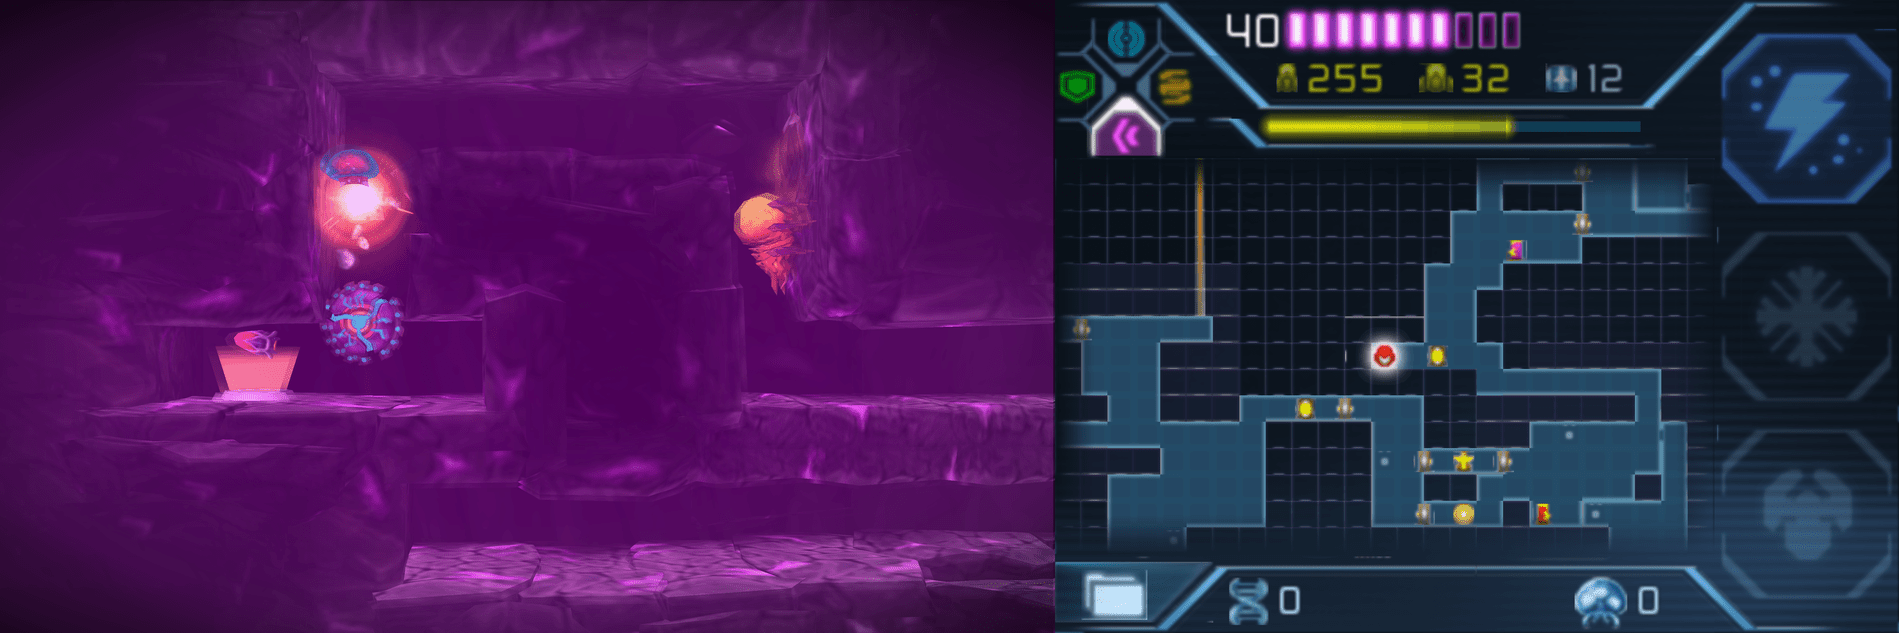
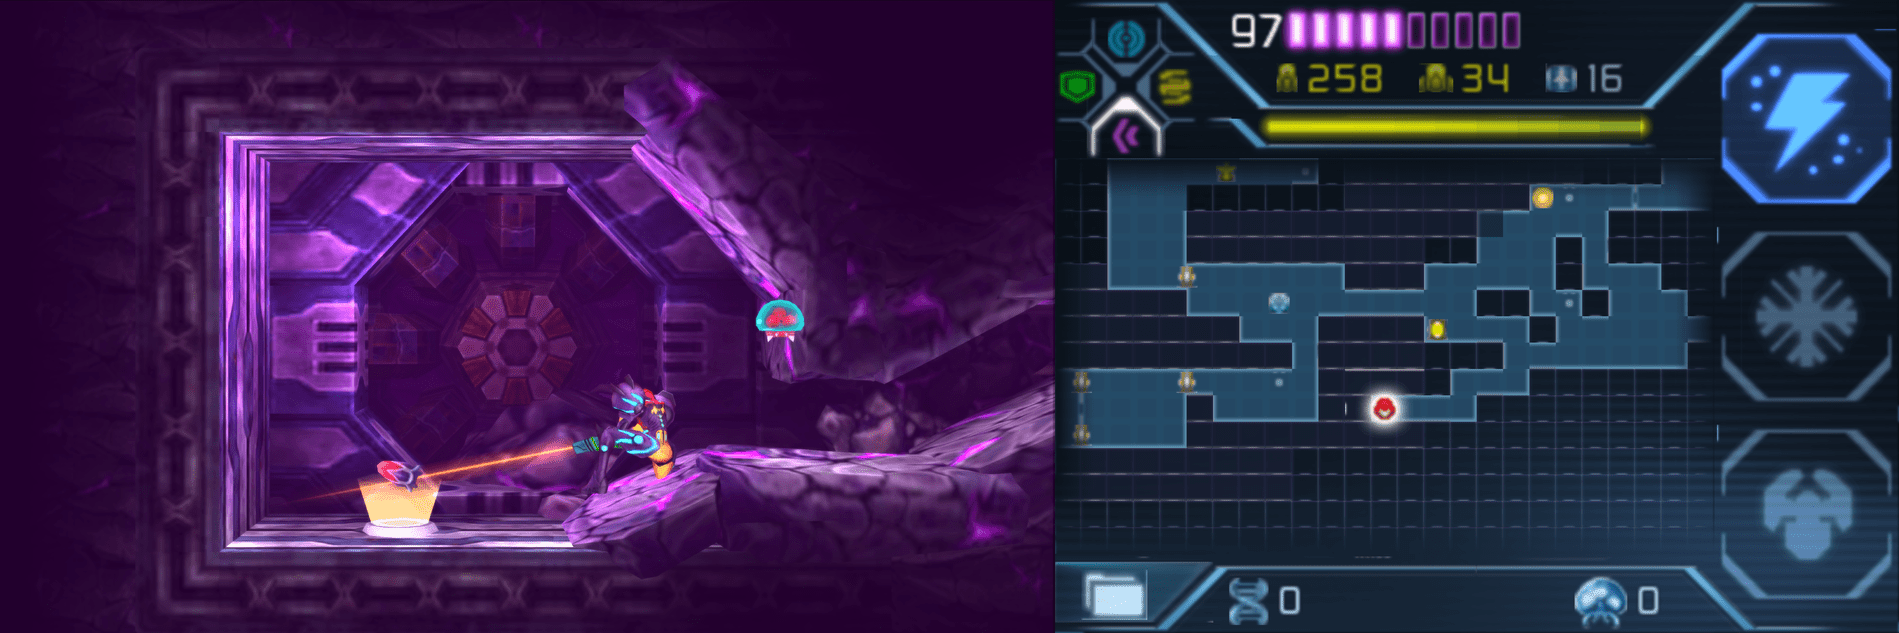
Missile Expansion #26
Location: Area 4 (First Visit)
Requirements: Space Jump
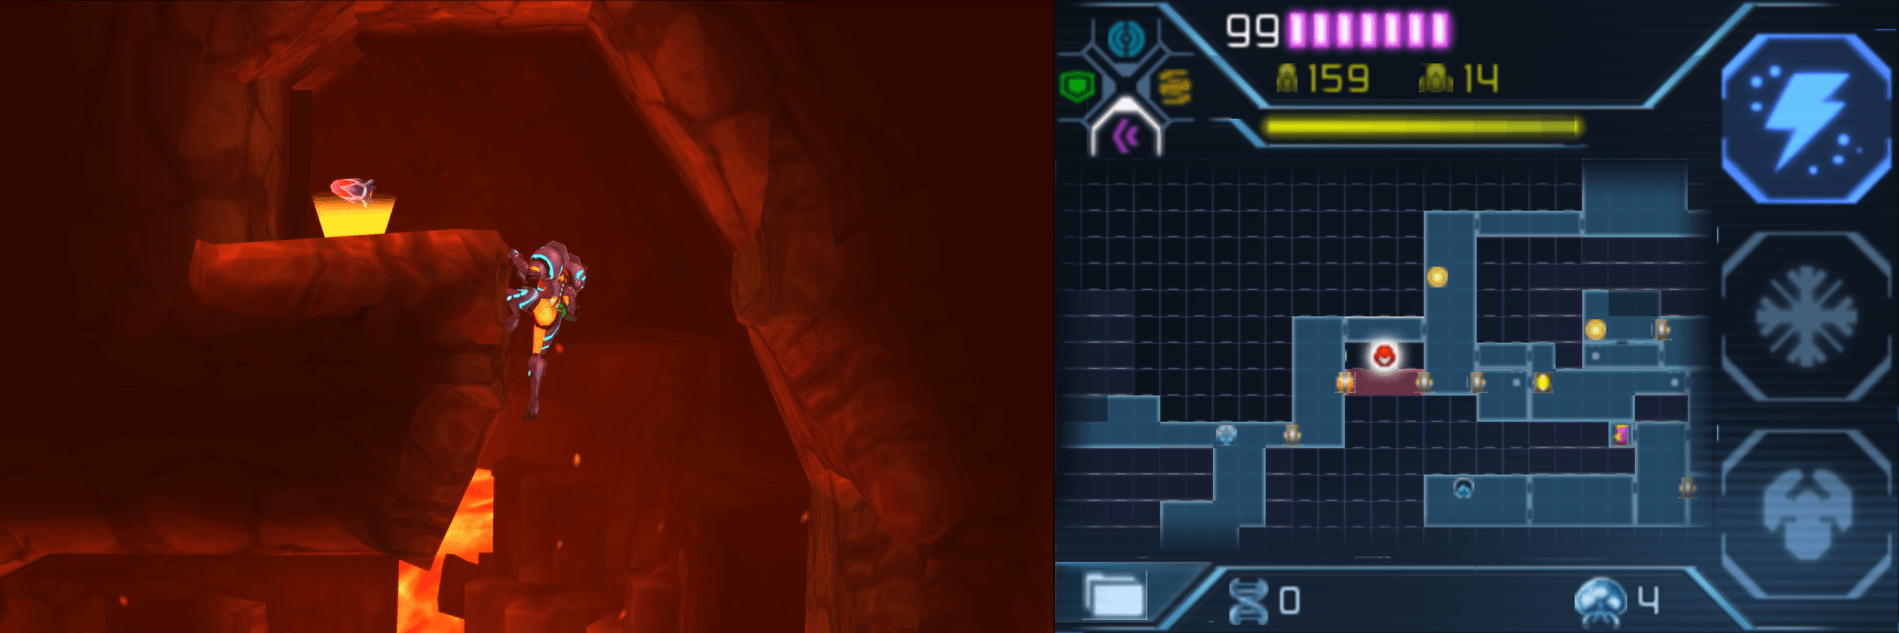
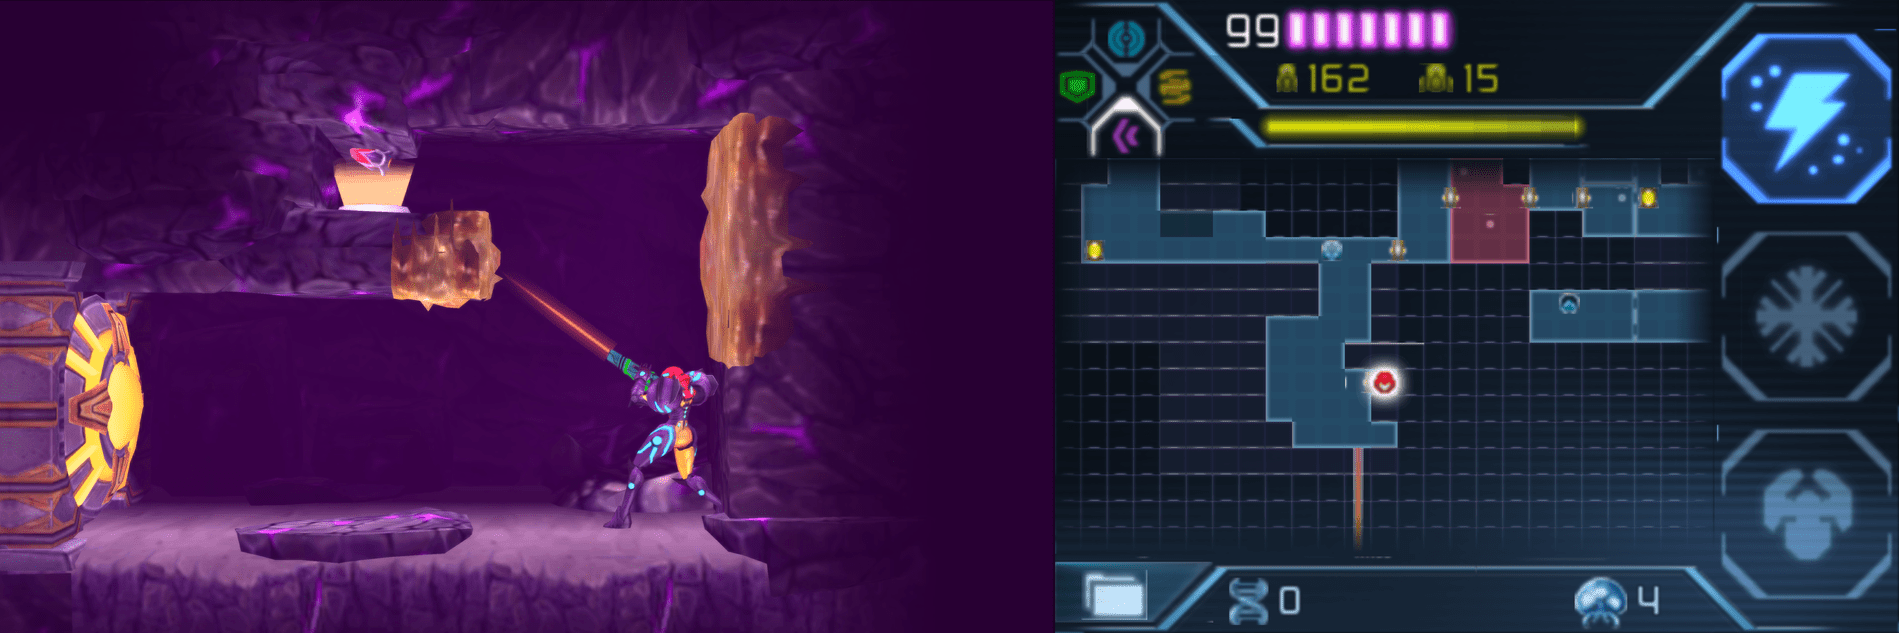
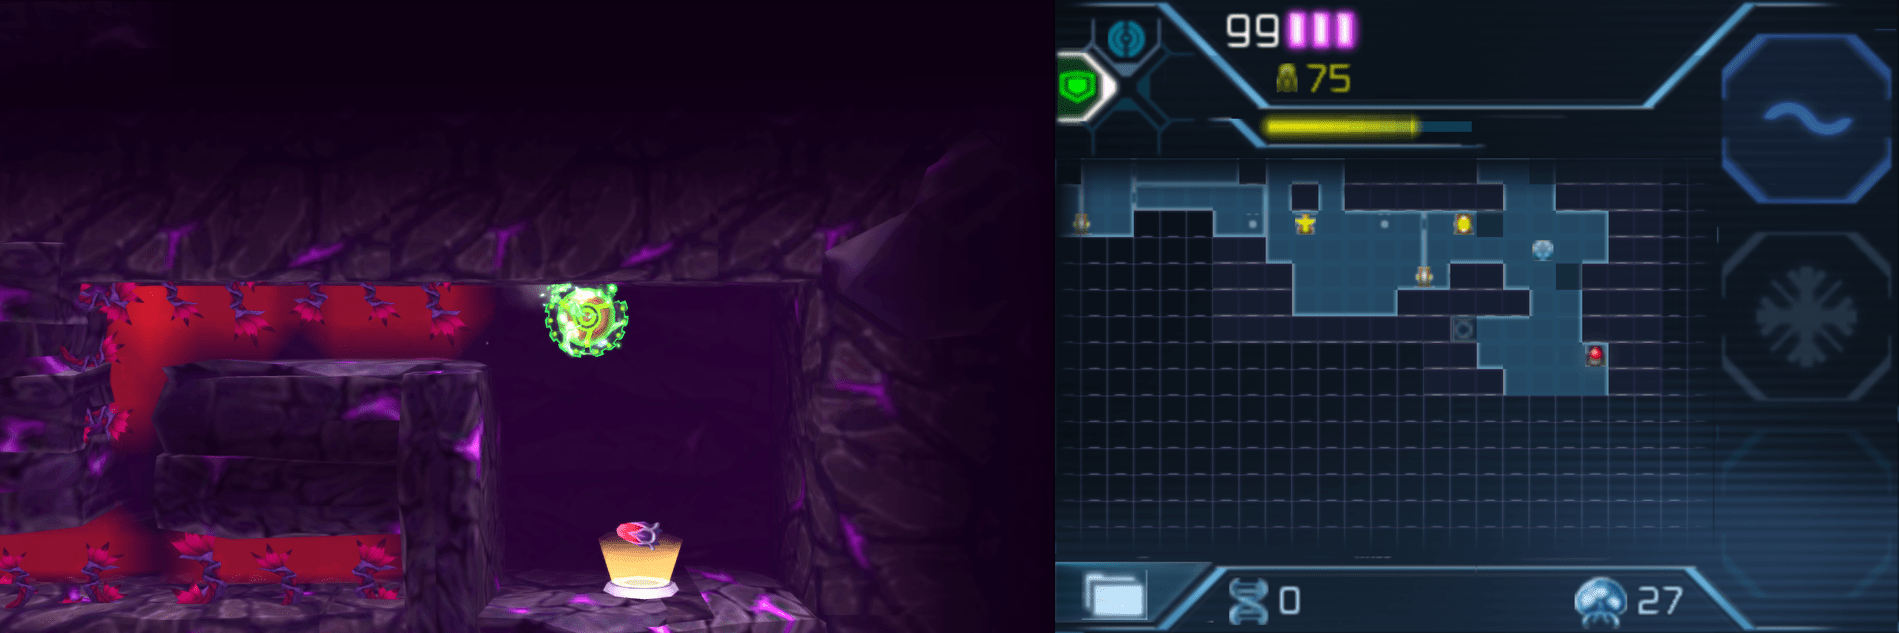
Get to the most spectacular looking room in the game, with hundreds of beautiful purple crystals in the background, which looks absolutely awesome. Beautiful, serene, but still full of danger. Eliminate the enemies in the room and Space Jump up to the top-left corner, where you’ll find MISSILE EXPANSION #26.
Missile Expansion #27
Location: Area 4 (First Visit)
Requirements: Super Missile, Grapple Beam, Bombs
From the Chozo Seal, press towards the left and only stop when you see a red Grapple block. Fire a Super Missile to destroy the block in front of the Grapple block and then slip inside the Morph Ball tunnel. Yank the second Grapple block to the right and then follow the Morph Ball tunnel upwards until you start rolling beside some red weeds. Tuck into the little alcove, lay a bomb, and MISSILE EXPANSION #27 will be revealed!
Missile Expansion #28
Location: Area 4 (First Visit)
Requirements: Spazer Beam, Spider Ball
From the Chozo Seal, drop down towards the tunnels and use your Scan Pulse to see what bricks you need to bomb, and drop out , heading through the Spazer Beam door on your left. In the new room, jump up and roll into the Morph Ball tunnel. Fire the door open on your right when you get to the top and then carefully jump across the platforms in Morph Ball form; the ground is all pitfall blocks, so if you really want to play it safe, you can Spider Ball across the ceiling. One you’re at the other side, drop down and grab MISSILE EXPANSION #28.

Missile Expansion #72
Location: Area 4 (Second Visit)
Requirements: Space Jump, Spazer Beam
Right after you exit the Chozo Seal room to the left, you’ll see a gap in the roof where you can jump up. Space Jump to the top and blast away the Spazer Door on the left. Walk through and MISSILE EXPANSION #72 will be sitting there right for the taking!
Missile Expansion #73
Location: Area 4 (Second Visit)
Requirements: Missiles, Bombs
Head to the room on your map that’s directly above the hot zone on the west side of Area 4 – you can’t actually access the room from the hot zone, keep in mind, but use it as a good point of reference. The actual room you can grab this missile in connects to where you chased the Gamma Metroid earlier, so make your way there and bomb the floor to drop down to a little alcove. Use your Scan Pulse and you’ll see a blocking glowing inside of a nook. Grab the opposite ledge, fire a missile into the nook to destroy the missile block, and you’ll see MISSILE EXPANSION #73 reveal itself.
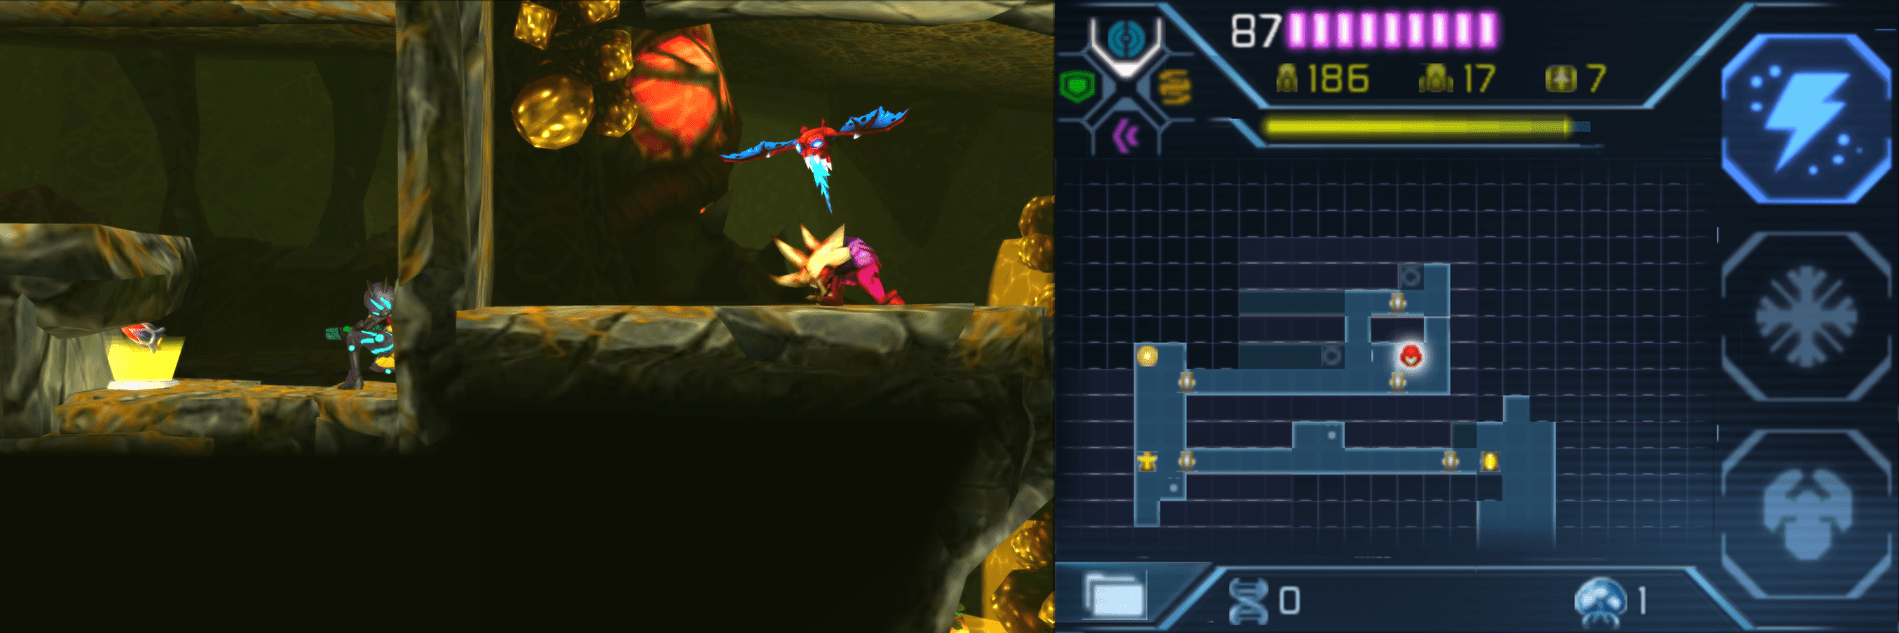
Missile Expansion #74
Location: Area 4 (Second Visit)
Requirements: Baby Metroid (recommended), Spider Ball
Get to where the Diggernaut chased you earlier. Starting off from the first level of the chase, press forwards about halfway in and you’ll see some crystals that the Baby Metroid can eat up. Once they are destroyed, MISSILE EXPANSION #74 will be yours! If you wanted to, this expansion is also available from the lower level too, you just need to follow a Morph Ball tunnel. Easy peasy!
Missile Expansion #75
Location: Area 4 (Second Visit)
Requirements: Power Bombs
In the Diggernaut chase area, head left towards the Missile Recharge Station. You’ll eventually see a self contained alcove with two fans blowing downwards and some small platforms and blocks inside. Enter the alcove and lay a Power Bomb, destroying all of the blocks, letting you jump up and grab MISSILE EXPANSION #75.
Missile Expansion #76
Location: Area 4 (Second Visit)
Requirements: Bombs
Go to the lowest level of the Diggernaut chase sequence now and get to about the halfway point – you should be able to see this expansion in plain sight. Lay a bomb on the floor and you’ll be able to slip into the small submerged tunnel to grab MISSILE EXPANSION #76.
Missile Expansion #77
Location: Area 4 (Second Visit)
Requirements: Gravity Suit, Space Jump
Get to the small hot zone in the center-right of Area 4 and enter it. Drop down into the lava and the Space Jump up in between the spikes and you’ll see MISSILE EXPANSION #77 sitting on a ledge!
Area 5
Missile Expansion #29
Location: Area 5 (First Visit)
Requirements: Lightning Armor
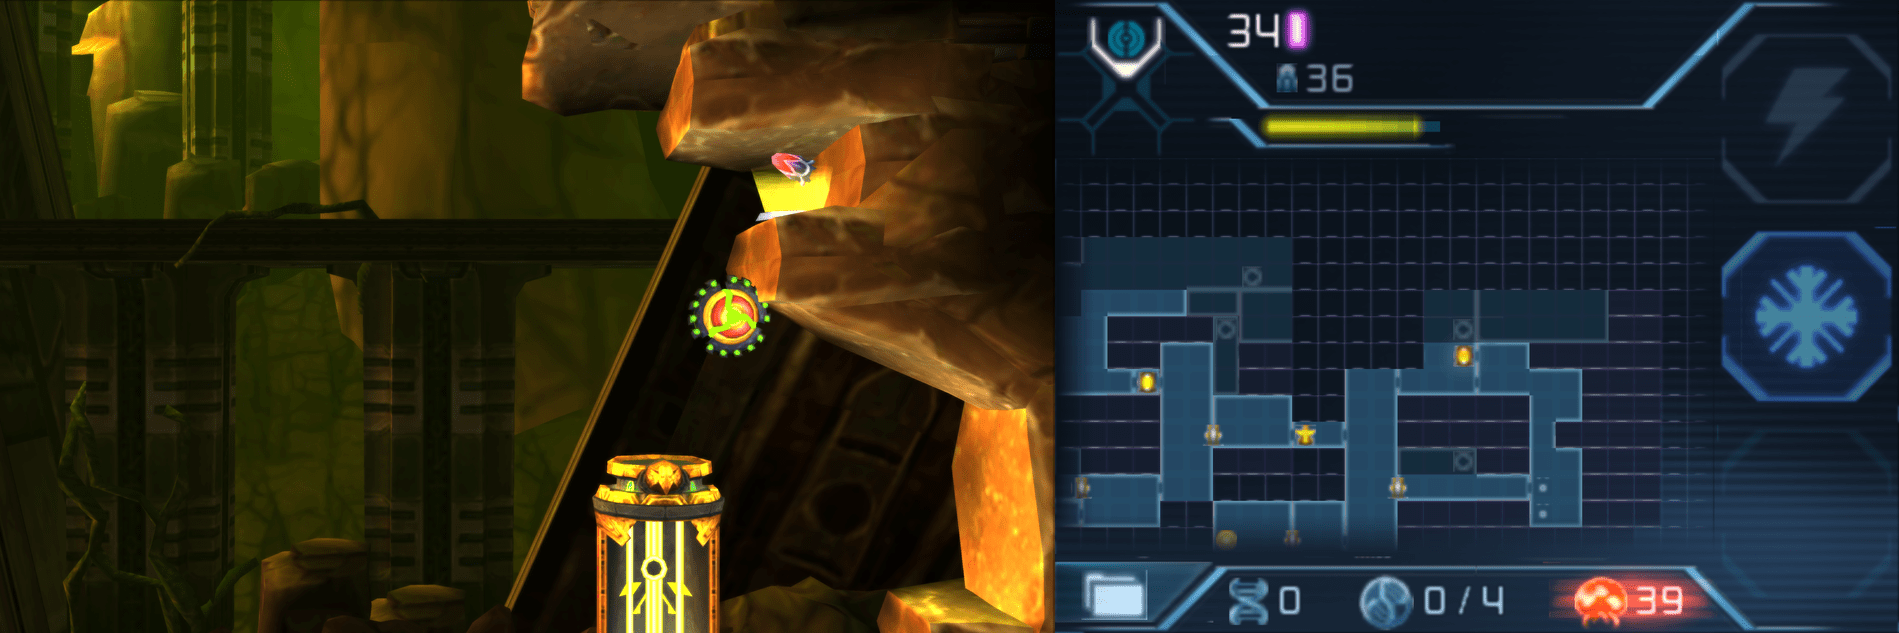
Right before the hot zone on the west side of Area 5, you’ll be in a room with some red weeds. Activate your Lightning Armor, drop down into the weeds and you’ll see MISSILE EXPANSION #29 tucked away in the bottom corner.
Missile Expansion #30
Location: Area 5 (First Visit)
Requirements: Gravity Suit, Grapple Beam, Missiles, Spider Ball, Bombs
Make your way to the bottom of the Gravity Suit room and exit through the lower door. Press ahead and morph down and tuck into the small alcove; drop a bomb and roll through until you’re standing in a small shaft with orange spikes on either side. Jump up and use your Grapple Beam to pull you to the upper right ledge; shoot a missile directly in front of you and then Spider Ball it over the tunnel and around the rock to grab MISSILE EXPANSION #30!
Missile Expansion #31
Location: Area 5 (First Visit)
Requirements: Space Jump, Super Missiles, Spider Ball, Phase Drift
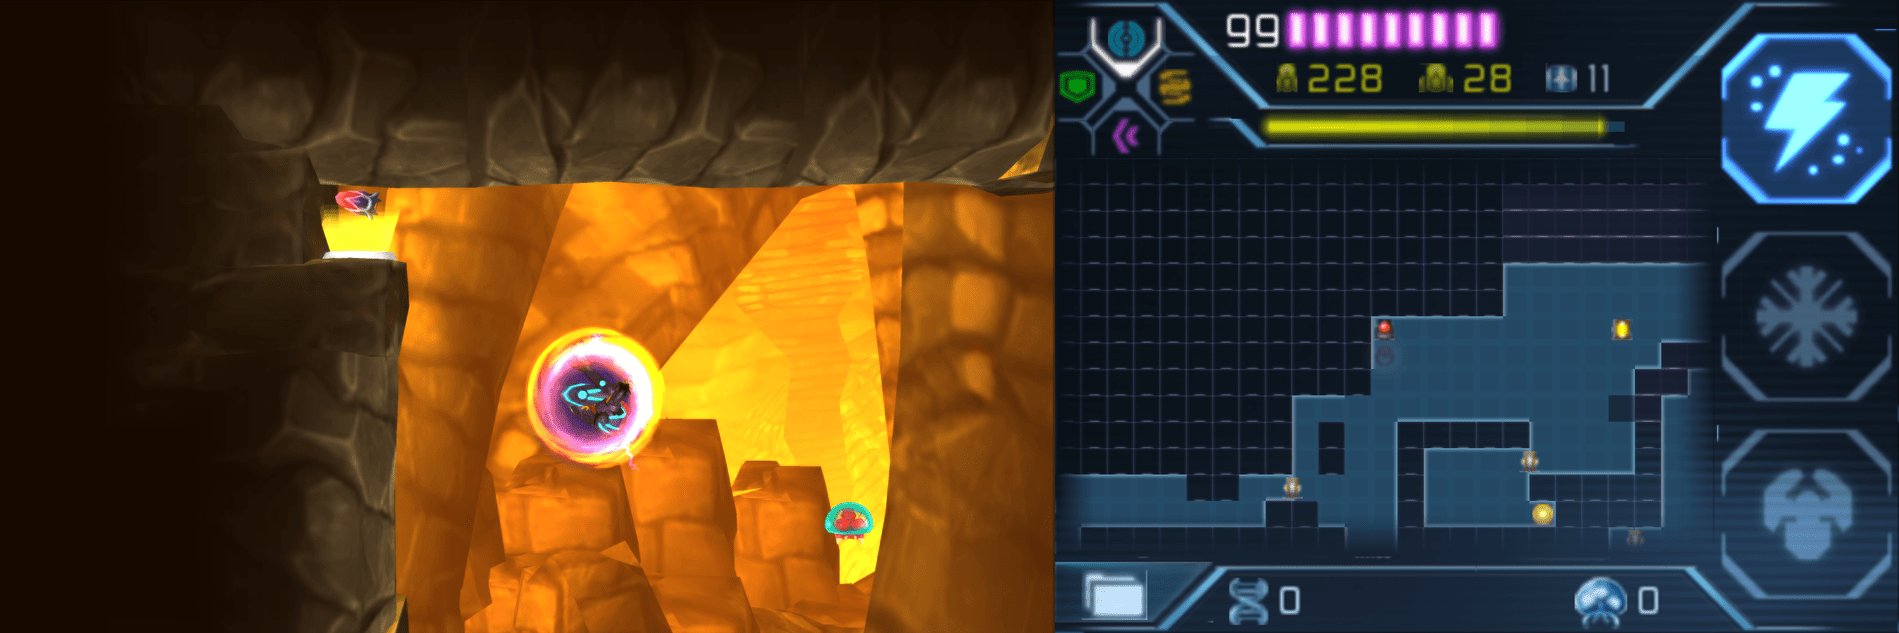
In the room directly above the Gravity Suit room, Space Jump up to the top right corner and you’ll see a small tunnel that you can tuck into; roll through and jump up, going through the Blast Door on the left. Be careful here! The bridge blocks are all pitfall clocks, and you’ll fall if you try to run on them! Activate your Phase Drift and run across, breaking the Super Missile shield on the Blast Door. Keep your Phase Drift on, run over another pitfall bridge, and you’ll run right into SUPER MISSILE EXPANSION #6! But hold on – there’s more! Deactivate the Phase Drift and fall down the pitfall blocks, and try to hug the left hand side so you land on a platform. Use your Scan Pulse and you’ll see a block on the opposite wall start to glow. Use your Spider Ball to roll over, lay a bomb, and viola – there’s MISSILE EXPANSION #31!
Missile Expansion #32
Location: Area 5 (First Visit)
Requirements: Space Jump, Bombs
In the top left corner of the Atrium, you’ll come across a series of small platforms sticking out of the wall. Use your Scan Pulse, and you’ll see a block glowing on the platform second down from the top. Bomb it to grab MISSILE EXPANSION #32!
Missile Expansion #33
Location: Area 5 (First Visit)
Requirements: Screw Attack
In the Atrium room, get to the Save Station on the lower left; jump straight up through the Screw Attack blocks and claim MISSILE EXPANSION #33.
Missile Expansion #34
Location: Area 5 (First Visit)
Requirements: Beam Burst, Bombs
Get to the very northwest corner of the Atrium, dropping to the very bottom. You’ll see a charge beam door, a Save Station, and an elevator; start off by going through the door.
You’ll be in another huge room, with a water stream flooding the bottom half, and an Energy Recharge Station in the top left corner. Jump up a bit and you’ll be on a clearing; use your Scan Pulse and you’ll see there are some blocks on the lower right wall that can be destroyed. Bomb them and then slip into the tunnel; there are a bunch of those indestructible mushroom things everywhere, so switch on your Beam Burst and put that sweet 360° aiming to work and destroy them all! Carefully drop down, sticking to the center, to the pool of water to grab MISSILE EXPANSION #34. There are pitfall blocks on the left and right, so watch your step (roll?).
Missile Expansion #35
Location: Area 5 (First Visit)
Requirements:
After taking the elevator down from the southeast corner of the Atrium room, you’ll be back in the room with the Autracks now; work your way to the room just before the Plasma Beam room, the one with the tunnels, Grapple blocks, and Glow Flies (ugh!). Drop down on the right side and when you land on the upper platform, Screw Attack through the blocks on the floor; when you hit the floor, activate the Phase Drift and quickly roll over across the bridge and bomb the far wall to reveal MISSILE EXPANSION #35! You may need to roll once to bomb, and then roll again to actually grab the missile – just keep the Drift on and you’ll be fine!
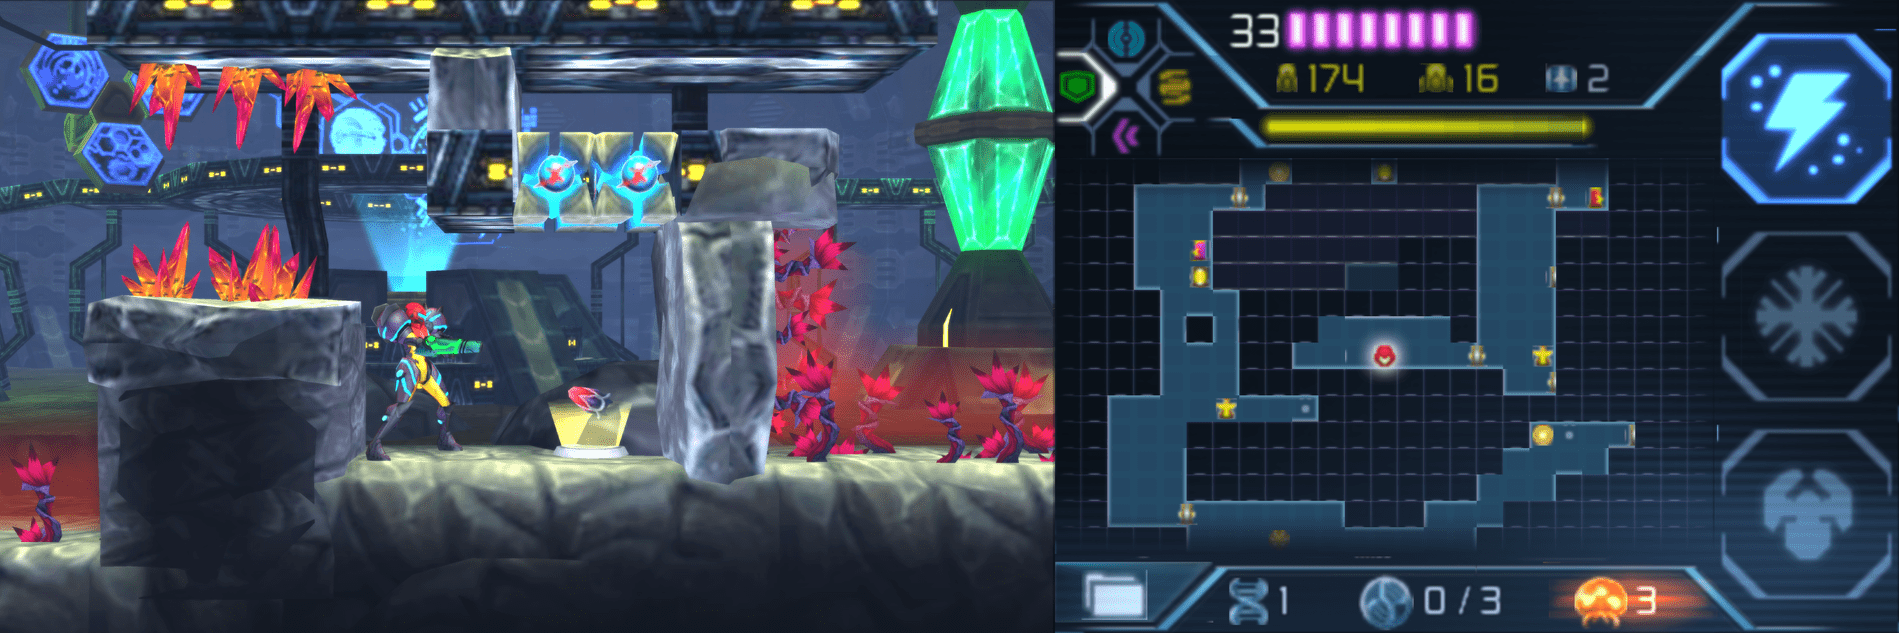
Missile Expansion #36
Location: Area 5 (First Visit)
Requirements: Plasma Beam, Screw Attack, Missiles
Get to the room on the right side of Area 5, directly before the Zeta Metroid. You’ll be in a new flooded chamber that’s full of water on the bottom half and cliffs and platforms on the top half; this is a big room, but there’s not actually a ton of stuff here, so just make your way to the Plasma Beam door and blast away the Gryncore to enter the new room. This room has a ton of red weeds and short spaces you’ll need to jump through; get about halfway in, crashing through a wall made up of Screw Attack blocks, and you should see an opening in the ceiling that you can jump upwards in. You’ll see an expansion and a diagonal slanted platform with orange spikes on it. Carefully aim diagonally and fire a missile to break the missile block just above the expansion and then quickly jump up on the ledge, roll through and drop down to get MISSILE EXPANSION #36!
Missile Expansion #37
Location: Area 5 (First Visit)
Requirements: Gravity Suit
When you get to the big room filled with water (this is the room that connects to the first Alpha Metroid fight in the area!) sink down towards the bottom and press left. Enter the Morph Ball tunnel and simply jump upwards at the end; your Gravity Suit will allow you to make the tall jump and grab the ledge on the left; roll over to grab MISSILE EXPANSION #37!
Missile Expansion #38
Location: Area 5 (First Visit)
Requirements: Bombs
Go through the Alpha Metroid room and towards the Teleportal. Use your Scan Pulse and you’ll see some blocks glowing on the wall opposite of it, just under a ledge. Bomb the blocks and roll through the tunnel to grab MISSILE EXPANSION #38!
Missile Expansion #78
Location: Area 5 (Second Visit)
Requirements: Baby Metroid
Warp to Area 5’s middle Teleportal (the one in the room directly above where you grabbed the Plasma Beam). Conveniently, there will be a bunch of crystals directly underneath the Teleportal that the Baby can deal with, letting you grab MISSILE EXPANSION #78.
Area 6
Missile Expansion #39
Location: Area 6 (First Visit)
Requirements: Spider Ball
In the room to the right of the Zeta Metroid, drop down through the tunnel and you’ll land beside an expansion on the other side of a bridge with a fan blowing right in front of it, meaning you can’t lay a bomb to simply get it. No worries – roll across the bridge, which is made up of pitfall blocks, and just let yourself fall down. You should notice a block on the left side wall that looks funny – almost like when you’re playing Zelda and notice a portion of the wall that looks like a different color and could maybe be bombed. Shoot it to reveal ENERGY TANK #7! Use your Spider Ball to climb the left wall, tuck inside the tunnel and grab MISSILE EXPANSION #39 too!
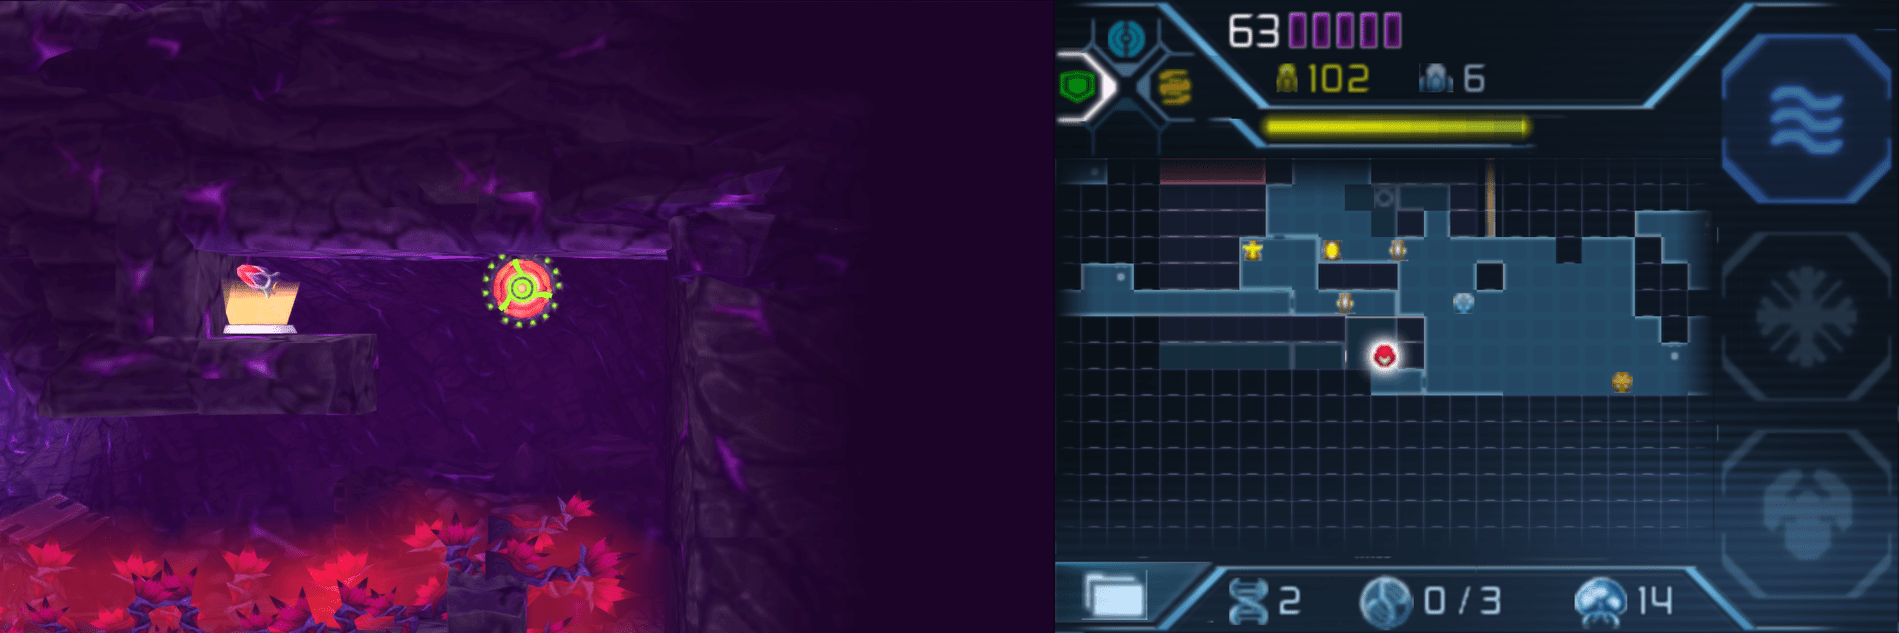
Missile Expansion #40
Location: Area 6 (First Visit)
Requirements: Lightning Armor, Bombs
In the room to the left of the Omega Metroid room; activate your Scan Pulse and you’ll see a block on the ground glowing to the left of the Aeion refill. Bomb it, slap on your Lightning Armor and follow the Morph Ball tunnel down through the red weeds to pop out right beside MISSILE EXPANSION #40.
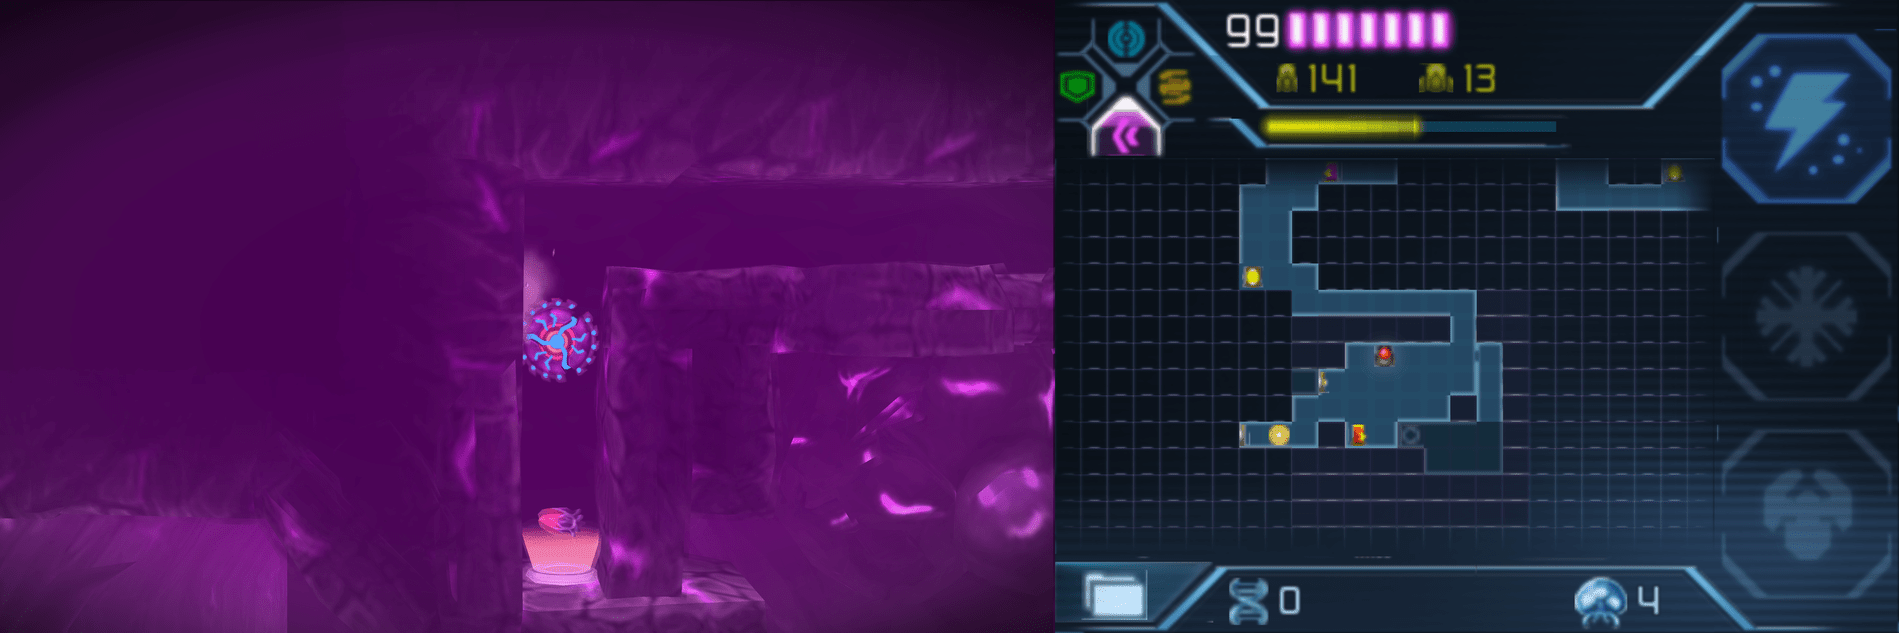
Missile Expansion #41
Location: Area 6 (First Visit)
Requirements: Bombs, Both Area 6 Seals Unlocked
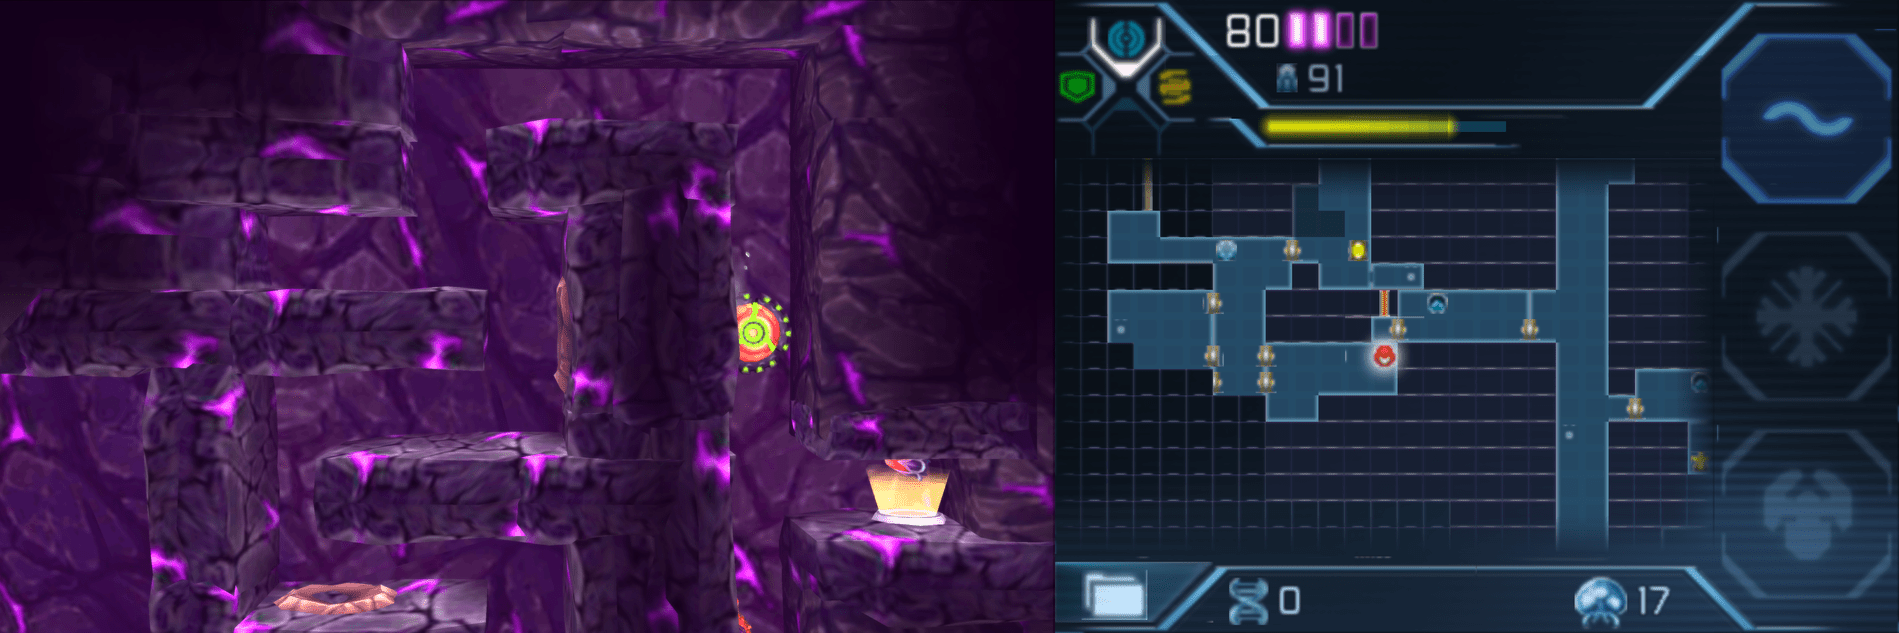
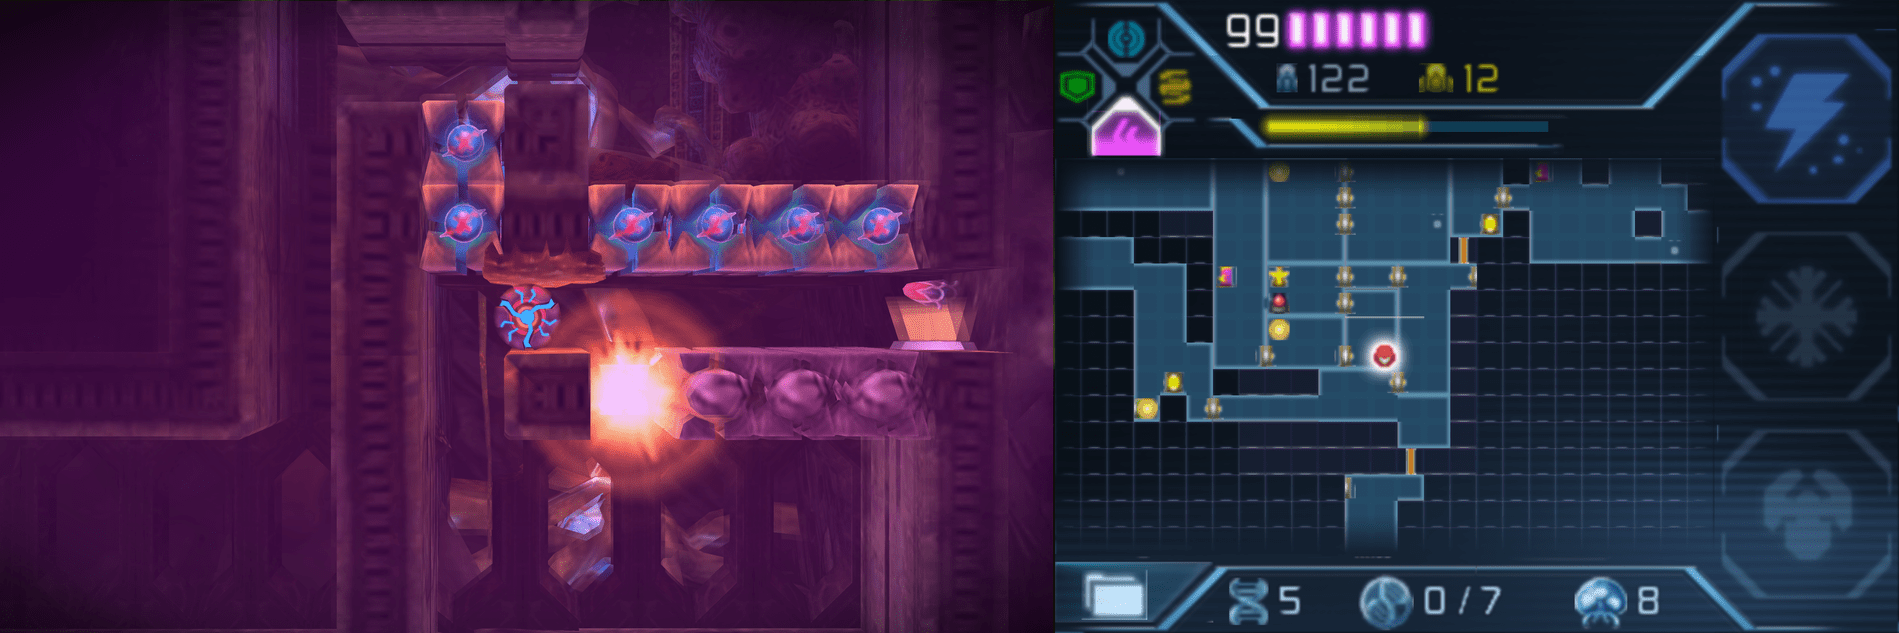
Make your way back to the Chozo Seal and deposit the Omega Metroid DNA. Once the acid has dropped, work your way left in the purple caves to the left side of Area 6, by the Energy Recharge Station, and then drop downwards until you land on a Save Station. Lay a bomb on the wall beside the Save Station and activate your Phase Drift; quickly roll through the Morph Ball tunnel and you’ll pop out right beside MISSILE EXPANSION #41!
Missile Expansion #42
Location: Area 6 (First Visit)
Requirements: Phase Drift, Bomb, Spider Ball, Both Area 6 Seals Unlocked
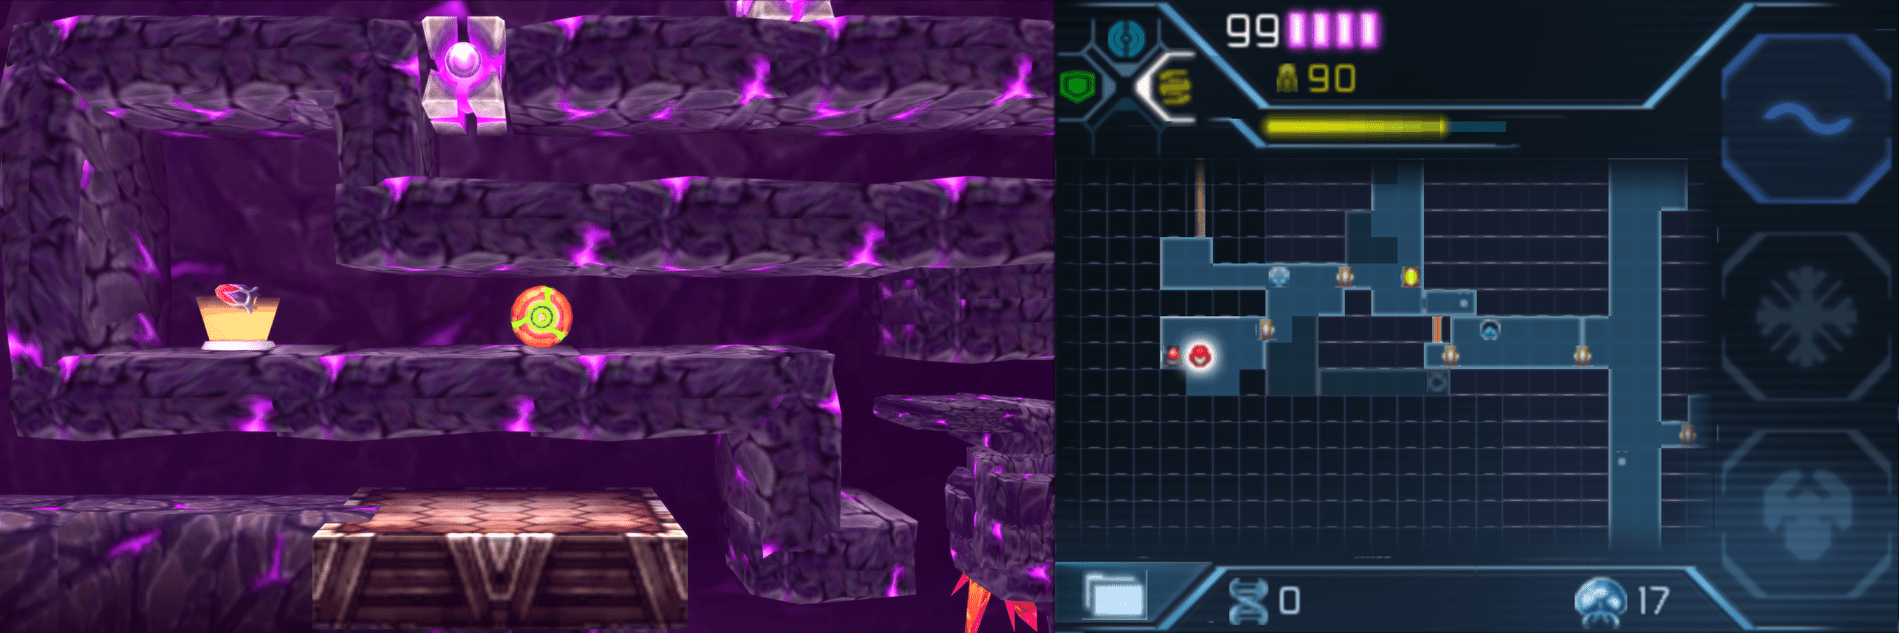
From the second Chozo Seal. follow the pathway down until you’re in a large room in the purple caverns; there will be an Energy Recharge Station at the bottom. Space Jump upwards and you’ll see an expansion behind a thin wall of rocks; activate your Phase Drift, use your Spider Ball to crawl on the underside of the floor of rocks, lay some bombs, and tuck inside to grab MISSILE EXPANSION #42!
Missile Expansion #43
Location: Area 6 (First Visit)
Requirements: Phase Drift, Both Area 6 Seals Unlocked
From the Teleportal closest to the Diggernaut fight room, step through the door in front of you and activate your Phase Drift; if you’re fluent in the Metroid language, you could probably already guess these are pitfall blocks. Shoot ahead of you and then, before the blocks give out, quickly morph down and tuck into the small alcove to grab MISSILE EXPANSION #43!

Area 7
Missile Expansion #50
Location: Area 7 (First Visit)
Requirements: Missiles
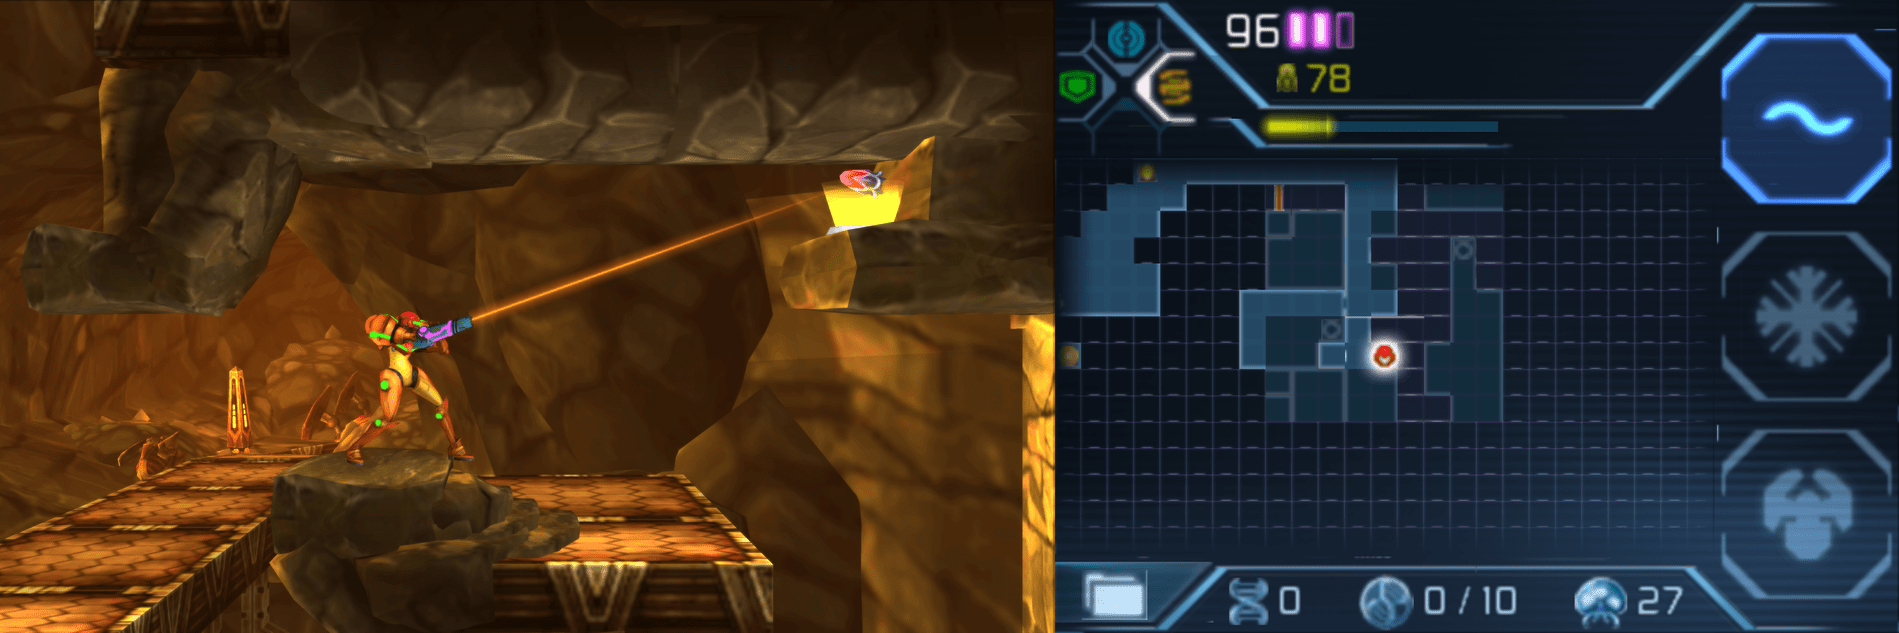
From the Chozo Seal, head upwards and to the right, going up a few ledges until you see an Aeion recharge orb on a high ledge; get up there and use your Scan Pulse. You’ll see a missile block on the opposite wall; destroy it and tuck over to grab MISSILE EXPANSION #50!
Missile Expansion #51
Location: Area 7 (First Visit)
Requirements: Power Bombs, Bombs, Beam Burst
Get to the room that connects to the northwest Omega Metroid room. You’ll see red weeds on the floor and spikes on the ceiling, but at least there’s a lot of room in between the two. Jump over to the very end, but before going through the door on the left, jump up to the ledge on the right; lay a Power Bomb and a Morph Ball tunnel will open up. Roll through it; stopping to bomb open some passageways and blast away the Wallfire with your Beam Burst, and eventually you’ll roll right into MISSILE EXPANSION #51. Grab it and then head back to the door on the left wall.
Missile Expansion #52
Location: Area 7 (First Visit)
Requirements: Grapple Beam
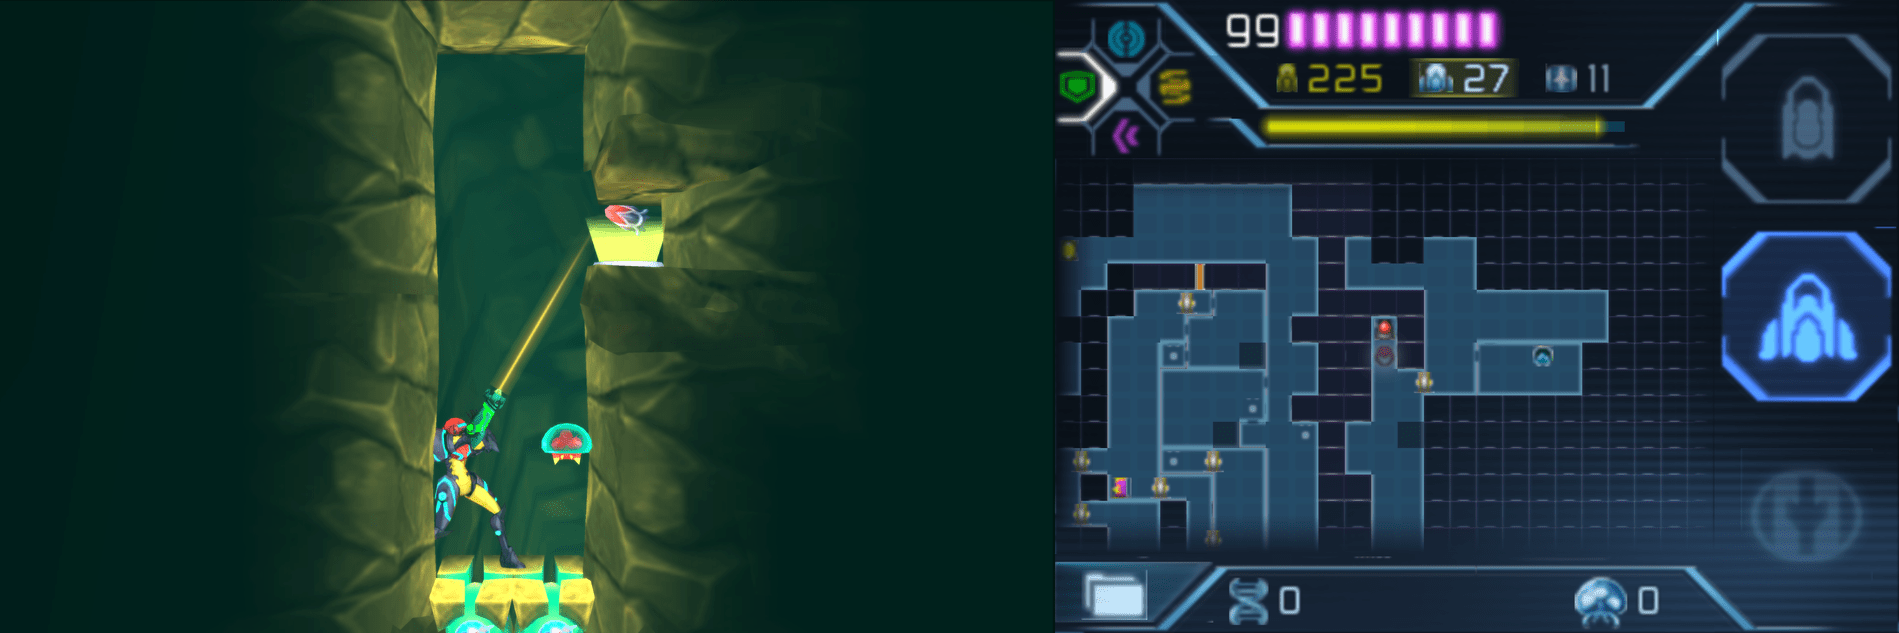
From the Missile Recharge Station, jump back up to the top of the room and you’ll see a split; there’s a small tunnel in the top left corner, and a narrow shaft to jump up on the right. Go right for now, and jump up until you grab the ledge beside the red Grapple block; use your grapple beam to pull yourself over to the right wall, in between the orange spikes, using the blue Grapple block in the wall to your left. Roll through the top tunnel to grab MISSILE EXPANSION #52 and then destroy the red Grapple block.
Missile Expansion #53
Location: Area 7 (First Visit)
Requirements: Power Bombs, Spider Ball, Spazer Beam
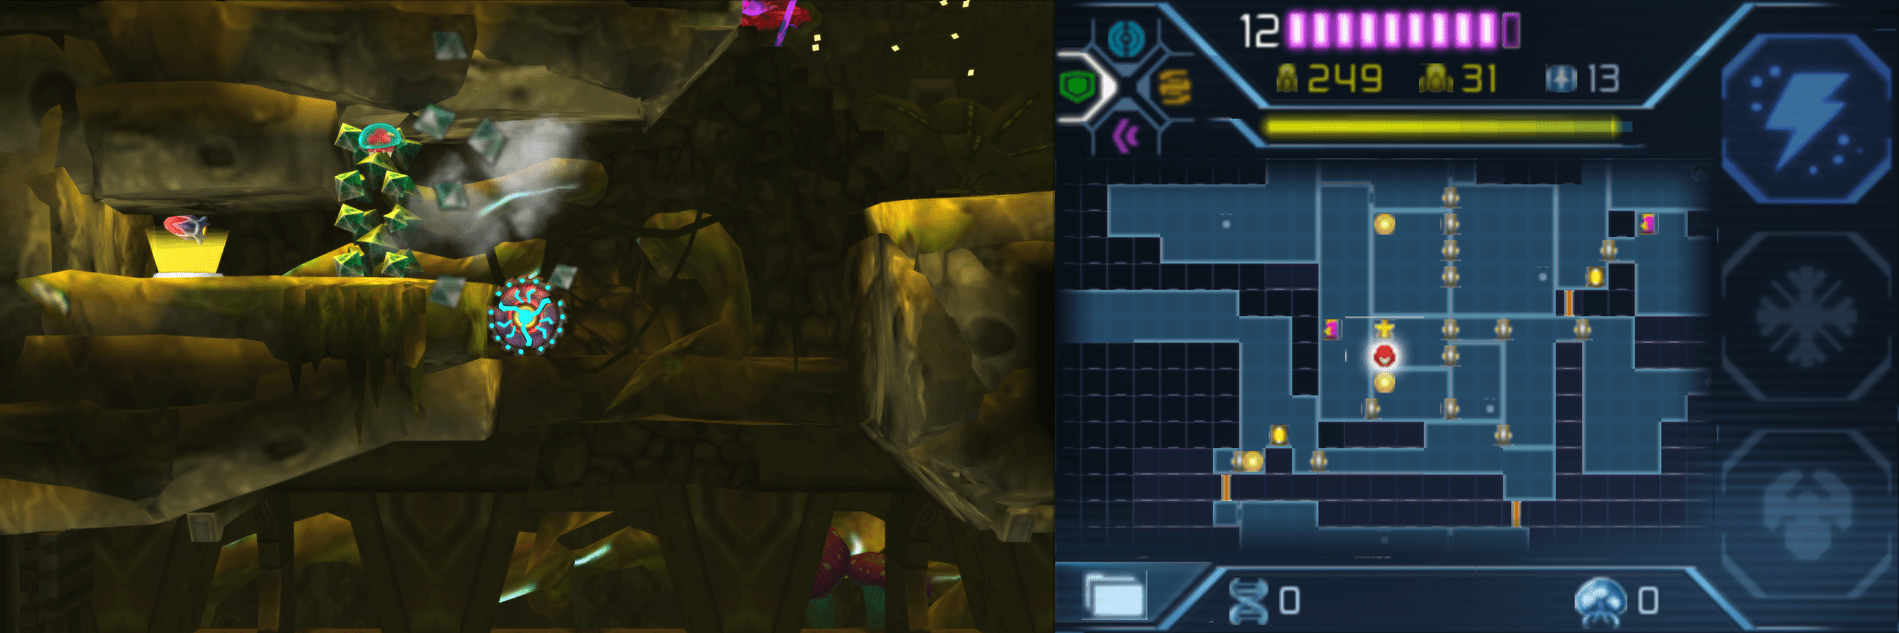
In the middle of the room directly under the middle Omega Metroid fight room, there will be a platform with some orange spikes underneath it and an expansion just below them in plain view. Get yourself over to the leftmost wall and you’ll see a little ledge poking out just above the weeds with a small alcove you can fit into. Get yourself so that you’re sticking to the outside of the block sticking out, NOT the inside tucked in the alcove. Spiderspark and you’ll be shot pretty much directly on top of MISSILE EXPANSION #53.
Missile Expansion #54
Location: Area 7 (First Visit)
Requirements: Missiles
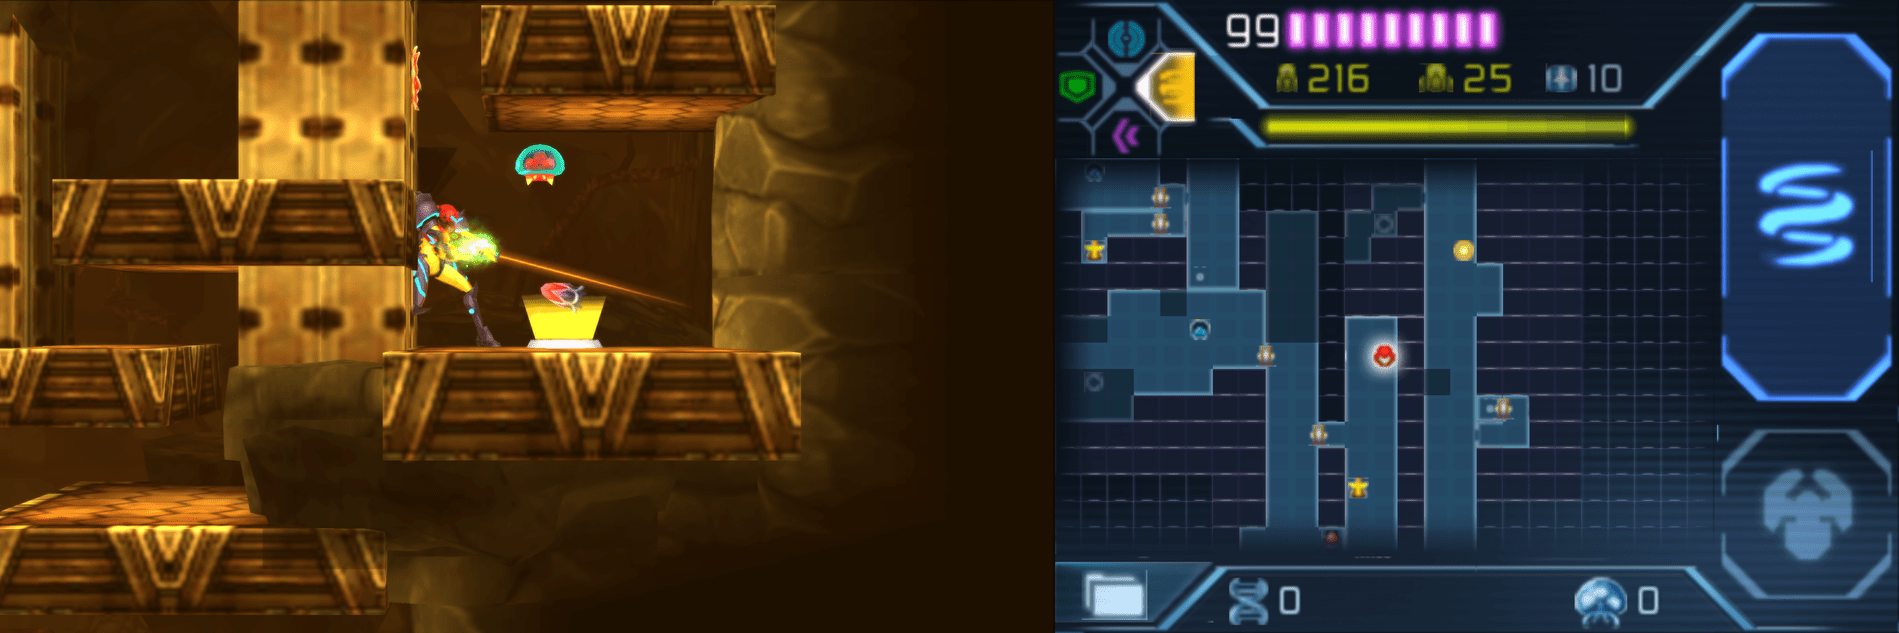
Tuck into a tunnel below the eastern Teleportal. You’ll be in a room with a Save Station, so use it if you want, and press forward, laying a Power Bomb to open up the tunnel. Jump up and destroy all of the machines trying to kill you. There will be a platform with a couple of Wallfires rapidly firing flameballs at you; destroy them and then use your Scan Pulse. You’ll see a lone block in the very top corner start to glow. Fire a missile at the block and jump up to grab MISSILE EXPANSION #54.
Missile Expansion #55
Location: Area 7 (First Visit)
Requirements: Grapple Beam, Power Bombs, Phase Drift, Area 7 Seal Unlocked
Get to the Chozo Seal and insert the Metroid DNA, causing the acid to drop. Once it’s clear, drop down and destroy the red Grapple block, going through the tunnel. Follow the path and drop all the way down until you arrive at the bottom. Destroy the creatures in front of you and press forward to the Blast Door, BUT WAIT! Lay a Power Bomb here and some blocks above you will break. Jump up into the new tunnel that was opened up and activate your Phase Drift – there are pitfall blocks in here! With time slowed down, roll across the blocks to grab MISSILE EXPANSION #55.
Missile Expansion #79
Location: Area 7 (Second Visit)
Requirements: Baby Metroid, Bombs
Get yourself to the Chozo Seal and then head towards the right. Drop down in the purple caves until you reach the Save Station; from there, head right some more and you’ll see some crystals. Destroy them and then slip into the tunnel. Chip away at a few more crystals, use your Scan Pulse to see a hidden bombable block in the lower corner of this hidden alcove, and then slip through that tunnel until you’re face to face with MISSILE EXPANSION #79!
Area 8
Missile Expansion #56
Location: Area 8 (First Visit)
Requirements: Lightning Armor, Missiles
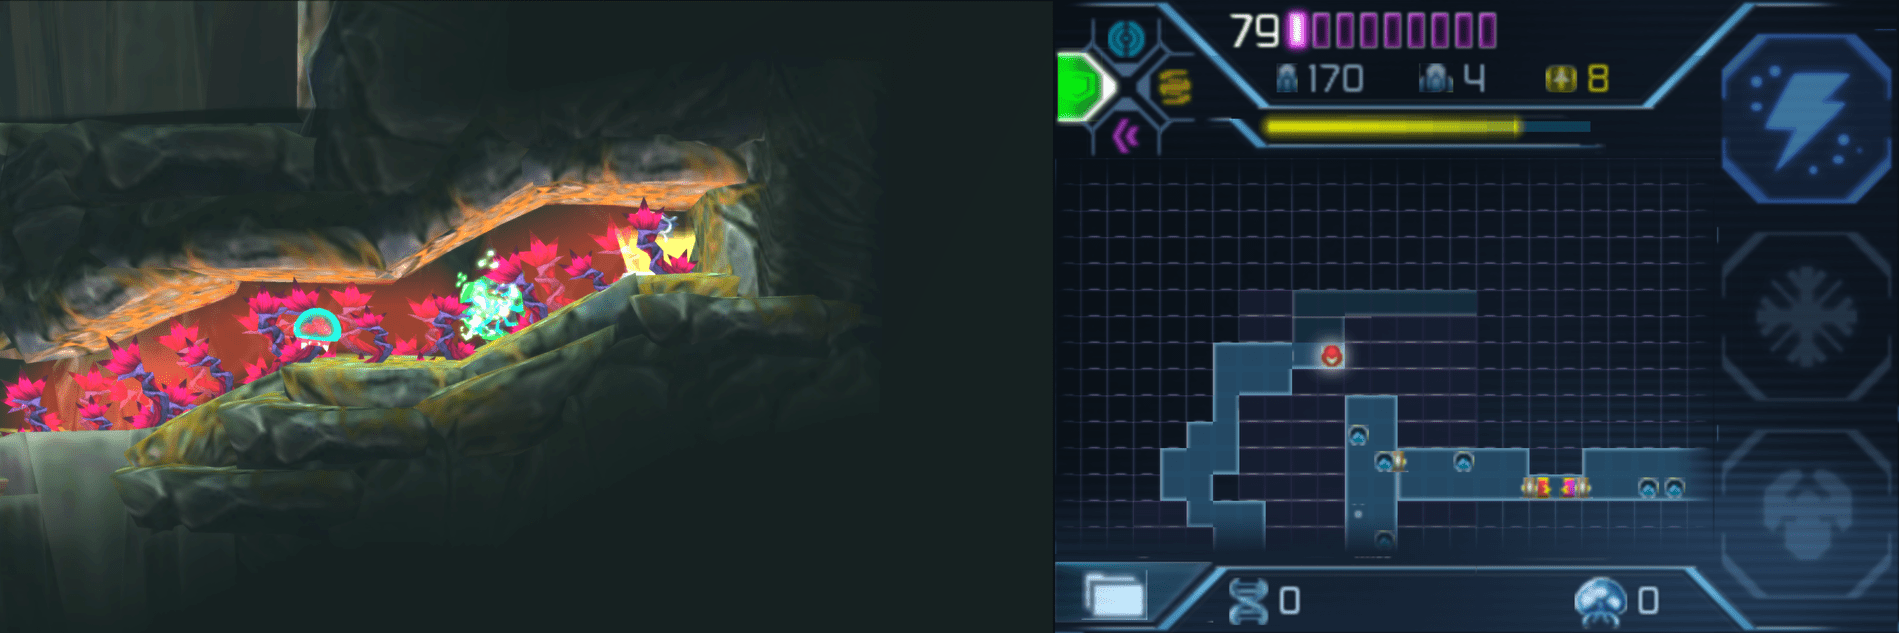
From the lower Teleportal, drop down, and you’ll see those unbreakable crystals everywhere, alongside some red weeds. At the very bottom, there will be a small tunnel that has crystals on the top and bottom; activate your Lightning Armor, drop down into the weeds and then jump up and fire two missiles into the tunnel, which will destroy two missile blocks. Roll into the tunnel before they respawn and you’ll snag MISSILE EXPANSION #56.

Missile Expansion #57
Location: Area 8 (First Visit)
Requirements: Screw Attack
Work your way up from the lower Teleportal and head through the Blast Door on your left. In this new room, walk ahead a few steps and you’ll see a spire shooting down from the ceiling; right under that are some pitfall blocks, so let yourself drop downwards, BUT jump and Screw Attack to your RIGHT as you’re falling! The wall on the right is made of Screw Attack blocks, so if you do this correctly, you should break them apart, allowing you to get into the small opening; walk to the right a few steps and you’ll grab MISSILE EXPANSION #57.
Fall down and then make your way back up to the pitfall block room; once you’re back, press forward in the room for a bit until you get to the far wall. Screw Attack through the blocks on the floor and you’ll drop down into an opening with liquid Aeion to your right and a red Grapple block that you should destroy on your left. Instead of jumping into the liquid Aeion, instead, line yourself up so your Spider Ball is sticking you to the outside lip of the little block sticking out. Spiderspark and you’ll go shooting into MISSILE EXPANSION #58!
Missile Expansion #58
Location: Area 8 (First Visit)
Requirements: Screw Attack, Grapple Beam, Power Bombs, Spider Balls
Work your way up from the lower Teleportal and head through the Blast Door on your left. In this new room, walk ahead a few steps and you’ll see a spire shooting down from the ceiling; right under that are some pitfall blocks, so let yourself drop downwards, BUT jump and Screw Attack to your RIGHT as you’re falling! The wall on the right is made of Screw Attack blocks, so if you do this correctly, you should break them apart, allowing you to get into the small opening; walk to the right a few steps and you’ll grab MISSILE EXPANSION #57.
Fall down and then make your way back up to the pitfall block room; once you’re back, press forward in the room for a bit until you get to the far wall. Screw Attack through the blocks on the floor and you’ll drop down into an opening with liquid Aeion to your right and a red Grapple block that you should destroy on your left. Instead of jumping into the liquid Aeion, instead, line yourself up so your Spider Ball is sticking you to the outside lip of the little block sticking out. Spiderspark and you’ll go shooting into MISSILE EXPANSION #58!

Missile Expansion #59
Location: Area 8 (First Visit)
Requirements: Space Jump
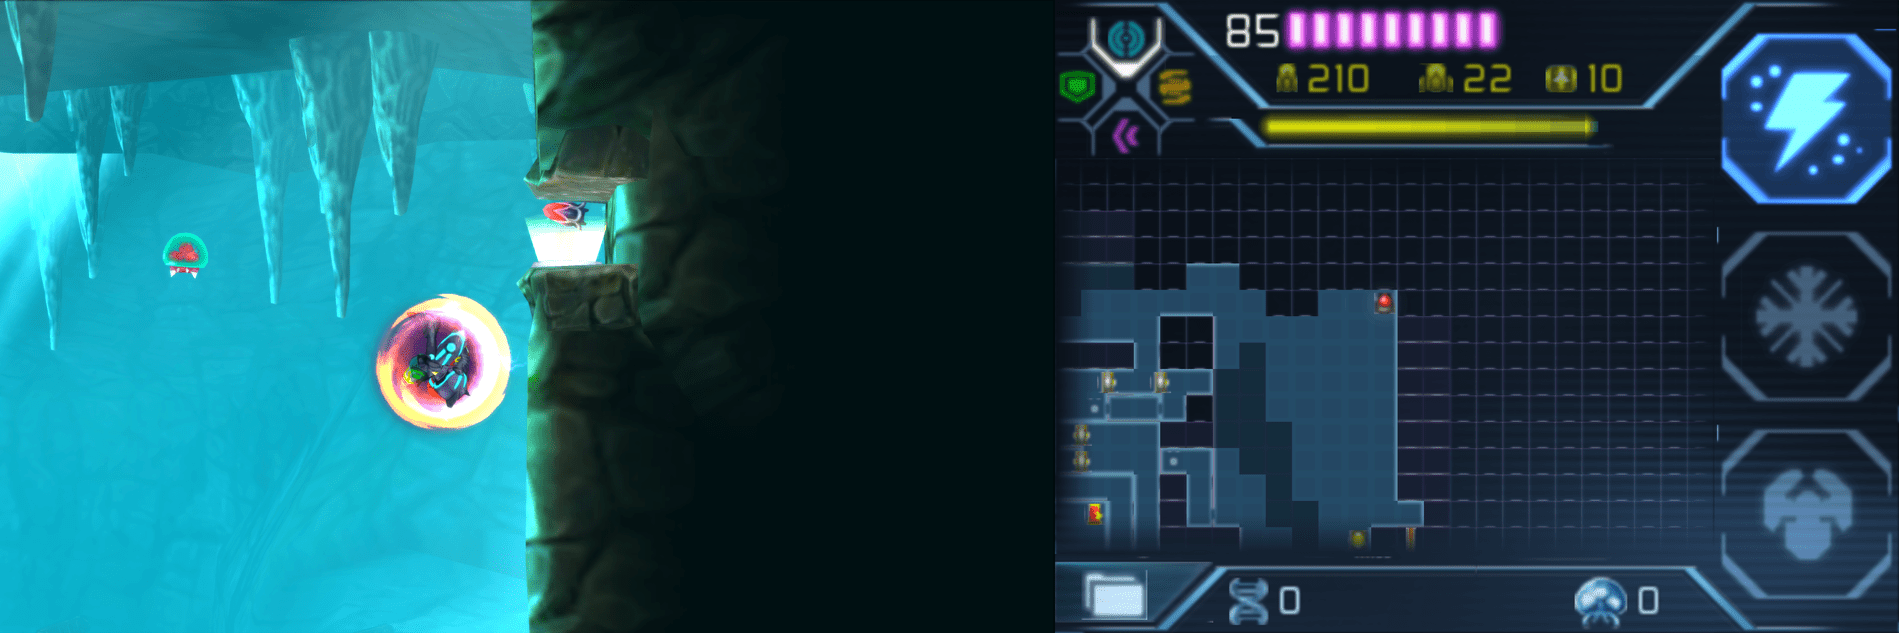
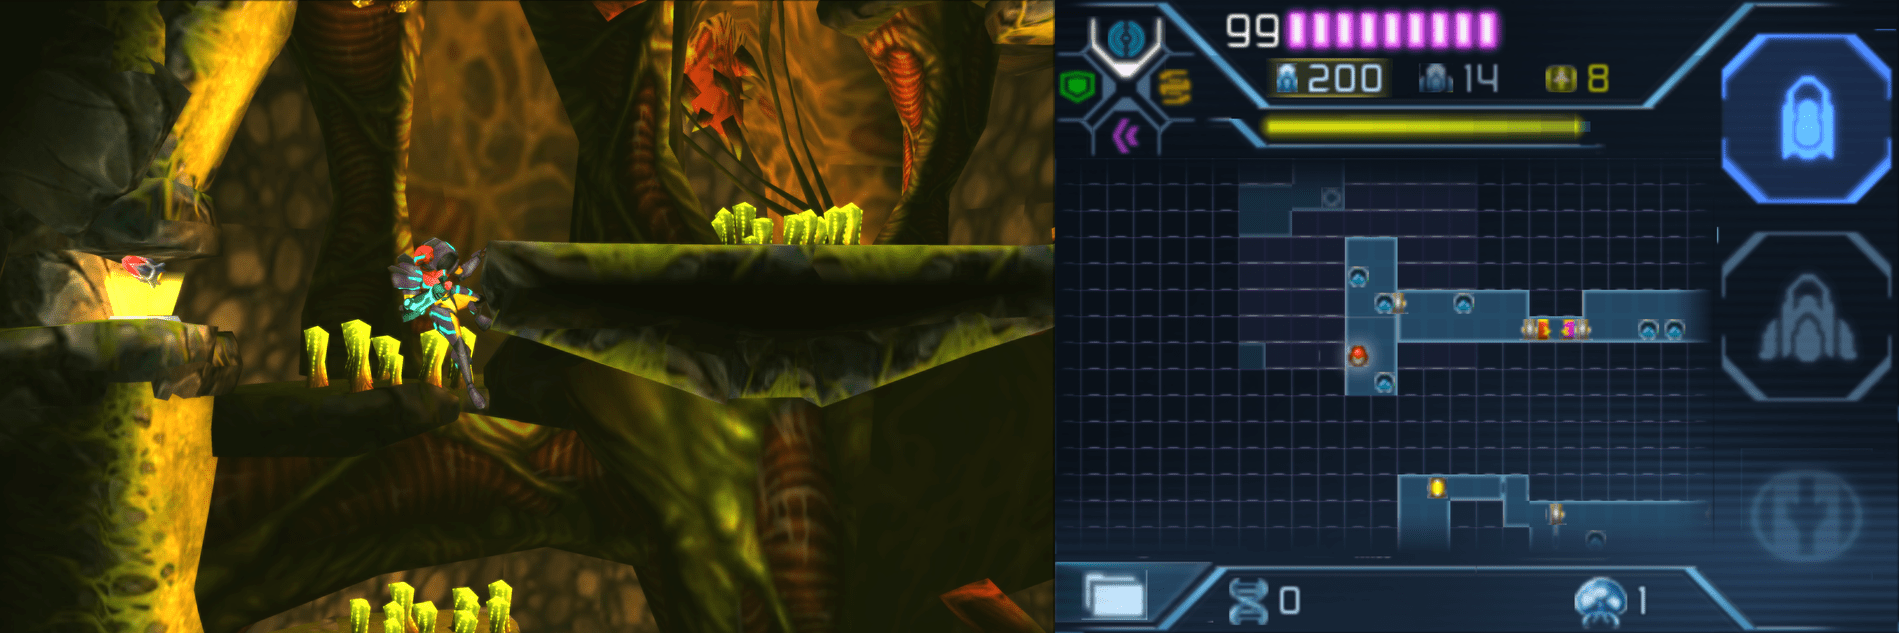
Space Jump up on the left side of the Nest Chamber – you’ll keep going up and up and eventually just see MISSILE EXPANSION #59 sitting on a ledge, waiting for you to take it.
Missile Expansion #60
Location: Area 8 (First Visit)
Requirements: Spider Ball, Power Bombs (optional)
Go past the Missile Recharge Station in the Nest Chamber, jumping up – be careful not to bump into the orange spikes! You’ll need to pull a tricky move here; before heading into the tunnel, you’ll want to position yourself on the wall directly under the yellow goop on the wall using your Spider Ball. You can do this one of two ways; first is to jump up and quickly morph down, using your Spider Ball to stick the wall. If you’re good, you can do this before you hit the orange spikes. Second option is to get to the tunnel, position yourself directly on top of the orange spikes on your left and Spiderspark across. Either way, once you’re on the right wall, use your Scan Pulse and lay a bomb to reveal MISSILE EXPANSION #60.
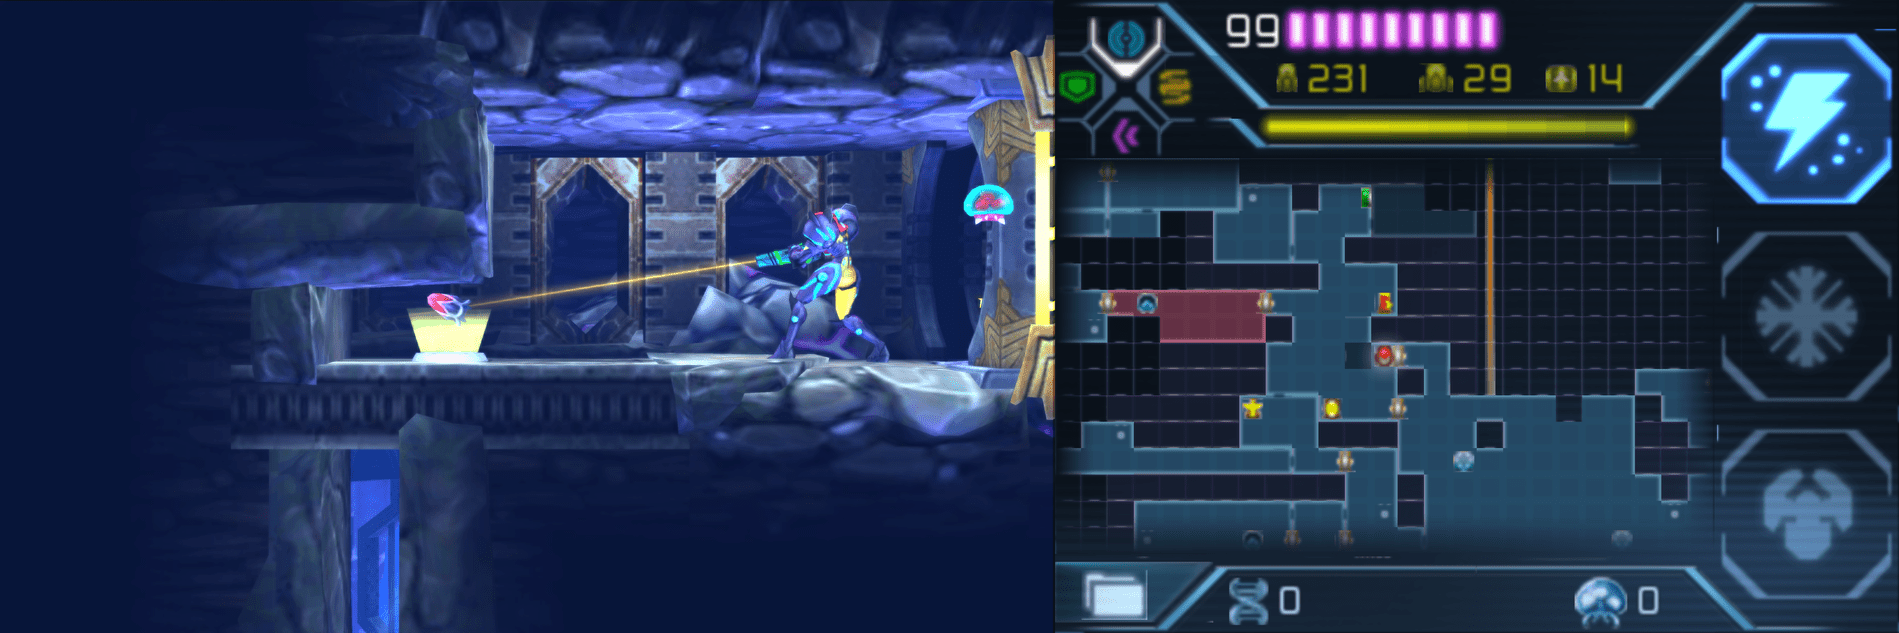
Missile Expansion #61
Location: Area 8 (First Visit)
Requirements: Grapple Beam
Continue upwards in the Nest Chamber through the tunnel until you finally come across a clearing at the top of the structure. Head left, destroying the red Grapple block along the way, and then up and to the right again; you’ll notice some debris start to fall in the background. Keep climbing up and over and you’ll see a red Grapple block that can be destroyed from the left side. Break it, and then go back to the right side, enter the tunnels and follow the path to MISSILE EXPANSION #61.

Missile Expansion #62
Location: Area 8 (First Visit)
Requirements: Missiles
On your way to the Queen Metroid, you’ll be in a room with three Metroids lurking there, so stay sharp! Jump upwards to the higher ledge and the first two Metroids will show up – try to lure them down individually if you can. The third Metroid is towards the bottom of the room. Before you leave through the door, use your Scan Pulse in the middle of the room and you’ll see a block glowing on the left side wall. Fire a missile at it to reveal MISSILE EXPANSION #62.
Missile Expansion #63
Location: Area 8 (First Visit)
Requirements: Lightning Armor
Work your way towards the Save Station after the Queen Metroid fight. Save your game and then continue to follow the path upwards. Towards the upper part of the pathway, you’ll see a small Morph Ball tunnel covered entirely in red weeds. Slap your Lightning Armor on and roll in to grab MISSILE EXPANSION #63.
Missile Expansion #80
Location: Area 8 (Second Visit)
Requirements: Baby Metroid
Once you land in the Teleportal in the lower half of Area 8, make your way upwards and go through the top right door. Keep pressing forward until you exit the door on the top left. Press forward in this room and keep climbing up; eventually in the very top of the pathway, just before the doorway that takes you to the Nest Chamber, you’ll see some crystals and an Autrack; destroy the annoying machine and then jump up, destroying the crystals. Here, submerged in liquid Aeion, you’ll see the final Missile Expansion of Metroid: Samus Returns – MISSILE EXPANSION #80!