


Super Metroid Walkthrough – Bosses
Here you’ll find a detailed list of strategies, information, and tips in fighting the many bosses of Super Metroid.
- Ridley (Prologue)
- Torizo
- Spore Spawn
- Kraid
- Crocomire
- Phantoon
- Botwoon
- Draygon
- Golden Torizo
- Ridley
- Mother Brain
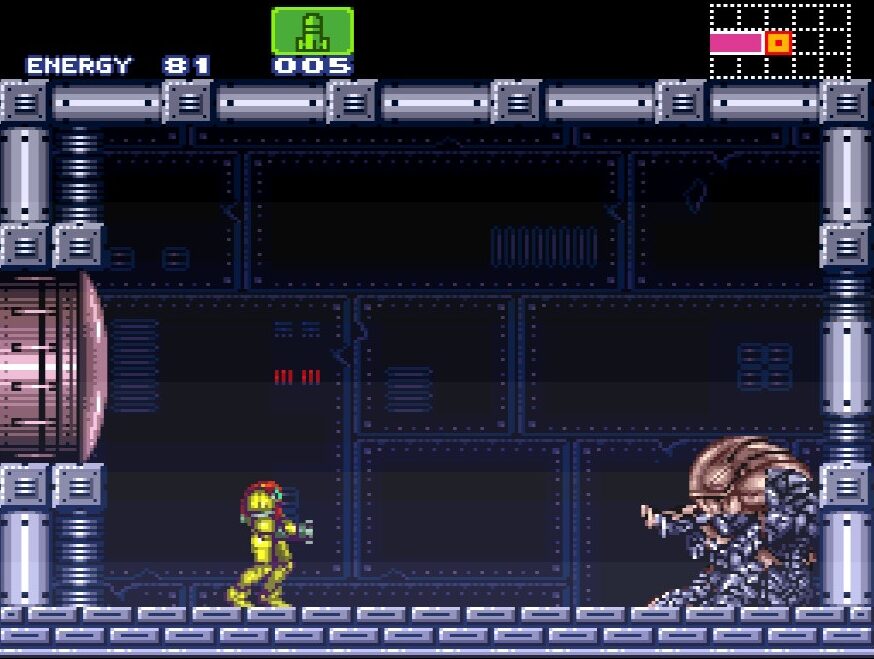
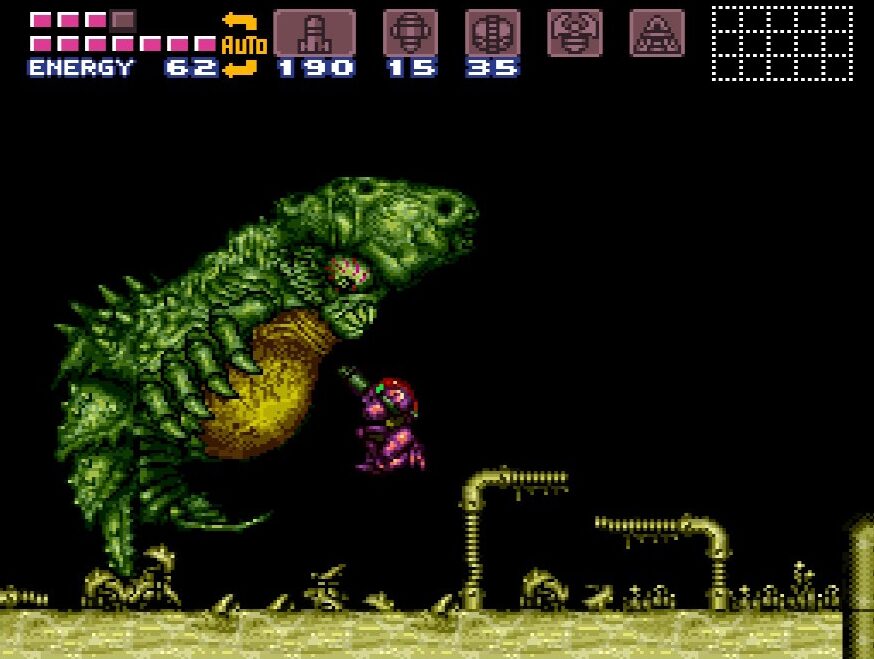
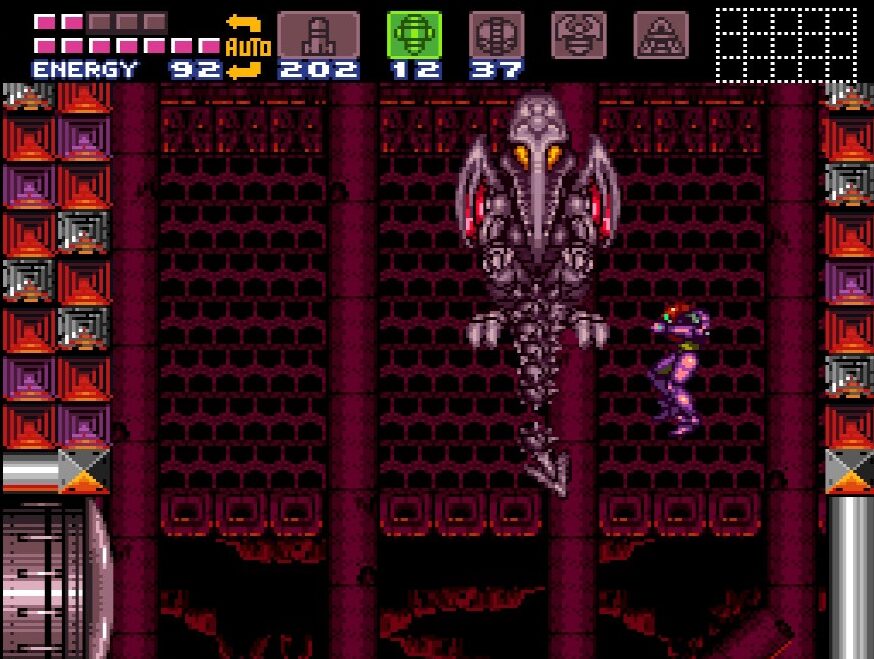
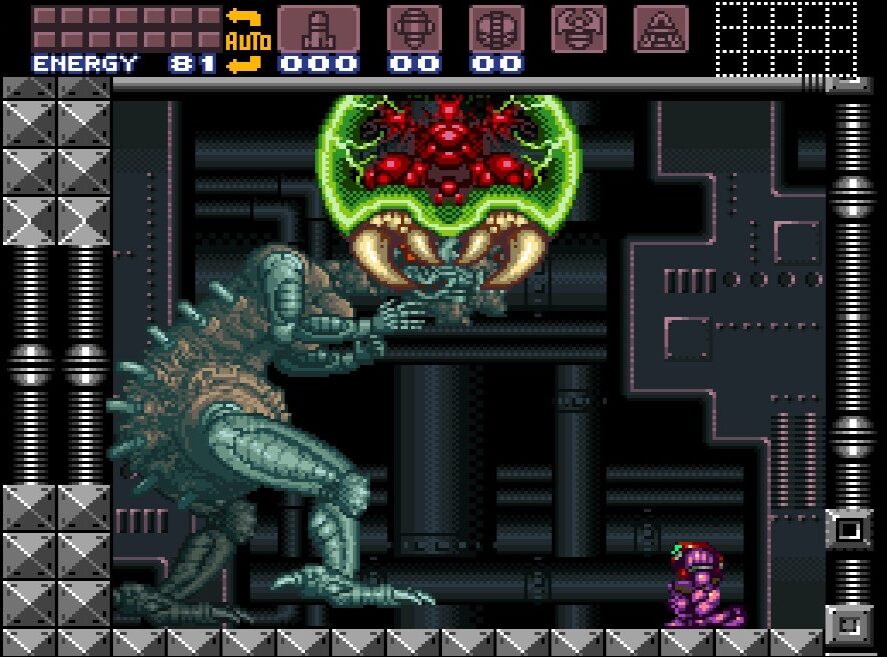
RIDLEY (PROLOGUE)
Now, this isn’t a boss battle in the strictest sense of the word so much as it is a story battle. You can’t die, nor can you defeat Ridley, but that doesn’t mean we’re going to take it easy on him!
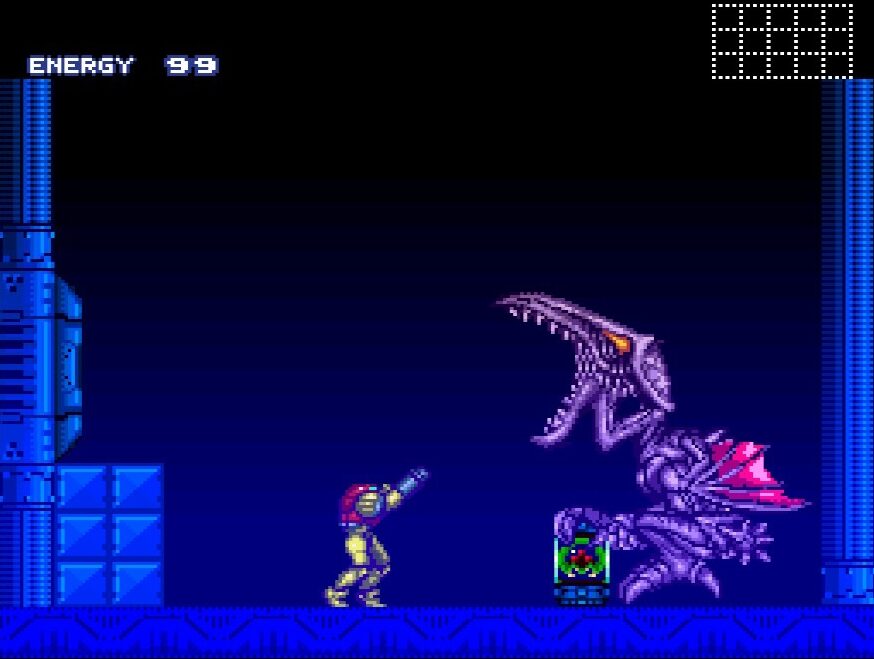
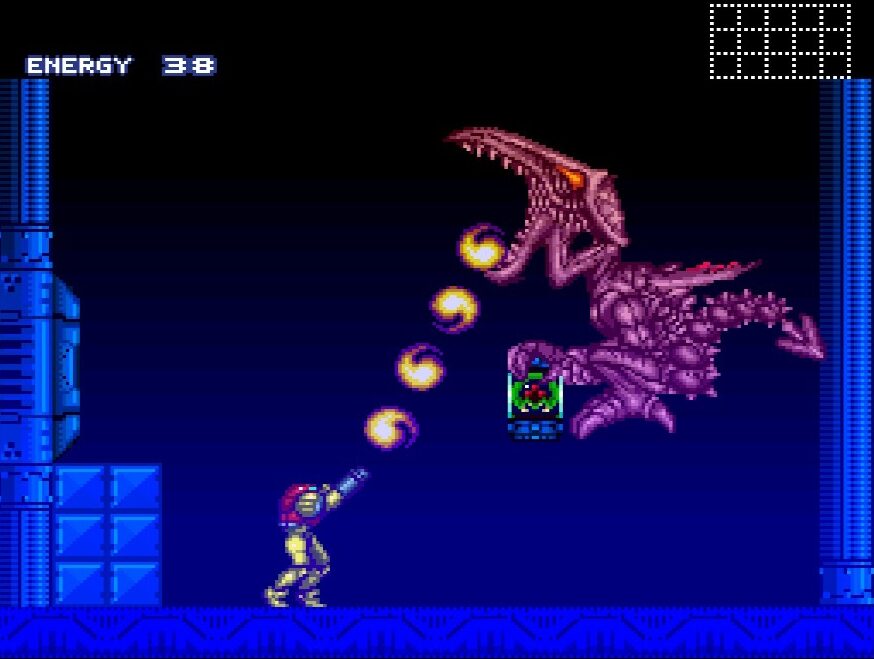
Ridley will attack you with fireballs that he spits from his mouth. Dodging them in the air is not enough! Once these fireballs hit the ground, they will sit for a bit, damaging you. Your best bet is to jump on the platform behind you to avoid them.
Ridley will also have his tail spinning around at all times. Needless to say, we want to avoid that. He’ll fly towards you with it, so your best bet is to try and jump over him and quickly head back to the left. If he hits you, take advantage of the seconds of invulnerability you have!
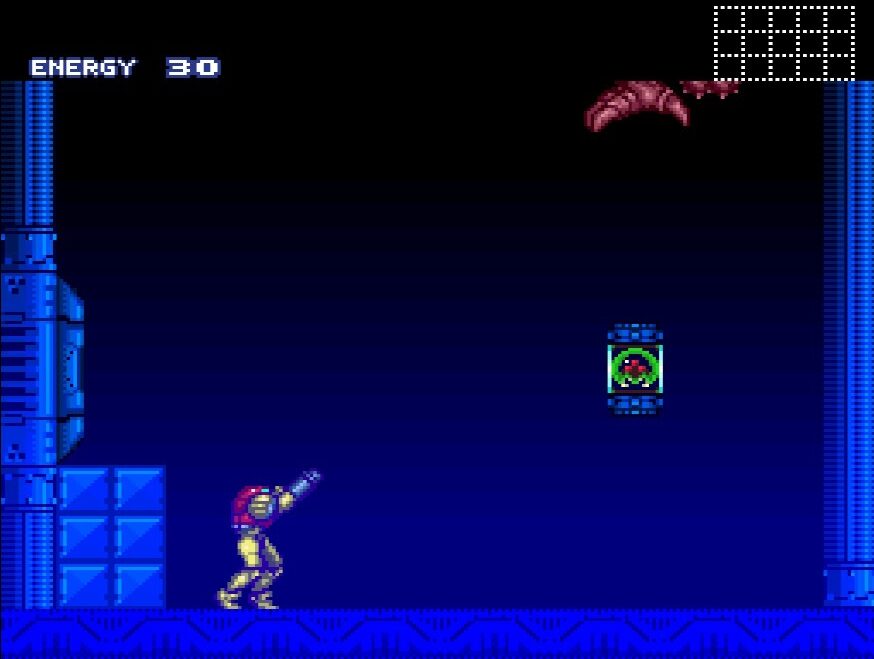
Always be diagonally shooting upwards at the Space Pirate. The more you hit him, the redder he becomes. Like I mentioned, you can’t defeat Ridley, but hit him enough times and he’ll drop the baby Metroid before rushing at you and flying away with the infant.
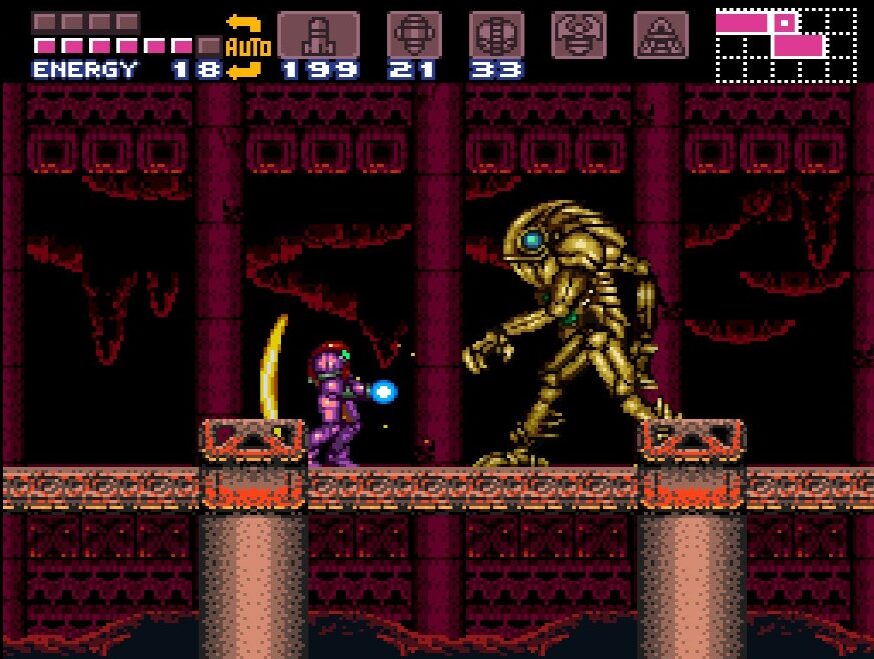
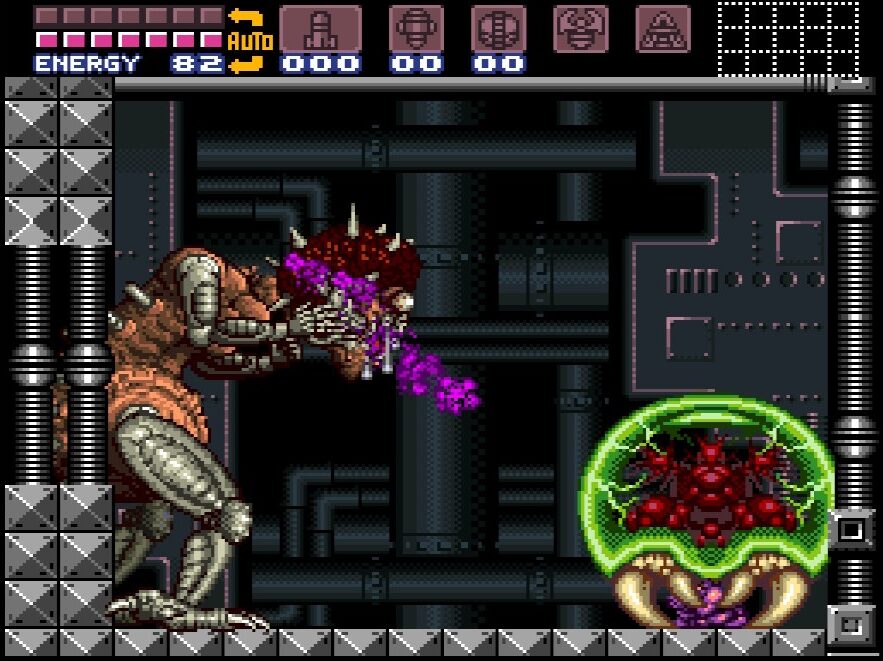
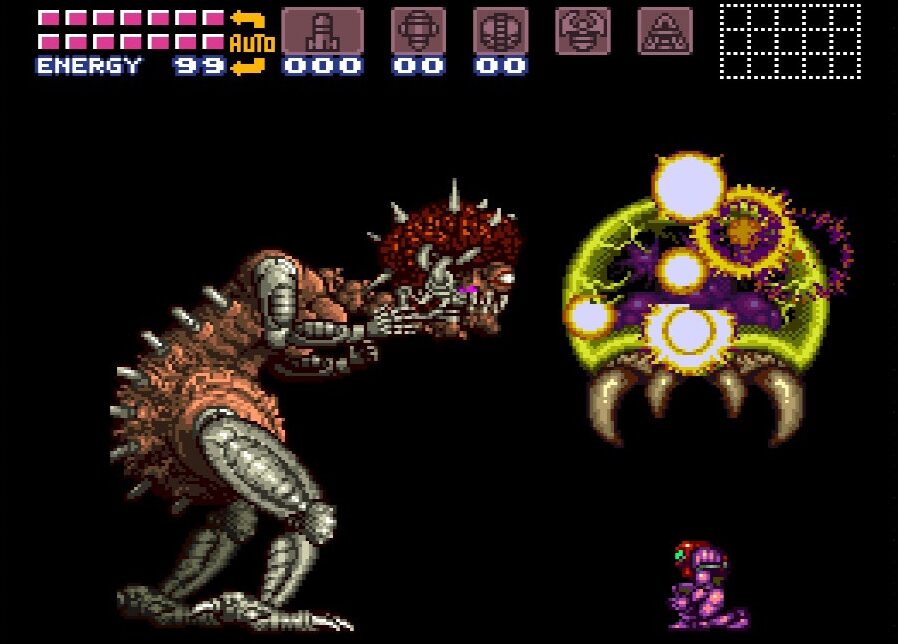
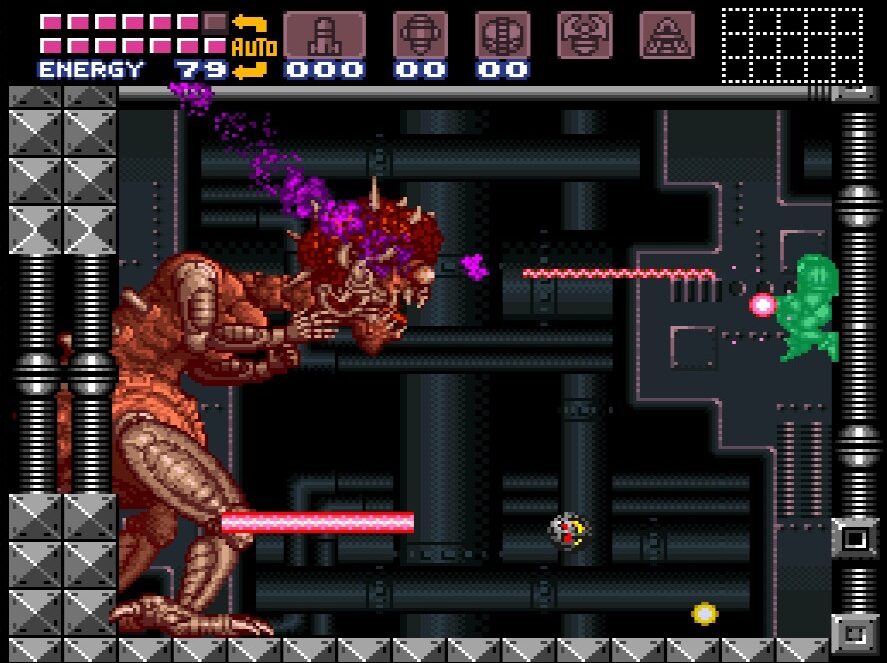
TORIZO
Nothing quite like the sting of betrayal that a trustworthy Chozo gives you when it turns out to be an evil doppelganger called the Torizo…
You only have 99 health still, so you’ll want to be cautious, as well as aggressive. The Torizo has a few attacks that you’ll want to make sure you’re ready for.
He’ll wave his arms and a shock wave will come flying straight towards you, dealing some damage if it hits. Fortunately, this is pretty easy to jump over, but he does fire in pretty quick succession. The Torizo will also regurgitate these gasball… things(??)… at you, which are both easy to avoid and give you health and Missiles if you blast them while still airborne.
A little trickier is his arm attack, where he will literally just wail his arms at you. This would be fine, except he’s moving back and forth across the room, and the more damage he takes, the faster he moves (at one point, his head will literally fall off, yet he’ll be faster than ever. Go figure).
The best defense in this fight is a good offense. If you filled up, you should have 10 Missiles at your disposal, which will be more than enough to send this imposter packing. You’ll see a plate on his chest that flashes – this is where you want to direct your Missiles to. After 6-ish hits, Torizo will be down for the count and you’ll be free to leave with your new Morph Ball Bombs.
SPORE SPAWN
What a gruesome looking monster this guy is. Spore Spawn is a giant head/mouth/thing attached to a very flexible tentacle that will constantly bob around the room. Spore Spawn himself will be invulnerable to attack while his mouth is closed, so don’t waste your Missiles trying to get a few shots in while he’s moving. Not only this, but there will be spores that slowly fall from the top of the room. Both the spores and creature himself will damage Samus if they make contact, but fortunately, that’s their only attack. Even better for us is that shooting the spores will give you health and Missiles.
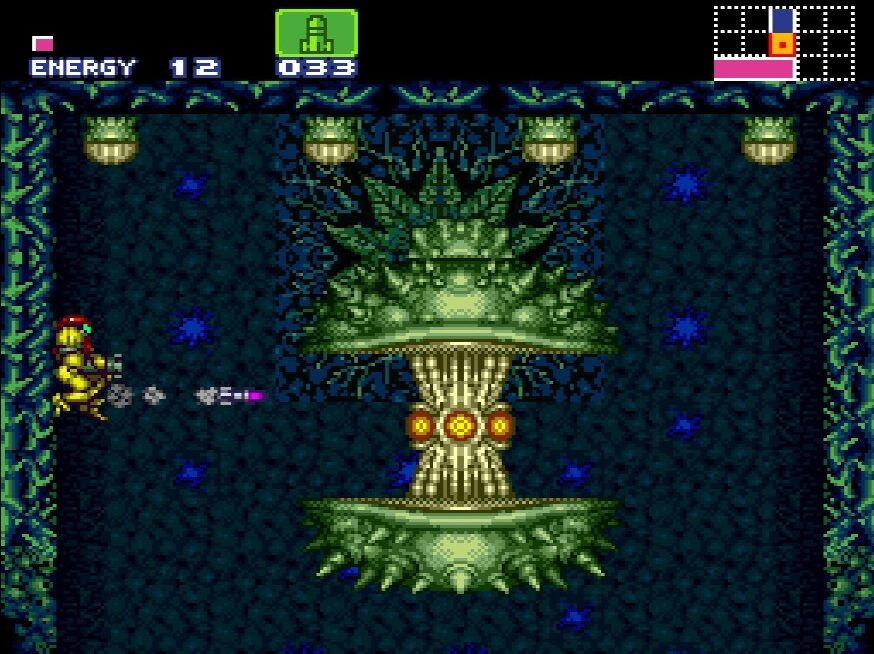

The best strategy is to go to the elevated platform at the side of the room (I chose the left side). If you are in Morph Ball form, Spore Spawn won’t be able to hit you at all no matter how fast he’s going. All you need to worry about is avoiding the spores that fall from the ceiling. Quickly get up and shoot a spore if it’s about to hit you while Spawn is on the other side of the room, and then drop back down into Morph Ball form to avoid getting bonked by his big head.
Spawn will stop periodically, opening his mouth. This is your chance to strike. Jump up and pepper him with as many Missiles as you can before he closes his mouth and starts moving again. He’ll move much faster the more damage he takes, but as long as you’re in Morph Ball form in the very corner, he won’t be able to touch you. Keep blasting away when he stops to open his gross mouth, and he’ll be finished in no time.
After the battle is won, climb to the top of the room and go right, following that hall to the very end. Jump on that pipe and fall seemingly forever until you land right in front of a Chozo Statue. Blast it open and claim SUPER MISSILE EXPANSION #1!
KRAID
There ain’t nothing mini about this Kraid, that’s for sure. The reptilian nemesis from the original Metroid returns, except now, he’s as big as a skyscraper. The good news is that despite his frightening appearance, Kraid is actually kind of a pushover if you can time your jumping right and aim carefully with your Super Missiles.
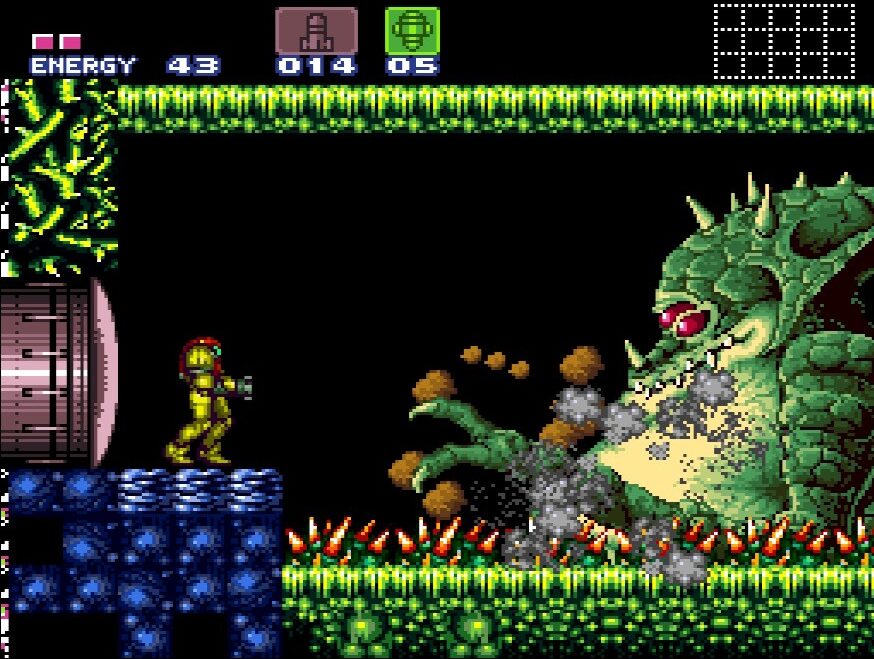
The floor is covered in spikes with the exception of a little platform that you can stand on. This phase of Kraid is super simple. He won’t do anything except charge at you while spitting out rocks. We’re not even going to give him the chance to do that, however. As soon as Kraid’s head has finished coming out the ground, strike fast! Hit him with a regular Missile right in the eye. You’ll see it flash yellow for a second, which will give you enough time to switch over to your Super Missiles. As soon as he opens his mouth, open sesame! If you’re really good, you can stun Kraid instantly with your Missiles and then slam him with 3 quick Super Missiles and kill him instantly. If you miss, no worries though – just be sure to get at least a shot in when Kraid is vulnerable.
After taking that first hit, Kraid will grow even bigger and move to the screen above you. This is a bit trickier. Now, there are only two smaller platforms for you to stand on, with Kraid and his shirt little T-Rex arm moving back and forth looking to damage you. At the same time, there are now thorns flying in every direction, and the big man is shooting thorny platforms out of his belly straight at you. Shoot the thorns if you can for Missiles and health, and do your best to avoid the platforms (you can stand on them, so use that to your advantage!)
The quicker you can beat Kraid, the easier this is going to be. Obvious advice, I know, but the longer this battle drags out, the more damage you’re going to absorb from everything happening on screen. There’s so much going on, it will be impossible to dodge it all. Again, shoot your regular Missiles at Kraid’s eye, wait for him to open his mouth, and let your Super Missiles (or regular Missiles) fly. Three direct hits to the mouth is all it takes to bring down the giant, so pound away hard and fast before you absorb too much damage and Kraid will fall.
Once you’ve defeated him, move into the next room and claim the VARIA SUIT.
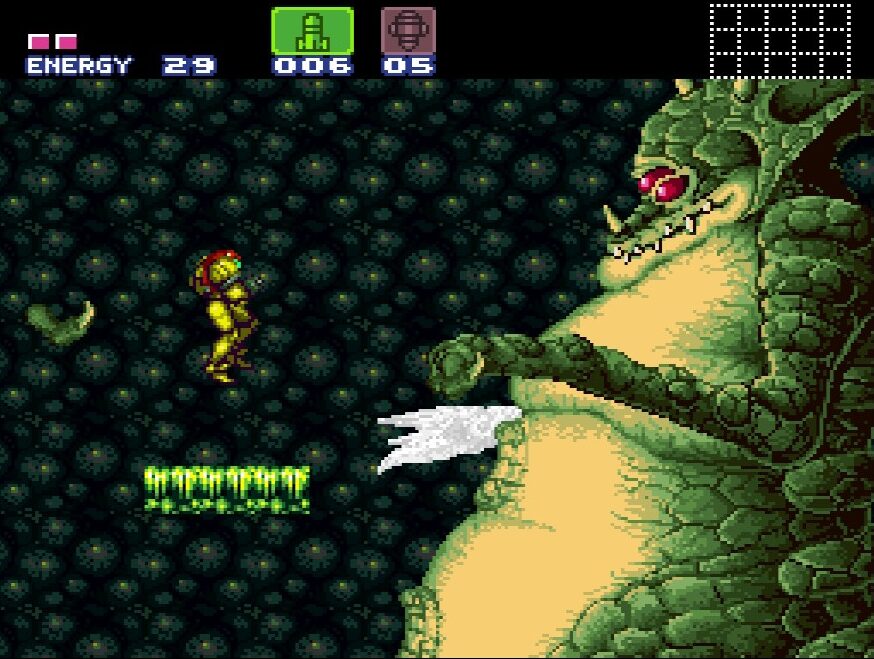
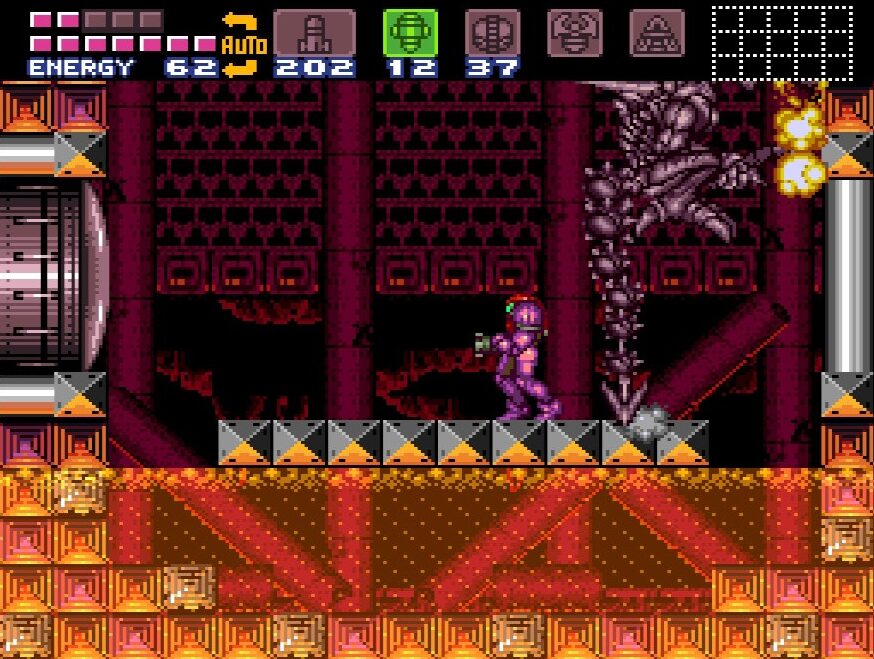
CROCOMIRE
So I think Crocomire must be Kraid’s little cousin or something… I can see the family resemblance. Fortunately, just like his older cousin, Crocomire isn’t going to give us much trouble either if you know what to do. In fact, the reason that we’re battling Crocomire now instead of later like the game intends is because of the relative ease of this battle and the reward we can get after. But on to the battle itself.
You’ll find yourself in a narrow corridor. Behind you is a wall of spikes. Croc’s whole deal is he is trying to slowly advance on you until you are pushed back into the wall. Our goal won’t be to defeat him in the traditional sense, but to instead force him backwards, to the point where he will fall and die.


Just like Kraid, Crocomire will spit out rocks at you from his mouth that will damage you, but can also be shot for some health and Missiles. He also will use his little T-Rex arm to try and damage you, which will actually hit you for a ton of damage if you get close enough to get hit.
Fortunately, just like Kraid, he’s a fairly one trick pony, and if you can keep your distance and stay out of his arms reach, you should be fine. Yet again in Super Metroid, when it comes to this boss, the best defense is a good offense. Just like Kraid, his mouth is his weak spot. Hit him there, and he will take a few steps backwards. The trick is to hit him as soon as he opens his mouth! Jump up, make sure you shoot over his arm, and blast away before he has a chance to spit out rocks or do any of his other moves. Charged Beams should do the job nicely here, but if you feel like you’re not getting the timing right, jump up and let a bevvy of Missiles fly as he’s about to open his mouth. You’ll use up more Missiles, but you’re pretty much guaranteed to hit him. Continue blasting him in the mouth until he retreats back far enough and falls into the lava.
(Side note – I know he was just trying to kill us, but did anyone else feel really bad for Crocomire as his skin was literally melting away from the bone?! Poor bastard…)
Head over to the other side of the room where the spikes were, and LOOK OUT! It looks like Killer Croc ain’t done with us yet! Get ready to fight his fearsome skeletal form!

… psyche. He’s definitely dead.
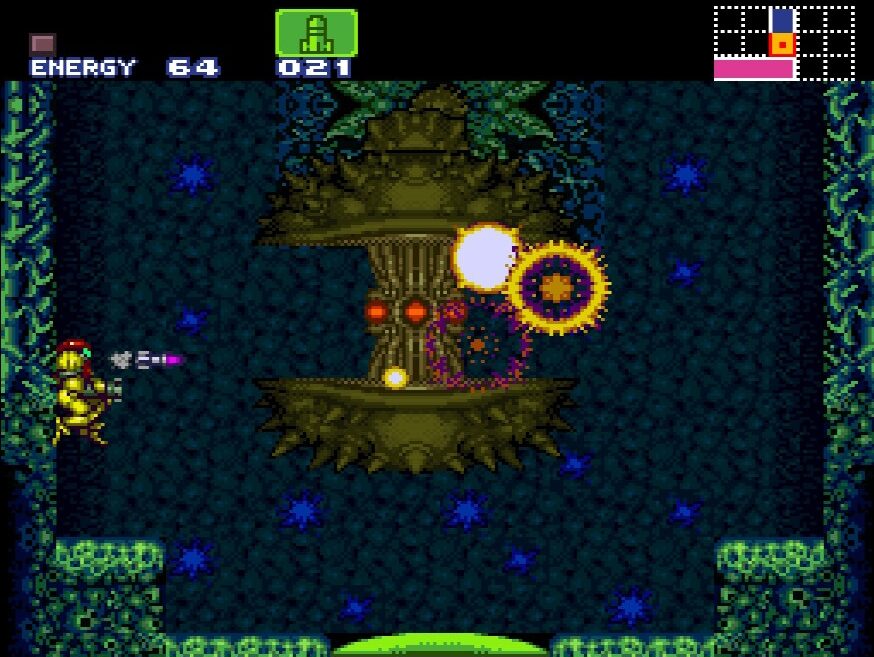
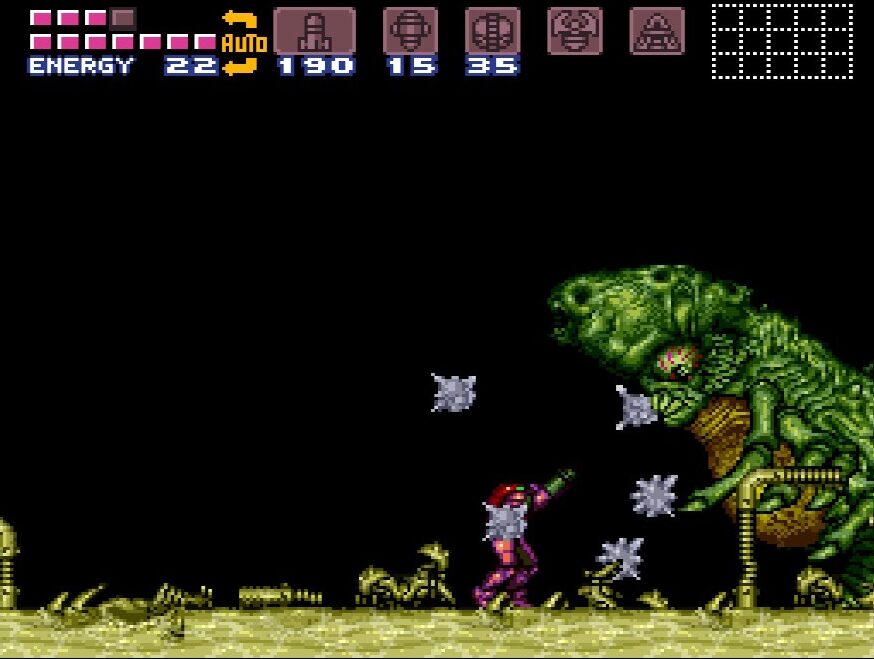
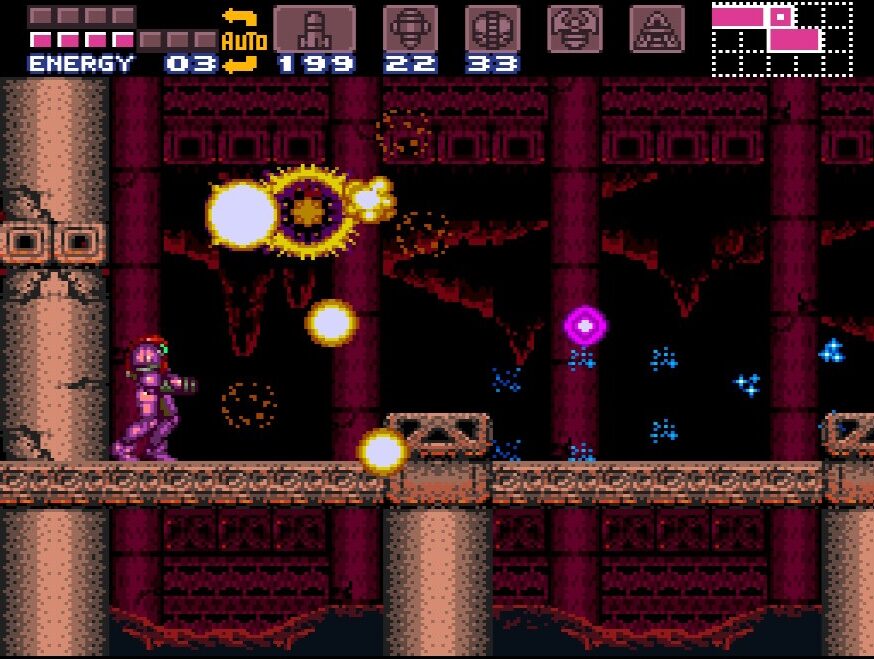
PHANTOON
Buckle up. Most of the bosses so far have been pretty manageable. Dare I say “easy”. Not this guy. If you’ve followed the guide and got all of the optional Energy Tanks I’ve recommended, you’ll probably have enough health to bully your way through this, but this will still be a tough fight.
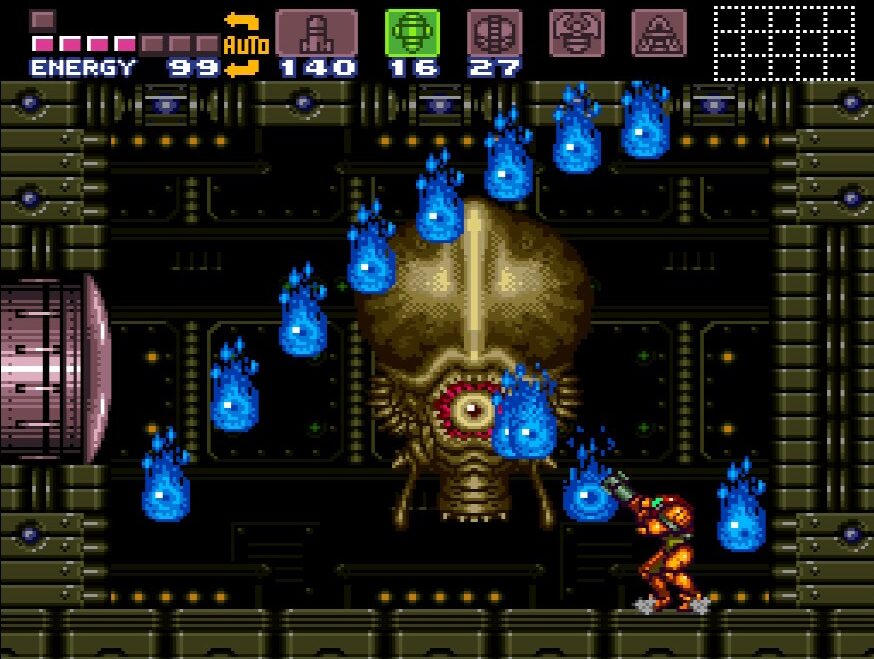
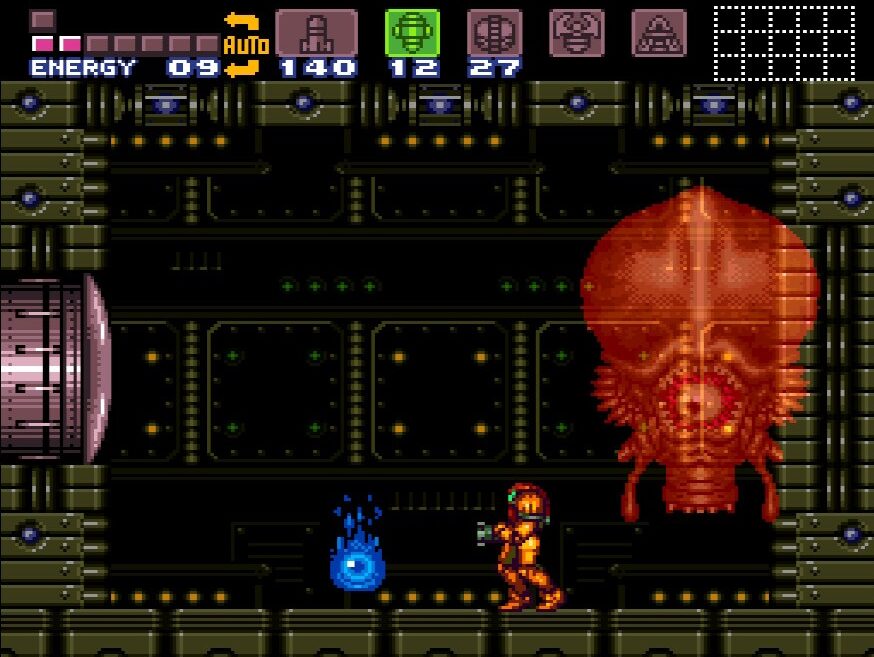
So. Phantoon. This guy is a giant squid looking ghost who spends most of the battle phased out of physical space, meaning your Missiles are going to go straight through it. Phantoon will only phase into physical form for a brief moment at certain parts, giving you a small window of opportunity to blast it with Missiles.
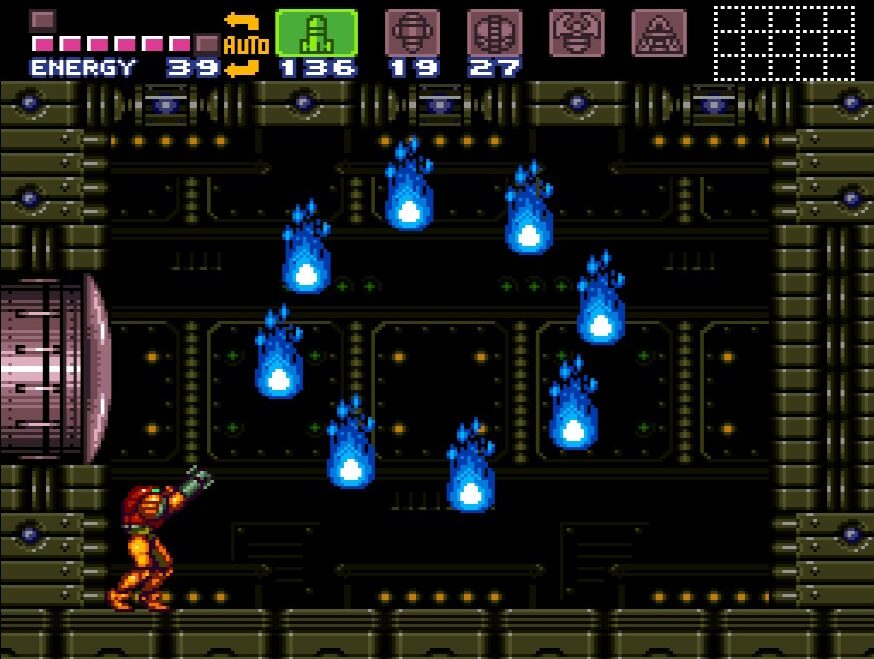
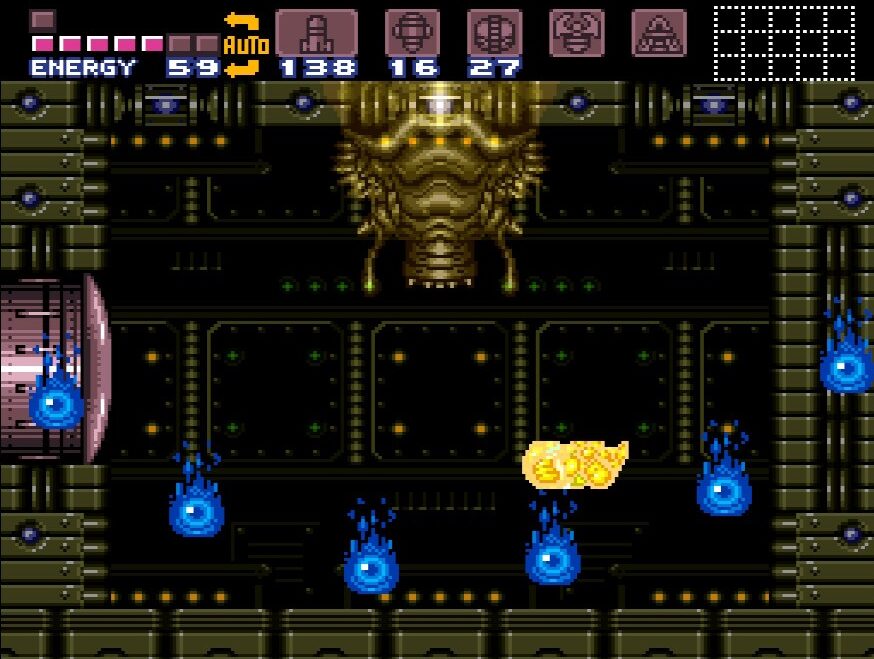
Making matters worse, the Ghost will constantly be throwing blue flames at you, which can do a decent bit of damage if they connect. You can shoot the flames to give you health and ammo, however, the flames (much like Phantoon itself) take a second to materialize in physical form, so they’ll need to settle for a second before you can shoot them. Unfortunately, they’ll damage you whether they’re physical or not.
Phantoon will drop flames on you at random, flinging three or so in quick succession. Use your beams to quickly get rid of them before more flames arrive and the battlefield gets cluttered. Phantoon may decide to drop a straight line of flames on you as well, so if you see the blue line in the sky, quickly dash over to whatever side is free and take cover.
Fortunately, Phantoon has a tell which we can exploit. Whenever you see a blue ring of fire quickly form around it, that means that very soon this Ghost will be in physical form. Dodge the flames and blast Phantoon when it becomes solid. Try not to hit any of the blue flames flying around it, but also don’t be too conservative with your ammo. Now, very important to note: you have two options here. You can blast Phantoon with a Super Missile when it becomes solid, which obviously deals the most damage, but will send the Ghost into a frenzy; OR, you can hit it with a few regular Missiles, which do less damage, but cause Phantoon to stick to its usual routine.
If you choose to go the Super Missile route, after you connect, Phantoon will head towards the top center of the room and start throwing waves of flames at you from the left and then the right. This attack is incredibly hard to dodge, especially if you’re trying to jump over, but luckily, there’s a trick! Fire up a charge beam and hold it; when you jump and have that energy flowing through your Varia Suit, you’ll be able to spin jump through the blue flames with no damage! Hallelujah! This is almost a proto-Screw Attack, so use this, and avoid the six or seven flame waves Phantoon will send out.
Conversely, another strategy I’ve found is to get below Phantoon and step to either the left or the right of itand shoot straight upwards. If done right, your beams will destroy all the fire at the very top of the room before they even have a chance to start swinging. If done incorrectly, you’ll at least take out a few flames, and if you quickly jump just a smidge after firing upwards, you should avoid the trailing fire coming after you. There’s no reason to do this unless you can’t get the charge beam going in time, so this this method as a backup.
Repeat all these processes and wait for the blue ring of fire. When you see that, get your Missiles and/or Super Missiles ready and pelt Phantoon when it’s solid with your Missile of choice. The more damage that Phantoon takes, the faster all of its attacks get, so make sure you blast it when the opportunity arises as the longer this battle goes on, the harder those attacks will be to avoid. Five or six Super Missiles and you’ll finish him off, but again, if you want to play it a little safer, use regular Missiles. If you can stun him and fire off numerous Missiles in a row, then boo-yeah. If not, this process will take a little longer. Keep up the attack, and soon enough, the Ghost from beyond will fall.
Whew. This was by far the toughest battle in Super Metroid yet, and to add insult to injury, we don’t even get a cool item for beating him. However, as soon as Phantoon has crossed the void, power will be restored to the Wrecked Ship!
BOTWOON
I hesitate to use the term “Boss Battle” ‘cause this giant red worm is hardly up to the size or scope of the last couple guys we fought. Either way, Botwoon is in our way and we need to defeat him.
He doesn’t really have a whole lot of attacks; he’ll mostly just worm his way around the room, slithering in and out of the four holes in the wall. Occasionally, he’ll poke his head out and spit some acid at you, but this is pretty easy to dodge. Chances are if you just stand on the left side of the room and shoot Missiles at him, you’ll barely be touched.
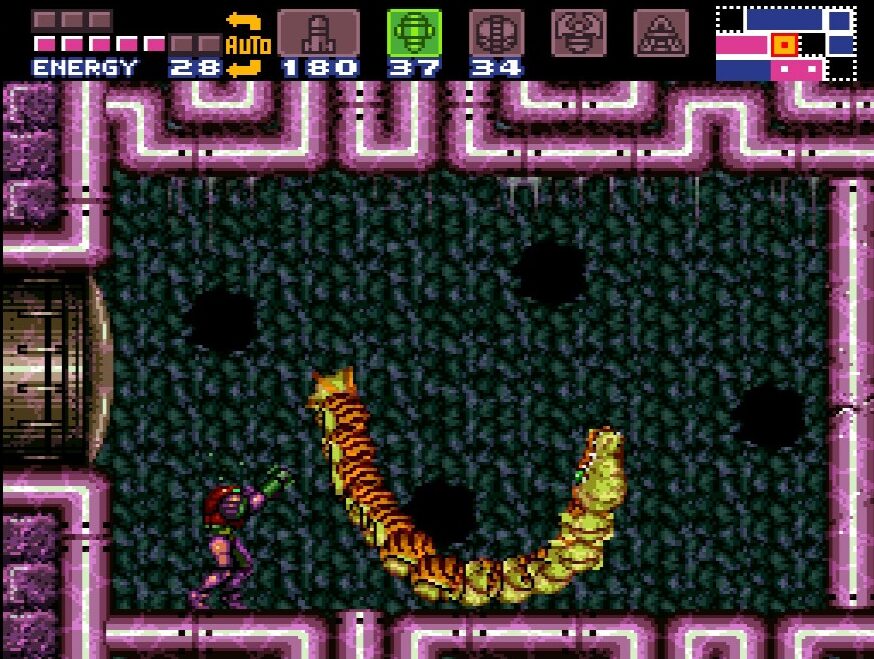
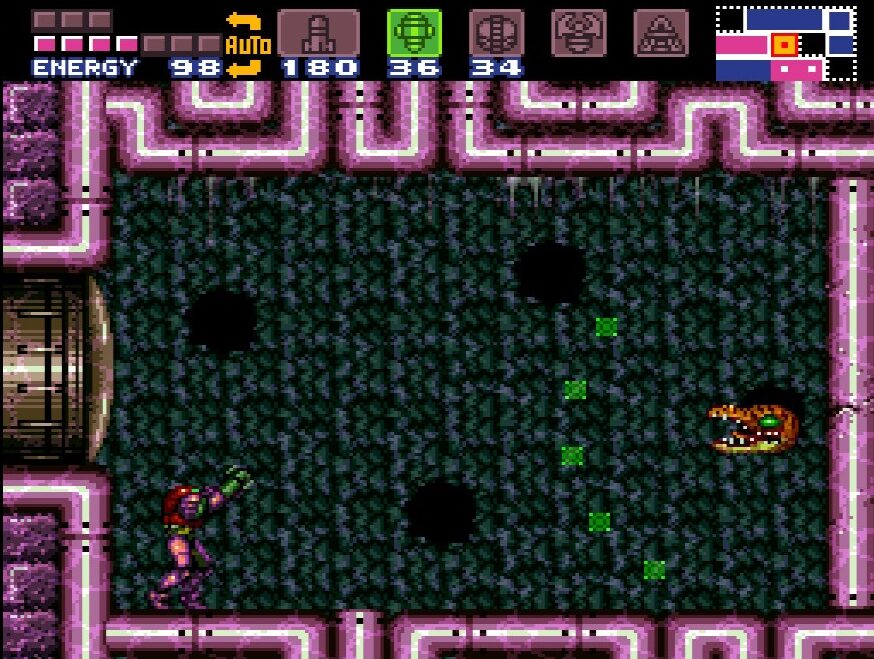
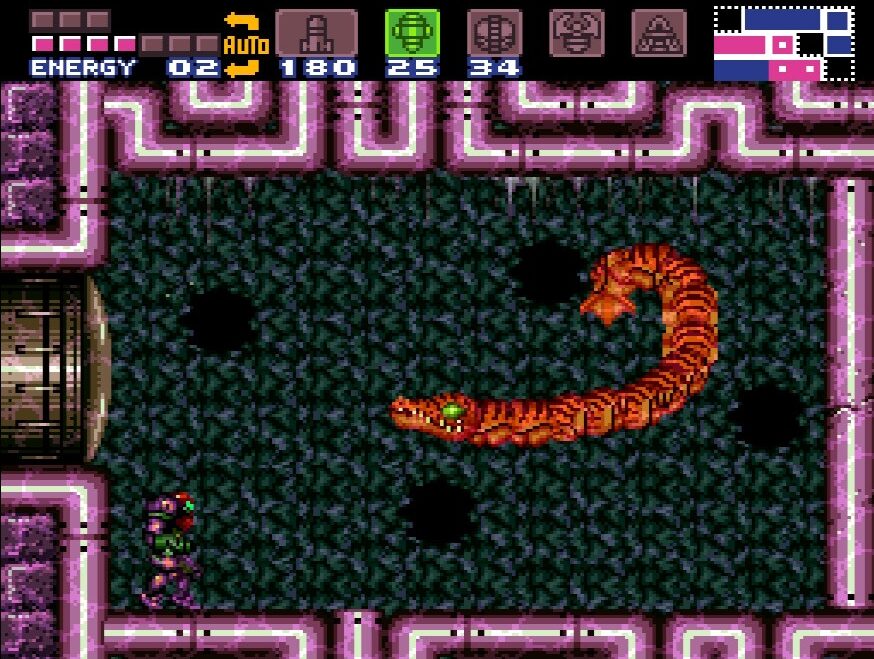
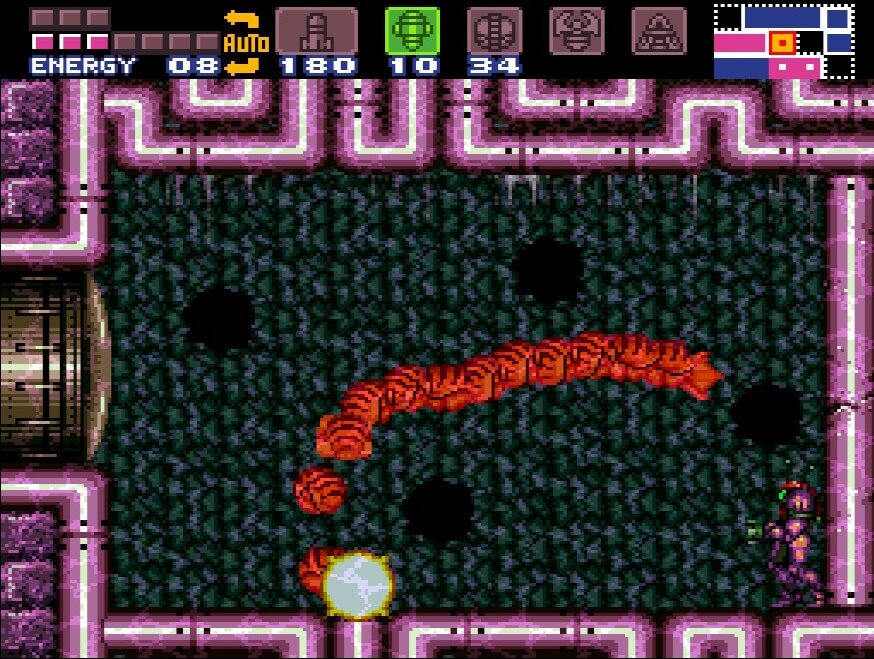
Of course, that’s the trick right there. He may not do much damage, but he is kind of a pain to hit. You’ll need to blast his head with about 10 Super Missiles to send him, and just like every other boss in the game, the more damage he takes, the faster moves. There’s no real strategy to speak of, other than try and aim well, although, if you’ve been following this guide, you should be packing 40 Super Missiles and almost 200 regular Missiles, so I think you’ll probably be fine. Once he is defeated, collect some health and press on into the next room.
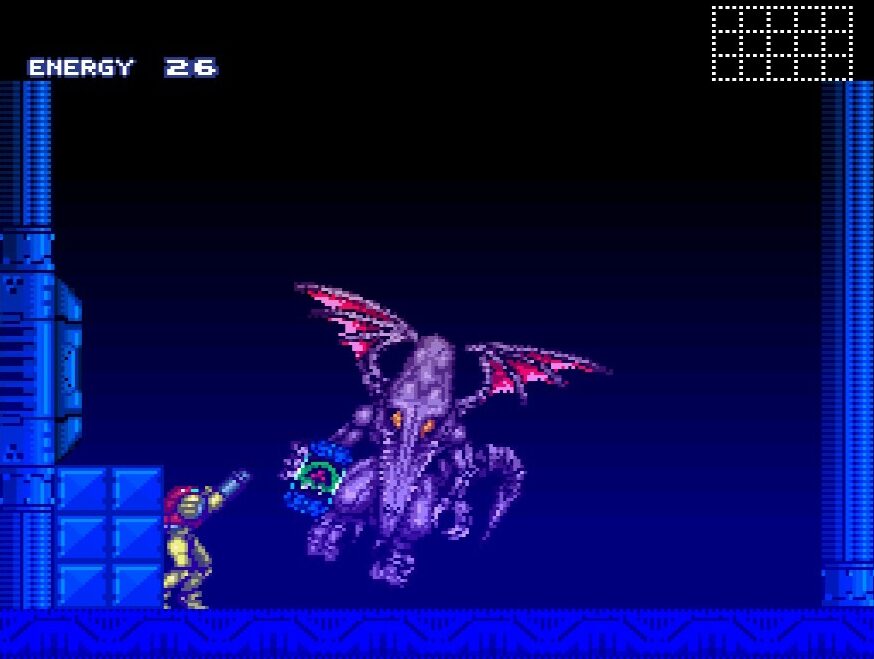
DRAYGON
So, this boss battle can go one of two ways. There’s the easy way… and there’s the hard way. First, let’s set the stage.
You’ll find yourself in a big pit. Around you on the walls are four electrical conduits. These conduits will be constantly firing off electrical charges at you, which hurt if they hit you. These cannot be shot down either; you’ll just have to avoid them. Pay special attention to the conduit on the upper left. You’ll notice the cap is off and there’s raw energy crackling out. We’re going to use that in a bit.
You’ll see a bunch of baby Draygon’s floating around. They actually can’t damage you, so don’t worry about them for now. Instead, get ready for Draygon, since at any moment he’ll swoop down and stab you with his tail. Draygon is a big, imposing creature who, if you ask me, doesn’t really look that much like a dragon, but does look super nasty. Draygon’s main attack is swooping from side to side in the room, stabbing you with his tail as he does so.
You’ll notice that his big yellow belly is sticking out when he swoops down, which is your chance to slam him with a Super Missile. His belly is the only part of him that is vulnerable, so aim well!
His second main attack is spitting out webs at you. They’ll slow you down if they hit you, and that’s when Draygon goes for his most devastating attack. If you’re caught in the webs, Draygon will swoop in and try and pick you up. He will absolutely pummel you if he grabs you, and he won’t release you for a good while. In a regular battle, getting picked up two or three times is gonna be Game Over for you.
Key words there were “in a regular battle”. This is where the divide between doing this battle the easy way or the hard way comes in.
The easy way is the route I recommend, since, well, it’s easier. To defeat him, we’re going to face the left side of the room (this is critical!) and let him spray us with webs and pick us up. Draygon will start pummeling you and rising to the upper part of the room. Using your Grapple Beam, grapple and hook onto the exposed conduit in the top left while he’s holding you. Don’t let go! The electricity will pour through you, damaging you a little, but completely wrecking Draygon. He’ll die and his kids will float around him at the bottom. Almost sad.
The hard way is to slug it out with him and defeat him with Missiles. There’s really no good reason to choose to do this unless you’re looking for a challenge, but here we go anyways.
It is absolutely critical that you do not let Draygon pick you up. I can’t overstate how much he just beats the tar out of you when he does. You’ll want to blast him in the belly with Super Missiles when he swoops side to side, but as soon as he starts shooting webs, switch to your beams and try to get rid of them.

It’s pretty hard to not get hit with the webs, so if you find yourself in a sticky situation (har har har) do your best to jump up and down to avoid Draygon grabbing you. Mercifully, he’s pretty slow when he goes for the grab. Another good strategy when you see him sitting out webs is to aim your Super Missiles upwards and get really close. Hit him in the belly once or twice and then run right through him. You’ll take some damage, but nothing compared to if he grabs you.
A better strategy might even be to switch over to regular Missiles and just let them fly. The thing about the Super Missiles is when Draygon’s shooting webs, they get in the way of his belly, which either causes more wasted Super Missiles or requires more careful aiming, which can lead to you getting webbed. Switching between Super Missiles and beams when you’re in a hurry can be fairly clunky too. However, we’ve collected so many regular Missiles that it shouldn’t matter if you just fire at will at his belly while he’s spitting webs. You’ll destroy both the webs and damage him. It may take longer, and a whole lot of Missiles, but eventually, Dragon will fall.
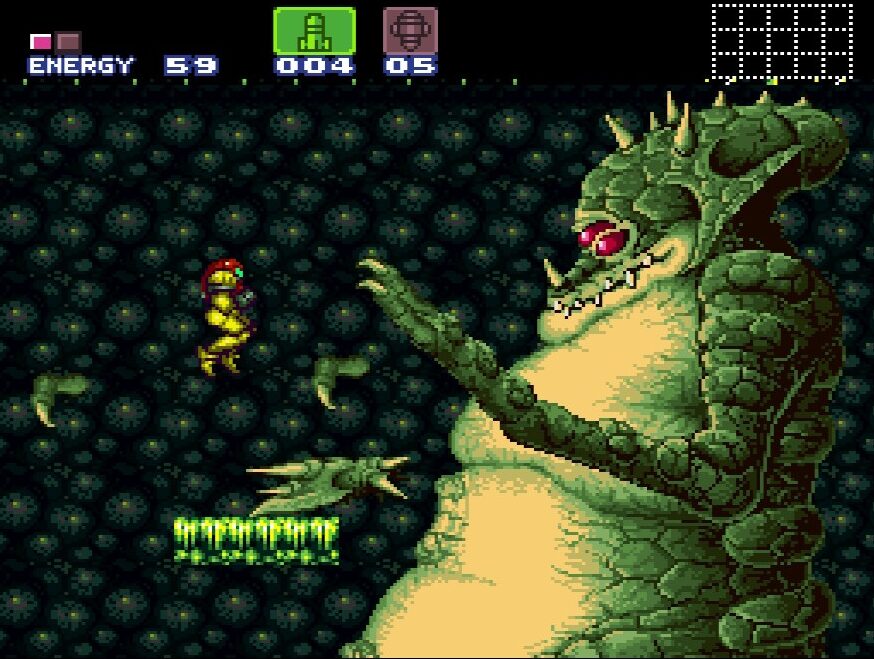
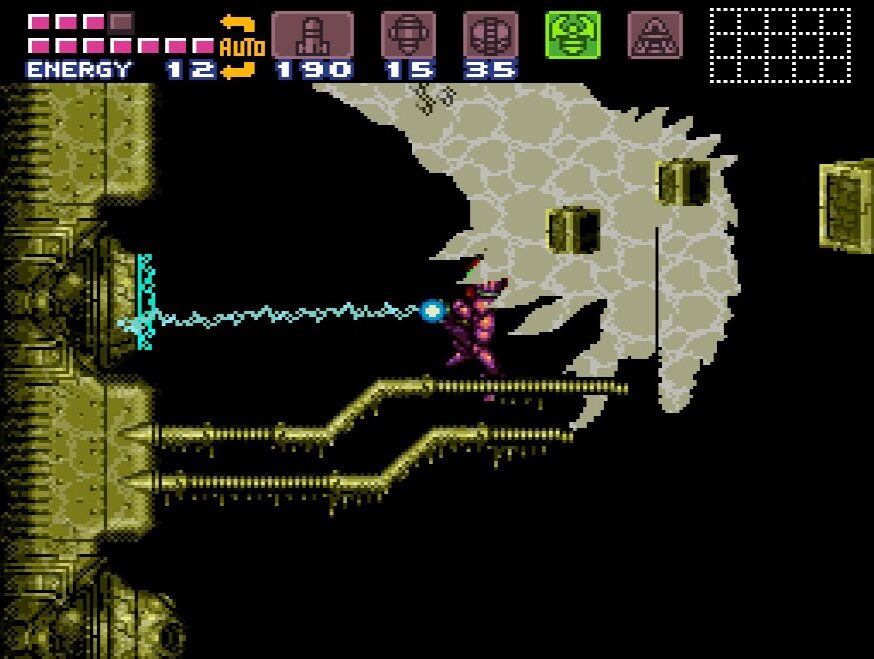
GOLDEN TORIZO
Look who’s back for a rematch! To trigger this battle, drop down and head towards the door. Move away from the door quickly as Torizo will literally drop on your head! The big guy will fall from the ceiling above and take a second to animate, but when he does, it’s on!
Golden Torizo has a few tricks up his sleeve that his younger brother from the start of the game did not. The first you’ll notice is how fast he is. We’re in a much larger room than our first encounter, and he’ll take full advantage of that by jumping around everywhere. That being said, you can do the same.
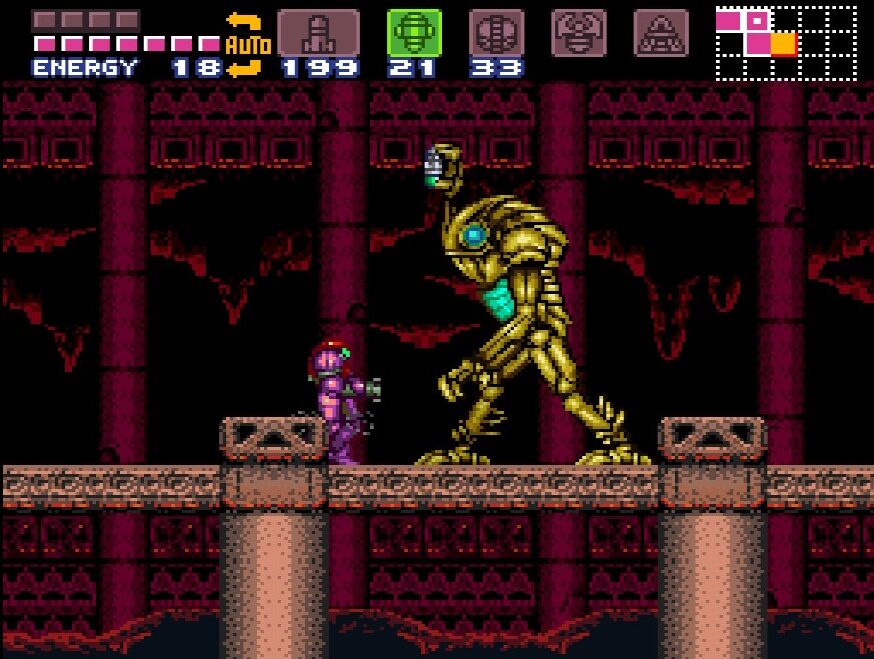
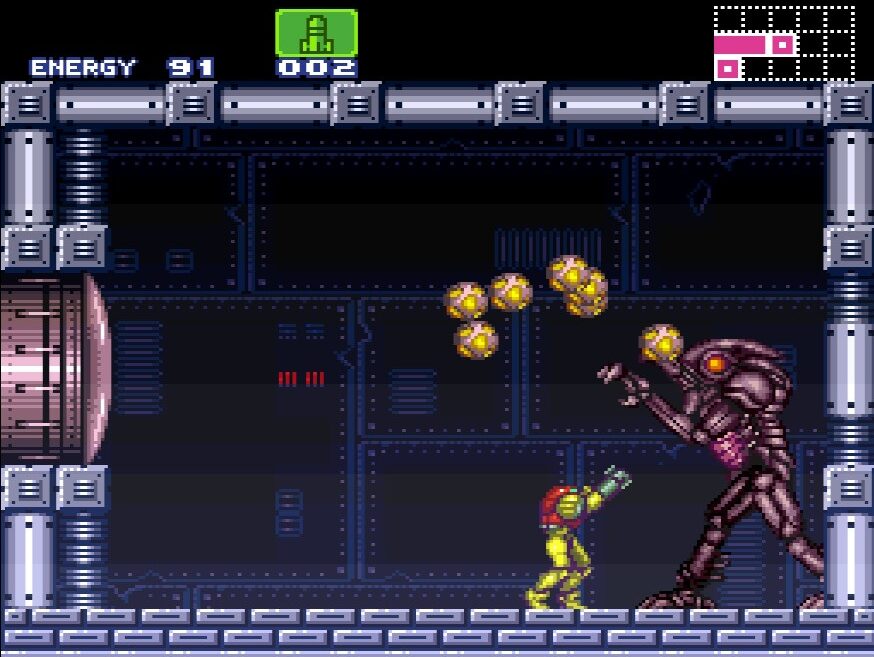
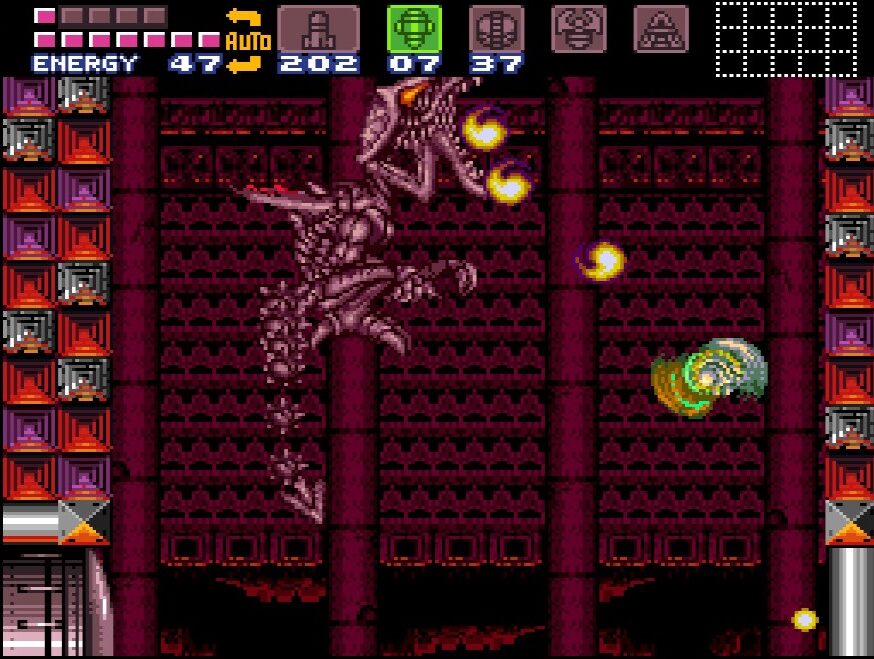
He has most of the same attacks we saw earlier, just jacked up. His arm can still punch you right in the face if you get close enough, and it moves fast and hits hard. He’ll also still shoot rocks at you that you’ll be able to shoot for ammo and health. This time around, Torizo will also shoot what I can only describe as little egg sack things that will hatch creatures that will damage you. Shoot these down as they come, or jump to avoid them. Lastly, Torizo will spit a line of fireballs at you; if the fireballs miss and hit the floor, they’ll cause a small eruption, so watch out!
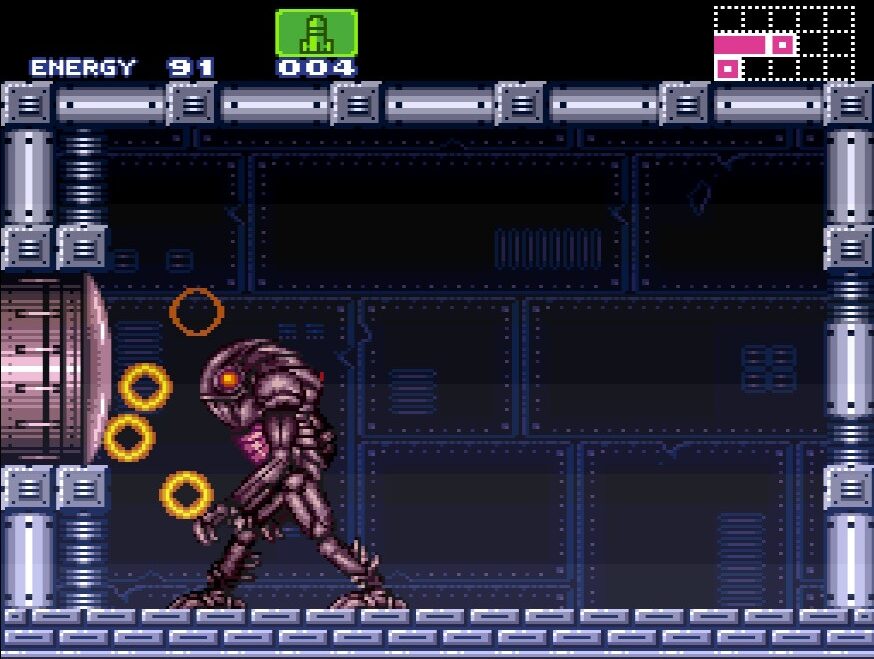
His most devastating attack is his shock wave attack. Just like before, he’ll wave his arms and send multiple vertical shockwaves your way. These hit really hard, so do your best to Space Jump over them. Actually, you can Space Jump through them as well – it seems as long as Samus is Space Jumping, the waves won’t damage you.
You’ll be able to see a glowing plate on his chest. This is where you want to aim your fire. I wouldn’t recommend using Missiles for this fight – Torizo will dodge almost every single Missile you throw at him. It is possible to beat him using Missiles, but you have to be extremely close to him, basically right under his chest firing diagonally up, and even then, he’ll still dodge a good number of your shots. Since we’re going to be needing those Missiles in a bit and they’re not effective anyways, attack him with charged beam shots.
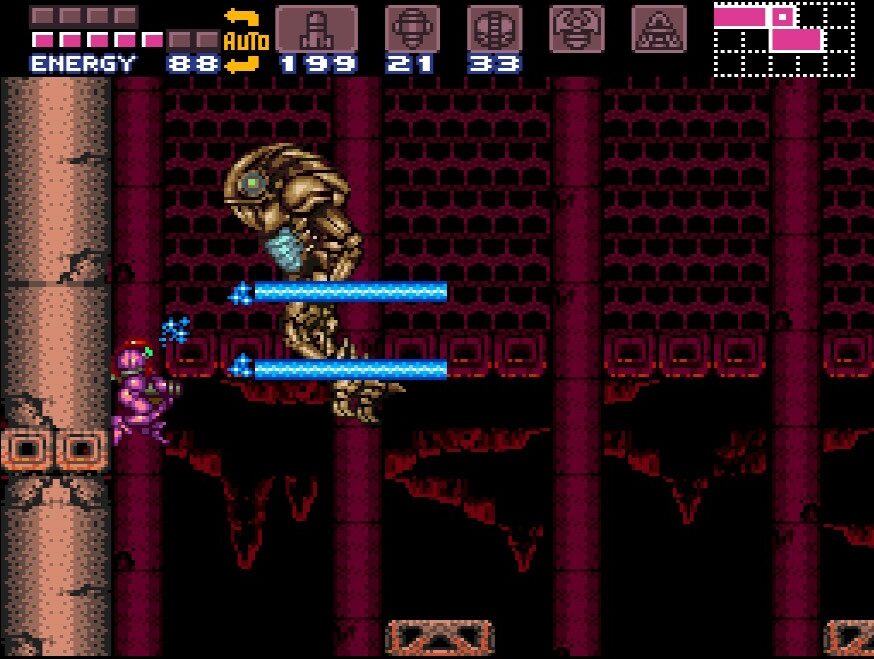
The key to this fight is to always be moving and always be jumping. The more time you can spend in the air avoiding his attacks and charging your own beams, the better. When you land, hit him with a charged beam shot and then jump again. You may bump into him in the air, but that’ll be far less damage than if he hits you with his shockwaves. The good thing about the beams too is the game is fairly generous about damaging him even if your aim isn’t perfect. The Plasma combined with the Wave Beam means you can hit him from almost any direction and he’ll take damage, as long as your shot is within spitting distance of his chest.
The more damage Torizo takes, the more his golden hue starts to fade. Keep this up and nail him with 15 charged shots and he should self destruct.
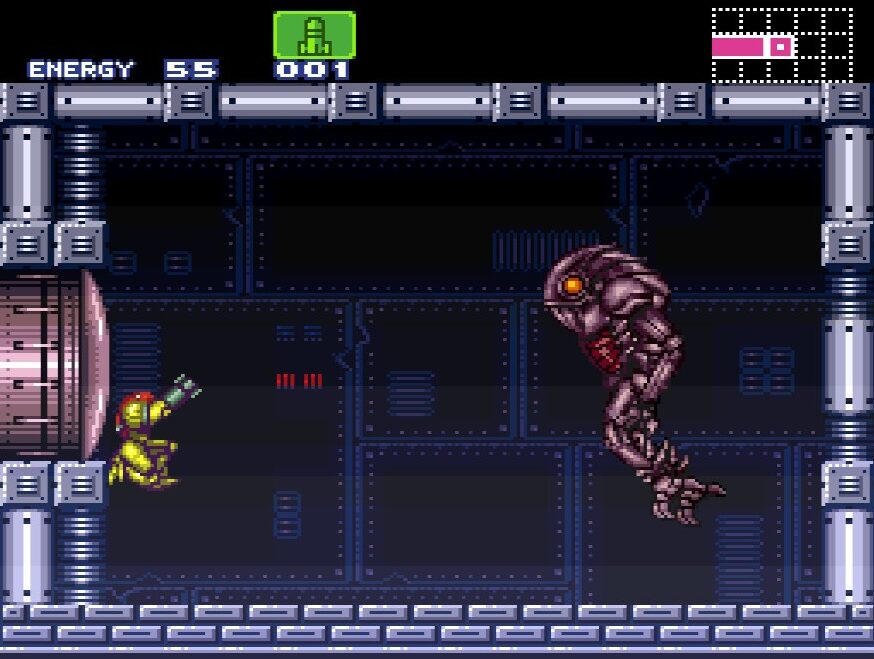
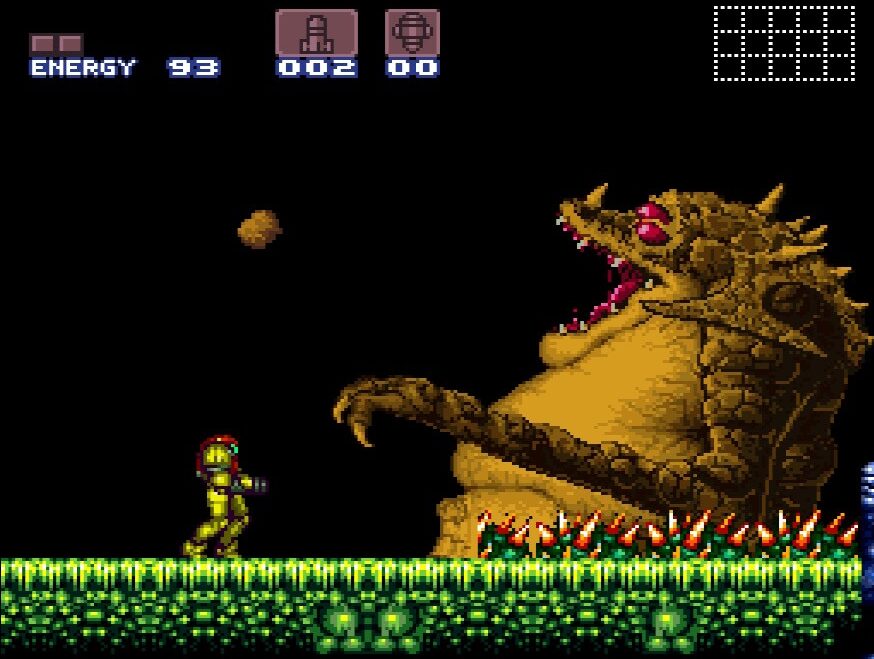
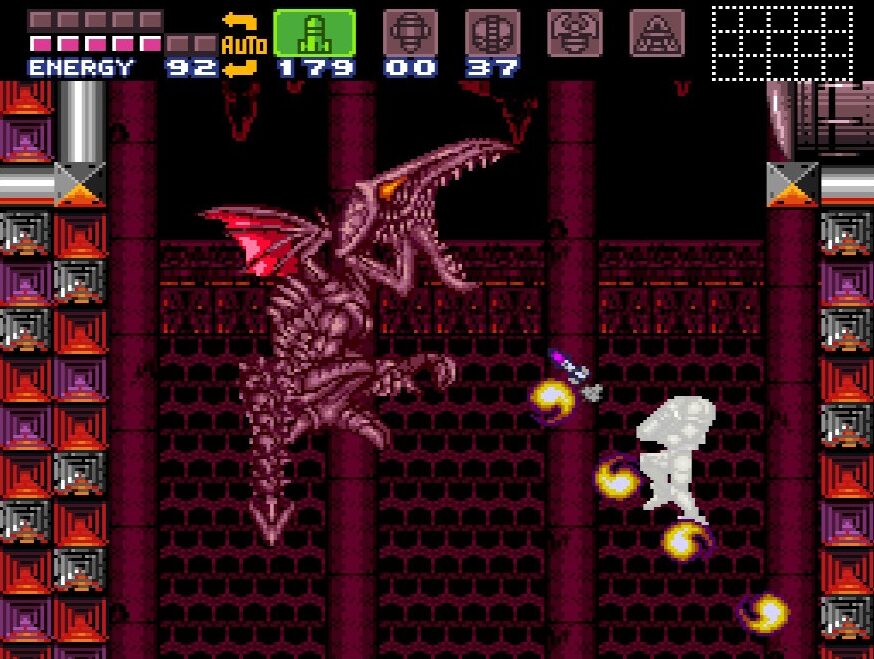
RIDLEY
Samus! Ridley! The time for talk is over. Now it’s time to fight!
I know this is counter-intuitive to this guide that you’ve hopefully been following, but I actually really want to encourage everyone reading to try this fight at least once without reading any of my tips. Part of the fun of this boss battle is just what a wild brawl it is. And truth be told… there isn’t much in the way of strategy. This won’t be one of those fights where you have to damage somewhere to expose a weak point and quickly strike. Nope… this will be a good old fashioned hoss fight between two big bastards trying to pummel each other to death.
As soon as the fight starts, you’ll be given a quick second where Ridley isn’t moving and instead just screams. Don’t waste this time – nail him with three or so Super Missiles right to the face!
You’ll be able to hit Ridley anywhere with Missiles and have him take damage, with the exception being his tail. His tail is invulnerable, so avoid it whenever you can. Other than that… pelt him every single way you can with Super Missiles and Missiles. There’s hot lava on either side of the room under the platform, so needless to say, don’t fall down. You will take a lot of damage in this fight, especially if it’s your first go around with the leader of the Space Pirates. To make it easier though, let’s take a look at some of Ridley’s attacks.
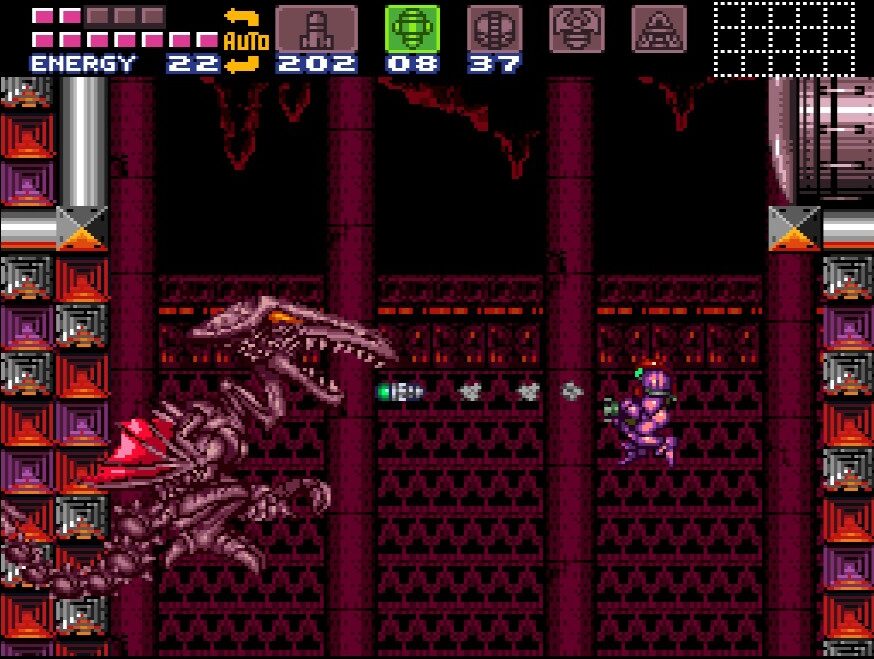
As I mentioned, Ridley’s tail is invulnerable, and he loves to swing it around at you. His tail will be going crazy this whole fight, so do your best to avoid it, and more importantly, to not hit it and waste a Super Missile.
Ridley will swoop from side to side in the room, often going off screen and swooping down and diagonally. This is your chance to jump over him, turn around in the air, and pelt him with Missiles. Ridley will also pick you up if he gets the chance. He won’t do as much damage as Draygon did, but still try and avoid this. If he does grab you, aim directly up and shoot off a couple Missiles. You should land at least a hit of two.
Of course, Ridley is a dragon (of some sorts anyways) so you know he’s got some fireballs up his sleeve. He’ll shoot a line of fireballs at you that will explode on impact, either on you or the ground. These are probably the least of your worries, as you can dodge them fairly easily and even Screw Attack directly through them, taking no damage. For that matter, you can actually Screw Attack through *Ridley* and not take any damage… except if you hit his tail. The Screw Attack won’t damage him, but you’ll be safe for a second anyways. Just watch out for that tail.
Speaking of his tail, Ridley’s signature attack is what Metroid fans have dubbed the “Pogo”. Ridley will straighten out his tail and start to bounce up and down like a point stick, trying to stab you as he goes. This is another great chance to aim up and blast the hell out of him with Missiles, duck and run under his tail when he goes up, and blast him from behind.
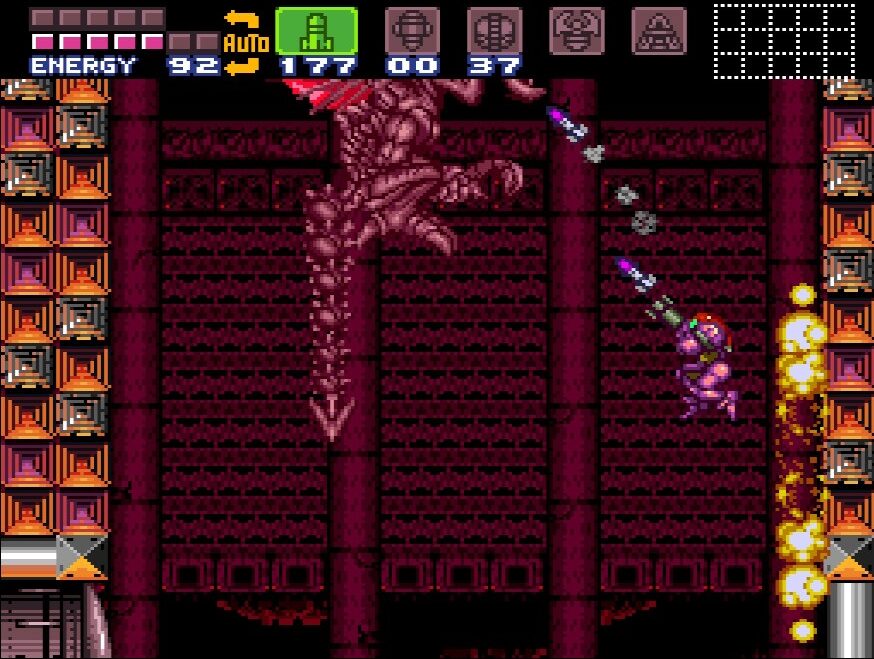
Obviously, Super Missiles are the way to go here. If you’ve been following this guide, you should have 50/50 Super Missile tanks, so don’t be shy using them. Ridley is by far the toughest enemy we’ve faced so far in terms of durability. The battle was too frantic to count, but I’m guessing if you hit him with about ~40-45 Super Missiles that should do it. Of course, that is assuming you hit every shot you take, which is about as likely as Ridley stopping to sing us a song mid battle.
If you run out of Super Missiles, you can either use charged beams, which hit hard but will take more precise aiming, or switch over to regular Missiles. Again, if you’ve been following this guide, you should have over 200 Missiles, and now is the time to use them. I’d recommend using Missiles and firing at will. Unload in every direction as you’re jumping and spinning around.

Just like Golden Torizo, the key to this is to always be moving and jumping. Try to aim your Super Missile shots, but don’t be so focused on making sure you land the perfect shot that you’re not firing at all. We need to hit Ridley a lot and accepting that some shots are going to miss will make this a lot easier.
Keep blasting him with every weapon at your disposal and watch as he turns redder and redder. Eventually, the slugfest will come to an end, Samus will raise her arm in victory, and you’ll hear the sweet, satisfying crunch of Ridley exploding.
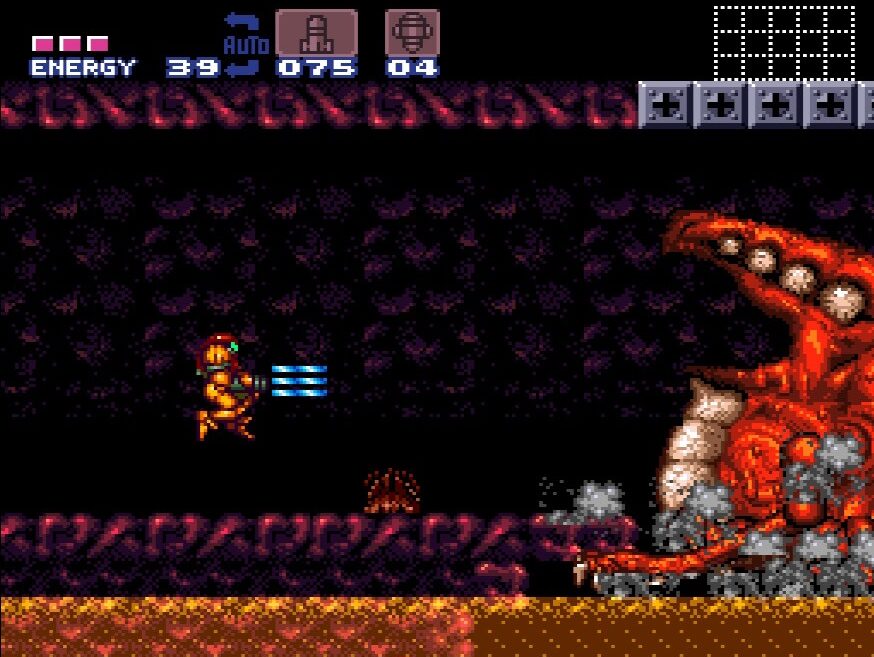
MOTHER BRAIN
Here it is, the final fight for all the marbles. Now would be a good time to switch over to Super Missiles.
Rising from the ashes is Mother Brain’s new mechanical body. A grotesque looking mechanical/biological hybrid with a creepy face on her already creepy brain. This body is completely invulnerable, so concentrate all of your fire on her head.
The good news is that comparatively speaking, this battle is easier than our previous encounters with Ridley and Draygon (well, Draygon the hard way). The bad news is that Mother Brain hits really hard, so if you’re caught by her attacks too often, you’ll run into problems. As a rule of thumb here: constantly be jumping up and down. You should be able to land at least two hits to her head with Super Missiles; one while you’re on the ascent of your jump, one while you’re on the descent.
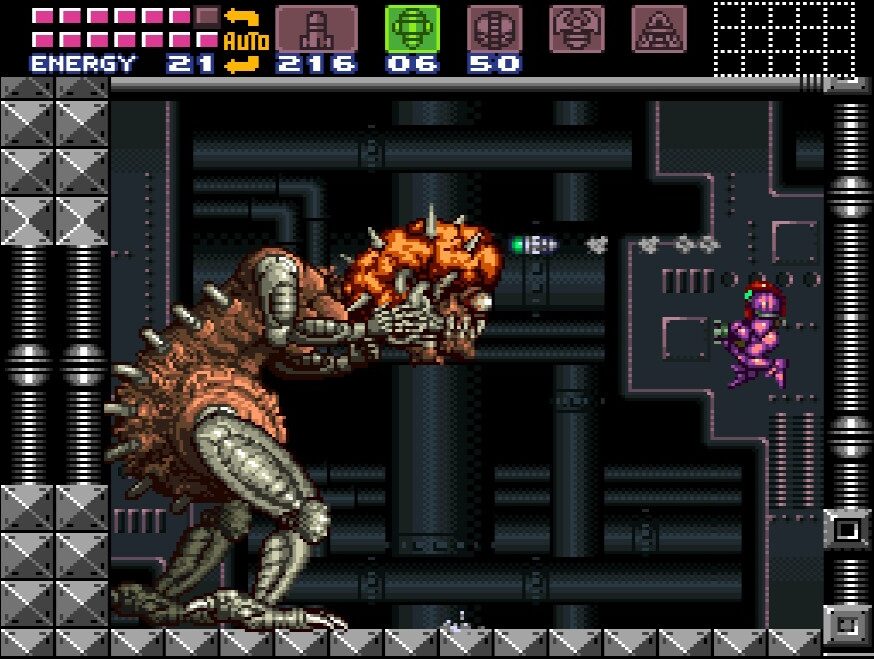
Mother Brain will start off with regular attacks that are fairly easy to avoid if you’re moving up and down constantly. She’ll throw a bomb which will bob around for a few seconds and then detonate, spreading fire left and right; easy to avoid if you get the timing down right and realize it won’t explode right away. She’ll also shoot out a Torizo-like laser from her eye, which will travel straight forward. Her last attack will be her throwing a string of blue bubble looking rings at you; they’ll move in a somewhat straight line, but leave a trail. The blue rings and eye laser cannot be Screw Attacked through like so many other attacks – if it hits you in any capacity, you’ll take damage.
Switch to regular Missiles after you’ve run out of Super Missiles and let those babies fly. With enough damage, Mother Brain will start using a new attack – a burst of fire energy. This fire attack will shoot in a mostly straight line, and it hurts like a mother if it hits you, so make sure to jump over this. If you do get caught by it, the fire will damage you for two whole tanks worth, so slow down your jumping if you need to; just make sure you avoid this.
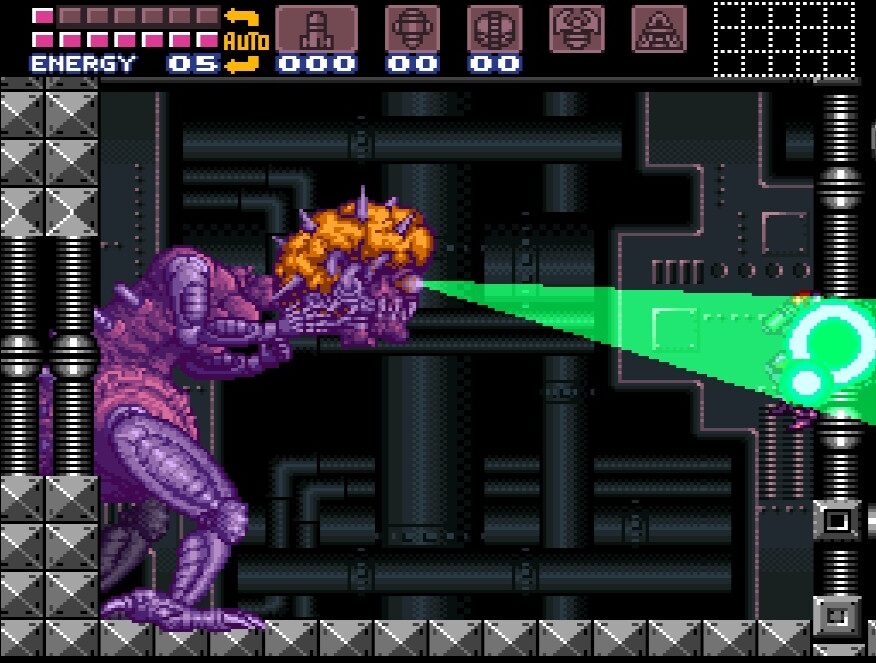
After enough damage, Mother Brain will decide enough is enough and unleash her most devastating move: the Laser Brain Attack. This is a multicolored Hyper beam that will completely obliterate you against the wall and suck a full three tanks of energy out of you. Not only is this unavoidable, but it will suck basically all your Missiles and power bombs away, AND leave Samus so exhausted from the attack that all she can do after is kneel helplessly on the floor.
Hopefully you have a decent chunk of energy left, or at the very least a couple full Reserve Tanks, because Mother Brain will start pelting you with bombs and lasers and you’ll basically be helpless to defend yourself (if you have a ton of energy left over, eventually you’ll recover, but then Mother Brain will hit you with another Laser shot. Eventually, you’ll end up in this helpless position).
As you sit there, beaten up and helpless, unable to move, Mother Brain will start charging up one last Laser Brain Attack to finish us off forever. Just as she is about to fire though, the Baby Metroid swings in and absorbs the shot from her head! The Baby will suck the life out of Mother Brain, stunning it for a second, and fly over to Samus, transferring the power of the Laser Brain Attack to her and restoring her energy too. As this is happening, however, Mother Brain starts moving and pelts the Baby Metroid with about after shot, eventually… killing it. Oh man… 🙁
They say revenge is a dish best served cold, and though the Baby Metroid may not have survived to see Mother Brain’s demise, it gave its life to power us up with our strongest ability yet: the HYPER BEAM. The rest is pretty much like at this point. Jump up and down, firing away at Mother Brain’s head. You’ll take way less damage and soon enough, Mother Brain will self-destruct for the final time.
Congratulations – you’ve beaten Super Metroid!