Metroid II: Return of Samus Walkthrough: Missile Expansions
Here you’ll find the location for every Missile Expansion in Metroid II: Return of Samus, as well as detailed explanations on how to get them and what powerups you’ll need. Expansions have been listed in order of when you can pick them up during the game.
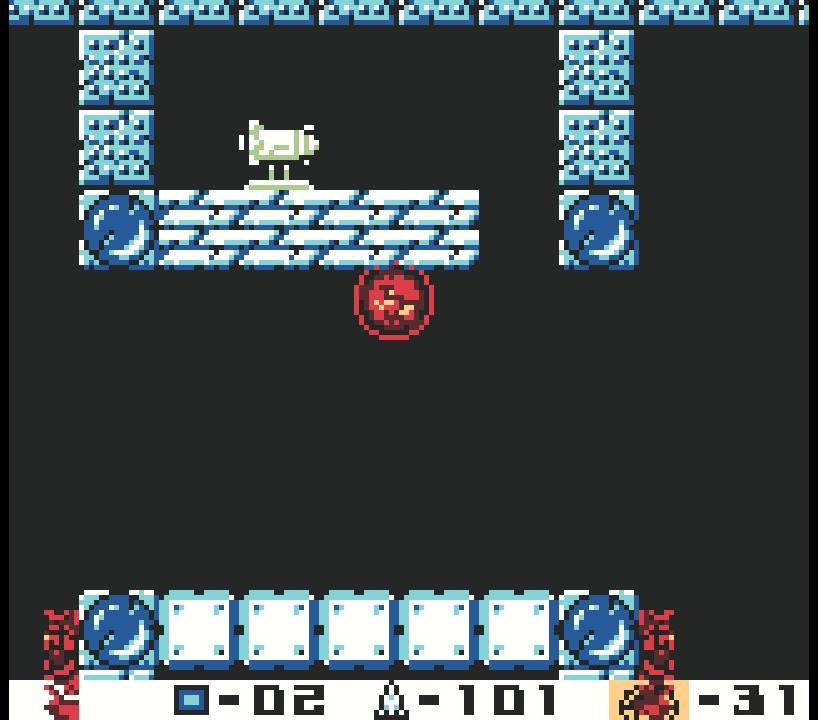
Missile Expansion #1
Requirements: Bombs
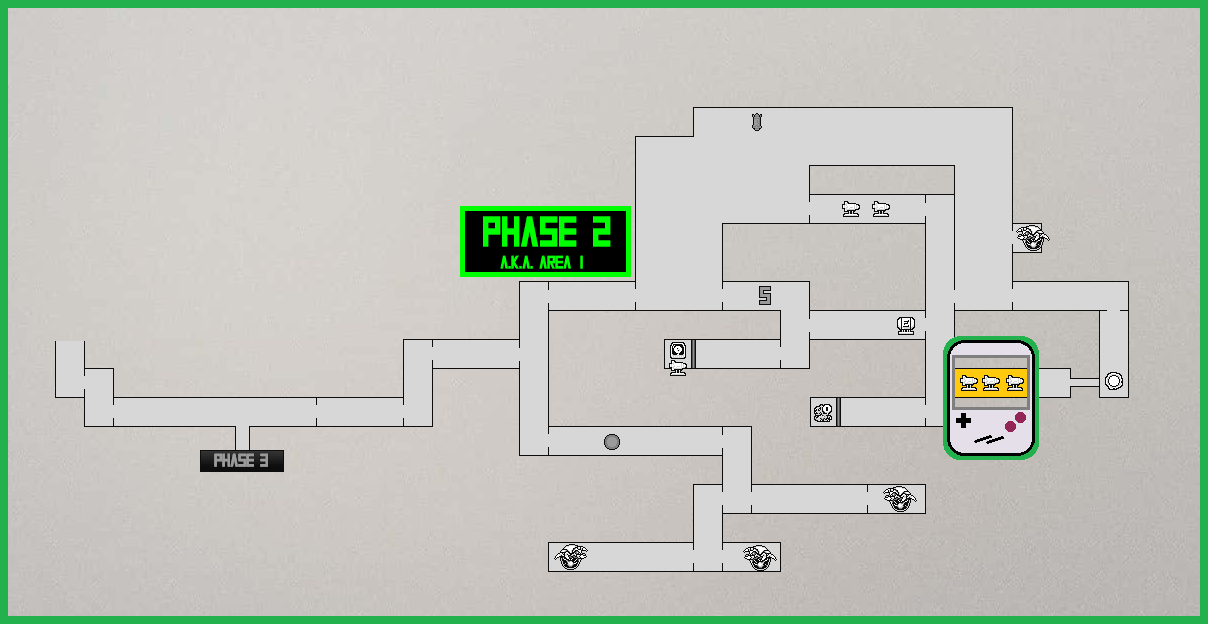
Location: Phase 2 (The Ruins)
Immediately after getting the bombs, put them to work and bomb the floor under the Chozo Statue (you’ll be able to see the Missile Expansion, bomb right above it). Drop down and grab MISSILE EXPANSION #1!
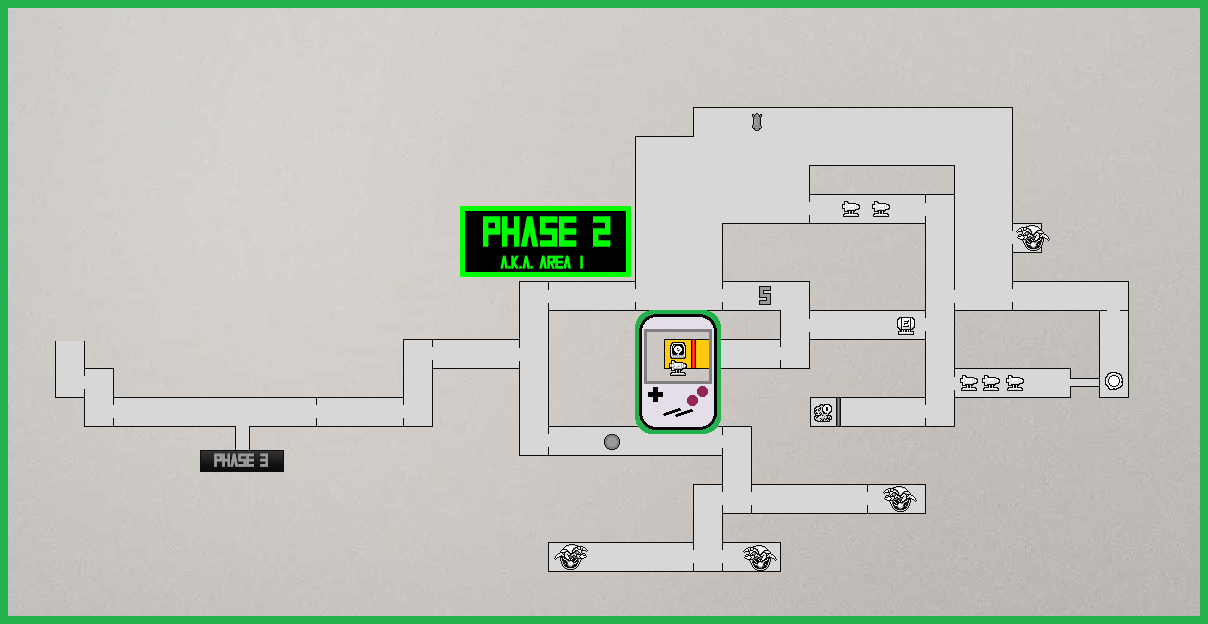
Missile Expansion #2
Requirements: None
Location: Phase 2 (The Ruins)
Walk into the room and you’ll see the first Missile Expansion in a boxed area. Simply shoot the bricks on either side and you can enter, grabbing MISSILE EXPANSION #2.
Missile Expansion #3
Requirements: None
Location: Phase 2 (The Ruins)
Immediately after grabbing Missile Expansion #2, do the same as before – you’ll see a boxed area with the Expansion underneath. Either shoot or bomb the tiles on the floor, drop down, and grab MISSILE EXPANSION #3!

Missile Expansion #4
Requirements: None (Spider Ball to make it easier)
Location: Phase 2 (The Ruins)
Right above Missile Expansion #3 is a final Expansion, this time nested in the upper portion of the room. The game intends for you to come back with the Spider Ball, but we can take advantage of the Game Boy to get this Expansion now. Shoot the block in the ceiling and you’ll see that you can’t jump high enough to reach the Expansion. No problem though – wait a second; jump up and time it so you hit the opening as soon as the block respawns. If you’re timing was right, you’ll take a bit of damage from the respawned block, but it will propel you upwards beside MISSILE EXPANSION #4!
Missile Expansion #5
Requirements: None (Spider Ball if entering through the right side)
Location: Phase 2 (The Ruins)
Use the Spider Ball to climb into this room from the right side and you’ll see MISSILE EXPANSION #5 as soon as you enter; bomb or shoot the blocks on either side to claim it.


Missile Expansion #6
Requirements: None
Location: Phase 2 (The Ruins)
Right after grabbing Missile Expansion #5, walk forward a bit in the same room and you’ll see a second Expansion surrounded by blocks. Shoot the sides MISSILE EXPANSION #6 is yours.
Missile Expansion #7
Requirements: Spider Ball
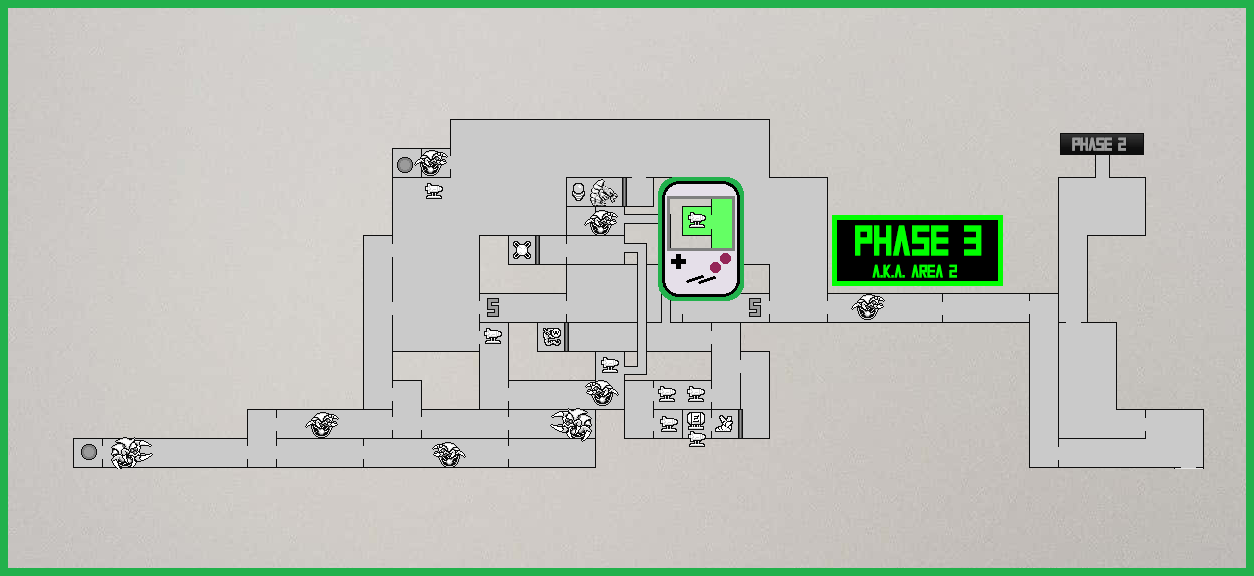
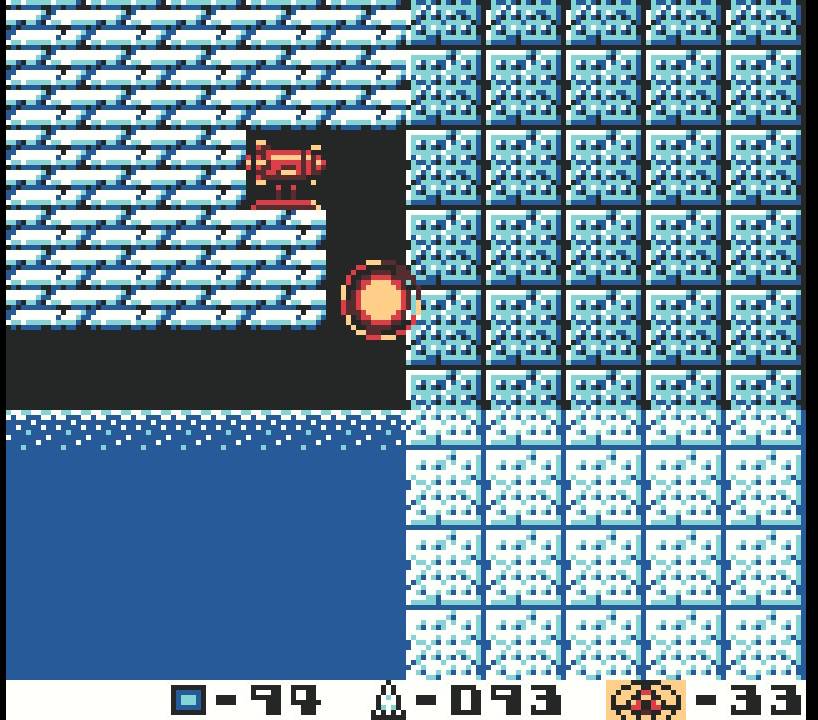
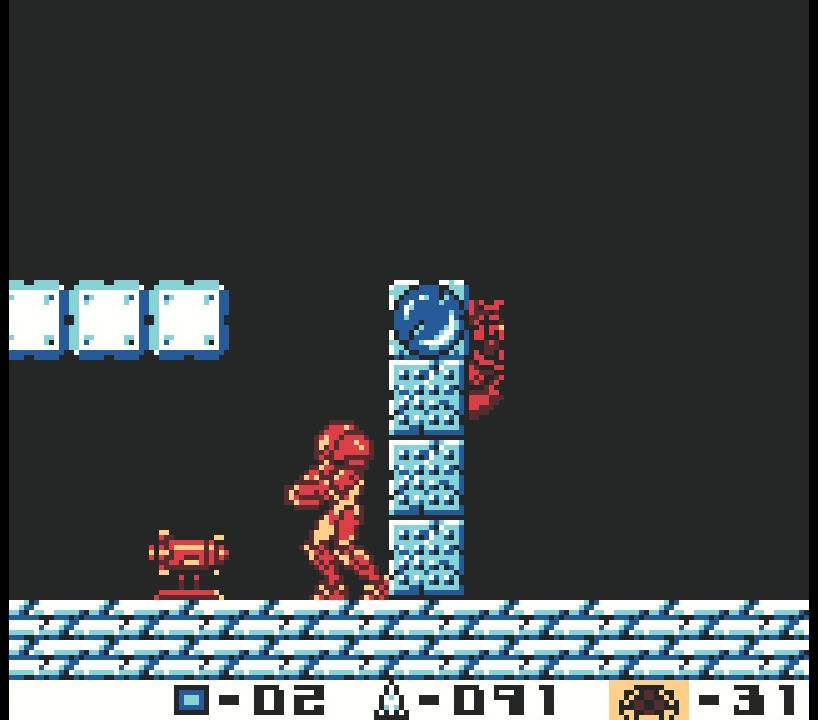
Location: Phase 3 (The Waterworks)
Stand on the pillar and jump up to the small ledge just above the Hydro Station’s entrance. Spider Ball your way upwards and you’ll reach a small clearing where a couple of Chute Leeches and a new spiky enemy called a Senjoo are waiting for you. Take them out and spider crawl up the side of the Station. You’ll see a small tunnel in the wall, so roll in and you’ll be rewarded with MISSILE EXPANSION #7!
Missile Expansion #8
Requirements: Spider Ball
Location: Phase 3 (The Waterworks)
After exiting the left side of the Hydro Station, walk forward on the bridge a bit and then drop down into the water. There’s a passageway on the lower eastside of the Hydro Station that you’ll want to slip through. As soon as you enter, get to the far wall and use your Spider Ball to climb up and grab MISSILE EXPANSION #8.
Missile Expansion #9
Requirements: Bombs
Location: Phase 3 (The Waterworks)
On your way to the Varia Suit, right before crawling up the pipe to take you to the top chamber – stop! There’s a hidden tunnel on the ledge just below you that you’ll want to roll through. Follow the path and you’ll come across MISSILE EXPANSION #9.
Missile Expansion #10
Requirements: None
Location: Phase 3 (The Waterworks)
Get to the vertical shaft with a ton of blocks in straight lines and drop to the very bottom, taking the passageway on the left. Press forward in the room and destroy two Wallfires; there are a couple of easy missile expansions here. Right after the second Wallfire, destroy some blocks and drop down to the alcove to grab MISSILE EXPANSION #10!

Missile Expansion #11
Requirements: Spider Ball, Bombs
Location: Phase 3 (The Waterworks)
Directly above Missile Expansion #10, jump up using your Spring Ball and, at the last moment, activate your Spider Ball to stick to the roof. Lay a bomb at the one breakable block and move out of the way. When the block is destroyed, roll through the opening to grab MISSILE EXPANSION #11.
Missile Expansion #12
Requirements: None
Location: Phase 3 (The Waterworks)
In the room on the other side of the High Jump Boots room (be warned – they’re not connected, even though you can see the expansions on either side!), destroy two Wallfires and then shoot the breakable blocks at the bottom to grab MISSILE EXPANSION #12.

Missile Expansion #13
Requirements: Bombs
Location: Phase 3 (The Waterworks)
Immediately after grabbing the High Jump Boots, lay a bomb on the floor to get yourself under the Statue. Spring Ball jump towards the wall and you’ll find yourself in another little tunnel. Lay some bombs, roll through, and what do you know – it’s the expansions from earlier! Jump up to the ledge and shoot the blocks below you to grab MISSILE EXPANSION #13.

Missile Expansion #14
Requirements: Spider Ball, Bombs
Location: Phase 3 (The Waterworks)
When you’ve made your way back outside the Hydro Station and are ready to rock, head left across the ruined bridge and through the leftside passageway. You’ll be in a vertical shaft with a bunch of floating platforms now. Start climbing up and keep going until you see a passageway in the top right corner. Head through and you’ll be back in the giant room with the Hydro Station, Morph down and use your Spring Ball to jump up and stick to the ceiling above the passageway you entered from.
There’ s another expansion hidden here, but it’s tricky to spot, so use the below video to help you out! Basically, you want to roll alongside the wall and keep rolling until you’re in a little groove where the ceiling is flat for a second. You’ll want to lay a bomb here, but be careful – obviously your bomb will deactivate your Spider Ball! The best trick is to lay the bomb and as soon as it detonates, activate the Spider Ball again; you’ll start to “climb” up. Lay about 5 or 6 bombs and you’ll enter a tunnel; roll over to the right to grab MISSILE EXPANSION #14!

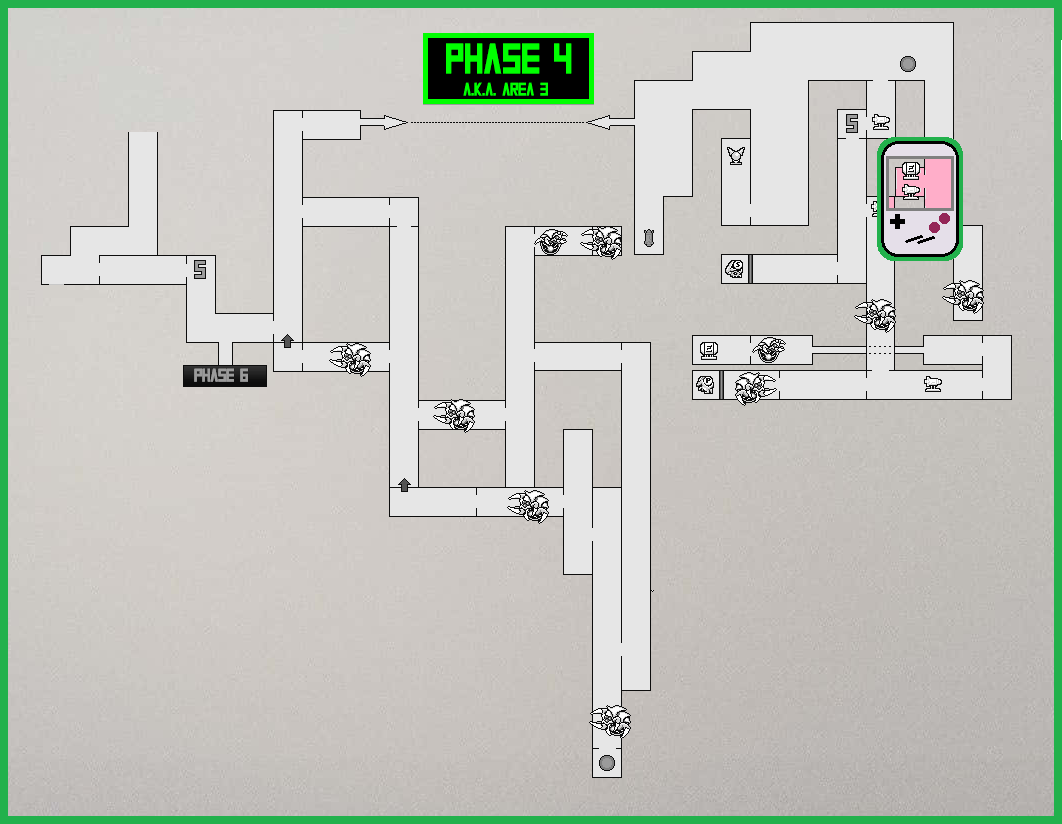
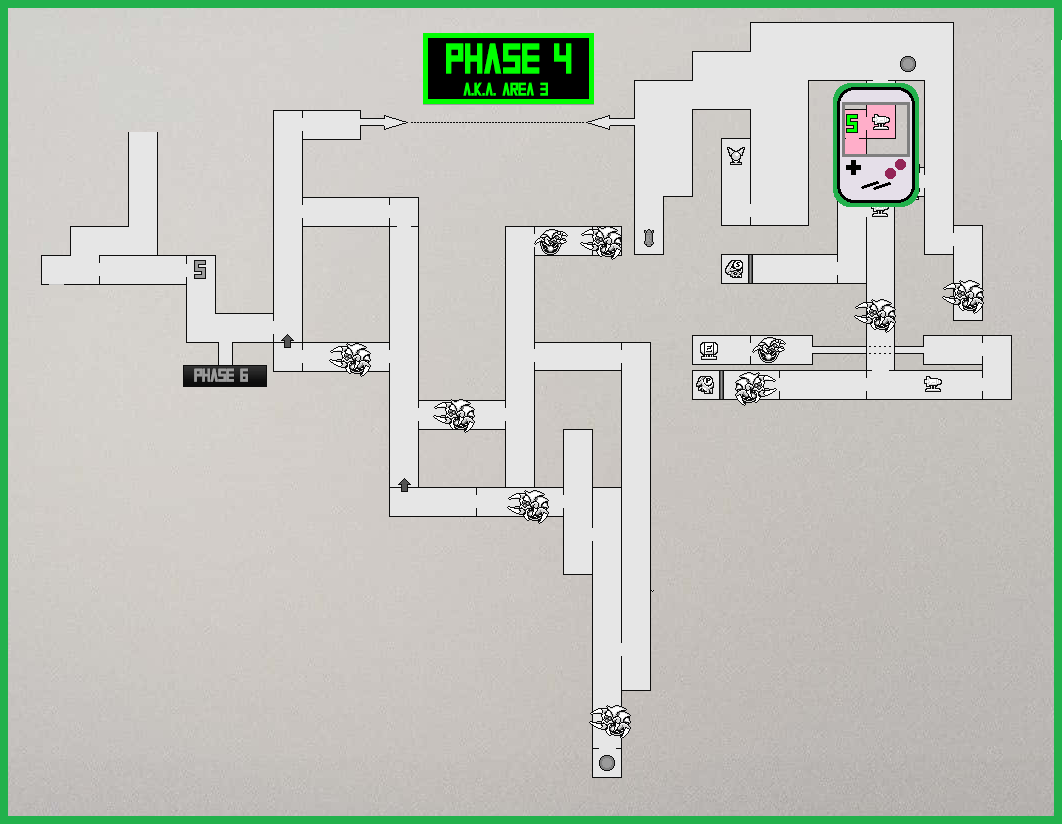
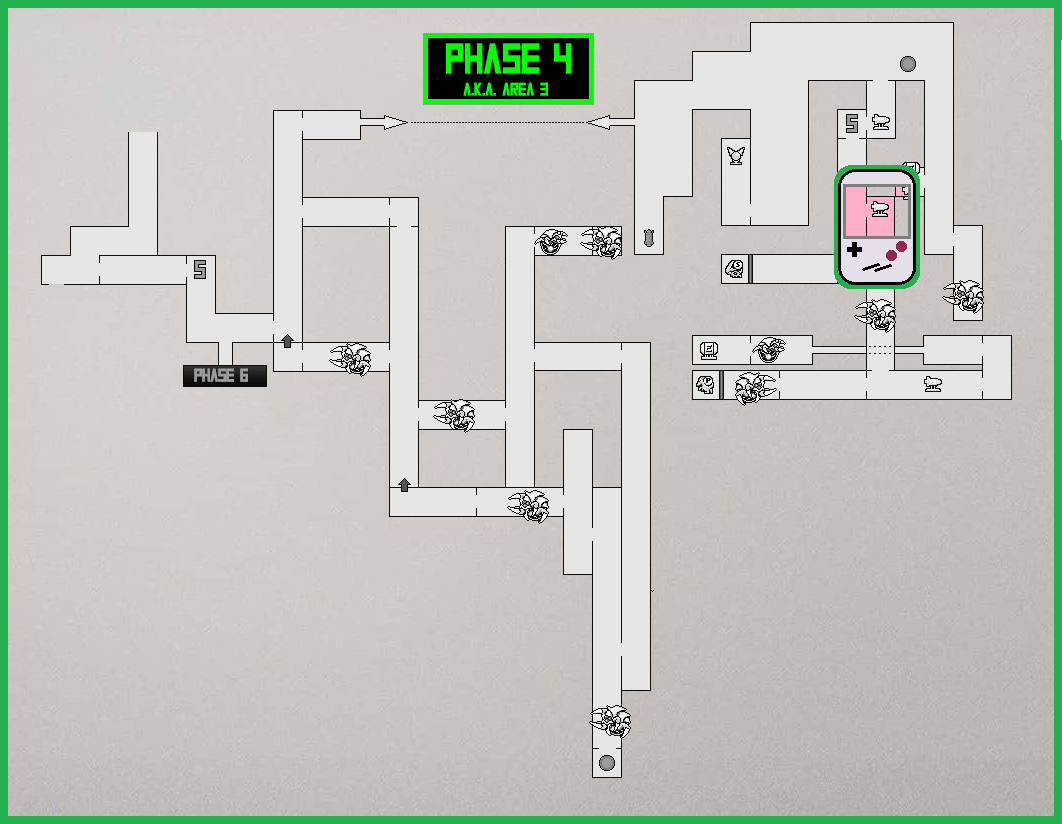
Missile Expansion #15
Requirements: Space Jump, Spider Ball, Bombs, Spring Ball (recommended)
Location: Phase 4 (The Complex)
Space Jump to the right side of the Complex, drop down and stick to the right side. There will be a bunch of robotic enemies called Proboscum’s alongside the wall and you’ll be able to stand on them for a moment before they give away. Drop down to the fourth Protoscrum and enter Morph Ball form; you’ll have about three seconds, so JUMP to the other side and use your Spider Ball to stick to the wall!
If you did that right, you’ll be sticking to the outside of the Complex and you should see a missile expansion. Roll up a bit and bomb the block covering up a tunnel that will lead you inside. Roll forwards a bit, bomb the block in your way, and jump across to grab ENERGY TANK #3! After that, drop down below where the Tank was and roll towards the right. You’ll roll directly into MISSILE EXPANSION #15!
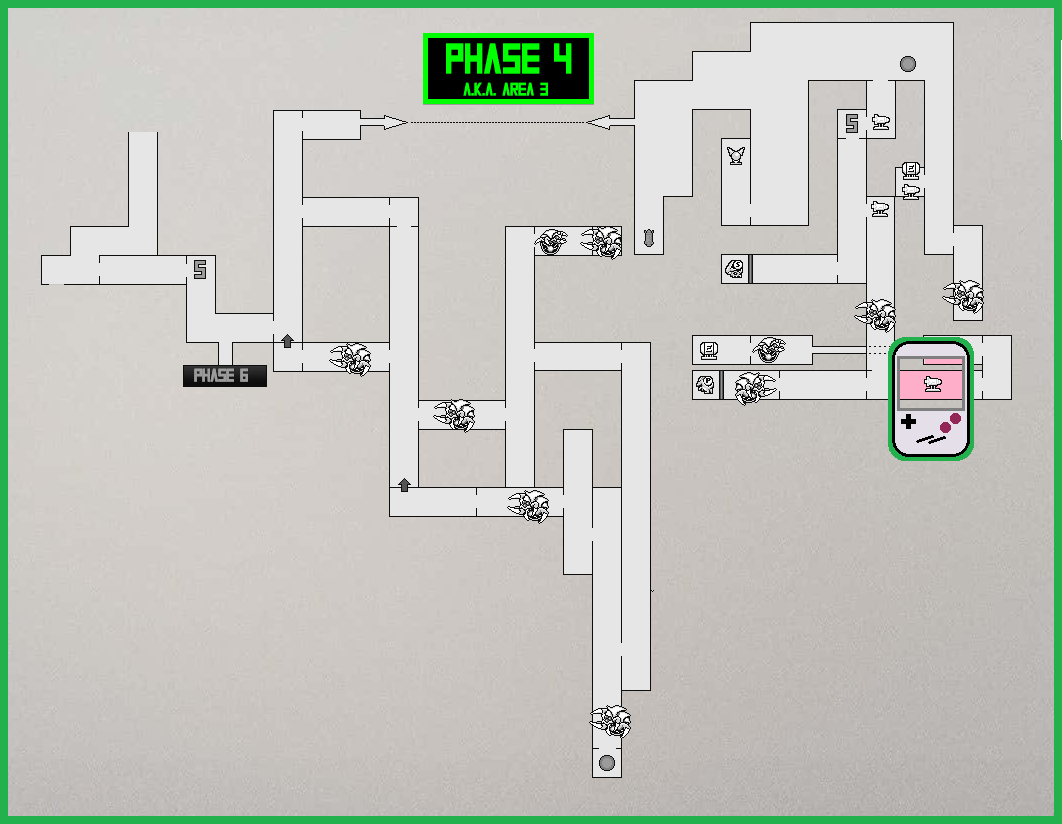
Missile Expansion #16
Requirements: None
Location: Phase 4 (The Complex)
Enter the Complex using the opening at the top. You’ll drop down into another giant pit of sand, so start shooting it so you can drop down (is it just me, or does anyone have this strange impulsive need to shoot away all of the sand? Anyone??). Near the bottom of the pit, you’ll actually uncover MISSILE EXPANSION #16 buried within the sand, so grab it!
Missile Expansion #17
Requirements: Spider Ball, Bombs
Location: Phase 4 (The Complex)
From the Spazer Beam room, get yourself over to the vertical shaft that leads you to the lowest part of the Complex. There will be a Gamma Metroid for you to destroy, but after you’re done, ump to the top of the room and use your Spider Ball to stick to the roof. Lay a bomb and you’ll be able to slip into the top portion of the room, where a hidden tunnel on the left wall will lead you right to MISSILE EXPANSION #17!
Missile Expansion #18
Requirements: None
Location: Phase 4 (The Complex)
Head right from the Plasma Beam and go back to where you landed; you’ll see a Metroid husk buried in the sand. Walk forwards a bit and you’ll see MISSILE EXPANSION #18 just sitting there for the taking!
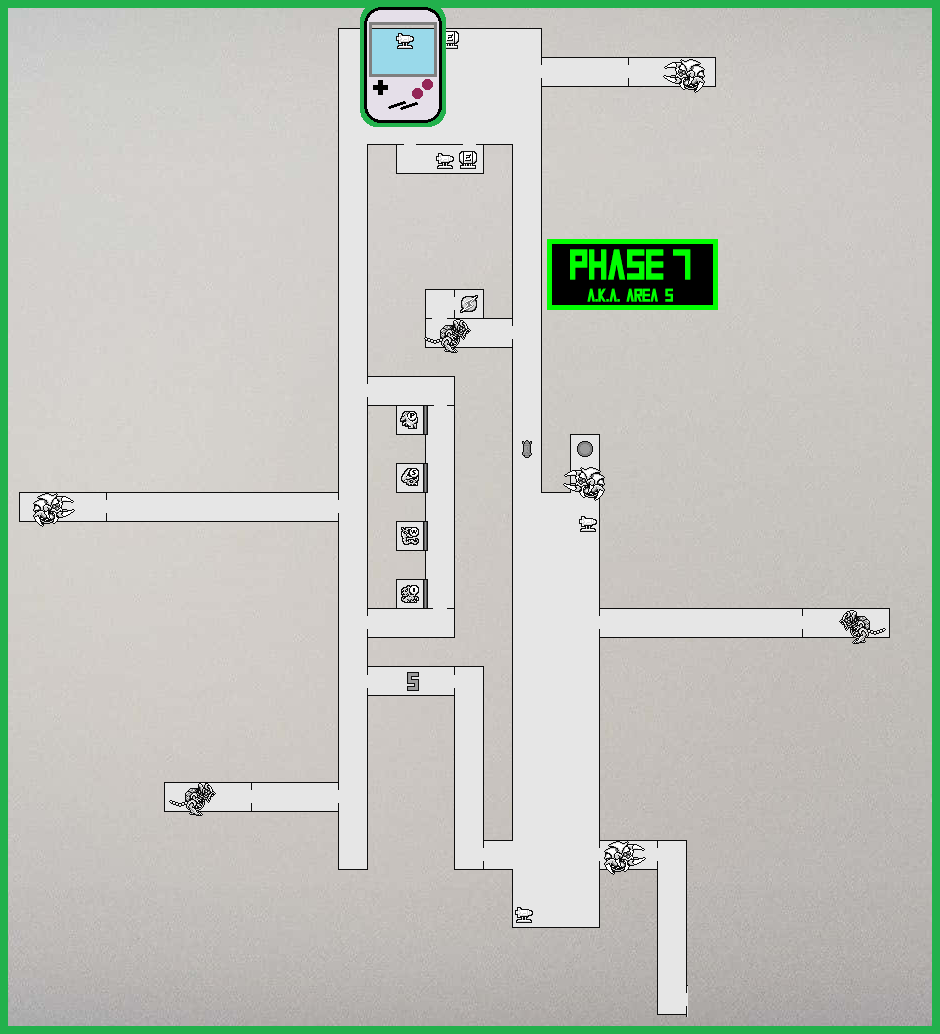
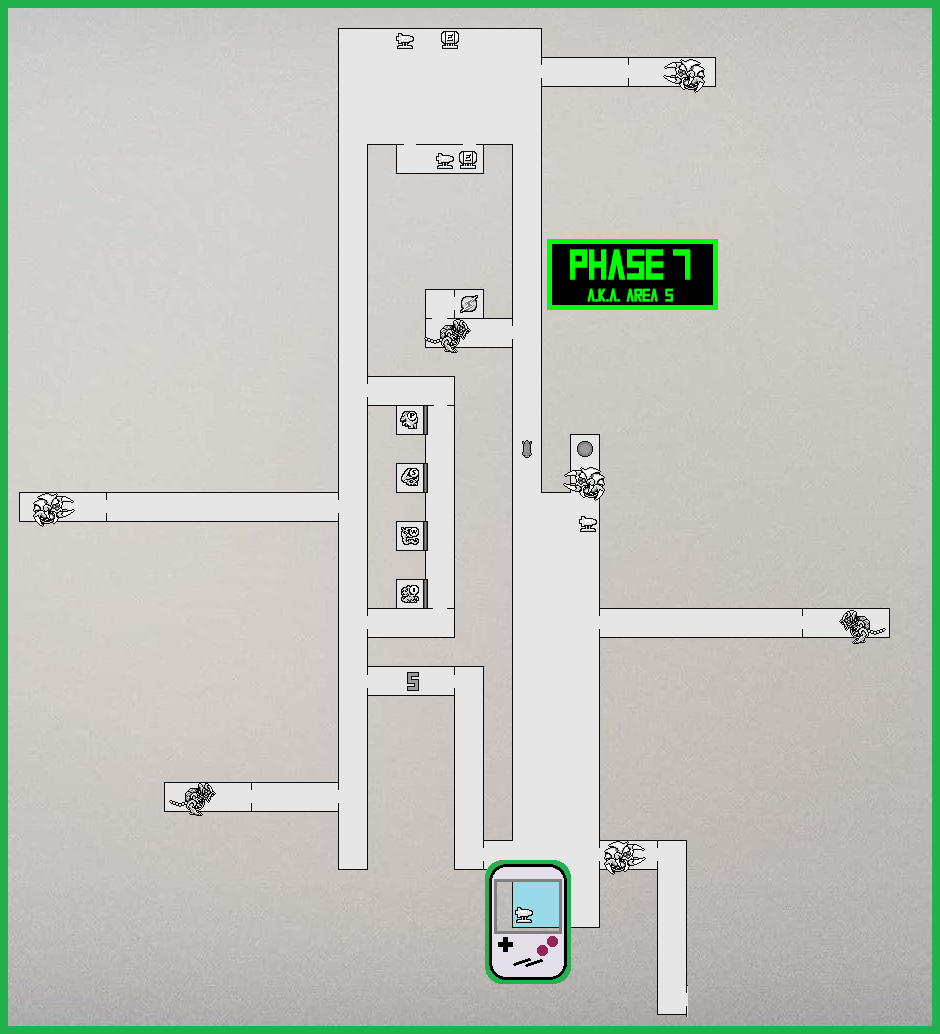
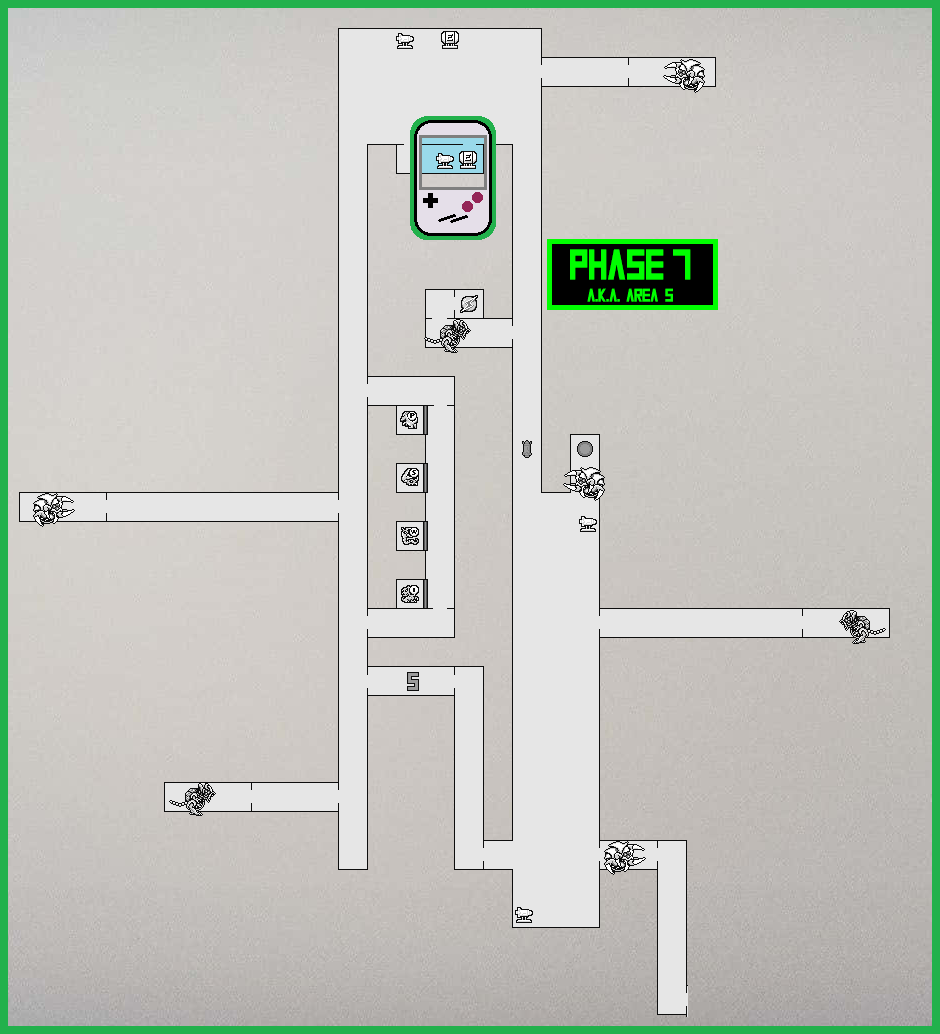
Missile Expansion #19
Requirements: None
Location: Phase 7 (The Tower)
The first thing you’ll want to do when entering the Tower is drop through the second Metroid husk into the water. Head left and you’ll see a Morph Ball tunnel; roll through and you’ll see MISSILE EXPANSION #19 sitting there!
Missile Expansion #20
Requirements: Space Jump, Bombs
Location: Phase 7 (The Tower)
Again from the entrance of the Tower, Space Jump upwards a ways, steering slightly to the right. You’ll see two ledges on the right wall – keep jumping until you get to the higher one. There should be a bunch of spikes on that upper ledge, but if you lay a bomb beside them on the rightside wall, a small tunnel will open up, allowing you to drop down and grab MISSILE EXPANSION #20.

Missile Expansion #21
Requirements: Bombs
Location: Phase 7 (The Tower)
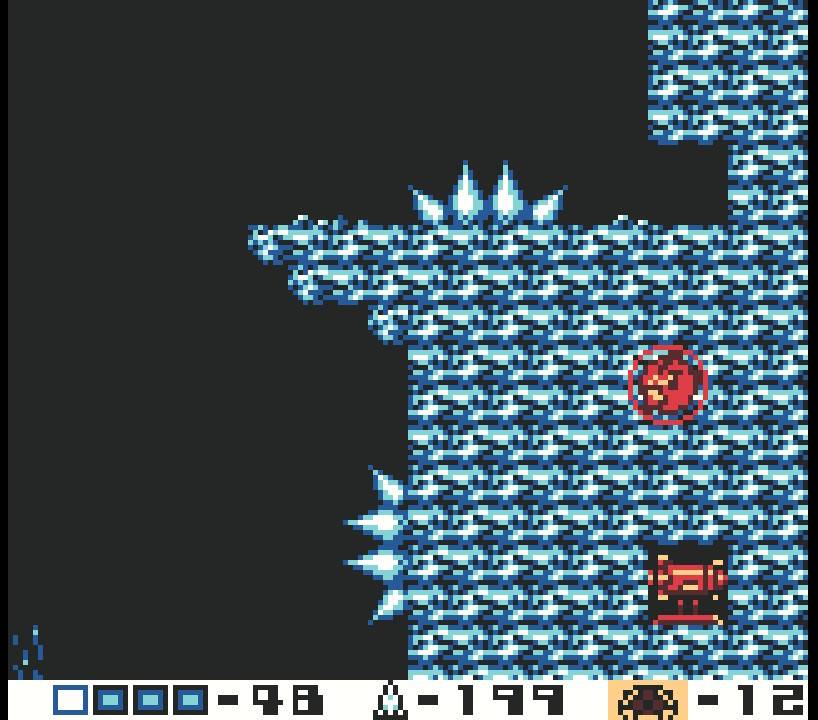
Get to the roof of the Tower and you should see an opening. Drop down and the screen will be completely black, which will make navigation here a bit tricky to say the least. A good way to keep track of if you are moving or not is to lay bombs when you’re rolling – they’ll tell you if you’re actually moving forwards or not! To get what we need, you’ll want to 1) land! 2) roll to the right as far as you can – you’ll be able to see an expansion under you when you reach the end. 3) jump up and activate your Spider Ball. You’ll pop out outside beneath a Metroid husk and ENERGY TANK #5! 4) Drop back down and roll back to the beginning. Lay a bomb and you should see yourself drop down. Roll to the right to grab MISSILE EXPANSION #21! 6) Get the heck out of the tunnel!
Missile Expansion #22
Requirements: Spider Ball, Bombs
Location: Phase 7 (The Tower)
Space Jump to the top left corner of the Tower room and get on the top most ledge. Activate your Spider Ball and start crawling towards the roof. Lay a bomb at the first little flat portion of the wall and you’ll see the beginnings of a tunnel. Just like we did earlier, what you’ll probably find easier is just laying a bomb, letting it explode to take out the next block above you and just quickly reactivating your Spider Ball as you go up. Do this enough times and you’ll reach a tunnel at the very top that will house the last two expansions of the game – MISSILE TANK #22 and ENERGY TANK #6.