Metroid Fusion Walkthrough – Missile Expansions
Here you’ll find the location for every Missile Expansion in Metroid Fusion, as well as detailed explanations on how to get them and what powerups you’ll need. This list is ordered by way of progression; for a list of Missile Expansions by area, click here.
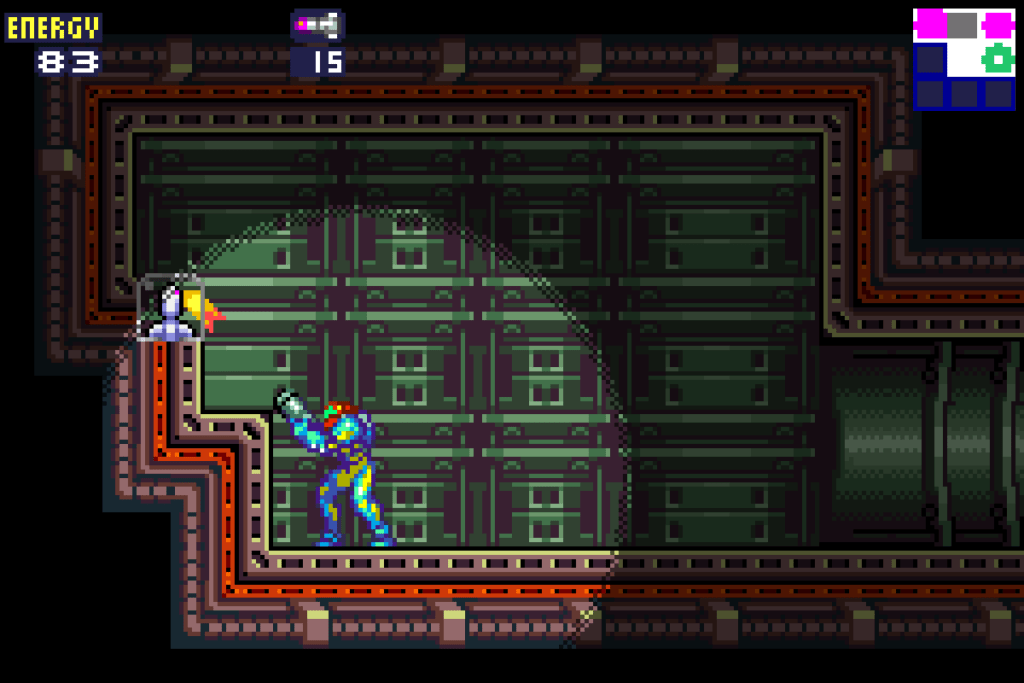
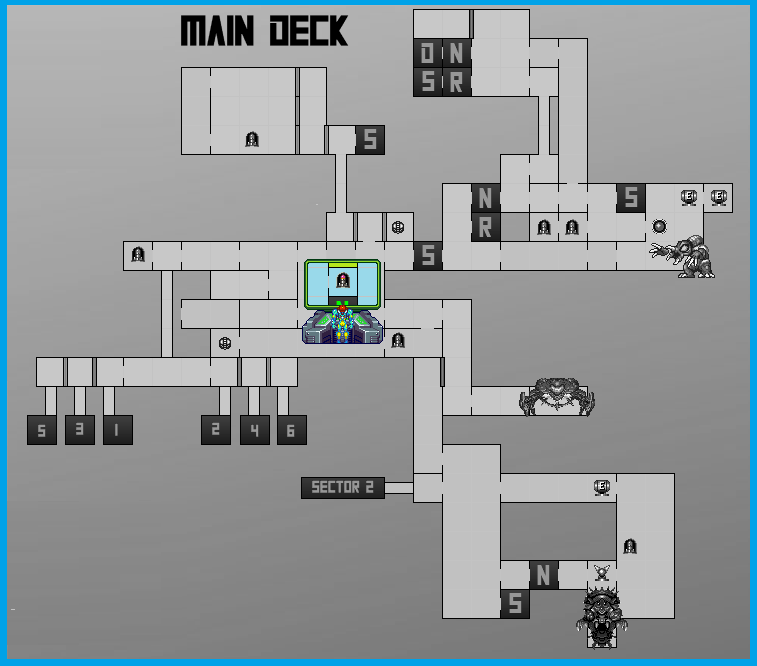
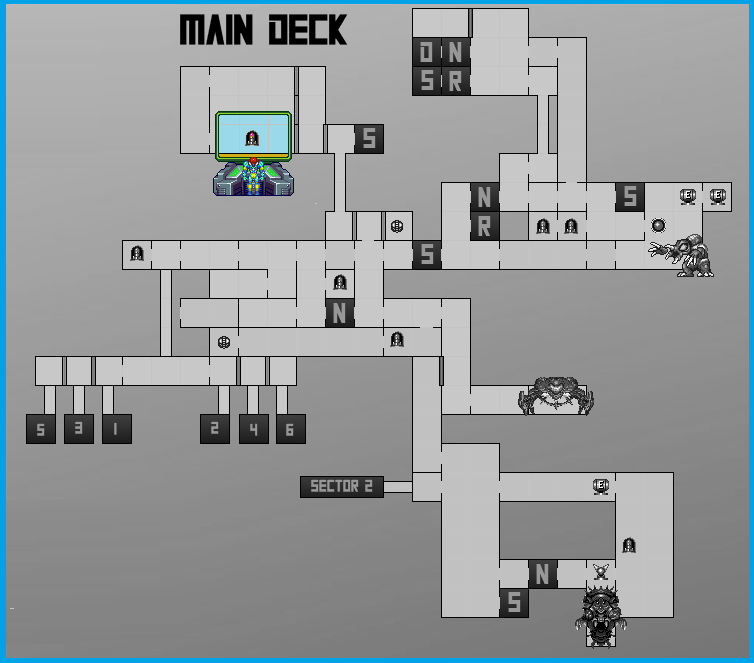
Missile Expansion #1
Location: Main Deck
Requirements: Missiles
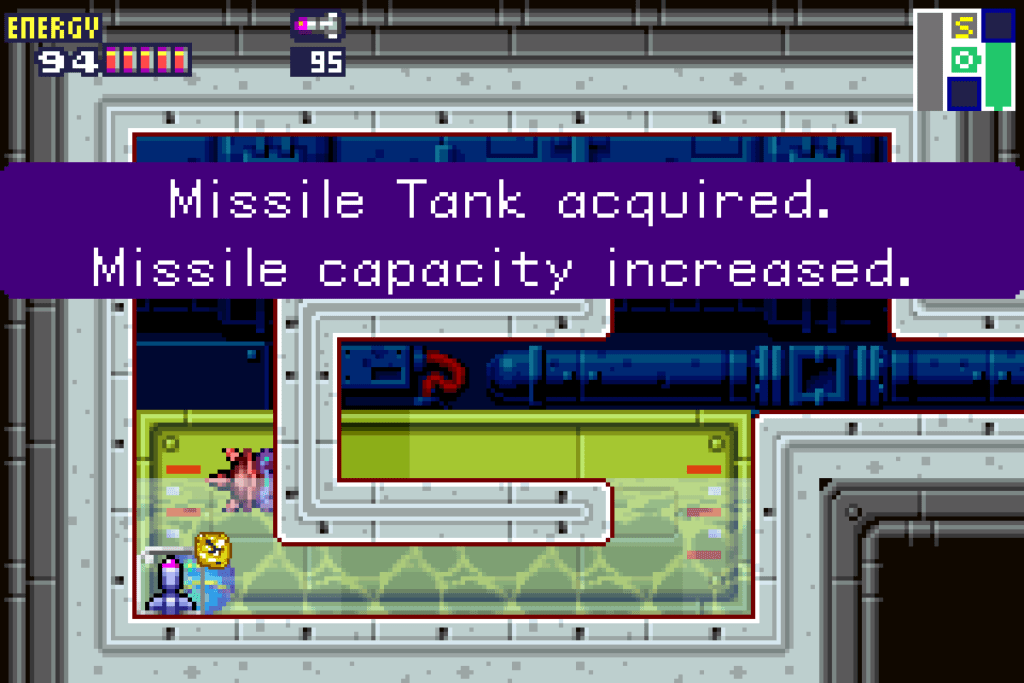
Starting from the Operations Room, jump across the two platforms, and then blast that metal, shiny door on the wall with your new Missiles to reveal a secret passage! Oooooh! We’ll run into another one of those gross slimy sac things; blast it in the center with three Missiles and it will disintegrate. Drop down in the tunnel, shooting the cracked walls in front of you and climbing on the ladders on the wall. Keep dropping down past some giant wires until you fall right beside MISSILE EXPANSION #1!
Missile Expansion #2
Location: Main Deck
Requirements: None
Run to the room to the left of where you picked up Missiles Expansion #1 and shoot the top ledge to reveal MISSILE EXPANSION #2.
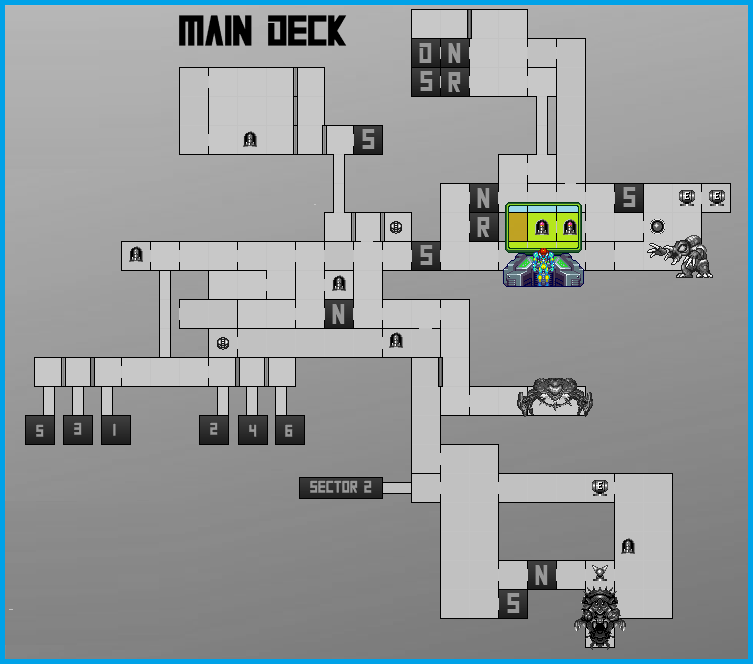
Missile Expansion #3
Location: Main Deck
Requirements: Morph Ball
In the Main Deck, from the Navigation Room in the middle, exit to the left and head up. Stop when you see a small tunnel about halfway up this corridor, get into Morph Ball form and slide under to pick up MISSILE EXPANSION #3.
Missile Expansion #4
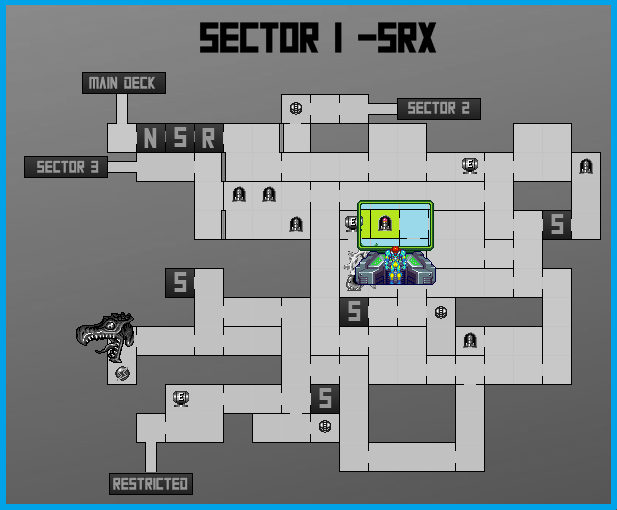
Location: Sector 1 (SRX)
Requirements: None
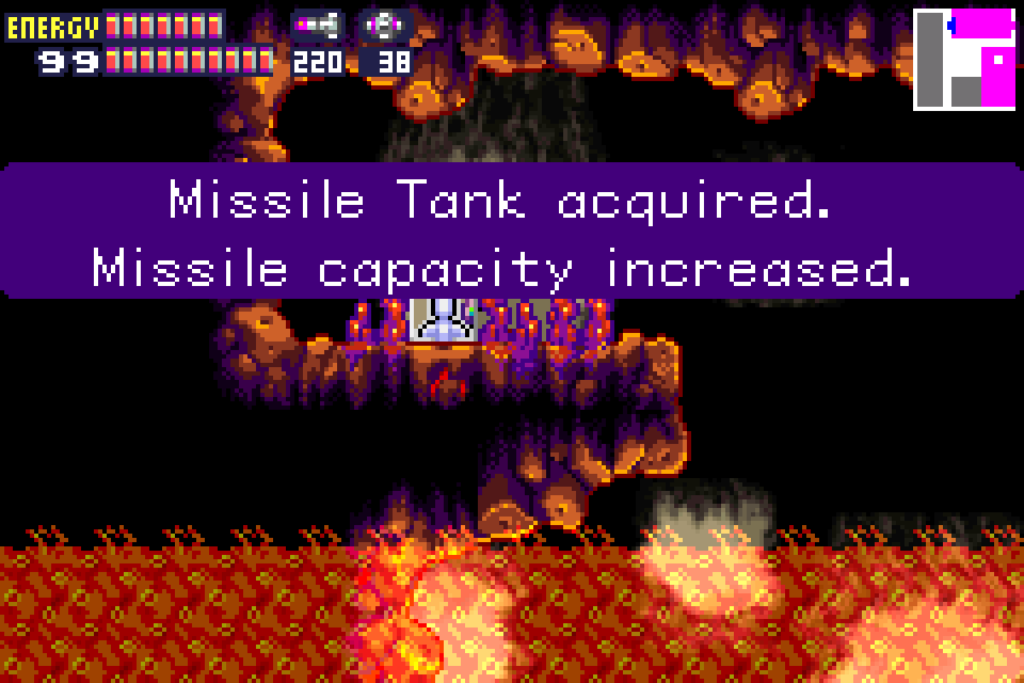
Once you’re out of the second atmospheric stabilizer room, you can drop down the shaft that we previously jumped over. From here, we’re going to drop halfway down this shaft and then enter a long hallway to our left. This room is filled with some pretty nasty creatures named Moto’s. These guys will try and ram you, but a well timed jump and a single Missile to their exposed backside should take care of them quite nicely. Work your way to the end of the room, and exit left. You’ll be in another long vertical hallway, but before we drop down, jump over and enter the room to your left.
You’ll see a ton of lava in this room, with what goes without saying, we want to avoid. Jump up to the ceiling and grab the monkey bars (that’s what they are, right!?) and climb over until you see a platform. Drop down and snag MISSILE EXPANSION #4.

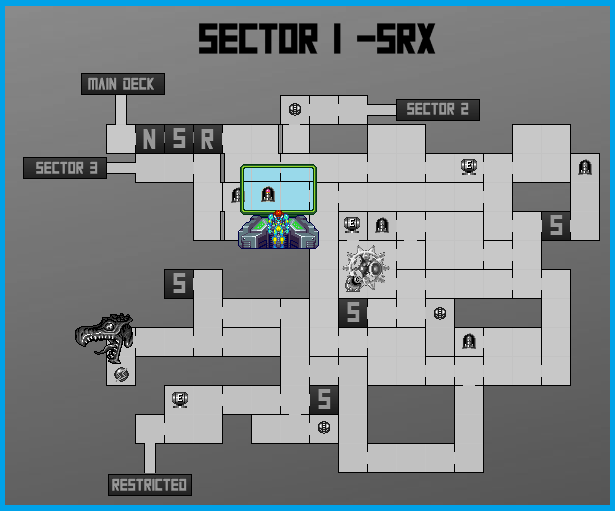
Missile Expansion #5
Location: Sector 1 (SRX)
Requirements: None
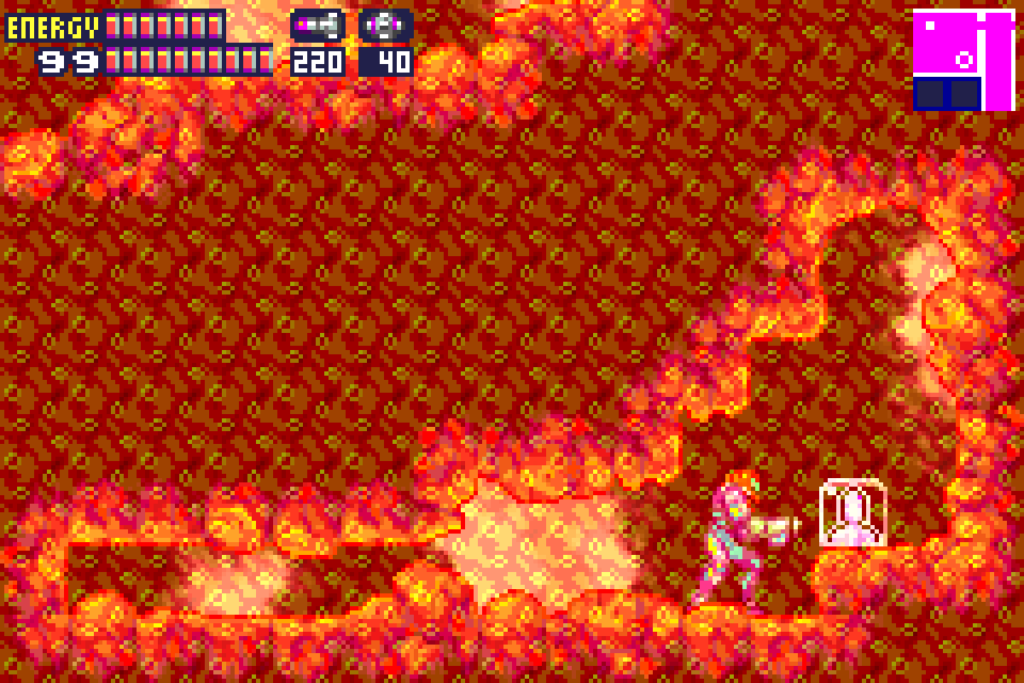
Once the fourth atmospheric stabilizer is back online, in the same room, head over to the upper left door, which is now unlocked. Pop in and grab MISSILE EXPANSION #5.
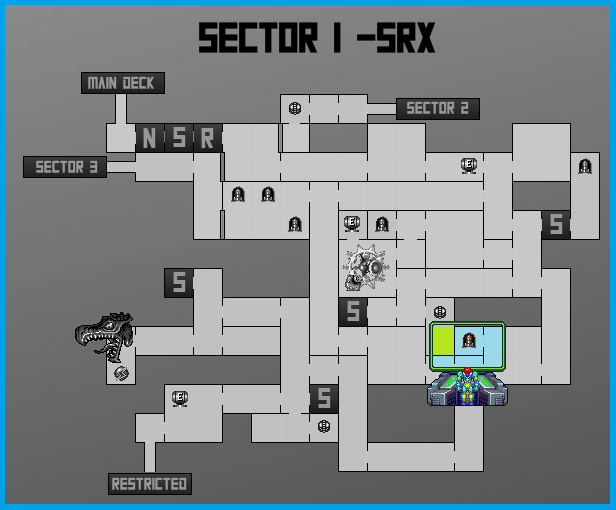
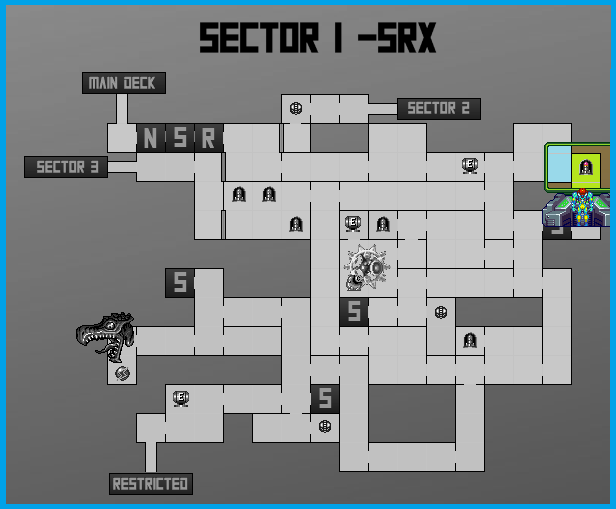
Missile Expansion #6
Location: Sector 1 (SRX)
Requirements: Missiles
From the room where you fought Elephant Bird, head out through the top right door. Shoot the middle part of the ceiling in this next room and jump up. You’ll see some monkey bars at the top of this room. Jump up and fire a couple Missiles to the left side of the wall, revealing a passage. Crawl through and eliminate all the creatures in this room, picking up MISSILE EXPANSION #6 at the bottom.
Missile Expansion #7
Location: Sector 1 (SRX)
Requirements: None (wall jumping is required early, or Space Jump for later)
In the Save Room on the far right of Sector 1, you’ll notice part of the wall is cracked. Shoot it and roll through. Note, you’ll have to jump in the air and press down twice at the apex of your jump to get the Morph Ball inside.
Now, this can be a little tricky, and if you want to come back later in the game once we have the Space Jump, that’s totally fine. BUT, if not, let’s get that expansion.
You’ll want to wall jump (see Special Abilities for a breakdown on what that is and how to do it) up to the very top of the room and snag MISSILE EXPANSION #7. Don’t worry if this takes you a few tries; wall jumping in this game feels very different than in Super Metroid, so it can be tricky.
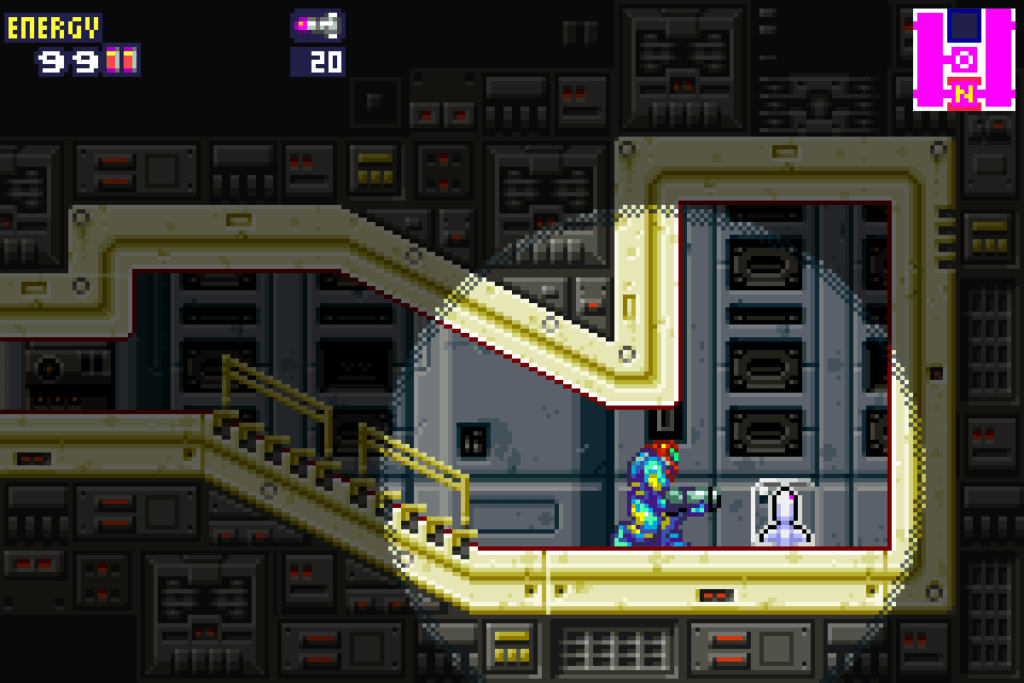
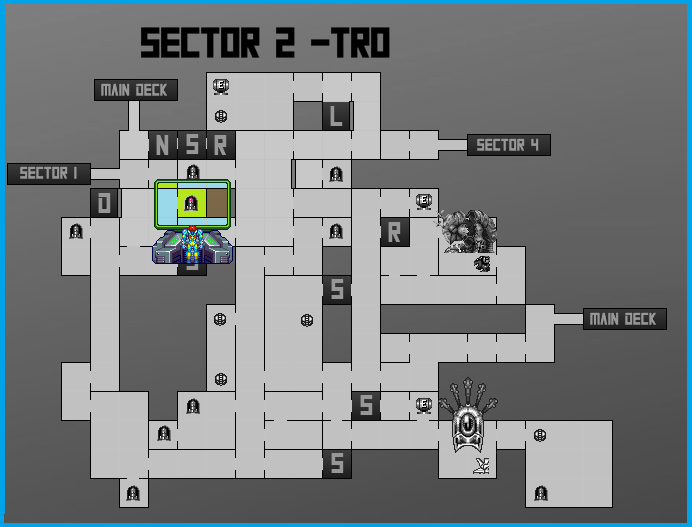
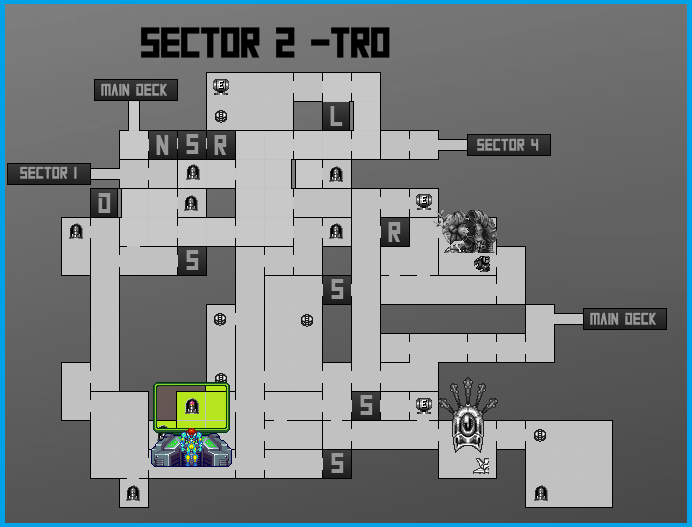
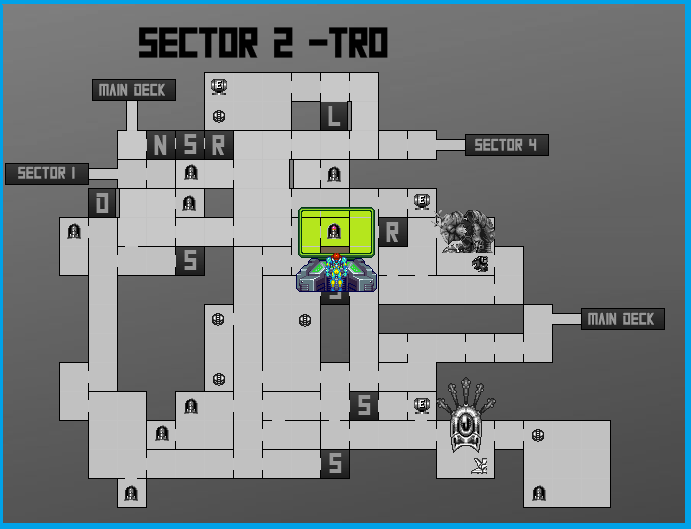
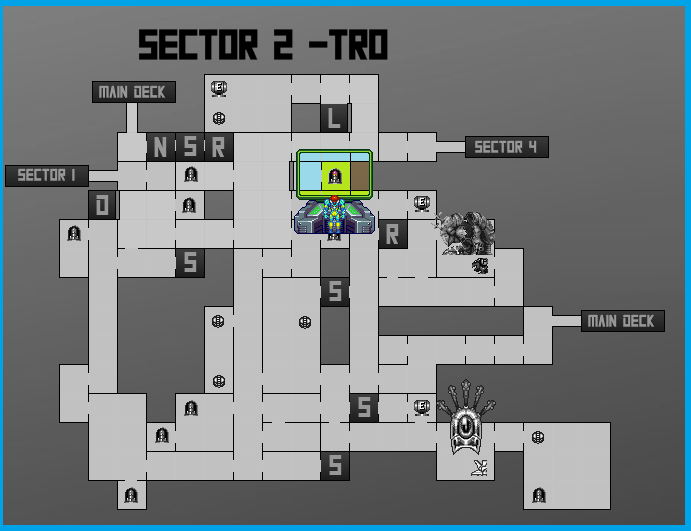
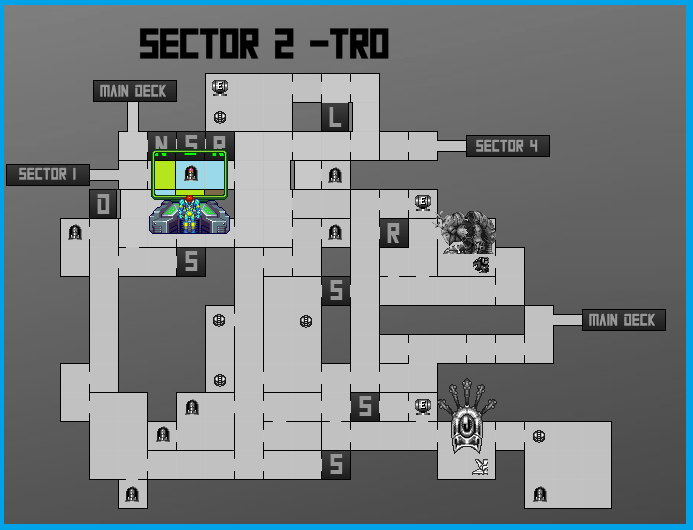
Missile Expansion #8
Location: Sector 2 (TRO)
Requirements: Bombs
From the Data Room in Sector 2, you’ll see the doorway to this room has been destroyed by the SA-X, so we’ll have to find another way out. First things first though, in the upper right ledge, you’ll notice a small line of blocks on the bottom that is just waiting to be bombed. Bomb the wall, roll through and grab MISSILE EXPANSION #8.
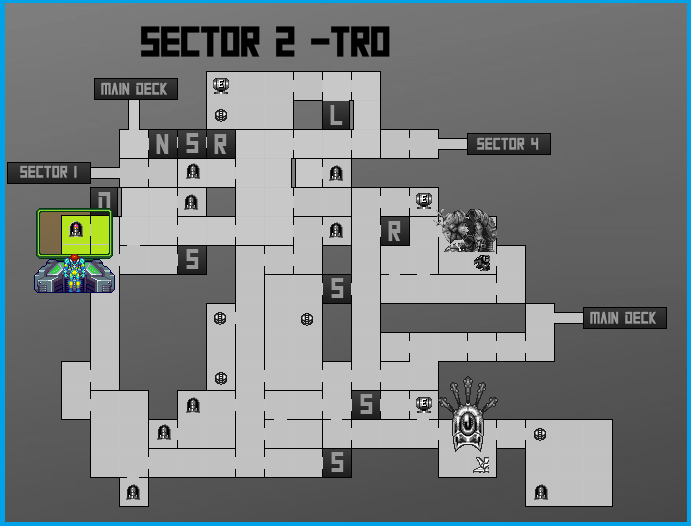
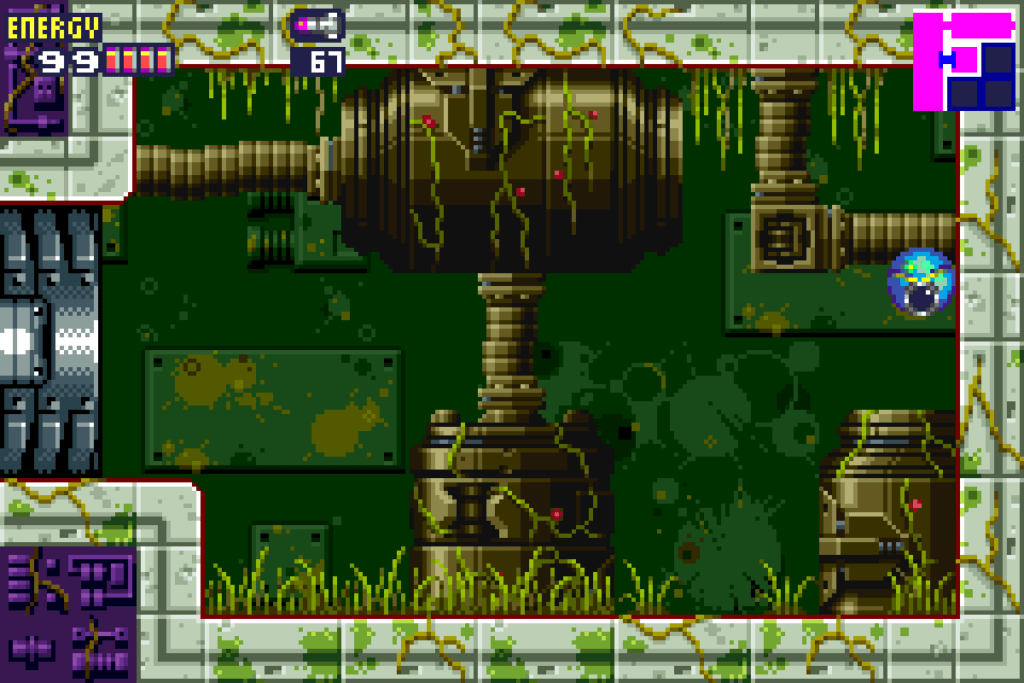
Missile Expansion #9
Location: Sector 2 (TRO)
Requirements: Bombs
Right underneath the Data Room, you’ll see a bunch of blocks on the ground. Bomb the one closest to the wall and a metal spire will rise up; get on top of it and shoot the wall to the left, where you’ll see a tunnel appear. Pop through and you’ll be in a new room with a single brick rising from the ground. Bomb the floor to the left of the brick and another metal spire will rise up. Jump on it and grab MISSILE EXPANSION #9.
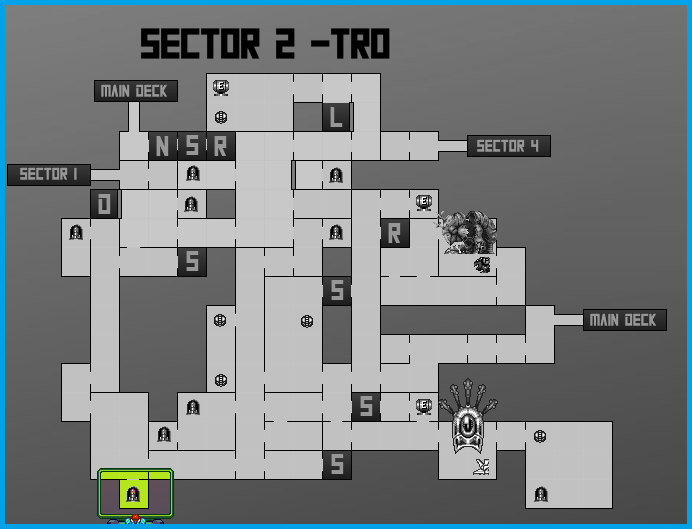
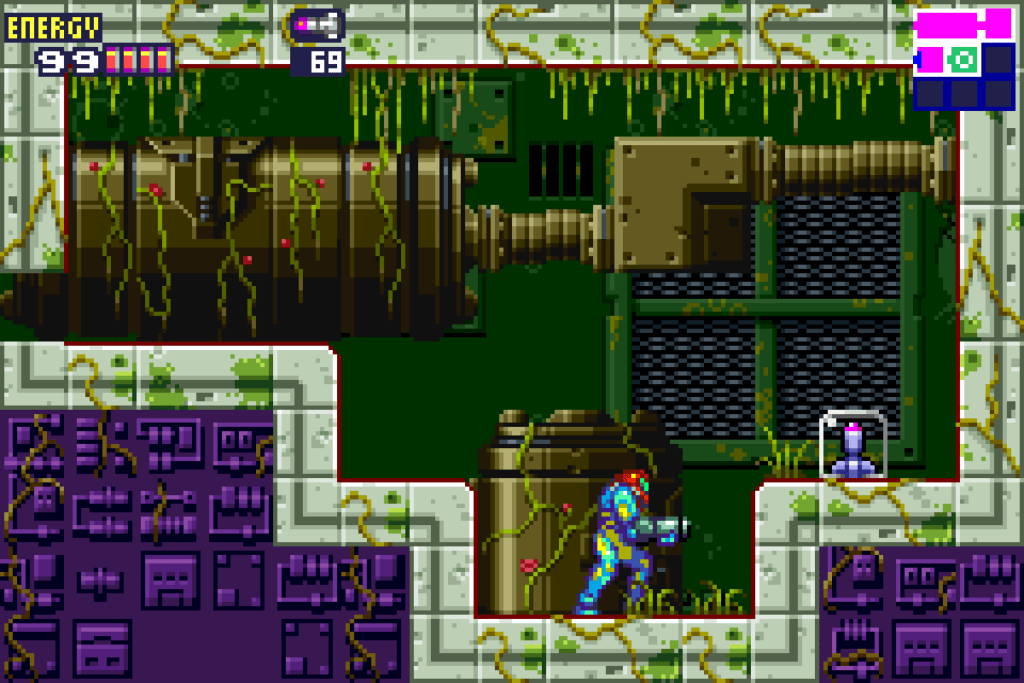
Missile Expansion #10
Location: Sector 2 (TRO)
Requirements: Bombs
From the Plant Room, work your way down, but heads up, there are a few enemies in here we’ll want to take note of. First is the Kihunter; we’ve seen him before, but he’s gonna hit harder than you might remember, and he shoots out bullets going sideways, so watch out. Second, at the bottom you’ll see your standard red slugs (they’re called Zero’s, but I just like calling ‘em slugs) but you’ll also notice a single blue one. With this particular blue slug, you’ll probably need a dozen Missiles to kill it. Once he’s gone, don’t leave this little alcove yet. Bomb the floor on the right most side, right under the ledge to get out, and the ground will give away, leading you down to find MISSILE EXPANSION #10.
Missile Expansion #11
Location: Sector 2 (TRO)
Requirements: Hi-Jump Boots
In the Plant Shaft Room, get yourself up to the second door from the bottom on your left. You’ll enter a large room full of water. Our new Hi-Jump boots will let us jump way up, grab the monkey bars, and mosey on over to grab MISSILE EXPANSION #11.
Missile Expansion #12
Location: Sector 2 (TRO)
Requirements: Bombs
Starting in the Plant Shaft room, move upwards, using those disgusting insect sacs as platforms to help you on your way up. When you get to the very top, don’t forget that you can now jump in Morph Ball mode! I’ve seen a few people get stuck here, but don’t worry, just jump up and lay a bomb. Pass through and then go straight through to another mossy hallway. Here, you’ll see two ledges that you can grab onto. Jump up to the second highest ledge on the right and roll into the little space there, Bomb the wall and you’ll be able to grab MISSILE EXPANSION #12.
Missile Expansion #13
Location: Sector 2 (TRO)
Requirements: Bombs
From the “main” room directly after the Navigation, Recharge, and Save Rooms, head on over to the blue door on the upper right. Clear that room of enemies, Springball jump on the side of the of the wall, lay a bomb, and roll over to grab MISSILE EXPANSION #13.
Missile Expansion #14
Location: Sector 2 (TRO)
Requirements: Hi-Jump Boots
From the “main” room directly after the Navigation, Recharge, and Save Rooms, head towards the small room directly under the Recharge Room. Jump over those giant worm looking beasts and grab MISSILE EXPANSION #14.

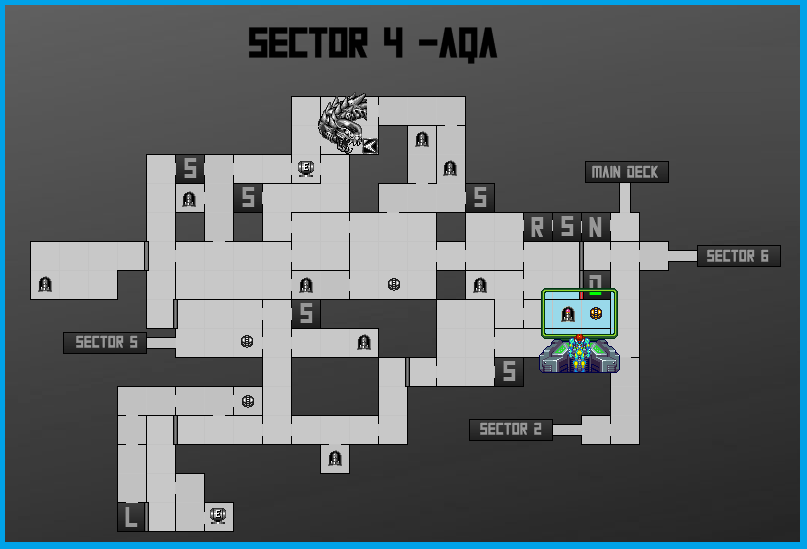
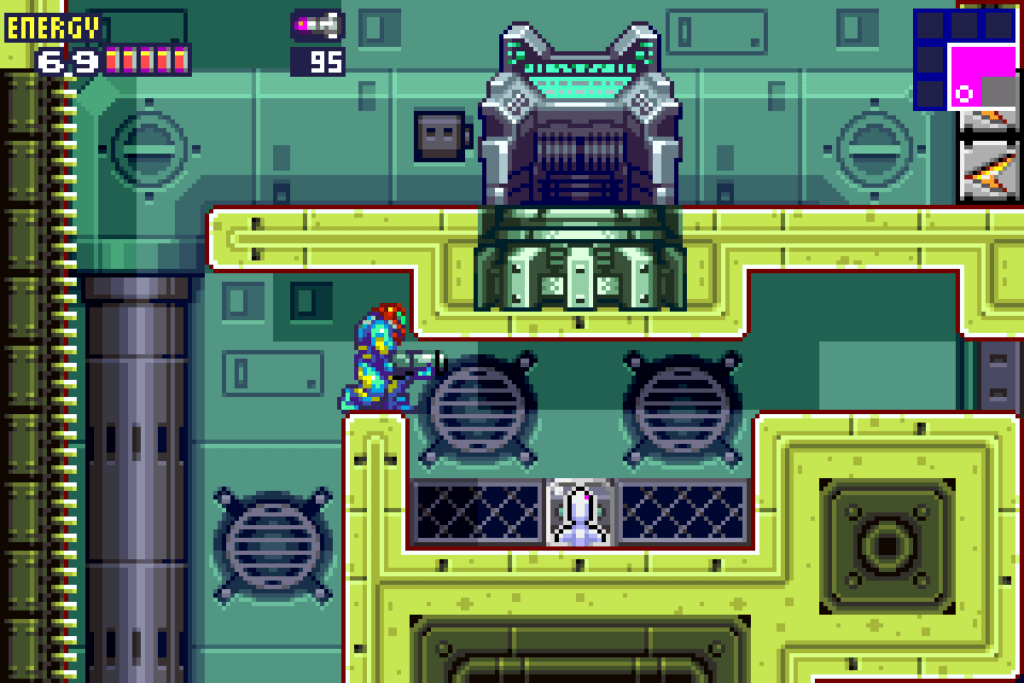
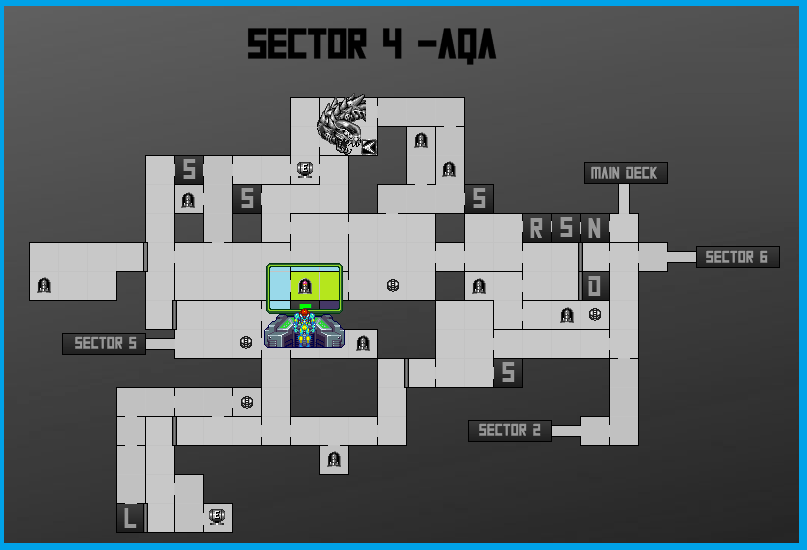
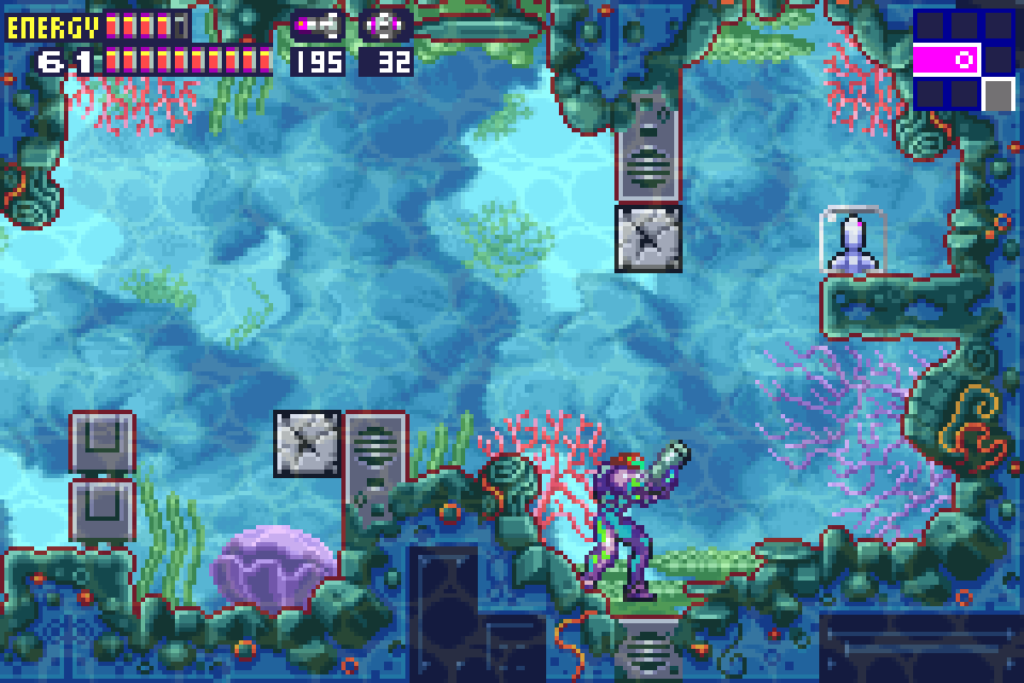
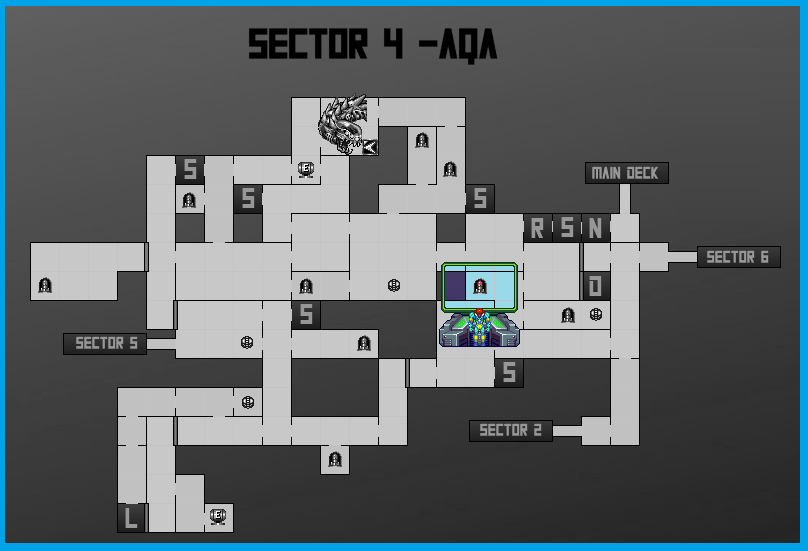
Missile Expansion #15
Location: Sector 4 (AQA)
Requirements: Bombs
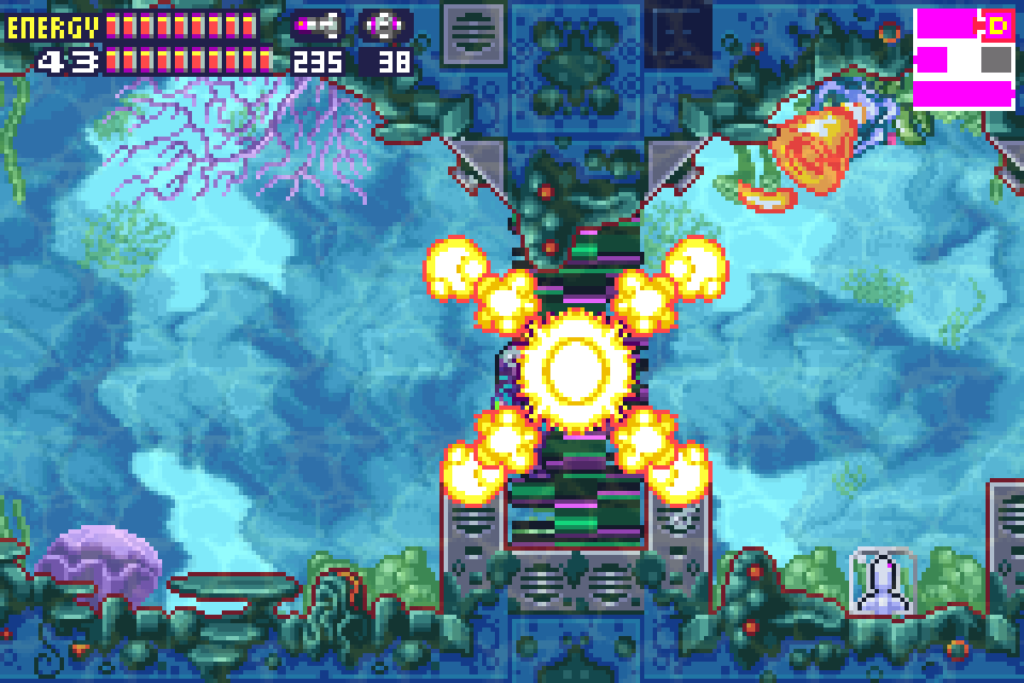
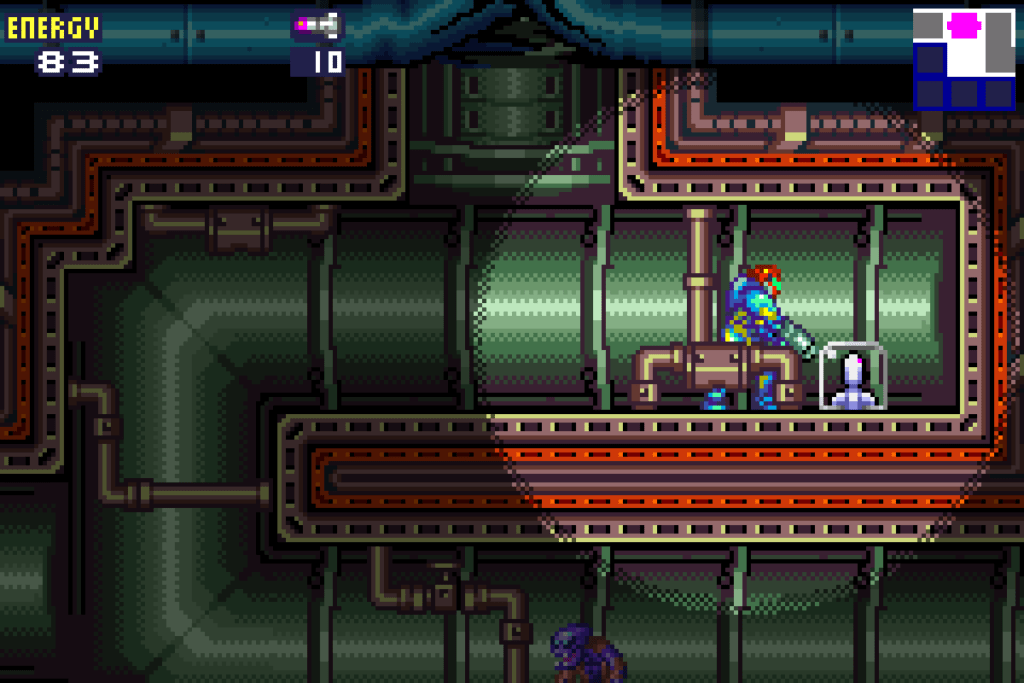
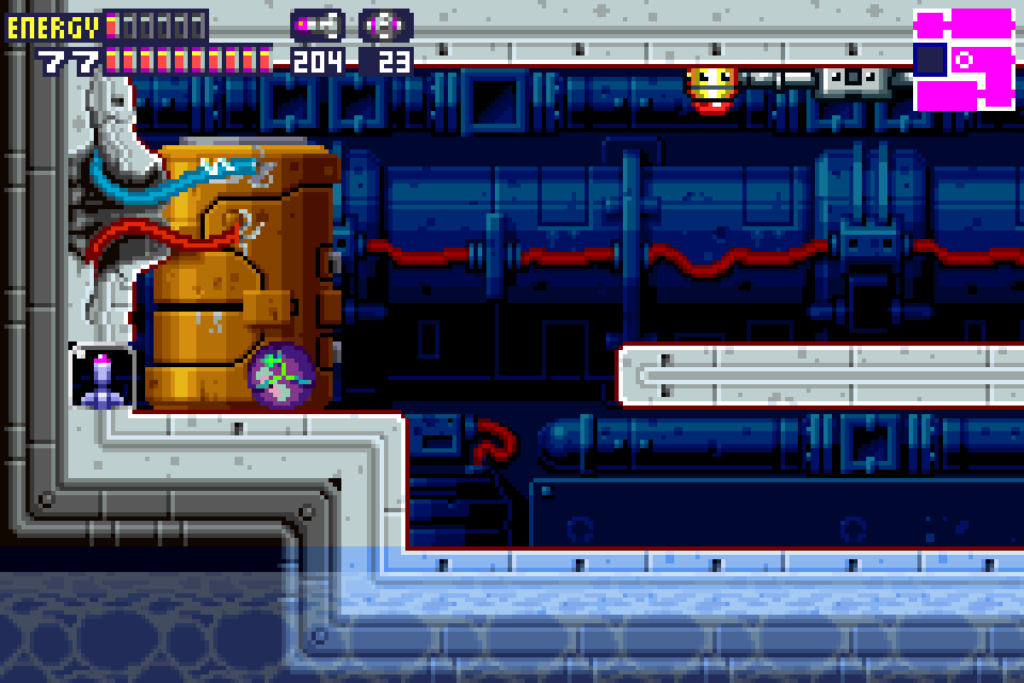
From the “main” room directly after the Navigation, Recharge, and Save Rooms, Head towards your left two rooms until you get to a large room with electric water and monkey bars at the top. Bomb the block blocking said monkey bars and then climb across as far as you can. You can drop down to some small platforms, but do not get in that electric water! Towards the middle of this room, you’ll see an opening in the ceiling. You’ll be in a giant room that wasn’t on the map, and it’s full of goodies! Press on to the other side of the room (you can go through the door and save your game if you want) and then wall jump up to the higher ledge. Bomb the center bit of the wall and watch it fade away, roll over and bomb the bottom the other section of the wall so the monkey bars are clear. Before you hop on, bomb the bottom left corner of the wall and you’ll find MISSILE EXPANSION #15. Hop on the monkey bars and shoot two Missiles to the wall; you can now roll through the opening to a little area below. Press on half a screen to the right, jump over the pit and jump up and shoot the upper right wall. Doing so will net you MISSILE EXPANSION #16.

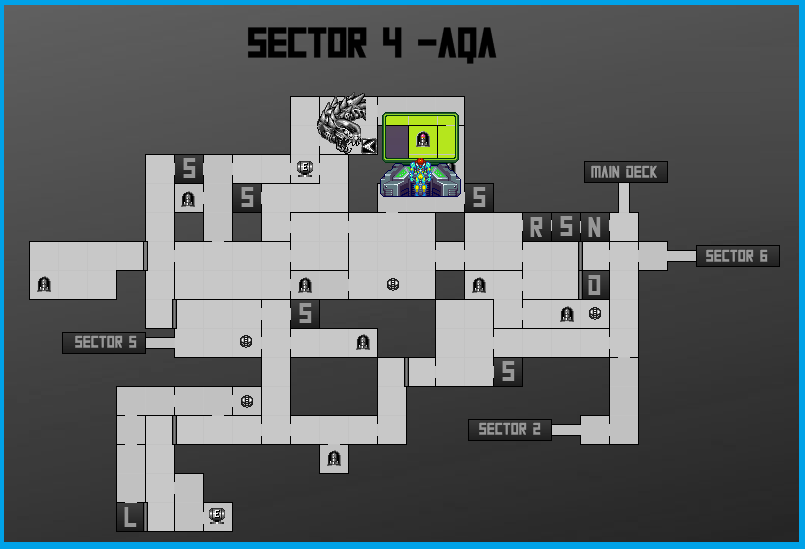
Missile Expansion #16
Location: Sector 4 (AQA)
Requirements: Missiles
See Missile Expansion #15
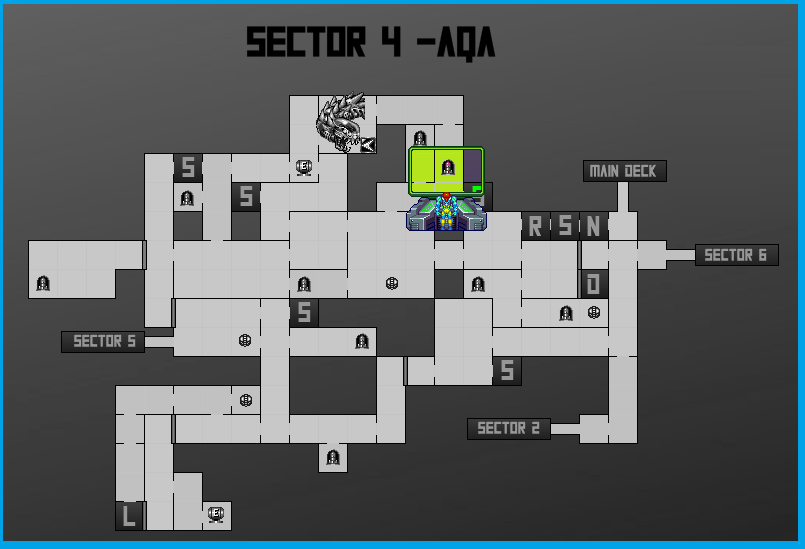
Missile Expansion #17
Location: Sector 4 (AQA)
Requirements: None
In the rectangular room to the right of the Pump Control room, you’ll see a break in the ceiling. Head up and you’ll be in another room not on the map. You’ll see a few more pits filled with water and monkey bars on either side of the room. At the top of the monkey bars on the left hand side, you can roll through an invisible wall (what is this, Maridia?!) to a secret room. Clear this room of enemies, roll over in the water and grab MISSILE EXPANSION #17.
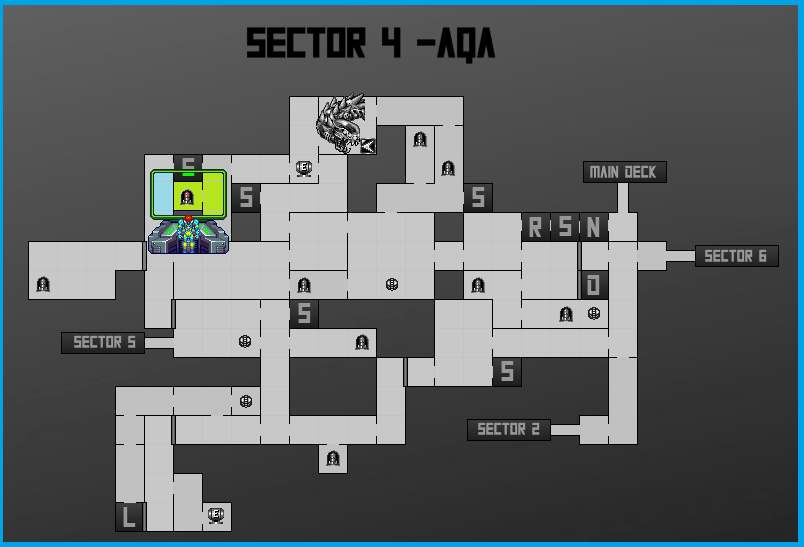
Missile Expansion #18
Location: Sector 4 (AQA)
Requirements: None
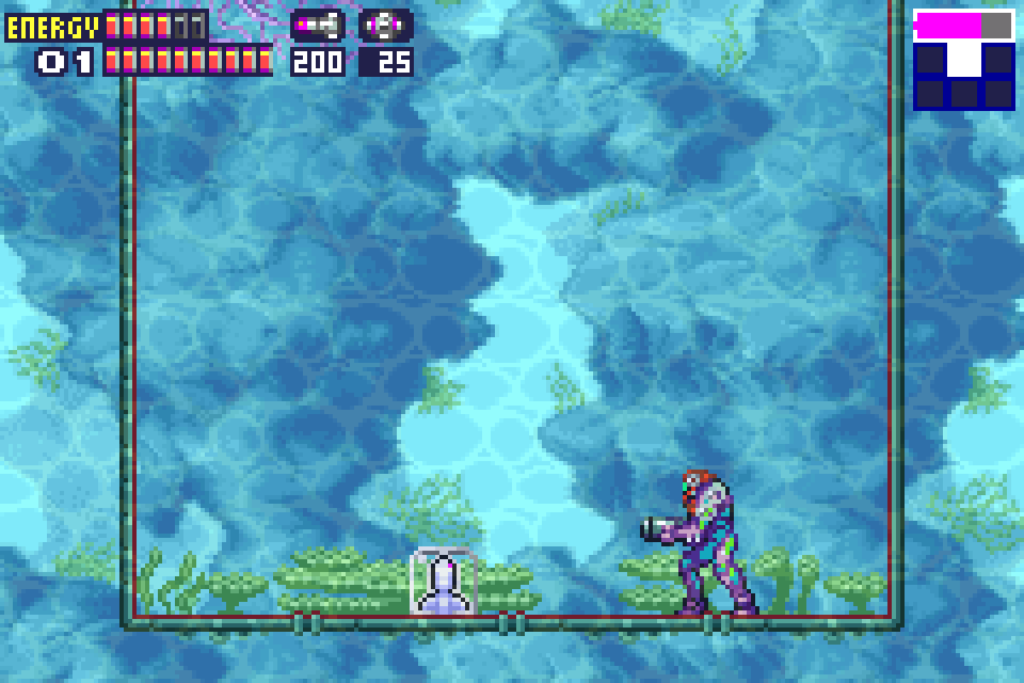
After you drain the water, directly under the Pump Control Unit is an easy, no work required MISSILE EXPANSION #18
Missile Expansion #19
Location: Sector 4 (AQA)
Requirements: Speed Booster
From the Pump Control room, make your way to the right. Once you get to the second room with exposed wires, drop down to the floor and get yourself over to the leftmost side of the room. You know what to do – start running!
You’ll go through a wall and see an expansion sitting in some water right above you. Stop your run, jump up, and trudge through the water to grab MISSILE EXPANSION #19.
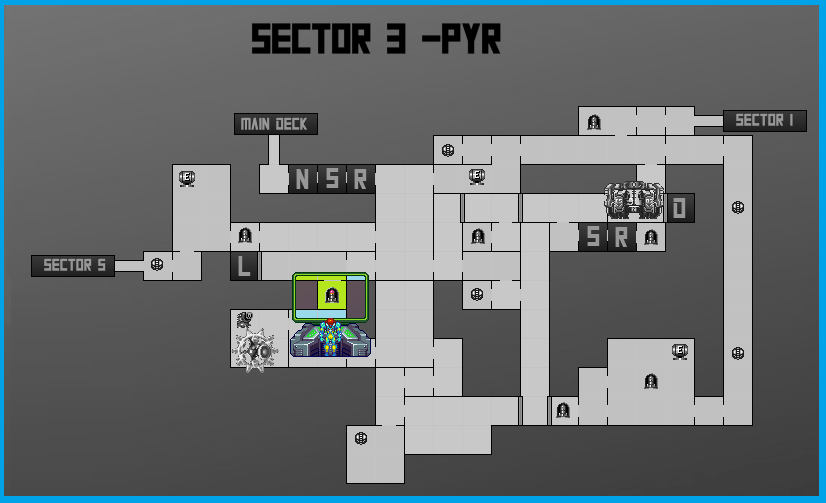
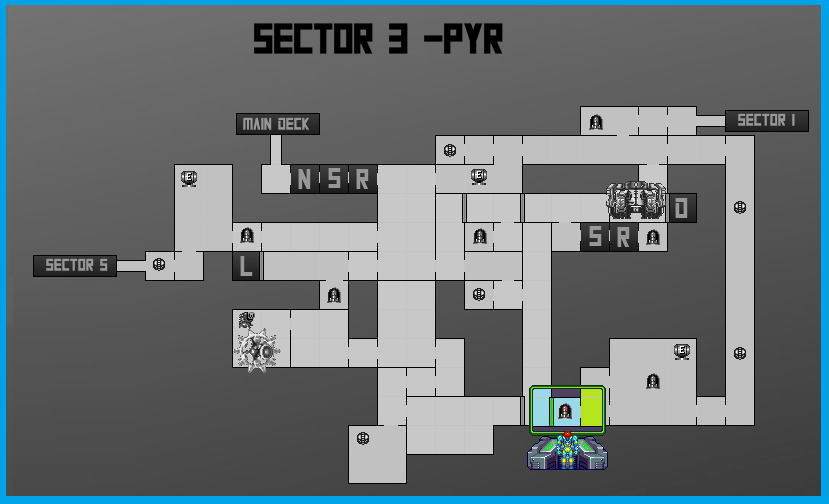
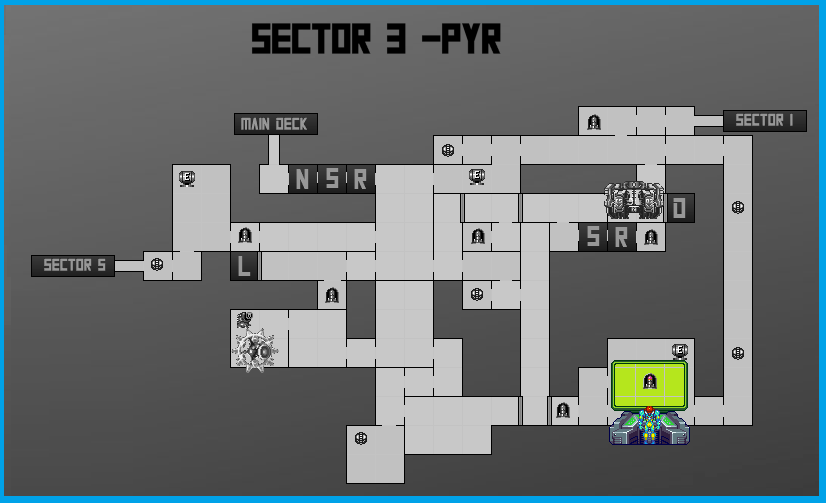
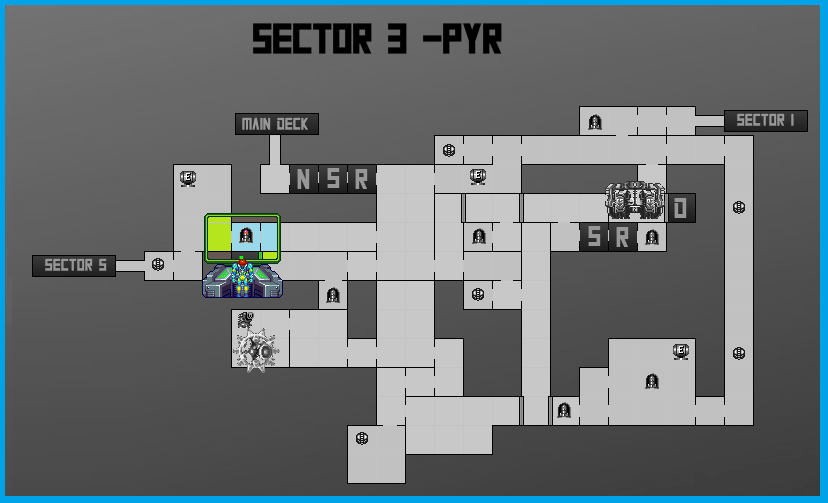
Missile Expansion #20
Location: Sector 3 (PYR)
Requirements: Bombs
From the Lock Room, exit into the hallway, run over the first bump in the road and bomb directly after it slopes. The floor will give away and you can drop down. Shoot the brown tile in the ceiling, the second tile from the wall on the right hand side, and MISSILE EXPANSION #20 will be revealed!
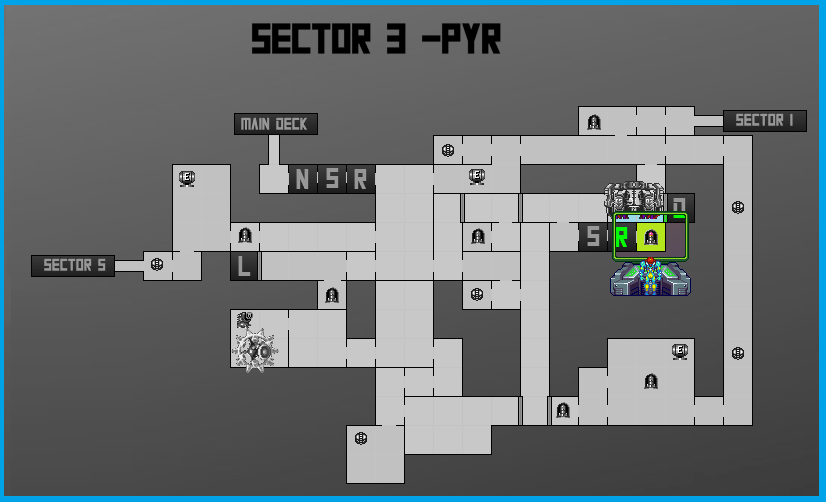
Missile Expansion #21
Location: Sector 3 (PYR)
Requirements: Bombs
In the Xeno Shaft room, drop aaaaaall the way down to grab a pretty easy pickup. Once you’re at the bottom, take the green door to your right. Go and take care of all the enemies and bomb the top of the center block to reveal MISSILE EXPANSION #21.
Missile Expansion #22
Location: Sector 3 (PYR)
Requirements: Bombs
Exit the Xeno Shaft room into the small room on the top. Bomb the wall of this room and roll over to grab MISSILE EXPANSION #22.
Missile Expansion #23
Location: Sector 3 (PYR)
Requirements: Super Missiles
Exit the Data Room and you’ll find that something pretty bad has seemingly happened while we were upgrading our Missiles. Every door is destroyed and there’s a big hole in the ground where there wasn’t before. Drop down this hole and head into a room with two Reo’s and one of those gross eyeball things, but purple instead of the regular green. Destroy the enemies and use your new upgraded Missiles to blow up the eye, grabbing MISSILE EXPANSION #23.
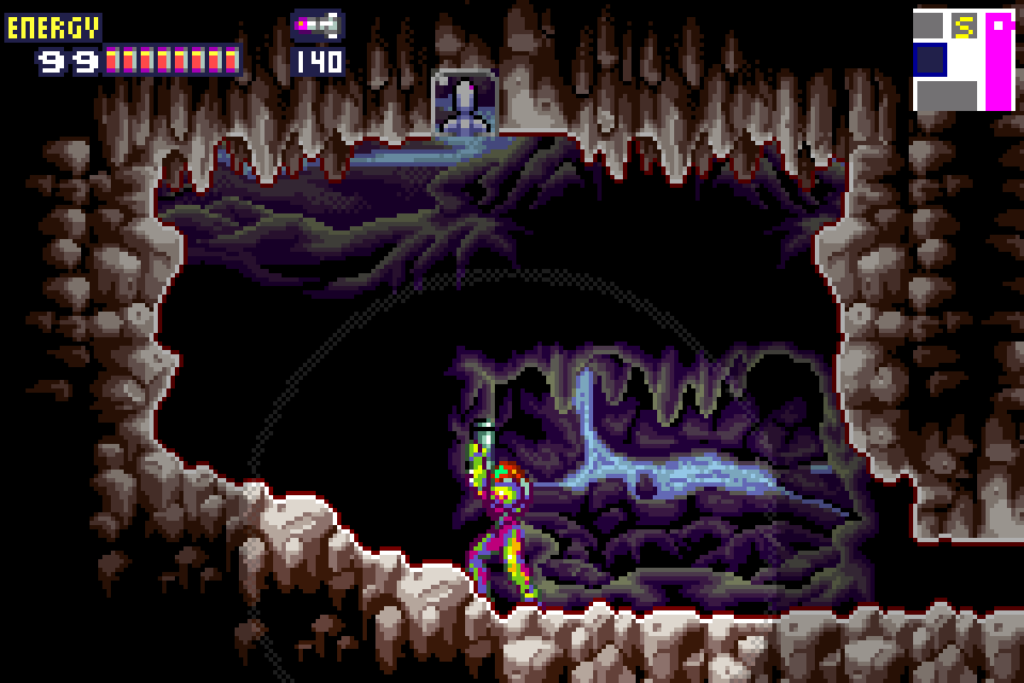
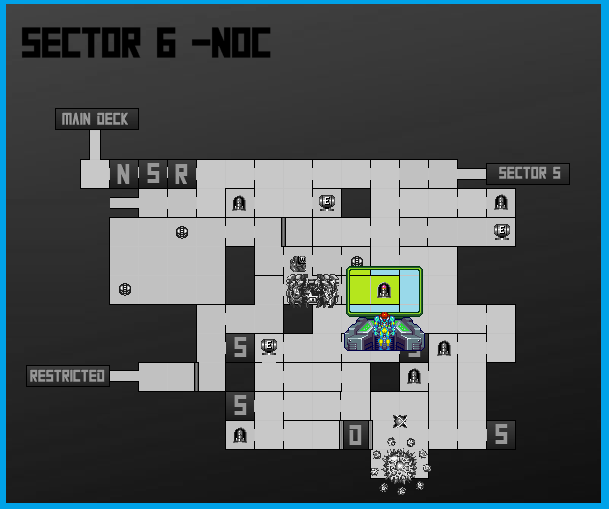
Missile Expansion #24
Location: Sector 6 (NOC)
Requirements: Bombs
Make your way into Sector 6. You’ll notice this room is full of bat-esq creatures called Menus. These are easy enemies that will give you a bunch of health should you need it. Run into the next room and bomb the lower left wall in the corner. Roll over and grab MISSILE EXPANSION #24.
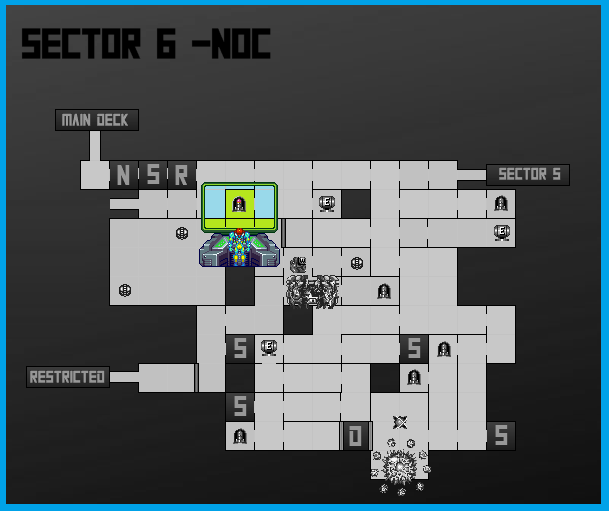
Missile Expansion #25
Location: Sector 6 (NOC)
Requirements: Bombs
Outside the Save Room you get to after encountering the SA-X, you’ll see some shootable blocks on the ground. We need to be careful about where we shoot cause there are frozen X hiding in most of the blocks here. You want to shoot directly down, and you’ll be on a platform that’s about 2 blocks wide by 3 blocks high. Get over to the left side and shoot straight down. I’m actually going to break my rule here and encourage you to shoot the block on the bottom left. A frozen X will come and zap you, but just take the hit. The convenience of not having to backtrack for this powerup outweighs the damage you’ll take, especially because there’s a Gadora that will fully heal us next room over.
Bomb the lower left side where the block with the frozen X was and roll over into the other room. Clear out all the enemies, grab the top ledge, and grab MISSILE EXPANSION #25.

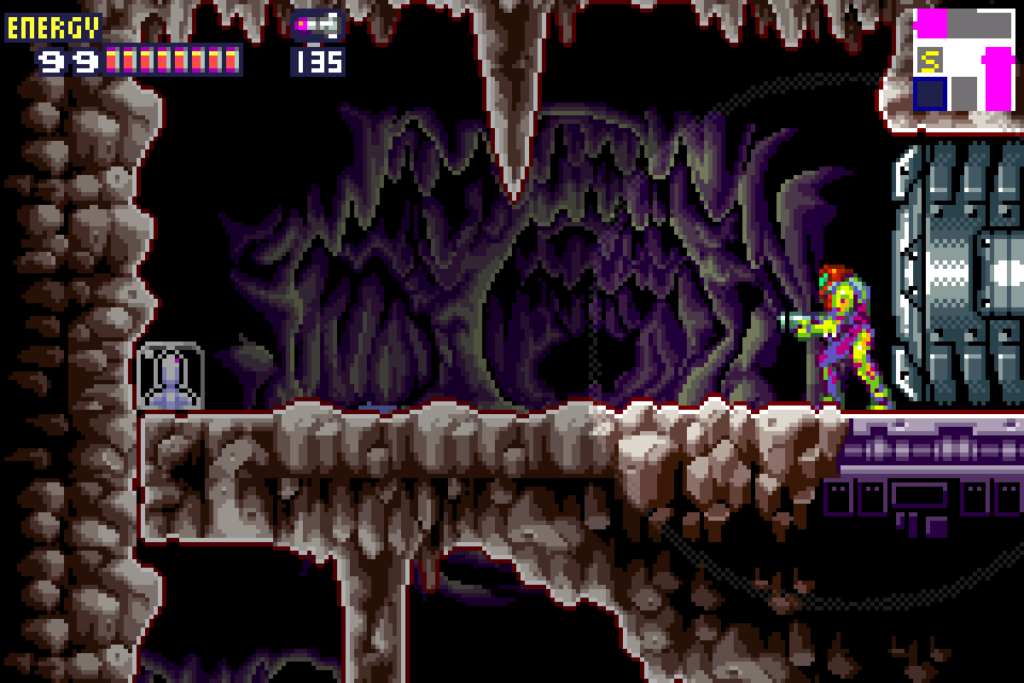
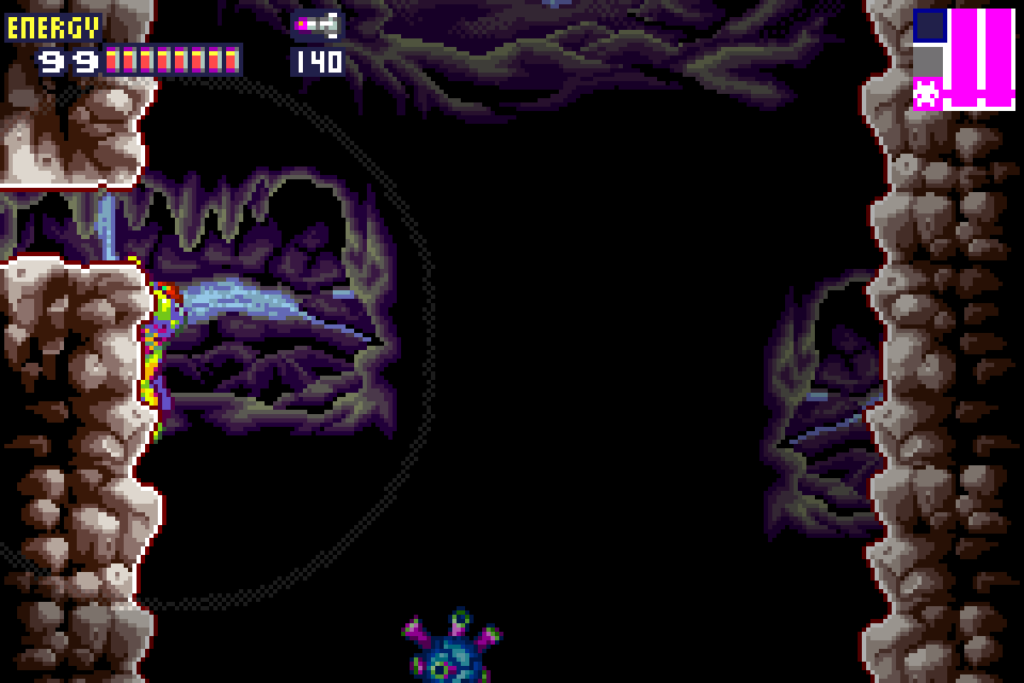
Missile Expansion #26
Location: Sector 6 (NOC)
Requirements: Varia Suit
From the Save Room by the Barrier Core-X boss room, you’ll have seen two long vertical halls. Take the vertical hall closer to the Save Station, get to the top and enter the door on your left.
You’ll see MISSILE EXPANSION #26 just sitting there for the taking, so go grab it, BUT make sure you jump on it when you get close enough because the ground directly under will give way once you step on it. Actually, you’ll want to let the ground give out from under you and as you’re falling, hug the wall on your left. You’ll grab a ledge as you’re falling which lets you roll into a room. Shoot the ceiling to reveal MISSILE EXPANSION #27.
Missile Expansion #27
Location: Sector 6 (NOC)
Requirements: None
See MISSILE EXPANSION #26.
Missile Expansion #28
Location: Sector 6 (NOC)
Requirements: Bombs
In the vertical hallway on the right-most part of the map, enter the upper right room. Go in, take care of all the X, and go over into the next room. You’ll see a Missile Expansion, or so you think. This “Expansion” sprouts wings and starts flying around like some kind of vampire bat. Super bizarre and one of the strangest enemies we see in the Metroid series. Shoot it with a Missile, bomb the lower right of the wall and roll over into a new room where MISSILE EXPANSION #28 awaits you.
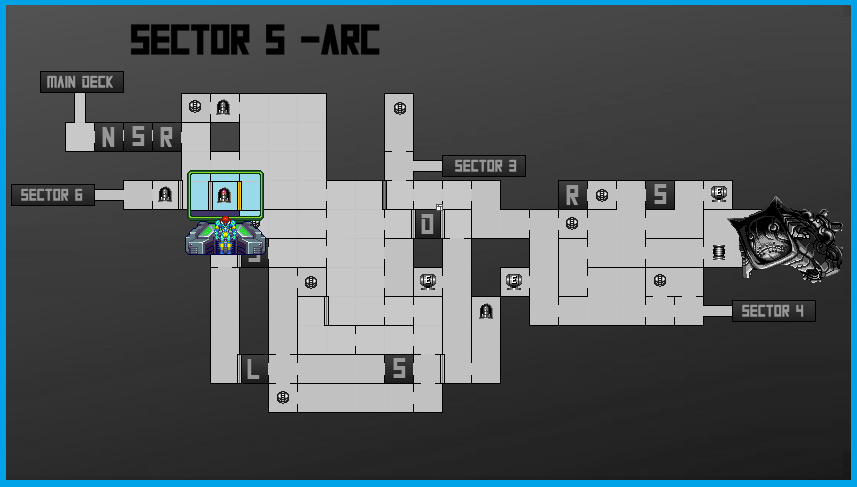
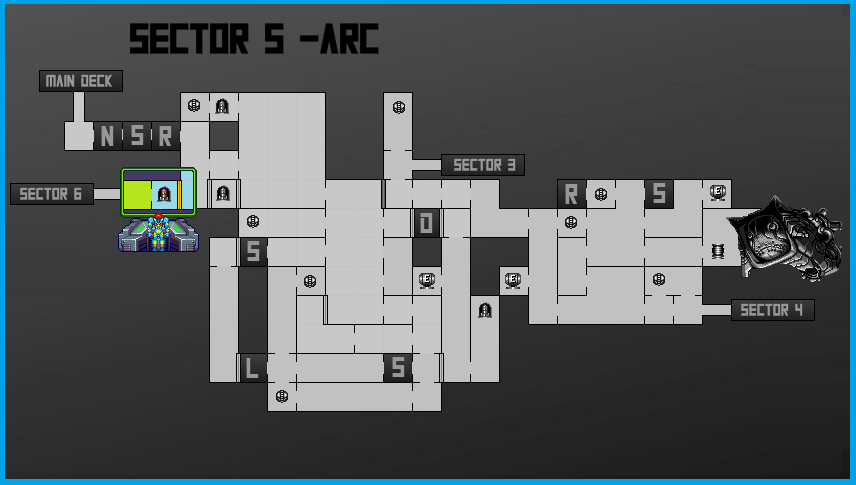
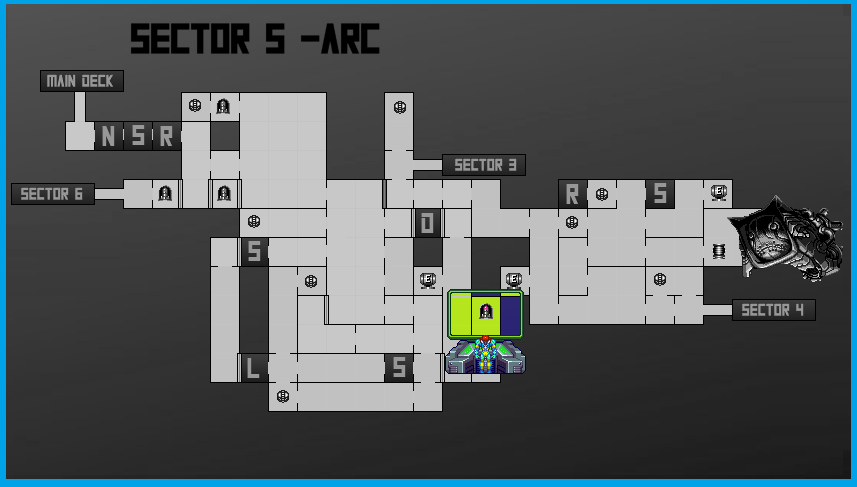
Missile Expansion #29
Location: Sector 5 (ARC)
Requirements: Ice Missiles
In the Big Freezer room, work your way to the upper left hand side. You’ll see a couple enemies that like to jump pretty high and casually float back down. Freeze them while they’re high in the air and use them as platforms to get to the upper left door, Enter and you’ll see MISSILE EXPANSION #29 sitting there for the taking.
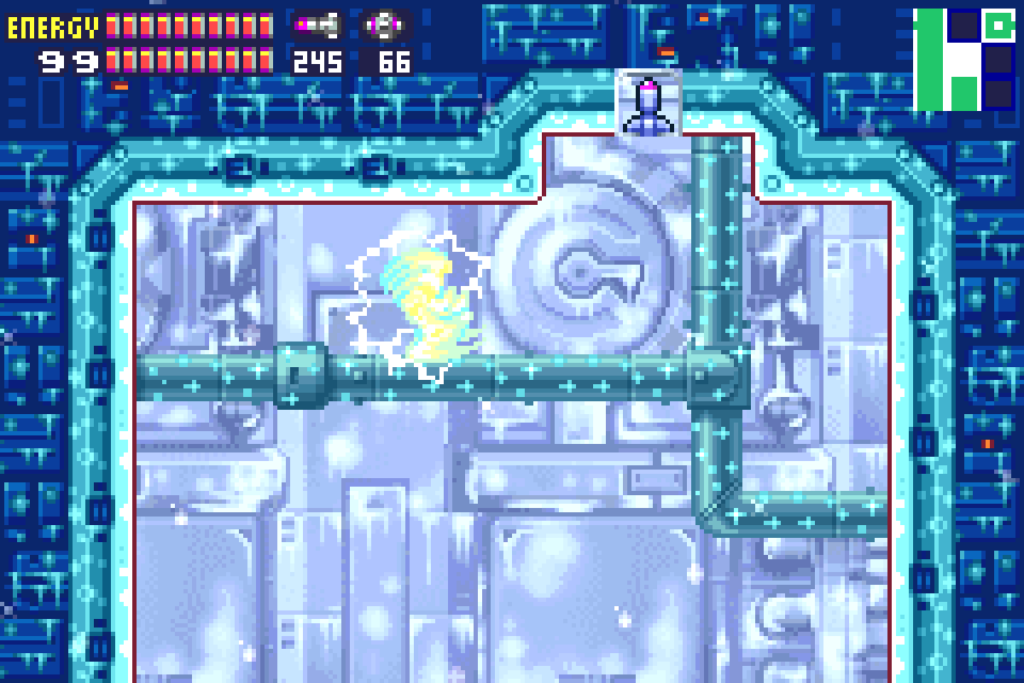
Missile Expansion #30
Location: Sector 5 (ARC)
Requirements: Security Level 3 unlocked, Bombs
In the Big Freezer room, go through the Yellow door in the lower left. As conditioned to bombing the floor as you may be by now, ignore your instinct. Instead, destroy the bug at the top and springball jump up and bomb the ceiling in the upper right corner to grab MISSILE EXPANSION #30.
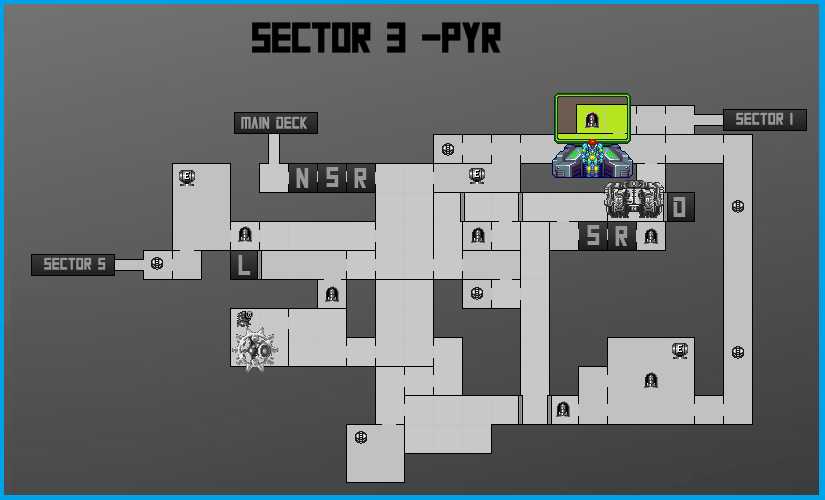
Missile Expansion #31
Location: Sector 3 (PYR)
Requirements: Ice Missiles
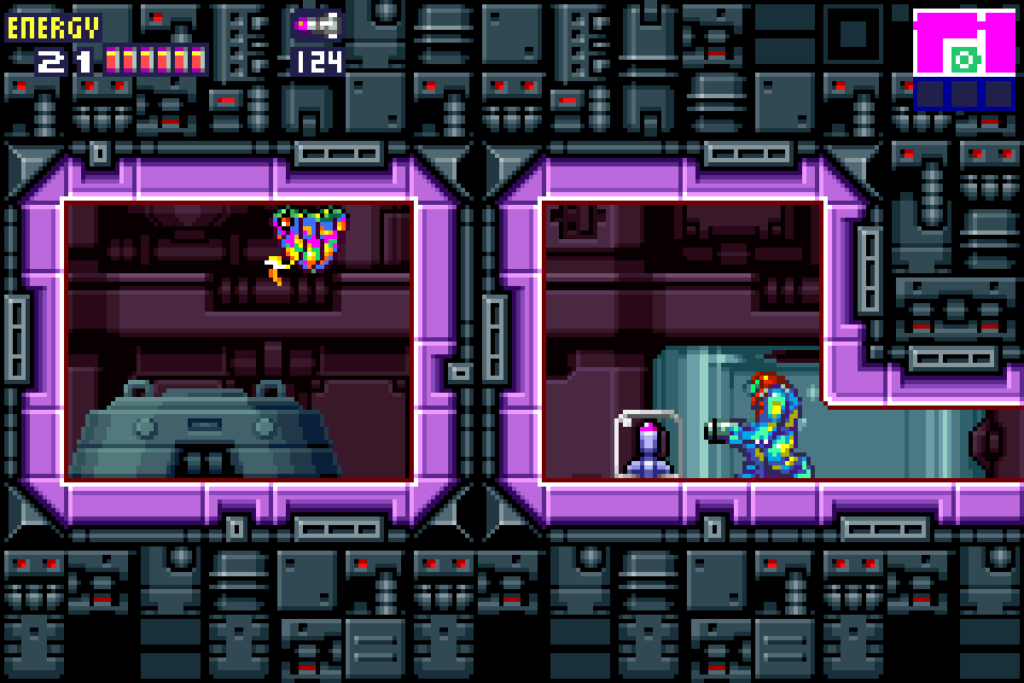
From the Xeno Shaft room, at the very bottom, take the door to your right. This will lead you to the room we grabbed a Missile Expansion in earlier. Bomb the right hand wall and roll through. You’ll see a door, but don’t bother going through it. Instead, jump up to the platform above you and wait for the fire bug to be somewhat in the middle. Freeze him with a Missile and jump on top of it. This frozen bug will give us the extra bit of height we need to grab the upper ledge and pull ourselves up. Go through the door.
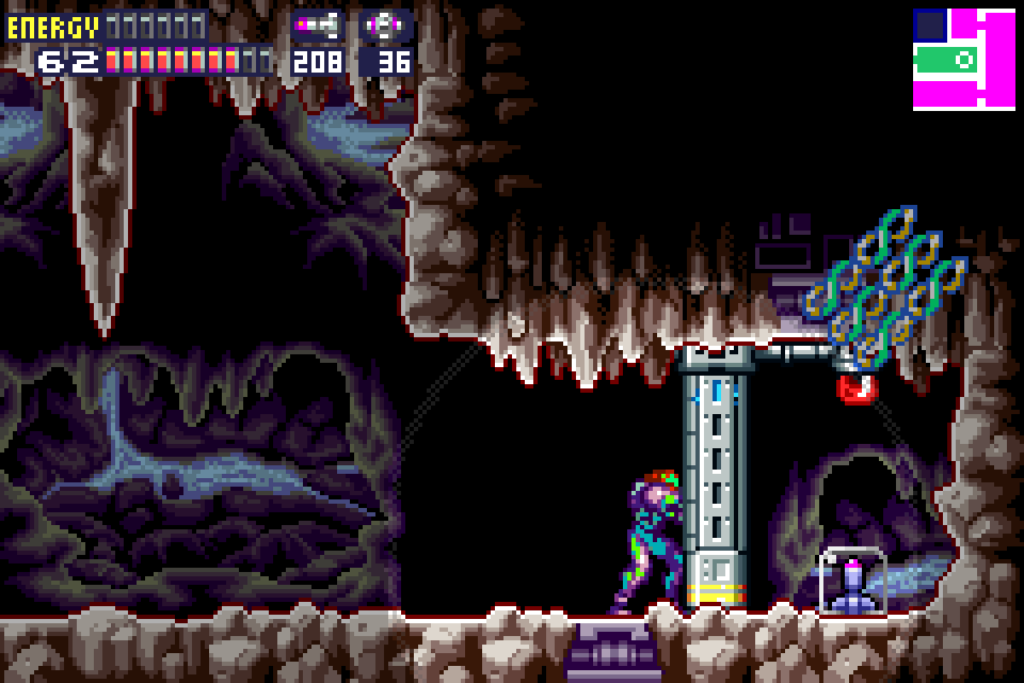
You’ll be in a large room with a bunch of floating platforms. Unluckily for us, every one of these platforms EXCEPT for the first one will disintegrate as soon as we step foot on them. No problem though, because all these platforms have fire bugs on them that we are able to freeze and step on. Freeze them all and jump from bug to bug; eventually, you’ll get to the top and nab ENERGY TANK #10! Jump up and grab the ledge, and roll through the tunnel to also pick up MISSILE EXPANSION #31.
Missile Expansion #32
Location: Sector 3 (PYR)
Requirements: Varia Suit
Work your way back to the first room in Sector 3, the one immediately after the Recharge Room. There is a door in the middle left wall that was too hot for us to enter earlier, but now is fair game. Enter and you’ll see lava on the floor and monkey bars on the ceiling. You know the drill; hop up and worm your way across, avoiding both the fire and the Sidehoppers. Eventually, you’ll get to the end and enter the next room where MISSILE EXPANSION #32 will be waiting for you.

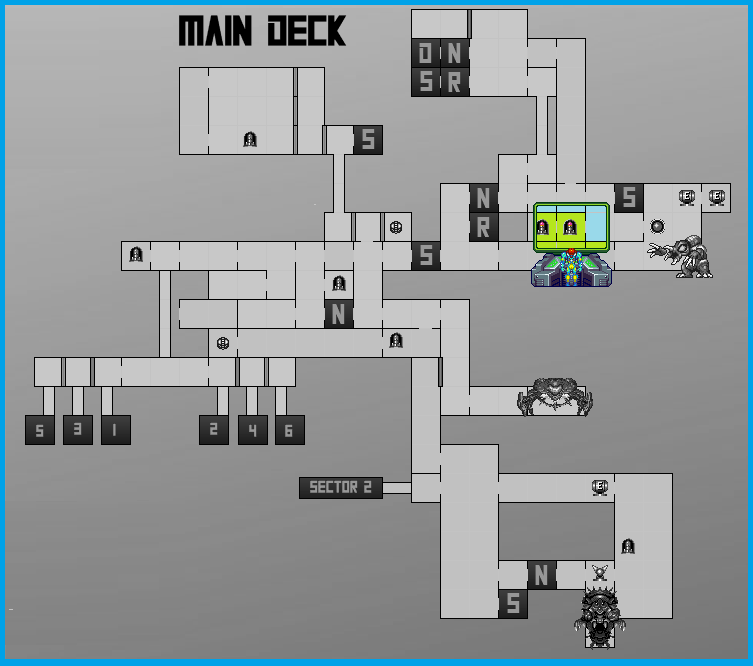
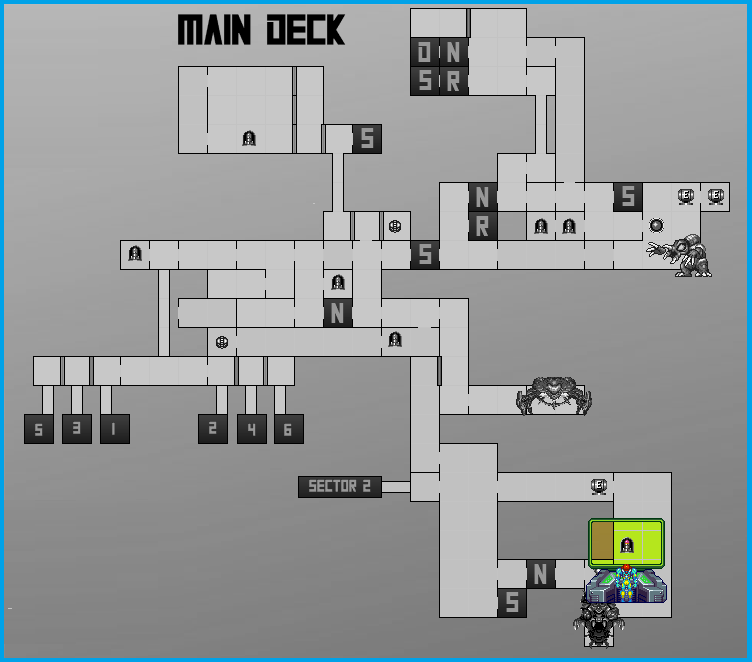
Missile Expansion #33
Location: Main Deck
Requirements: Speed Booster
Once you arrive in the Main Deck from the elevators that lead you into each Sector, head right towards the far room door. Once you get there, stop and start running back towards the elevator. Let your Speed Boost activate and run right past the elevator and you’ll go crashing into a wall in the next room, which will net you MISSILE EXPANSION #33.

Missile Expansion #34
Location: Main Deck (Habitation Deck)
Requirements: Speed Booster, Ice Missiles, Bombs
Once you arrive at the Habitation Deck, you’ll find a hallway with three Green doors. We want to take the one on the top, but there’s not really a great way to get there… or there wouldn’t be, if it wasn’t for the X. Fortunately, the X will spawn two Xeno’s in the wall that we can freeze and use for convenient platforms to help us get to the top. Freeze them and scale upwards, entering the top Green door.
You’ll now be in a huge room that’s actually separated by levels and gates. You’ll notice two squares on the floor that can be bombed. Ignore the first square and go over to the second. Bomb it and drop down. Shoot the gate open and run to the furthest right hand side, but don’t actually leave the room. Run towards the left and your Speed Boost will activate, breaking the floor tiles. Drop down to the first level. Shoot the gates to your right open, stroll over and grab MISSILE EXPANSION #34.
Missile Expansion #35
Location: Sector 5 (ARC)
Requirements: None
From the Big Freezer room and enter the lower left hand door. Keep heading left until you get to the last room, two map squares directly under the Recharge Room. You’ll see a Missile Expansion and tons of enemies here. Clear out the room and then stand under the middle floating platform. Position yourself to the left, four tiles in starting for the right. Jump up and you’ll go right through the wall. Grab MISSILE EXPANSION #35.
Missile Expansion #36
Location: Main Deck
Requirements: Speed Booster, Power Bombs
On the way to your ship from the elevator tunnels in the Main Deck, shortly after the frozen room with Ridley’s remains, you’ll find yourself in a long tunnel full of Geemers directly on your path and some creepy zombie enemies called Genesis’s above you. The Genesis’s will drop acid on you, so do your best to avoid that. Clear out all the Geemers and start running to the right. Let your Speed Booster activate and go crashing as far as you can into the next room. Once you stop, lay a Power Bomb and you’ll see MISSILE EXPANSION #36.

Missile Expansion #37
Location: Main Deck
Requirements: None
From the Central Reactor Core, enter the upper door on the right hand side. Start by taking out the first two Pirates as you move right, and you’ll run right into ENERGY TANK #12. Nice! Enter the next room and take out the Pirate; the X will reform as another Pirate on the floor below you, so shoot the floor, drop down, and destroy him again. Shoot the floor again and drop down. Take out another Pirate. Before dropping down, look over to your left and you’ll see two pieces of scaffolding close together. Shoot at them and jump over into the exposed tunnel to grab MISSILE EXPANSION #37.
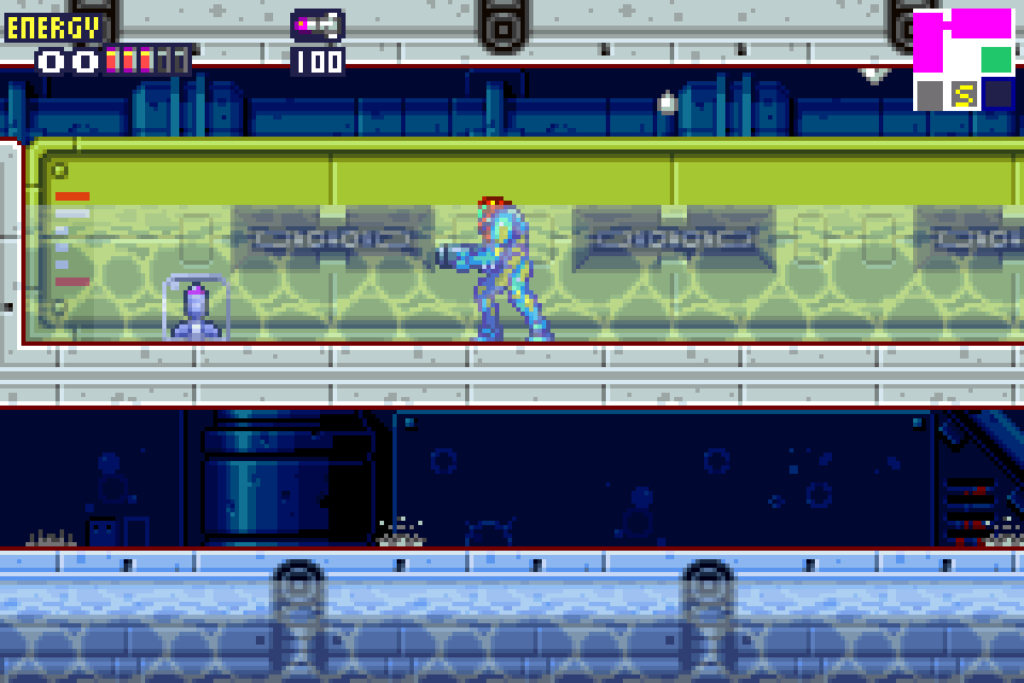
Missile Expansion #38
Location: Sector 4 (AQA)
Requirements: None
From the room in Sector 4 that connects to Sector 5, roll out and enter the door across from you. This room is packed with annoying enemies called Yards. These guys have a super thick shell so they’re hard to damage, and they are constantly shooting out projectiles at you in a diagonal trajectory. The most efficient way to deal with them is to hit them with two Missiles. Clear the room and work your way to the right to grab MISSILE EXPANSION #38.
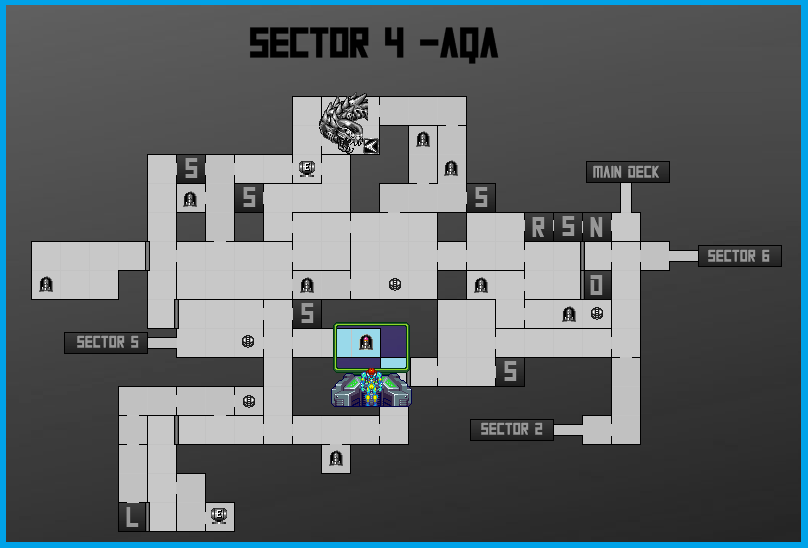
Missile Expansion #39
Location: Sector 4 (AQA)
Requirements: Power Bombs, Security Level 4 unlocked
From the Lock Room, head up and follow the path to the right until you get to the second glass tube. Lay a Power Bomb and the ground will give away. You’ll fall into a pit with MISSILE EXPANSION #39 sitting right there for the taking!

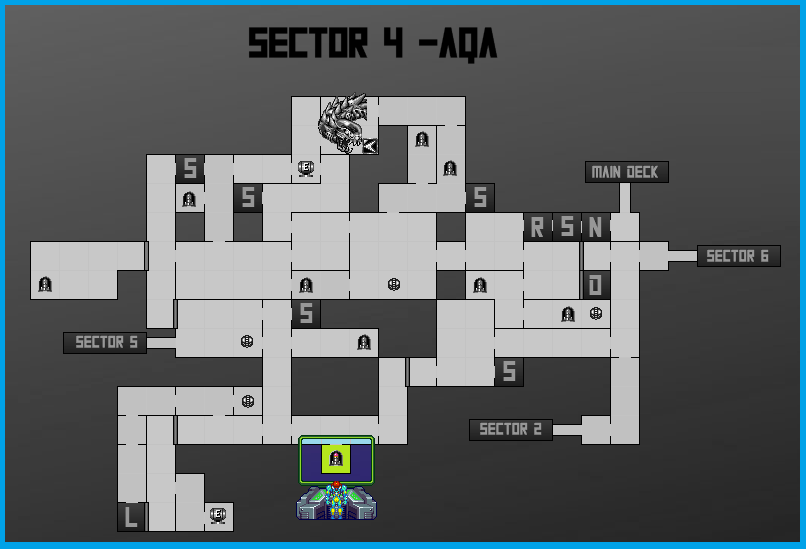
Missile Expansion #40
Location: Sector 4 (AQA)
Requirements: Diffusion Missiles
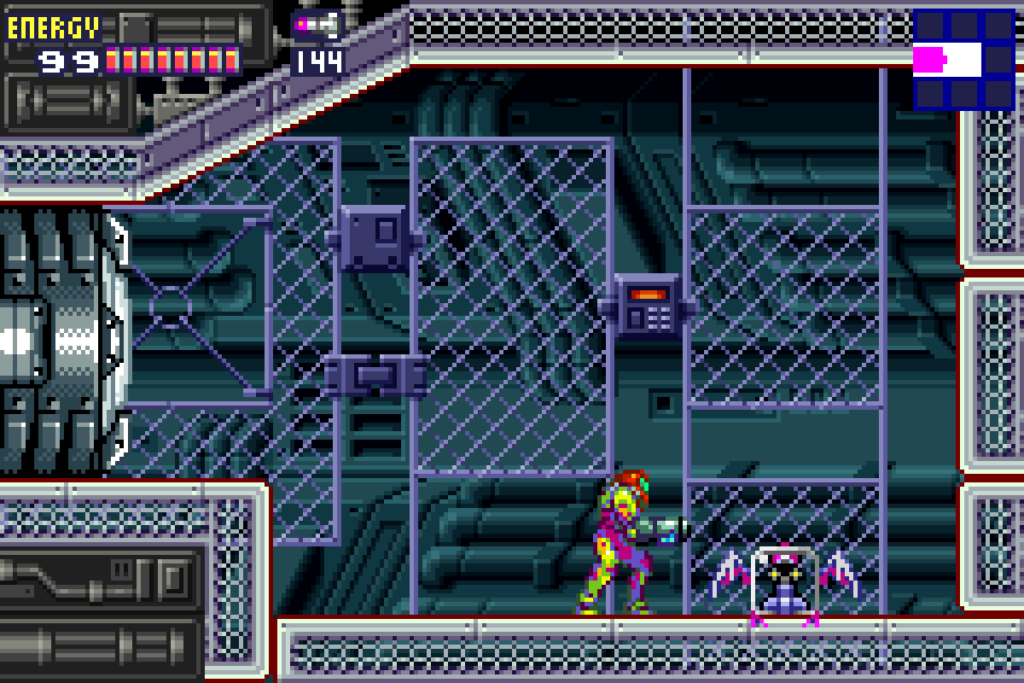
From the Data Room, exit and charge up your Diffusion Missiles. Fire them at the blowfish things blocking your passage to the left side of the room. Your Missile should explode and send bursts of ice everywhere, allowing you to roll over! Run through the mesh at the bottom left of this room into a hidden room with broken electrical wires. Destroy the eyeball blocking your path with some Missiles and then bomb the wall under the second broken electrical wire to reveal MISSILE EXPANSION #40.
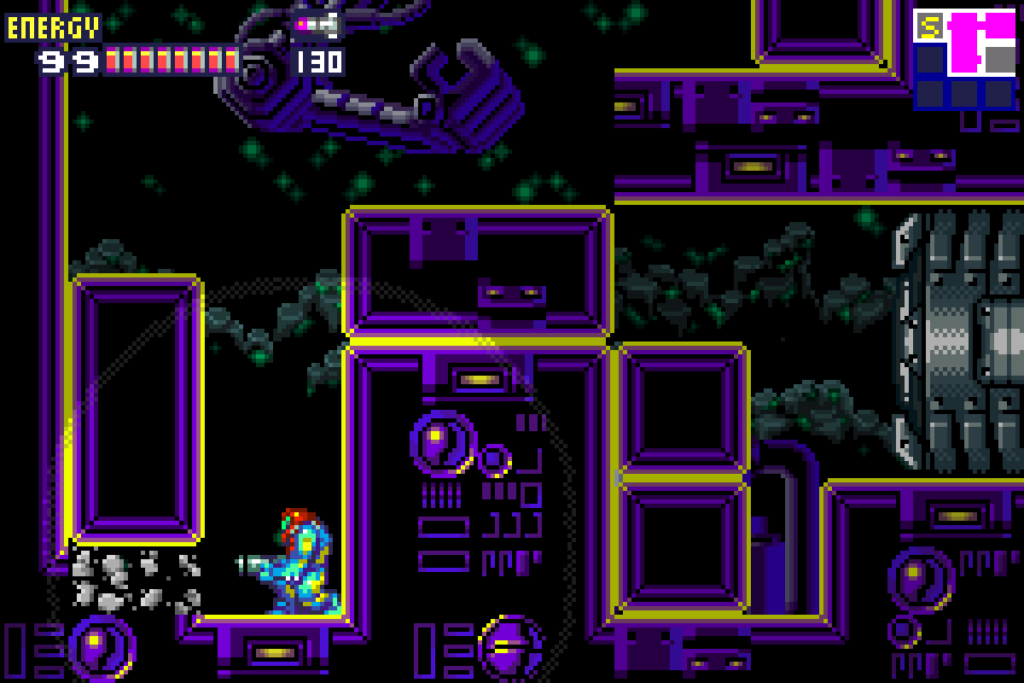
Missile Expansion #41
Location: Sector 6 (NOC)
Requirements: Wave Beam
After defeating B.O.X. for the second time and recovering the Wave Beam, head towards the door to your right. You’ll be in a long room with an expansion hiding behind a gate. Now that we have Wave Beam functionality, all you need to do is shoot the gate switch from the other side of the gate and your beam will pass right through and hit it. Walk over and grab MISSILE EXPANSION #41.
Missile Expansion #42
Location: Sector 1 (SRX)
Requirements: Gravity Suit
In the “main” room of Sector 1 (immediately after the Navigation Room), take the Blue Door on the bottom left. Drop down the fiery hallway and exit into the giant room full of lava. As soon as you walk in, jump to the top of the room and grab MISSILE EXPANSION #42. Go back down the bottom, Morph ball, and roll over all the way to the right to grab MISSILE EXPANSION #43.

Missile Expansion #43
Location: Sector 1 (SRX)
Requirements: Gravity Suit
See MISSILE EXPANSION #42.
Missile Expansion #44
Location: Sector 5 (ARC)
Requirements: Space Jump (highly recommended, Ice Missiles if not), Power Bombs (recommended)
From the Thin Freezer room, go to the Save Station two tiles under it. From there, head right and keep going until you pass through a Yellow Door. You’ll find yourself in a freezer room; roll over and jump along the rightmost wall and you’ll find a hidden tunnel that will take you to a hidden vertical hallway next door. Shoot the platform above you and Space Jump up to the higher platform. Lay a Power Bomb and you’ll see MISSILE EXPANSION #44. (Note: we could have actually gotten this after getting the Diffusion Missiles, but this is so much easier. If you want to get this earlier, head to this room and shoot all the enemies. Don’t absorb any X, wait for them to respawn, destroy again, and then freeze the final enemy, giving you the clearance to jump up.)
Missile Expansion #45
Location: Sector 3 (PYR)
Requirements: Speed Booster, Screw Attack
From the connecting bridge between Sector 3 and 1, charge up your Speed Boost and run towards the right. You’re probably thinking about Shinesparking, but actually what you need to do is just a regular jump so your Screw Attack can take out the first wall and the activated Speed Boost in your jump can take out the second. You’ll probably need three short, tight hops. Once you’re at the other side, grab MISSILE EXPANSION #45.
Missile Expansion #46
Location: Sector 2 (TRO)
Requirements: Gravity Suit, Power Bombs
In the long vertical hallway directly underneath the “main” room of Sector 2 (the first room after the Navigation Room, elevator, etc.), take the second door on your left and you’ll be back in a room full of water. Jump up, grab the ledge, roll over into the next room, lay a Power Bomb, and nab yourself MISSILE EXPANSION #46.
Missile Expansion #47
Location: Sector 2 (TRO)
Requirements: Speed Boost, Screw Attack
From the room you fought Zazabi in, jump up to the top right corner and Screw Attack through the wall. Drop all the way down to the bottom and run to the right side of the room. Instead of jumping up, run right back to the left side. Crouch and get your Shinespark charged up. Jump in the air towards the pillar and Shinespark in the rightward direction. You’ll break the wall and reveal MISSILE EXPANSION #47.
Missile Expansion #48
Location: Sector 4 (AQA)
Requirements: Screw Attack
Head to the hallway directly under the Data Room. Screw Attack through the giant worm and pick up MISSILE EXPANSION #48. Congrats – that’s the last one!