


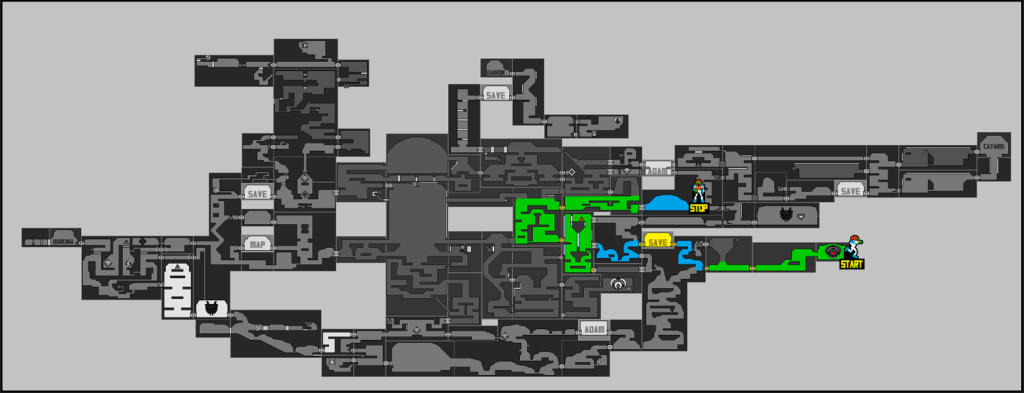
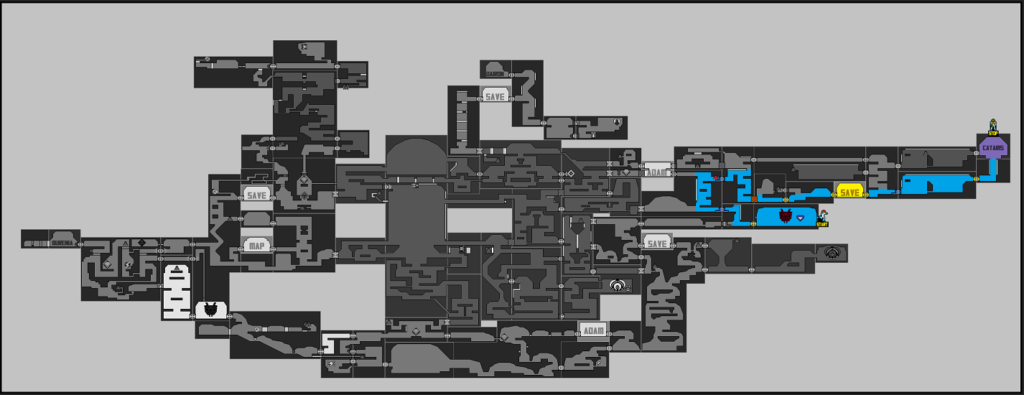
Metroid Dread Walkthrough – The Caverns of Artaria
Walkthrough
- The Caverns of Artaria
- The Furnace of Cataris
- The Hunt for Kraid
- The Complex of Dairon
- The Depths of Burenia
- Quiet Robe
- The Mystery of Elun
- The Forest of Ghavoran
- The Ruins of Ferenia
- Frozen Planet
- To the Surface
- ZDR’s Secrets
- Raven Beak
Prologue
“We’ll soon be entering ZDR’s atmosphere. The risk clearly outweighs the rewards.”

Another day, another incredibly dangerous mission for our resident superhero bounty hunter, Samus Aran. In Metroid Dread, Samus, and by extension, you the player, have been tasked with investigating the planet ZDR to determine two things: first, if the incredibly dangerous X parasite, who we had thought were wiped out in Metroid Fusion, are alive and well on this planet; and second, to see why the nigh-invincible research robots previously sent to analyze the situation – the E.M.M.I.’s – have gone dark. Samus, still facing lingering side effects from the Metroid DNA vaccine injected in her to save her life from the X, is the only person in the galaxy who can withstand the X, and the only one who can solve the mystery of the planet ZDR.
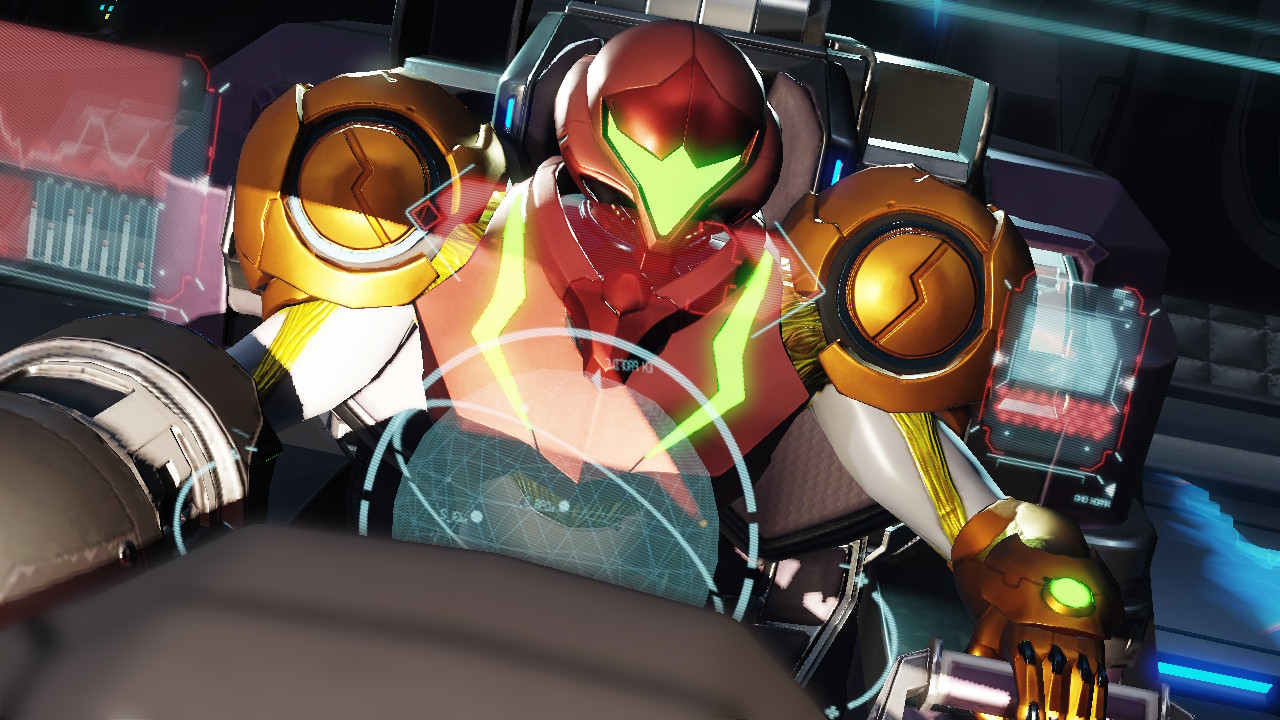
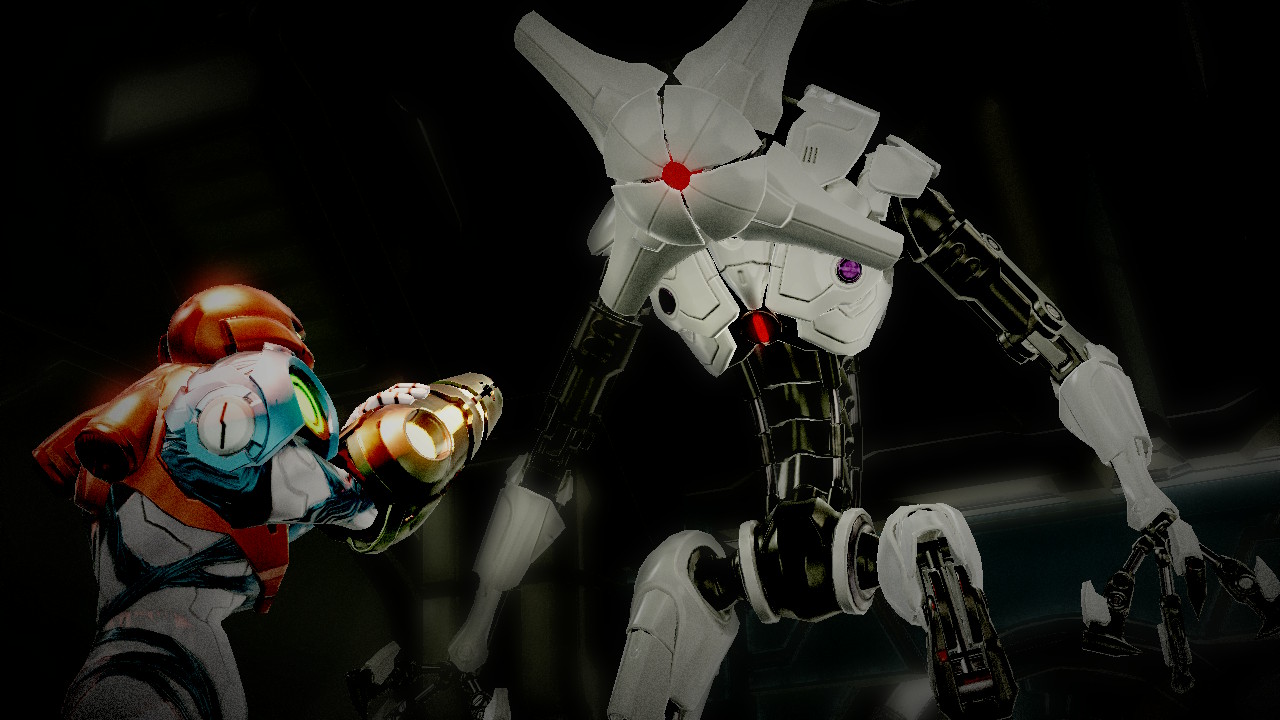
Samus lands on the planet, only to be confronted by an incredibly powerful Chozo Warrior who we will learn later is called Raven Beak. Raven Beak will look familiar to anyone who has played Metroid: Samus Returns, but still, to finally see a moving Chozo is pretty exciting!
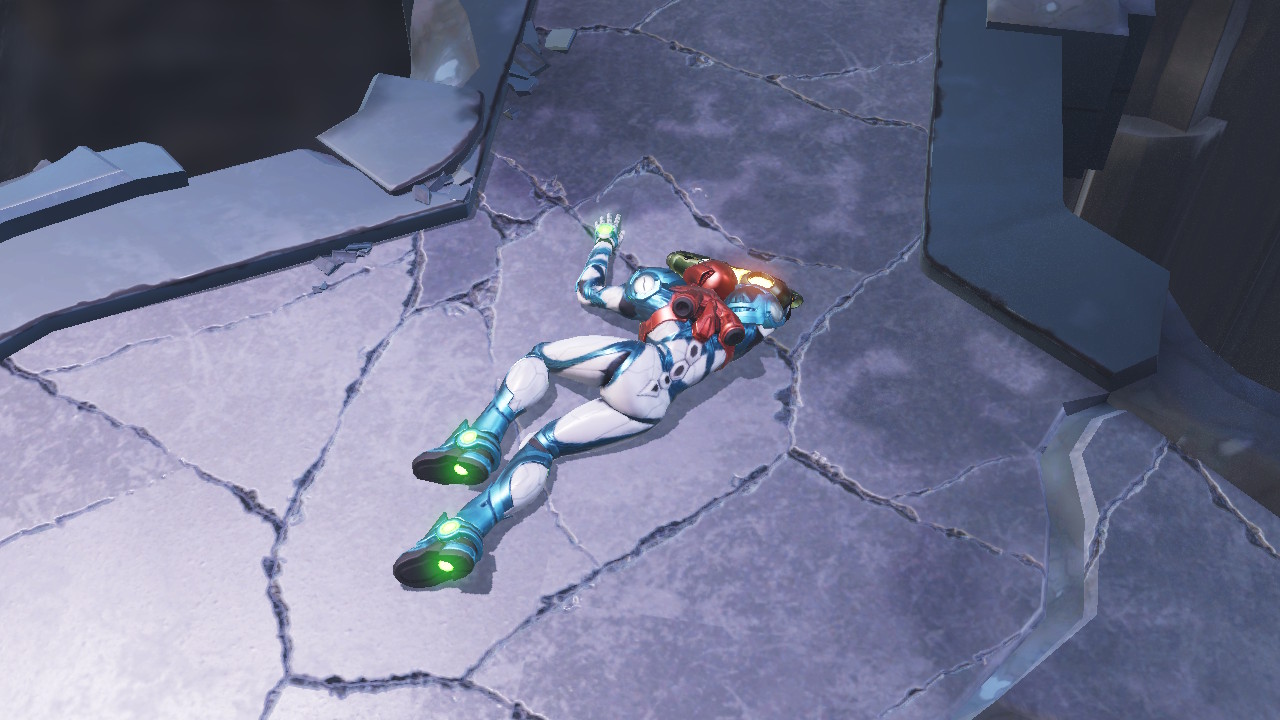
Less exciting is how utterly overpowered Samus is by Raven Beak. Samus puts up a heck of a fight, but it’s to no avail. The Dark Chozo has Samus clinging to her last breath, grabbing her by the throat, ready to fire his (massively massive) arm cannon at her. Just as the final blow is about to be struck, though, the screen goes black and Samus wakes up some time later, suffering from “ability amnesia”. We now find ourselves in a different part of the planet – the cavernous Artaria, located in the depths of ZDR. It appears nothing on this planet will be what it seems.
It’s here that we finally take control of Samus. Let’s get to work.
E.M.M.I.-01P
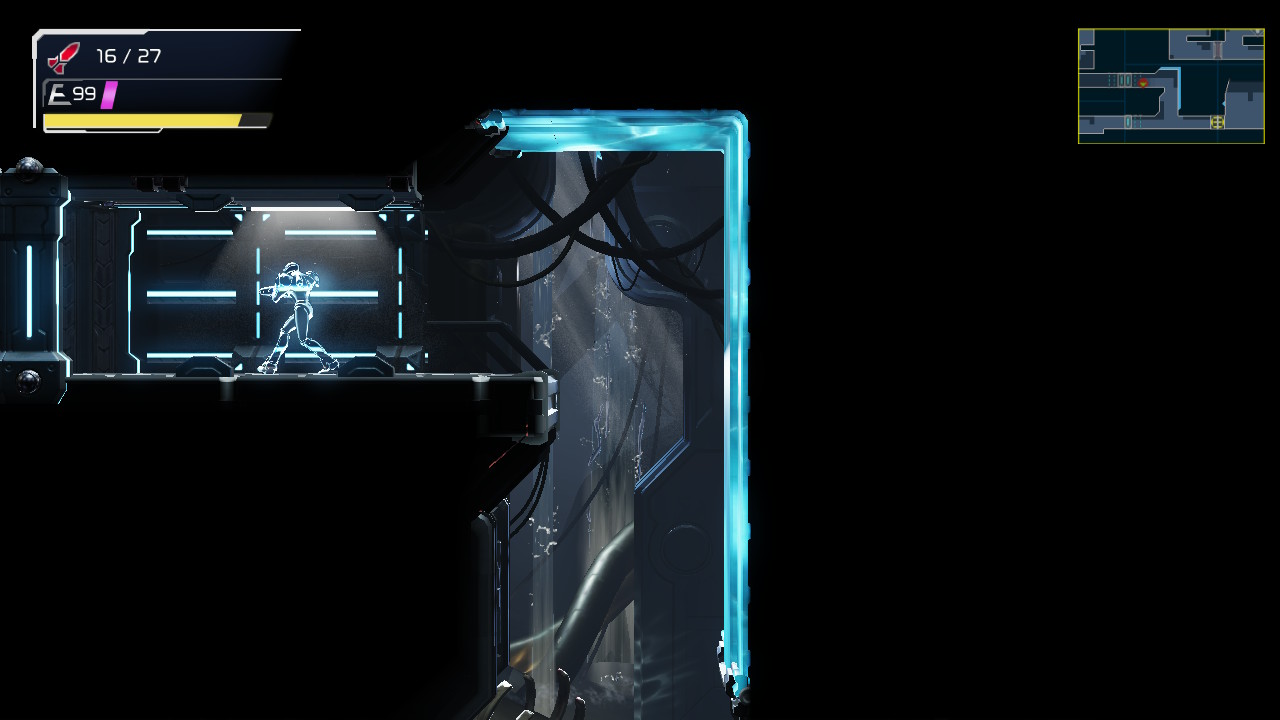
You’ll find yourself in a beautiful room populated with cherry blossoms and Chozo temples. This is what I’ll be referring to as the Starting Room. Once you get used to the controls a little bit, head towards the right side of the room and make your way out.
Keep pressing towards the right, shooting any creatures that get in your way. Eventually, you’ll see a pillar sticking out of the ceiling, leaving you only a tiny space beneath it to get through. Now, we may not have our Morph Ball yet, but one of the most welcome additions to Metroid Dread is the ability for Samus to slide. Press the ZR button and slide right on under that pillar to the other side and continue right until you see a red gooey orb thing in the wall. We’ll call these things tumors going forward. Aim upwards and shoot the tumor, which will explode, blasting away the walls blocking your path. Cool! Now that the way is open, jump up.
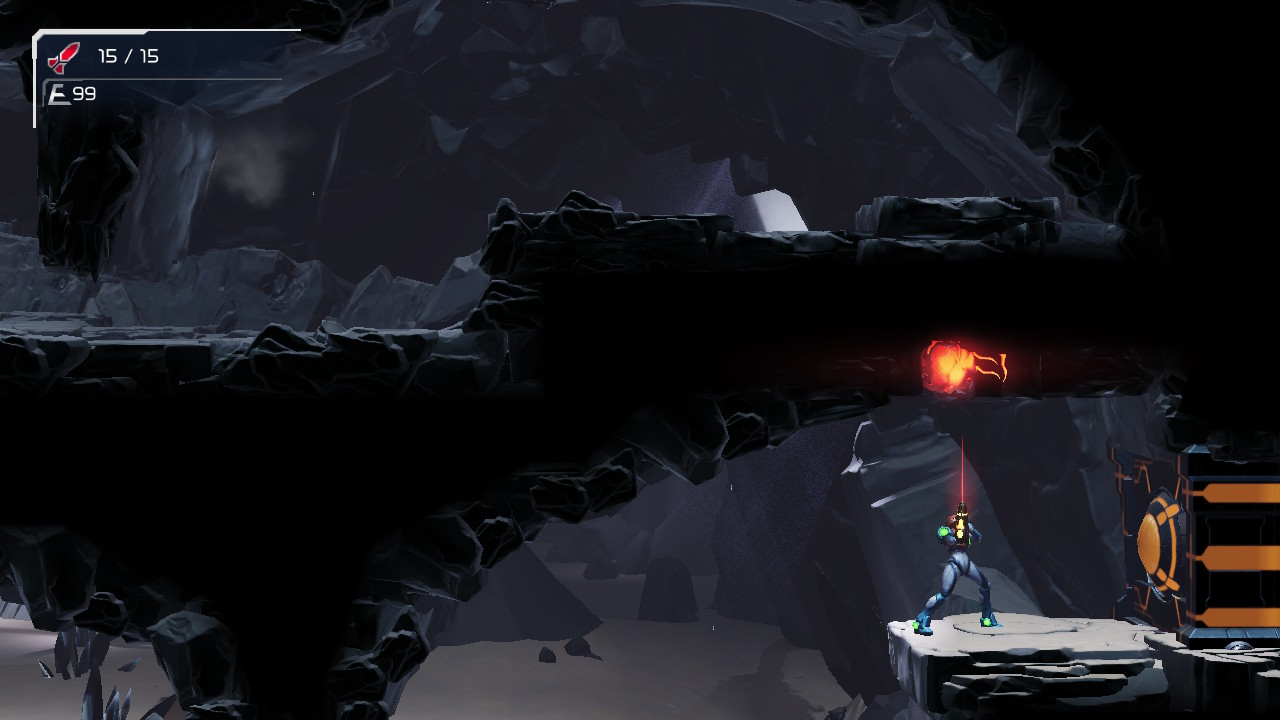
You’ll come to a pretty steep looking passageway that we obviously need to climb, but with no apparent way to do so. Never fear, cause it’s time to put Samus’s 360° aiming to work! Hold LZ and Samus will stop moving and aim her arm cannon in any direction that you need. Focus on the two bricks in the wall that are a different color. These bricks can be shot, creating a ledge that you can jump and grab onto. It’s worth noting that you can 360° aim when you’re holding onto a ledge, or doing just about anything else for that matter. Proceed up and over to the right and you’ll enter a Network Room.
These Network Rooms are scattered across ZDR and they’ll be what we use to communicate with Adam. They’re also Save Stations, so double hurrah! Chat with Adam and he’ll give you the lay of the land, explaining how communication works, the structure of ZDR, and so forth. After you’re done, head to the right.
Fall down and slide under another pillar. The game will now teach you how to melee counter! Every time you hear a click and see that white-ish light go off by an enemy, get ready to smash X and counter! This is a huge part of the game and a major contributor to your success against some of the tougher enemies and bosses, so practice as much as you can! Fortunately, we’ll get a chance to test it out right away, as we need to scale to the very top of this next room which has more enemies than you can shake a stick at! Counter, shoot and jump your way to the top.
Right when you reach the top, the game will pause and tell you about flashing areas on your map and what they mean. Basically, if there’s a section of your map that’s white and flashing, there’s a secret item hidden there! Now, keep in mind that not every secret item will be able to be obtained right away, but it’s a nice visual indicator of areas that you need to check out more thoroughly.
This particular flashing area is easy enough though. Slide under the pillar, shoot the tumor in the wall, and BAM! The surrounding area will explode, and wouldn’t you know, your first pickup is sitting right there. Go and grab MISSILE EXPANSION #1!
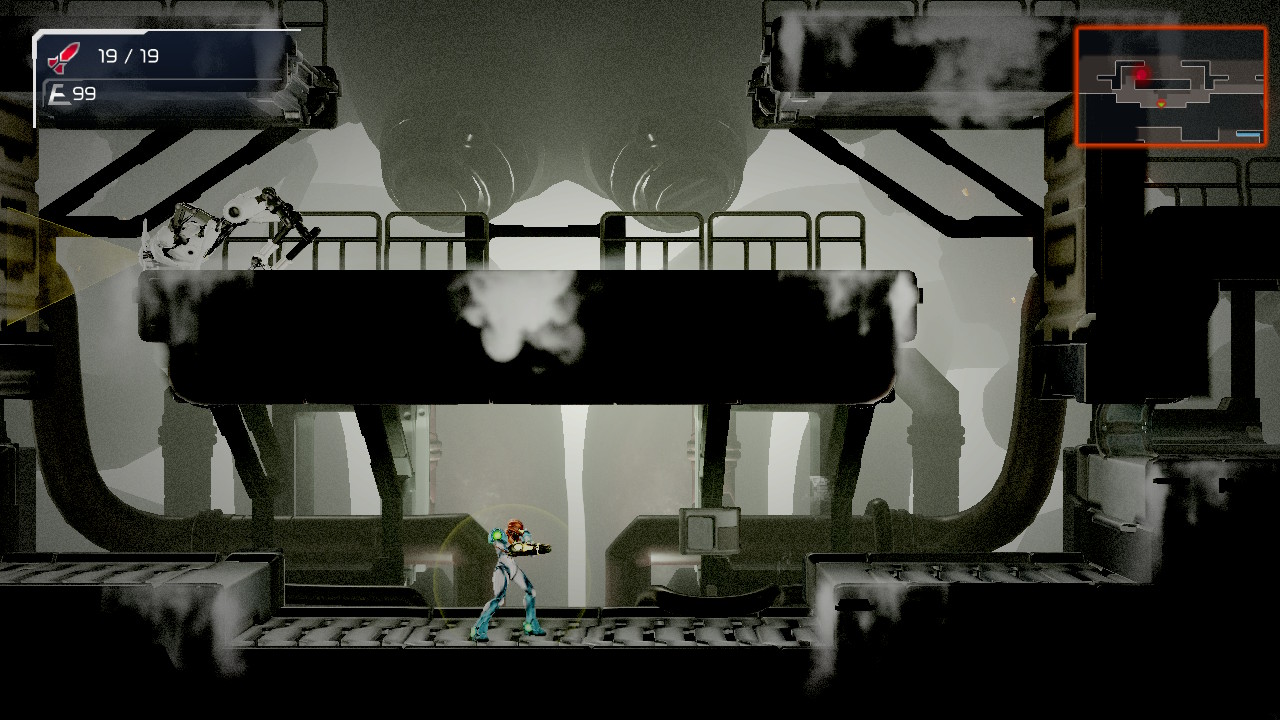
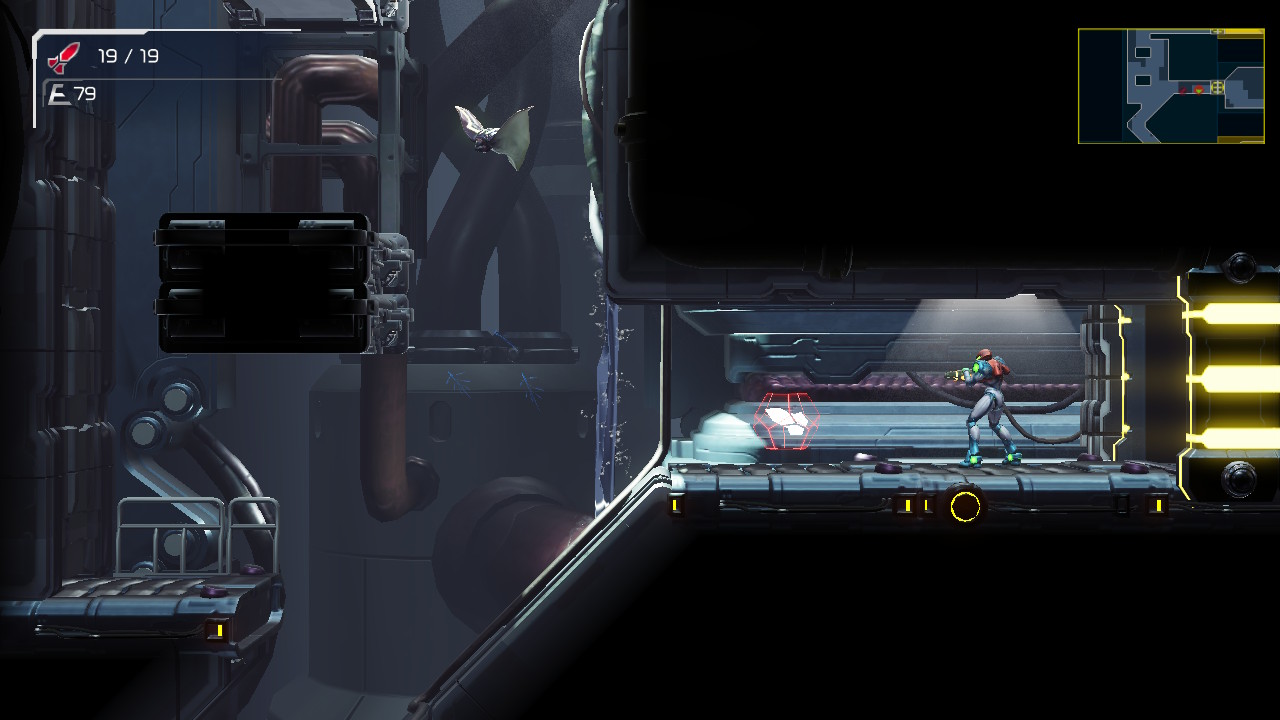
Open the door right beside the Expansion and head through. You’ll drop down and a cutscene will be triggered. You are now in an E.M.M.I. Zone, and face to face with an E.M.M.I. itself. These DNA sucking robots are nigh indestructible, although, this one appears to be heavily damaged. Even so, you are no match for this E.M.M.I., so don’t even think about trying to fight as you are right now. A cutscene will play out, showing you how to counter an E.M.M.I. attack and slide under the fearsome machine. Once you’ve slid underneath, get through the door on your right and haul butt.
Keep moving towards the right, jumping up and over into the next room. Side note – wall jumping is easier than ever in this game if you want to use that technique here. This game will allow you to hold the direction towards the wall and then just press jump again, which is far easier than the last minute directional change of previous Metroid wall jumps. Either way, get to that top room as fast as you can! This room is what is called a Central Unit room.
Once you’re inside, you’ll see a suspiciously Brain-looking organism on the ground. This too looks like it’s been damaged quite a bit. Walk over to the brain and you’ll be able to absorb it (??!), which powers up Samus’s arm cannon to the OMEGA CANNON. This weapon is the only thing that is capable of damaging E.M.M.I.’s, but unfortunately, it has a very short usage span. This is to say that we better make our shots count!
The game will teach you how to use the cannon (hold L to aim and then R to charge, lastly pressing Y to fire), so blast away the door to the Central Unit room and get back into the hallway.
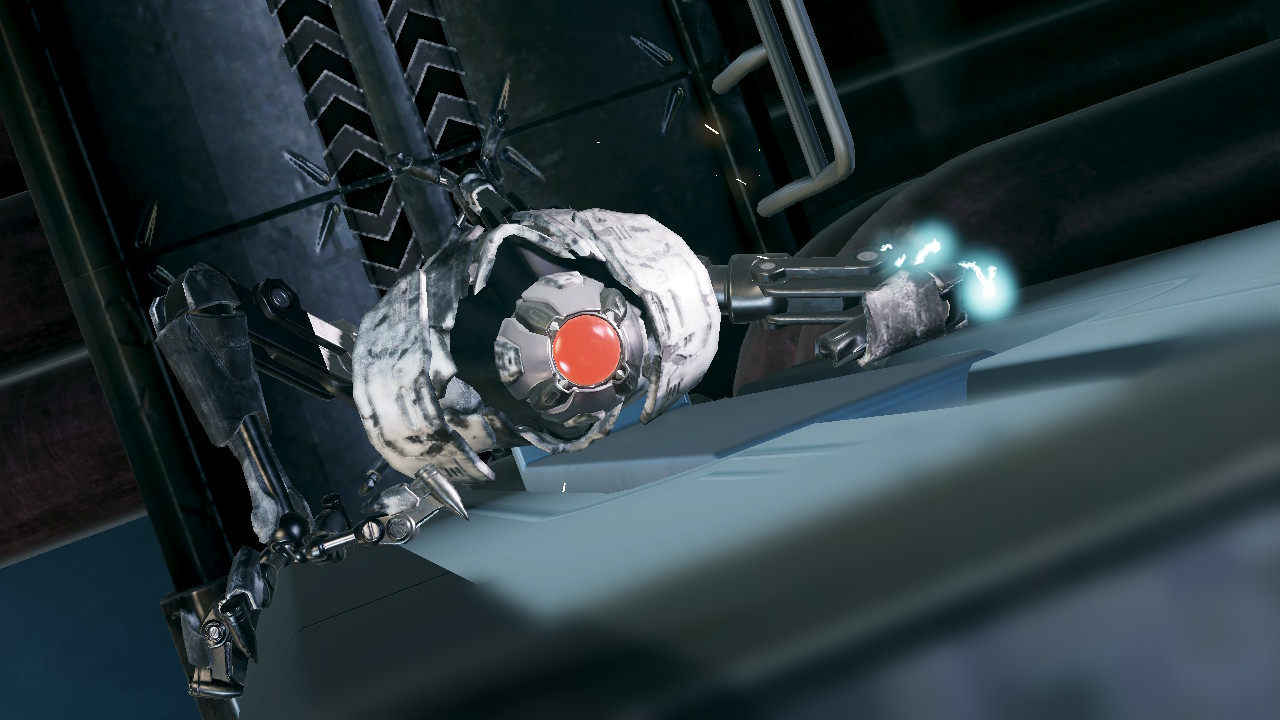
Drop down and charge up your Omega Cannon. You’ll see the broken E.M.M.I. creep through the door. Aim carefully and blast it right in the head with a charged shot. Pro tip – the “eye” of the E.M.M.I. will change from red to glowing blue if you’re aiming in the right spot, so fire when you’re charged up and see that!

The E.M.M.I. will fall, finally destroyed, and your Omega Cannon will go offline. Congratulations, you’ve defeated your first E.M.M.I. and finished the prologue section of Metroid Dread!
Into the E.M.M.I. Zone
Now that the E.M.M.I. is no longer a threat, head out of the E.M.M.I. Zone, moving towards the left. Blast the door and the access door will open up, leading you back into the cavernous hallway from before. Head up again, but this time, take the top left door. You’ll enter into a Save Station. Do your business and move on to the left.
You’ll want to drop down, sliding under the pillar at the bottom of this room. Jump up and to the left and you’ll be inside of a shallow pool of water. Moving around in water is a mega pain in the butt right now, but luckily, there’s a tumor in the lower right corner. Blast it away and the water will drain into the lower part of the room, allowing you to jump up, into the E.M.M.I. Zone.

Upon entering the Zone, you’ll see immediately that the atmosphere is different. There are weird sounds, quieter music, and a sense of stillness that is quite unsettling. Make no mistake – every time you walk into an E.M.M.I. Zone, you are being tracked, and if an E.M.M.I. catches you, chances are good you’re going to be seeing that Game Over screen. My advice to you any time you enter an E.M.M.I. Zone is to proceed quickly, but cautiously.
Once you enter the Zone, you’ll want to head to the door on the other side of the structure in the middle of the room. To do that, make a U-shaped approach; slide down and under where you entered, head across to the right and then up and through that door. Get ready.
A cutscene will trigger and we will meet E.M.M.I.-02SM. This is not damaged in any capacity and is clearly impervious to our weaponry, so Samus will do the only logical thing – run! The game will pick up again after Samus has slid into the next portion of the E.M.M.I. Zone. For what it’s worth, anyone who’s played Metal Gear Solid should be familiar with how the detection system works. Green means you’re safe, yellow means the E.M.M.I. is suspicious, and red means it has you in its sights. Worth mentioning too is when the alarms are going off, the E.M.M.I. Zone doors are sealed. Unfortunately, things are redder than ever right now so we need to move fast.
Aim up and shoot the tumor above you. As soon as the wall is destroyed, the E.M.M.I. will start moving, so go fast! Jump up up up and then make your way through the door to your left. You’ll see two doors on your left – take either one, it doesn’t matter, just get to the next room. In here, you’ll see a pillar you can slide under that will lead you to a shallow pool of water. Slide away and get into that pool. Eventually, the E.M.M.I. will come in and disengage its hunt, seeing that it can’t fit through that small opening. Wait for the Zone to settle and then exit the room.
The Charge Beam
You’ll see yourself in a beautiful cavernous room, with rays of sunshine penetrating the cold rock surface of Artaria. You’ll also notice what looks like a creature moving, though it’s largely invisible to the naked eye. That’s probably not good, but that’s a battle for another time. For now, press forward and you’ll see some doors that have sensors on them. These sensors are motion detectors that will lock the door when they see Samus coming, so as we are right now, we’re not getting through them. Instead, head up, and at the top, you’ll be able to grab MISSILE EXPANSION #2. Once done, head to the left and through the door, into the Network Station.
Adam will tell you what you’ve no doubt come to realize by now – you are no match for the E.M.M.I.’s, so don’t even bother fighting them. After some more useful tips, you’re free to start moving again. Take the top right door out of here. Get ready, cause we have a lot of ground to cover here.
You’ll be in a room with two tumors in the wall and a missile expansion. Unfortunately, we can’t get the missile right now, but blast both tumors so the walls explode, allowing you to use the debris to slide into the E.M.M.I. Zone.
Once you enter, drop down the slide and move towards the right when you land, moving quickly and quietly. You’ll want to drop down and then head into the door on the upper right. From here, quietly make your way as far right as you can, exiting the door on the lower right. Be careful of the E.M.M.I. – don’t panic if it sees you, just keep moving. Eventually, you’ll be able to shake it off.
Keep pressing in the E.M.M.I. Zone. You’ll enter a new room with a passage right under the floor. Slide under it. When you land, you’ll see a tumor to your left, but ignore it and jump towards the right instead. Shoot away the walls blocking your passage and quickly press to the right and through the door. Exit into this new room, slide under the pillar and drop to the floor, exiting the E.M.M.I. Zone door right in front of you. Whew.
As soon as you exit the E.M.M.I. Zone, you’ll fall into a hall of water, but that’s okay. Destroy all the enemies and make your way to the right and through the door. Mercifully, we’ll finally have arrived at a Save Station. Do your thing and then exit left.
You’ll step into a long vertical hallway filled with dripping water, enemies, and a missile expansion. For now, fall all the way to the bottom of this room until you’re submerged in water. You’ll move slowly, but press forward to the right, through the swarm of water bugs (these things are pretty handy if you need to get some health or ammo!) until eventually, you hit a wall. There’s a tumor in this wall just begging to be blown up, so oblige it and watch the water drain. Head back towards the left where you came from. Now, the water should be low enough for you to jump up to the platform in the first vertical hallway we came in through. Head up and through that door, and you’ll come across a Map Station. Download the Artaria data and save your game! When you’re ready, press forward.
You’ll walk forward and see that you can either go up or go down. For now, we want to head up, so blast away any enemies and get goin’. Go through the top right door, but watch out – there’s a giant enemy crab ready to pounce on you. One well timed melee counter will finish him off, though. Exit the door behind the crab and you’ll find yourself back in the vertical hallway with MISSILE EXPANSION #3 in front of you. Grab it, fall down, and get yourself back to the Map Station.
In the room after the Map Station, this time we’ll head downwards. Land in the water and press forward again until you see that dreaded E.M.M.I. Zone door. We gotta go inside unfortunately, so let’s do this.
Enter and slide under the ledge. You’ll see a little flying robot which, if you blast with a single missile, will drop a tooon of ammo and health. Continue through the door and you’ll find yourself in a huge, open room. Drop down until you can’t anymore. You should be standing on a platform that has water underneath of it and a small tunnel to your right. That tunnel is where we need to be, but we can’t fit through it like this. Head to your left and you’ll see an interactive control panel. Stand on the panel and water will start filling up, raising the ground level.
Now, you may have to stand on this panel in intervals since the E.M.M.I. is more than likely on your tail. That’s okay! Stand for a couple seconds, wait until the E.M.M.I. is close, and then run away and do a loop. Don’t get too far ahead of the E.M.M.I. since you never know when those demon robots will switch directions. Slow and steady will win the race here. Once the water is full and the ground is level with the tunnel, head over and slide through.
You’ll slide for what seems like forever, finally landing in a different part of the E.M.M.I. Zone. Slide once again under the pillar, drop down, and exit the E.M.M.I. Zone to your left. FINALLY!
You’ll exit into some more water, so jump out and use the ammo recharge station if you need to. Head through the bottom passageway into a new room. Once the enemies are cleared, you’ll be able to see the cold frost emanating from the power blast door. Cold is a big no-no for our Metroid DNA, so instead, blast the tumor under the door and slide through.
Drop down and blast the missile cover on the door, entering the next room. Clear the enemies and drop down. You’ll see doors on either side of you and neither can be opened with our current weaponry. However, there is a tunnel underneath the door to your left, so slide under it. At long last, we’ll encounter a Chozo Statue, holding the CHARGE BEAM. Go and claim your prize!
Artaria Central Unit
Equipped with your new charge beam, charge up some shots and press to the right for two rooms. You’ll now find yourself all the way back at the starting area.
Keep heading right, hopping over the crab and retreading the same opening hallway. Instead of jumping up at the end of the hall, however, charge blast the door on your right open and enter. Hop up onto the ledge and take out the stupid sucker-type enemy attached to the wall (dunno about any of you other Metroid veterans out there, but I was missing Xeno’s in this game) and then slide down. ENERGY TANK #1 is there for the taking! Grab it and exit top right.
You’ll find yourself back in the first vertical hallway we traversed through earlier. Make your way up and to the Save Station.
Exit and drop down into the pool of water that you filled earlier, charge up a shot and then blast the door open to your right. Drop down and then enter the E.M.M.I. Zone. You’ll see a cutscene of the Central Unit awakening to your movements. Looks ominously familiar…
Continue to the left and then slide down into the U-shaped room from earlier. You should be familiar enough with the layout, so make your way up and out of the E.M.M.I. Zone in the same pool of water exit. Once back in the caverns of Artaria, head back up to the Network Room with four doors inside.
Once you’re there, charge up a shot and blast your way through the upper right door. In this next room, slide under the middle blocks to grab MISSILE EXPANSION #4. This room has become somewhat infamous for certain players becoming stuck, including game designers, but luckily, I am here to help you by informing you that all you gotta do is point up and shoot at the ceiling and the blocks will dissolve like a turkey on Thanksgiving. Proceed up and to the right.
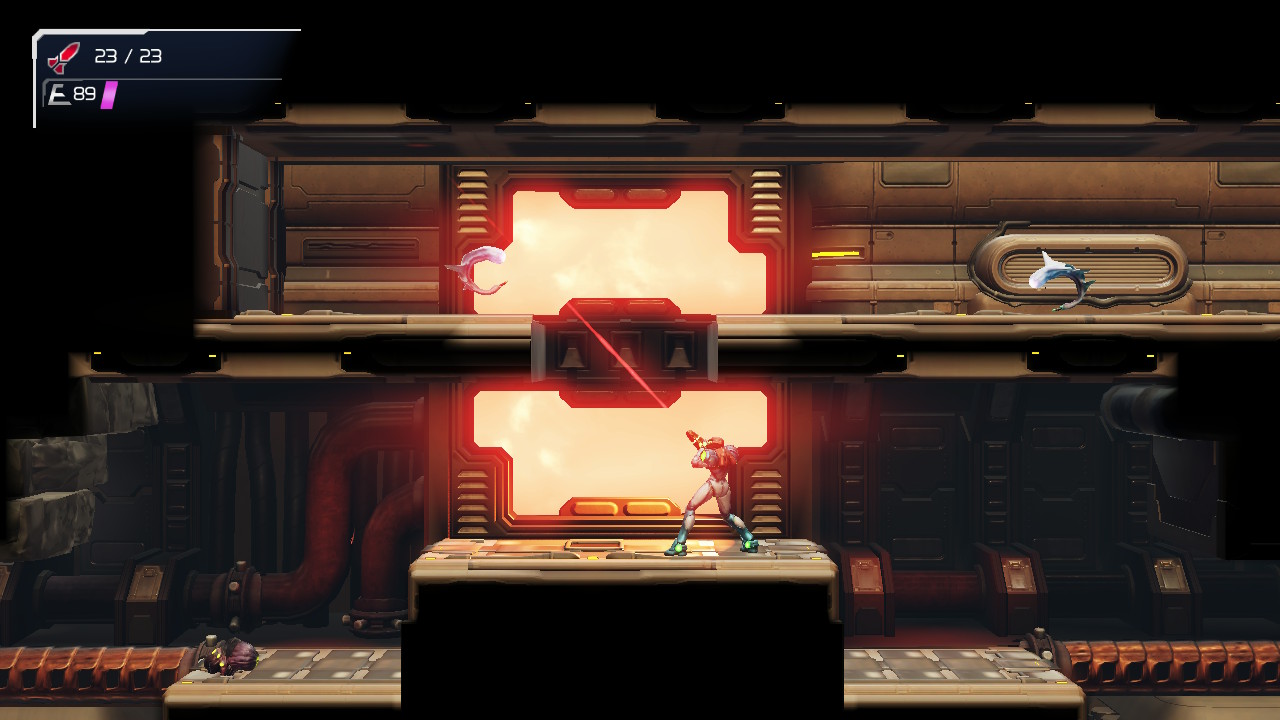
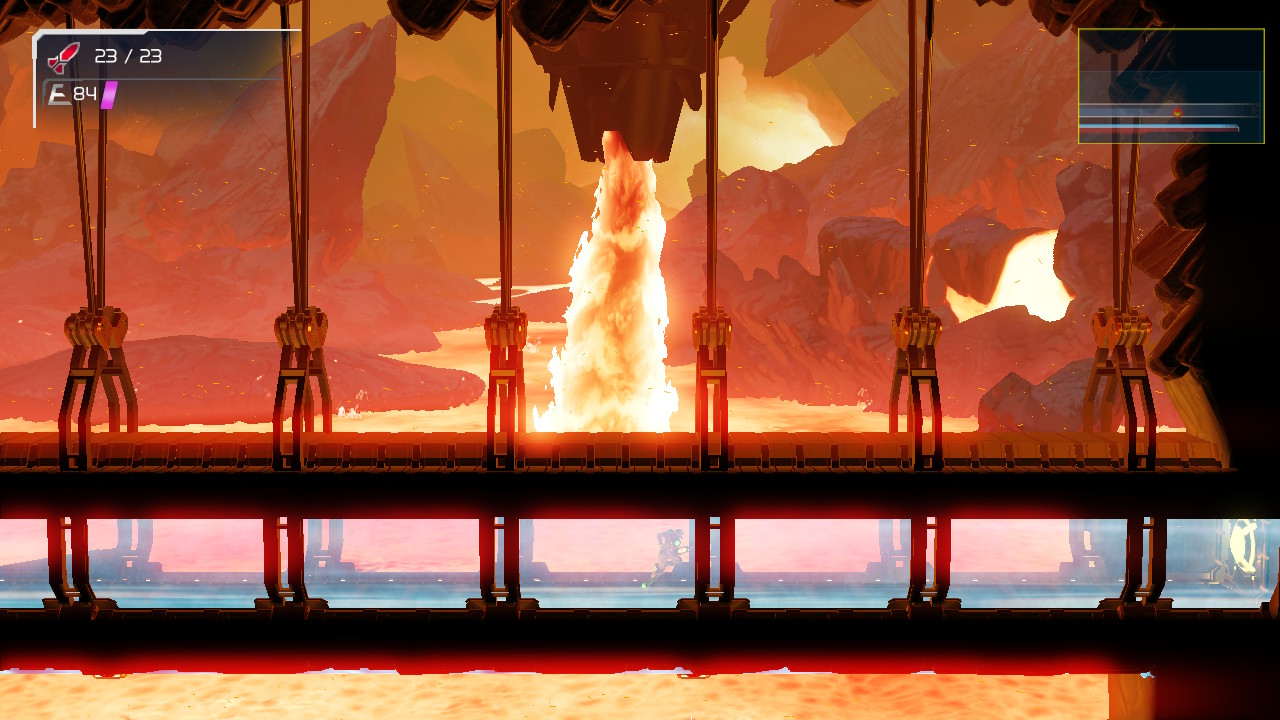
Blast away those annoying flyers and get up to the door on the right in this room as well. You’ll be in a long glass tube with a crazy impressive spire in the background spitting flames over a spectacular river of magma. Man, this game is gorgeous! Continue on until you get to the end and head through the door.
This next room is a vertical hallway that will have a bunch of doors you can go through… just not yet. You’ll be able to see the heat emanating from the doors, and as you probably guessed, those rooms are a little too hot for us right now. Continue to the very bottom and then exit left into the Save Station.
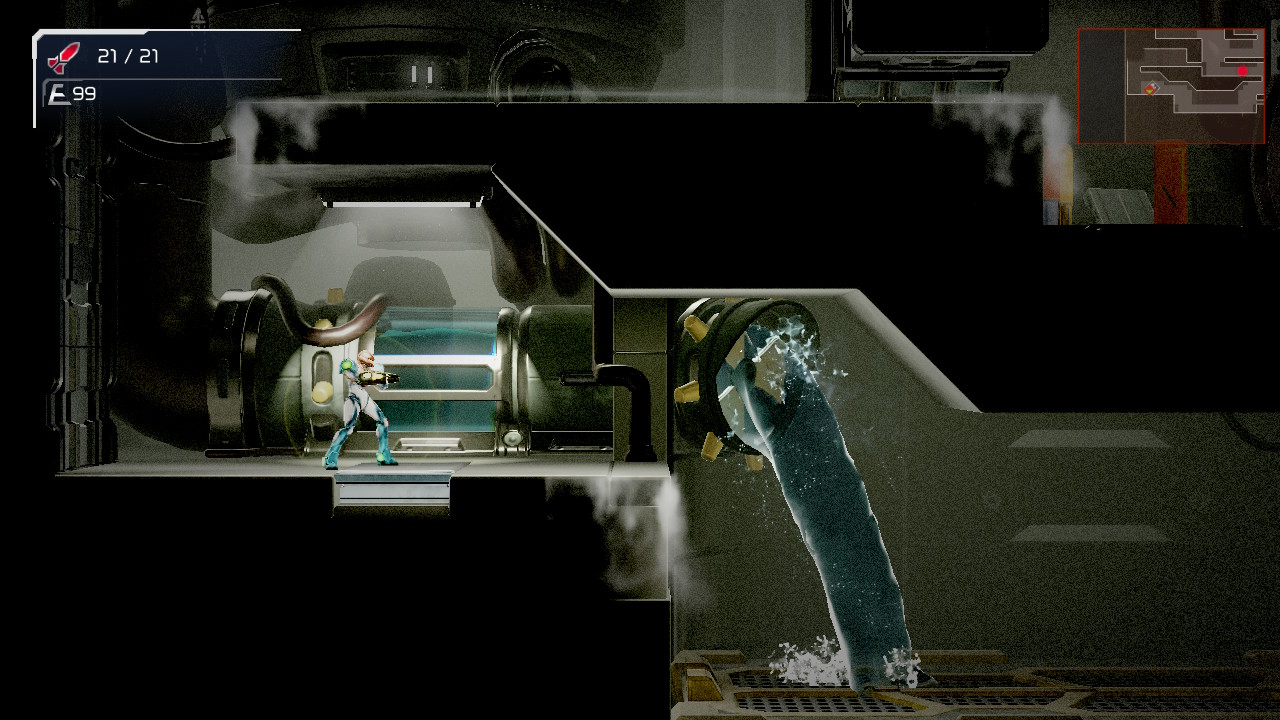
Head left and through the door and into the room on the bottom. You’ll see an interactive station that you’ll need to access, but before you do, hold on! Fire a missile at the wall to the right of the station and you’ll see that your missile destroyed a red block in your way, revealing a missile expansion. You can’t fit through here, but don’t worry – just fire a shot with your beam at the door and the access will open. Backtrack to the other room and enter above. You’ll grab MISSILE EXPANSION #5! Shoot the missile block again, slide through and activate the platform. The thermal fuel flow of Artaria has been redirected, meaning that all those thermal doors should now go open sesame when we want to go through them!

Take advantage of this immediately by going through the thermal door to your left. Head up and shoot out the tumor, getting you to the same room you entered in. Exit through the thermal door on the left and you’ll be back in “the room”. You’ll see a fuel line in the background leading back into the Network Station. Pay attention to where the fuel line goes, because we’ll be following it through the E.M.M.I. Zone. For now, step into the Network Station.
Listen to Adam’s spiel about your Chozo attacker and then head through the thermal door on the bottom left. Try and follow the fuel line as best you can as you step inside the E.M.M.I. Zone. Drop down and head to the left. The thermal doors take a second to charge up and open, so if you happen to have an E.M.M.I. hot on your tail, take a different direction. Again, following the fuel line, head left and then drop all the way down, going through a thermal door on your left.
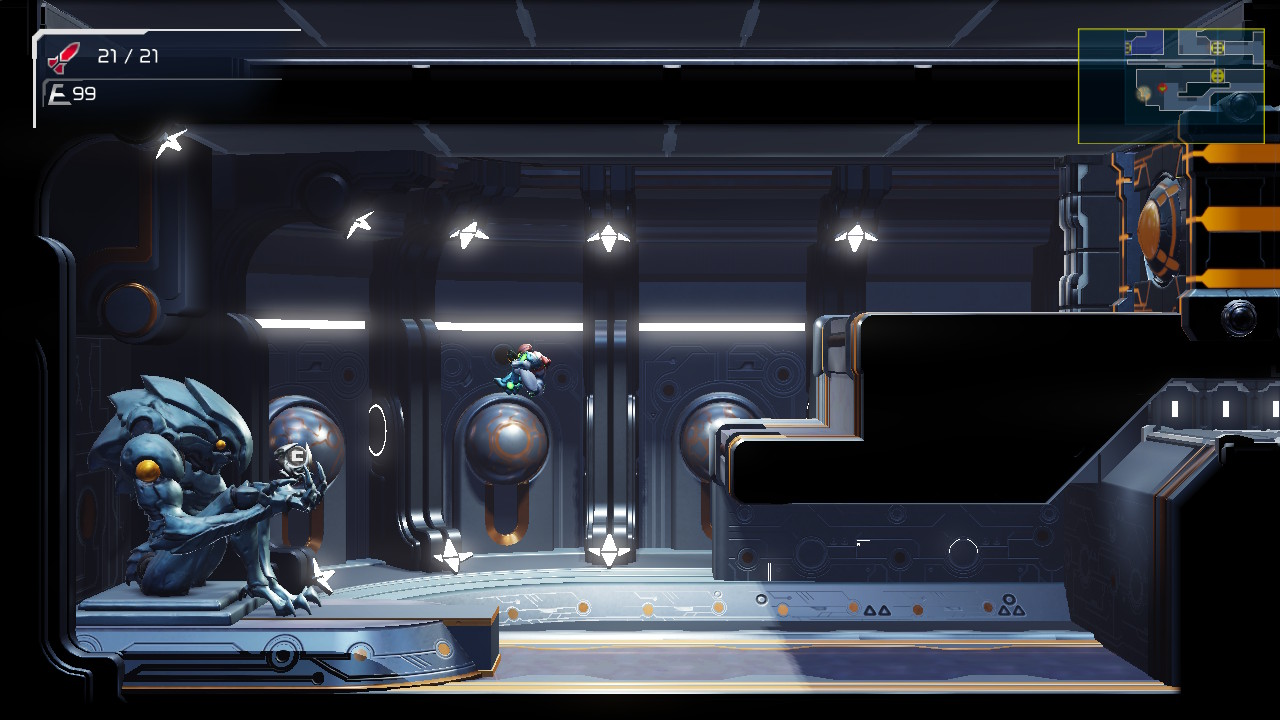
You’ll walk on top of a trap door that will give out; don’t worry about jumping over it, the other side is just a dead end, so just let yourself fall. You can jump on either the first or second platform, or you can fall all the way to the bottom, it doesn’t really matter; the destination will be more or less the same. Assuming you just let yourself fall to the bottom, slide under the ledge and jump up in the new room to the platform above you. Run to the right, charging up a shot and blast open the door in front of you. We’re getting close to the Central Unit now. Jump up in the next room and slide in the tunnel on the far right. Here we go!
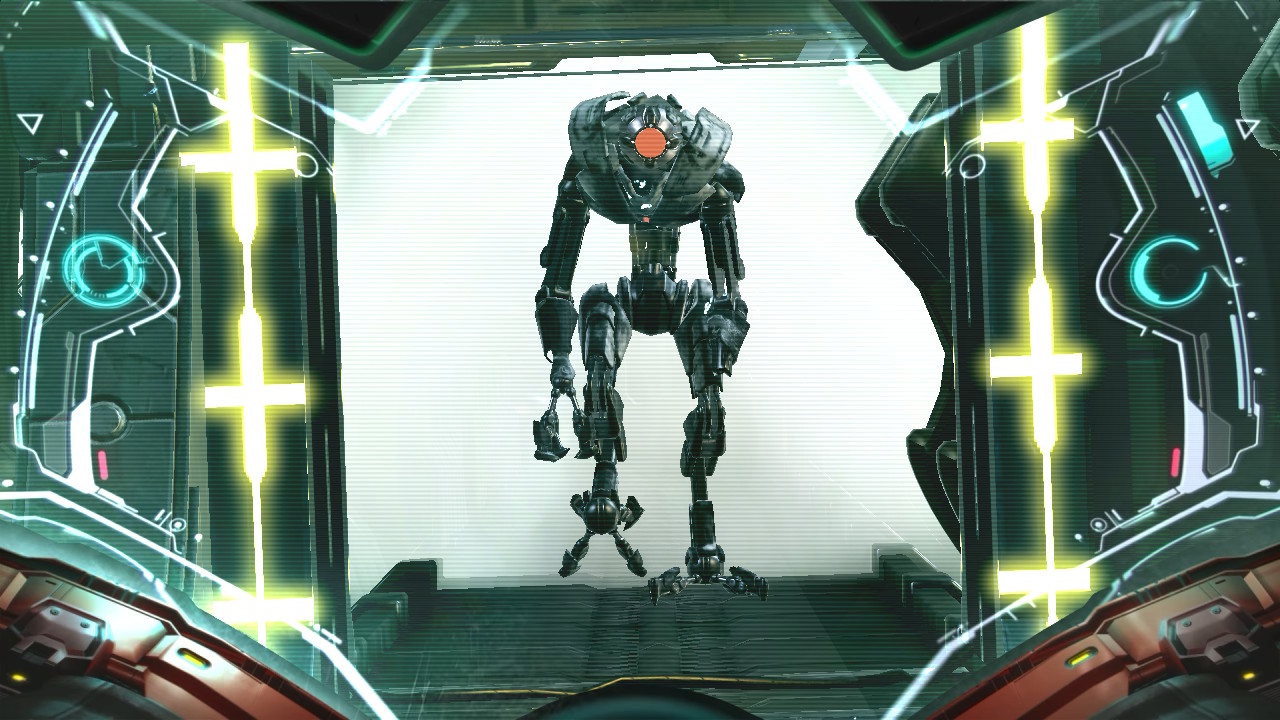
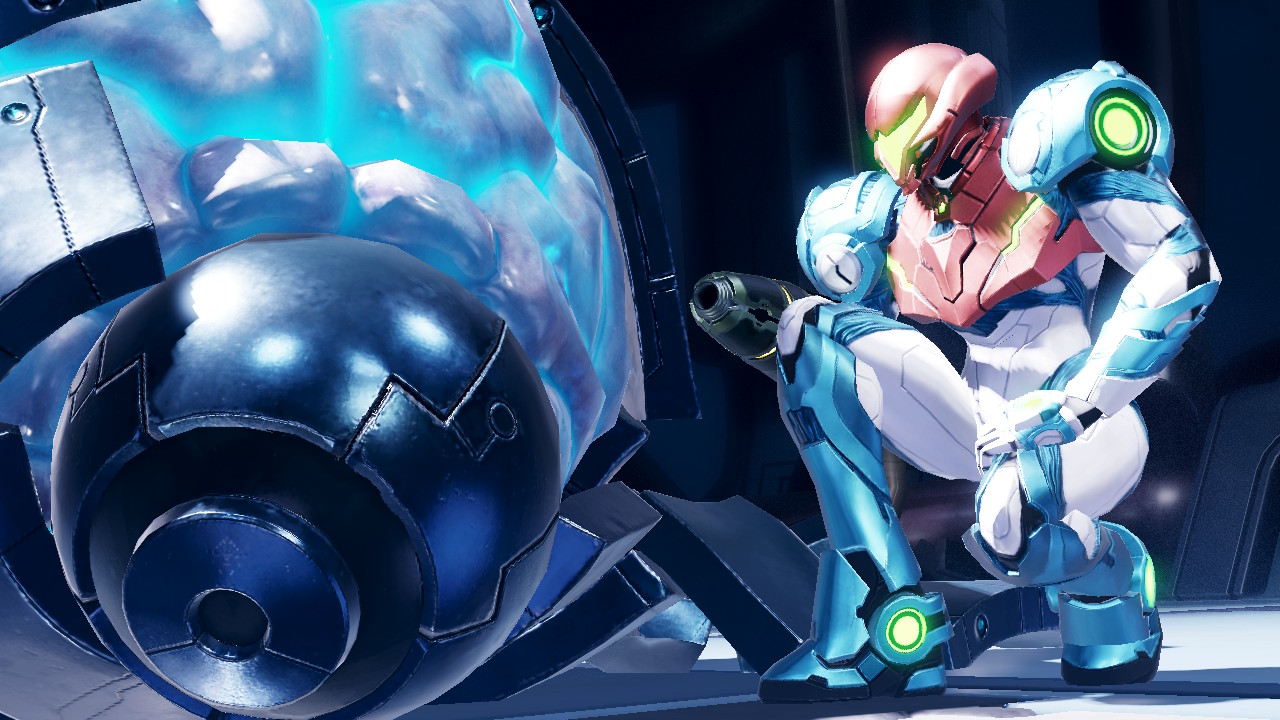
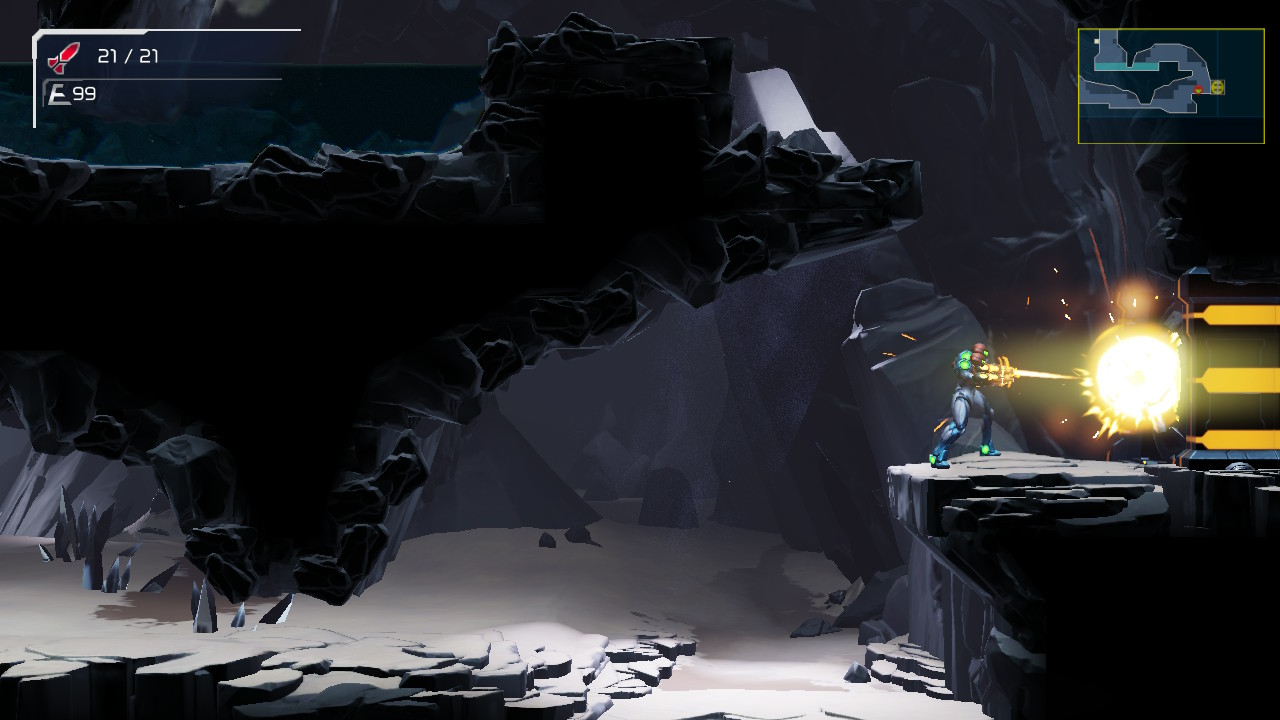
You’ll now be face to face with the Central Unit, a sentient being who will float above you and surround itself with metal protective barriers. This Mother-Brain-look alike even comes equipped with Rinkas and turret guns protecting it, just to give you that classic Tourian feeling. Once the cutscene stops, point up and unload your missiles on the Central Unit. You’ll need about 20 direct hits to break the metal plating and another 10 to finish off the exposed brain part. If you run out of missiles, charged shots will deal some damage too, and the Rinkas can be destroyed for more ammo and health. Do your best to fire quickly and avoid the incoming fire and the Central Unit should fall quickly.
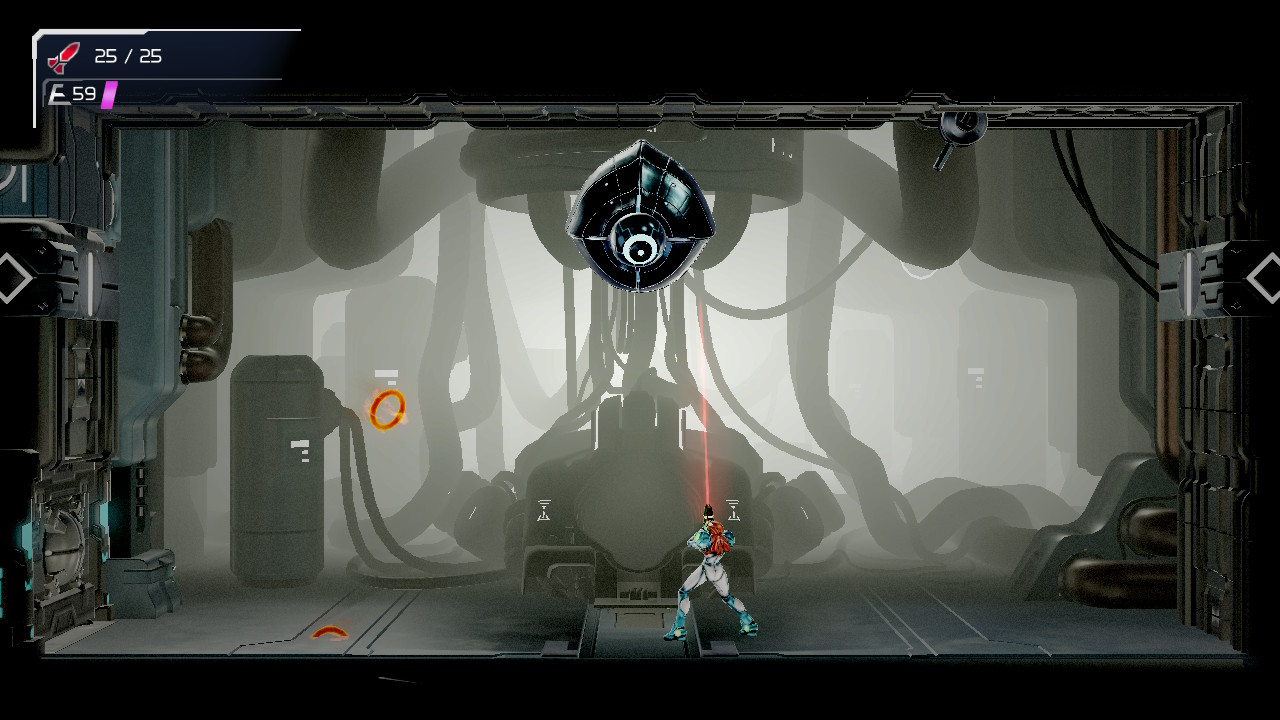
Once you’ve finished it, go over and gather up that brain juice to upgrade to the Omega Cannon. The E.M.M.I. will now know exactly where you are and it’s coming for you. Get ready.
E.M.M.I.-02SM
So, before we face the E.M.M.I., it’s important to know the difference between the Omega Stream and the Omega Blaster. Omega Stream is a continuous fire that will melt away the protective metal plating on both the door and the E.M.M.I.’s head. You’ll need sustained, continuous fire in order to melt away the protective plating – if you leave it, then the plating will cool and you’ll have to start over again, and with the E.M.M.I.’s, we won’t have much room for error. The Omega Blaster is the part you should be familiar with already – aim, charge, fire. That being said, destroy the lock on the door and blast it open.
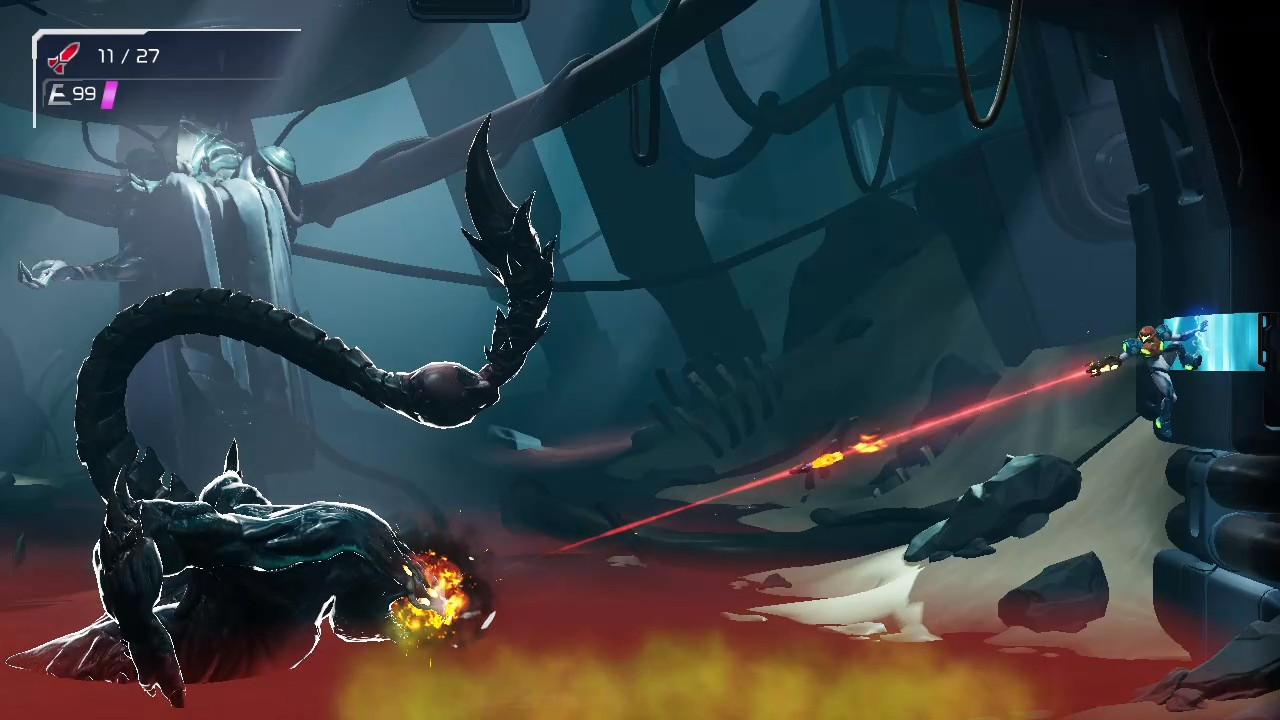
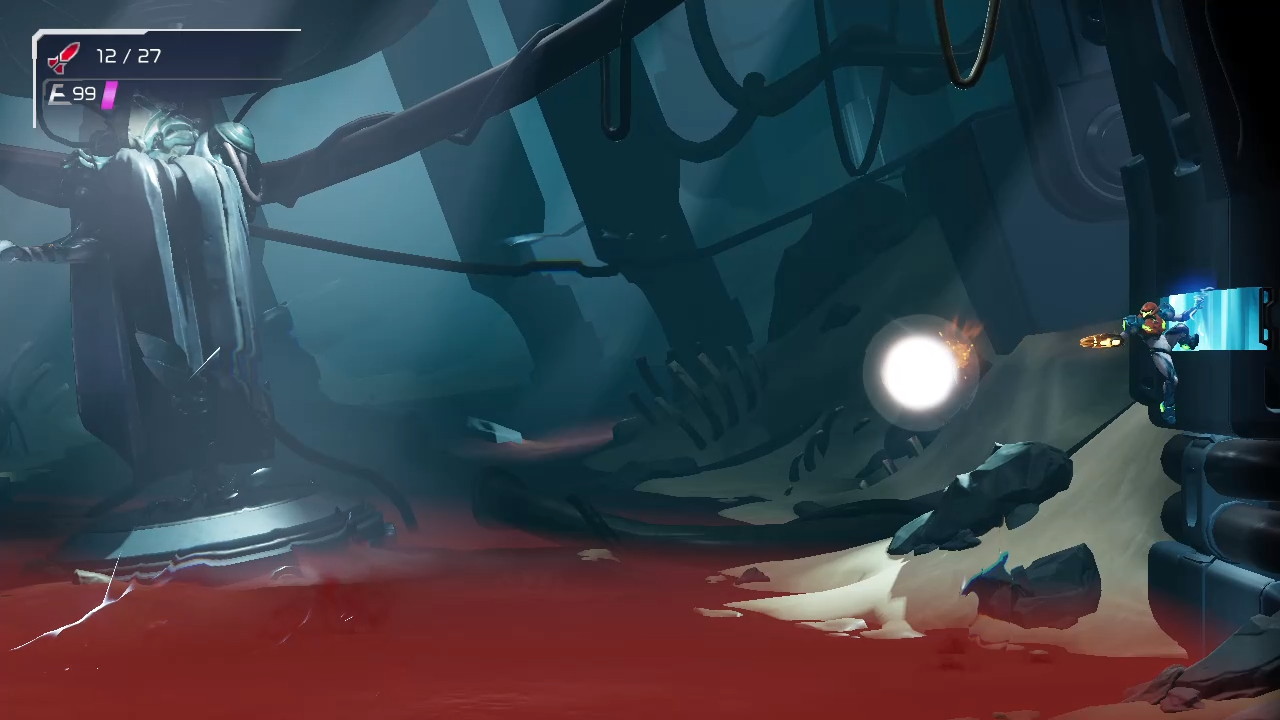
Exit the Central Unit room. I’ve found the best place to use the Omega Stream is the ledge of the upper platform after you fall. The E.M.M.I. will start crawling towards you, so blast it right in the face, carefully aiming. You’ll have to slowly and carefully move the cannon as the E.M.M.I. moves, but luckily, direct contact from the Steam to its face slows the E.M.M.I. down slightly, so you should have enough time to melt off the protective plating. It’s worth noting that after you destroy the E.M.M.I.’s face plate, you’ll have a few seconds while the E.M.M.I. shakes off to go and get away.

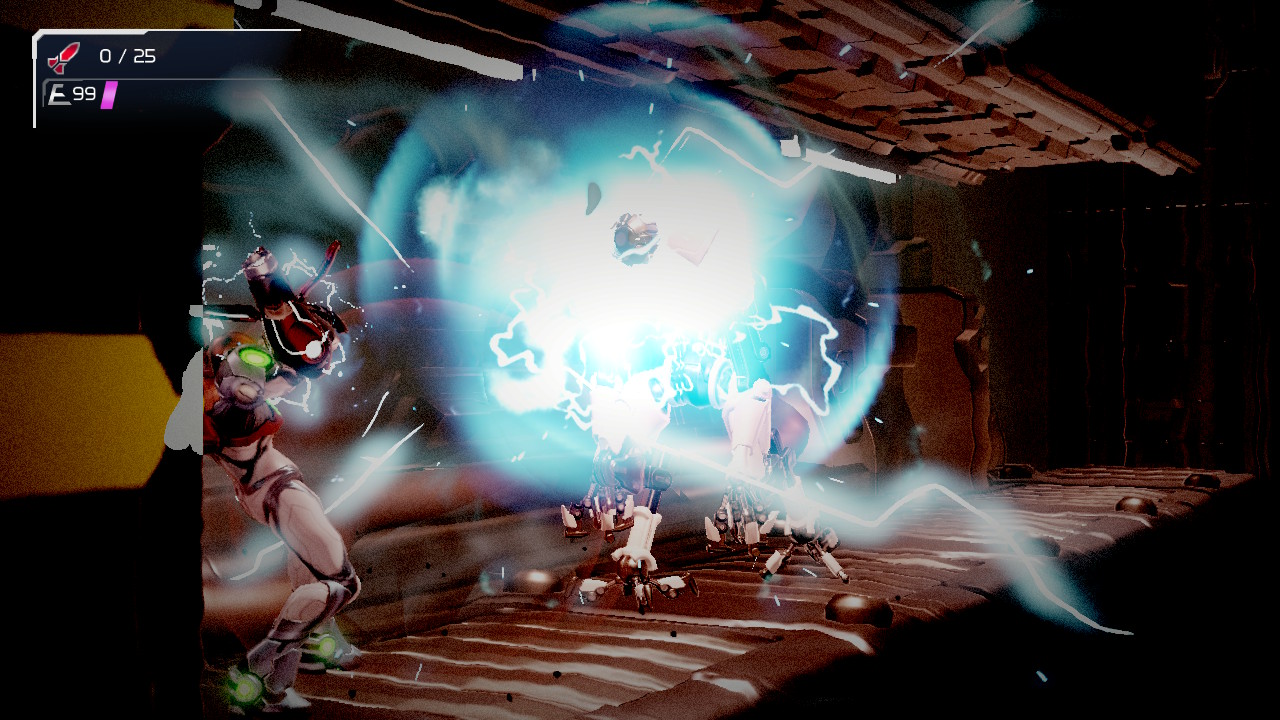
Now quickly drop down below and get to the very far left door. Turn around and start charging up your shot. When you see the E.M.M.I., line up your shot and fire away. If you’ve lined up your shot correctly, you should see the E.M.M.I.’s face fall off and the unit collapse. Go over and grab the SPIDER MAGNET! This will allow you to grab the blue magnetic tracks that are strewing about all over ZDR.
Once you get going again, shoot the door open to your left and go through. Head to the upper left door and put that Spider Magnet to use. Jump up and grab the tracks, climbing up and out of the door. You’ll see another spider track on the wall and a small platform with a spider track underneath it. Jump up and grab the track underneath the platform, and the thing will fall down into place a little lower. You can jump up on it, and through the door on the right. Continue and jump up to the door on the right.
You’ll be back in the U-room now (I think I’ve mentioned this in every Metroid guide I’ve written, but man, I hate how the 2D Metroid games don’t give any of the rooms actual names. Gah!). As you’ve no doubt noticed by now, the E.M.M.I. may be destroyed, but that opens the door for the E.M.M.I. Zones to be filled with regular enemies. A pretty alright trade off if you ask me, but either way, you’ll have some baddies in your way. Get to the door on the left and jump up on the tracks, scaling upwards. When you get to the top, shoot the wall to your right and jump over and grab MISSILE EXPANSION #6. Directly in front of you now is a platform blocking the E.M.M.I. Zone door, but would you know it, this platform is covered with spider tracking. Jump on and grab it and the platform will drop. Jump back up and exit the E.M.M.I. Zone.
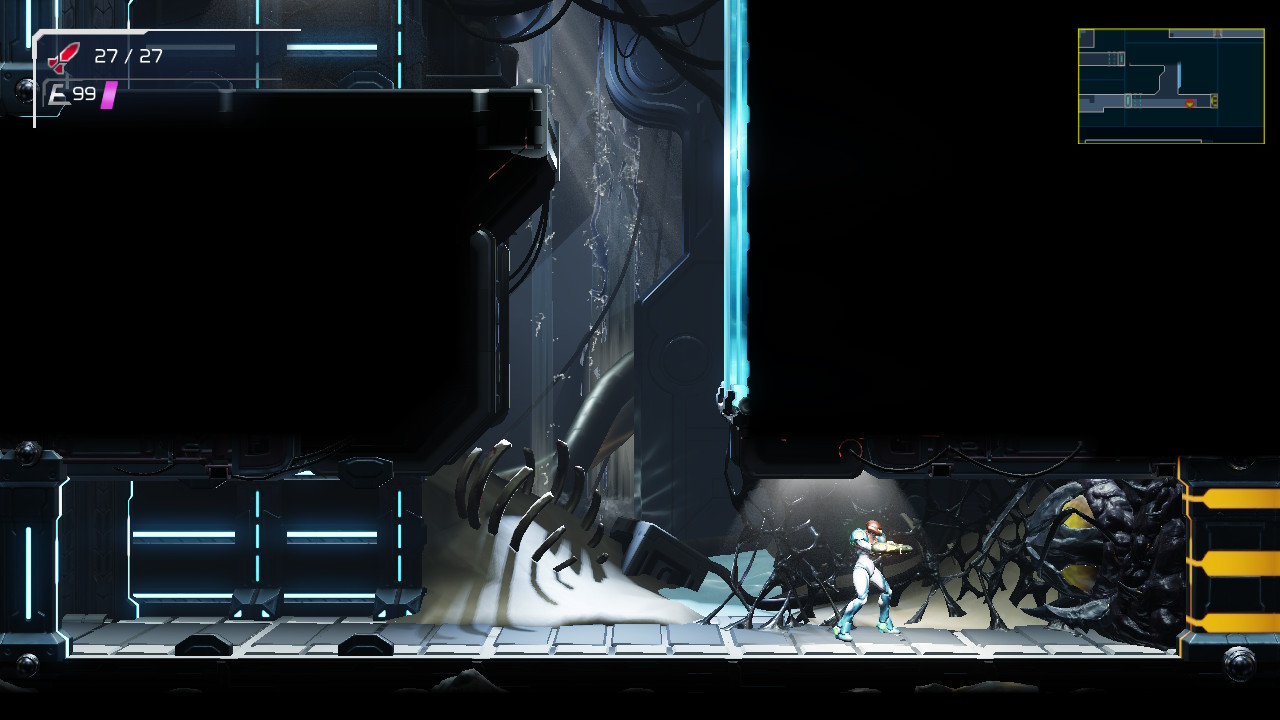
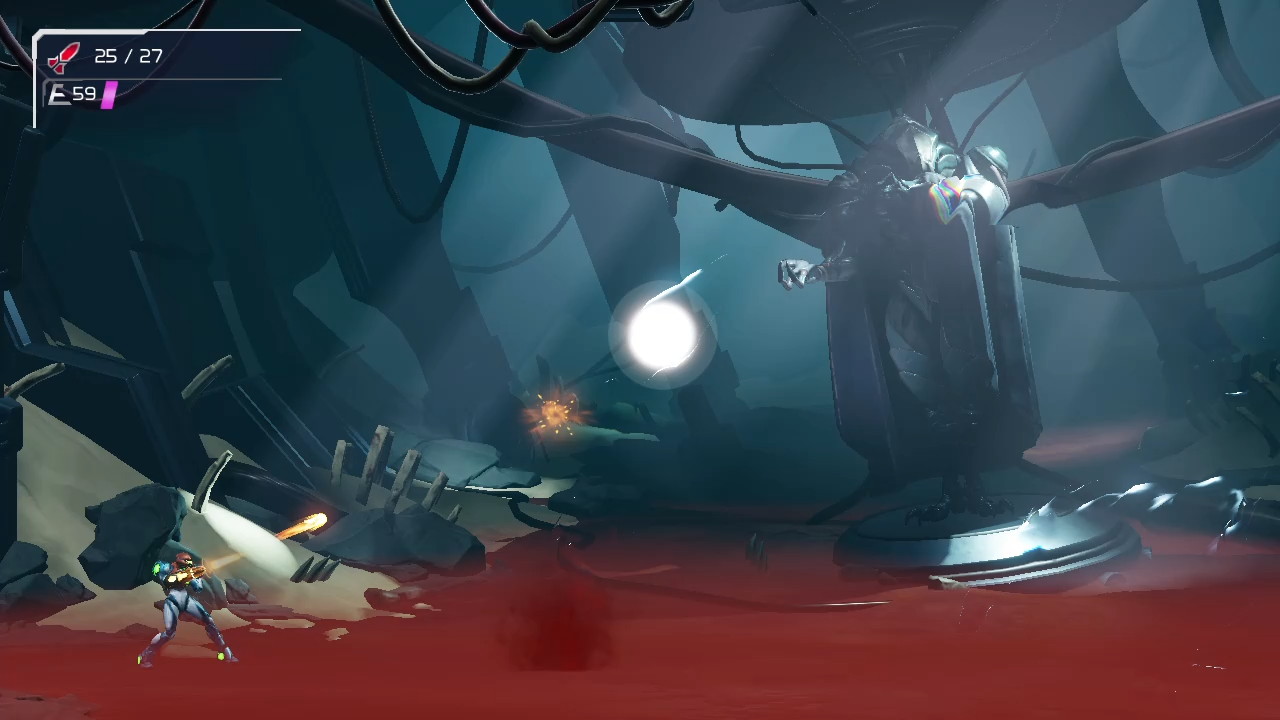
In this new room, drop downwards. You’ll see a tumor on the ground; blow it up, and then head back up and through the door on the right. You’ll be in a gorgeous rocky area that has water flowing everywhere – it’s almost peaceful. Keep going through and take the door on your right. Keep pressing forward and you’ll come face to face with a Gadora.
Gadora’s are creatures that block a door and signify a boss on the other side. These Gadora’s are a little different from the ones of Metroid past however. Instead of shooting it with missiles to destroy it, you’ll want to get close enough to it to trigger a melee counter. Destroy it, collect everything you need to, and step inside…
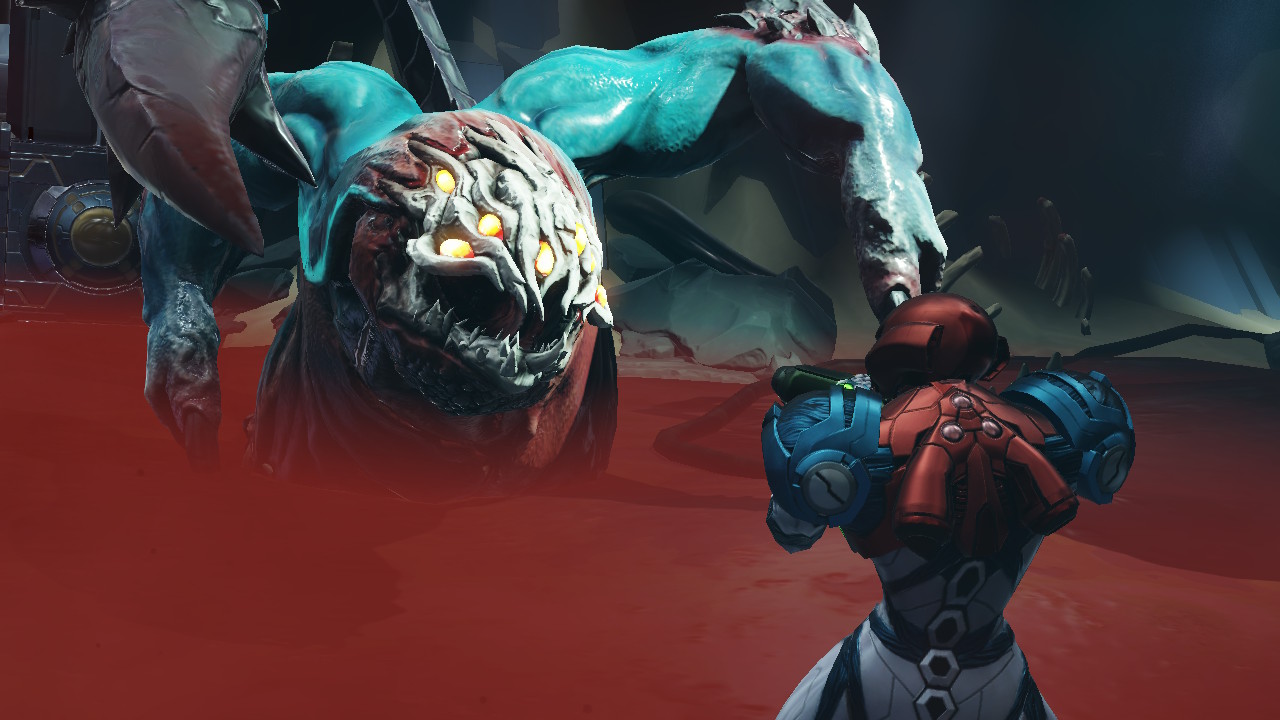
Corpius
Holy smokes, what a setting. Looks like there’s blood all over the floor. Creepy.
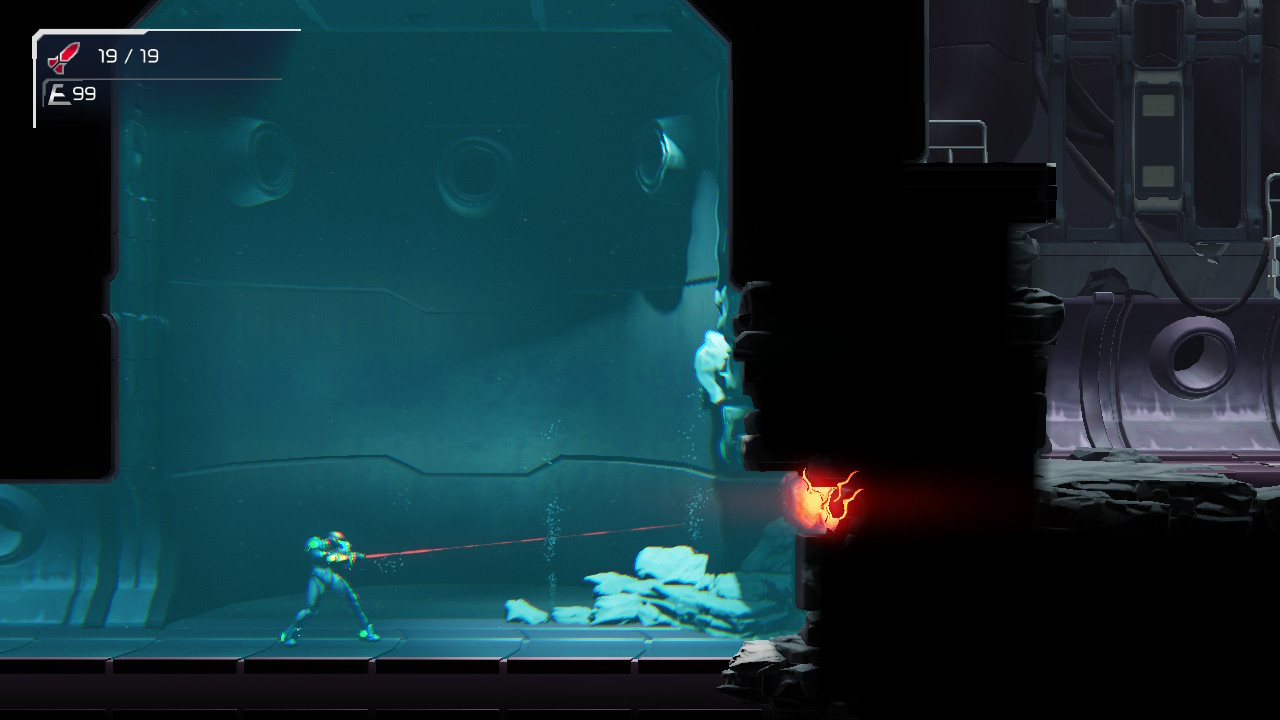
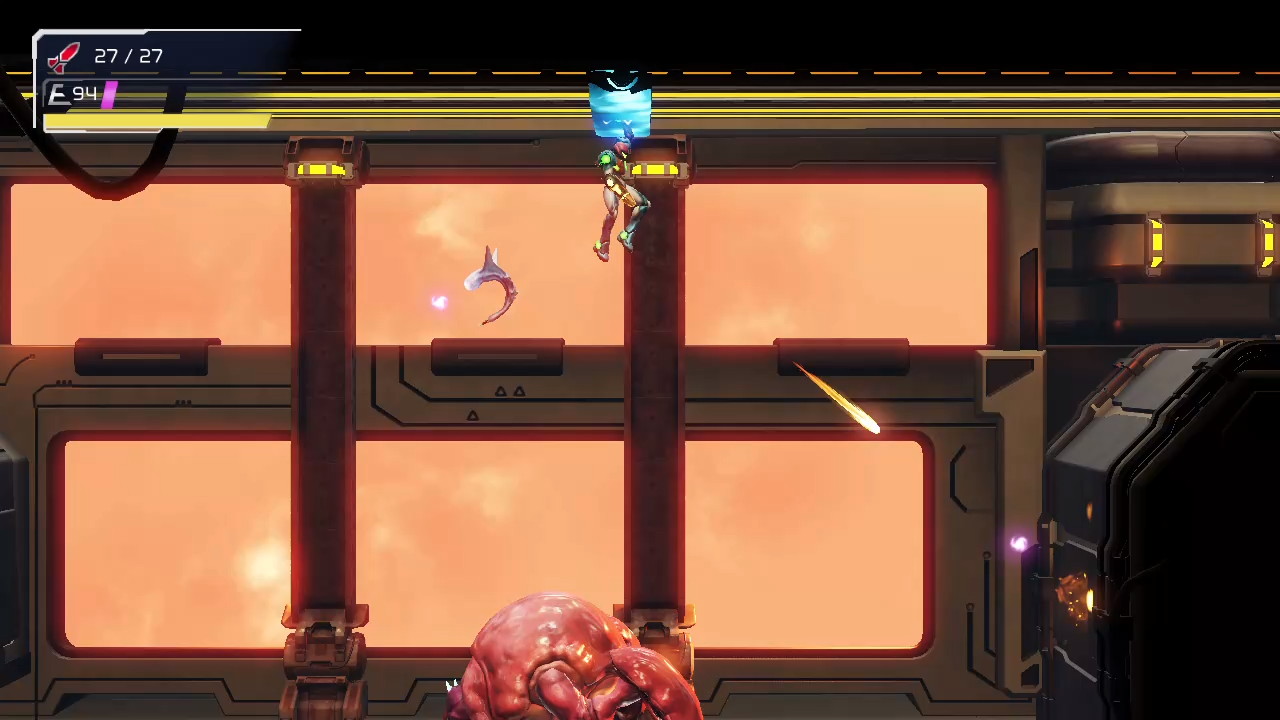
Remember that invisible creature we saw in the background earlier? Meet Corpius, a beast-like creature missing everything below the torso, except for a giant scorpion-like tail. Let’s get down to business and take this thing out.
The first phase will be somewhat straightforward. You’ll want to concentrate fire on Corpius’s head. He’ll spit out some green gunk at you every now and then. Simply shoot the gunk and you’ll get ammo and health refills.
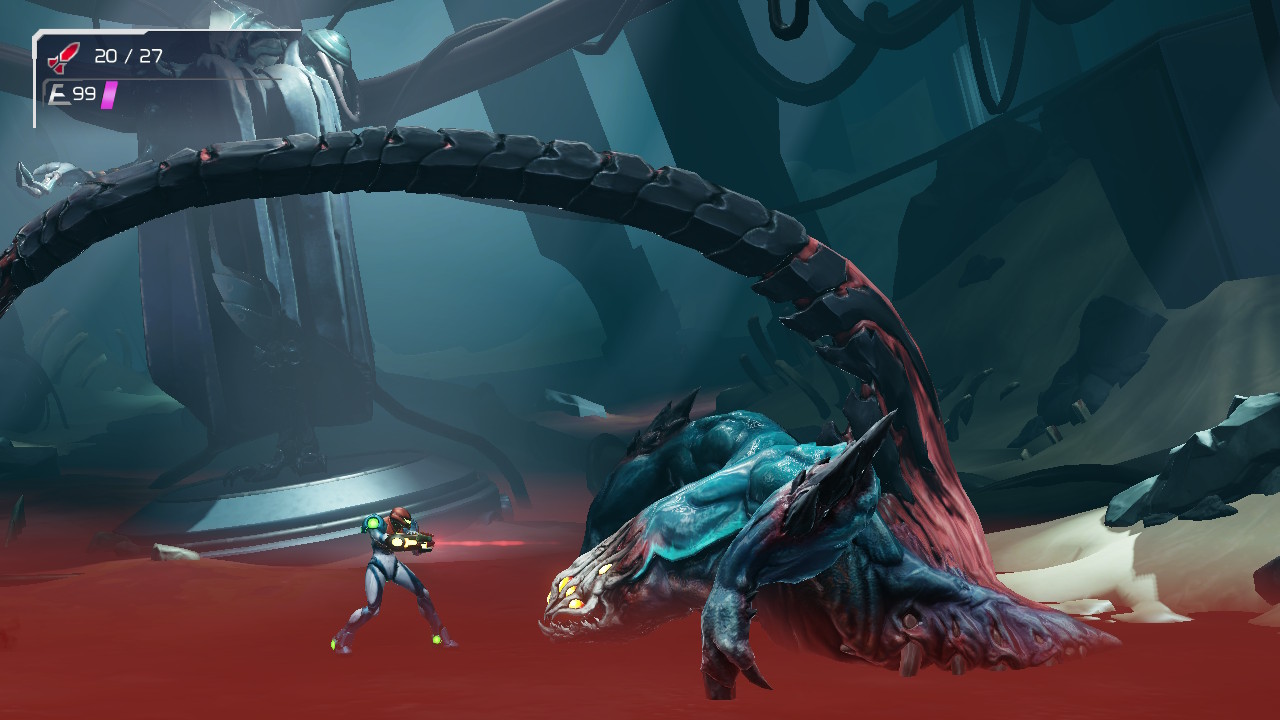
Pay attention to what its tail does, because that will indicate what kind of attack Corp is about to unleash. When you see the tail go back and twist, that means the tail is about to strike you where you stand. When you see this, jump out of the way as his tail has incredible reach.
When you see the tail just stiffen up, that means that Corpius is about to plant his tail in the ground. Now – you can do one of two things when you see this: move backwards and out if it’s way, just avoiding it – this is the safe bet. Conversely, when you see that tail stiffen up, you can actually run towards Corpius’s head and let the tail plant itself to the ground, trapping yourself under it, but directly in front of Corpius at close quarters. This is obviously more risky, but if you get in the right position, you can blast Corpius’s head with missiles.
Keep avoiding the tail and green gunk and continue pelting his head with missiles, and phase two will trigger.
Here’s where things get interesting. Corpius will turn himself invisible. You’ll still be able to somewhat see him, but for now, the only vulnerable spot on Corpius is a spot on his tail that is glowing. His attacks will pretty much stay the same, so concentrate your fire on the glowing spot on his tail. I’ve found that just rapid beam shots are more effective than missile shots since the spot can be tricky to hit and you’ll want to save your missiles.
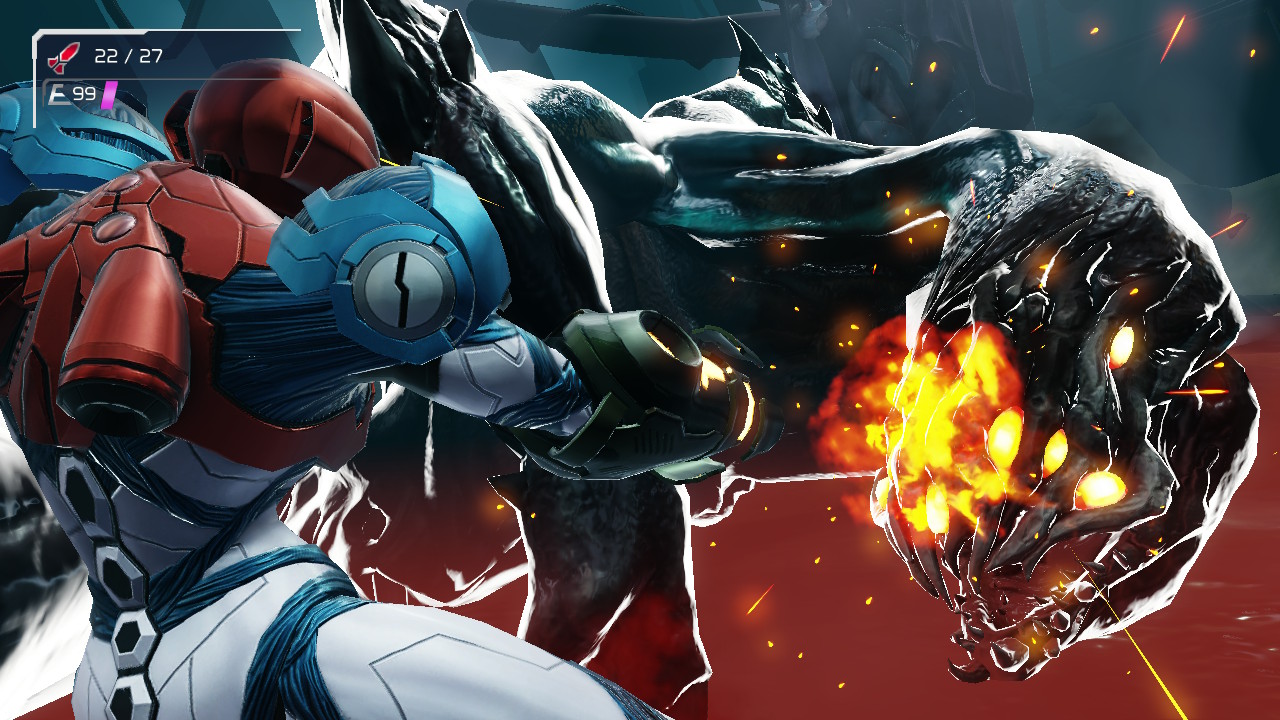
Once you’ve hit his tail enough, Corpius will do kind of a weird attack where he points his butt at you and has his tail start gyrating. Eventually, his tail will slam downwards, but before it does, slide underneath Corpius. GET READY TO MELEE COUNTER! As soon as you’re almost done sliding, the trigger will appear. Counter and then blast Corpius away with missiles!
The third phase will start, and this time, it looks like our boy is about to throw up. Run towards either side of the room and grab onto the spider track. Corpius will throw up a bunch of green acid on the ground. This is a good time to aim downwards and blast him in the face with missiles from your safe spot on the spider track. Still though, watch out for that tail, as even up there, the tail can get you.
After enough hits, Corpius will turn invisible again. Same tactics as before – blast the glowing part of the tail with your beams. Eventually, Corpius will turn around to do his butt attack again. Slide under and counter! Blast him away with missiles until he falls.
If you miss the counters, don’t worry. Keep playing it safe, blast away, and eventually, Corpius will fall in defeat. Collect the PHANTOM CLOAK as your well earned reward.
The Road to Cataris
Exit Corpius’s room and head up. Using your handy dandy Phantom Cloak, walk across the sensor lock door and into the other room. Head upwards and then over through the sensor lock door on your top right. Shoot out the tumor and head downwards back towards the thermal can’t room. Keep heading right until you get to the Save Station. Continue through and use the Phantom Cloak to pass through the sensor lock door.
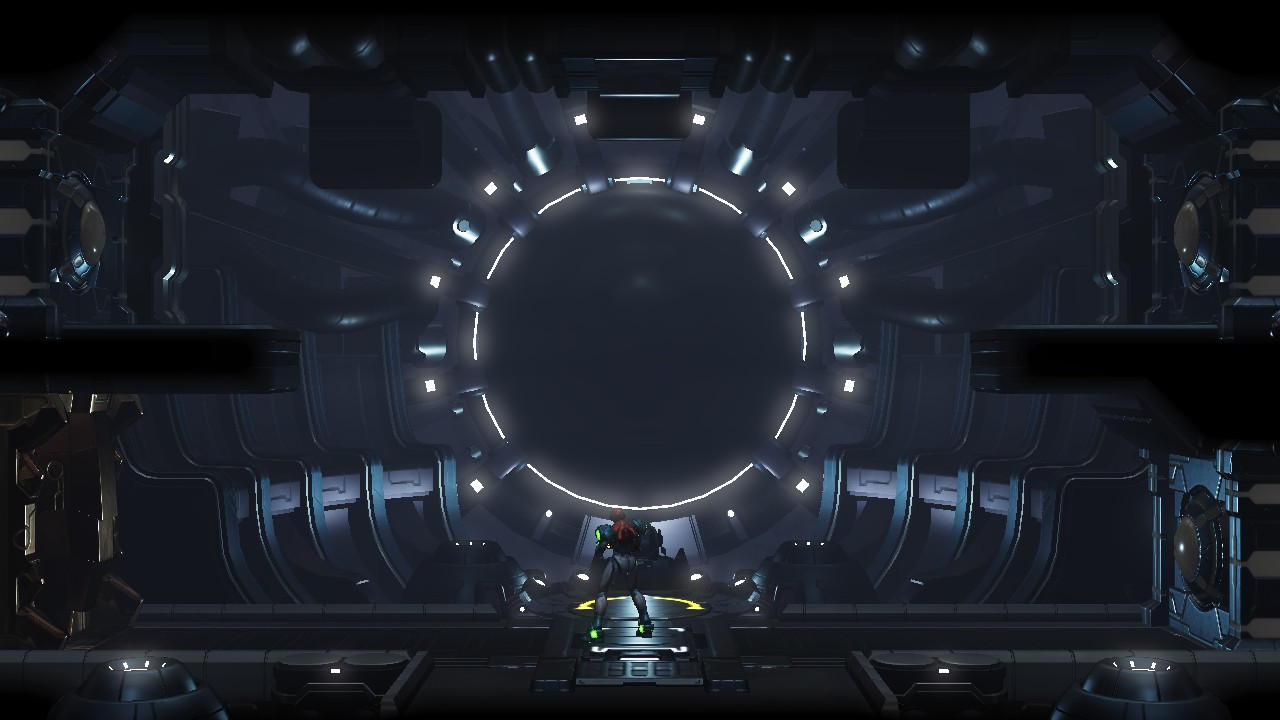
In this new room, grab the spider track in the side and make your way up. There’s a spider track on a moving rail on the ceiling, so grab it and blast away any enemies in your way. Kinda cool, right? Sort of like zip lining, but with deadly aliens trying to knock you off? No? Either way, ride up and go through the door. This room will have spider tracks going up the wall and fire blowing on every side. Make your way up and then get in the elevator to Cataris.
Next Chapter: The Furnace of Cataris