Metroid Dread Walkthrough – Energy Parts
Here you’ll find the location for every Energy Parts in Metroid Dread, as well as detailed explanations on how to get them and what powerups you’ll need.
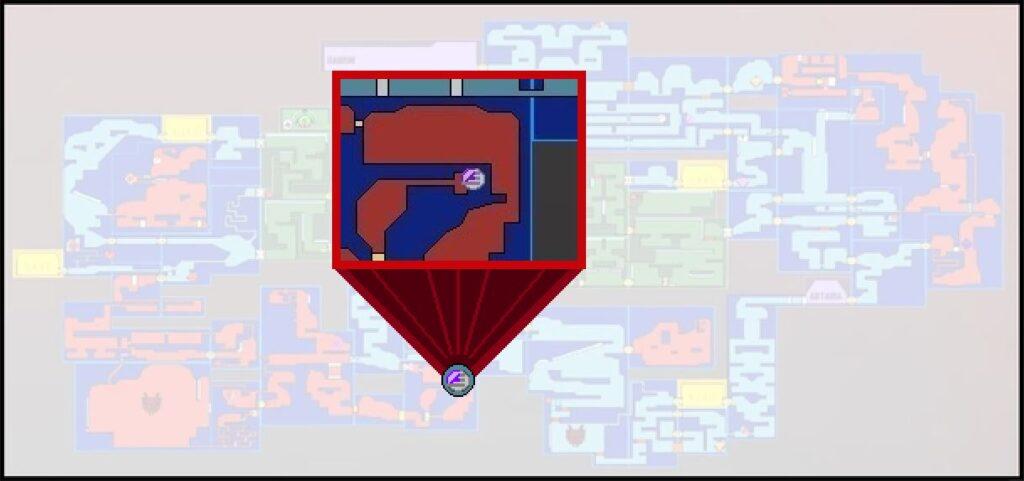
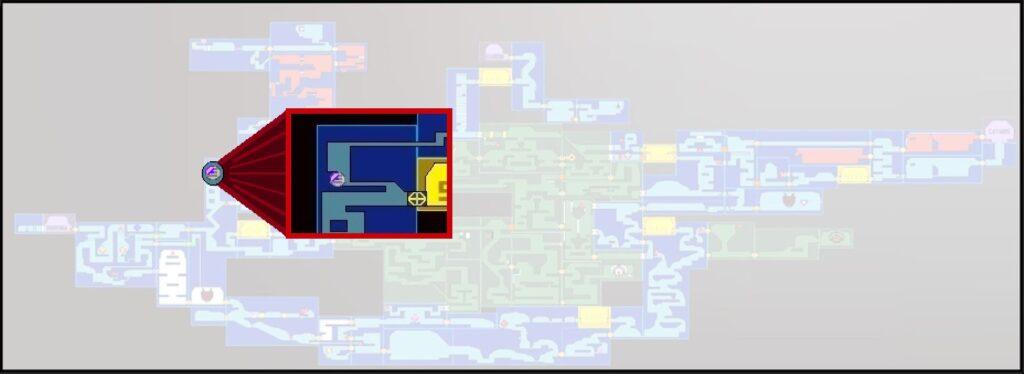
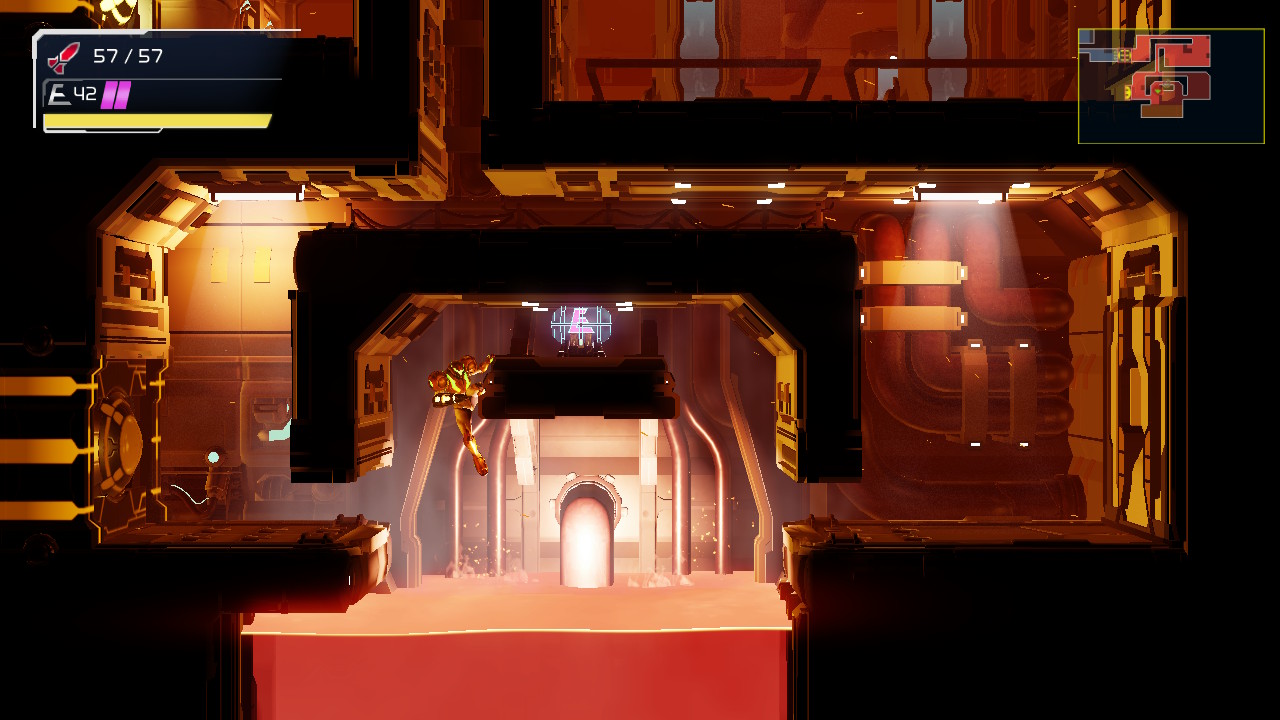
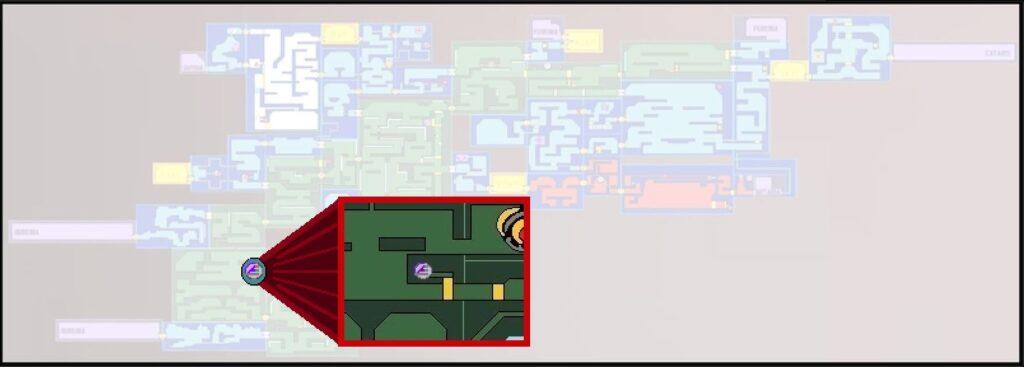
Energy Part #1
Location: Cataris
Requirements: Activate Thermal Switches 1 and 2
Get directly underneath thermal switch #2. Slide under the pillar, jump up and grab the platform, allowing it to fall and giving you access to continue onwards. Before you head back, continue forward on the path, heading in a C-shaped direction, blasting away any enemies that stand in your way, until you grab ENERGY PART #1.
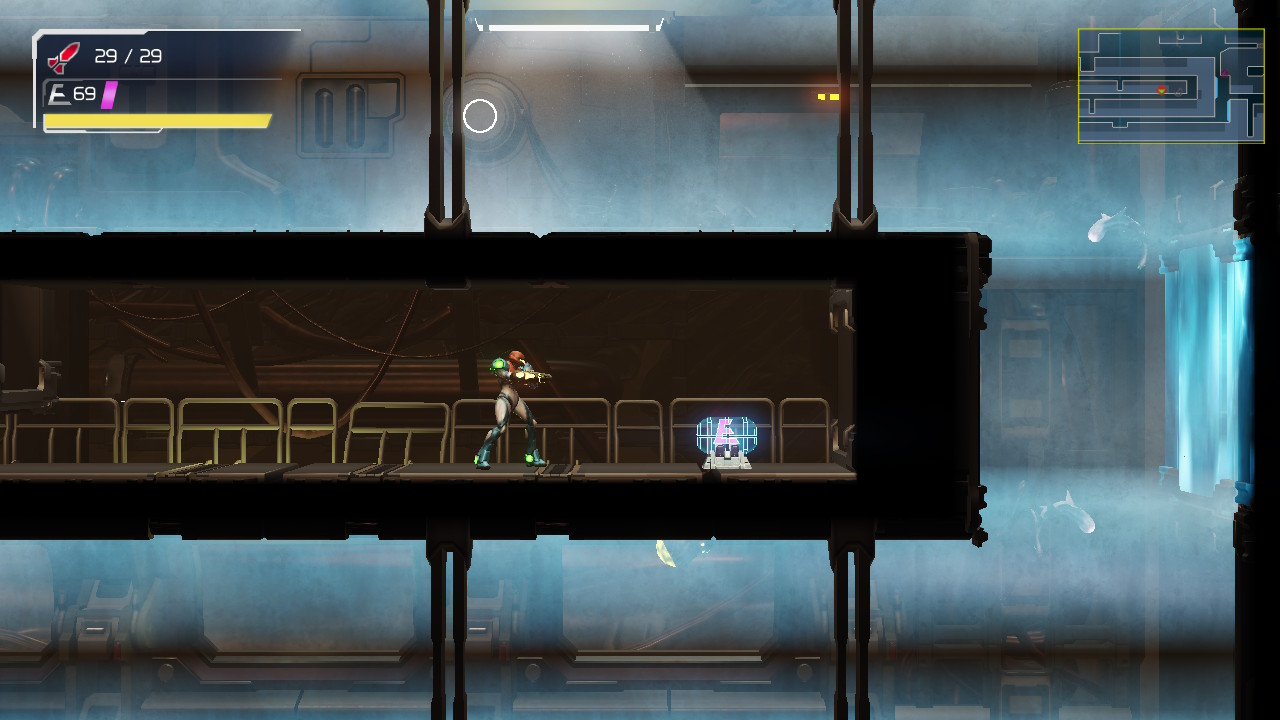
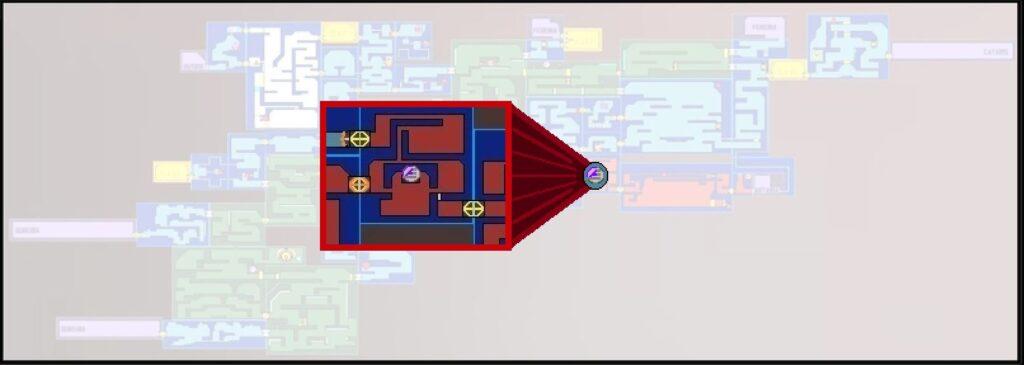
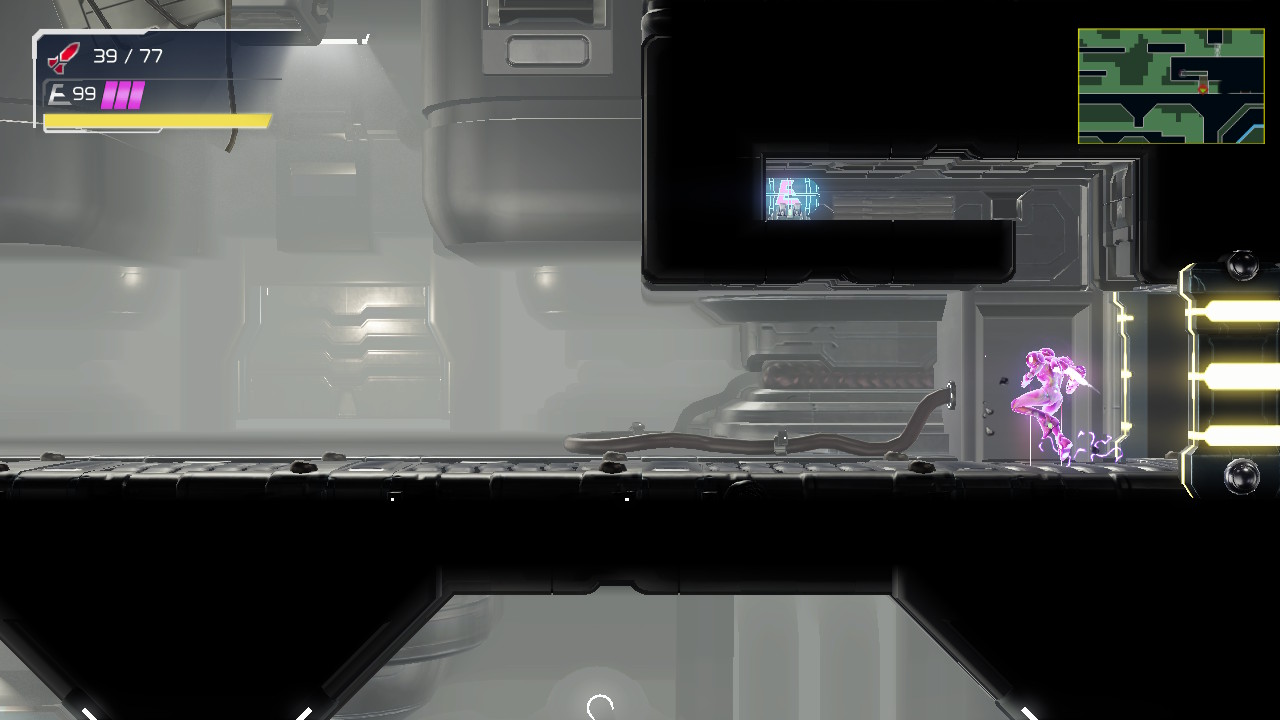
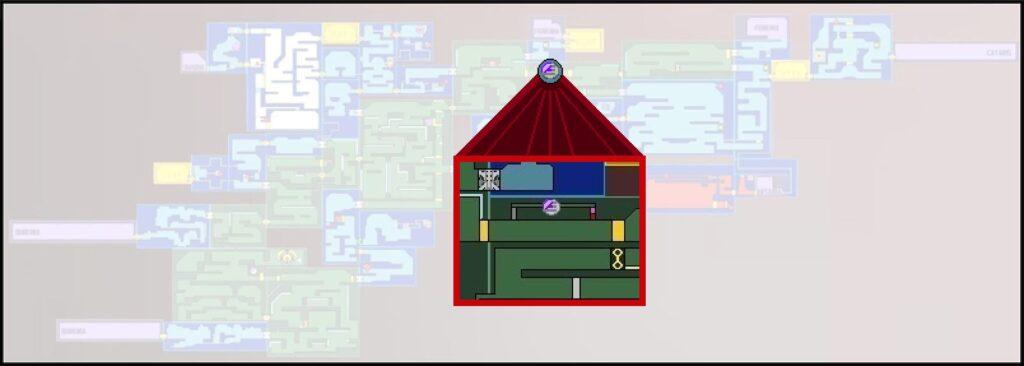
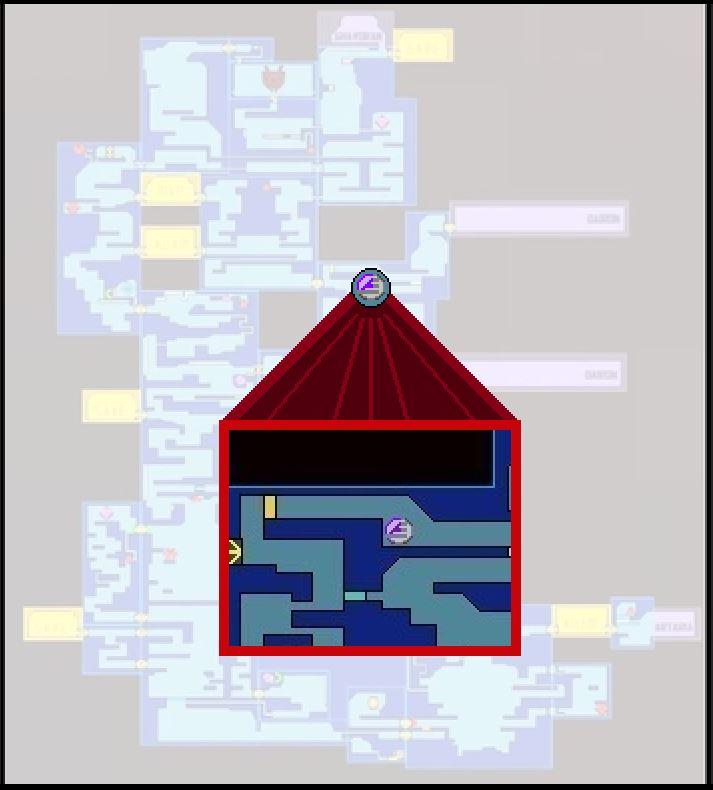
Energy Part #2
Location: Artaria
Requirements: Morph Ball
From the Red Teleportal, drop down and into the water. Continue on through the door and into the Save Station; proceed left. In this next room, jump up and enter the tunnel; ENERGY PART #2 will be right there waiting for you!
Energy Part #3
Location: Dairon
Requirements: Wide Beam, Varia Suit (Gravity Suit optional)
When you arrive in Dairon from the Purple Teleportal, shoot below you to make the tumor explode and drop down. You should recognize this room from earlier; head over to the right and blast the Wide Beam cover on the door and enter. Drop down the bottom of this room and you’ll see an Energy Part. The game intends on us coming back with the Gravity Suit to snag this, but it’s actually simple enough to get it now. You’ll want to perform a slide jump under the ledge – basically slide under, but the split second before your slide ends and you start falling into the lava, jump! You’ll grab the ledge and be able to easily snag ENERGY PART #3.
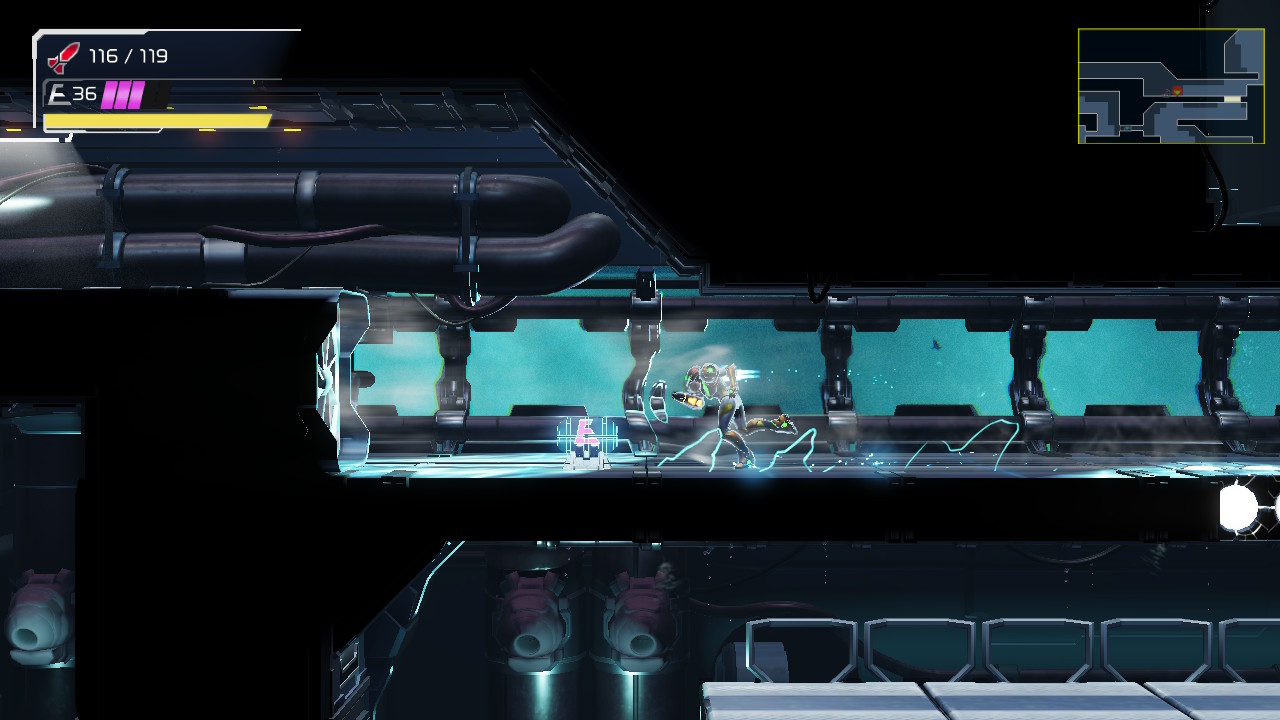
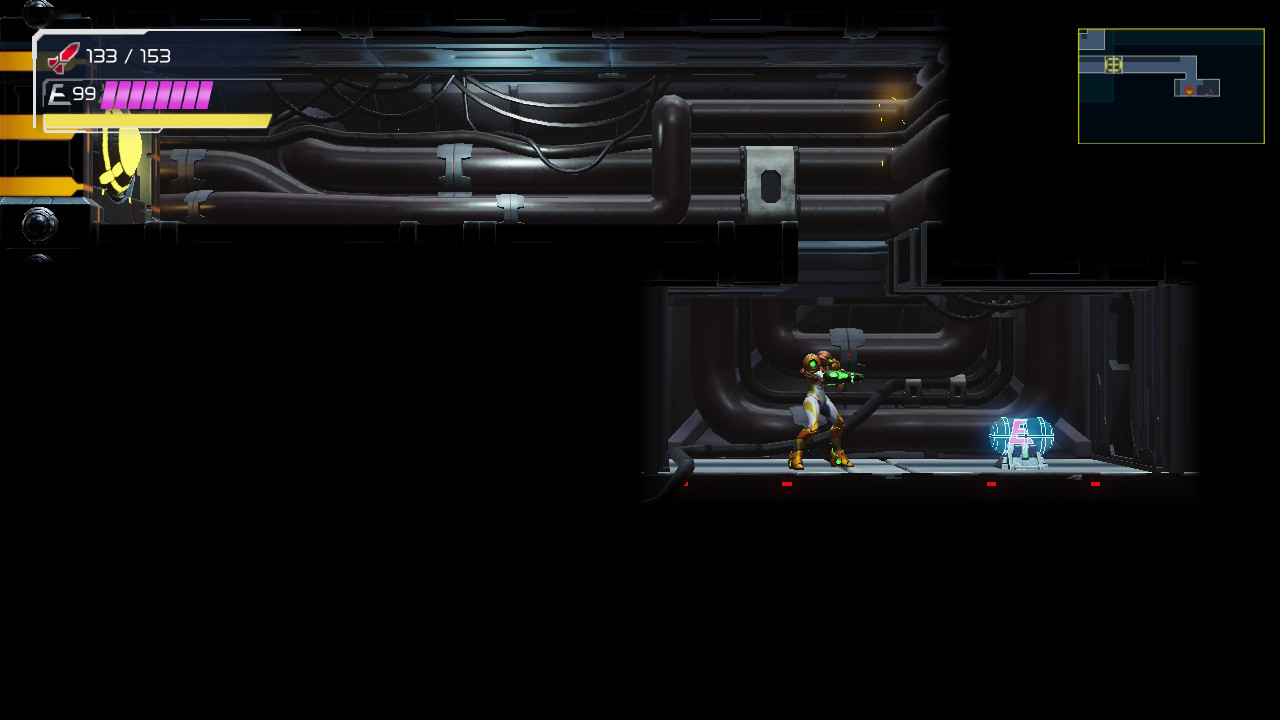
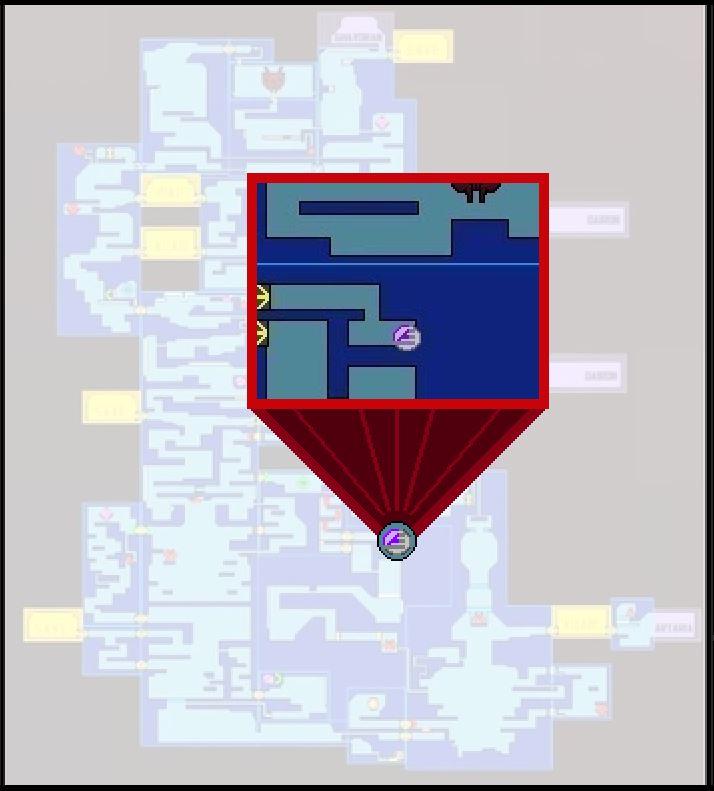
Energy Part #4
Location: Dairon E.M.M.I. Zone
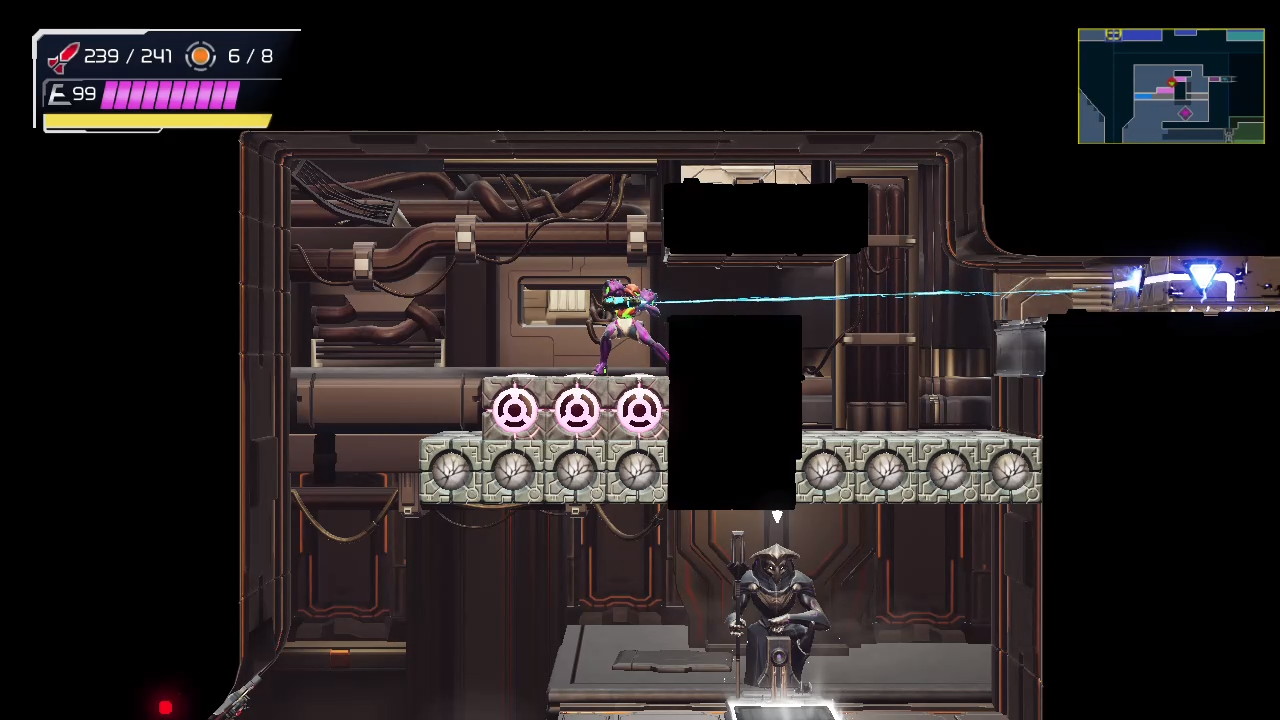
Requirements: Speed Booster
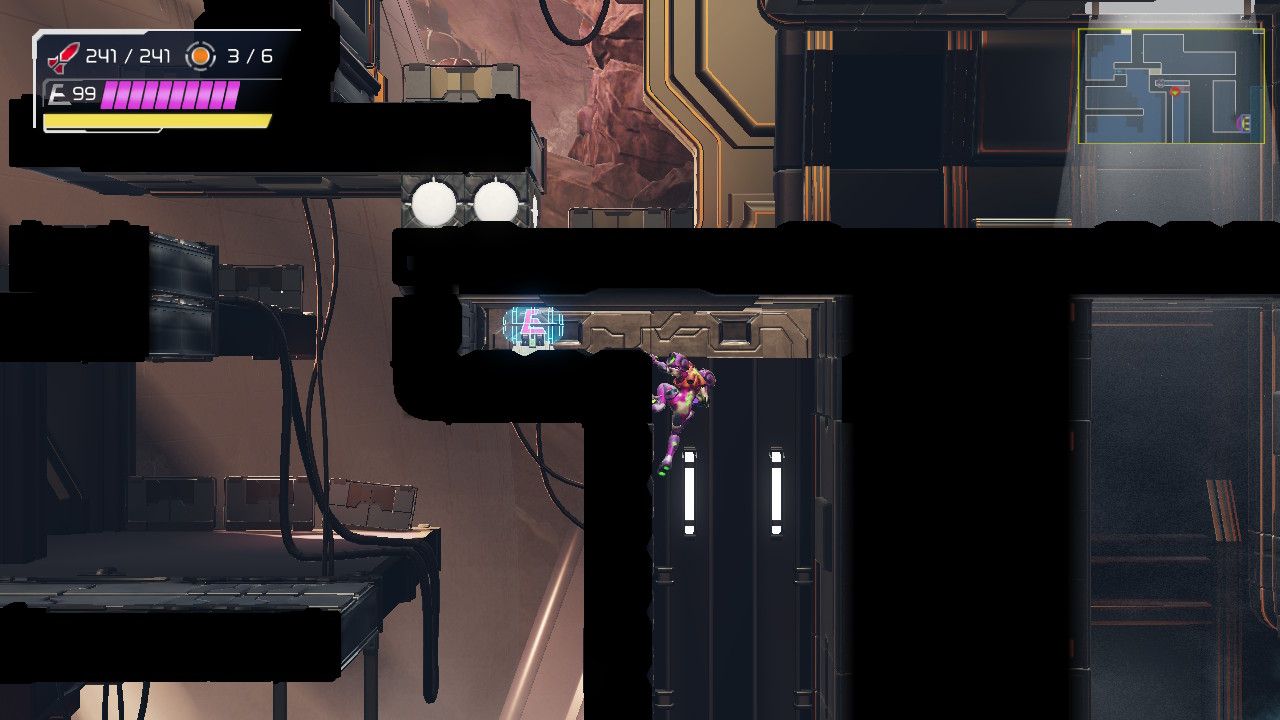
Once you’ve defeated the E.M.M.I., go to the right of the zigzag room. You should see an Energy Part that’s stuck in the wall. No worries! Head to the left and run to the right, activating your Shinespark just underneath the Energy Part. If you go a little too far and end up in the next room, no worries! Just head back and Shinespark straight up right beside the door. The Speed Boost blocks will break and you can grab ENERGY PART #4, giving you an extra tank of health!
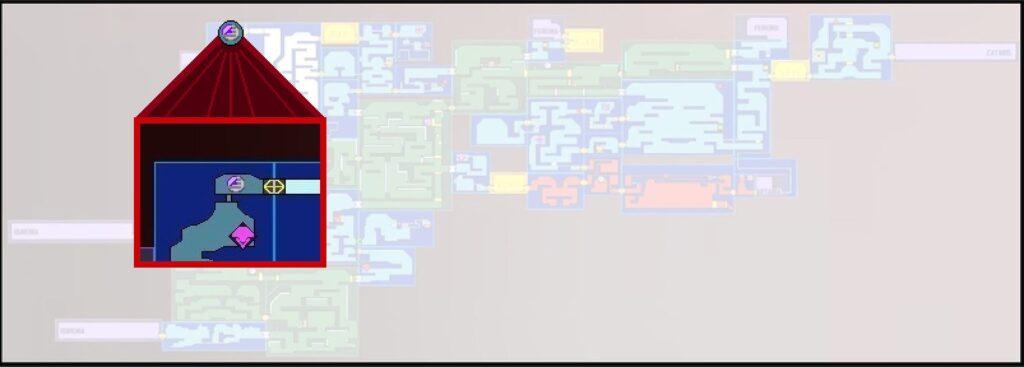
Energy Part #5
Location: Dairon E.M.M.I. Zone
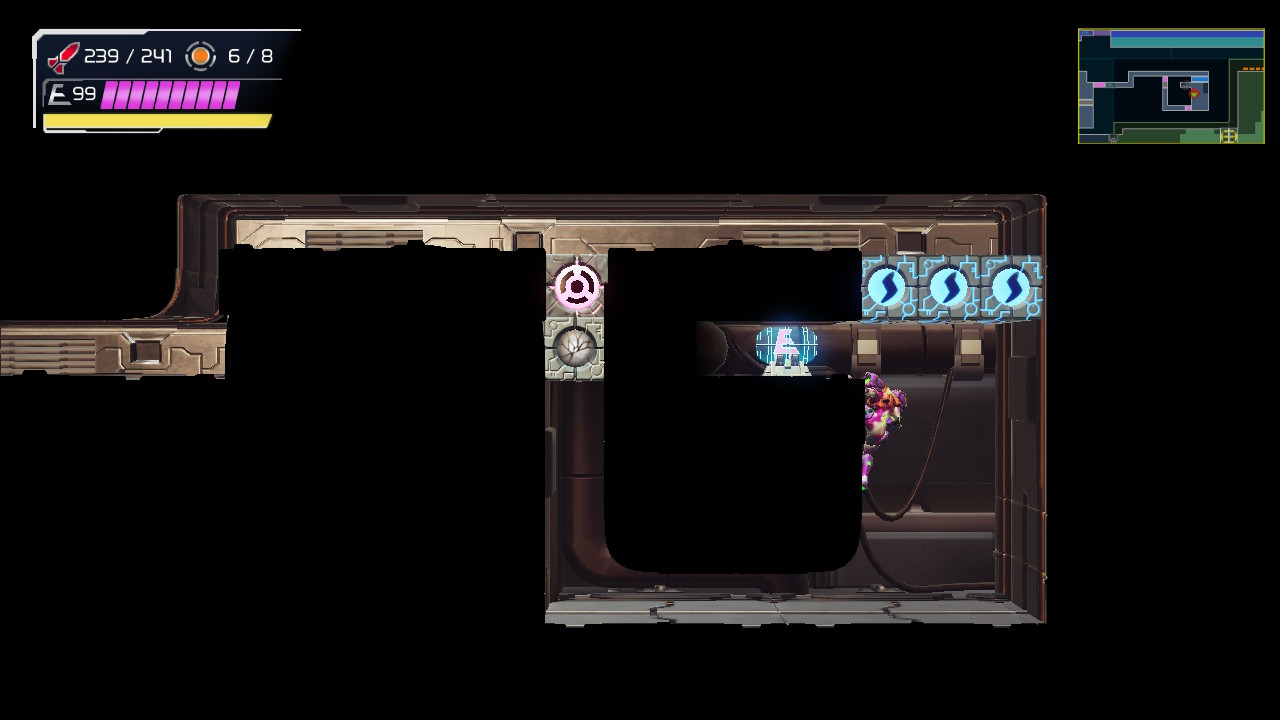
Requirements: Speed Booster, Bombs, Morph Ball, Space Jump (optional)
Activate your Speed Booster, taking out the Speed Boost blocks on the way. Using the shutter below you as a measuring stick, walk about four or so steps to the left from the start of the shutter and shoot a missile at the ceiling. You’ll see a missile block give away. Quickly, turn into a ball, jump and lay a bomb, and then jump when the bomb is about to explode again. You’ll be shot up higher, so quickly lay another bomb at the apex of your jump, breaking the bomb blocks and allowing you get into the small tunnel above you, grabbing ENERGY PART #5. This is known as Bomb Jumping in Metroid, and luckily, its easier than ever to pull off in Metroid Dread.

Energy Part #6
Location: Ferenia
Requirements: Grapple Beam, Flash Shift
Make your way up, using your Grapple to pull you up so you can roll through the tunnel and through. Grapple up again; there will be two sets of spider tracks on the walls. Get to the top one, Flash Shift over to the other wall and immediately perform a wall jump. If done correctly, you should grab onto the ledge of the small tunnel. Pull yourself through, roll over and grab ENERGY PART #6.

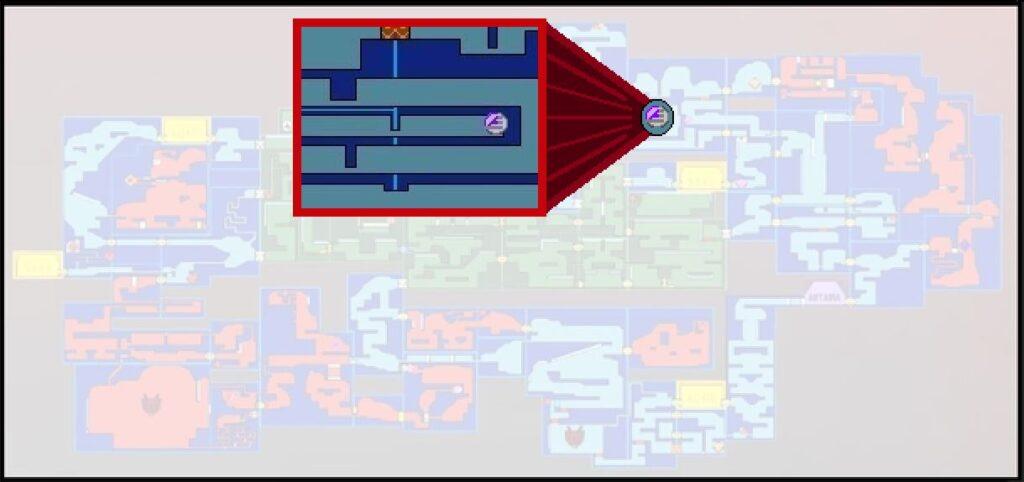
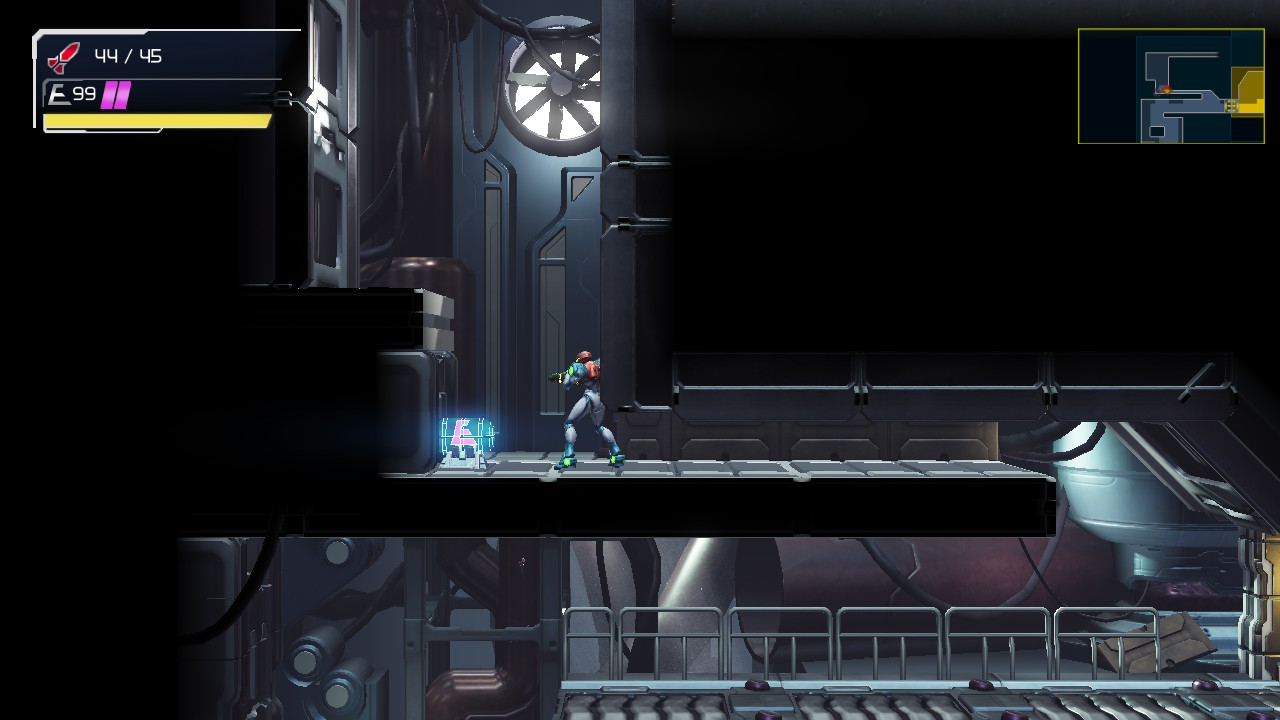
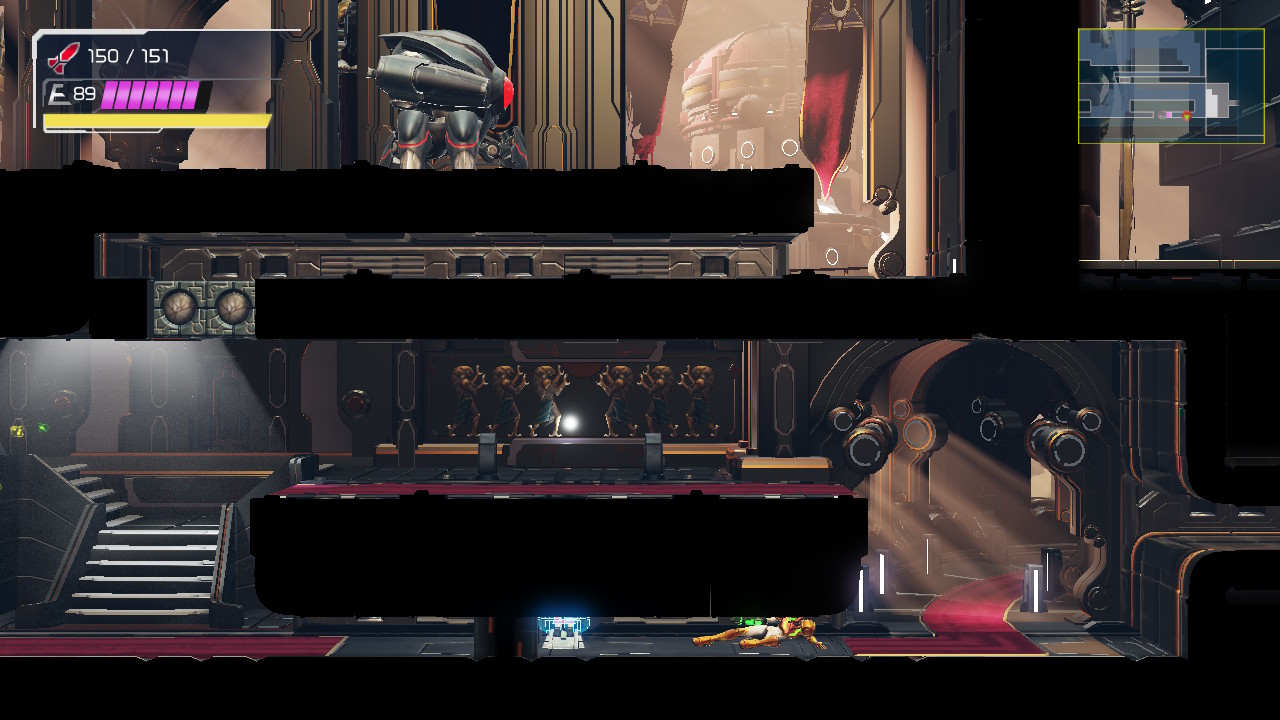
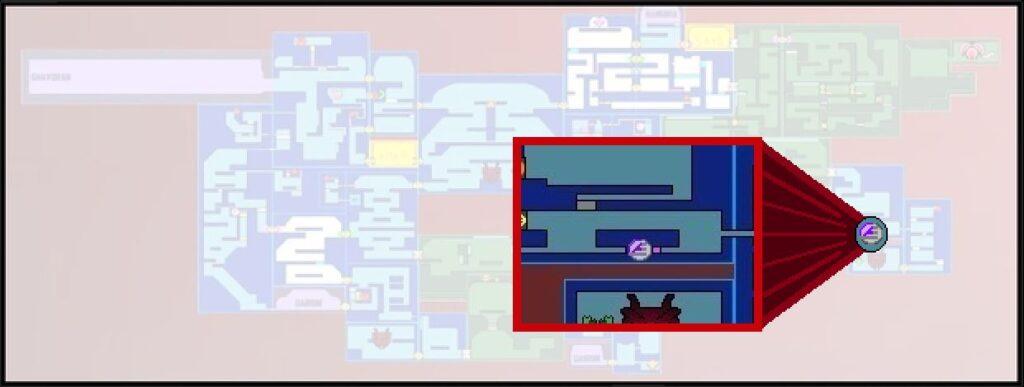
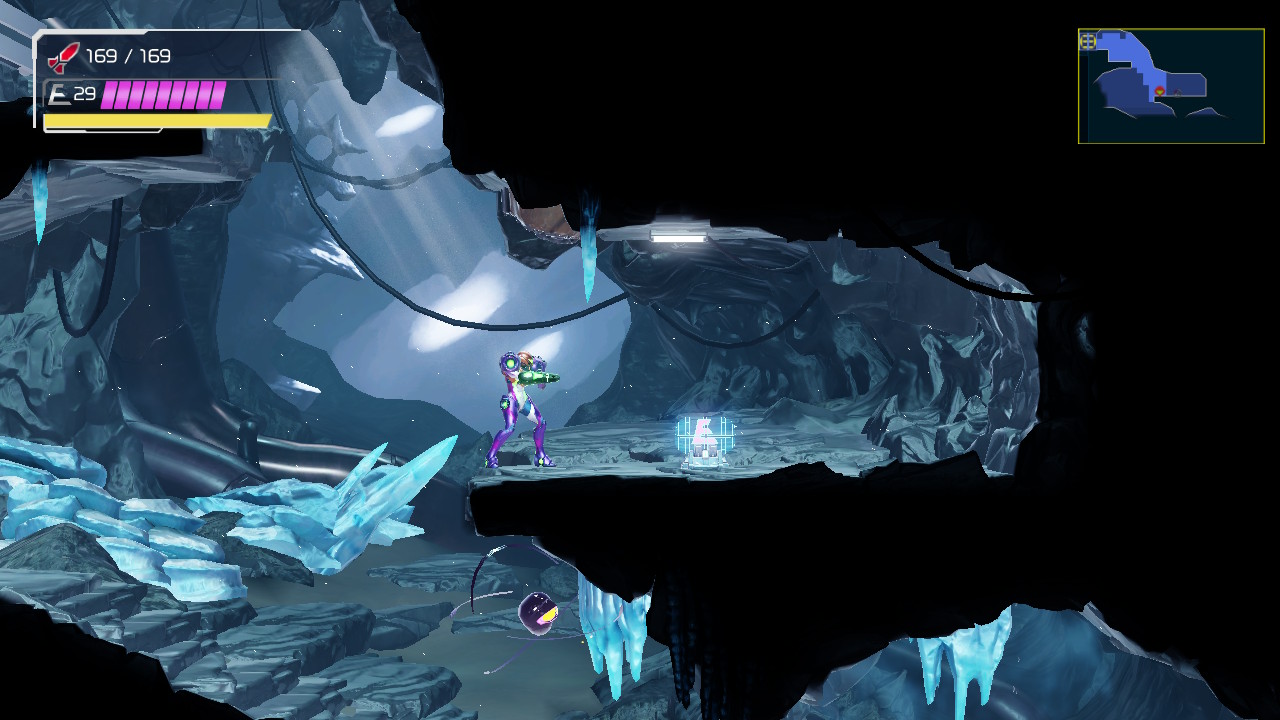
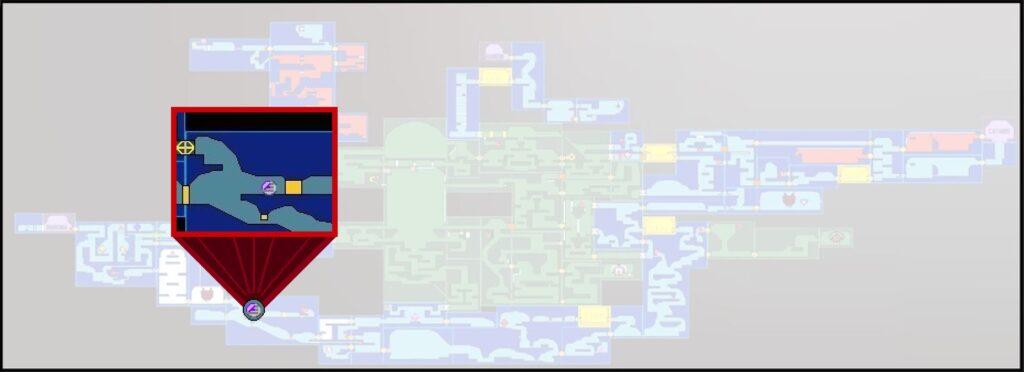
Energy Part #7
Location: Burenia
Requirements: Speed Booster
From the Dairon elevator, head down until you get to a platform with an Energy Part and a fan blowing at you. Activate your Speed Booster and charge forward, grabbing ENERGY PART #7.
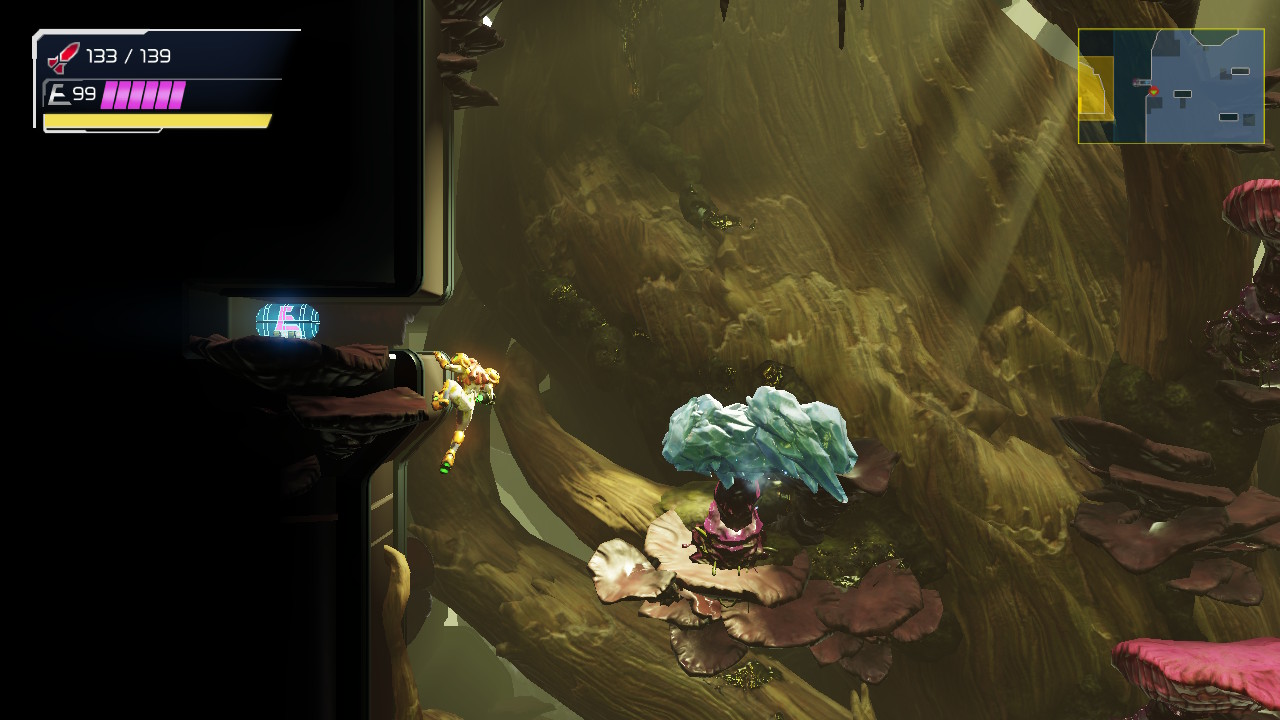
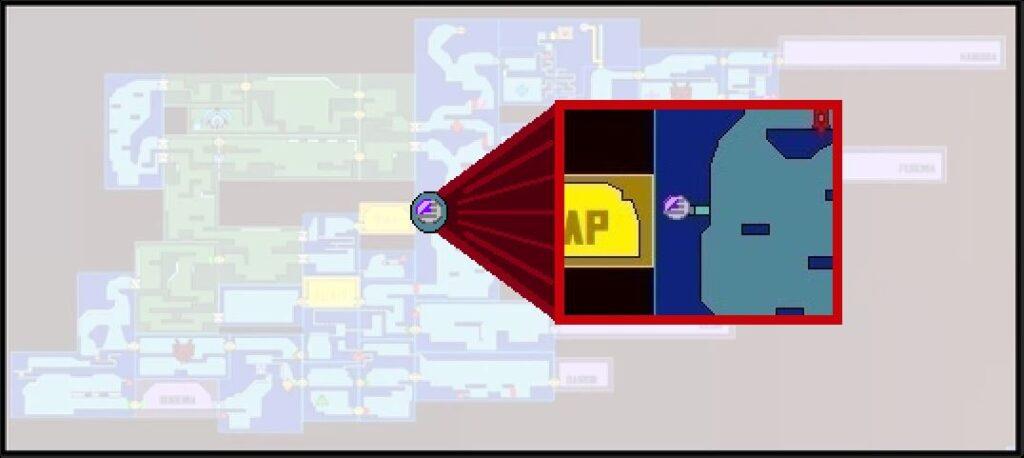
Energy Part #8
Location: Ghavoran
Requirements: Ice Missiles, Grapple Beam, Morph Ball
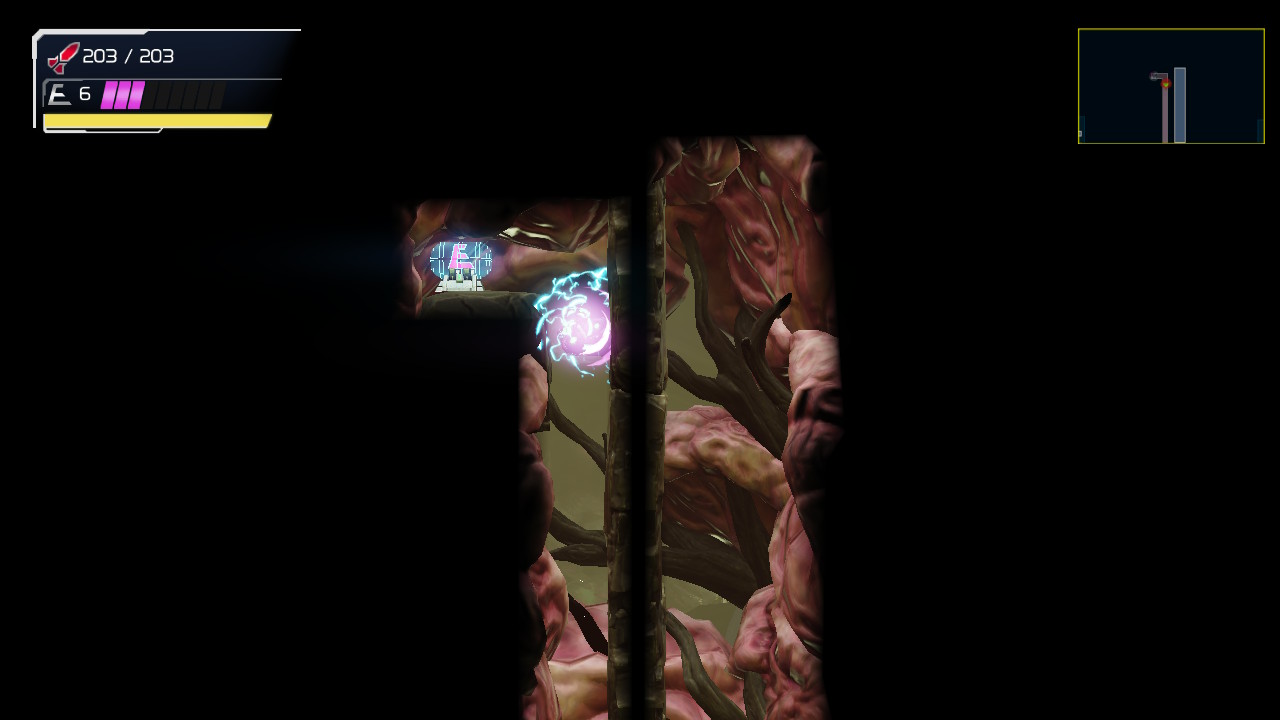
In the Giant Tree room, beside the door leading to the Save Station, freeze the flower platforms to your left and jump on them; you’ll see a Grapple block in the wall to your left, so while the flower platform is frozen, quickly destroy the block and before you jump into the tunnel, fire off a missile to destroy the block. Once the path is clear, jump over and grab ENERGY PART #8!
Energy Part #9
Location: Ferenia
Requirements: Bombs, Morph Ball
Hop over the middle ledge and slide into the nook beneath it on the right side. Drop a bomb and grab ENERGY PART #9.
Energy Part #10
Location: Burenia
Requirements: Ice Missiles, Morph Ball, Bombs
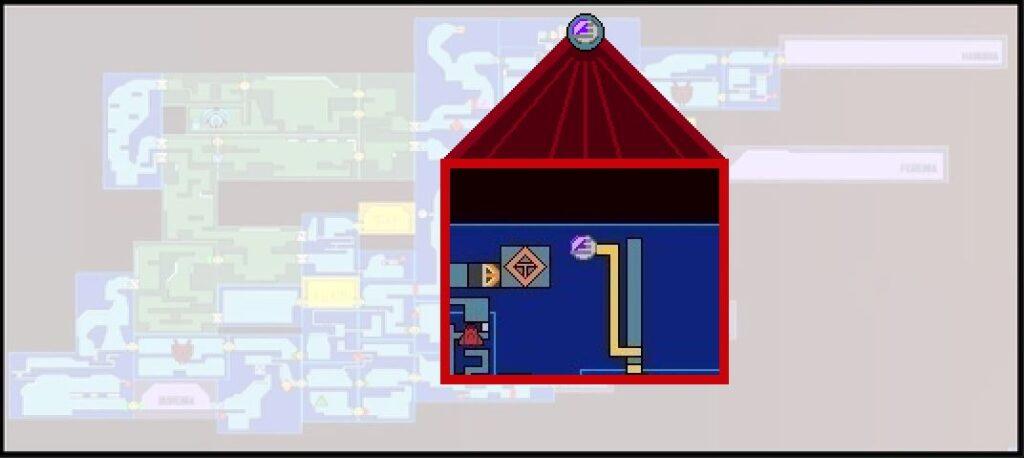
From the Green Teleportal Station, bomb the lower right corner of the room and drop down. Blast away the three Enky’s in your way and go through the door to grab ENERGY PART #10.
Energy Part #11
Location: Artaria
Requirements: None
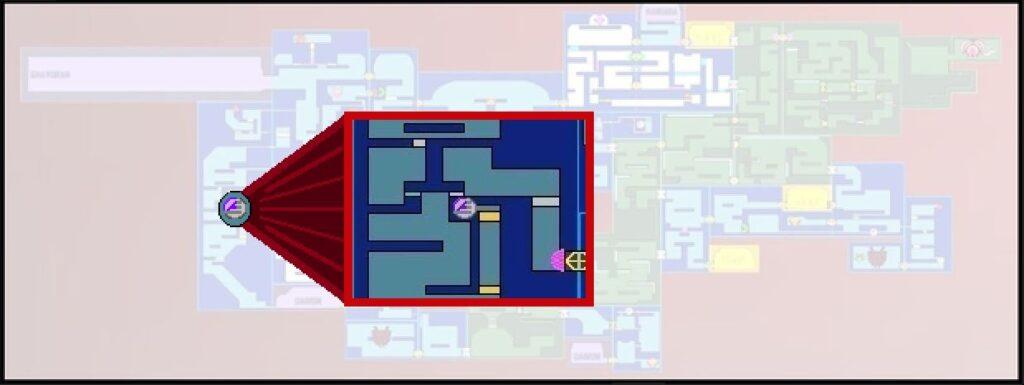
From the Spear Chozo Soldier boss room, head into the next room and drop down to a ledge on the opposite wall where you’ll grab ENERGY PART #11.
Energy Part #12
Location: Ghavoran
Requirements: Screw Attack, Speed Boost, Grapple Beam, Morph Ball
From the Green Teleportal Station, head back to that oh-so-familiar pool of water that we know leads to the Spin Boost room. The ceiling is made up of Screw Attack blocks, so slice and dice! Open the Grapple Door and start Speed Boosting. Running into the next room, charge your Shinespark and head into the middle of this room. Shinespark straight up and you should see two tunnels appear. Once you’ve crashed into the top of the room, drop down and squeeze through the opening to the second tunnel. Jump up and grab ENERGY PART #12!
Energy Part #13
Location: Ferenia
Requirements: Speed Booster
Get into the Dairon elevator room and start Speed Boosting. Slide under the pillar and charge your Shinespark as soon as you land in the larger room. Jump up and release your Shinespark in midair, shooting towards the slope. When you hit it, you’ll start running. Once you get to the top, charge your Shinespark again and quickly slip through the tunnel. Midair Shinespark again up a smaller slope, and charge your Shinespark at the top again. Finally, shoot upwards and you’ll grab ENERGY PART #13! See Shinespark Puzzles for video.
Energy Part #14
Location: Ferenia
Requirements: Screw Attack, Cross Bombs / Power Bomb, Morph Ball, Grapple Beam
From the Main Hall, take the bottom right door. Head up in this room to where the Energy Recharge Station is. The blocks on the left side of the ceiling are Screw Attack blocks, and the blocks on the right side are pitfall blocks. Jump up and get to the small tunnel at the top. This is tricky. Fall in Morph Ball form and position yourself in the middle. As you’re falling, lay a Cross Bomb; if it’s positioned right, it should knock out the blocks on either side of it. Quickly jump up and use your Grapple Beam to destroy the Grapple block. Lay another bomb, or even a Power Bomb if you need to, and jump over to grab ENERGY PART #14.

Energy Part #15
Location: Dairon
Requirements: Speed Boost, Space Jump, Gravity Suit
Get to this bottom and start Speed Boosting. Charge up your Shinespark and then jump towards the top of the room as quickly and efficiently as you can. Once you’re at the top, midair Shinespark to your left and you’ll go crashing through the wall. Open the door and grab ENERGY PART #15. See Shinespark Puzzles for video.

Energy Part #16
Location: Cataris
Requirements: Gravity Suit, Power Bombs, Wave Beam, Grapple Beam, Speed Booster, Morph Ball
Head towards the Purple Teleportal Station. Go through the Grapple Door and you’ll see a blocked door with a tunnel above it. Head through the tunnel and then turn around and shoot the Wave cover on the other side of the blocked door. Quickly exit the tunnel and go through the door now that it’s open. Keep pressing forward until you drop down in some lava; continue until you get to a Grapple block and destroy it. Head back to the Purple Teleportal Station.
Directly in front of the Grapple door under the Purple Teleportal Station, shoot the floor and you’ll drop down into some lava. Slip into the tunnel in the bottom right corner of the room and then lay a Power Bomb. Part of the wall will explode; now, you’ll be able to run back across and start Speed Boosting. When you get to where the Grapple block was, Shinespark straight up and grab ENERGY PART #16! Congrats – you’re at maximum health!