


Metroid: Samus Returns Walkthrough: Bosses
Here you’ll find a detailed list of strategies, information, and tips in fighting the many bosses of Metroid: Samus Returns.
- Alpha Metroid
- Gamma Metroid
- Arachnus
- Zeta Metroid
- Omega Metroid
- Diggernaut
- Queen Metroid
- Proteus Ridley
Alpha Metroid
If you thought that the only kind of Metroids on the planet were the ones you already knew and loved, think again. This particular Metroid has evolved into the second evolutionary line of the Metroid family, the Alpha Metroid! You can quite literally see the skin that it shed during its evolution; yuck! That being said, Metroid skin is going to be a great visual indicator of where a Metroid could be hiding out, so pay attention to the husks when you see them, as they’ll often be leading you towards your goal.
Alpha Metroids are a fairly standard type of Metroid, and they make up the bulk of the 40 Metroids that you’ve been tasked with eradicating, but that doesn’t mean you should take them lightly! They are still a formidable foe, particularly when there are environmental obstacles to contend with as well. As just an FYI, I won’t be writing detailed battle notes for each individual Metroid battle (and that goes for every Metroid evolution) since most battles are more-or-less the same, so just refer back to this guide if you get stuck!
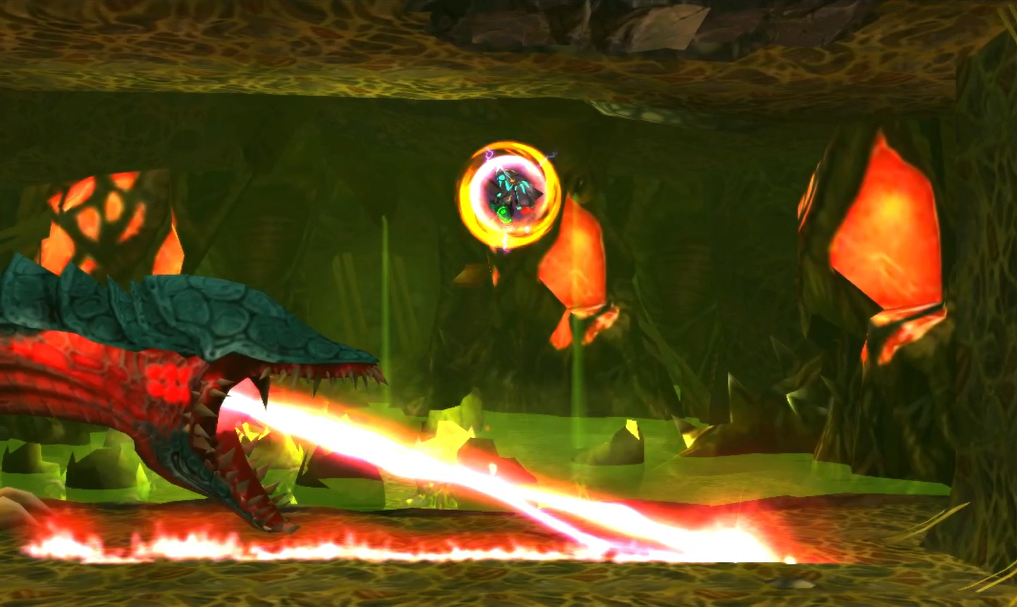
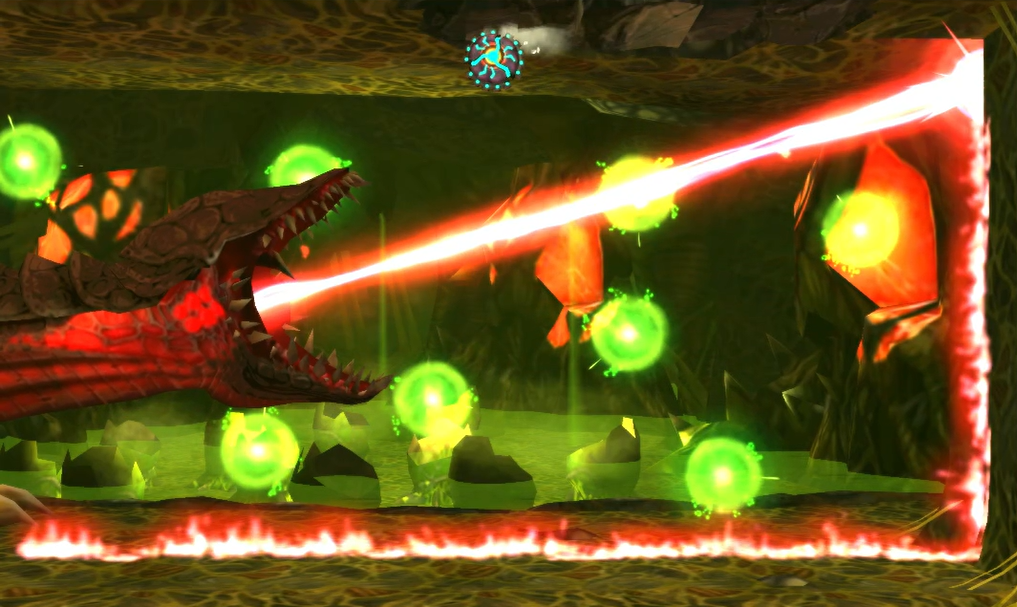
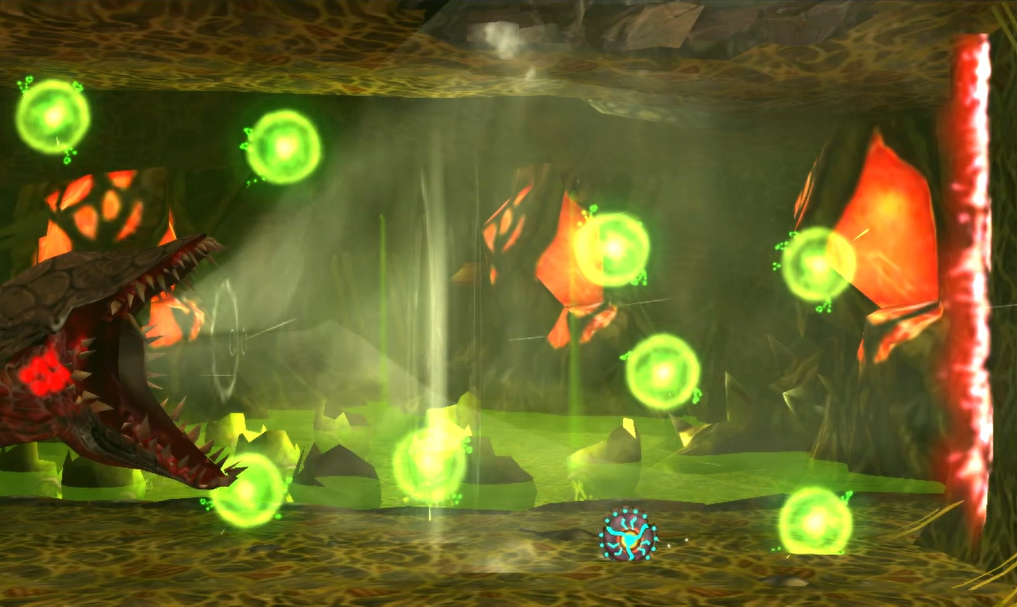
The Alpha Metroid has a few different attacks up its figurative sleeve, but what you’ll be mostly doing is jumping over it as it charges towards you. The Alpha Metroid will typically lunge at you in a swooping down pattern, starting high and levelling down, so a simple jump above it should prevent any damage. It will also drop energy balls in bursts of three, so be careful not to bump into those since those suckers will do more damage than you might think!

If it wasn’t obvious, the weak spot on this evolved Metroid is the green underbelly with the red nucleus. You’ll want to use your 360° aiming to bombard the belly with missiles, and that will certainly finish it off, but the even better opportunity you have to destroy the Alpha Metroid comes when it charges towards you and gives you a chance to melee counter it. Do this, and you’ll stun the Alpha, letting you fire missile after missile right into its mouth. Not only that, but you’ll refill your Aeion gauge and missiles at the same time! This is riskier, but faster. Also, once you get the Ice Beam, you can slow down the Alpha if you blast it with a charged shot, so add that move to your repertoire if you need to!

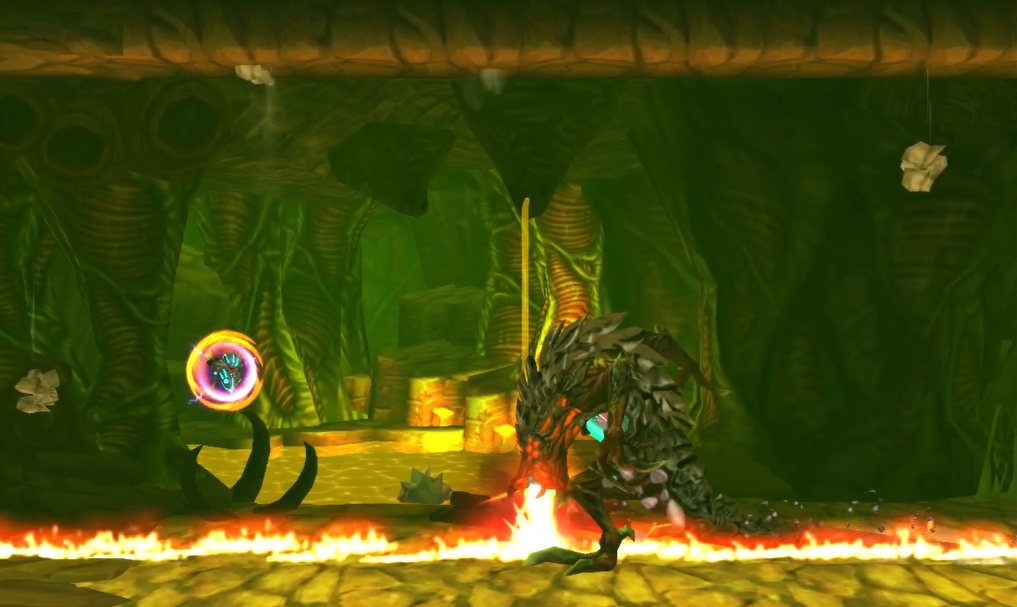
As you fight more Alpha Metroids on SR388, take note: some of them can set their bodies on fire! That doesn’t really change anything in the fight, as a Metroid slamming its teeth, back and butt into you is still going to hurt whether it’s on fire or not, but just be extra careful not let it smack you or you’ll take even heavier damage. Also note – instead of dropping energy bombs, these Metroids will drop a singular fire bomb that will engulf the entire floor in flames for a brief second; make sure your jumping is on point.
Whatever your method, the Alpha Metroid shouldn’t give you too much trouble, so deal with it and collect the Metroid DNA that it gives off.
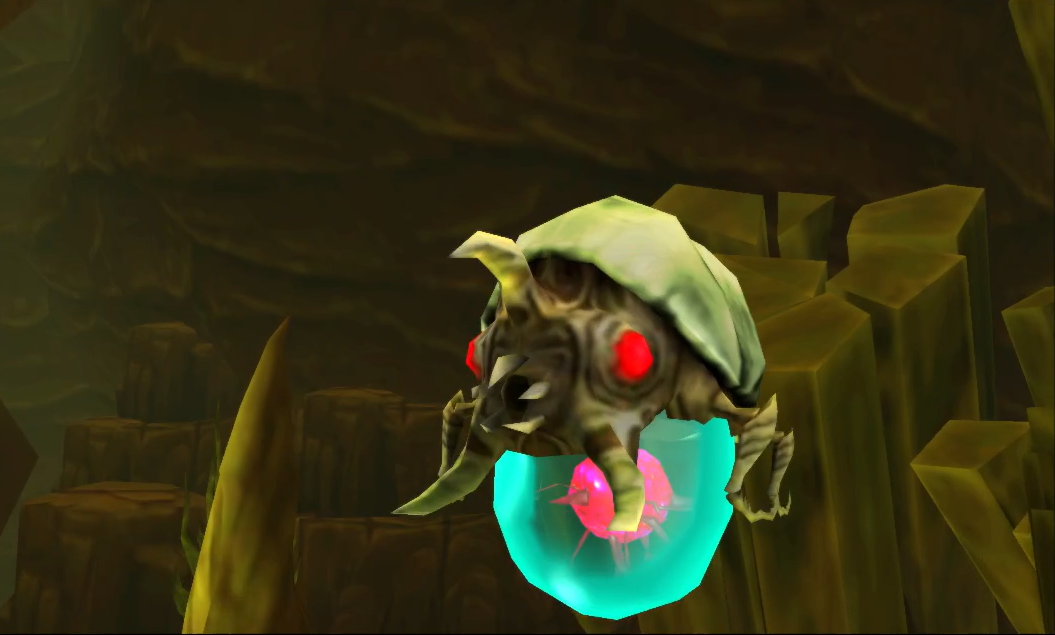
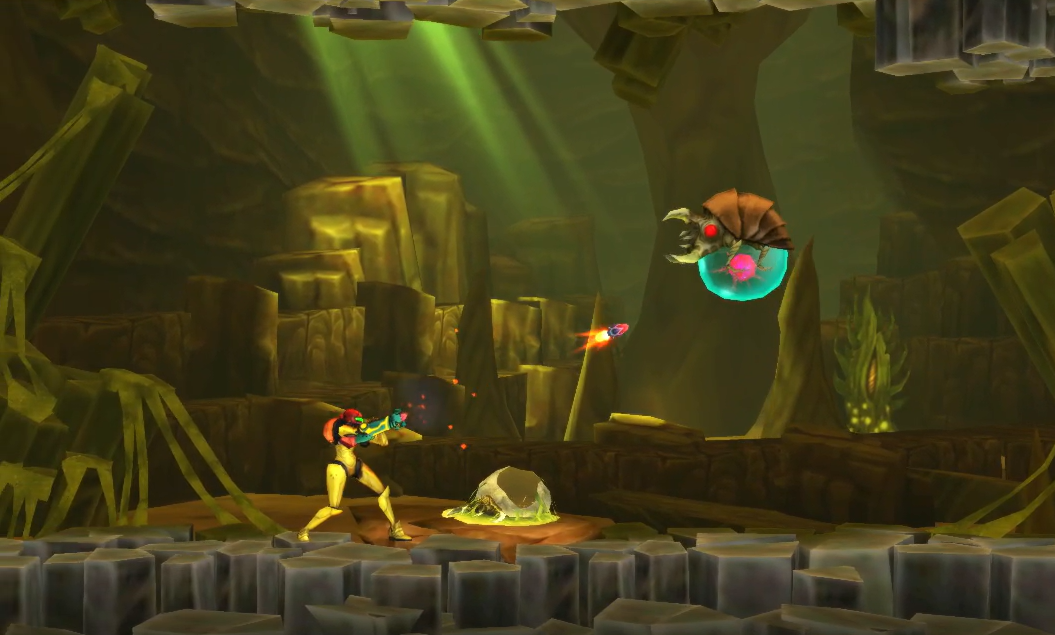
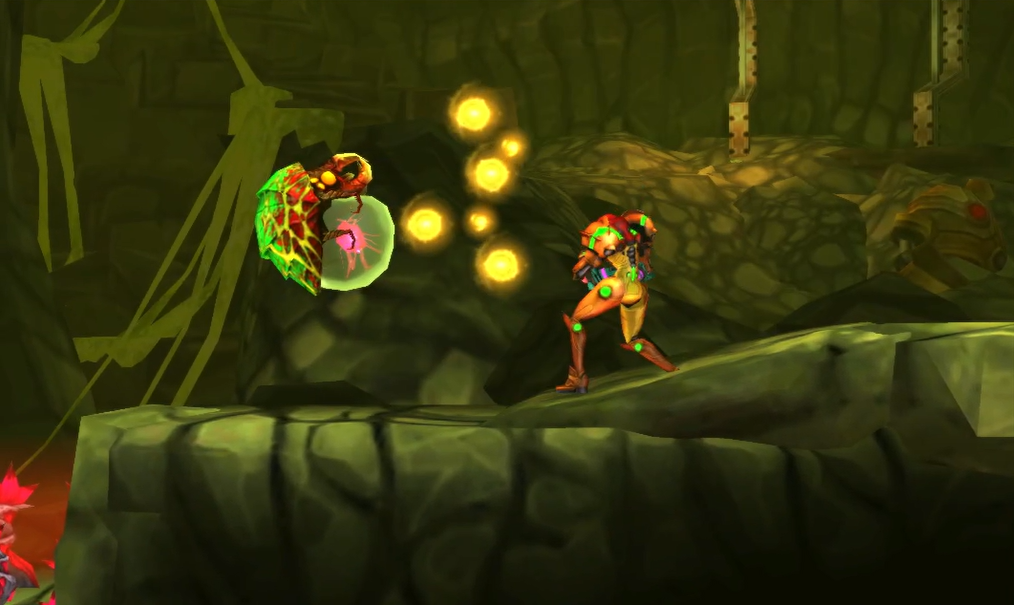
Gamma Metroid
You’ll now be face-to-face with the next rung in the Metroid evolutionary ladder – the GAMMA METROID! This evolution still flies around like it’s previous evolution, but has started to grow limbs in which it can use to traverse the ground (and smack you with!).
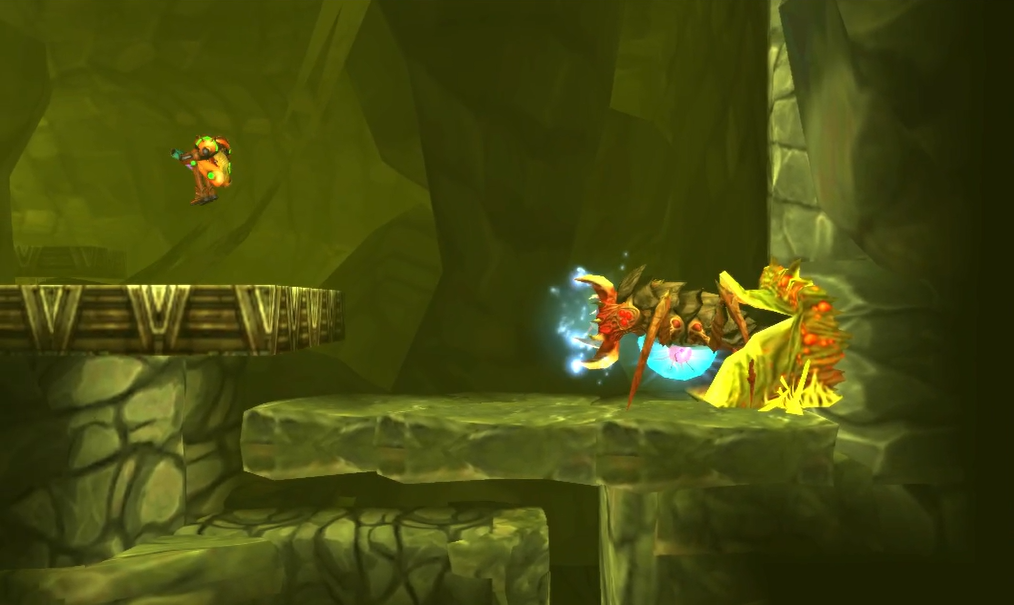
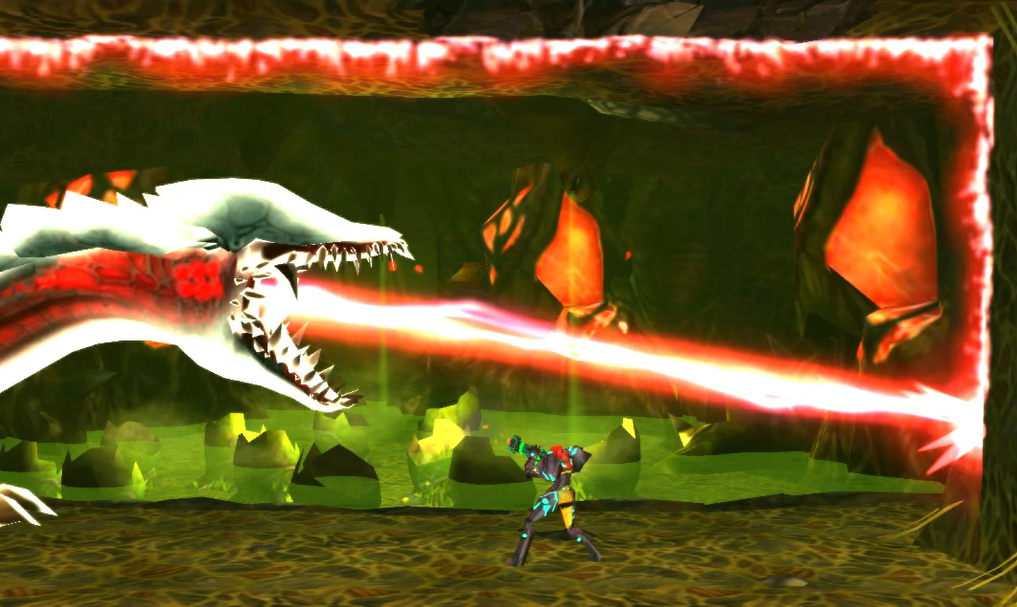
Limbs aren’t the only new tricks the Gamma has up its sleeves, either. This Metroid will shoot an energy beam at you (typically in a downwards diagonal direction,) that will do big damage, and can charge up a shockwave blast that emits from its body, only giving you a few precious seconds to get as far away as you can. The sweeping attacks and triple bombs are also still attacks you’ll need to contend with, just like the Alpha Metroid, so use the same strategies as you would with them.
As mentioned, the biggest new attack you’ll want to look out for is when the Gamma gets on the ground and starts aggressively coming towards you. If you get rammed, that’s a big ouchy, and even if you stay a step ahead, you’ll still need to watch out for a laser attack that the Gamma will shout from its mouth. The plus side to this attack is that when the Gamma is on the ground and not glowing with energy, its mouth will line up perfectly with your arm cannon, so let those missiles fly! The Gamma will also snap its jaws at you sometimes instead of firing a laser, which will give you the chance to melee counter it. As a general rule for Metroids, but especially the later level evolutions, melee counters are going to be the most effective way to deal damage.
One thing unique to the Gamma Metroids is their annoying penchant for running away from the battlefield before you can land the killing blow. If this happens, you should have probably seen at least one other room nearby that looks like it could have housed a Metroid fight, but usually there will be three of these rooms in close proximity. You’ll need to chase the Gamma down and keep attacking.
Aside from countering, you’ll deal damage to the Gamma in the same way you would the Alpha; shoot its underbelly every chance you get with missiles. Attack the mouth and the belly every chance you get, focus on avoiding attacks as your top priority, and eventually, you’ll take down this gruesome Metroid.
Arachnus
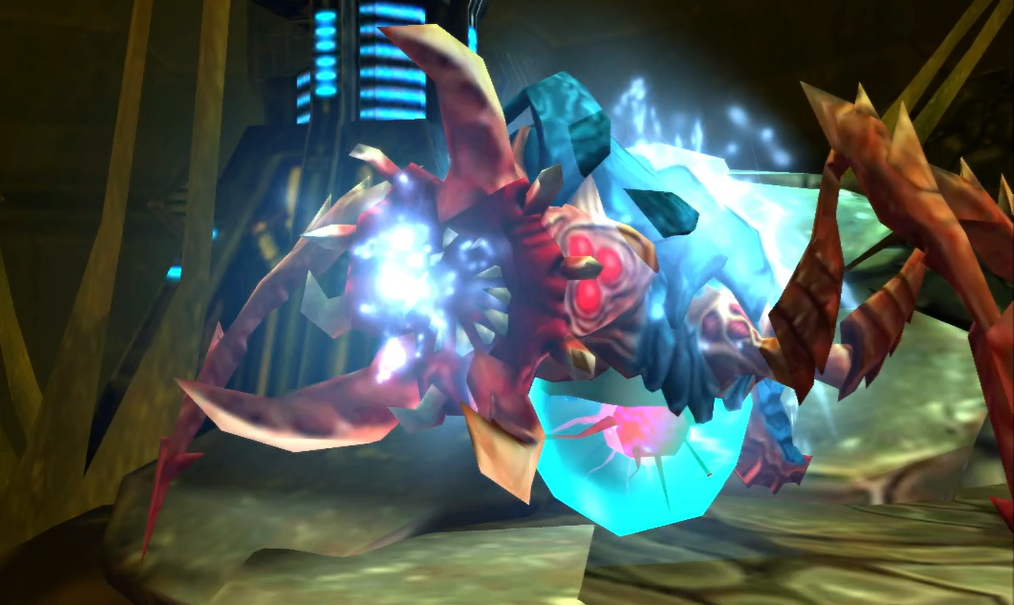
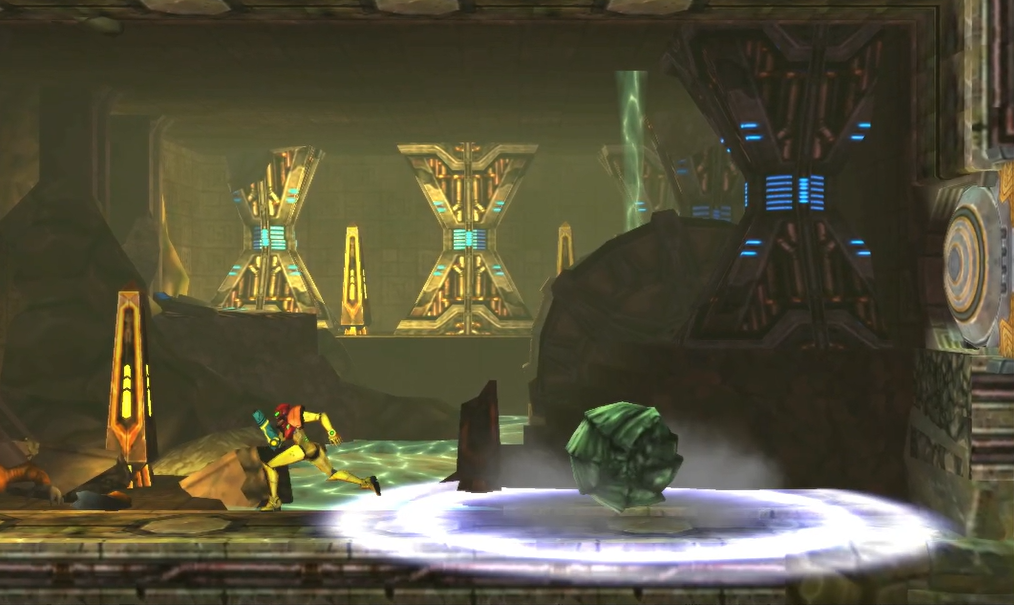
As you walk into this room, you’ll see a Chozo Statue as usual, although the orb that it’s holding looks a bit… odd. Come a little closer, and you’ll soon realize that what the Chozo is holding is no powerup, but rather a classic Metroid foe reborn: Arachnus!
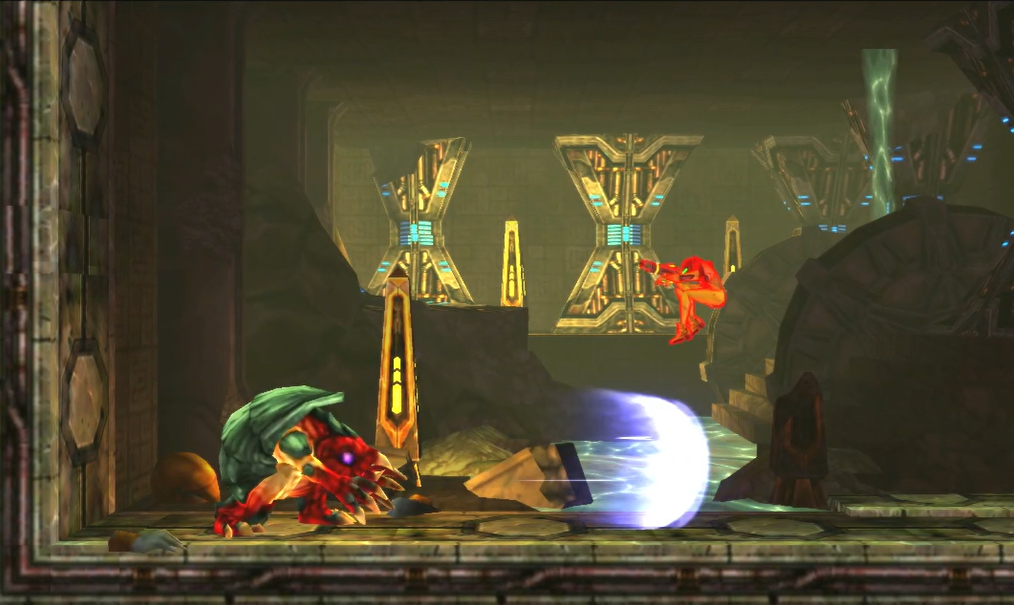
Shoot the ball a few times and Arachnus will bounce right out, destroying the Chozo Statue and damaging you if you get too close. Once it lands, you’ll see Arachnus in all of its glory: as a hunched over, armadillo-esque looking creature with three fangs protruding out of its mouth, ready to try and lay the smack down on you for disrupting its slumber.
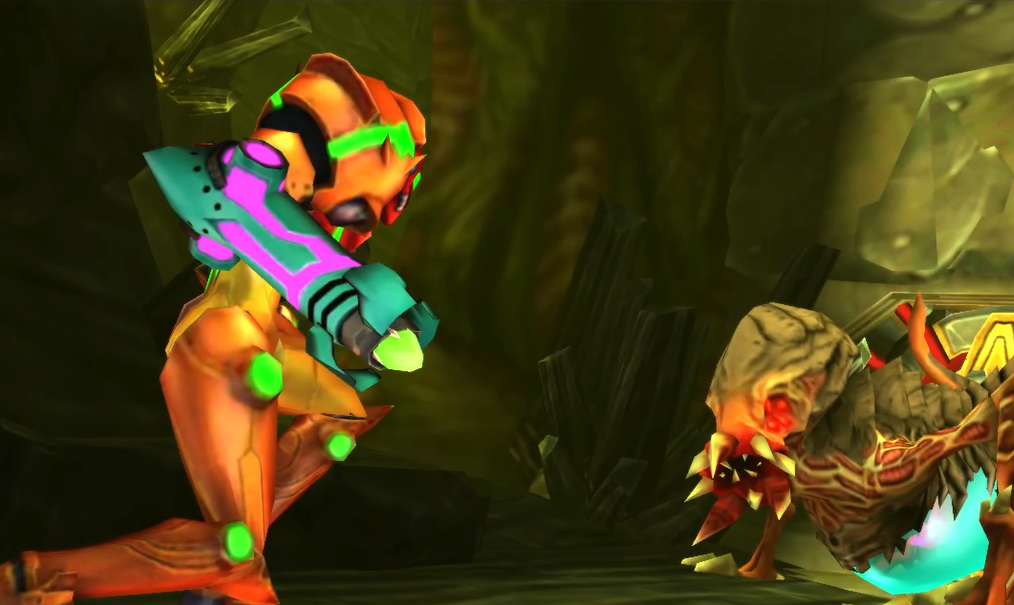
Arachnus is a formidable foe, but nothing that should cause you to throw your 3DS against the wall (hopefully). It has a few different attacks that you’ll want to look out for, with the first being its shockwave attack. As the name implies, Arachnus will swipe its claws at you, which will send a burst of energy flying your way. A simple jump should put you in the clear, so just make sure to time your jumps right, as Arachnus will usually fire off at least two shockwaves. You’ll also want to watch out for the fireballs that Arachnus will spit out of its mouth; again, these are usually fired off in bursts of three, so just make sure to avoid them.
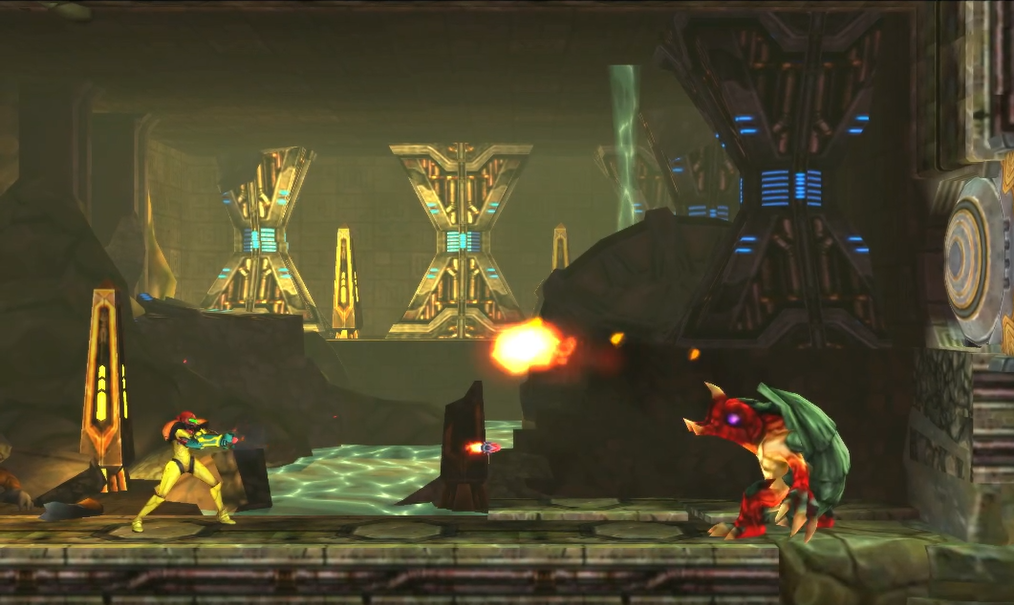

Where you’ll really want to be mindful of Arachnus though is when it curls up into ball form. This is essentially the Arachnus Morph Ball, and one of its go-to attacks is morphing down and jumping up and across the room to try and smash you; it will usually do three hops, and those hops cover a decent amount of distance in this small room. You can either jump over or roll under, but either way, don’t let it hit you. Another regular move will be for Arachnus to jump in the air, turn into a ball, and slam straight downwards, causing a shockwave when it lands. You want to be anywhere in this room other than under Arachnus when it does this, and usually, Arachnus will spin in the air for a second, allowing you to move out of the way as long as you’re quick.
Its last attack is to get into ball form, charge up, and simply ram you. This is surprisingly not as easy to jump over as you might think, as I’ve always personally struggled with the timing; Arachnus will charge up for a second or two and then propel itself towards you. Now, you can jump over this attack and avoid it, OR you could risk it all and drop some bombs on the ground right before Arachnus unleashes itself. The bombs will stun the beast, allowing you to hammer it with missiles straight to the face.
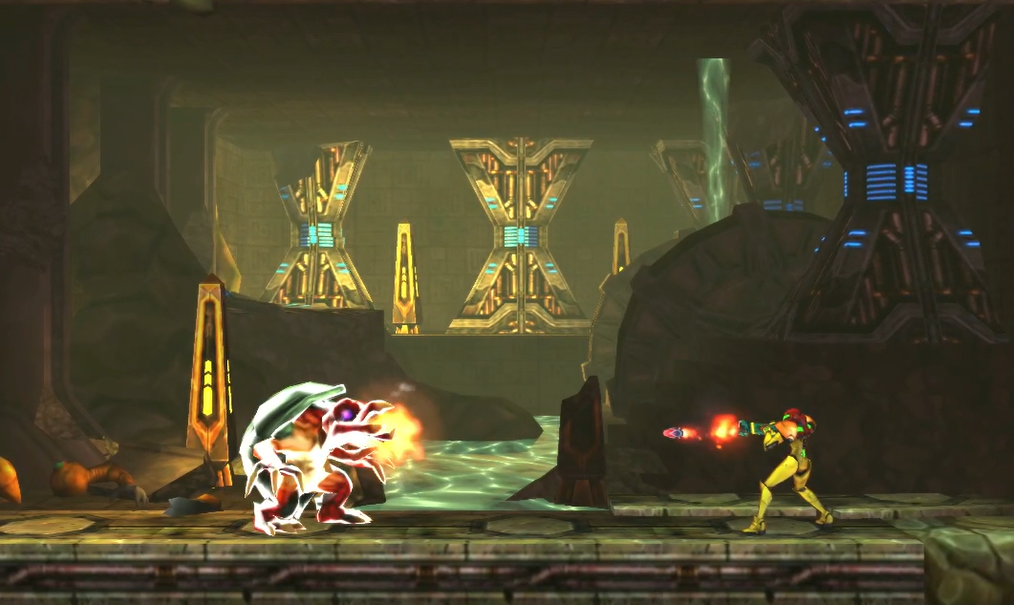
Damaging Arachnus is simple enough, as your missiles to its body are all it takes. Obviously, just concentrate on avoiding attacks when Arachnus is in ball form bouncing around, but whenever its face is out, light it up! Stunning Arachnus with bombs as it tries to ram you is a great way to get some pretty easy shots in, so keep at it and it will fall.
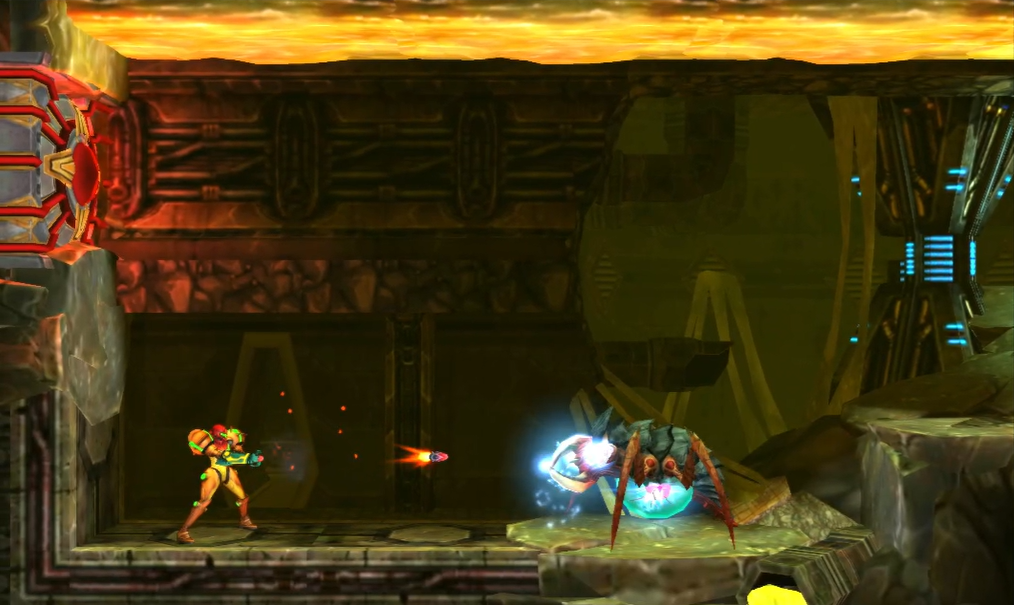
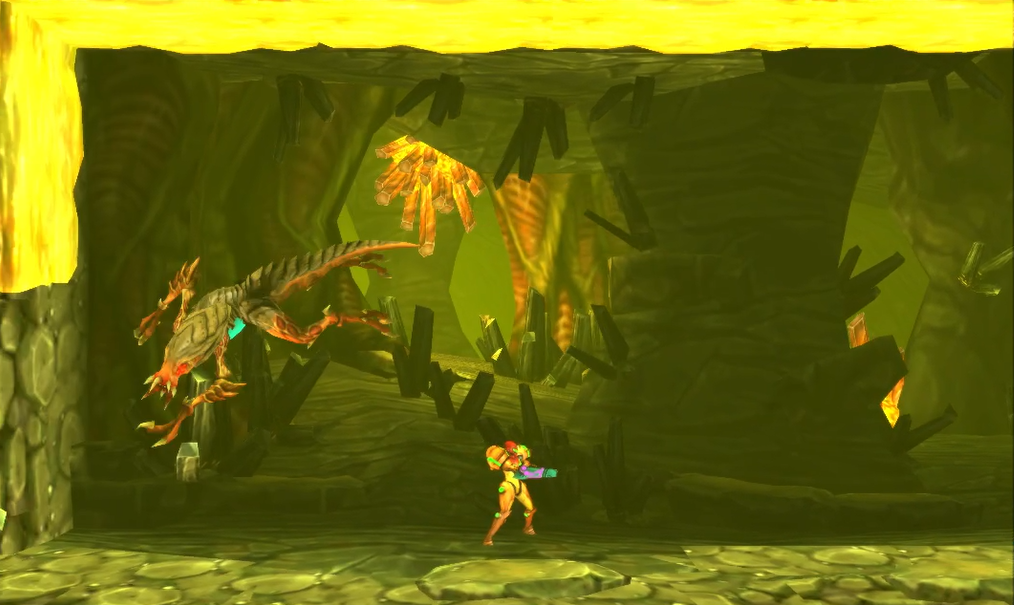
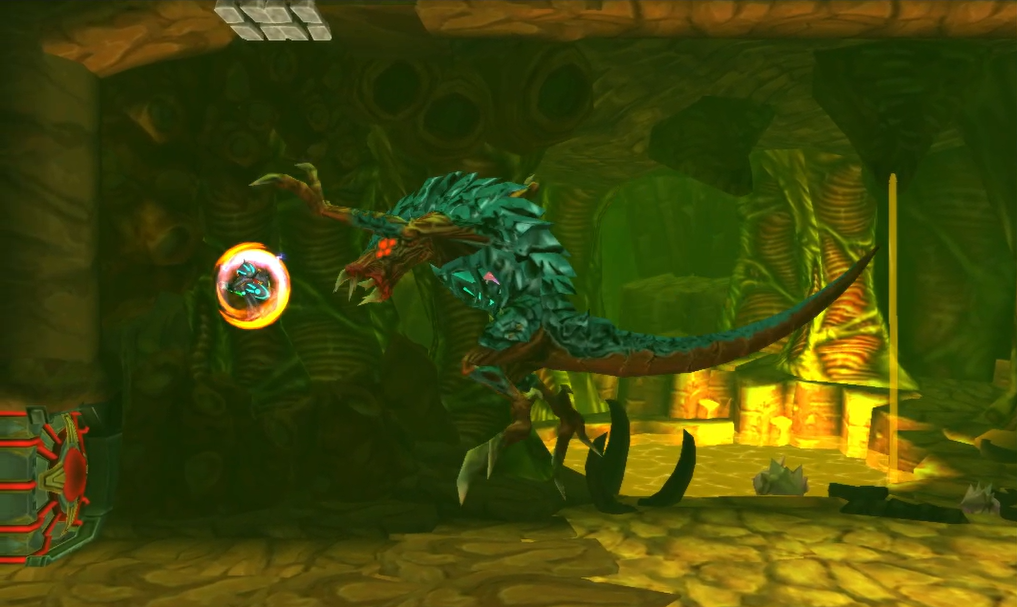
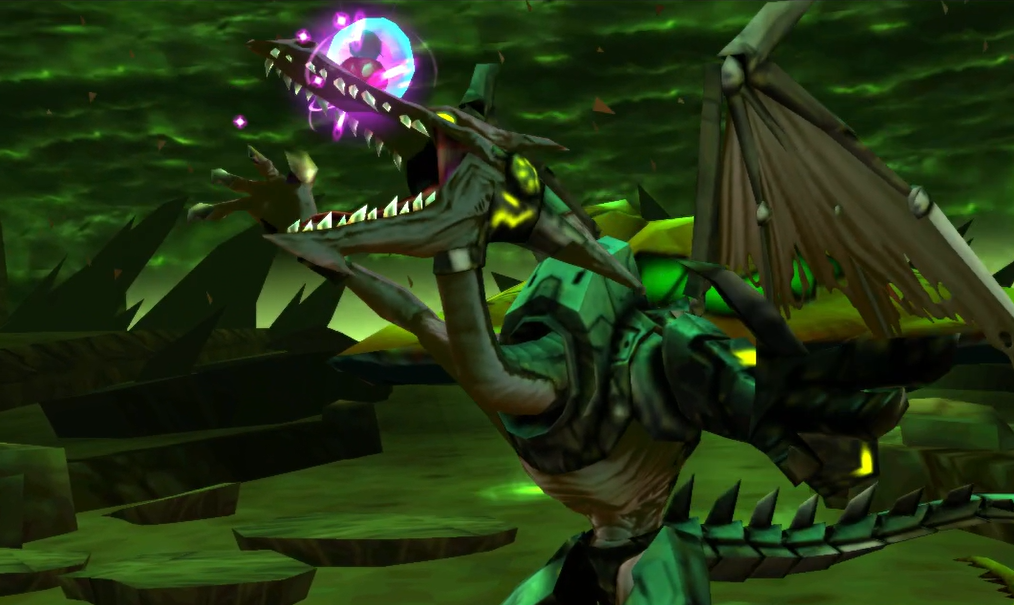
Zeta Metroid
A cutscene will play as you enter the room. The next evolution in the Metroid family has revealed itself, and it is far more deadly than any previous versions we’ve faced off with. We’ll now be going head to head with a ZETA METROID.
The Zeta’s are much more agile than their previous counterparts, and while they don’t fly around, their underbelly is far more difficult to hit. Zeta’s look almost like you might imagine a very angry salamander would, and they’re fast, so be ready. On the plus side, Zeta’s will never run away, so the room you do battle in will stay the same. The room itself will have its ceiling covered in yellow gunk, meaning no Spider Ball for you.
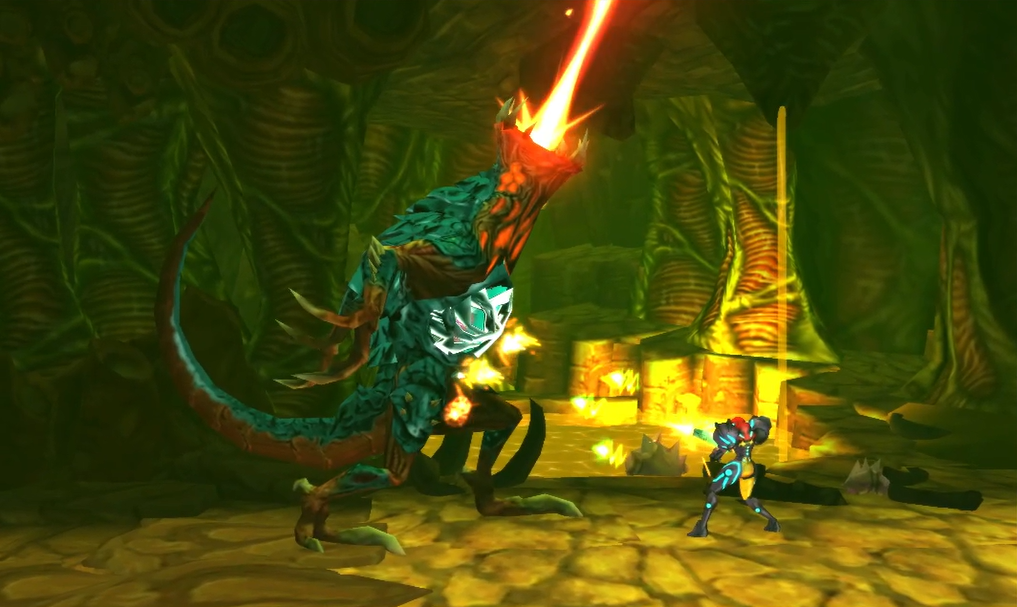
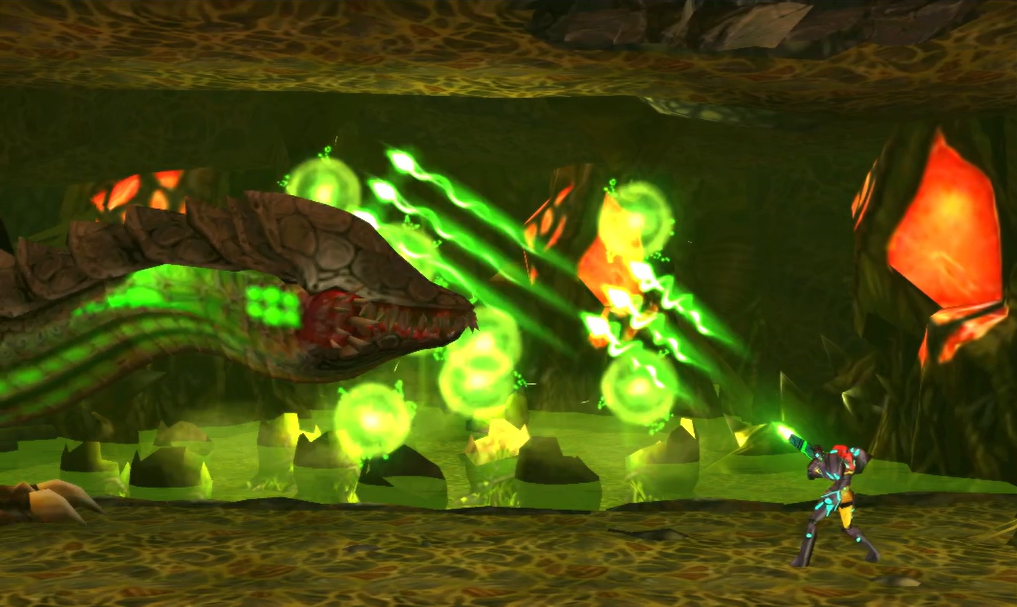
The Zeta Metroid is also much more adept at combat and will have several attacks that you’ll want to avoid. It will breathe fire at you, always shooting it in a straight line, so make sure you’re not getting burnt by that; it will also shoot acid at you, typically in three bursts, which cannot be countered, only avoided. The Zeta can and will fire its acid shots on the ground, walls, or the ceiling, so be careful when that happens.
Once the Zeta has taken enough damage, it will get on the ceiling and either fire a series of fireballs that shoot out in a circular pattern, or it will release several acid shots that will flutter around the room. These are incredibly difficult to avoid, but luckily, these are countable (to a degree): when the Zeta is on the ceiling, a familiar red point will start to glow on its back. This is your cue to Grapple it down, which will cause the Zeta to smash to the ground, stunning it and leaving its belly vulnerable. Blast away as quickly as you can, but be sure not to be standing directly under the Zeta when you yank it down, cause, yeah, that’ll hurt; don’t ask me how I know.
Your best bets in terms of inflicting damage are the aforementioned Grapple tug, and then regular ol’ melee counters. You’ll have to be patient, but if you can nail a melee counter and activate your Super Missiles, you’ll not only activate a wicked cutscene, but you’ll inflict massive damage. You can try and use the Beam Burst while the Zeta is shooting its three acid blobs, but I’d honestly just play it patiently and wait for your chance to attack.

It may take a few tries, but if you keep countering and unloading Super Missiles, the Zeta Metroid will be destroyed.
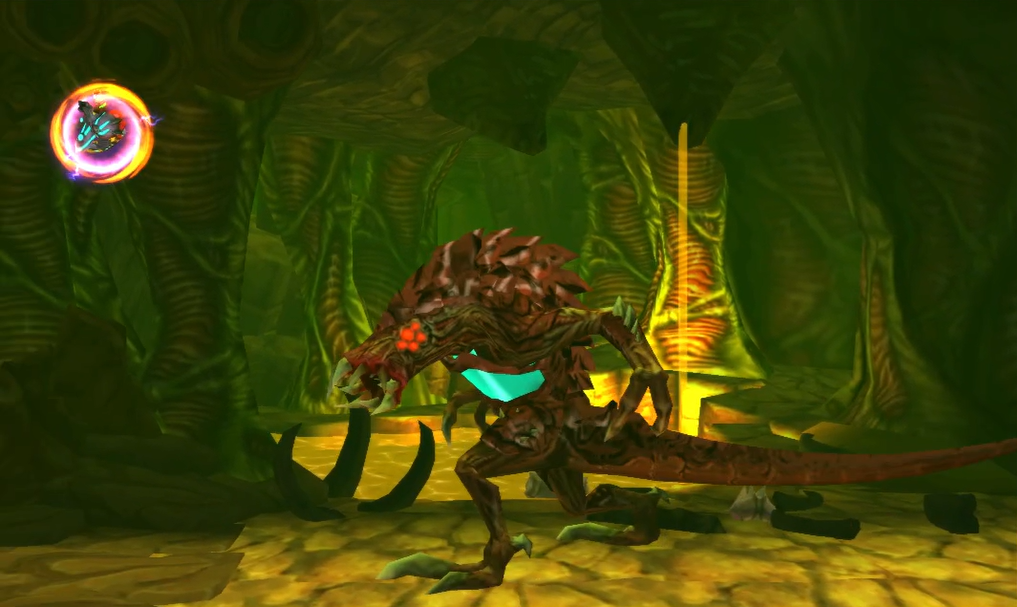
Omega Metroid
Step inside and the room will shake, as the final standard evolution of the Metroid line will reveal itself: the hulking, fearsome, indomitable OMEGA METROID! I mean, we named our website and podcast after this beastly creature, so it must be pretty impactful, right?
All those other Metroids you’ve faced have nothing on this monster. For starters, you’ll see the nucleus in its belly is covered with a protective skin – it can be blasted away, but needless to say, that will make things significantly harder. The Omega hits devastatingly hard too, so whatever you do, try to avoid getting into a fist-fight with it, as that’s a fight you’ll surely lose.
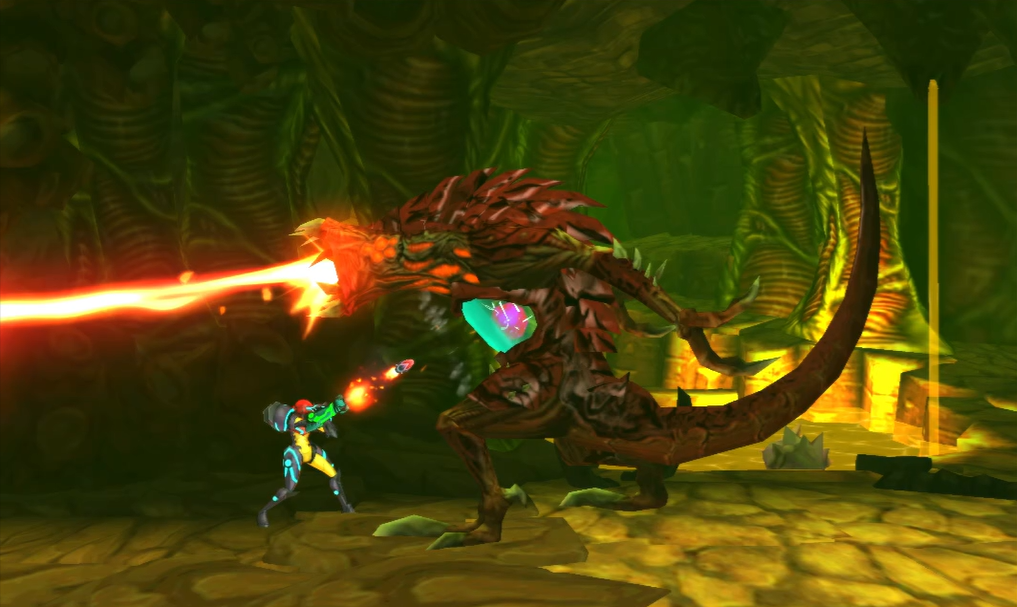
The Omega Metroid has several attacks at its disposal, and all of them hurt. As mentioned, the Omega will be the most physical type of Metroid you fight, as it will typically swipe its claws at you; depending on its damage level, it may swipe its claws once, it may do a one-two swipe combo, and it may even do a one-two punch and then spin around to whip you with its tail – sometimes twice in a row too! This is incredibly punishing, so either be ready to jump several times in a row, or play it safe and just Space Jump over and beyond the Omega. All these moves can happen on their own, too, so stay frosty. Be careful about getting caught in the corners, and this mammoth Metroid likes to just pounce on you as well, slamming you with its big body; usually, the Omega will do a little hop in place before it does this, so use this as your cue to move your butt before you get pummeled.
A typical move it will use to begin a battle involves it smashing its tail on the ground, causing rocks to fall from the ceiling. You CANNOT Screw Attack through the blocks, you’ll take damage, but you CAN shoot them with your beams to get some ammo, health, and Aeion. A good bet is to stand stationary and shoot upwards. As like the rest of the evolved Metroids did, the Omega has a fire beam it will shoot out of its mouth, so watch out for that: it can fire in a straight line, diagonally, or in a clockwise motion, starting from top to bottom. When it’s firing the laser clockwise, that’s actually a good time to get up close and upload your Beam Burst on its protective skin covering the nucleus.
Strangely enough, I’ve actually found the best defense in this fight is a good offense, so don’t be afraid to get up close and fire away at the protective skin and the nucleus. Your Beam Burst is a must in this situation, so get close and aim upwards, and as soon as you see the Omega start to move in any kind of offensive way, get out of there! Once you break the skin and free the nucleus up for attack, then you can really start to get going!
As always, your best opportunity to damage the beast is to melee counter it when it snaps its jaws at you. Get the timing right, and you’ll be treated to an absolutely sick sequence where Samus is flying everywhere, doing all kinds of cool acrobatic stuff, and pumping (ideally) Super Missiles into the Omega Metroids belly. Once you complete a melee counter, or after enough time, the Omega will respawn its protective skin.
As the Omega takes damage, its melee moves will all start to double up – double tail swipes, double claw strikes, etc. – so be careful! Things will really start to get spicy now, as the Omega Metroid will shoot its fire laser at the floor, meaning you have to continually Space Jump until the fire is gone. At the same time, it will be slamming its big tail on the ground, causing rocks to fall, so you’ll need to Space Jump around them. I won’t lie – this is hard, and one of the most lethal attacks this formidable foe has at its disposal. Try to jump in short, tight circles and ride it out; this attack usually lasts about ten seconds or so.
Get right under the Omega and stand close to its belly. You’ll do heavy damage to its protective skin or the nucleus itself, and the melee attacks from its tail and claws are manageable enough to avoid, so don’t be afraid to bring the fight to this hulking Metroid, as you’ll be better off the sooner you can end it.
Don’t be discouraged if you die a few times – this is a hell of an opponent, and one of the most physically imposing threats anywhere in the Metroid universe! Keep at it, keep attacking, and eventually, the Omega Metroid will fall.
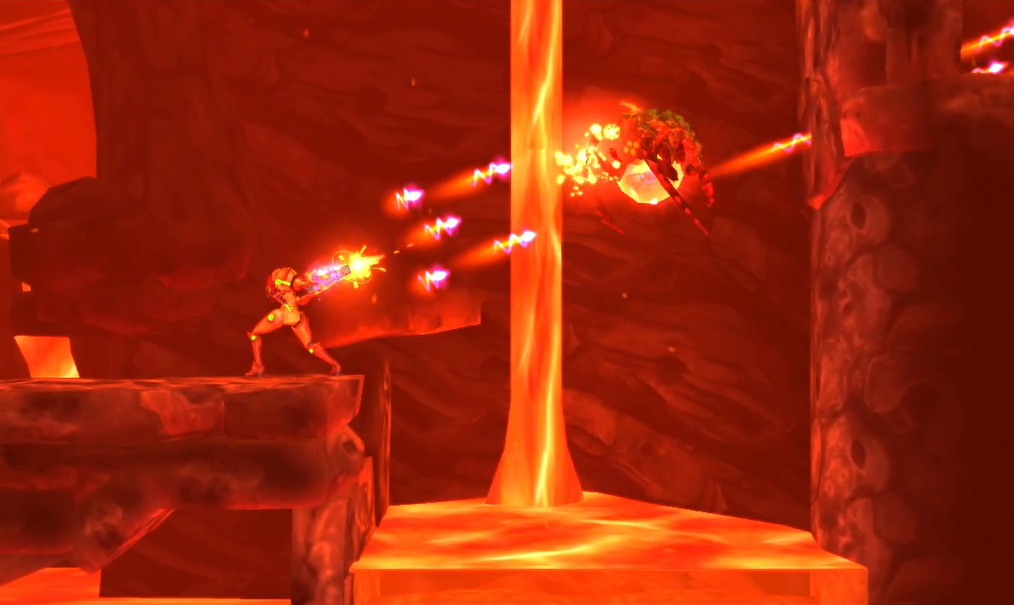
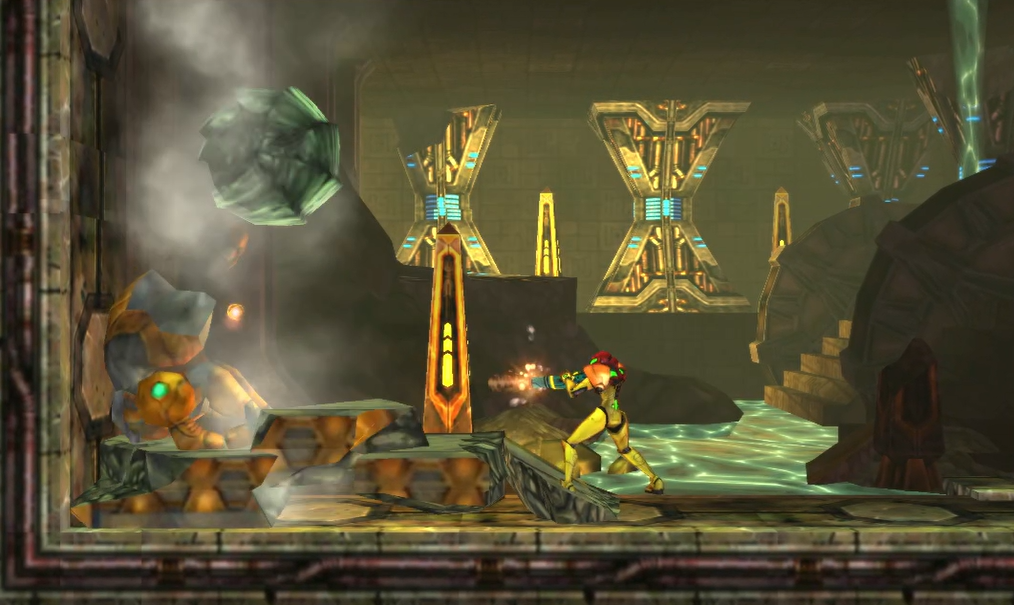
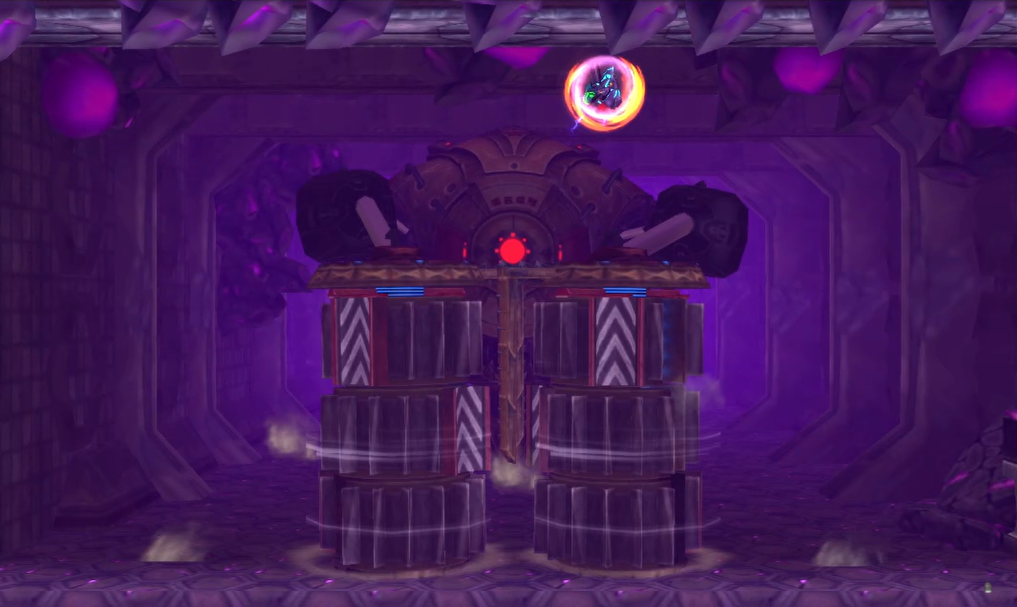
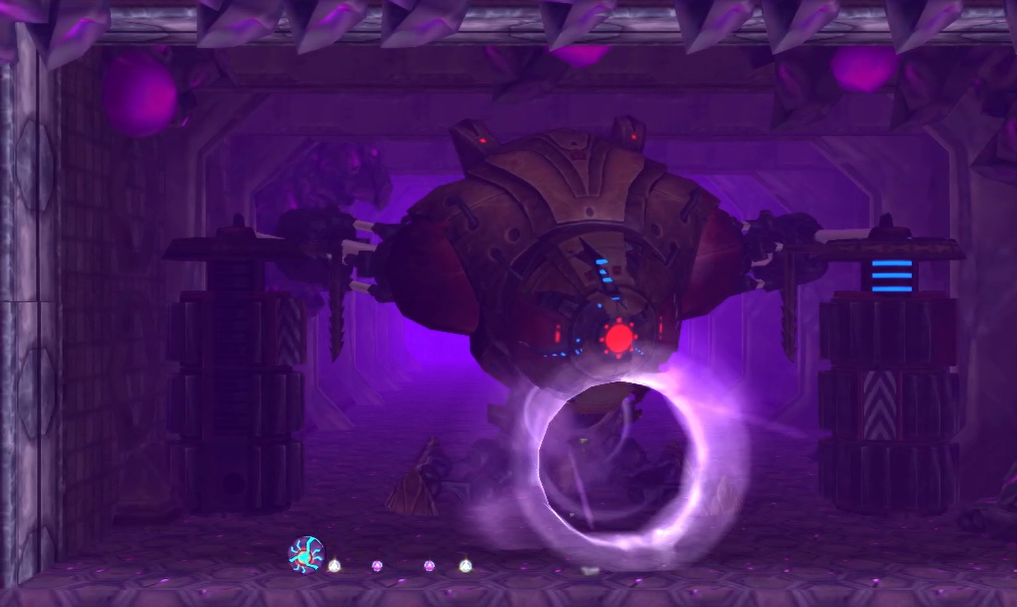
Diggernaut
It’s finally time! The fight that Samus Returns has been building up to all game is finally here. Samus vs The Diggernaut! It doesn’t get any better than that! You ready? Let’s go!
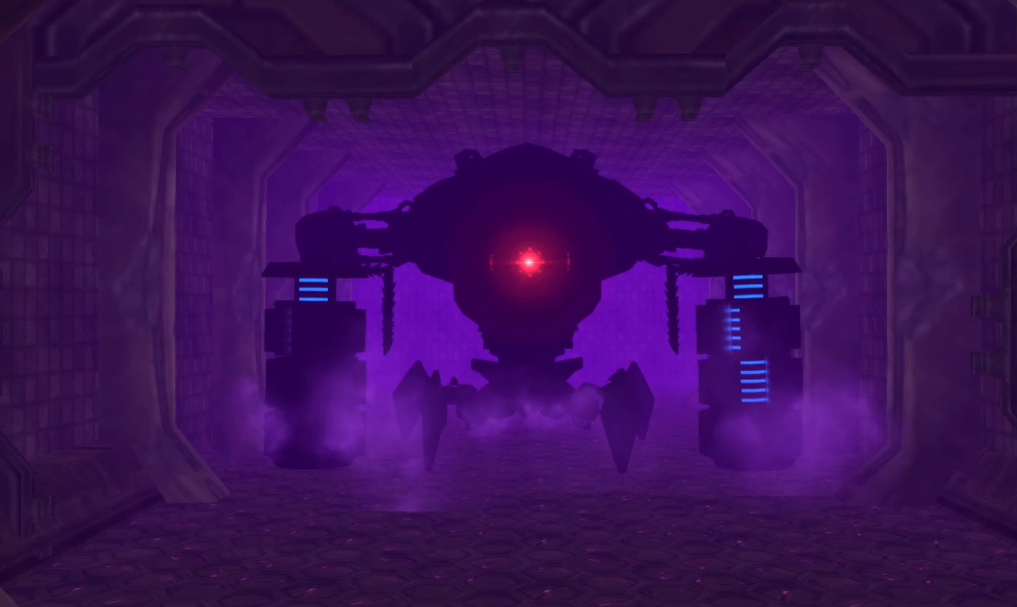

The Diggernaut will emerge from the background, its hulking silhouette and red laser eye coming out with you firmly in its sights. The Diggernaut itself will mostly stay in the background for the first little bit, really only bringing its drill arms out to do battle. You’ll have to wait for your opportunity to strike in this battle, so a large portion of the battle will be simply staying alive and avoiding the machine’s attacks.
The attacks will start right away, as a typical first move from the Diggernaut involves it sweeping its drills from side-to-side in the area. You’ll have a brief moment where there’s a gap in between the drills, so quickly jump through and get to the opposite side of the room when that happens.
The Chozo Robot will then typically have its drills attack you again, but this time, in a more linear way; you’ll see the Diggernaut put both drills in the center of the room, which is your cue to Space Jump over them and hover in the air for a second. The drills will split and crash into both far sides of the room, and then come crashing back down into the middle; your best bet is to keep Space Jumping in short, small circles.
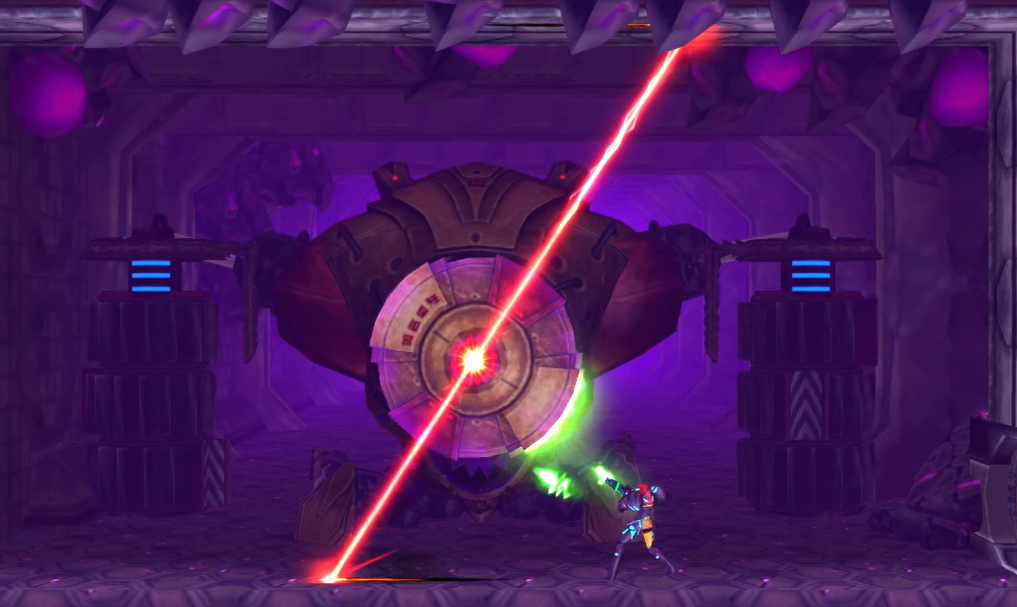
There’s more up this hulking machine’s proverbial sleeve, however! Once you land on the ground, the Diggernaut will stick its face in the arena and shoot out a laser from its eye; the laser is a straight line that will start to rotate clockwise, so just jump over the Diggernaut’s head to avoid it. This is a good opportunity to attack! Quickly land on the ground and fire off missiles, Beam Burst, charged shots, whatever your preferred method of firepower is, shoot it right at the Diggernaut’s head to damage it.
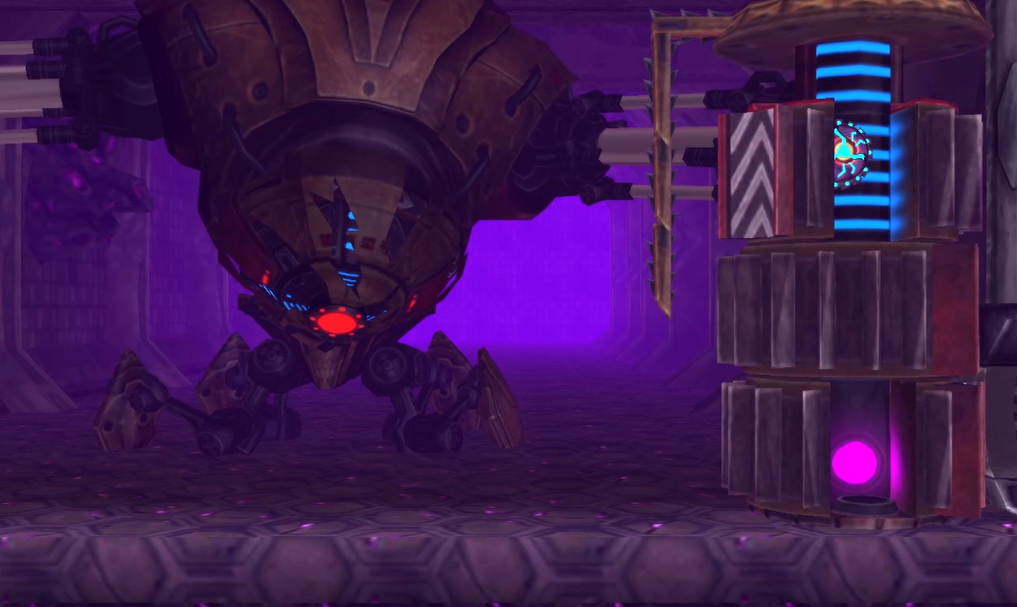
One final attack to look out for is the Chozo Robot smashing the ceiling with its drill arms. Instead of rocks falling down as you might expect, a bunch of purple blobs of acid will fall. These are slow, easy to avoid, and best of all, will give you health and ammo if you shoot them before they hit the ground!
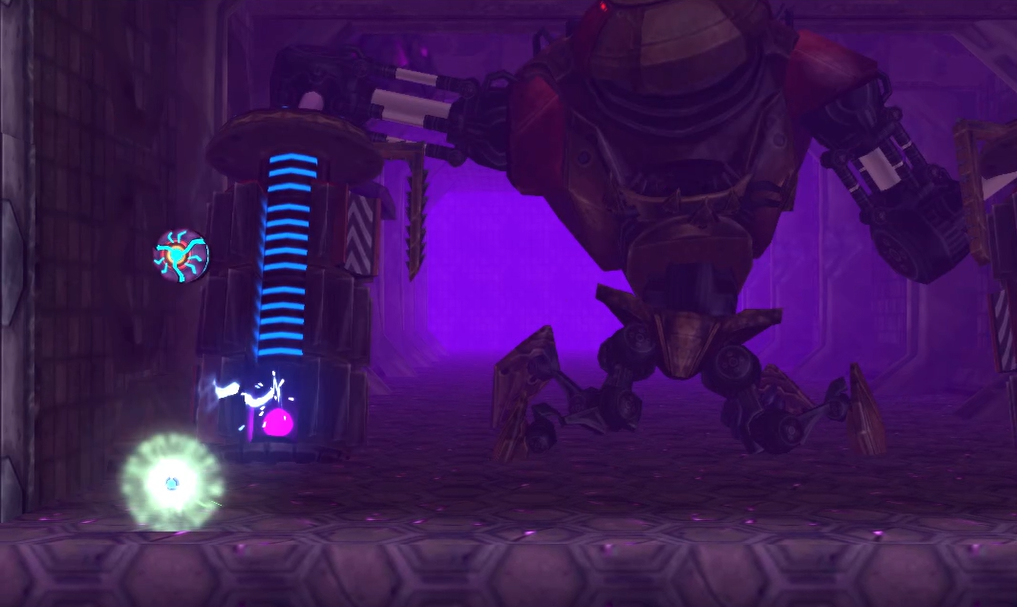
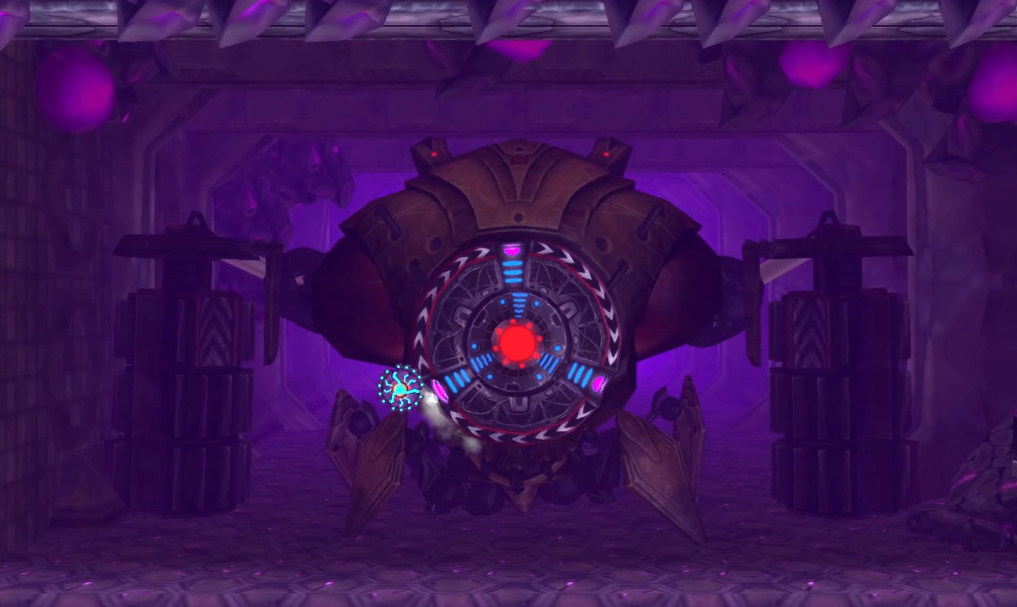
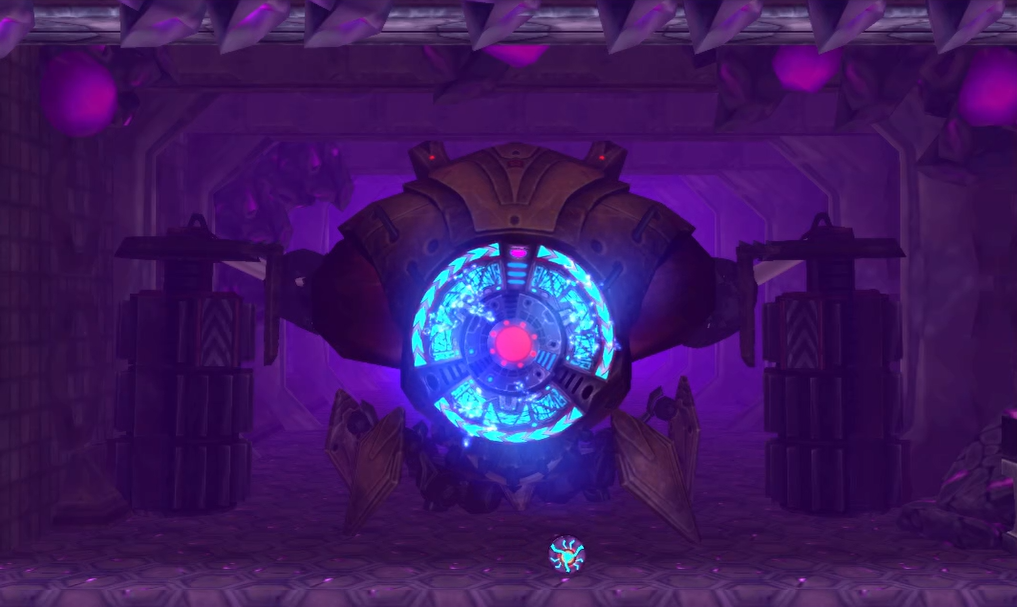
Keep the attack up, and eventually, you’ll stun the Diggernaut; this will cause it to drop both drills on the ground. You’ll notice each drill arm has three gears that are spinning; get into Morph Ball form and wait for the gears to line up that all have a Morph Ball track on it. Use your Spider Ball to quickly climb up and then tuck inside to the glowing blue track; quickly but CAREFULLY – don’t just drop right down! – wait for the blue track to line up and drop to the bottom. Lay a bomb in the purple slot and you’ll do major damage to the Mining Machine!
The Diggernaut will recoil, and phase two will begin!
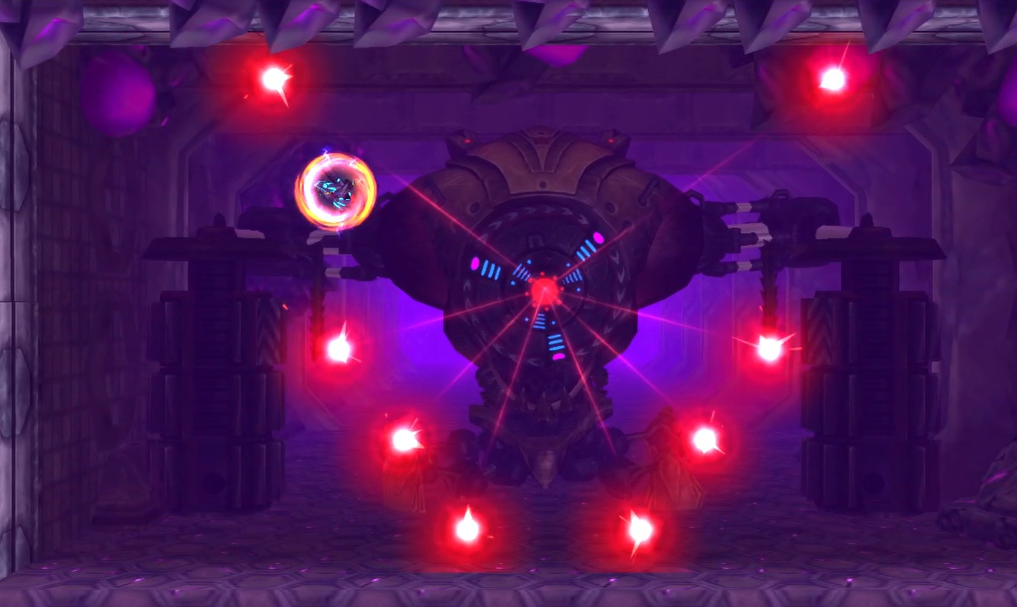
A few things have changed now in phase two – when the purple blobs start falling from the ceiling, the Diggernaut will now target you with a trace lock-on missile, so keep moving to make sure you don’t get blasted. The lasers that now shoot out from the Diggernaut’s head are no longer a straight line spinning clockwise, but rather three separate lasers that look like a capital “Y”; you’ll need to shoot and jump in between. Keep the Space Jumps short, tight, and only shoot when you can; it’s more important to avoid getting hit than it is to attack.
The deadly robot also has some new tricks up its sleeve this round, too. One attack you’ll see a lot is the Diggernaut sucking in air into its “mouth”, like a mini tornado, sweeping from left to right and back again. This is easy enough to jump over, but this is also a great time to attack! Get into Morph Ball form and roll just ahead of the gust; lay some bombs and instead of sucking up you, the Diggernaut will eat your bombs instead, which must not taste great, as enough of them will stun the machine. Activate your Spider Ball to avoid getting sucked up yourself; whatever you do, make sure that does not happen as the damage will be lethal, leaving you with barely any energy left if not outright killing you.
Keep the attack up, and eventually, you’ll stun the Diggernaut again! Go into the opposite drilling arm as last time and carefully drop down, laying another bomb to damage the machine.
Phase three will now begin, and the hulking robot seems really ticked off now!
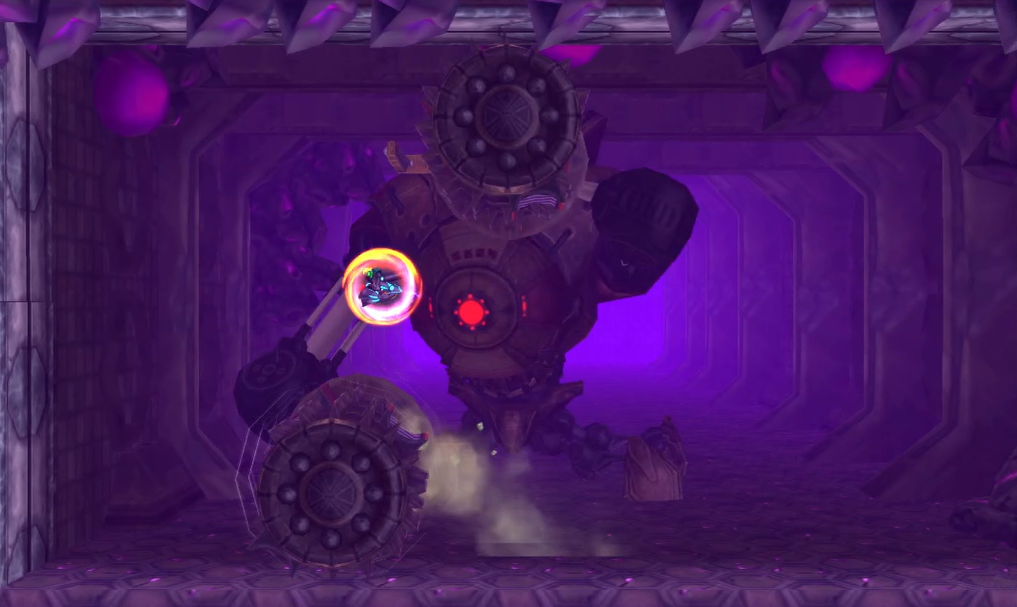
The Diggernaut will start slamming its drill arms into the ground, which will create shockwaves, so make sure that you’re jumping when the drills hit the ground. This will be done in bursts of three – the first time, with both claws in the center, the second, spaced apart a little bit, and the third, with either arm on the far side of the room. You’ll want to run under the drill arm between the second and third slam, jumping to avoid the shockwave.

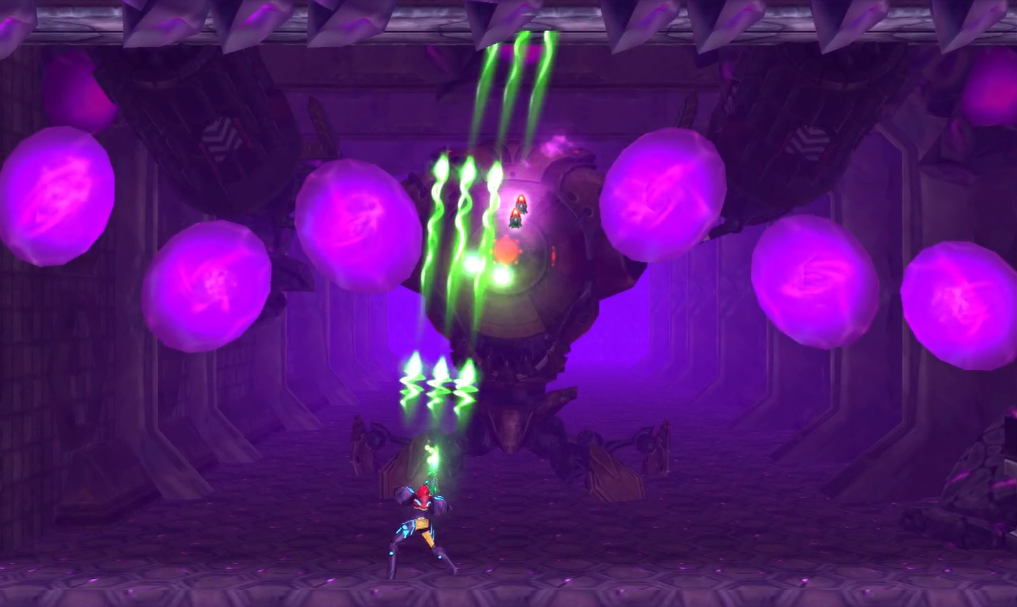
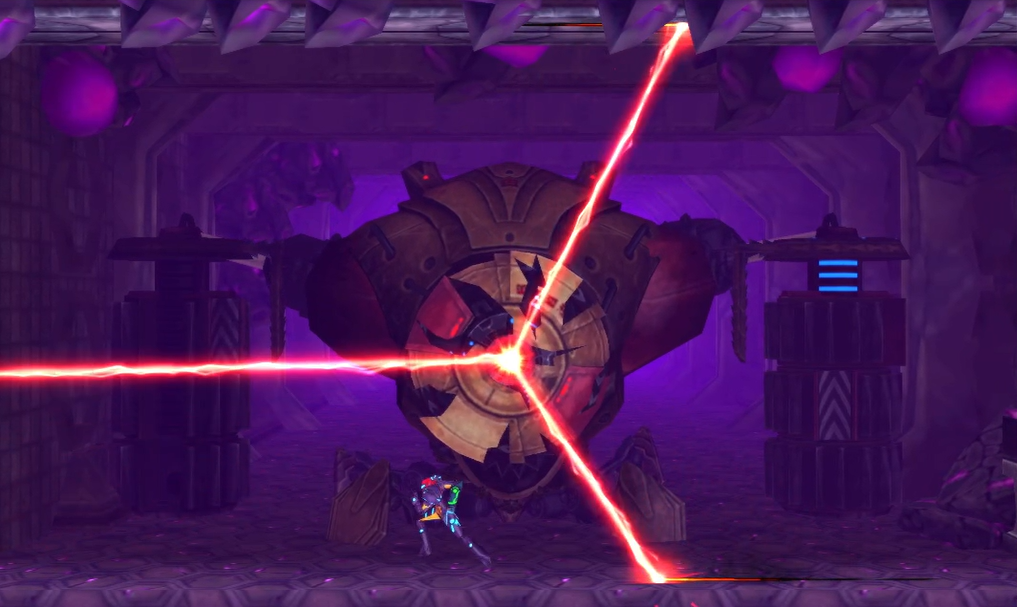
Next up is an attack right out of Resident Evil. The Diggernaut will fire out EIGHT laser beams from its eyes that you’ll need to Space Jump around. This will be difficult, but luckily, the lasers always follow the same pattern, so avoiding them should be okay once you get the hang of it.
The attack will begin with the eight lasers and will see four lasers on each side of the room in a straight line; they’ll start moving towards the center, starting from the bottom laser, so just Space Jump over top of them and then move to either side of the room. The lasers will then start moving from the center of the room back out, with the top four lasers heading straight up and over, while the bottom four head left and right; jump in between the lasers in the middle and get yourself to the middle of the room again. The lasers will once again shoot back out towards either side of the room, though this time, you’ll have enough space to jump in between the very top laser and the bottom three. Check out the below video for a more precise idea of the type of movements you’ll need to make!
The sucking air attack returns this round, however, the spinning “Y” laser attack does NOT, so make sure you’re dropping bombs when the Diggernaut is sucking up air. Eventually, just like before, you’ll stun the beast!
This time, once the Diggernaut is stunned, instead of crawling into its arms, you’ll want to wait for it to stick its face into the arena. The faceplate will glow blue for a few moments, meaning it’s electrified and will damage you, but when it’s not glowing, quickly morph down, jump up and use your Spider Ball to stick to the faceplate. There are three pink points, again in a “Y” formation, that will be spinning around the faceplate. BOMB THESE! This can be tricky, and it might take you more than a single try, so if you don’t get all three right away, go through the process again to stun the Diggernaut.
Once all three points on the faceplate have been destroyed, the Diggernaut will finally fall! Samus will give it one final shot to the face, and we’ll finally obtain our last powerup in the game: POWER BOMB EXPANSION #1!
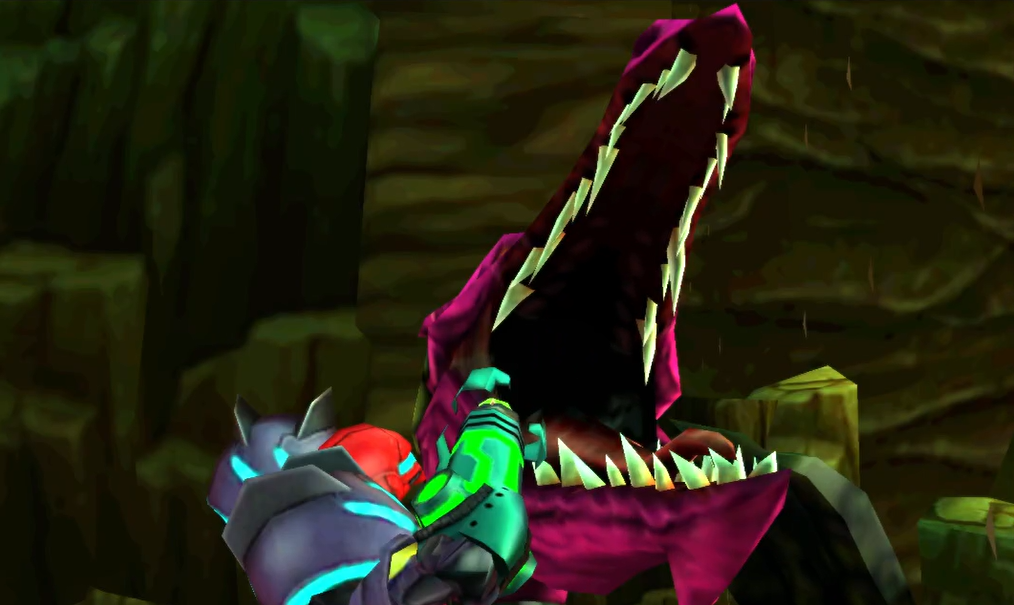
Queen Metroid
Watch the cutscene play out as Samus drops down below to once and for all take on the mother of all Metroids – the QUEEN METROID! This hulking behemoth will be the most imposing test we’ve faced thus far, so buckle up and let’s end this!
On the surface, this probably seems like a more straightforward fight – simply shoot missiles or the Beam Burst into the Queen’s mouth and it will take damage. While that’s true, as we Metroid fans know, it’s all about the journey, and nothing is ever that simple. Your opportunity to get clean shots at the mouth is going to be short and any hits you land will be well earned, so let’s unpack everything you’ll need to contend with.
The Queen has multiple attacks, and none of them may be more ferocious than her standard melee attack, where she will simply launch her head at you. This is simple, yet effective, as this will knock tons of health away, so anytime you see the Queen start to shake her head, retreat to the other side of the room and put as much space in between you and her as possible. If the Queen does this when you’re close to the wall, Space Jump up to the top corner and hope for the best!
Speaking of blunt attacks, the hulking Metroid will also rear its head occasionally for a big attack, which you can tell is coming by the purple energy swirling around her head. Get too close and that energy will suck you in, so be careful. Obviously don’t get hit, but typically after this attack, her mouth hangs open for a bit, so take advantage of your opportunity and get some shots in.
Another attack to watch out for will be the laser fire beam. She can shoot that beam straight at you, and just like the Omega Metroid, the Queen will fire that beam at the floor causing you to have to Space Jump over it. Unfortunately, at the same time as the floor is on fire, the Queen will start firing away at the ceiling and the wall behind you, meaning you’ll have to drop down and roll under the Queen’s head to avoid damage. You’ll have a quick moment when the Mother Metroid is firing at the wall where its mouth will be open and pointed straight at you, so take advantage of this and fire away!
This is pretty much it for the first phase, so keep firing away until the Queen is finally stunned. It will recoil its head a bit, allowing you to get some much needed Super Missile shots in its mouth. Get ready, because you’ll almost always have a chance to melee counter a bite from the Queen after this and do some bigtime damage! If you do it right, you’ll be able to grapple the Queen’s head down, roll into its gross mouth, head down its throat, and lay a bomb at its core! Activate your Lightning Armor if you have time before rolling into her mouth to avoid damage from her stomach acid.
The next phase will start up and the Queen will have some new tricks up her sleeve in addition to all the attacks she used previously returning. Watch out for her shooting the back wall with her laser breath and then blowing a ton of air at you; unless you morph down and use your Spider Ball to stick to the floor, you’ll go crashing into the fiery wall and take huge damage.
One trick you can keep in your back pocket is to Spiderspark off the wall and into the Queen. If done right, you’ll stun her, immediately bringing an end to whatever attack she is in the middle of performing. This can be tricky, however, as if your Spiderspark hits an acid ball, laser beam, whatever, your attack is over, hers continues, and you’ve just taken some major damage. Use this if you feel confident in your ability to hit it; otherwise, skip it.
The Queen will also spit out a bunch of green acid bubbles, usually in spurts of eight by my count, that will flutter around the arena for a good 12-Mississippi seconds, which feels like an absolute eternity as they can’t be destroyed with any of your weaponry. Making matters worse is the Queen will follow this attack up with a laser shot at the floor and back wall, making avoiding them extremely difficult. Your best best is to Spider Ball and stick to the ceiling, rolling out of the way of the acid balls as best you can, but even that carries risk as the Queen will bash her head on the ground, causing you to fall, and probably fall into an acid bubble. There’s no other way to say it: this is a really tough attack to successfully evade.
For that reason, quickly eliminating the Queen is your best bet, as the longer this fight goes, the worse your chances of survival become. Use your Super Missiles and your Beam Burst at will, and eventually, you’ll stun the Queen again. Repeat the melee counter process from earlier and the third phase will begin.
The attacks remain largely the same, except now, the Queen will fire her acid blobs and hit the back wall with her laser beam. She’ll try and push you into the back wall with her hot air, but just use your Spider Ball on the ground and you should be okay; just watch out for the acid.

You should have upwards of 200 regular missiles now, so fire at will anytime that you think you might have a chance of hitting the Queen in the mouth – chances are you’ll be out of your other ammo at this point. Keep the attack up and you’ll stun the beast for a third time. This next step is the make-or-break portion of this fight. If you are going to only ever hit one single melee counter in your life, make sure it’s this one!
Grapple the Queen’s head down, roll inside its mouth, and lay ONE. LAST. POWER BOMB. That will finally be enough to put the behemoth down for good, once and for all! The Queen will finally be destroyed, and you will have fulfilled your mission!
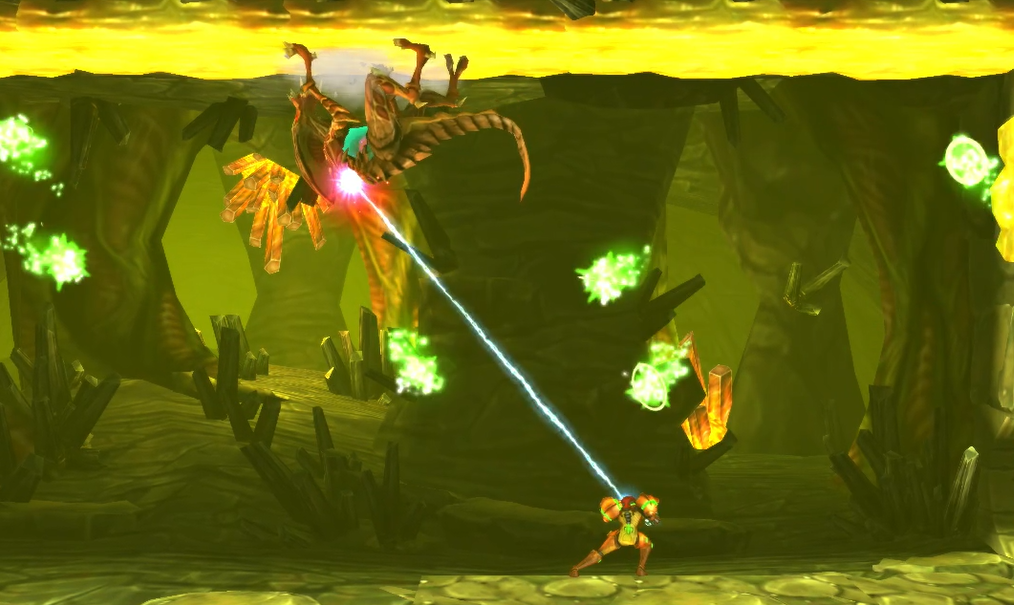
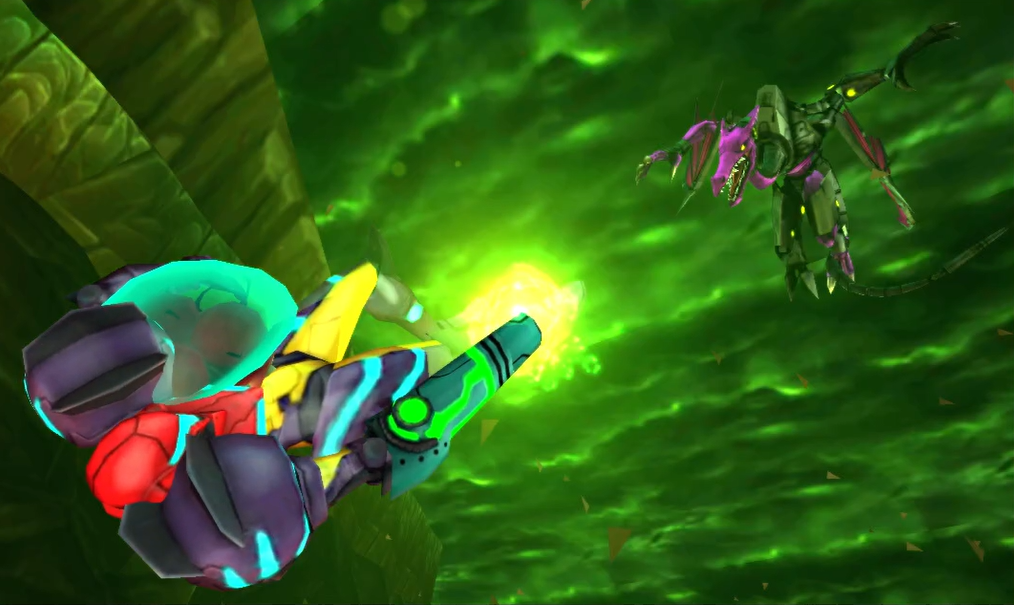
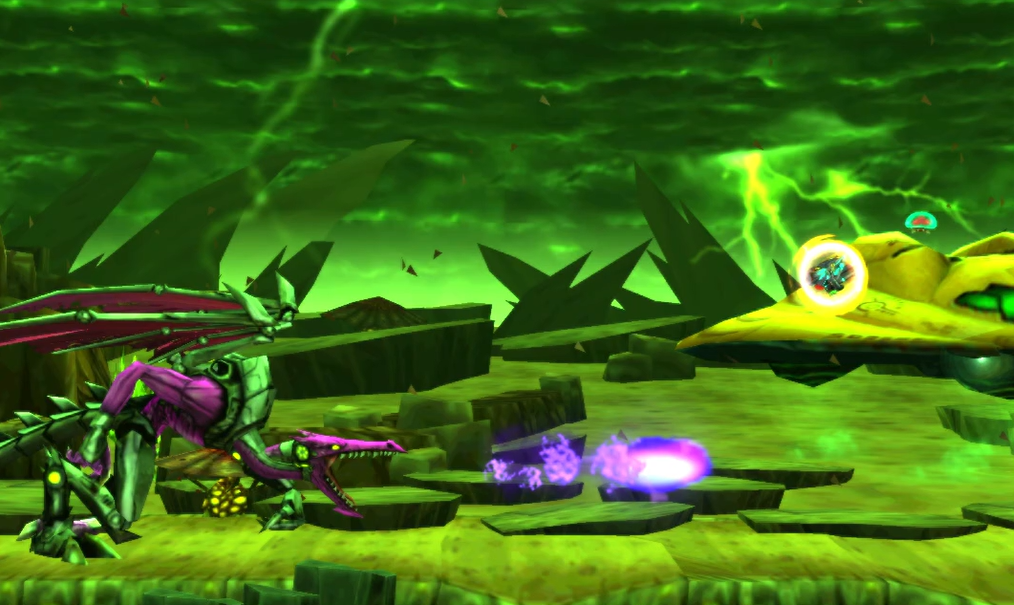
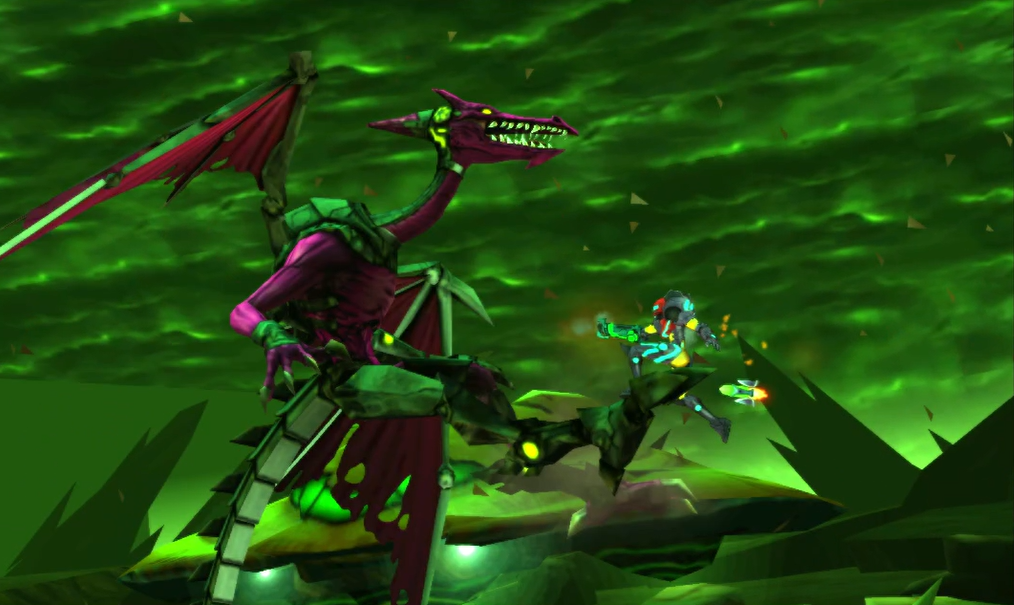
Proteus Ridley
As if the dark, foreboding music and imagery wasn’t enough to tip you off that something foul might be afoot, as you get towards your Gunship, a cutscene will start to play. Samus will open her ship and the Baby Metroid will fly towards it, only to be intercepted by an old foe – Ridley!
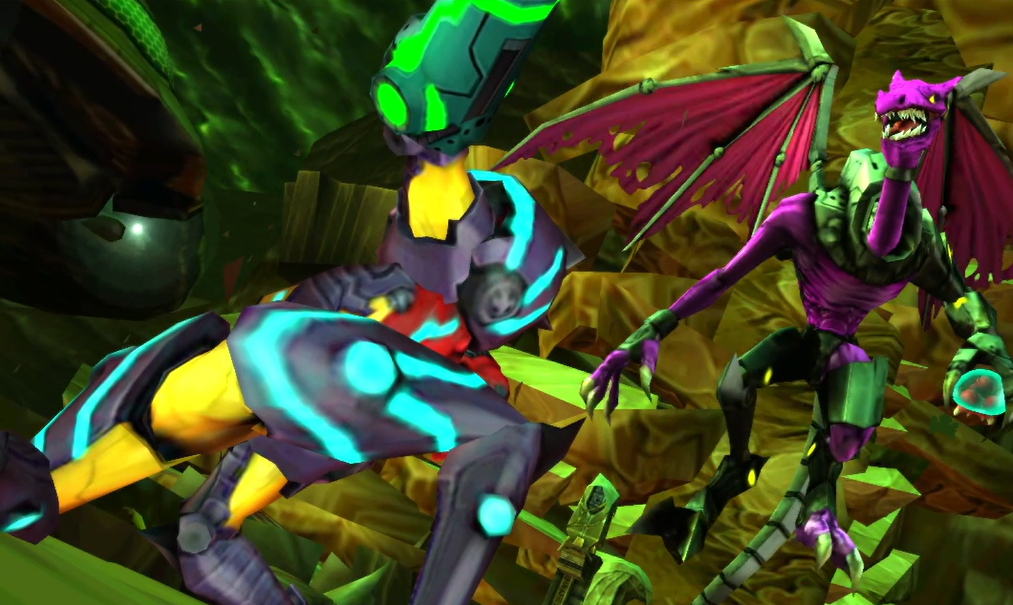
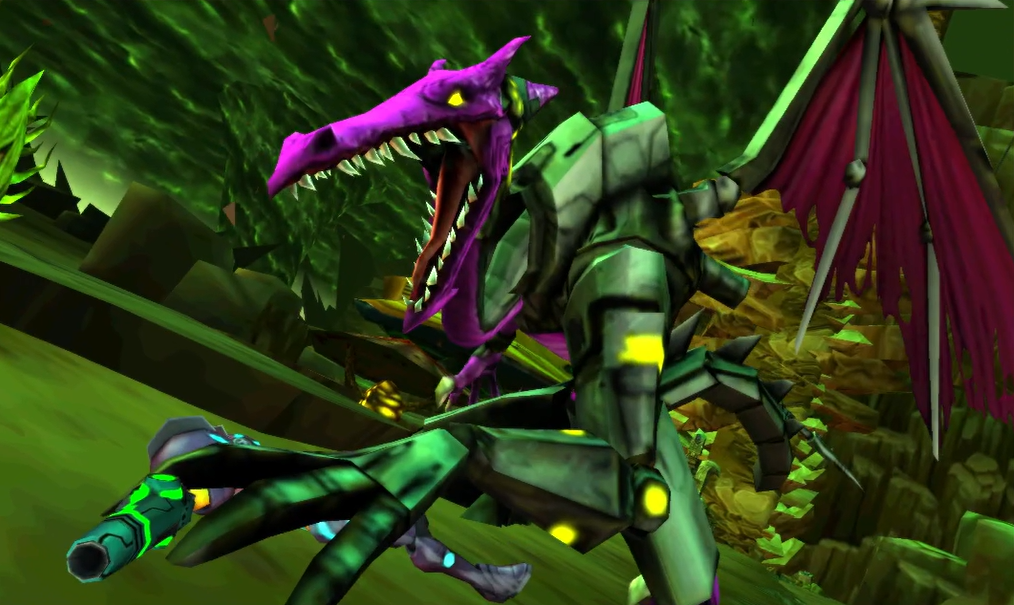
This isn’t just any version of Ridley, though – this is Proteus Ridley, an amalgamation of the classic version of the Space Dragon we know and the Meta version the Prime series introduced. Ridley will grab a hold of the Baby, meaning our final mission is clear: rescue the Baby and annihilate Ridley!
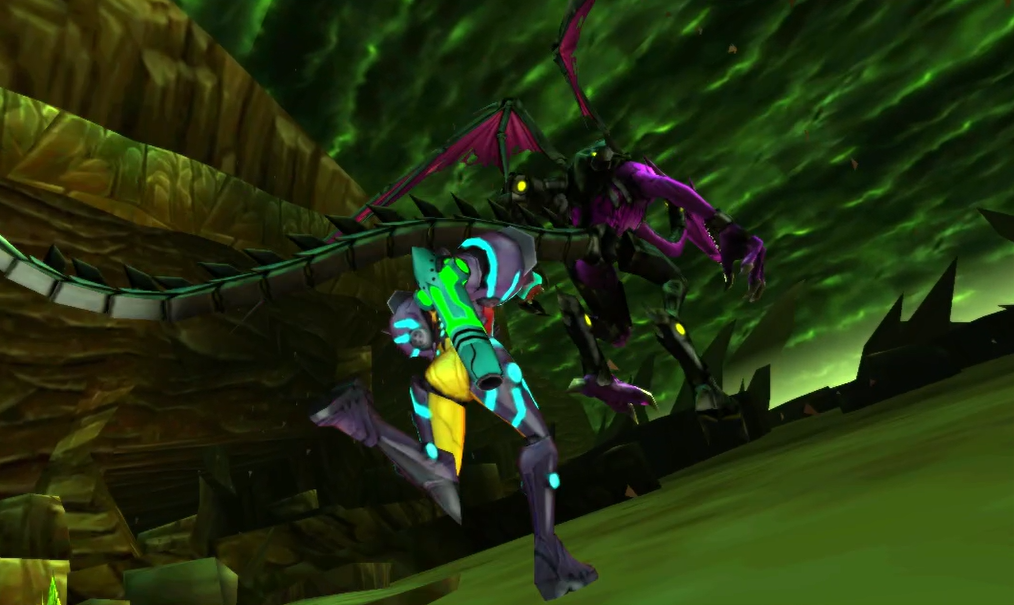
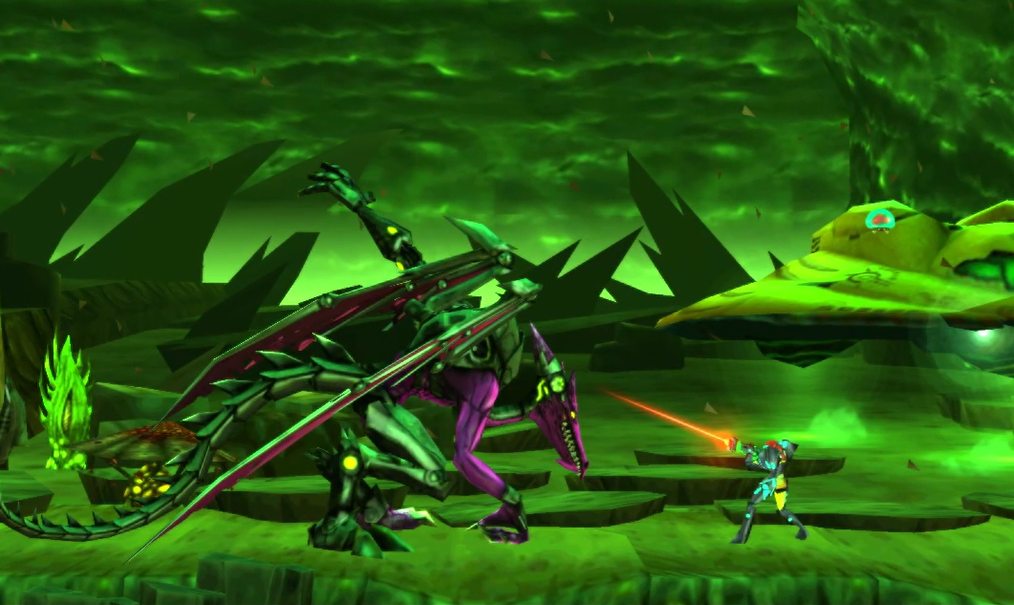
The first phase of the fight will begin right away, and the nice thing about Ridley is that in almost all of his various fights across the Metroid series, you don’t need to do anything special to damage him – just fire beams, missiles, whatever at his chest and head and he will take damage; thankfully, this encounter is no different. That being said, regular missiles will be ineffective and he can take a LOT of damage, but that’s what we went and got every item in the game for, right? The only place you’ll want to avoid shooting is Ridley’s tail, as it’s indestructible. Avoid the legs too, as that almost never hits right. Concentrate fire on the chest and head every chance you get.
Ridley will come in hot with his attacks, whipping his tail around like crazy. This hurts a ton, so do your best to avoid it. The Space Dragon will also shoot out a series of five fireballs that can’t be destroyed or Screw Attacked through, so make sure to avoid those as well. Don’t get too close to the wall, or Proteus will use melee attacks, which needless to say don’t feel too nice.
That’s pretty much it for phase one to be honest, so keep firing away at Ridley’s chest. As a general rule, use your Beam Burst before using missiles, since after every phase you’ll get a nice Aeion refill. As an added bonus, after each phase, you’ll get an absolutely killer cutscene of Samus and Ridley duking it out!
Once you’ve stunned Ridley, he will drop the Baby Metroid and square back up. The Baby will float over to your ship, so with its safety secured, let’s get started with phase two!
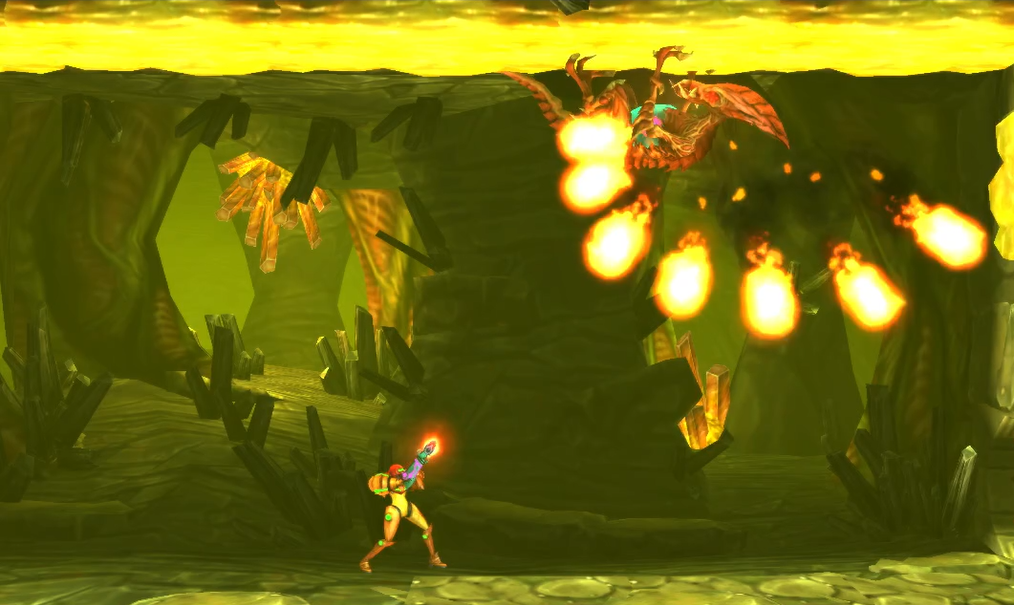
The Space Pirate enforcer will be more grounded this phase, so keep firing at the Space Dragon’s head to damage him and watch out for some new attacks. One in particular to avoid is Ridley’s fireball, this time, shooting straight at you one at a time bullet style. These are easy enough to avoid, but just watch out, as Ridley likes to fire a few in a row.
The far more devastating attack will be Ridley’s claw lunge. Anytime you see him raise his arm behind his back, get out of dodge as quick as you can, because a second later, Ridley will swipe that arm at you and lunge forward a bit; this is usually done a few times in a row, too. Avoid this at all costs, because one hit is going to knock off a full Energy Tank, and if he gets you with a striking combo, that could very well be game over.
Ridley will eventually take to the air again, where your strategy to deal damage will remain unchanged. Watch out for the same attacks, and be mindful of some new ones too. When Ridley is flying and you see him stick his tail in the ground, JUMP! Space Jump as high as you can, because that means Ridley is coming full speed at you, tail and all, and the only way to avoid taking a huge hit is to jump over him.
One other thing to note about the tail – in this phase, when Ridley tries to impale you with his tail and misses, his tail will become stuck in the ground for a second, which is a prime time to lay some Super Missiles into him. Also worth noting just because it’s kinda cool, but there is a massive cyclone spinning around viciously in the background that definitely adds to the big fight feel!
Keep firing away, and another cutscene will play of Samus and Ridley brawling. Just when it looks like Ridley is about to finish his oldest rival off for good, just when all looks hopeless for Samus, IT’S THE BABY METROID TO THE RESCUE! Who else is cheering out loud!? The Baby will attack Ridley, letting Samus regroup. Together, Samus and the Baby Metroid will stand up to Ridley for one last phase.
Ridley has augmented his claw swipe in this round. In addition to the regular claw swipe you already know about, he’ll have a super duper charged version of this attack which is absolutely lethal, so don’t get hit! Jump over, just up, just jump out of the way any way you can when you see him charge that claw swipe up!
When Ridley gets in the air, he’ll take to shooting fireballs downwards that will cause shockwaves on the ground if they don’t hit you, so be mindful of those and jump before the fireballs hit. Ridley will now just frantically lunge straight at you in the air too, so be ready to move quickly!
If you damage the Space Pirate enforcer enough, he’ll be momentarily stunned, allowing the Baby to swoop up and leech on his face, damaging him. Ridley will ALWAYS try and bite you afterwards, giving you a chance to melee counter! Hit this and you’ll be able to pump him full of Super Missiles, doing massive damage!
This is it, so fire at will and use every missile, every Aeion ability, everything at your disposal to take Proteus Ridley down. After enough damage to the face and chest, Ridley will finally fall.