Metroid Walkthrough – Kraid’s Lair
Walkthrough
- A Few Things You Should Know Before Playing
- The Planet Zebes
- Ridley’s Lair
- Kraid’s Lair
- Mother Brain
Expansions Galore
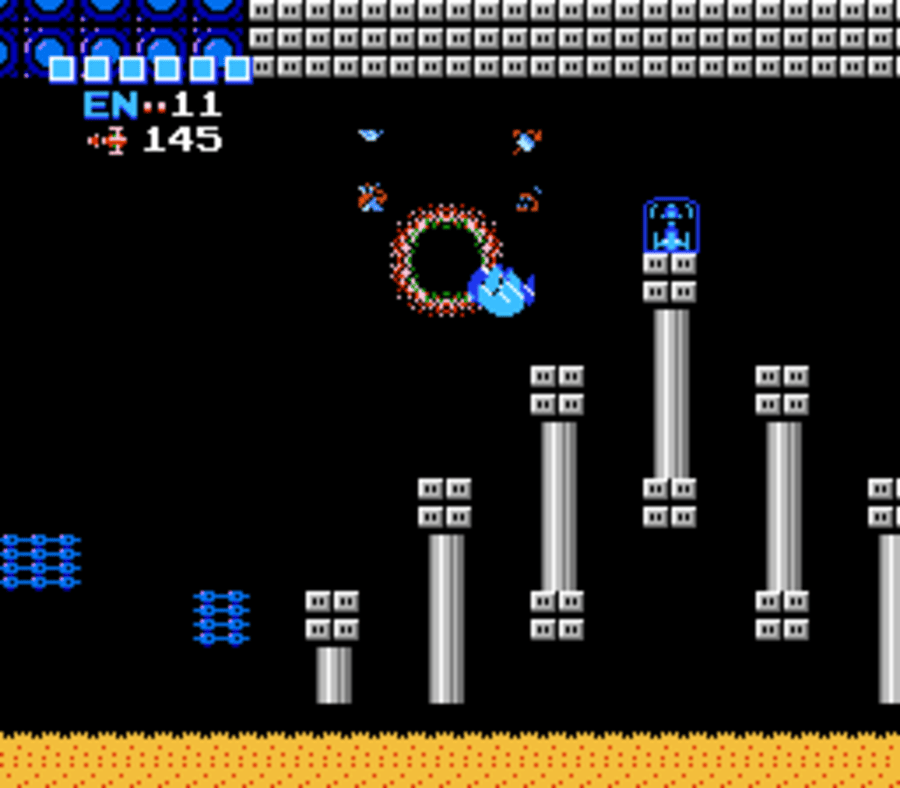
Once you’re back in Brinstar, make your way all the way back to the spot you started the game in. Before you get there though, you’ll have passed under a tunnel that’s in a room to the right of the starting point. There’s an Energy Tank hiding up in the ceiling, but even the Hi Jump Boots won’t let you jump high enough to snag this expansion. To acquire it, you’ll want to roll under the tunnel so you’re on the right side of the door, and then lure a Skree to the ground. Don’t destroy it; instead, get it to follow you and roll through the tunnel.
Once you get the Skree to the other side, freeze it with your Ice Beam and shoot the ceiling. You’ll see ENERGY TANK #5 exposed, which you can jump up and snag. Once you’ve grabbed the Tank, go through the blue door on the left and bomb the floor, dropping down until you get in the elevator to Kraid’s Lair.
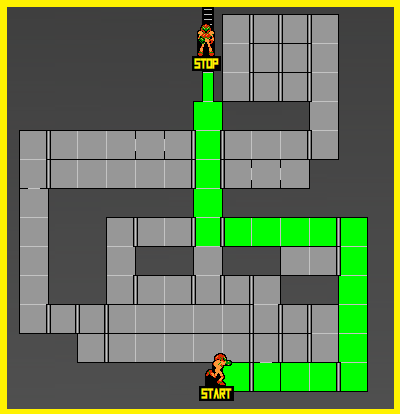
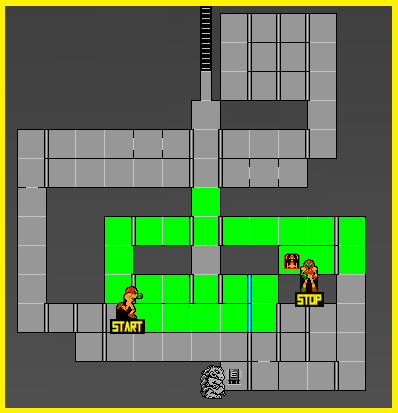
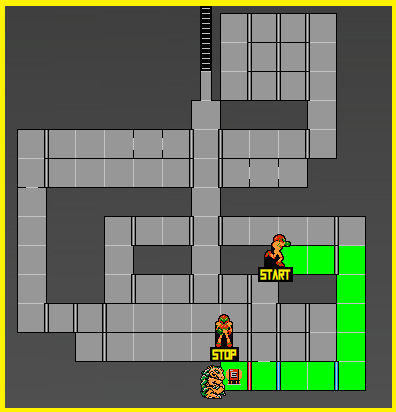
Brinstar-to-Kraid’s-Lair Route:
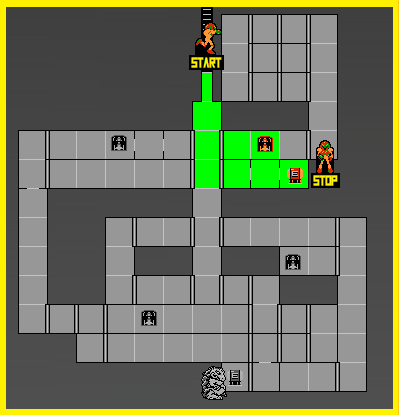
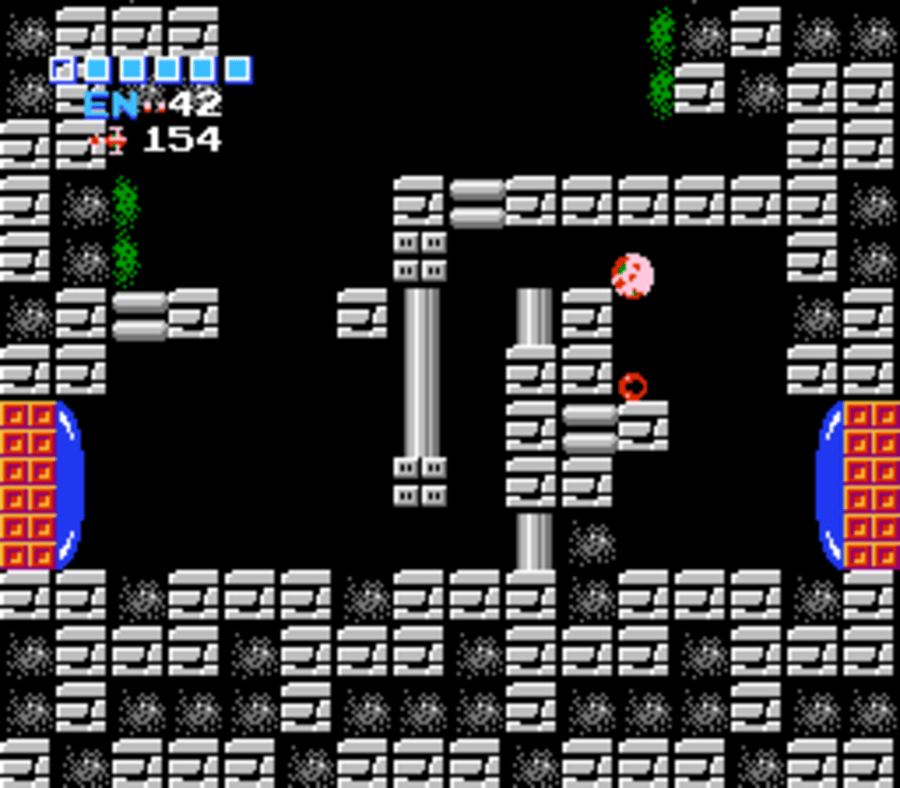
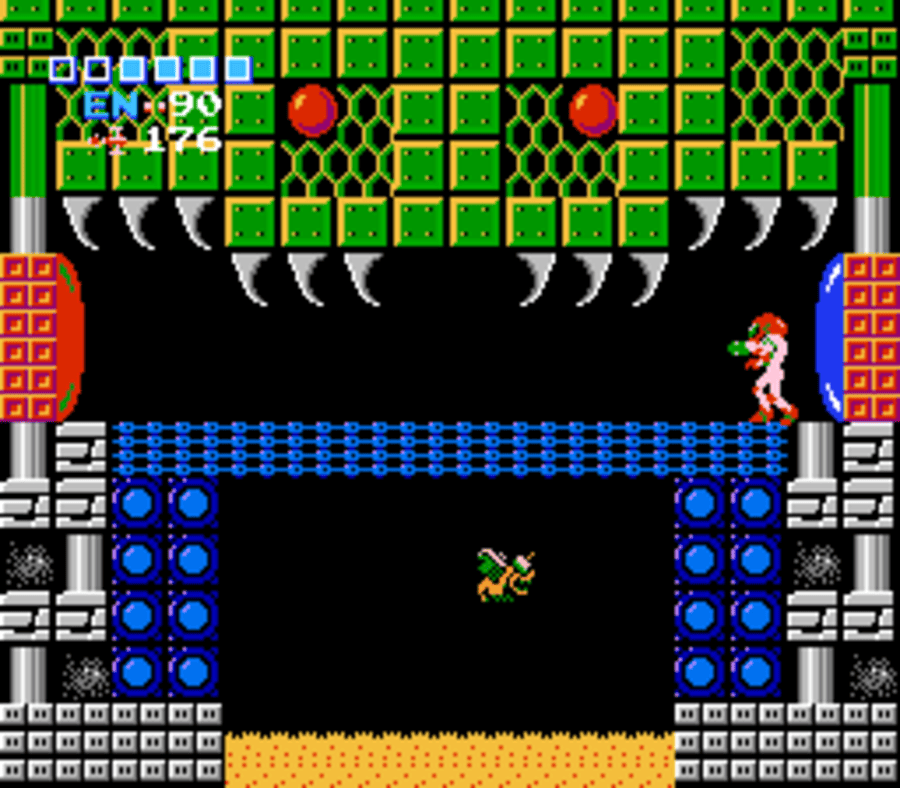
Once you’ve arrived in Kraid’s Lair, drop down and enter through the red blast door to your right. Jump over a bit and you’ll grab MISSILE EXPANSION #18. Exit out of this room and then drop down again, taking the red blast door directly under this room. Jump across the platforms until you get to a wall. Do a little shootin’ do a little bombin’, and roll through a tunnel in the wall. You’ll pop out right beside ENERGY TANK #6 – the last Energy Tank that we’ll be acquiring for our run.
Energy Tank #6 Route:
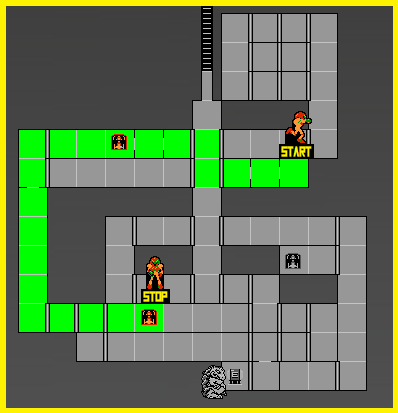
Head back to the elevator to Brinstar. Drop down, and this time, take the door on the left side versus the right. Press forward until you get to a wall; you know what to do. Roll through the tunnel hidden within the wall and you’ll pop out by MISSILE EXPANSION #19. Jump over and claim your prize!
Keep heading left and go through the blue door. Drop down, and when you see the blue door right below where you just fell from, turn around and keep dropping. The green acid (or whatever it’s supposed to be) isn’t real and you’ll fall right through it. You’ll actually fall for what seems like forever, and chances are good you’ll hit some Rippers, so just grin and bear it. Once you land, head through the door. Head forward a couple rooms until you get to a red blast door. Shoot it open, enter this new room and then jump ahead a bit. MISSILE EXPANSION #20 will be waiting for you!
Missile Expansion #20 Route:
Press towards the right, eventually going through the blue blast door. You’ll see another blue door behind some bars that we can’t get through, so instead, jump up and head out the left side door. Go through the door and then bomb and roll your way through the small opening until you’re on the other side of the bars. Head through the door on the left and curve around, heading through the door and then up and then to the right until you’re back in the same room, just a little higher up.
There’s a red blast door opposite you, but you’ll need to jump up and drop down to get to it. Honestly, you’ll probably have to drop down past the door and then jump back up to get to the door. Once you’re through, grind to the left until you exit the blue blast door. Drop down and take the blue blast door directly under the door you came from. This room will house MISSILE EXPANSION #21. Awesome – that’s every Missile Expansion in the game! We are currently operating at maximum firepower!
Final Missile Expansion Route:
It’s time to eradicate the menace lurking in Brinstar’s depths, so let’s get to work on finding Kraid! Head back into the vertical hallway you entered from and drop all the way down the bottom. Press through towards the left until you get to the red blast door. Shoot it open and get ready!
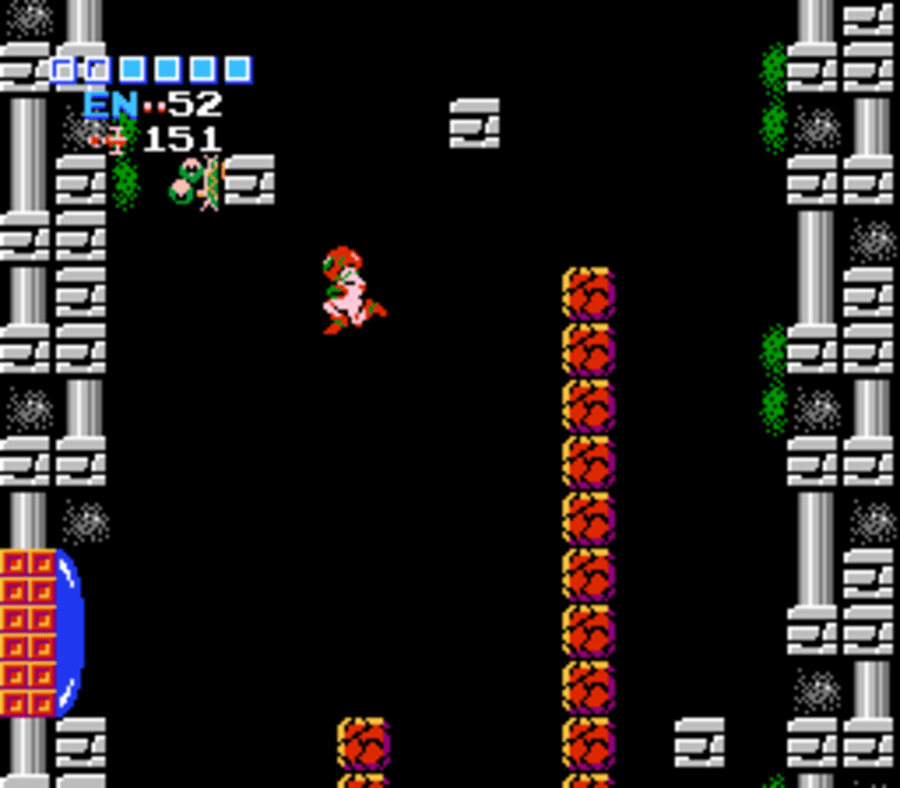
Kraid’s Boss Room Route:
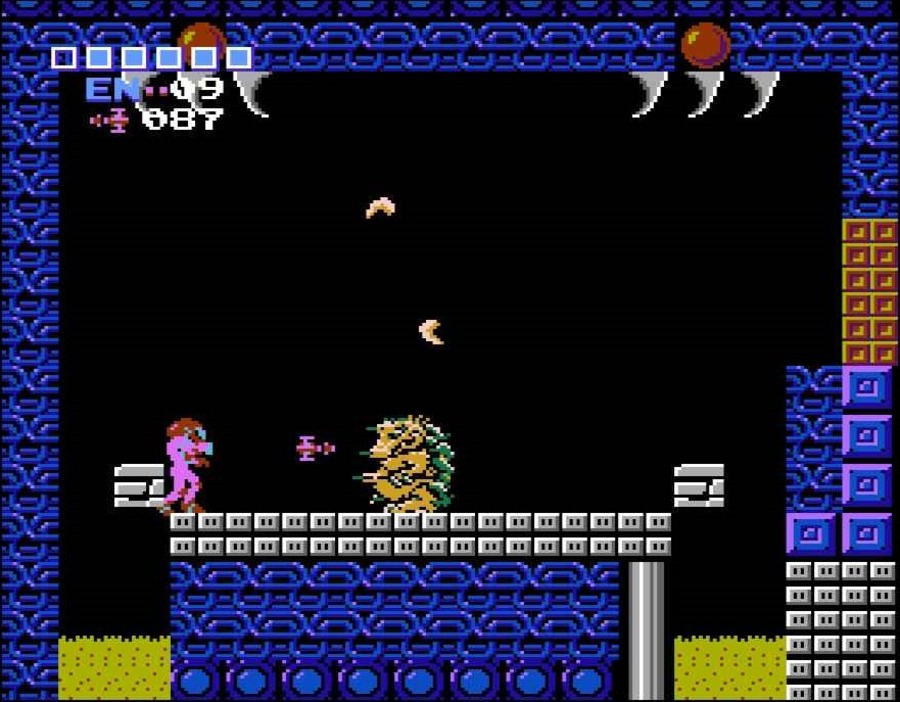
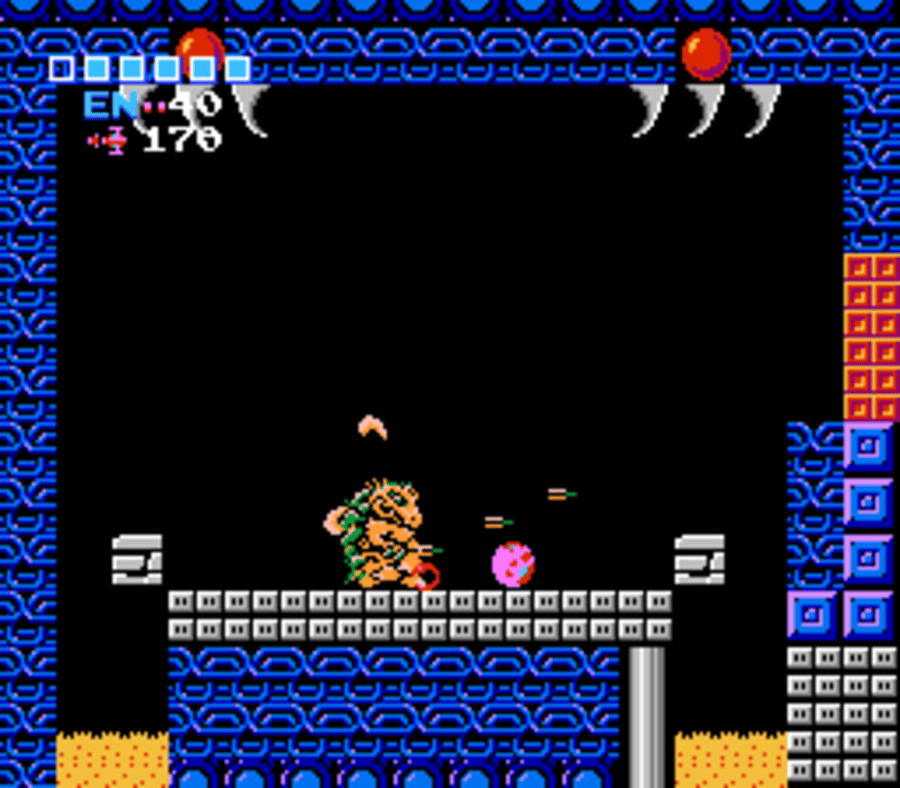
Kraid
Playing Super Metroid as often as I had growing up had conditioned me to expect the Ridley fight to be hard and the Kraid fight to be a breeze, so it was kind of refreshing to see that NEStroid actually went the opposite way.
Kraid is a beast in this fight. He is extremely hard to hit and is firing projectiles at you constantly, from both above and from his belly. The projectiles above aren’t too bad, but the ones firing from his belly are a real pain in the butt, for the simple fact that they block your missiles, they stay frozen in place if you hit it with your Ice Beam and still block your missiles, and the bottom one is basically unavoidable unless you get down into Morph Ball for and lay a bomb, something that will probably take more time than you’ll have. Our strategy of Screw Attacking through Kraid to get to the other side and hit him before he turns around also won’t work since the projectiles shoot out of his back too.
So what to do?
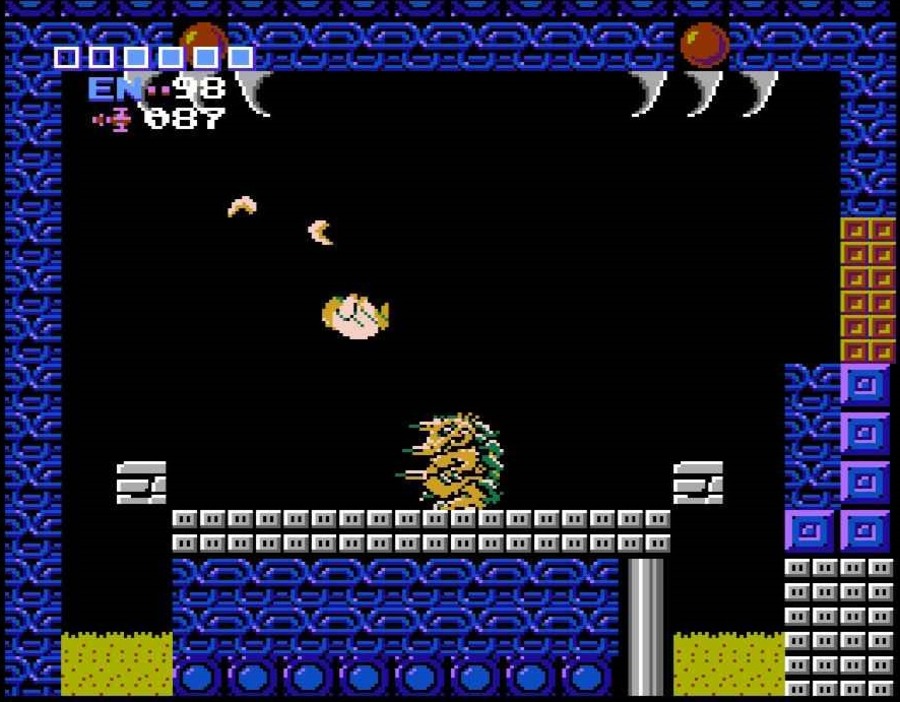
I’ve found that the most effective way to beat Kraid is to actually get in Morph Ball form and lay bomb after bomb until Kraid explodes. This is a risky strategy, as obviously you’ll need to get close to Kraid in order to damage him. There’s no way around it: you’re going to take a beating here. You will absorb a ton of punishment, buuut the key difference here is that Kraid will also be absorbing his fair share of licks, far more than he would if you were fighting Kraid head on.
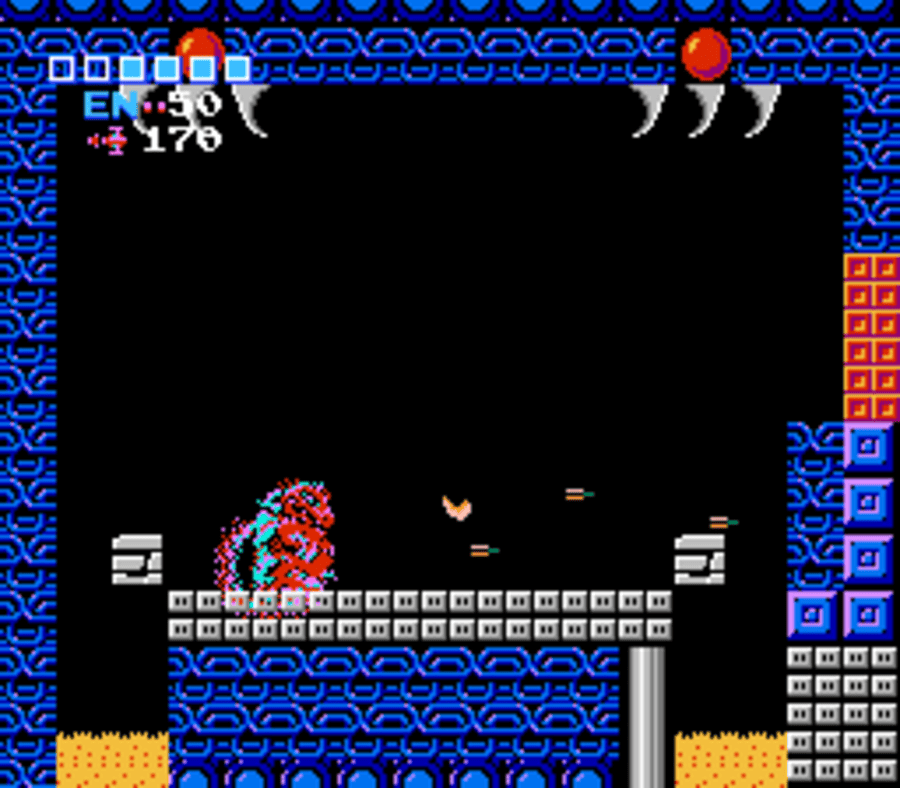
This is why we saved this fight until after Ridley and why we collected all the Energy Tanks the game has to offer. If you’re aggressive with your bombing and can keep yourself on the platform, you should outlast Kraid.
Pro-tip: there is an Energy Tank in this room. While it won’t add any extra Tanks to our health, it will completely heal you, either after or during the fight if you need it. It’s hidden directly below the door 4 blocks down. Jump in the lava, shoot the block, jump back up, Morph Ball and drop and tuck in to grab it.
Once you’re done, leave Kraid’s Lair and head back to Brinstar.
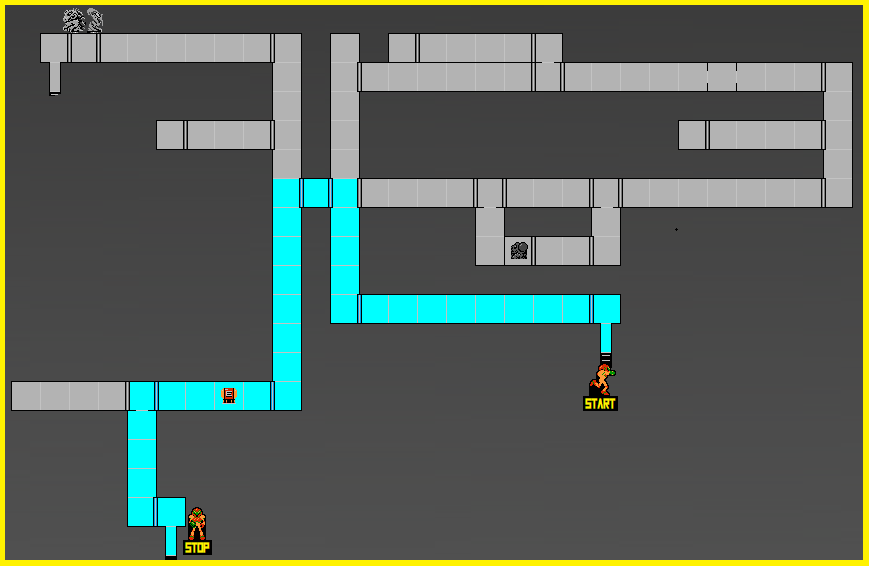
Kraid’s-Lair-to-Brinstar Route: