


Metroid Prime Hunters Multiplayer Walkthrough – Multiplayer Arenas & Strategies
This guide will have a detailed description of every multiplayer arena in Metroid Prime Hunters, the arenas properties, and specific Hunter strategies for multi-person melees and 1v1 battles! The default format will be written for 4-player free for all. 1v1 will have its own segment per arena. Each arena is listed directly below for quick navigation:
Combat Hall | Data Shrine | Processor Core | High Ground | Ice Hive | Alinos Perch | Sic Transit | Transfer Lock | Sanctorus | Compression Chamber | Incubation Vault | Subterranean | Outer Reach | Harvester | Weapons Complex | Council Chamber | Elder Passage | Fuel Stack | Fault Line | Stasis Bunker | Head Shot | Celestial Gateway | Alinos Gateway | VDO Gateway | Arcterra Gateway | Oubliette
Combat Hall
THE poster map of Metroid Prime Hunters and Metroid multiplayer in general. Starting out in First Hunt multiplayer as “Ancient Vestige”, Combat Hall is an iconic map with a simplistic design that provides great features for each Bounty Hunter to take advantage of.
Samus: Starting out with charged Homing Missiles creates immediate early pressure and potential kills for Samus. The high ground perches on both sides are perfect for missiles, while players on the lower floor have to keep constant caution against swift boost ball plays that can quickly replenish ammo and health for Samus. The tunnels are great for threatening space, getting health, and pursuing weakened opponents.
Kanden: As the only Volt Driver user on this map, Kanden can take advantage of how fast he can melt HP with this rapid fire weapon while using the charge shot to track his opponent’s retreating to another floor. Kanden’s Stinglarva Bombs being anti-pursuit allows for safer resource accumulation in the tunnels.
Spire: Thanks to his Affinity Weapon, Spire is able to start each life with the Magmaul from either side of the map right after he spawns. With the ability to lob Magmaul shots through the tunnels, you can nab some witty kills. All while Spire wall climbs with the Dialanche to get to higher up health orbs before the opposition.
Trace: A great plan A is to grab the Affinity Weapon orb then go into the Triskelion while quickly getting to the cliff right above that orb via the tunnels. Unless all three of your opponents choose to hide in the right hallway, you could quickly win the game by staying next to the health orb and nabbing Imperialist headshots. If you get targeted, you can pull back for a bit, taking advantage of the protective high ground. You can Jump Strike from the one jump board to reach the middle bridge quickly.
Noxus: Combat Hall is the perfect map range for Noxus and his unique arsenal to be a constant threat. Thanks to Shadow Freezing, Noxus can Judicator freeze across the map on both floors, while taking advantage of the weapon’s bouncing capabilities against opponents in the tunnels or hallway. Be swift though, a frozen target can be an easy kill for your other two opponents. The Spin Attack is great to constantly use while moving around the tunnels and hallway, granting even more kill opportunities.
Sylux: Sylux’s Tripwires are brutal in the upper tunnels. Completely blocking off health and parts of the map if opponents don’t want to take 40 damage. Having control of the bottom floor allows for close range Shock Coil pressure while taking advantage of the open lower level is the perfect amount of space for Tri-Bomb kill setups.
Weavel: When placed on the bridge or cliffs, Halfturret plays allow for Weavel to quickly get resources in the tunnels and the hallway while the turret shots chip away or even get kills on the opposition. With the Battlehammer, Weavel has great range to and from the cliffs, while also shooting through the windows with added splash damage for great kill opportunities anywhere.
1v1: The map often gets split between the bridge when it comes to crossfire play. If a player chooses to cross over, they often will when they have above 99 HP. Upon respawn, the tunnels provide a quick way to get back into the HP arms race, but be careful from Magmaul ambush shots.
Data Shrine
Bountiful resources on the ring, rapid kills at the core. Data Shrine demonstrates Metroid Prime Hunters distinct strategy framework between getting Power-Ups vs. getting kills. Getting the two gold health orbs in the Alt-Form tunnels will grant you an advantage in a duel, but time away from the center of the map can quickly put you behind in the kill race. With every Affinity Weapon available, jumping right into the center is a great Plan A to go for.
Samus: Not only is the center bridge amazing terrain for Samus to high ground shoot her Homing Missiles, but there is ammo right in the center as well. If a target retreats to the ring, her Boost Ball is fast enough to usually ambush them if you take a tunnel to lock in a kill.
Kanden: Trailing Stinglarva Bombs allows for Kanden to escape pursuits in the Alt-Form tunnels while accumulating resources and potential kills. Similar to Samus, Kanden can take the high ground on the center bridge and use charged Volt Driver shots to lockdown on the opposition while firing a barrage for swift kills.
Spire: Spire loves the close quarter combat of the center area. The Magmaul is in quick reach, and its wall-bouncing and arching properties allow for an omni range of kill opportunities within this area. The tunnels in the ring allow for Spire to hit with both Fire Blades with ease as he acquires health.
Trace: Trace is the overall fastest Hunter that can retreat to the tunnels in the ring while presenting a constant offensive threat with his Jump Strike. Paired with his cloaking abilities, Trace can ambush for quick kills on anyone retreating outside while going for Imperialist headshots in the center area.
Noxus: The Judicator allows for a lot of trick-shot opportunities across tunnels and around corners. Spin attack is a great tactic to constantly use while traversing the tunnels, while the ability to freeze in close range quarters makes Noxus a well rounded constant threat.
Sylux: The Lockjaw’s mobility allows Sylux to swiftly pick up a weapon, ammo, and some health before going after his first kill. Tripwires can halt the tunnels for low HP opponents, while the threat of a Tri-Bomb in the center area makes Sylux an efficient Data Shrine killer.
Weavel: With health orbs in each cardinal direction, Weavel can drop the Halfturret in the center area while he continues to add health with constant damage to anyone within turret range. Because of the natural traffic to the center area, Weevil can get the Battlehammer and take advantage of its splash damage to hit multiple targets on any level.
1v1: Without the threat of opponents getting kills before you, unless you die, Data Shrine’s ring becomes a momentum-building area thanks to getting to full health quickly. The duel aspect of 1v1 creates a high priority for every health orb in all cardinal directions. If your opponent retreats during a fight, use your knowledge of these health orbs to go for an ambush.
Processor Core

Walls and narrow routes galore—the figure eight of Processor Core makes for chaotic frays with rewards, like the Deathalt, for those that travel up top. A skilled Hunter will make the most of their Power-Ups in close reach, with their opposition respawning right next to them.
Samus: Because every spawn point is on the lower level, Samus can use her Boost Ball to traverse the lower floor for fast kills and Power-Up retrieval. Speaking of, if Samus gets Double Damage in the top tunnel, she can win the game in one swoop with respawn chasing.
Kanden: Kanden can take the high ground on the center bridge and use charged Volt Driver shots to lockdown on the opposition while firing a barrage for swift kills. On the lower level, Stinglarva bombs on the center platform easily hones in on opponents within their respawn points while you control getting the health orb.
Spire: With Magmaul right next to you, Spire can start dishing wall-bouncing damage right when he spawns. After cleaning up with some kills, you can start charging your Magmaul while grabbing the health orb and ammo nearby. Spire can use his Dialanche to climb the closest two walls and get to the top level before any other Hunter on average. Allowing for Double Damage strategies to storm the map.
Trace: With the Affinity Weapon orb on the higher level bridge, Trace’s Jump Strike off of the jump board will get him the Imperialist quickly. In terms of carrying good momentum, you can either stay up top and snipe opponents, or come back down with Double Damage.
Noxus: With the Judicator in the neighboring hallway, Noxus will fire a barrage of wall bouncing ice beams that makes hiding on the lower floor difficult, if the opposition isn’t already dead. The close quarters also provide for easy freeze plays around the corners.
Sylux: The health orb in the middle of the map allows for Tri-Bomb setups to take out opponents that want it. Sylux can Bomb Jump on the higher level to get the Affinity Weapon orb and Double Damage, quickly allowing for fast kills and rehealing opportunities.
Weavel: The Halfturret can hold a choke point on the high or low levels against opponents, all while Weavel collects resources and kills on battle weakened foes. Getting the Double Damage will make the splash damage from Weavel’s Battlehammer lethal that can get multiple kills.
1v1: A duel on Processor Core anchors around the center health orb. Whoever gets the first kill gets a lot of momentum. So much that you can travel to the top of the map right after getting the health orb at the bottom, granting you more resources, and the high ground.
High Ground
Traversing the lateral labyrinth of High Ground will quickly teach you the advantages of the namesake while pursuing retreating targets underground. Keeping track of your opponent’s with route knowledge and good aim tracking aligns as a go-to strategy to win.
Samus: Samus can win a lot of games by staying around the bottom floor and basement. With her homing Missiles and Morph Ball health melting abilities, the respawn points in this range can be used to her full advantage. These abilities aid in retreating kill opportunities to other levels as well.
Kanden: Not only is the double damage anchored in the dead center of the map, but going into the Stinglarva to get it serves as a momentum advantage as you plant homing bombs around the center. The Power Beam alone does a lot of damage with this Power-Up, while grabbing the Affinity Weapon orb and heading to the higher ground allows for Volt Driver storms to nab kills.
Spire: The tunnel eradicator, players fighting against Spire using the Magmaul (which can be acquired on multiple floors) will find a catch-22 where the gravity influenced shots raining below, and bouncing in the hallways for quick kills. Spire’s ability to climb walls grants him quick and easy access to the Imperialist at the top of the map, allowing for another momentum swinging strategy from the top.
Trace: Trace loves high ground positions in general, so paired with the appropriately named map and you have a recipe for success. Trace’s Jump Strike serves as one of the quickest ways to get the Double Damage Power-Up in the center of the map. Cloaking with the Imperialist with sights mainly on the main floor is a great strength to push for deadly kills.
Noxus: The Judicator and two health orbs in the basement serve as a great arena for Noxus to control, which links to other floors thanks to the jump boards. Freezing from above and wall bouncing trick shots indoors allows Noxus to find plenty of kill opportunities on this map.
Sylux: Bomb Jumping is huge for Sylux on this map. By maintaining fast momentum throughout the entire map, he can accumulate items and pursue weakened targets with ease. The Shock Coil is easily available on the first floor to boot.
Weavel: Raining Battlehammer shots from above is a great strategy by itself as the opposition fights below. The top platforms on both sides of the map can easily be reached with Weavel’s double jump thanks to his Halfturret animation. Dropping the turret part towards the bottom grants kill opportunities as you reposition.
1v1: There is a natural clash between the top and bottom of this map. The top provides advantageous high ground with amazingly suitable weapons (Magmaul / Imperialist) while the basement serves for picking up health and the Judicator. It’s best to not cross to the opposition’s range until some health is acquired, unless the top of High Ground is locked down.
Ice Hive
“The bowl” arena, aka Ice Hive’s lobby, where everyone spawns is high damage throwing chaos. Good players will know to take advantage of that chaos while keeping tabs on the surrounding hallways and Power-Ups.
Samus: Because every Hunter spawns in the lobby chambers, Samus can bombard them with missiles while charging and throwing them out by the time they step out. If they don’t step out, that can serve as a faster kill. With the Affinity Weapon and a health orb being right in the lobby, Samus can stay and win the entire game here.
Kanden: Thanks to vast hallways and naturally populated lobby, Stinglarva Bomb trailing is huge on this map. Which is great for Kanden as he maintains pressure with Volt Driver barrages and recharges for respawning opponents that can quickly melt again. The vision scrambling effect from the charge shot is perfect for making the opponent’s scramble and panic upon respawn.
Spire: The Dialanche’s close quarter combat and wall climbing abilities grant Spire mobile strengths throughout the map. There are multiple cliffs that look down into the lobby, allowing for fierce Magmaul plays to be used upon fighting and respawning Hunters.
Trace: Grabbing the Affinity Weapon orb and leaving the lobby for one of the cliffs is an ideal plan A to push. Plan B is getting the Imperialist across the bridge and sniping from that room. If everyone leaves the lobby, natural respawn traffic should have kill opportunities show up throughout the game. You can always pursue with the Triskelion though to get your final kills.
Noxus: Noxus has the ability to lock down the lobby. With Judicator freezes on respawning Hunters, momentum will quickly snowball for Noxus. With the Vhoscythe, high damage mobility pushes Noxus as a great all-range Hunter.
Sylux: The Lockjaw’s mobility serves for Sylux to pick off retreating Hunters from the lobby while he uses Tripwire traps close to the respawn areas. The Deathalt in the corner of the map (by the Imperialist bridge) is an amazing Power-Up for Sylux to start and finish games with.
Weavel: Weavel loves the chaos that tends to happen in the lobby. The Battlehammer aims for multiple kills on opposing Hunters, while the Halfturret’s animation flip can provide a crucial double jump for the surrounding cliffs to reposition and/or ambush targets.
1v1: A race to the Deathalt becomes a top common strategy. Especially with the close respawn points. If the Deathalt is off the table, the fights tend to show a focus on whoever wins the first encounter, collects surrounding resources, and keeps the pressure upon a respawning Hunter.
Alinos Perch
Cliff fighting is the name of the Alinos Perch game. Not only are all of the spawn points on the bottom floor, but the aiming advantage granted for Hunters is huge for game winning momentum. The outside floor where the Magmaul is is the “sweet spot” for pushing high ground pressure and efficient respawn kills.
Samus: The “sweet spot” high ground makes Samus’s Homing Missiles lethal for Hunters spawning with 99 HP. If you end up respawning with another Hunter on the “sweet spot” level, using your Boost Ball to mix up a fast approach while avoiding headshots is great at negating and even switching the pressure to your favor.
Kanden: Kanden is a great demonstrator in taking the strengths of the high ground for his favor. A really cool trick is using the grounded jump board while charging your Volt Drive and having it lock-on to a target below while you barrage with uncharged shots.
Spire: The wall climbing terrain is great on this map for Spire. From taking cover in the respawn areas to taking shortcut routes on cliffs, there are a lot of creative Dialanche routes you can take here, all while pressuring opponents with Magmaul shots that can roll down hills and cliffs.
Trace: Experienced Trace players often go for an easily achievable win condition; the ability to grab the Imperialist upon spawn or in the highest room, then snipe on the “sweet spot” platform to keep killing respawning Hunters. The Jump Strike carries amazing momentum off of the jump board, allowing you to enter the highest room right when the game starts.
Noxus: If there’s a big map to practice and hone Shadow Freezing, Alinos Perch is one of the best. Freezing from far away is huge here, especially with how you can use the high ground or jump board to quickly approach and lock-in kills. This map also demonstrates how effective the Judicator is from all ranges.
Sylux: Getting the Shock Coil by a spawn point or in the highest rooms is great for Sylux pushing his strengths throughout the map for close quarter combat. If he wants to play at mid- to long-range, he can pair the jump board with his Lockjaw mobility to skyrocket across the map and get the Magmaul or Imperialist respectively.
Weavel: The Halfturret placed on the “sweet spot” level or highest level has the opportunity to hold a choke point and alert Weavel of enemies that have made it out of the respawn level. By grabbing the Battlehammer early, you can push its arching range to your advantage with smart jump board and cliff play.
1v1: The race to the Imperialist and getting the first kill is big on this map. Because not only will the respawning Hunter be at 99 HP, but the sniper can secure the “sweet spot” platform while snowballing kills. Don’t count out the Missles you start out with either, the high ground dials up the overall effectiveness of this weapon, especially as you try to cut off the opponent from getting to higher levels.
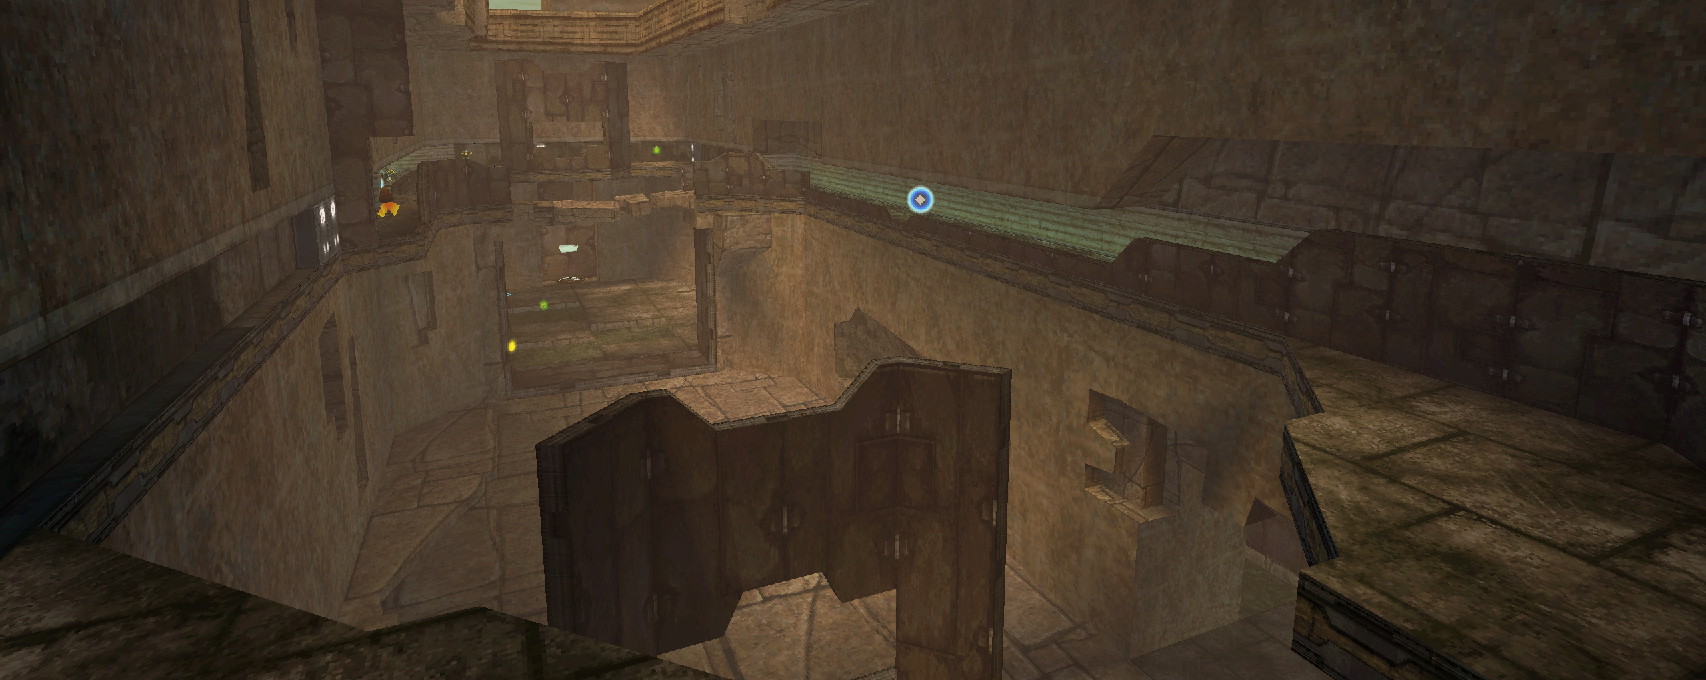
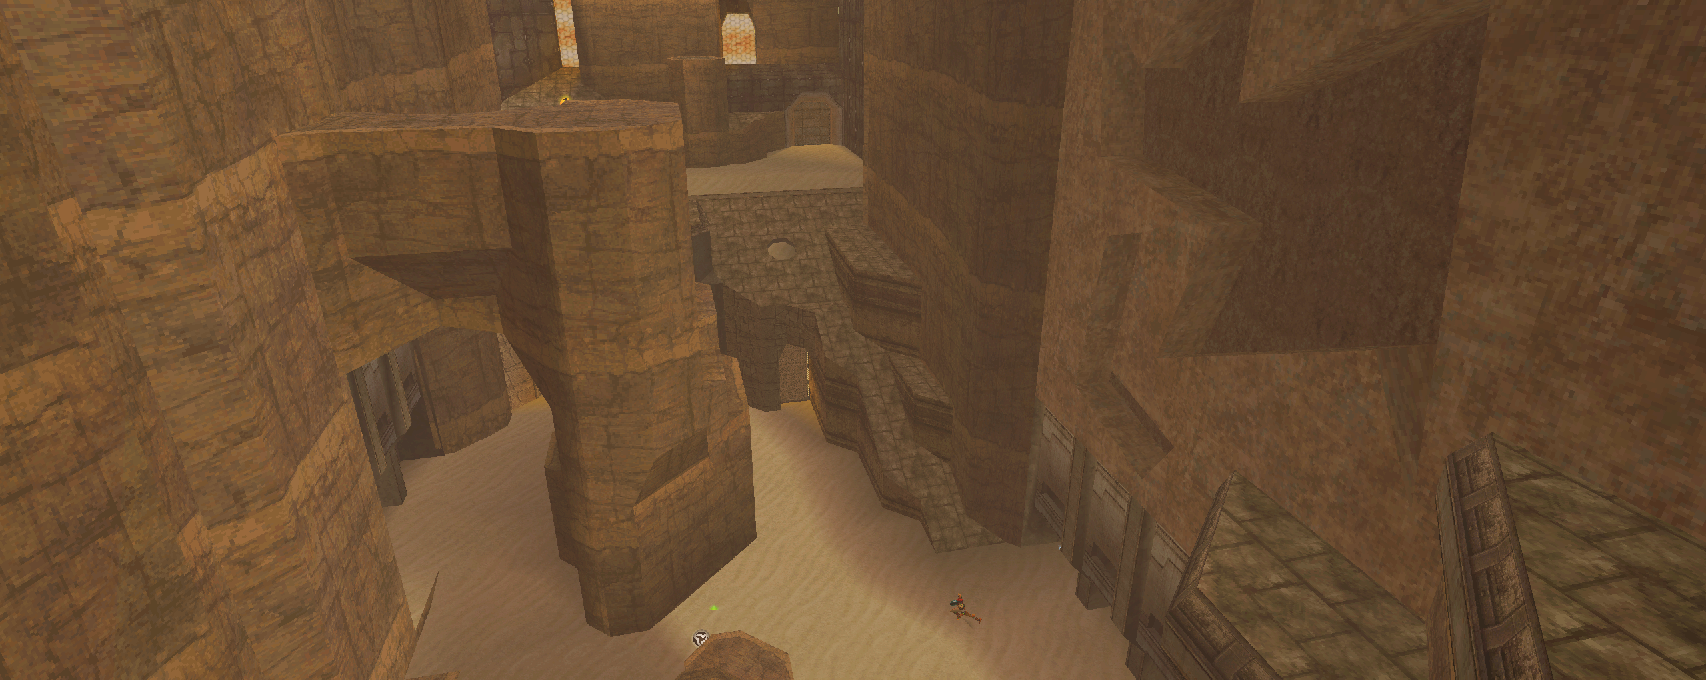
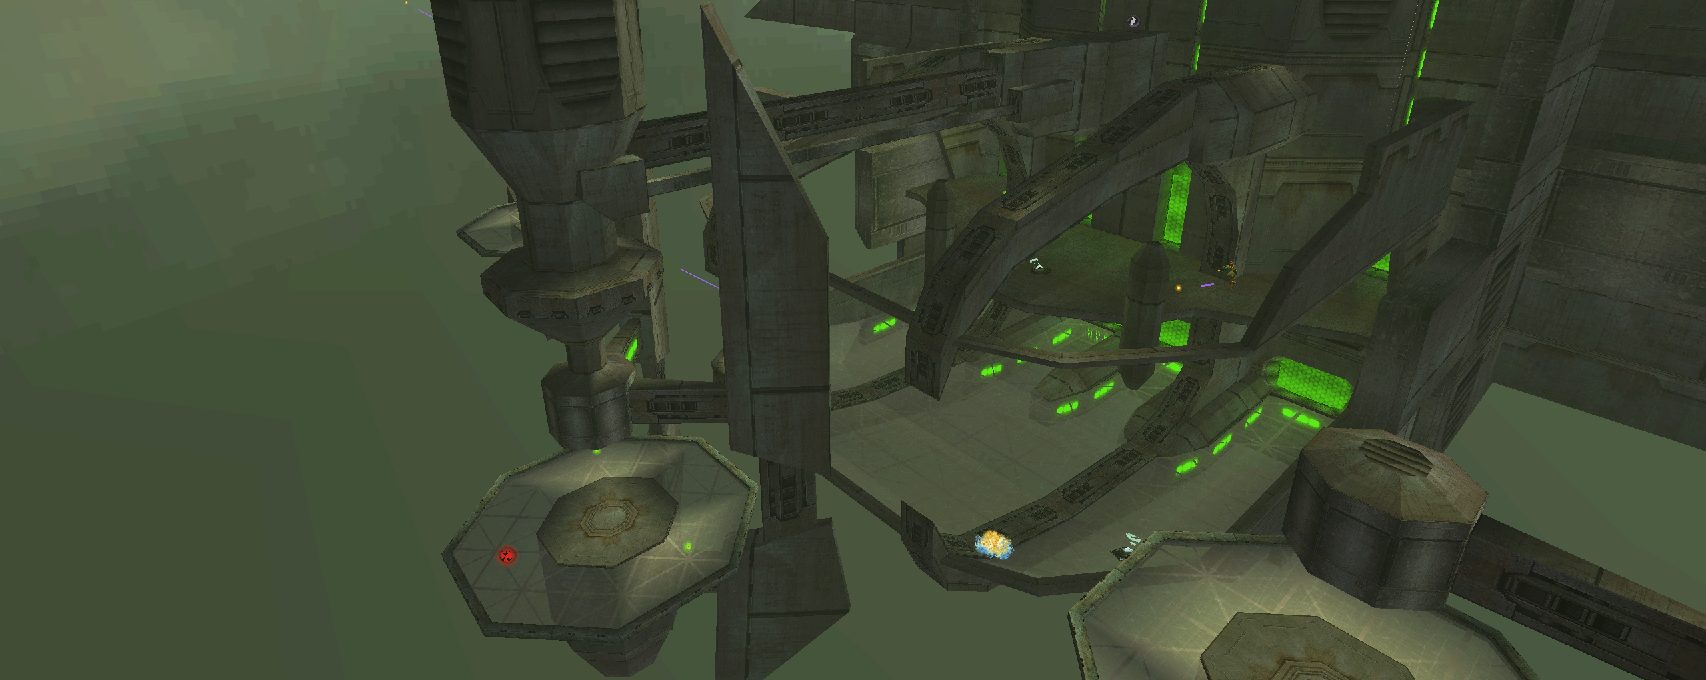
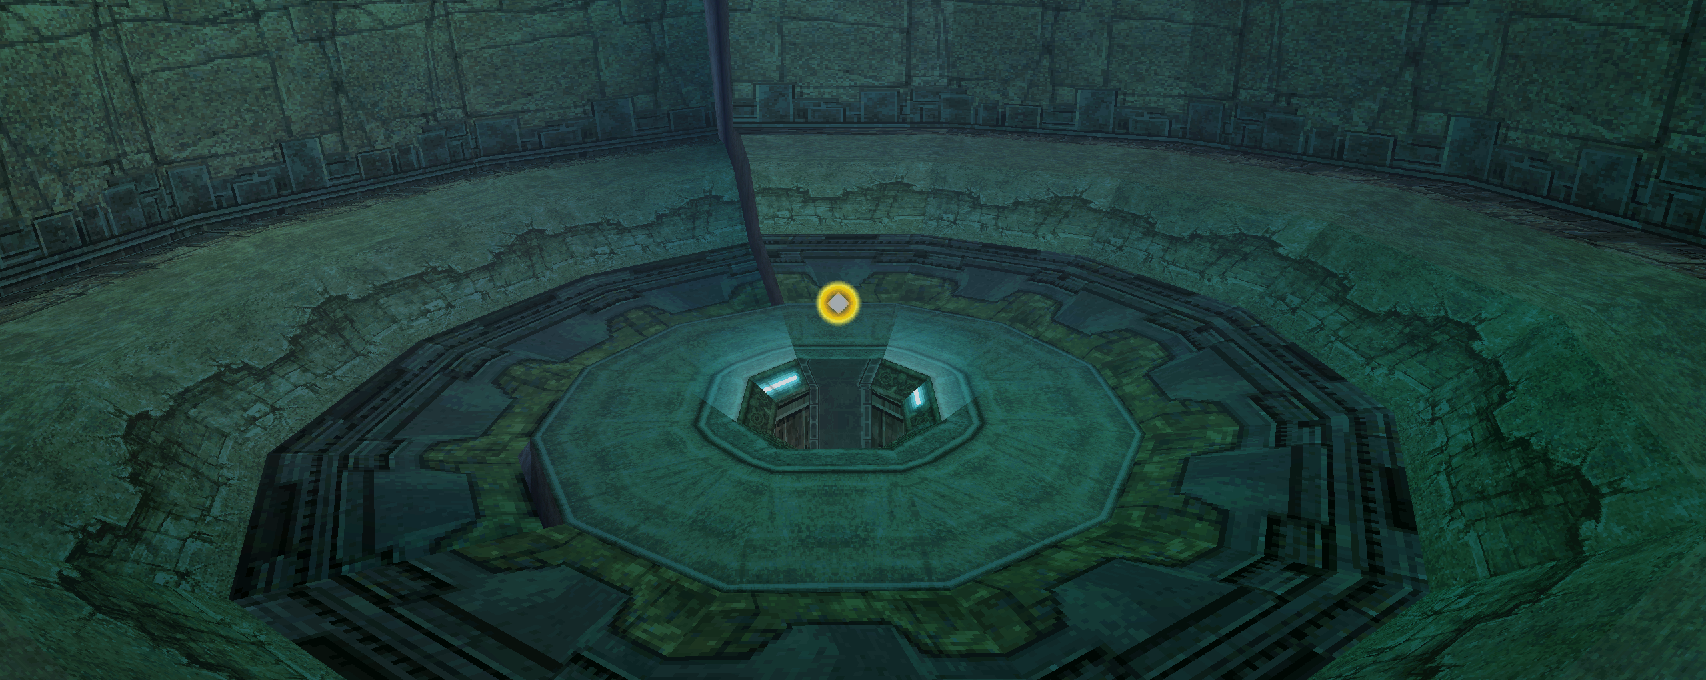
Sic Transit
![]()
A three level map with diverse terrain for a plethora of unique fighting areas. While the first level center area provides great resources, there is an advantage to be had on all three levels to control. General Hunter traffic can go just about anywhere, but the first level center area is a core spot to keep tabs on for Power-Ups and kill opportunities.
Samus: Missiles and the Morph Ball are reliable for handling fights in general. One thing Samus can aim for is getting the Double Damage Power-Up in one corner (second level outside) and the Cloak Power-Up in the other corner (third level inside). Which makes Samus an invisible Missile storming monster.
Kanden: It can’t be understated how good the Volt Driver’s charge shot follows a target. Kanden can fire it outside and quickly track where the shot goes, preparing an ambush play. Volt Driver + Double Damage is a game winning recipe paired with rapid fire aim tracking.
Spire: Spire loves the central core spot of this map; it grants him the Magmaul, more HP, and natural close quarters for his Affinity Weapon and Alt Form to get fast kills. The Dialanche’s wall climbing allows Spire to shortcut to the Cloak Power-Up and quickly climb up to the bridge on the highest level.
Trace: Just like his debut appearance in Adventure Mode, Trace loves the high up bridge and cliff room (by the Cloak Power-Up) to snipe rival Hunters outside. The Triskelion is amazing for moving around the inside of the map while dealing a ton of damage, potentially getting your opponents to run outside for more snipe plays.
Noxus: The outer halls are perfect for Spin Attack plays while you get Power-Ups. Not only can Noxus push the unique multi-level terrain for Judicator freeze plays, but the default Judicator shots are great for getting kills across the map or in the same rooms as your opponents.
Sylux: Getting the Affinity Weapon orb and Double Damage right next to each other makes Sylux a life stealing death machine. If an opponent is out of Shock Coil range, take advantage of your high damage Power Beam and Missiles. You can put a Tripwire over the health orb in the central core spot while looking for Tri-Bomb kill plays.
Weavel: Each Hunter loves the Double Damage by default, but Weavel on this map can shut down rooms with his enhanced Halfturret and Battlehammer that rains lobbed shots across different levels of the map.
1v1: The second level being all outside makes it a high-risk area in duels. If you don’t accumulate resources, a showdown will be challenging on average vs. a player that’s done duels on Sic Transit even a few times. Double Damage and Cloak are going to be high-priority targets; go into Alt-Form right when the match starts to increase your mobility for fast Power-Up retrieval.
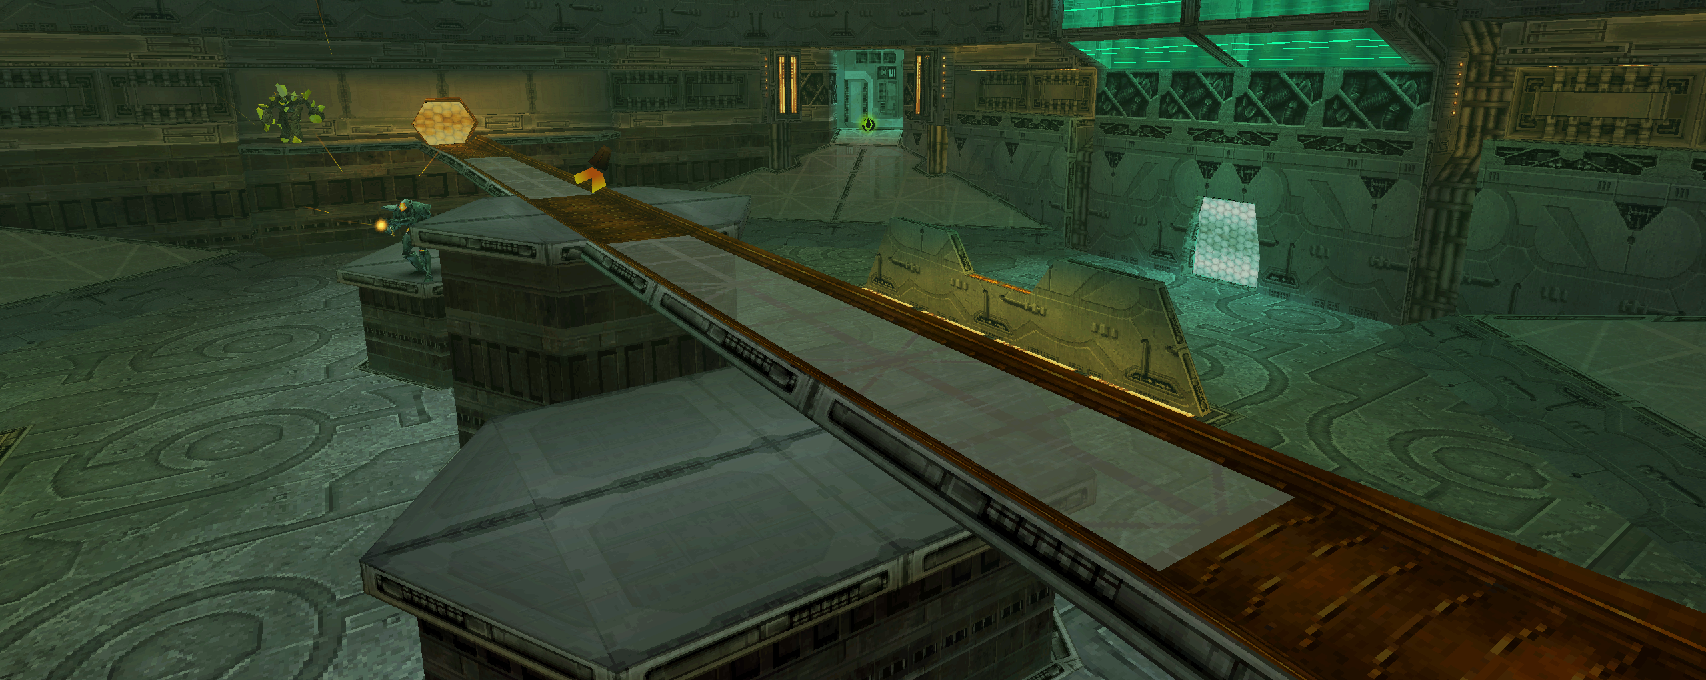
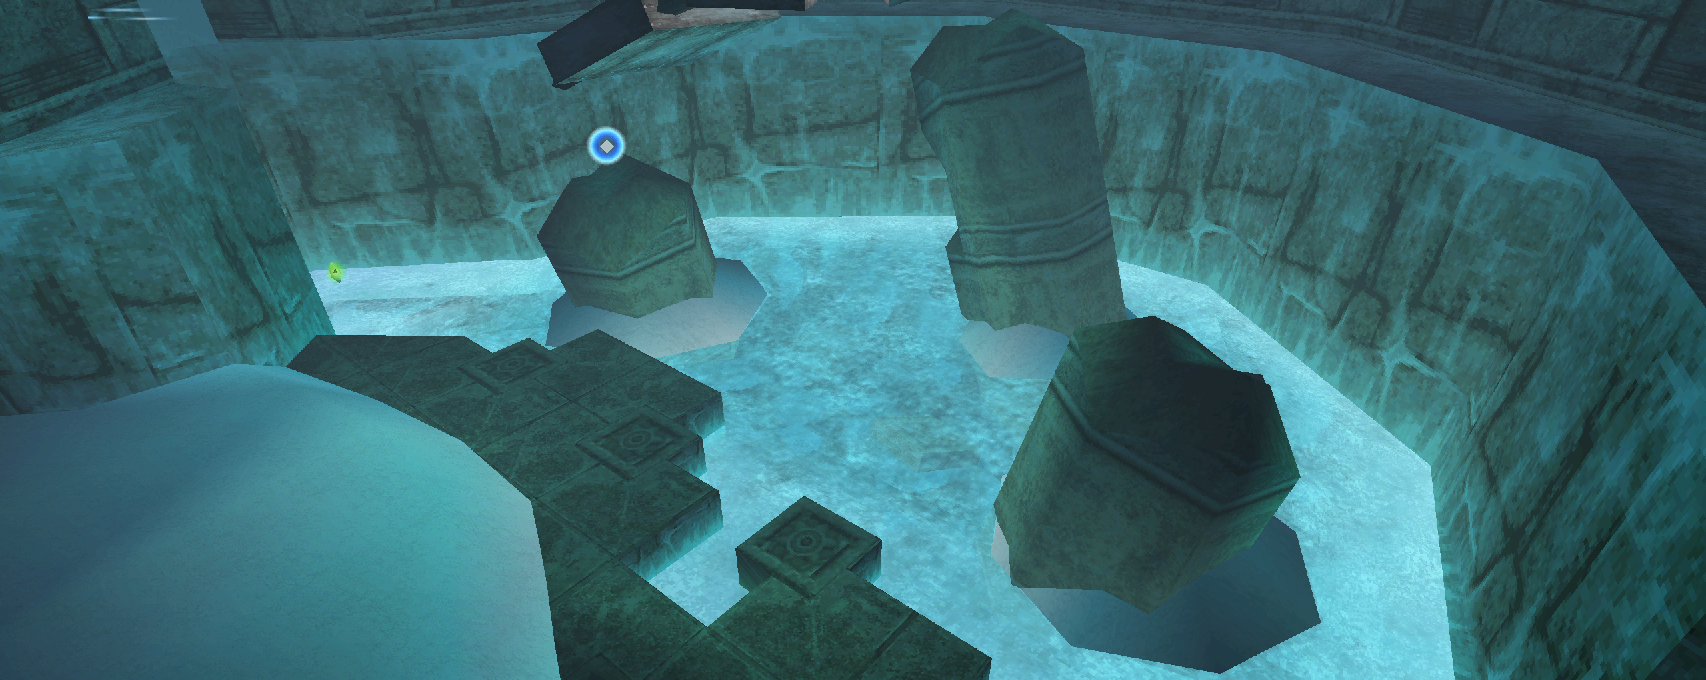
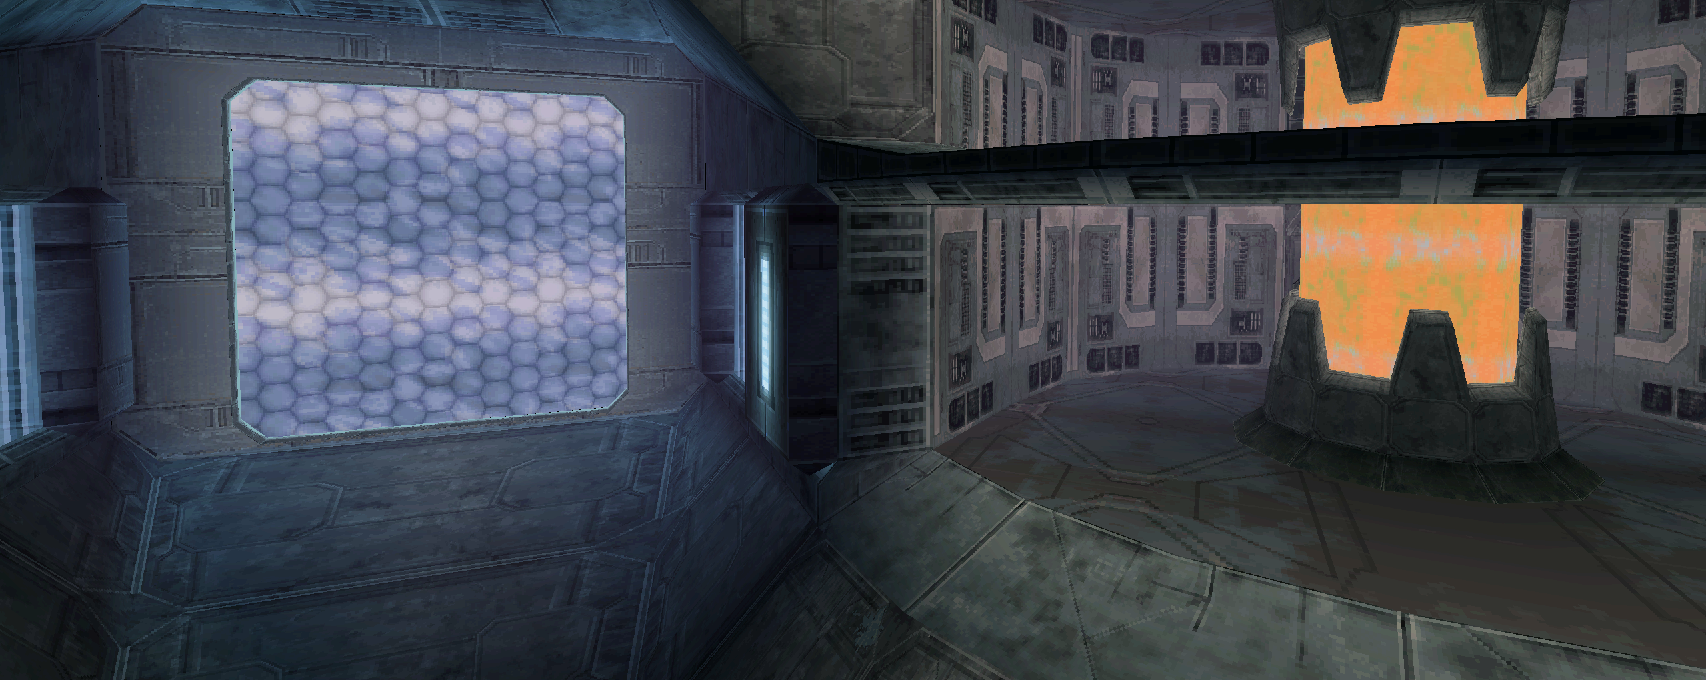
Transfer Lock
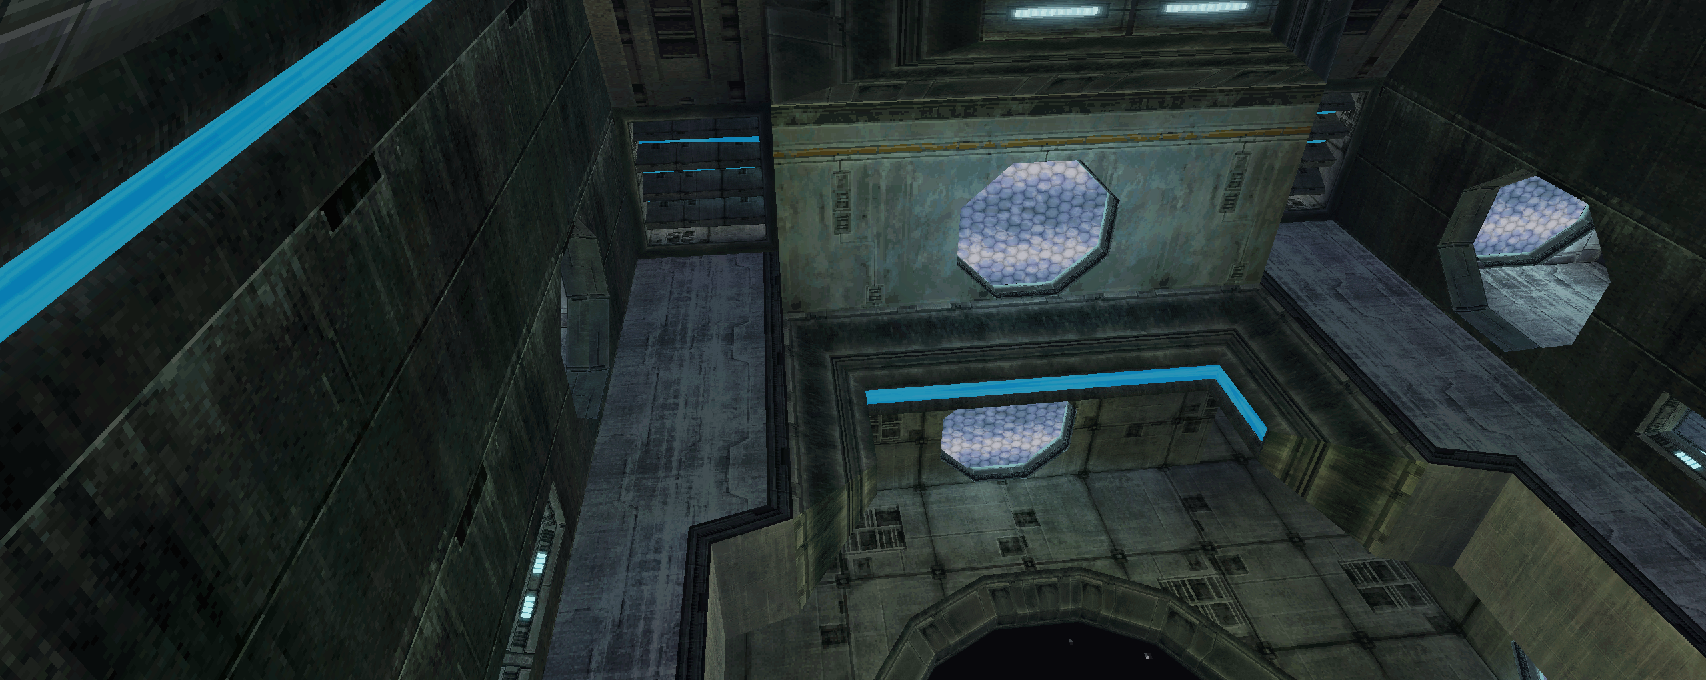
![]()
Pushing a strong dynamic between open and enclosed terrain, Transfer Lock’s layout pushes for more duels to happen compared to a lot of other maps on average. Don’t count out the opportunity to snag kills from across the map, though; a kill is a kill.
Samus: The narrow tunnels allow Samus to Boost Ball with ease, for mobility and/or kills. The highest platforms and bridge allow for Samus to fire Homing Missiles for high damage openers that she can finish off with the Power Beam or remaining Missiles.
Kanden: Transfer Lock’s terrain is amazing for Kanden’s Volt Driver and Stinglarva; the open corridors serve for easy lock-on charge shots while the lower tunnels make for easy repositioning thanks to trailing Stinglarva Bombs.The rapid fire rate of the Volt Driver opens up so many kill opportunities, many that your opponent’s might do the majority work for you onto other rival Hunters.
Spire: Spire appreciates the teleporters at the bottom of the map. Allowing for shortcut pursuits on retreating burning enemies. The Magmaul is devastating in the trenches of the narrow tunnels and a lobbed charge shot is a constant threat for players on the top bridge and circle area.
Trace: The far end of the map with the Imperialist is an amazing spot for Trace. But can also wait on the lowest level for anyone wanting to go on higher levels and not expect an instant killing headshot. Comedically, and tactfully, you have the ability to jumpscare your opponent’s that use the teleporter and get hit by a cloaked Triskelion Jump Strike.
Noxus: With Shadow Freezing, this map serves as a full freezing playground for Noxus. Even if you don’t see a charge shot opportunity in the moment, the omni effective range of the Judicator serves for effect sharpshooting on the bridge, and rapid wall bounces down the tunnels. The Spin Attack is great in the tunnels, especially with the ability to ambush teleporting Hunters.
Sylux: Sylux has the mobility to find fights quickly. You can use the Lockjaw to move across the top level without worrying about getting a headshot. In addition, Tripwire traps work well throughout the map, especially at the top circle area. Stay nimble and keep your Shock Coil ready for quick duels to rack up kills.
Weavel: There are three health orbs on this map. Use this to your advantage by placing the lower Halfturret in a pretty traffic-heavy spot (you can use the bridge, but you’re risking taking easy damage here), while you cut off their resources. The Battlehammer will explode in any area of the map where a fight might happen; take advantage of the multiple levels here for cover and snagging kills.
1v1: The triangle of health orbs on this map are important to keep track of. If your opponent keeps beating you to them, try retreating to the tunnels and high-up circle area to see and predict your opponent’s path. Then beat them to another health orb as you fire shots to wither them down. If you’re confident in your Power Beam aim, take the high ground health orb and keep headshotting your opponent that might run to the others; if they don’t, that’s more health for you.
Sanctorus
*Map Property: Ice Floor*
Iconic for fast chaotic free-for-alls and long stamina testing duels, Sanctorus is the perfect example of using “controlled chaos” to your advantage. With an entire back route tunnel that gains you the high ground, there are a lot of fun risk and reward strategies in this well-combined map.
Samus: True to her formula, Samus loves starting with her Affinity Weapon. It’s Missiles firing like crazy for overall effective openers that can take one to three kills with only a few. The lower area is a Morph Ball playground, especially on the ice with opponents slipping around and having to face the Boost Ball melting their HP.
Kanden: With two Power-Ups that provide the Volt Driver nearby, Kanden thrives in the rapid kill accumulating chaos of the Sanctorus lobby on the lower floor. While charging your Volt Driver, head over to the small enclosure in the corner to get a health orb. Going around to the high ground is pretty safe for Kanden thanks to Stinglarva Bomb trailing.
Spire: Spire has amazing prowess in close quarter high traffic areas, like the lower level lobby. Spire has the ability to take control of the map with the constant splash damage threat of the Magmaul and damage grinding Fire Blades. Getting the double damage could win you the game with enough Magmaul ammo and health that you can get by staying on the move in the lobby.
Trace: Trace appreciates the broken stairs on this map. Grabbing the Imperialist and heading up there can create a “free pickings” opportunity for Trace to win the game. If you’re being rushed down there, head down and see if the Double Damage is available to shred with his Jump Strike.
Noxus: The entire lobby is basically in Judicator freeze range. Just make sure that you snag the kill before someone else. Regardless, the wall bouncing properties of the Judicator allow Noxus to do great damage from a good distance, usually near the health orbs in the corners.
Sylux: The Lockjaw is fast enough to go to the higher level at the start of the game and get Power-Ups with an advantageous high ground you can take advantage of. You can leave a Tripwire in the right hallway as a security hazard to punish players taking that route. Don’t ever count out Double Damage + the Shock Coil as a devastating life stealing combo.
Weavel: Weavel’s Battlehammer can knock opponents back, hindering their jump paths to get Power-Ups while also being able to snag multiple kills thanks to its splash damage. He also can quickly snag Double Damage thanks to his Halfturret jump animation. Area control is the name of the game, and Weavel is your licensed professional.
1v1: Sanctorus is a highly played map in competitive 1v1 formats. The two health orbs across from each other create a dynamic akin to western shootouts. Keeping track of the respawn rates for these health orbs allows for bold approaches to damage your opponent and run to the next one, negating a lot of potential damage they dealt.
Compression Chamber
A multi-leveled figure eight arena, Compression Chamber demonstrates fun multiplayer design with Alt-Form gates, jump boards for tricks, and a constant push and shove for high ground advantage, or lower level health orb accumulation.
Samus: Thanks to the Boost Ball, Samus loves the Alt-Form gates that cut the bottom of the map. She can quickly get to 199 HP and stack up ammo for the Judicator or her own Missiles. See if you can snag the double damage and choose the higher or lower level based off of predicted Hunter traffic.
Kanden: Nab an Affinity Weapon orb and some health down below, and Kanden will be a running deathmatch machine. Whether firing Volt Driver shots or Stinglarva Bombs, Kanden has the ability to stream constant damage while picking up more and more resources. A Charged Volt Driver shot on the high ground has great range for what it locks-on to.
Spire: Magmaul shots are incredible when fired from different or the same ground levels. The shots travel through the lower Alt-Form gates well, allowing for witty kills on retreating opponents. The Dialanche does well for territory control on the lower level, especially when paired with Double Damage and the two health orbs.
Trace: The close quarters can serve as an asset for Trace players that quick scope their Imperialist for one shot kills. While the map doesn’t have a lot of terrain to stay in place much, Trace’s amazing Alt-Form serves well for repositioning and acquiring resources. Staying close to the two health orbs next to the jump board allows Trace to stay sustained while he headshots players across the map.
Noxus: Noxus has the highest average opportunities to get the Judicator on this map, which is threatening even when shot “randomly” thanks to the terrain. Due to the Spin Attack having no drawback when drawn out on this map, you can constantly threaten and control the lower level. The higher levels can’t shrug off a charged ice wave either.
Sylux: The close quarter combat is perfect for Sylux’s Shock Coil. To the point that you can bank off of ammo being replenished health as you keep looking for your next target. The split on the map allows for witty Tripwire traps that can be capitalized off of with Sylux’s swift mobility to pick fights effectively.
Weavel: The Halfturret is strong when placed on the high ground ledges on the map, opening up its coverage range while you gather a plethora of Power-Ups on the bottom floor. This is the type of map that awards audio awareness, listen for fights and fire Battlehammer shots that way as you approach.
1v1: Duels tend to split territories up down the middle on small sized maps like this. If you’re on the Judicator side, take advantage of your health orbs being on the high ground. If you’re on the Double Damage side, take advantage of getting that and your health orbs being right next to each other. The crossfire game rewards patience and smart knowledge of the specific matchup you’re in. If you’re at full health, look at your opponent’s positioning and see if you can cut them off from getting their next health orb while firing at them.
Incubation Vault
*Map Property: Hazardus Energy*
A cool map in both form and function, Incubation Vault promotes proactive play to stay on top of the leaderboard with crossfire to expect around every corner. The green energy tube will damage you, but there are plays worth it for crossing the terrain faster.
Samus: Using the Boost Ball to roll in the lower corner of the map will get you two health orbs and lead to a jump board coming out of either side. This serves as amazing momentum for Samus, while she rains missiles from the high ground. Keep the health orb locations in mind, because Samus can play pretty recklessly with the Power Beam and Missiles for fast kills.
Kanden: This map allows for Kanden to do some cool Bomb Jump tricks while making good progress. The first major area is the clear platform after the jump board, you can lay a bomb there to both scout other jumpers while using the momentum to mix up your top and bottom floor movement while in Alt-Form. The other is in the corner where the Affinity Weapon orb is in a boxed area. You tend to already treat bombs while moving, but you can stop there and jump up to quickly get the Volt Driver, which is devastating on the straight paths of this map. Kanden also loves both jump boards to fire a charged Volt Driver shot and follow it to his next target.
Spire: Dialanche wall climbing is excellent here, taking advantage of how the Fire Blades activate Alt-Form Dropping, which provides fast burst damage and mobility potential. Charge your Magmaul while on the outer parts of the map to rush your opponent down with a high damage opener while locking down the two health orbs under the green energy tube to halt any burn healing.
Trace: Trace loves the straight lines that Hunters tend to take on this map. Have confidence in your quick scope Imperialist headshots, especially on these four major walkways. Trace’s Jump Strike covers these walkways well, getting both health orbs under the green energy tube with ease.
Noxus: Noxus is a corner ambushing killer here. You can accumulate health and ammo in the roofed parts of Incubation Vault while charging your Judicator to nab kills for whoever runs into you. The Spin Attack is really good with jump boards on this map, allowing for high damage kills that maintain your momentum.
Sylux: Sylux isn’t worried about the green energy tube’s damage as much as the other Hunters due to the Shock Coil healing him, opening more paths to approach your enemies with less overall risk. Placing Tripwire traps at the top of jump board routes can easily throw opponents off while you close in for a kill.
Weavel: The Battlehammer throws players off their planned landing spots while you barrage them with damage. The Halfturret on the clear platform or bridge is a strong spot for racking up damage. Weavel is also highly acrobatic with this Alt-Form, allowing for fast movement to pursue weakened targets.
1v1: The lower floor tends to be prioritized due to its abundance of health orbs. It’s your decision if you want to ambush an opponent from above or beat them to the race. Regardless, stay proactive in routing your health orbs before your opponent duels you at 199 HP to your 99. The beauty of Metroid Prime Hunters, though, is that you can still outplay your opponent to win in this scenario, but keep tabs on items that can help your fight beforehand.
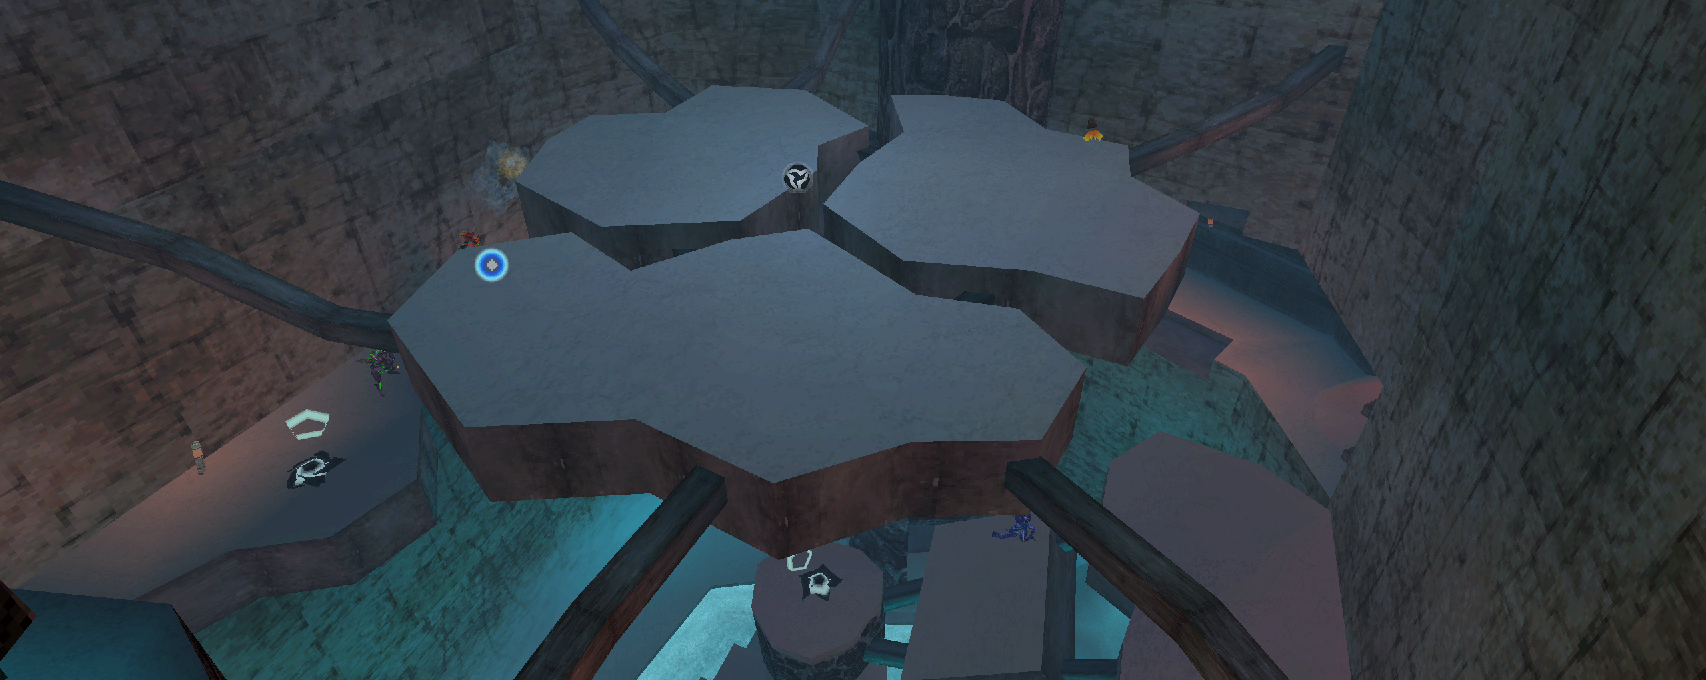
Subterranean
*Map Property: Ice Floor*

The best Bounty Hunter will use their ice exhibition skills in Subterranean, a cold cavern that features every Affinity Weapon in their own distinct sections of the map. Taking advantage of the multiple jump boards will serve you well for mobility and trick shot plays alike.
Samus: Samus loves the open upper area in the back of the map that shows the floor below. Bombard your opponents with Missiles while cutting off their escape route into the cavern with a Boost Ball pursuit. Samus also loves charging Missiles before using the jump boards for an amazing fight opener.
Kanden: The Volt Driver is an already great rapid-firing weapon on a map that is large enough for plenty of 1v1 duels to happen each game. Kanden has an edge by being able to get the Volt Drive in the middle of the map as well while using the jump boards to prepare a charge shot as a looming opener and/or finisher for fights.
Spire: Spire gets the Magmaul easily, not just with the Affinity Weapon orb, but the default Magmaul spot lets Spire climb the wall next to it to shortcut getting it. The enclosures are great for Spire, while the most wide open area serves as its own advantage for Spire firing at Hunters below.
Trace: While jump boards are amazing for those using them, Trace and the Imperialist add a significant factor of risk for Hunters using them. Not only can you nab headshot snipes there, but two major outdoor areas serve as a great hunting ground for Trace. Take note of the health orb at the top of the mountain and the Double Damage on the opposite side of the map, making Imperialist body shots their own constant kill threats.
Noxus: Not only is the Judicator amazing in the cave, but its sharpshooting capabilities are great for long range snipes and close cavern chaos. The Spin Attack is great with the fully vertical jump boards, while charging up the Judicator also works well with these.
Sylux: Sylux has the ability to lock down key items throughout the map, like the gold health orb, Double Damage, and Cloak in the back open square section of the map. All of those items help Sylux equipped with the Shock Coil wreck havoc in his skirmishes.This is a great map to push Sylux’s strengths in mobility, allowing him to quickly adapt with different weapons for different situations to rack up kills.
Weavel: This map has a lot of great spots for Weavel to shortcut jump with his Halfturret animation flip to get high up Power-Ups. Leaving the turret portion on high terrain is great for racking up damage and alerting you of someone nearby. Your Battlehammer is also great for firing down below to rack up damage and kills amongst chaotic skirmishes.
1v1: Because the wall splits the upper part of the map, a lot of duels between two Hunters with ammo and health loaded up happen on the lower level a lot. Don’t count out bold plays that cross over the wall with the jump boards, especially if you see an opportunity to ambush and grab health orbs on the other side.
Outer Reach
*Map Property: Low Gravity*

An open arena with a ton of positioning options that pushes for Hunters to pick and choose their fights accordingly. With a wide range of high ground and coverage options, Outer Reach is a constant shootout map that tests for consistently proactive play while being cautious towards falling off.
Samus: Bring the pain to where your opponents think they’re safe. Samus has the ability to Boost Ball rush down targets on the run. The two closed rooms on the second floor tend to be “safe rooms” for hunters looking for cover and health; taking advantage of this with Samus using her Morph Ball allows her to pursue and kill while in the enclosure.
Kanden: It’s hard to run from a barrage of Volt Driver shots, and with Kanden’s homing charge shot, there serves a lot of advantageous openers for fights and kills. Use the jump boards to your advantage to rain a barrage on the opposition while keeping tabs on Hunters on or above your level to instigate their fight or flight.
Spire: The Fire Blades work well with the narrow walkways that constantly risk fall deaths. Spire loves the multiple levels on this map, being able to charge the Magmaul with great coverage from below, with the higher levels working in tangent with the Magmaul’s gravity for damage raining from above.
Trace: The vast openness of this has Trace constantly looking for his next Imperialist headshot target. The circle shape of the map helps Trace reposition with the Triskelion to kite away from opponents and snipe them down. It’s worth practicing your sniping skills while using the jump boards throughout this map, or else you might get sniped first.
Noxus: You can use the Vhoscythe to traverse around the map while potentially killing opponents through damage, or even bumping other Hunters in their Alt-Forms off the stage. Take advantage of the high ground and jump boards to plunge down with a charged Judicator shot against your opponents.
Sylux: Sylux can hover effectively across this map with Lockjaw flying from the top jump boards. With amazing mobility, push your strengths in getting anywhere you want to follow prey and/or accumulate resources for your next fight. Sylux’s Shock Coil provides great pressure on a map where your opponents have to make sure to not fall off while avoiding its range.
Weavel: The middle section is great for Weavel to drop his Halfturret while he looks for kills and Power-Ups on the bottom two floors. Take advantage of the Battlehammer’s ability to push players back with its splash damage for both kills and denying your opponent from getting Power-Ups.
1v1: Duels naturally have their crossing grounds around the lower center of the map, both vertically and horizontally. Taking a jump board is often an initiation to fight in the open. It’s good to prepare your charge shots and line up your aim before laterally traversing Outer Reach. Use the roomed-off sections to get health orbs and cover when needed.
Harvester
A competitive multiplayer map so good that the developers carried it into the final game after using it for beta testing. Harvester has a great symmetrical design with every Affinity Weapon available for players to route towards upon spawning.
Samus:The spawn points being on the outer platforms serves as an opportunity for Samus to fire homing missiles on the other opponent spawning there (if the player count is four), the lower inner room is great for going for Morph Ball rush down kills.
Kanden: Once you get the Volt Driver in the upper center room, you can use the charge shot to pressure any respawning enemy that has to jump down to leave. The Volt Driver has great damage potential that can help Kanden lock down outside or in. You can use the Stinglarva bombs to cycle between the two health orbs in the bottom center room, which will lock-on to incoming enemies on the lower floor.
Spire: Spire can fend off opponents from high up and isolated platforms with the Dialanche’s Fire Blades. The center room is amazing with the Magmaul for its damage and gravity properties alone. Spire can grab the Cloak at the top of the map and use it to help his approach tactics with a charged Magmaul.
Trace: Trace loves the outdoors here. A good Trace player will take advantage of the Imperialist’s scope to zoom in past the light-up walls, allowing them to sneak in potential kill shots. The platforms with the Imperialists are great sniping perches that can snowball against respawning Hunters.
Noxus: The center area is big for Noxus and his Judicator. Allowing for great pace control, one freeze at a time. With Shadow Freezing, Noxus can threaten any enemy outside with the right ice wave angles. If you have some extra ammo, throw some Judicator shots as you approach the center building on the lower floor for chip damage and kill opportunities.
Sylux: With every Affinity Weapon available in close reach, Sylux can use his Lockjaw to get the exact weapon he wants to take down the opposition. The bottom floor is great for Tri-Bomb kill plays, all while you can collect more Power-Ups. This map is also good for Sylux pursuing targets with his Shock Coil for kills and healing.
Weavel: Placing your Halfturret at the top cliff inside the building is a strong option while you pick up Power-Ups in that room. The Battlehammer is highly disruptive on respawn platforms and during chaotic frays. Push the strengths of this arching weapon with the high ground vs players on the bottom floor for even more advantageous opportunities.
1v1: Going after the gold health orb right next to the spawn point is a big advantage to help for your first duel with your opponent. If you win or the opponent is holding back, you can hold down the lower center area with easy healing opportunities.
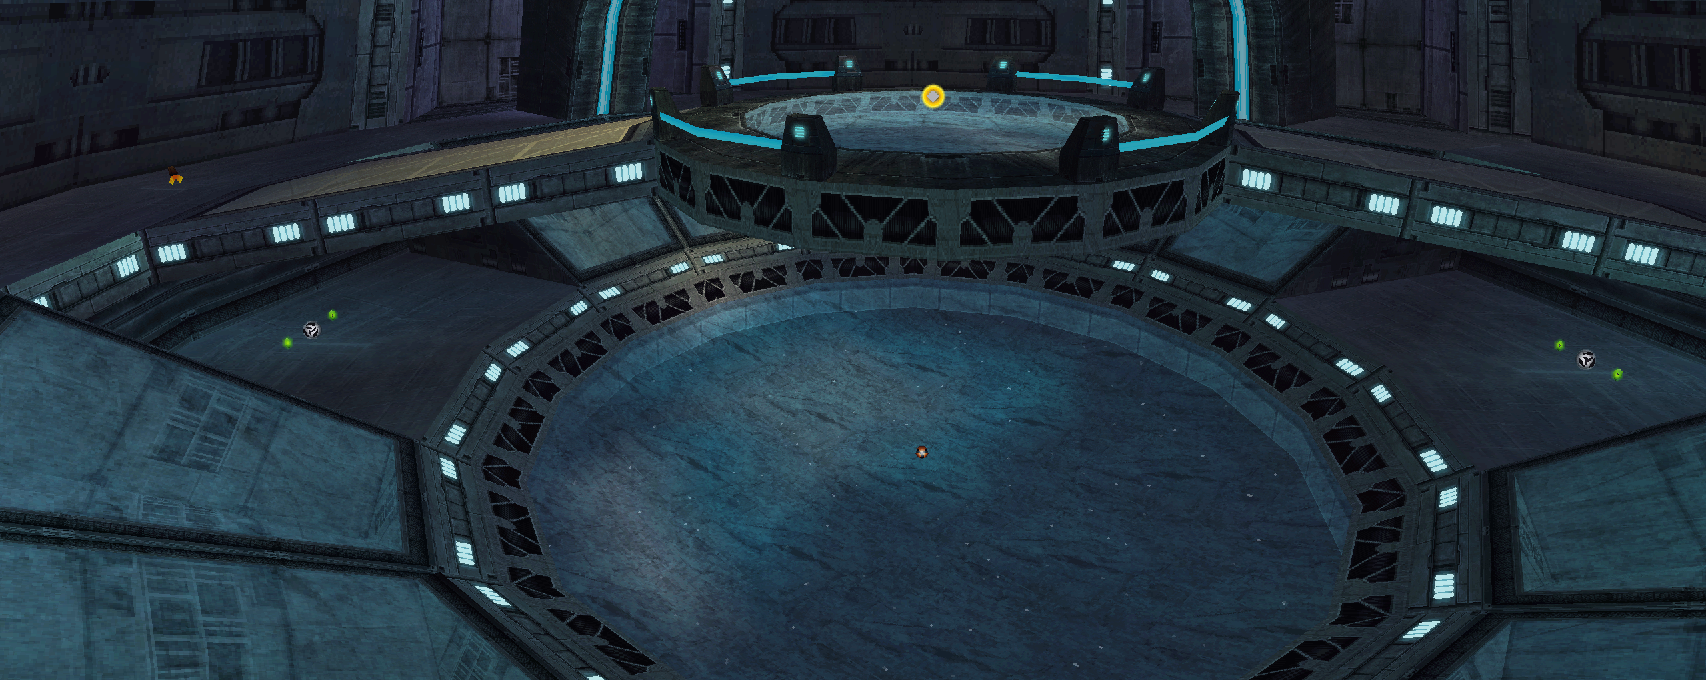
Weapons Complex
*Map Property: Low Gravity Areas*
Colossal and boasting numerous hallways arranged across multiple levels. Weapons Complex makes for a fun dynamic of having low gravity in the center portion of the map, rewarding tight track aiming against those risking to jump.
Samus: Homing missiles don’t recalculate their speed against low-gravity jumping opponents. With that in mind, Samus jumping herself allows for her to hold a high ground in fights, allowing for a charged missile to hit down on the opponent. Bomb Flying in this map is fun and allows Samus to shortcut to other levels of the map with ease.
Kanden: There are two Volt Drivers right next to the center area on the lowest floor. If Kanden needs to readjust his lateral positioning while streaming Volt Driver kills, he can use Bomb Flying to skyrocket above. Trailing Stinglarva Bombs is great between all of the entryways on this map, tacking on a lot of unexpected damage on the opponent.
Spire: Spire not only can use his wall climbing momentum to fling to the highest parts of the map, but his Fire Blades activate Alt-Form Dropping, serving for amazing vertical control in the central area. Inside the halls, Spire’s Alt-Form and Magmaul serve for potent close-range combat.
Trace: This is another map where the location of the Imperialist is a great overall spot to snipe. Trace gets the asset of cloaking, especially outside where any jumping opponent will take a bit to come down, giving you a lot of time to set up a headshot. The Jump Strike is great for both indoor mobility and using Alt-Form Dropping outside sharp lateral and horizontal positioning changes.
Noxus: Because of the amazing vertical range of the Judicator’s ice wave, Noxus loves the outside multi-leveled terrain of Weapons Complex. You can grab the Cloak Power-Up at the top of the map for sneaking freeze plays. Alt-Form Dropping outside allows for Noxus to pursue targets on lower levels with the Spin Attack.
Sylux: Electric Bomb Flying is a fast way to move across the center and back of the map. Practicing this will help Sylux players make ambush plays based on where fleeing opponents go indoors. Grab the Shock Coil high up inside and punish fleeing opponents that stay in the hallways.
Weavel: The Halfturret shots do not calculate low gravity jump alterations, so try to either use it on the high ground and/or quickly transform back and get some charged Power Beam headshots on your floating opponents. Weavel can leave the Halfturret on the high up outside platform next to the Cloak to hold a choke point by the tunnel and above most of the lobby.
1v1: The outer hallways are a big priority for accumulating Power-Ups. When dueling outside, watch out when jumping against an opponent with lethal Power Beam and Volt Driver aim. A race to the Cloak and Imperialist up top is its own game to fight for, especially with how much Map Control it can grant from the high ground.
Council Chamber
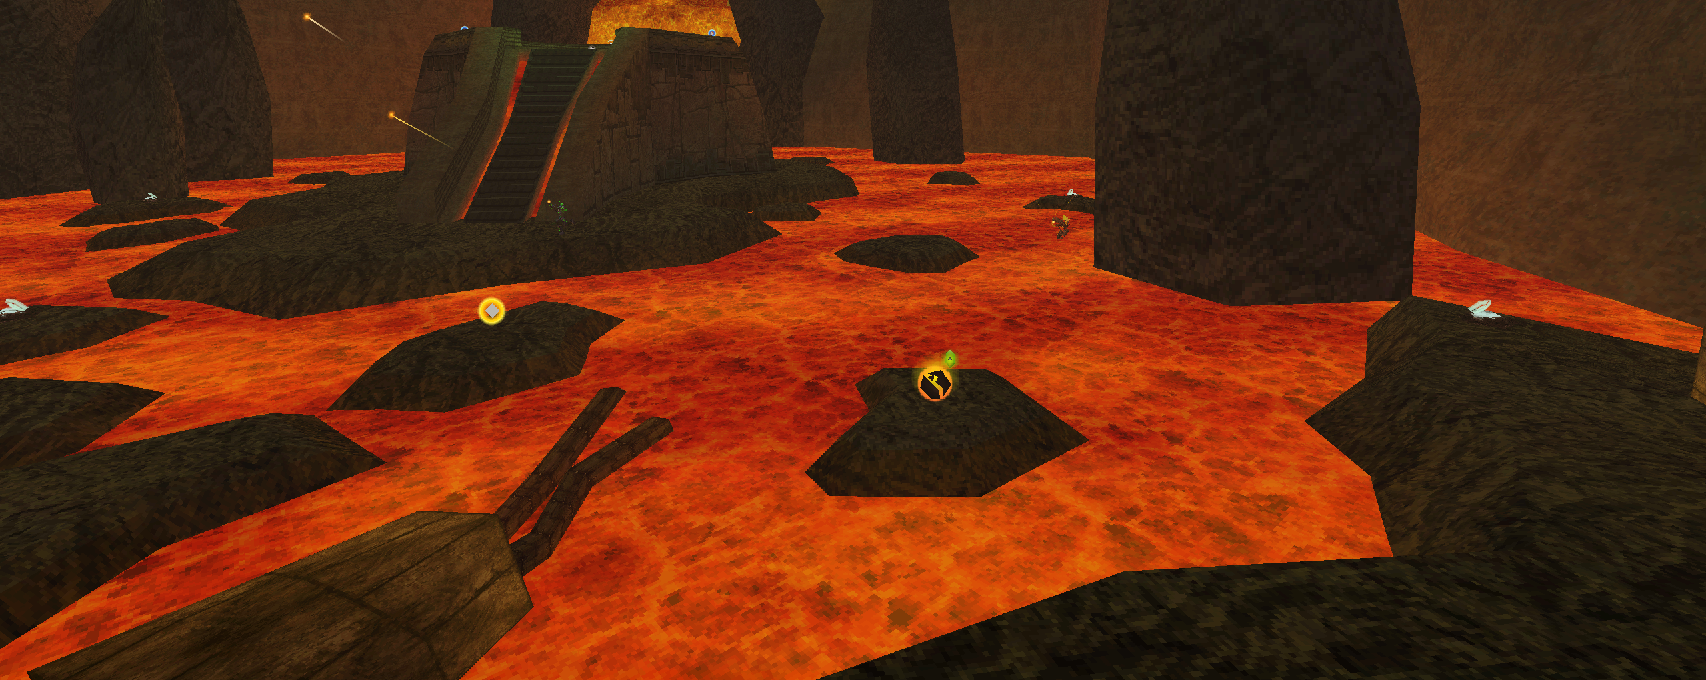
*Map Property: Lava Area*
An extended version of Alinos Perch, Council Chamber traverses further underground with new hallways, a bowl arena, and lava filled rooms with many exits to get to other parts of the map. With every Affinity Weapon available, there’s a lot of different types of fights to be had every game.
Samus: Samus is well equipped for taking the high ground with homing missiles and ambushing hallways with the Boost Ball. This is the type of map that will have Samus looking to press her mobility advantages to constantly adapt with the weapons she picks up for different fights on different terrain.
Kanden: Charging the Volt Driver (located in the lower circle arena) around the corner is a great strategy to push. In fact, Kanden getting more and more ammo is a great strategy to keep the Volt Driver well supplied to win multiple encounters with always prepared momentum.
Spire: Spire’s lava-proof passive ability plays into effect on this map. Keeping tabs on the room with lava is a great strategy, as you can pressure opponents that want the Judicator and have to cross that terrain. Paired with plenty of walls and high up platforms, Spire’s strengths are easily on full display here.
Trace: Even with the expanded labyrinths, Trace is still a monster on the iconic Alinos Perch cliff that’s still here. Use the Triskelion to get the Imperialist in the top back of the map and lay claim to controlling outside with headshot kills. If your opponents stay inside, you can go to the lower circle arena to get health and track your opponents paths to continue sniping.
Noxus: Noxus is a lethal threat with a charged Judicator around the corner. After you grab it in the lava filled room, you have a wide range of paths you can take to track a target down and take them out. Not only that, but the wall bouncing properties of the Judicator’s normal shots make it lethal for close range skirmishes.
Sylux: Sylux is here to cause havoc. With the Shock Coil right on the main outside lobby, he can push for many dueling opportunities to siphon health and take kills throughout the match. With the Lockjaw’s mobility, use your tracking skills in listening for where fights are and take advantage of the multiple routes on this map to get there.
Weavel: Rain Battlehammer shots from above during skirmishes to snag kills while maintaining a good position. This is a great map to push Weavel’s strengths in using the Halfturret mid-duel to throw your opponent’s aim and pacing off while rushing them down in the hallways. There’s a lot of great Power-Ups on cliffs and pedestals; you can fend players off with the splash damage of the Battlehammer as well.
1v1: The lower exits outside allow for players to have a strong escape option against opponents that push an Alinos Perch-High Ground respawn chasing strategy. While that strategy is still effective, the map having so many underground paths allows for Power-Up collection to be a great form for punishing opponents wanting to hold on the high ground.
Elder Passage
The new outer terrain on this map in comparison to High Ground allows for players to accumulate Power-Ups against threatening high ground shooters. You can use the light from the doors to stay hidden while peeking in and out to see if you can punish those high ground snipers here. The underground serves as a great way to travel the map more safely as well.
Samus: The bottom tunnels are great for Samus and her Morph Ball, all while she can use the jump boards to charge Missiles and shoot below. This is a good map to push the strength of Samus being able to finish opponents off with Power Beam headshots after going for a Homing Missle play.
Kanden: The great thing about Kanden is that the Volt Driver is good on the high ground, low ground, and the hallways. You can throw out charge shots on high up terrain and around corners indoors while trailing Stinglarva Bombs to pick up kills on characters pursuing him.
Spire: The bounce from the Magmaul is big for the hallways on Elder Passage. Spire’s wall climbing prowess is great for traversing around the map for pursuing fights and repositioning to the high ground or outer hallways.
Trace: Just like High Ground, the high up Imperialist spot is also a great sniping spot for Trace. The scary part about Trace is that if a weakened target retreats to the hallways or tunnels, he can quickly pursue and kill with the Triskelion’s Jump Strike.
Noxus: Thanks to the weapon’s wall bouncing and close range freezing, the bottom tunnels with the Judicator are a great area for Noxus to patrol and fish for kills. Tunnel control is especially strong with the jump boards taking you immediately to the high ground, especially with the Judicator being effective at a mid- to long range as well.
Sylux: Zipping from one end of the map to another, Sylux is an effective map sweeper that can adjust to different scenarios across the match. If there’s a group fight below, grab the Magmaul or Imperialist up top and fire away? Are they retreating to the hallways? Get the Shock Coil in the lobby and pursue the targets for isolated 1v1s.
Weavel: The Halfturret can be placed outside to spot opponent’s on this big map, allowing for Weavel to pursue his targets and reset the Halfturret in front of them. While you patrol, the side hallways provide quick ways to get Power-Ups while getting back to the high traffic centered lobby.
1v1: In pair with all of the tunnels, expect some cat and mouse for pursuit games when no one wants to claim the top for high ground shooting. Ironically, the high ground has a lot more risk here compared to the map of the same name due to how many resources the covered tunnels and hallways provide around the map. Gather your Power-Ups and check if your opponent is mounted on top for a sneak attack via jump boards or hallway peak shots.
Fuel Stack
*Map Property: Lifting Beam*

Fuel Stack’s lifting beam is the big centerpiece that anchors an otherwise labyrinth-like map. Use this knowledge to your advantage for where traffic tends to go for kill opportunities. To the point that when you go to other rooms to get Power-Ups, you’ll want to keep tabs on the central lobby to not lose kill opportunities. Speaking of, be careful on the lifting beam, the top and bottom will instantly kill you, drastically affecting how knowing Hunters navigate it.
Samus: Tried and true, Samus loves raining down Missiles from the higher grounds of Fuel Stack while anticipating retreats to pursue with the Morph Ball. With so many pickups to replenish Missiles around the lifting beam area, Samus can stay anchored here and quickly win games by staying on the move here.
Kanden: Stinglarva Bombs are great for homing in on Fuel Stack’s tight terrain. The charge shot from the Volt Driver is great when shot from the top, especially as you travel up and leave the lifting beam. It’s basically an ever strong tactic to traverse the halls with either a charged Volt Driver or dropping Stinglarva Bombs.
Spire: The lifting beam works with Alt-Form Dropping, which allows Spire to quickly cancel upward momentum and ambush a target with the Fire Blades. Have some extra health ready to start chaos with the Magmaul throughout this map that lacks big open lobbies.
Trace: Practice working with the lifting beam, because being able to quickly anchor up top with the Imperialist creates a great sniping area for Trace to rack up kills. Another asset comes from how slow a Hunter becomes when using the lifting beam at first, allowing Trace to have a decent amount of reaction time to line up his reticle for a headshot.
Noxus: Charging the Judicator and riding the lifting beam allows for a “Hunter Pickings” scenario for any enemy around it on any floor within freezing range. This map works well for blind Judicator shots down hallways that you predict opponents are at due to the rapid wall bouncing.
Sylux: Take advantage of your mobility skills that can race your opponent’s up the lifting beam while you shoot them under the beam’s slow movement. Mobility is a top priority for Sylux’s gameplan here; you’ll want to have Power Beam headshots and bombarding Missile plays ready for your next encounter. Stay vigilant, adapt with your pick-ups, and keep looking for 1v1 scenarios to drain down with the Shock Coil.
Weavel: Battlehammer blasts cause pushback on the narrow paths around the lifting beam; the arching trajectory and blast damage work well for the multilevel design of Fuel Stack. You can use the flip animation of the Halfturret and Slice (Alt-Form Drop) to quickly get to an area off of the lifting beam.
1v1: Being proactive in a duel on Fuel Stack is all about venturing around the center map, accumulating Power-Ups. Because you’ll most likely meet your opponent there, keep a chargeable weapon ready. When it comes to lifting beam, the top two levels grant amazing positioning that you can win off a plus one lead. While Double Damage can be found at the bottom, drastically helping you for your next duel.
Fault Line
*Map Property: Ice Floor*
Fault Line takes the various icy terrain of Subterranean and adds an entire new two story cave to explore. Make good use of the jump boards throughout the map for kill opportunities while traversing the two story cave for Double Damage and a gold health orb to give you a fighting advantage.
Samus: The Boost Ball is great on the icy terrain under the Double Damage. Not only can you snag it fast, but your opponent’s slipping up will be prone to being killed from only a few Morph Ball plays. Even without icy terrain, Samus is a Morph Ball menace on the lower floor while keeping pressure on the higher floor with Missiles raining down on the opposition.
Kanden: The two story cave is great for Kanden’s Stinglarva to travel swiftly while trailing homing bombs to followers. With the Double Damage and/or the gold health orb, Kanden can transform out of Alt-Form and barrage the opponent with rapid fire Volt Driver shots, which can be picked up right outside of the cave on the lower level.
Spire: Not only is the Magmaul easy to get with Spire’s wall climbing prowess, but the uncharge shots are amazing for the high passageways that connect the higher level of the map. Practice Magmaul wall bounce shots on this map, the reward for future trick shot plays amongst the cavern walls is worth it.
Trace: The next time you use a jump board, go for a zoomed-in Imperialist head shot on the opponent. Using vertical mobility with the ability to get instant kills is worth honing to have Trace as both a stationed and moving one shot kill menace. Trace’s Jump Strike is also amazing with the jump boards, making him an incoming Kriken Missile across the map.
Noxus: The Spinning Attack is amazing throughout all of the narrow trenches on this map, all without halting Noxus’s mobility. The Judicator is great in every tunnel throughout this map, while the charge shot freeze is what your enemies are constantly trying to avoid. Use the jump boards to your advantage while charging your Judicator to boost your approach speed.
Sylux: Sylux loves the small enclosures with his life stealing Shock Coil to win duels and heal for the next one. The open square lobby is great terrain for Sylux to quickly move around with the Lockjaw, especially with the jump boards. Sylux also loves the mountain with the gold health orb, where he can shoot from the high ground while being able to pursue weakened retreating targets.
Weavel: The corner with the Battlehammer is a great spot for Weavel to trap opponents with Halfturret ambushes that cut off routes for retreat while the ceiling brings the Halfturret slice down faster. The two-story cave is a great section of the map for Weavel to Power-Up, while the turret portion of the Halfturret on the top level can warn you if an enemy is nearby.
1v1: With plenty of resources throughout this huge map, there’s a lot of common spots for duels to begin. Prioritize getting at least your Affinity Weapon and max out your health if possible, a fight can arrive to you faster than you think. You can fake out retreats into another fight with the jump boards, allowing for reversal kill opportunities.
Stasis Bunker
First Hunt Morph Ball mode veterans will fight with glee to return back to this exciting map that stays true to its obstacle course roots. Stasis Bunker is all about momentum with a great spread of Power-Ups to snag while you go to find your next fight.
Samus: With early practice thanks to First Hunt, Samus looks like an extreme sports pro with her Morph Ball tricks and movement. These tricks aren’t just for show, using the terrain for the Boost Ball and Morph Ball bombs makes Samus an offensive threat while traversing Stasis Bunker. This is a great map to take advantage of how fast, reliable, and ready the Power Beam is when you leave Morph Ball mode for a crossfire fight.
Kanden: Kanden’s Stinglarva is perfect for traversing the map while dropping bombs that halt the momentum of your opponent trying to pursue you or other Hunters. The lower lobby is a great shootout spot for the Volt Driver and Kanden’s lock-on charge shot. You can cycle the first strategy with the last for your own optimized route for Power-Ups and kills.
Spire: The small bunkers in the lower lobby are great for Spire and the Magmaul to snag kills during frantic skirmishes. The upper level allows for the Magmaul to do multi-level trick shots against retreating and/or busy opponents with other fights. Keep your Magmaul charged around the corners when you’re not in the Dialanche and accumulate Power-Ups, allowing for advantageous openers to put your opponents on timers.
Trace: The Imperialist is strong in the lower and upper lobby areas of the map. If you hone zooming in while lining up your aim reticle for a headshot, you’re already practicing a game-winning strategy that can combo one shot kills. Mixing up your pace with Trace’s cloak from the Imperialist while standing in the lobby is another great tactic to catch kills in an area that tends to get high traffic.
Noxus: The Judicator is a reliable way to rack up kills and win the game with Noxus. The Vhoscythe is a great Alt-Form to traverse Stasis Bunker with a basically no-risk Spin Attack to take out while repositioning. Don’t underestimate the use of Spin Attack on the central jump board during frantic fights that don’t see it coming.
Sylux: Stasis Bunker is excellent for Sylux picking and choosing his fights with the swift movement of his Lockjaw. Keep pursuing your targets while taking advantage of chaos in the lobby by setting up for Tri-Bomb kills.
Weavel: With short walls and an open roof, the central lobby is perfect for Weavel’s arsenal of Battlehammer and Halfturret for arching explosive kills and fast repositioning for Power-Ups thanks to the flip of the Halfturret slice. If your low HP target retreats on foot, quickly switch to your Power Beam or Missiles to secure your kill.
1v1: Duels tend to still have heavy traffic through the lobby area. But you shouldn’t underestimate the surrounding narrow routes to get Power-Ups, especially the gold health orb in the U-shaped tunnel. With the short walls, duels in the lower lobby will test your endurance against an experienced player. Keep up your patience and watch your opponent’s movement to line up a charged Power Beam headshot.
Head Shot
*Map Property: Low Gravity Areas*
*Map Property: Ice Floor*
A circular space station with low gravity and four gold health orbs outside. An important thing to know upon spawn is the location of the Deathalt in the lower center of the map. If someone gets the Deathalt before you, there are plenty of tactics inside and out to kite away from the target while shooting them. Every Affinity Weapon is available inside the space station, creating specific routes for each player and the Hunters they play. When you spawn on this map, don’t forget to grab the gold health orb while firing a few Power Beam shots or Missiles down the Alt-Form tunnels for potential kills while you move.
Samus: Start charging your Homing Missile, take the jump board, and ambush the opposition that heads inside with you. If you get the Deathalt and your opponent is jumping and/or on the high ground platforms inside, do a fast Bomb Jump and continue your instant kill pursuit.
Kanden: Even with the Deathalt gone, the lowest chamber serves as a Stinglarva Bomb arena. The homing bombs have amazing range inside the chamber, getting opponents to flee. Pursue your targets and take advantage of the fast, rapid fire rate of your Volt Driver while your target moves slowly in space if they try to jump away.
Spire: Wall climbing outside allows Spire to fly off the walls for evasive movements that pair well with Alt-Form Dropping offensive maneuvers with the Fire Blades. After grabbing the Magmaul indoors, you can do a lot of wall-bouncing and floor-dropping shots to deal consistent damage in an already high traffic area.
Trace: Players naturally move slower in low gravity areas, allowing Trace to quickly one-shot kill with the Imperialist. The Jump Strike allows Trace to get the Deathalt faster at the start of the game than any other Hunter when executed well. Get some universal ammo inside, and you can jump between the spawn points to collect gold health while getting Imperialist kills.
Noxus: Take advantage of the Spin Attack and Judicator in the lowest chamber to kill those that enter it. If they retreat out the window, take advantage of the jump boards with a charged Judicator shot to freeze retreaters for a kill. Judicator shots down tunnels and doors are great for snagging unexpected kills on your opponents.
Sylux: Sylux can orbit the entire outside quickly with the Lockjaw’s ability to Bomb Fly in low gravity. The Deathalt is amazing with Sylux’s mobility, inside and out. With slow jumping and a circular enclosure, Head Shot is great for Shock Coil rush down plays.
Weavel: Weavel loves the platform stairs on the lower level inside. Not only does it help you stay away from Deathalt users, but it also allows your Halfturret and Affinity-boosted Battlehammer shots to hit from high ground platforms that provide Power-Ups. If your opponent tries to get these Power-Ups, your Battlehammer will push them back and off the platforms, which can negate crucial healing plays.
1v1: While the fight still starts as a Deathalt race on average. You can kite away from the Deathalt user with proper low gravity jumps and high ground plays indoors. With every Affinity Weapon available, you have a wide range of strategies you can push for the current matchup at hand. Four gold health orbs outside is nothing to count out during the whole duel.
Celestial Gateway
Multi levels with cool teleporter routes make Celestial Gateway a fun map for frantic big battles and great terrain for pursuits. Once someone drops to the bottom floor, they’ll eventually have to teleport to the top of the map if they don’t want to stay down there. Take advantage of predicted routes of your opponents while tacking on damage.
Samus: Homing Missiles away from any floor, this will always be a lethal tactic worth replenishing Missile ammo for. Use the Morph Ball to swiftly traverse the stories of the map while trapping opponents with its multiple hitboxes.
Kanden: The open design of Celestial Gateway allows for Volt Driver ambush plays that start with a charge shot. Shooting from the highest floor is effective for covering the middle and bottom floors, thanks to the teleporters putting the Hunters at the top floor. Use your Stinglarva going to and at the bottom floor to kill retreating opponents from other fights.
Spire: Magmaul slide off shots onto other stories are great against retreating opponents. Charging your Magmaul for the next fight is ideal for starting your next fight. Use the Fire Blades on the lowest level to grind in damage for kills in a narrow area. If they retreat, throw out some Power Beam charge shots that can finish off their low health.
Trace: It’s worth going right for the Affinity Weapon orb in the center and going for Imperialist headshots for fast kills. As the match continues, Trace appreciates the highest level of the map, allowing for high access for kill opportunities while opponents tend to travel down to teleport up and fight you, giving you enough time to cloak and set up an instant kill shot.
Noxus: The Judicator is easy to get on the center floor, granting Noxus amazing momentum to freeze and get wall bouncing kills around the map. The Vhoscythe is an amazing Alt-Form for traversing the map while looking for kill opportunities in skirmishes.
Sylux: The bottom of the map is a Tripwire hazard area. If you don’t predict enemies coming down for a bit, you can quickly teleport up and pick a target from that level or below to pursue. The bottom of the map also has the Shock Coil, granting Sylux his strengths for locking down 1v1 fights with health stealing ease.
Weavel: Weavel’s Halfturret is great for getting resources and chipping damage away at opponents for kill opportunities throughout the map. Leaving the turret portion on the highest outer ring of the map covers a teleporter point of your choice and the fights on the center platform under it.
1v1: Go for the health orbs on the level you spawn at, take out your opponent, and accumulate those health orbs again. The bottom to top floor routes tend to be used for retreats, but don’t count those out as mix-up options.
Alinos Gateway
*Map Property: Lava Areas*
The great outdoors… Alinos Gateway’s signature lava fall and terrain creates a constant terrain danger for Hunters that travel across the map for kills. Vast and distinct in its cardinal directions, there are a lot of opportunities to pick your fights on this map, with jump boards all over to help with repositioning.
Samus: Homing missiles are amazing in the grand outdoors of Alinos Gateway. Use the jump boards to ambush and rush down your opponents for quick kills. After hitting someone with a missile, keep the Power Beam ready for long, distant chip damage to kill retreating foes.
Kanden: The Volt Driver’s rapid fire speed is amazing for tracking foes both near and far from Kanden. Long distance charge shots can be pretty easy to react to, but you can surprise your opponents with jump board use to approach them.
Spire: Spire’s lava-proof passive ability is in full force at Alinos Gateway. You can take advantage of taking faster routes to Power-Ups compared to your opponents, all while your Magmaul afterburn and the lava damage combos make for drastic HP drops on opponents. The lavafall in the back is basically inaccessible to anyone else (unless they want to take a huge chunk of damage), you can use the Imperialist to snipe from there. The Dialanche and jump boards are great for following out of sight fights for kills.
Trace: The Imperialist is already an amazing weapon for getting long distance one-shot kills. Now paired with a huge, wide open map, you have a deadly recipe to quickly win games right after you get the weapon. Keep tabs on the high-up cliff with the Imperialist and take out the opposition that aims to counter-snipe you.
Noxus: Shadow Freezing is highly effective on this map, pushing the crazy long range of the tactic that can halt opponents from far away. You can sharpshoot foes with the Judicator, Imperialist, or charged Power Beam shots to lock in kills. Make sure to press the momentum with jump boards as well for surprise freezes.
Sylux: You can Bomb Jump over lava in the Lockjaw while repositioning yourself. You can also be effective off of jump boards with this technique. The Shock Coil is a great weapon for healing back lava burns while your opponent takes escalating damage.
Weavel: The Battlehammer located in the corner of the map serves as a good spot for its use, as opposing Hunters that aren’t Spire will often run to this non-Lava shore. Ambush your opponents with a jump board into Halfturret plays to make for panic plays.
1v1: There’s a lot of long, distant crossfire to expect for duels on this map. Keep tabs on when someone gets the Imperialist, as jump boards become more risky to use. For a player that does have the Imperialist, you can hold your ground until an opponent risks contesting it with either the jump board or climbing the wall labyrinth right under, allowing for headshot kill opportunities.
VDO Gateway
*Map Property: Ice Floor*
A lot of traffic will go to the ice bowl at the bottom center. The race to Double Damage will often involve fast Alt-Form maneuvers to get it at the start of the match. The outer ring on the middle level is good for scouting where fights are, while the highest level is great for pressing an advantage against opponents not directly in the ice bowl.
Samus: Missiles are amazing to start with for any character, and Samus gets a lethal bonus that can punish Hunters that go into the ice bowl. Staying in the Morph Ball after getting Double Damage is great, though don’t count out how good the Power Beam and Missiles are from even the dead center of the map for kills.
Kanden: The Stinglarva transformation animation provides a cool acceleration boost on the ice bowl, allowing for fast bomb trails and quick access to the Volt Driver on the bottom level. The charge shot’s homing ability is great for this map as you lock opponents down with uncharged shots.
Spire: There are three ways to get the Magmaul on this map, serving as an excellent weapon both on the high ground and the lowest level. Charging your Magmaul while using the jump boards is a favorable strategy as you maneuver towards opening a new fight.
Trace: Like Spire, Trace has three ways to get his Affinity Weapon, with a strong advantage when using it on the highest level. Jump Strike towards Double Damage at the start of the map and continue using that move for anyone nearby for fast kills.
Noxus: The ice bowl is perfect for Noxus’s Spin Attack, with or without Double Damage. Keep your Judicator charged for good kill opportunities on any level while using the uncharged shots to pick off enemies in other fights across the map.
Sylux: Using the Shock Coil on the lowest level is great for pressing an advantage while moving across the ice against opponents that only have the jump boards for close-by escape options (that you can use yourself). Bomb Jumping with the Lockjaw is great for pursuing and ambushing enemy Hunters.
Weavel: Placing the Halfturret on the highest level or second level bridge that watches over the level under it is strong for a divide and conquer deathmatch strategy. Keep tabs on the double damage with jump board plays that let you fire Battlehammer shots and potentially knock opponents off the top level.
1v1: The race for Double Damage in the ice bowl does not change in its game winning opportunity. Use your Alt-Form to move across the ice bowl quickly and get Power-Ups, hitting the jump boards to traverse the higher floors while you chip away damage on your opponent.
Arcterra Gateway
*Map Property: Ice Floor*
A tall chasm makes for an awesome fighting dynamic for pressing the high ground while using the bottom floor for Power-Up accumulation and sharking for kills against falling Hunters.
Samus: With so many jump boards, you’ll want to hone leading your shots against airborne opponents. One Homing Missile into a stream of Power Beam shots is a consistent way to lock-in kills. Take advantage of the icy terrain.
Kanden: Get your Volt Driver at top while raining shots under you. Take advantage of your charge shot’s ability to show a nearby opponent below, then throw a barrage of uncharged headshots. Laying Stinglarva bombs is great against opponents slipping on the ice and most likely damaged from above.
Spire: Raining Magmaul shots is great, you can easily pursue opponents down under for Dialanche or charged Magmaul shot kills. The Fire Blades are great for narrow area pressure while denying the cranny at the bottom with yellow health orb.
Trace: Trace has a lot of horizontal space in the middle caverns to snipe others with the Imperialist on that level and those dropping below. If your opponents get too close, you have good fight or flight options with Missiles or the Triskelion respectively. Sniping jump board users is a great way to get rapid kills.
Noxus: Freezing mid-air opponent’s and dropping Judicator shots for the kill is great. The caves on the middle floor allow for the Judicator to do strong wall bouncing shots against spawning opponents.
Sylux: The map might be big, but horizontally, Sylux can pressure with the Shock Coil in lethal 1v1 encounters. Tripwires are great on the icy floor to further disrupt skating opponents. Use your Lockjaw to maneuver the map using Bomb Jumps.
Weavel: Battlehammer shots that cause knockback are great against climbing opponents that fall to the bottom floor. Because you won’t take fall damage going into Alt-Form, use your Halfturret to pursue falling opponents and pressure them on the ice for a kill.
1v1: Once you get one kill, you can hold the high ground to replenish health and hold a win condition until your opponent contests you before time runs out. Hiding on the bottom floor while getting the gold health orb is good, but be careful about taking the climb against an opponent with the high ground.
Oubliette
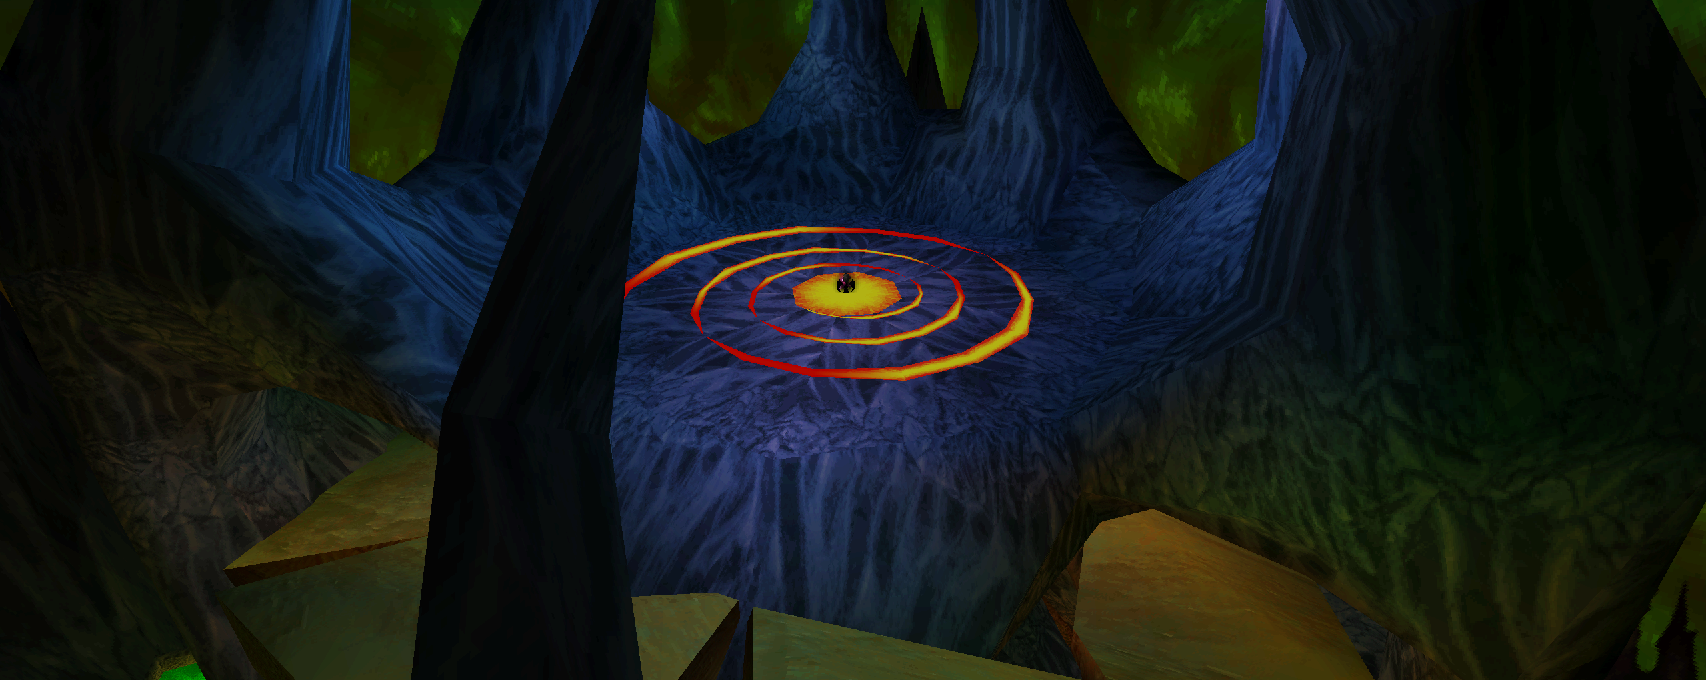
Metroid Prime Hunters’ Final Destination; Oubliette removes all Affinity Weapon Power-Ups, leaving each Hunter with the Power Beam, Missiles, and their Alt-Forms. There is one weapon, however, and while the one-shot killing power of the Omega Cannon is a great objective to get, don’t cheat yourself from the kill opportunities on the ground floor and climb up top.
Samus: Samus lucks out with her Affinity Weapon being available, allowing her to use Homing Missiles throughout the match. The Boost Ball on the ground floor is amazing for pressuring respawning Hunters to rack up kills.
Kanden: Kanden has a cool map specific strength here that has his Stinglarva able to hide under this deck, away from Omega Cannon shots from above. Trail Stinglarva Bombs while venturing to the top and/or while repositioning on the bottom floor.
Spire: Fire Blades are great on the ground and top floor. Because the Omega Cannon spreads horizontally, you can use your wall climbing ability to get out of its range, if the wall permits.
Trace: Not only is it Jump Strike time on the bottom floor, but while you use Oubliete’s jump boards for fast travel and ambush kills. If you get the Omega Cannon and wait at top, a cloaked Triskelion can surprise and kill a weakened climbing opponent.
Noxus: The Spin Attack is an omnipresent threat throughout the map, especially on the top and bottom levels. If your opponents are out of range, take advantage of how much damage a charged Power Beam headshot can do.
Sylux: With Bomb Jumping, Sylux can move across and to the top of Oubliette efficiently. You can lay witty Tripwires at the end of expected jump board landings to add more damage for the climb to the top.
Weavel: The Halfturret is great throughout the map. Place is on edges of the stairs to alert you of approaching opponents while you finish them off with your weapons.You can also leave the turret portion by the Omega Cannon spot as you traverse to replenish health and maintain control over the weapon respawning.
1v1: Duels dramatically place the race for the Omega Cannon as an even higher priority that centers the fight. If you die to the Omega Cannon while your opponent waits at top on a kill lead, you’ll need to pressure them to fire it with your Power Beam or Missiles, then avoid the shot by dropping or using a jump board.
(Community note: It’s not often used, but using the reflective green material around the map for a kill is one of the rarest ways to take a Hunter out, granting you a gold mine of brownie points. The one directly outside of the Omega Cannon’s spot can make for conveniently decent Power Beam spread damage while you wait for it to come back.)