


Metroid Fusion Walkthrough – Main Deck: Power Failure
Walkthrough
- Biological Space Labs
- Sector 1 – Atmospheric Interference
- Sector 2 – Unknown Saboteur
- Sector 4 – Ultra-High Speed
- Sector 3 – Rogue Security
- Sector 6 – Frozen Parasites
- Sector 5 – Cold Arsenal
- Sector 3 – Meltdown
- Habitation Deck – Signs of Life
- Sector 5 – First Encounter
- Main Deck – Power Failure
- Sector 2 – Overgrown With Vegetation
- Sector 5 – The Nightmare Awakens
- Sector 4 – Diffusion
- Sector 6 – Revelations
- Sector 1 – Neo Ridley’s Cry
- Sweeping the B.S.L.
- The Final Confrontation
Return To Your Ship
Adam will instruct you to return to your ship without offering any reason. Usually in Metroid, your ship is a pretty comforting place that offers you a place to save and a complete recharge of energy and ammo, and this game is no different, so let’s take him up on the good idea.
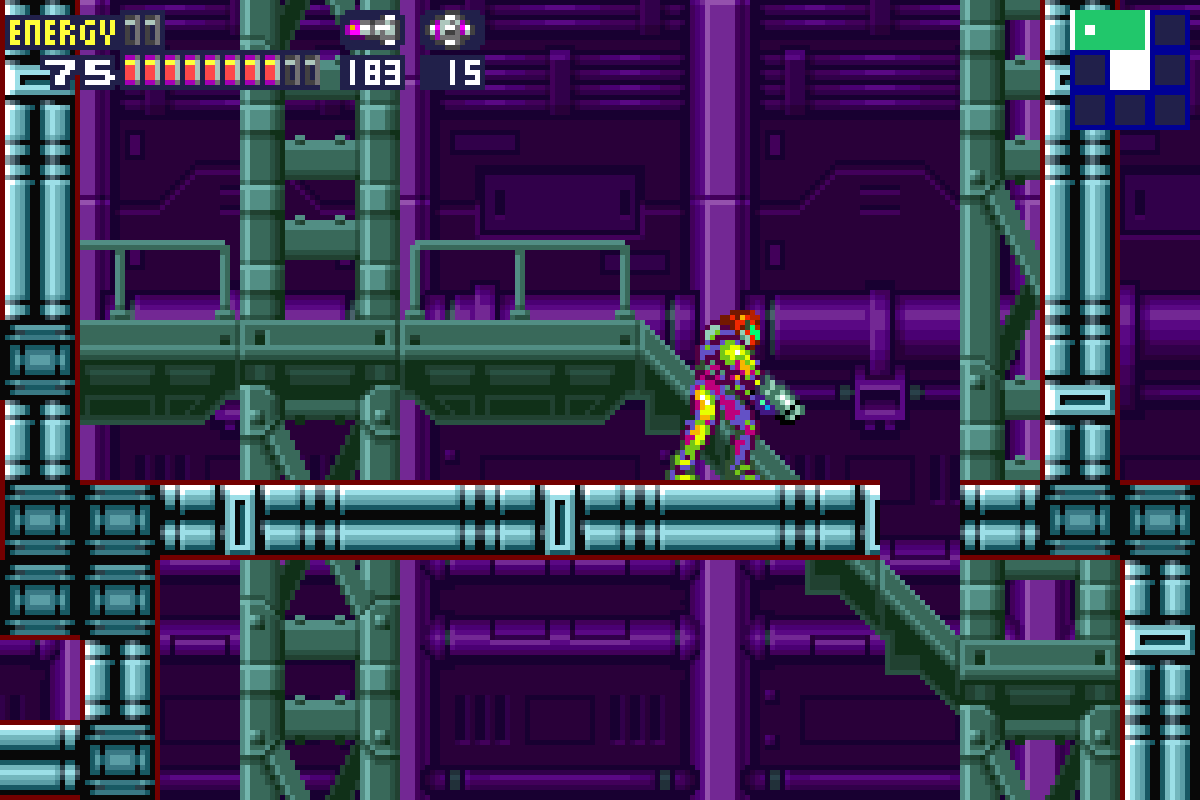
You might be thinking this should be a relatively easy journey back to the ship, but NOPE. The power to the B.S.L. goes out halfway up the elevator ride. Looks like we’ll have to take the scenic route. Turn to your right and shoot the wall until a tunnel all the way to the end wall is revealed.
Roll through and press forward. You’ll run into some Geemers, creepy crawly enemies that can only be destroyed with a charged beam shot. Destroy them and press forward, jumping up into the cracked wall on the right. What we see next is pretty creepy.
You’ll find yourself in a frozen containment room with the frozen remains of what looks very much like Samus’s arch enemy, leader of the Space Pirates, “the Cunning God of Death” himself, Ridley. But he is very clearly deceased… as we can see as his remains crumble into dust. But not so fast – a Core-X will float out of the rubble. Could our worst fears be true? Could the X have mimicked Ridley? Spoiler warning, but yes, that’s exactly what we just saw, so get ready. Not only do we have the SA-X to deal with, now we’ve got a X-ingested Ridley on our hands. That’s a problem for another time though; we still have to find a way to our ship.
Walk in the frozen containment room where Ridley’s remains are until the floor gives out and you drop down. Lay a Power Bomb when you land and you’ll see a tunnel appear to your left. Follow it to the end; lay some bombs and another tunnel going upwards will appear. Shoot the top of it and jump up to grab POWER BOMB EXPANSION #3.
Exit and head right. You’ll find yourself in a long tunnel full of Geemers directly on your path and some creepy zombie enemies called Genesis’s above you. The Genesis’s will drop acid on you, so do your best to avoid that. Clear out all the Geemers and start running to the right. Let your Speed Booster activate and go crashing as far as you can into the next room. Once you stop, lay a Power Bomb and you’ll see MISSILE EXPANSION #36. You’ll also see a nice little opening that you can jump through, leading you back to the Main Deck.
You’ll have a straight shot right to your ship now, so head there and talk to Adam.
Auxiliary Power
Once you’re at your ship, Adam will tell you that the main silo of the Reactor Core is offline. Uhoh. That means that nothing on the B.S.L. is working right now, including Save Stations. Adam instructs you to go and turn on auxiliary power to at least get some basic functions back. He also mentions that our pals the Etecoons and Dachoras have taken up residence in your ship, so we can breathe a sigh of relief knowing they’re safe. Now, let’s get that auxiliary power working.
Exit your shop and follow the path until you get to the first vertical hallway. You’ll notice a Kihunter here now. Take him out and lay a Power Bomb; you’ll see the wall to your left evaporate and a new tunnel open up. Get inside and drop down. Remember those sacs of bugs in Sector 2 from earlier that we could use as platforms? Well, it looks like whatever was in them have all hatched and are running around the B.S.L.
You’ll be on a thin row of what looks like in-game scaffolding. There will be lots of this in this hidden part of the Main Deck; shoot the floor and you’ll see a hole open up for you to drop down.
You’ll enter the Central Reactor Core, which is full of dead plants and vegetation. This room is massive and has tons of doors, but since the power is out, the only doorway we want to bother with right now is the upper door on the right hand side.
Climb up and you’ll enter a room with some more scaffolding. This room is absolutely riddled with X imitating Space Pirates, so tread carefully. They hit hard, taking out about half a tank worth of health, so try your best to avoid their beams. You can either use three Missiles or two charged shots to take them out; I prefer Missiles myself since you can fire them off faster. If you’ve been following this guide all the way through, you should also have Missiles to spare.

Start by taking out the first two Pirates as you move right, and you’ll run right into ENERGY TANK #12. Nice! Enter the next room and take out the Pirate; the X will reform as another Pirate on the floor below you, so shoot the floor, drop down, and destroy him again. Shoot the floor again and drop down. Take out another Pirate. Before dropping down, look over to your left and you’ll see two pieces of scaffolding close together. Shoot at them and jump over into the exposed tunnel to grab MISSILE EXPANSION #37. Drop down and take out the last Pirate in this section.
Follow the path, shooting and binding your way through the scaffolding until you get to the Gadora. Eliminate it, grab that red X, and step inside.
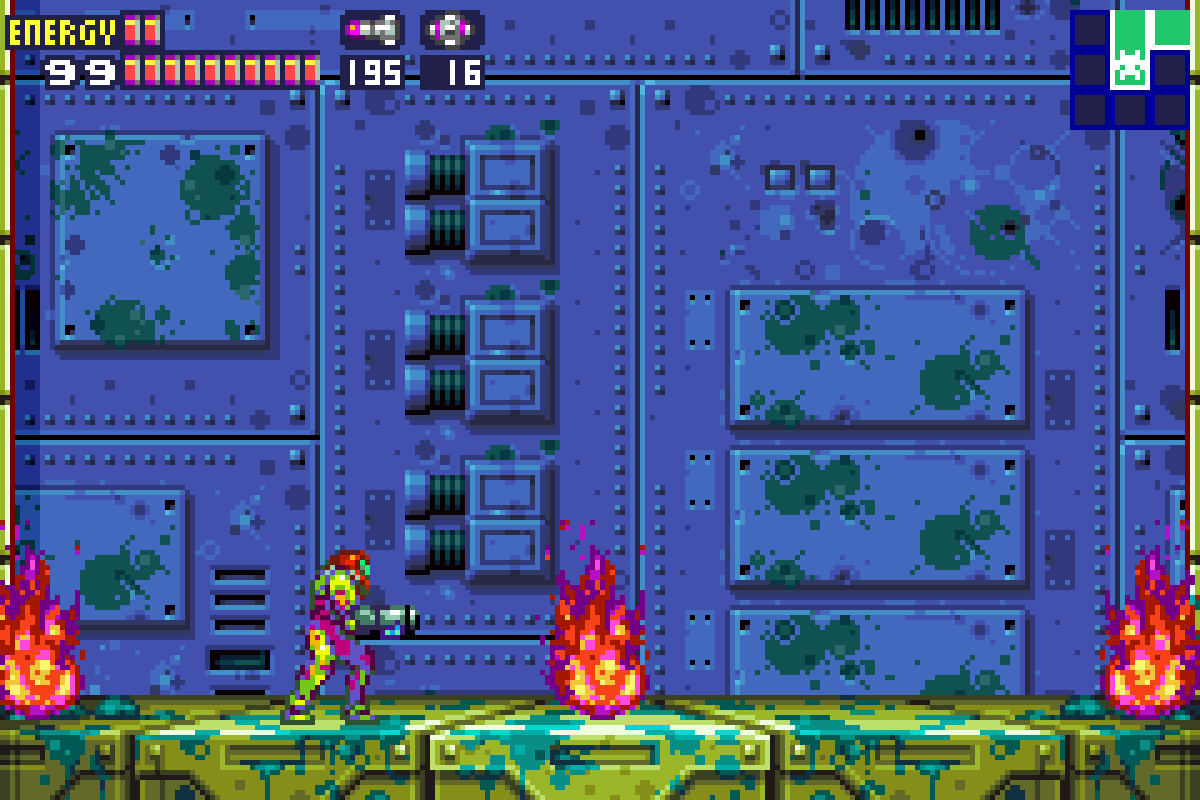
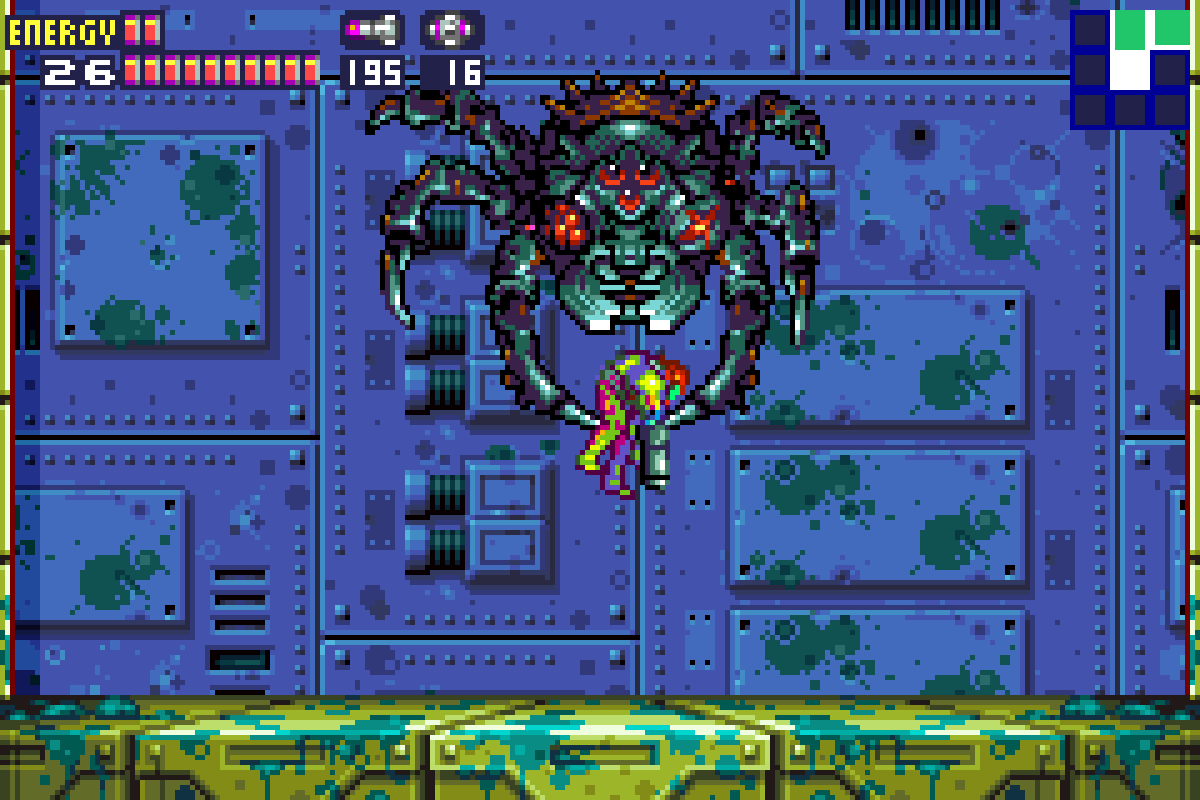
Yakuza-X
This fight starts off hot – literally! Don’t stand in the center or to the far left or right, ’cause there are three fireballs that are falling from the ceiling that will inflict a pretty decent amount of damage if it hits you. That will be nothing compared to what happens if Yakuza grabs you, however.
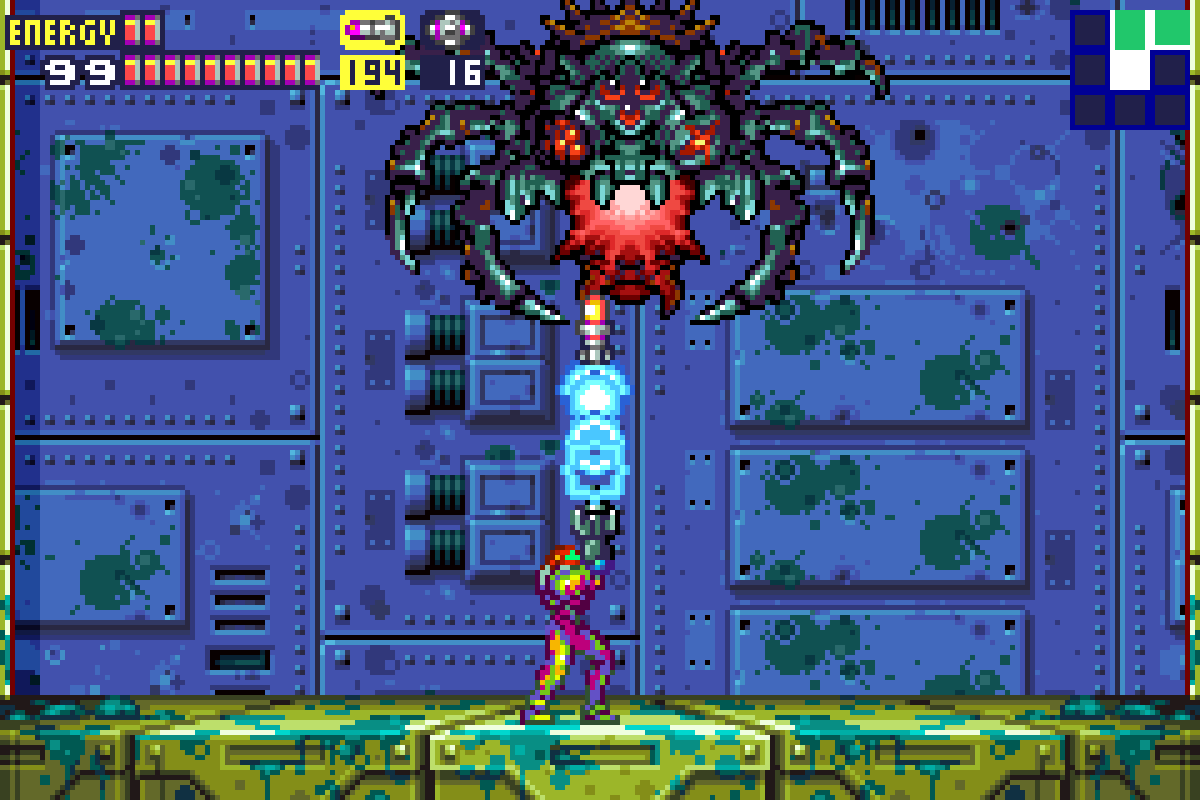
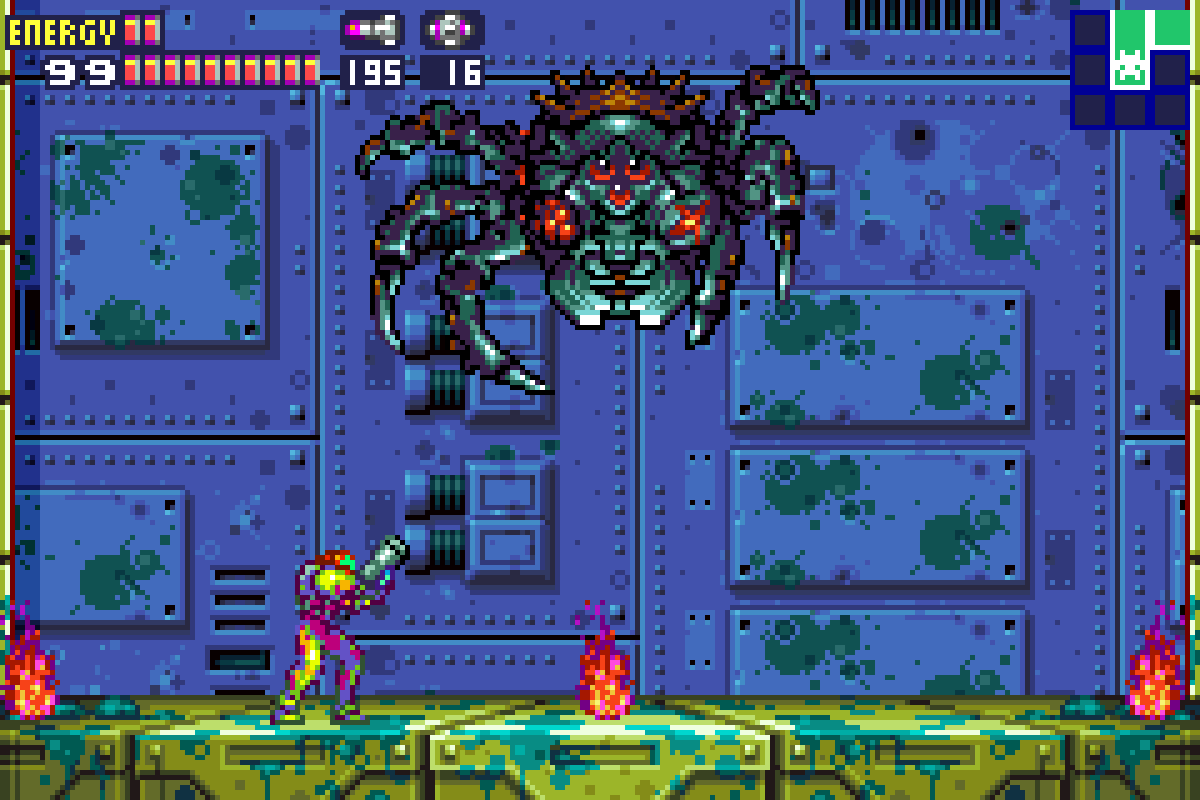
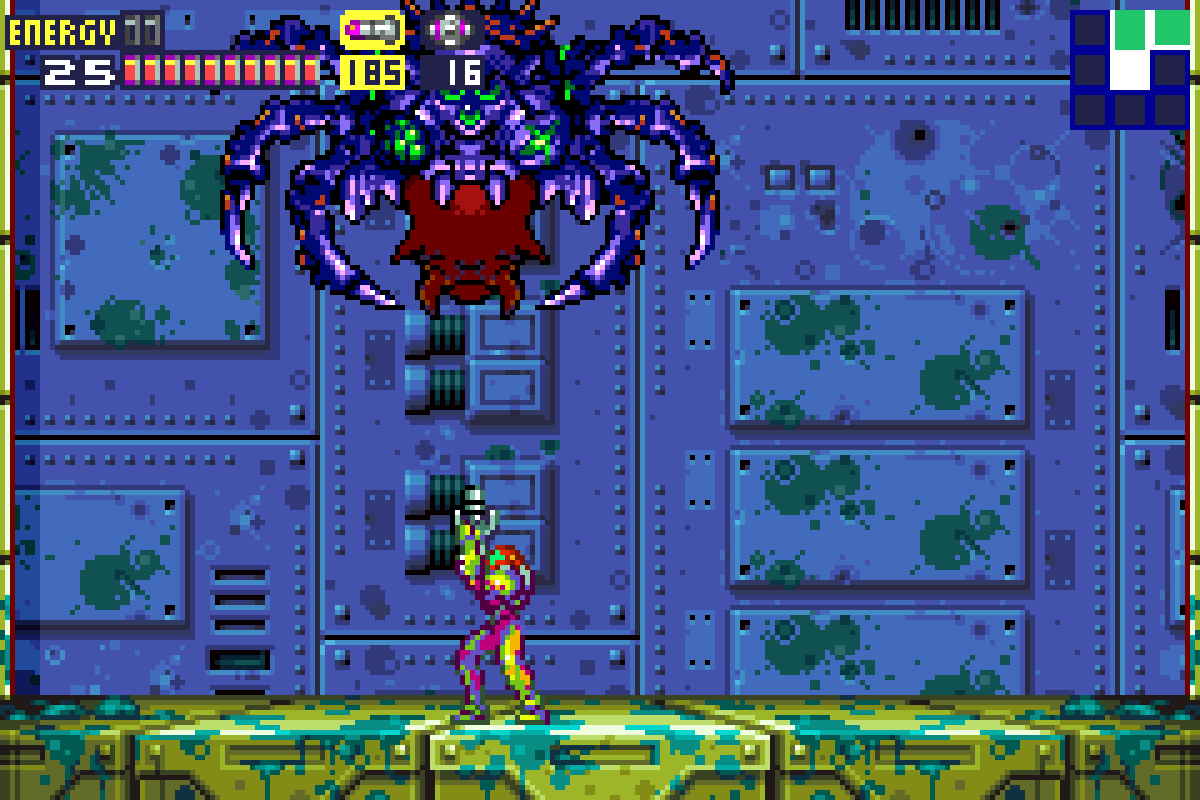
Yakuza will descend into the battlefield, revealing its spider-esq form. He will move in a diamond shaped pattern over the battle area. His main attack involves grabbing you with his claws, slowly dragging you to the top of the arena and giving what can only be described as the Metroid equivalent of a WWE piledriver right to the ground. This hurts. A lot. Whatever you do, don’t get snared by Yakuza, because this piledriver will take out a full two tanks of energy. Yikes. If you do get grabbed, you can mash left and right to escape, and avoid taking too much damage. Occasionally, Yakuza will stop to open up his mouth and drop down three fireballs at you as well, which we already established hurt you pretty good.
Fortunately, these attacks are all pretty easy to avoid. If you get into Morph Ball form and just stay in the corner, you can avoid 95% of Yakuza’s grabs, and the remaining 5% will be so obvious that you’re in a bad spot, you’ll have plenty of time to move.
(Side note here, but: I’m a massive fan of The Office. Does Yakuza’s attack pattern not remind you of the cold open where Jim was explaining the entire office was dying to see the DVD symbol perfectly hit the corner of the TV, or is that just me?)
Now that we know his attack patterns and how to avoid them, we can go about damaging him. This fight actually has the same basic principle as the Zazabi-X fight earlier; when Yakuza opens his mouth to spit fireballs on us, that’s when we strike. Stand directly under him and fire off a bunch of Missiles and then move so you don’t get hit by the fireballs.
Repeat this process, avoid his grabs, and eventually after enough Missiles, Yakuza’s body will break. We’re not done yet though.
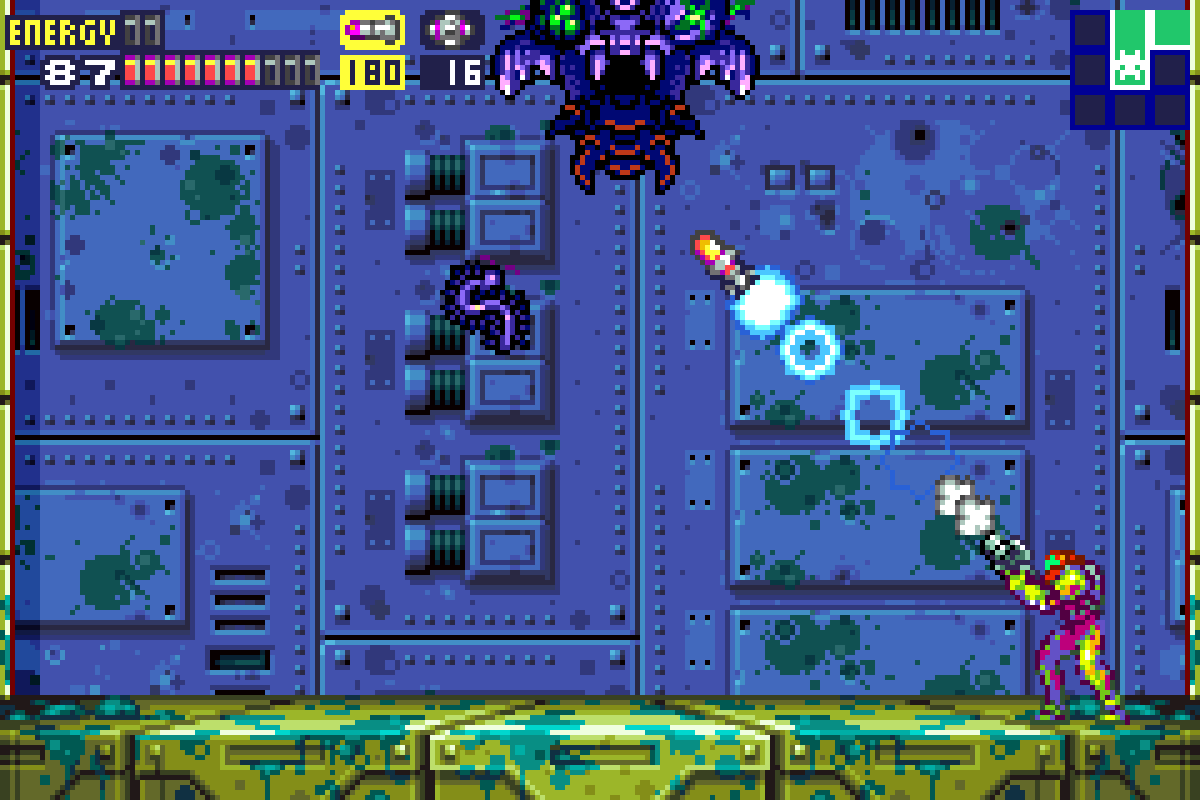
Now that Yakuza’s legs have been destroyed, he will go nuts, bouncing around the room and spitting out debris from its mouth at you. You’ll want to have your Missiles open and aiming upwards here. Yakuza’s mouth (read: his weak spot) will always be open now; it’s just a matter of hitting it. He’ll be moving pretty fast, and the debris he drops straight down might get in the way of your shot, but don’t let up. Keep firing Missiles straight up and moving back and forth.

You can sometimes get Yakuza into a pattern where he’ll be bouncing off the wall straight into a Missile shot, then bounce back to the same spot and wall jump right back to your Missile. The more damage Yakuza takes, the faster he moves and the more he will try and land on you. Be moving and always be shooting Missiles upwards. By my count, 11 Missiles to the mouth should be enough to put Yakuza down for the count.
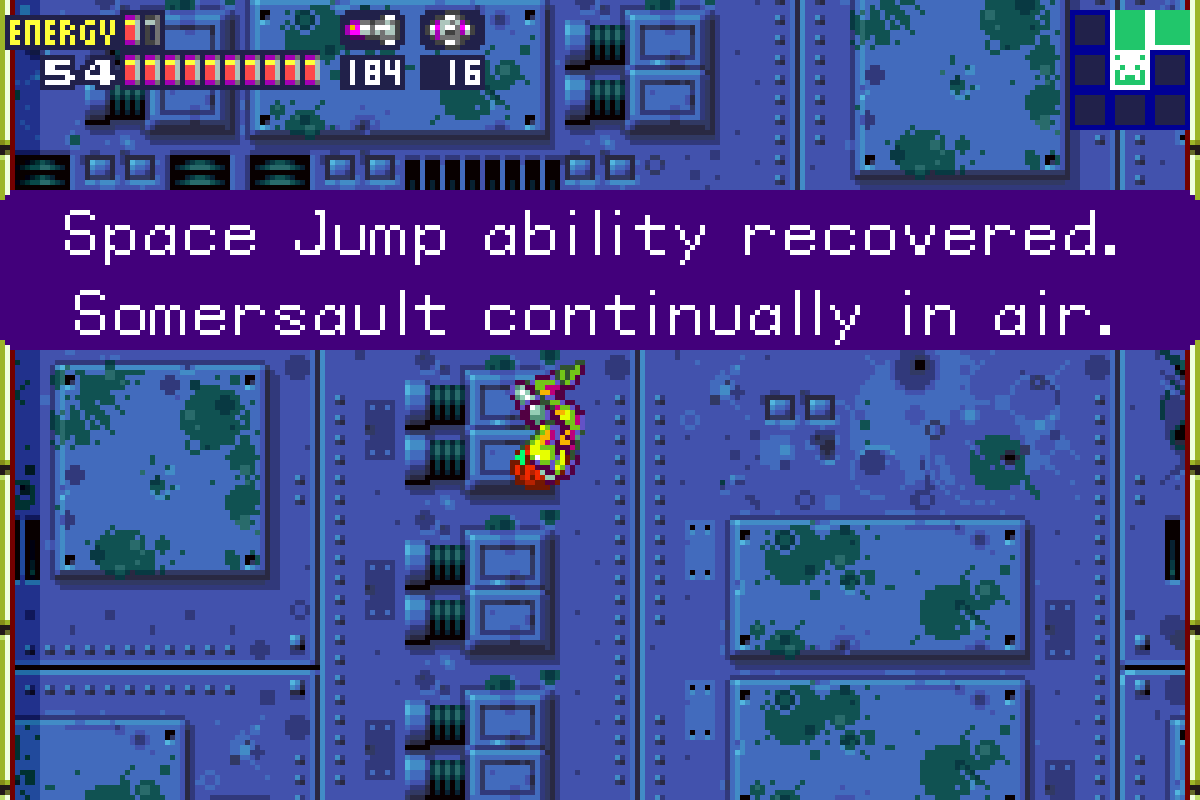
Destroy the Core-X that spawns from Yakuza and acquire the SPACE JUMP. Use the Space Jump to get up to the vent in the ceiling. Restore auxiliary power and step into the Navigation Room to check in with Adam.
Next Chapter: Sector 2 – Overgrown With Vegetation