


Metroid: Samus Returns Walkthrough: Aeion Tanks
Here you’ll find the location for every Aeion Tank in Metroid: Samus Returns, as well as detailed explanations on how to get them and what powerups you’ll need.
Aeion Tank #1
Location: Area 1 (First Visit)
Requirements: Spider Ball
Get to the Save Station in the lower right corner (the one with the Missile Expansion right above it). Go through the door on your left and head back into the vertical shaft; drop down and take the first door on your right. This is the room with the pit of water from earlier; get back into the small Morph Ball tunnel, only this time, use your Spider Ball to crawl towards the ceiling. Drop a bomb and you’ll have full access to grab AEION TANK #1!
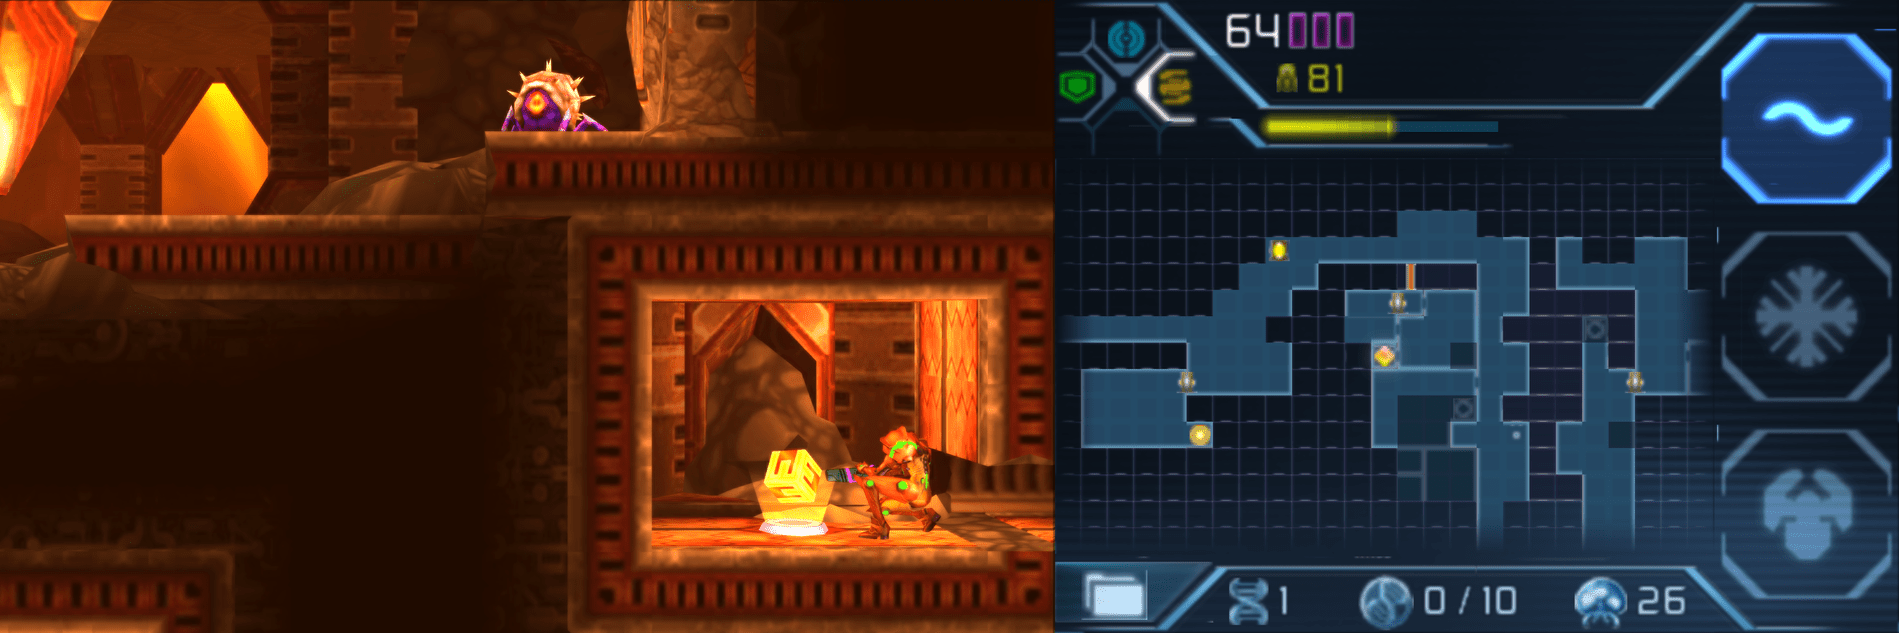
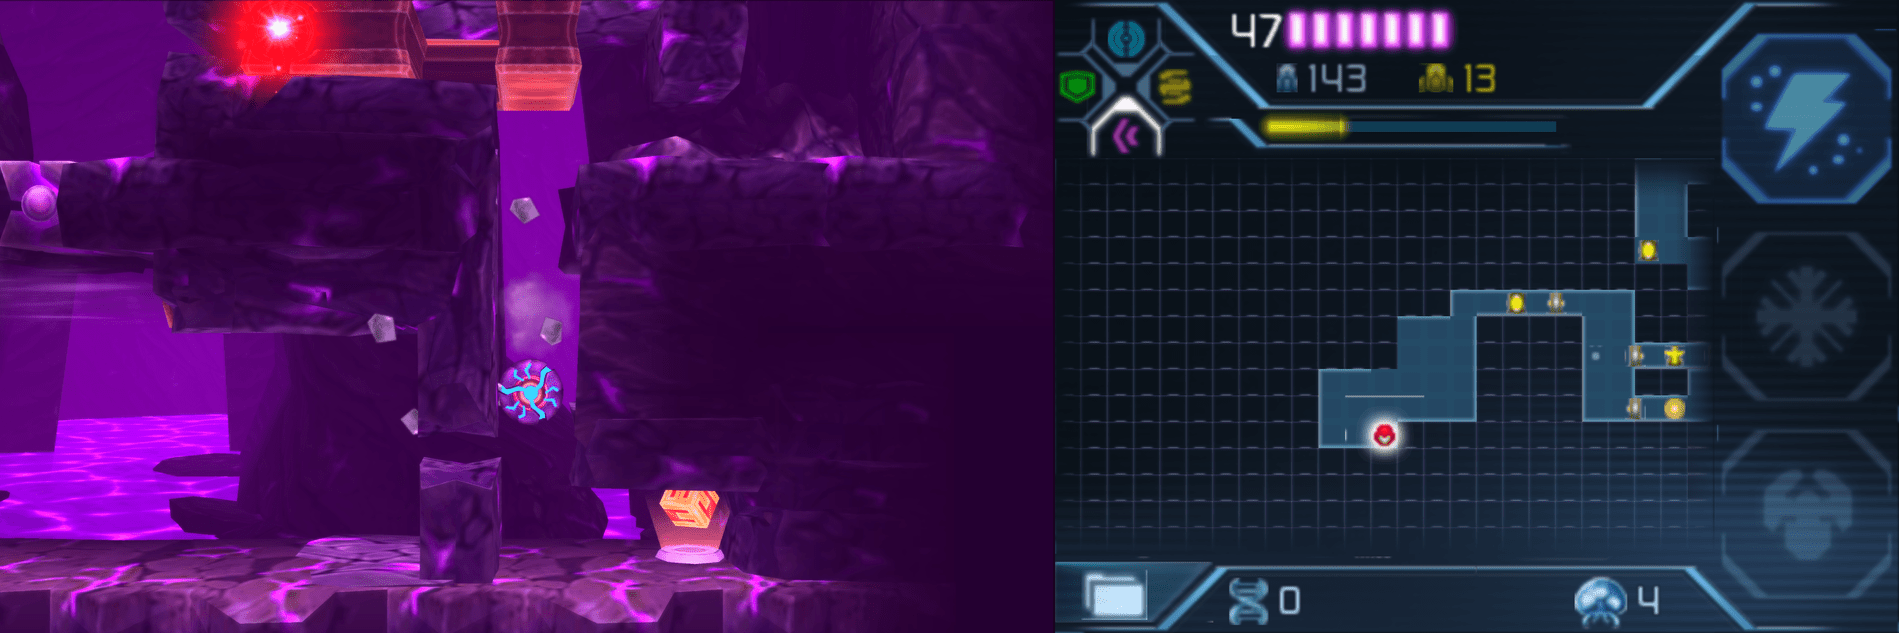
Aeion Tank #2
Location: Area 3 (First Visit)
Requirements:
Take the elevator in the middle of the Mining Hall room down to a lower part of Area 3. Once you’ve stepped off the elevator, ignore the door on your left and take the Morph Ball tunnel to your right instead. Work your way to the left side of the room and destroy the Grapple block. Now, head back up and go through the Blast Door to the left of the elevator. Drop down a bit, destroying the Wallfires, and slip through the tunnel on the right wall. Slip inside and destroy the Grapple block, and then, one last time, make your way back into the previous room. Take the Morph Ball tunnel to the right of the elevator and drop all the way down now that nothing is blocking your path. Lay some bombs in the lower-left corner, slip through the tunnel, and grab AEION TANK #2!
Aeion Tank #3
Location: Area 4 (First Visit)
Requirements: Lightning Armor, Grapple Beam
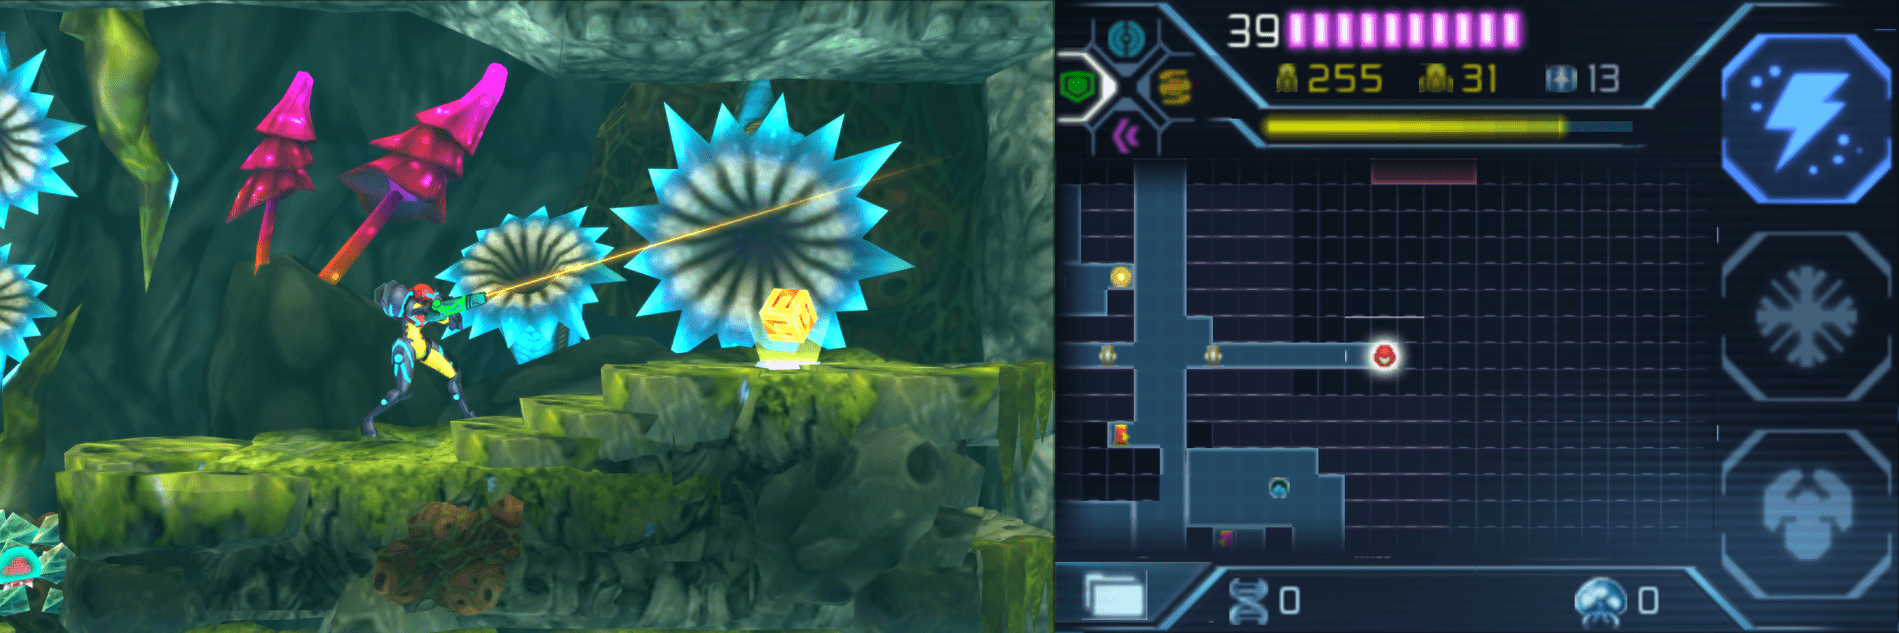
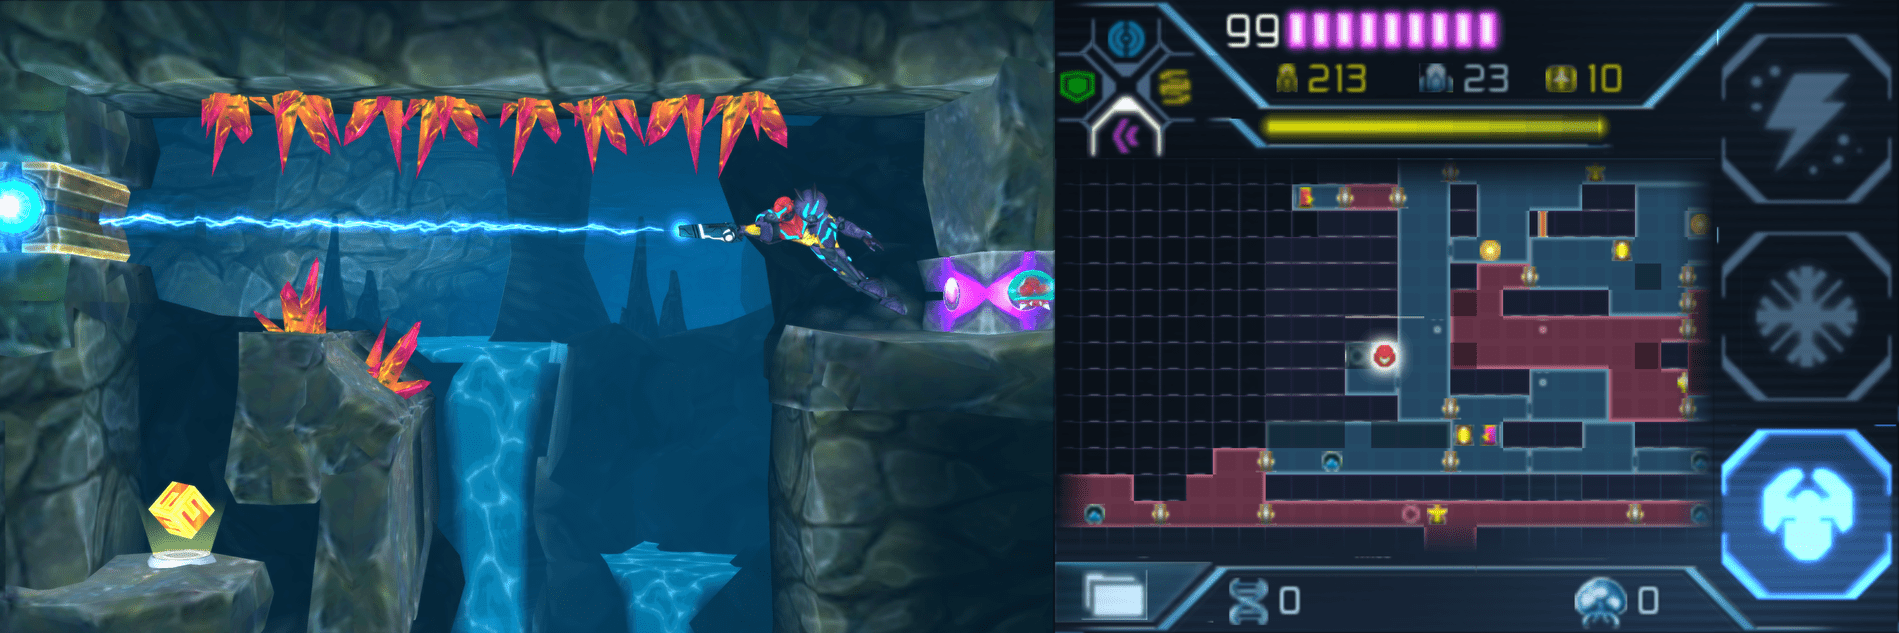
In the room to the left of the Chozo Seal, proceed to the Save Station and then start working your way upwards.Go past the Energy Recharge Station and keep on climbing; when you see a ledge with a red Grapple block, stop and drop to the previous ledge. Use your Scan Pulse and you should see a block start glowing in the bottom left wall; bomb it and you’ll roll into a pool of water. Shoot the ceiling above the water and jump up in the new pathway. Keep blasting the bricks in your way – use your Scan Pulse to see them easily! – and stop when you see the evil purple beehive. Activate your Lightning Armor and run past the beehive, jump up, and grab AEION TANK #3. Hightail it as fast as you can back to the water as those dastardly purple insects will be all over you.
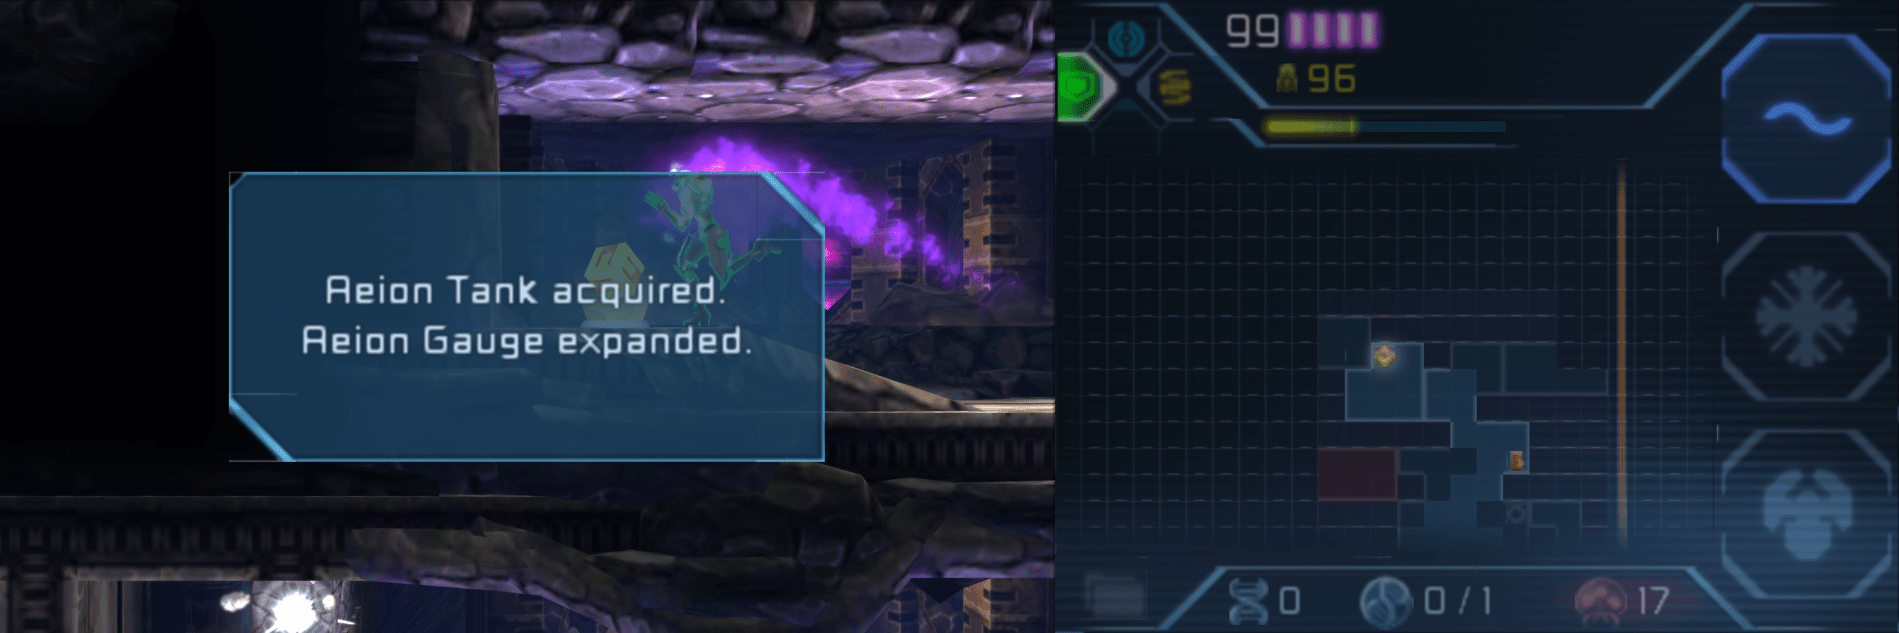
Aeion Tank #4
Location: Area 4 (First Visit)
Requirements: Lightning Armor
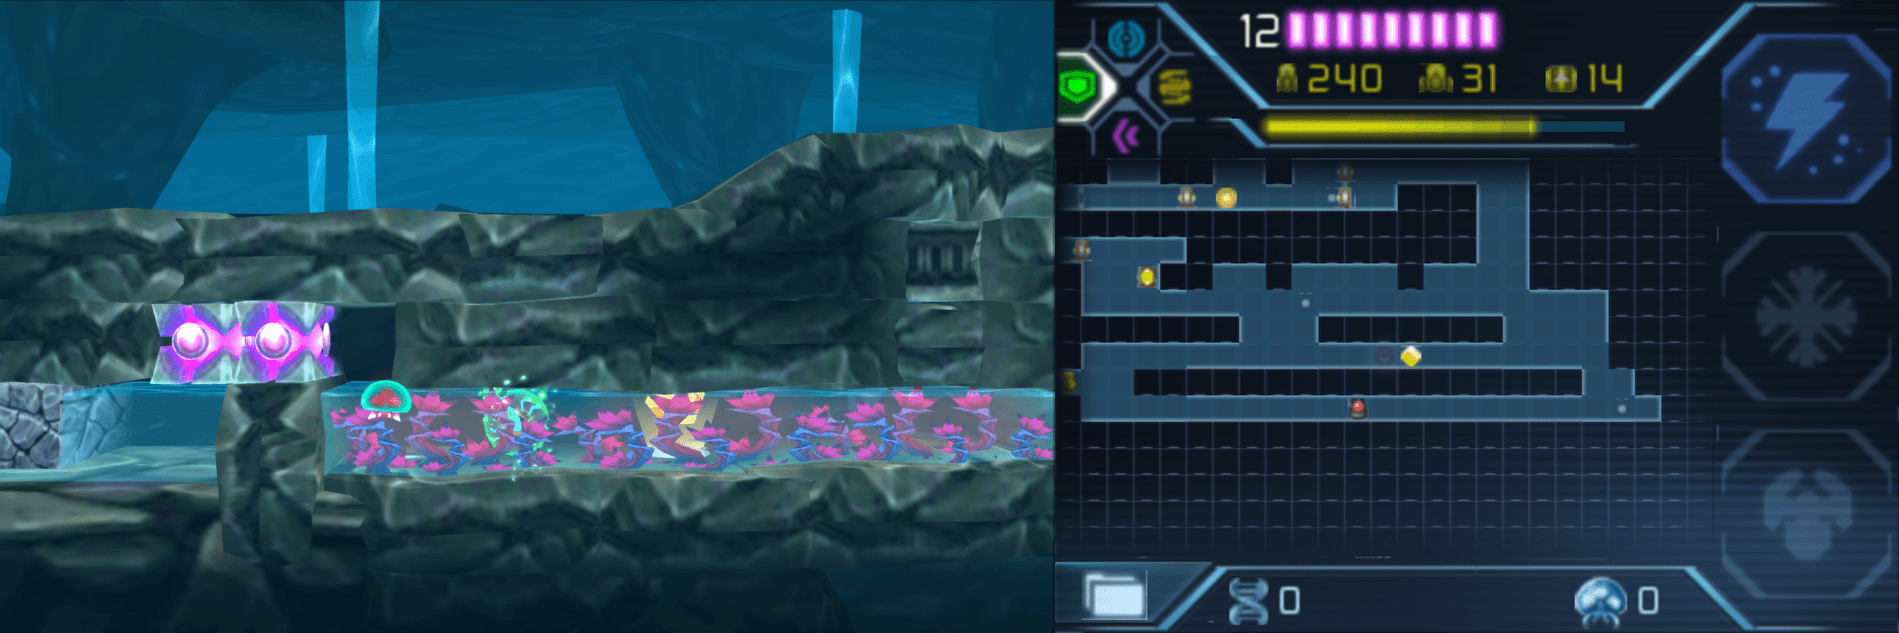
Enter the hot zone on the left side of Area 4, grapple your way across the room and continue on. You’ll be in a new room with a bunch of red weeds, so activate your Lightning Armor, quickly tuck under the platform you’re standing on and grab AEION TANK #4!
Aeion Tank #5
Location: Area 5 (First Visit)
Requirements: Screw Attack
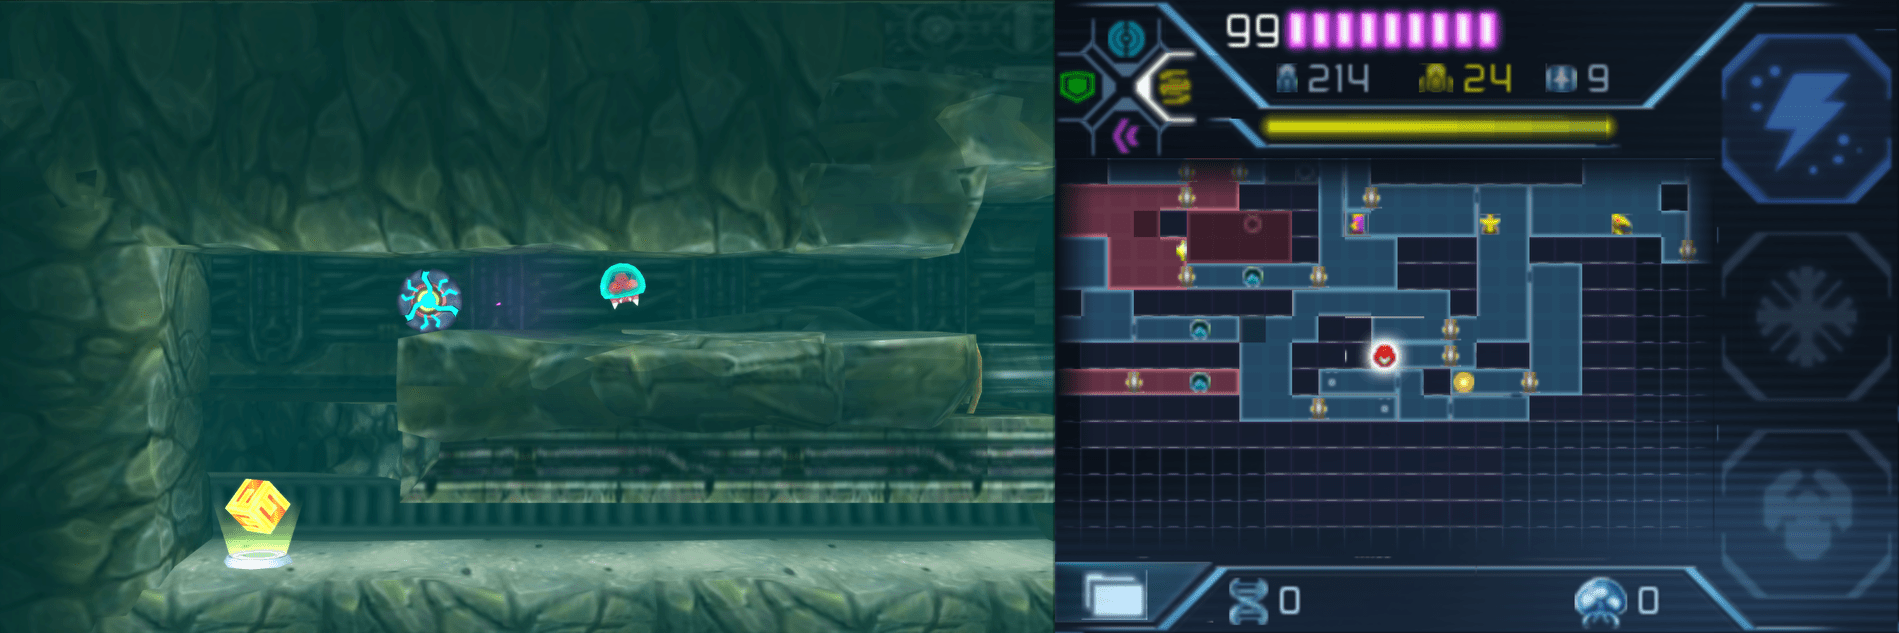
Get to the lower Teleportal and keep making your way down. If you fall all the way to the bottom and submerge yourself in the water, press a little towards the right and jump back up; you’ll go crashing through some Screw Attack blocks that are sealing a cozy little alcove that houses AEION TANK #5! Snag it, and rip away the Grapple Block while you’re there!
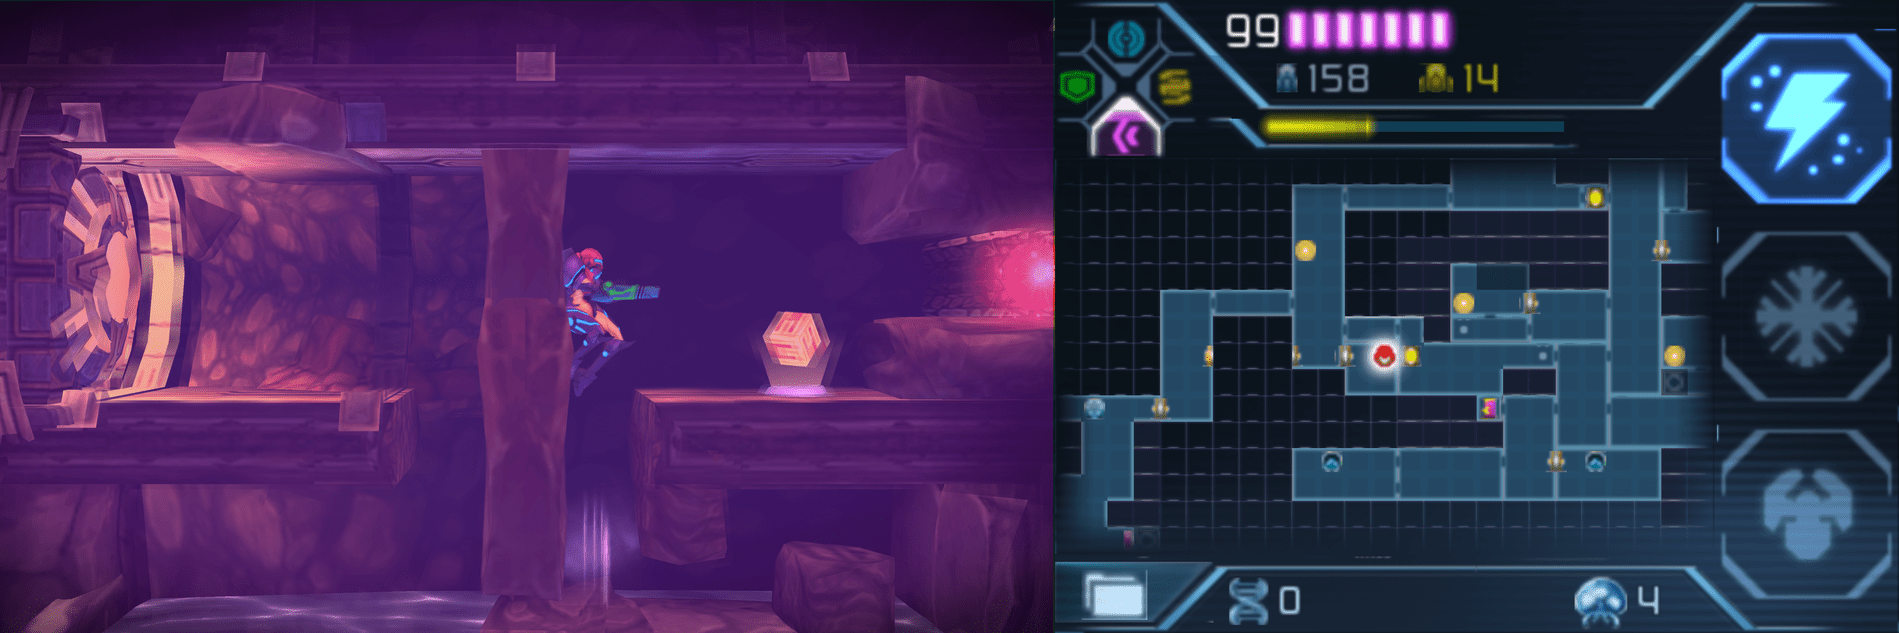
Aeion Tank #6
Location: Area 6 (First Visit)
Requirements: Grapple Beam, Phase Drift, Bombs, Missiles
Right before the Diggernaut battle room, you’ll see a bunch of red weeds, so navigate towards the left side tunnels until you hit the ground. Destroy the Grapple block and then jump up to the small nook in the upper left corner. Activate your Phase Drift, shoot the block directly in front of you, fire a missile to destroy the missile block across from you, and then roll over (the Phase Drift should be on for this still!). Yank the movable Grapple block over to the left and then drop down; roll up above the two pitfall blocks and drop down the newly opened tunnel to grab AEION TANK #6!
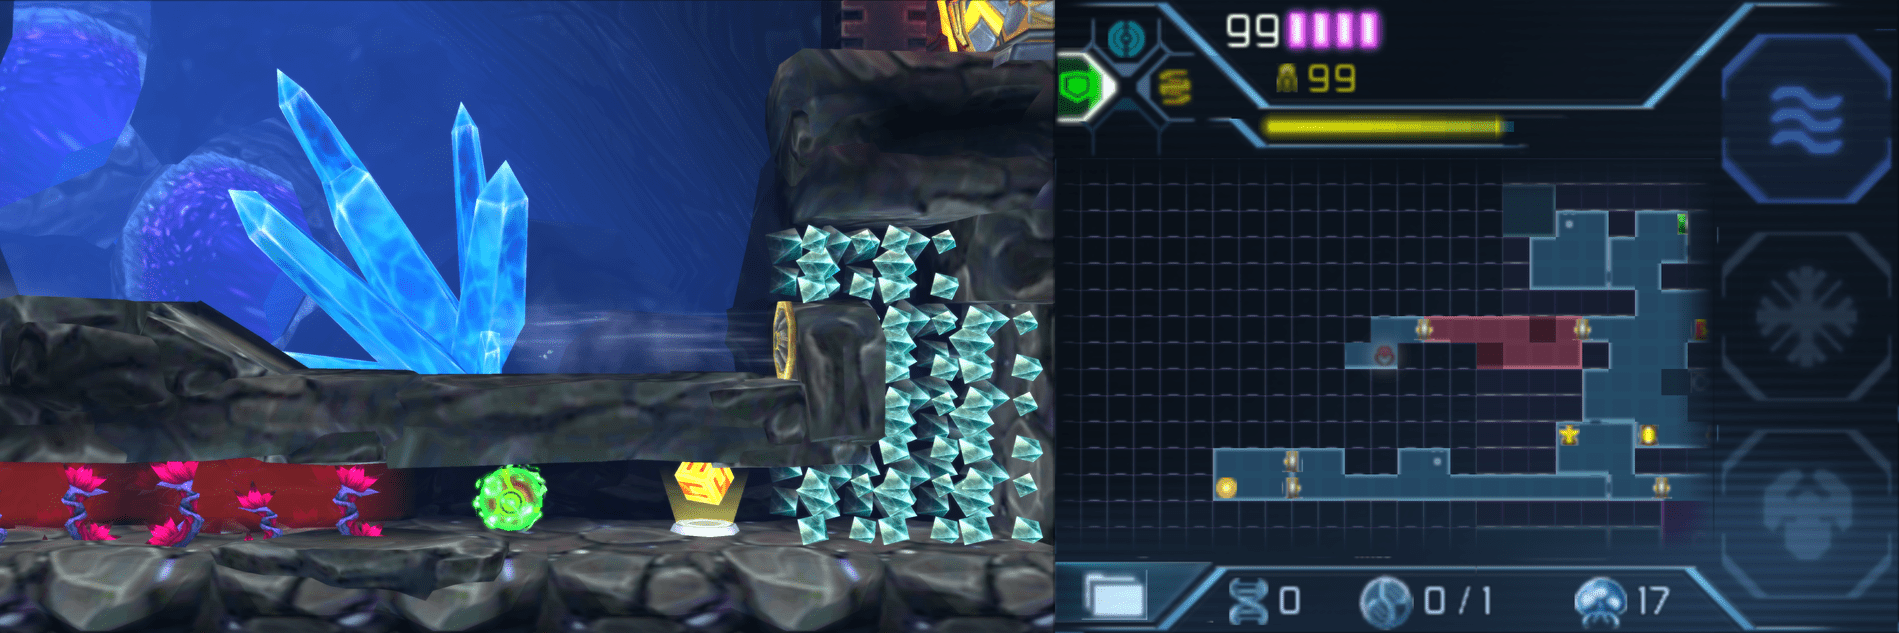
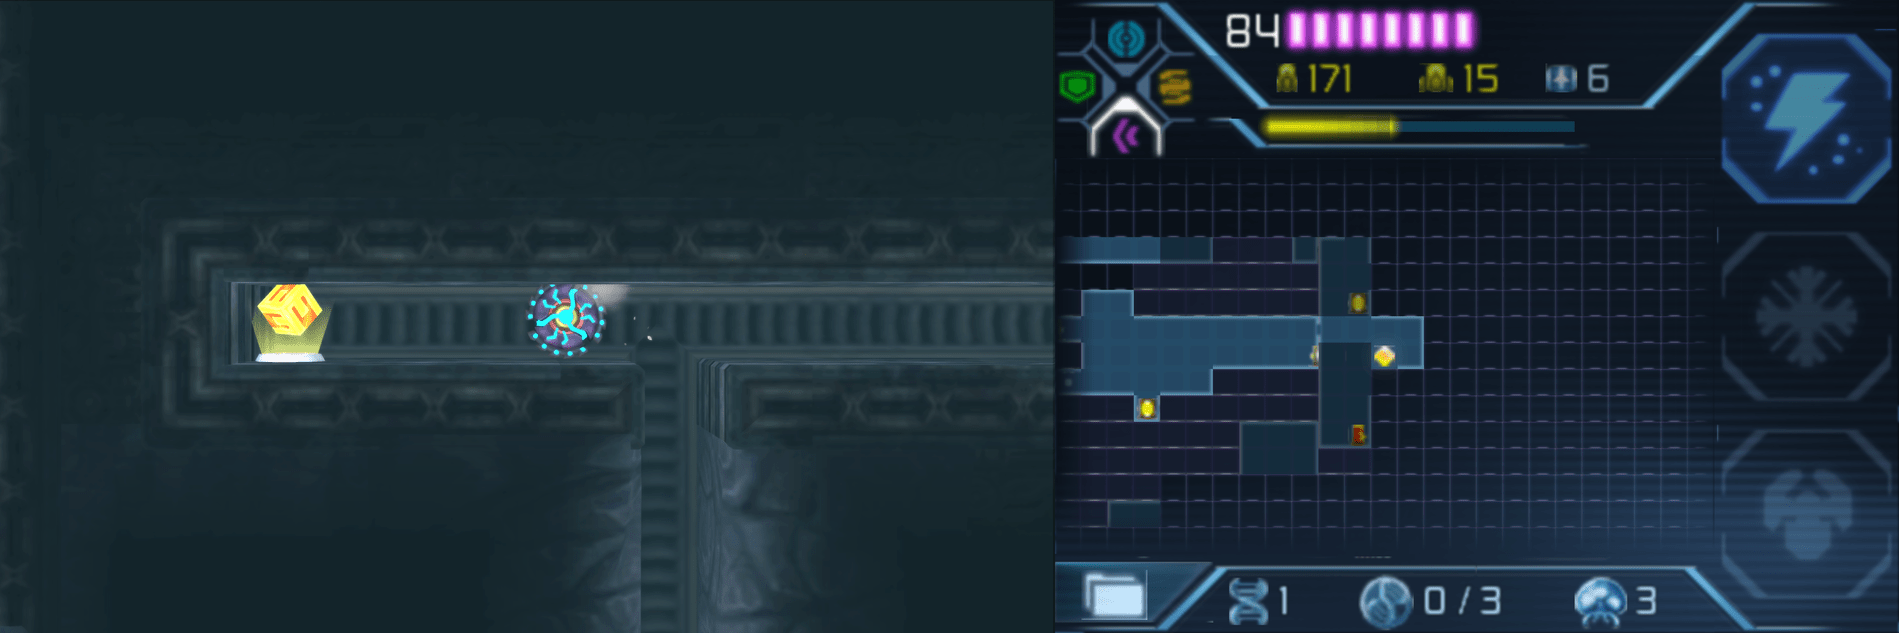
Aeion Tank #7
Location: Area 1 (Second Visit)
Requirements: Plasma Beam, Wave Beam, Phase Drift, Missile
Get yourself to the right of Area’s 1 singular hot zone door. Before you go in, you should see a Plasma Beam door and an Aeion Tank; shoot the Gryncore off the door using a combination of your Wave and Plasma Beam, and then activate your Phase Drift and shoot the door open again. Quickly run to the other side and enter the door before it closes. Keeping your Phase Drift on, drop down into the water, and when it’s up to your waist, fire a missile through the crack in the wall straight ahead at the block on the other side. A missile block will be destroyed, so quickly navigate your way over and up through the crystals before the missile block respawn to grab AEION TANK #7!
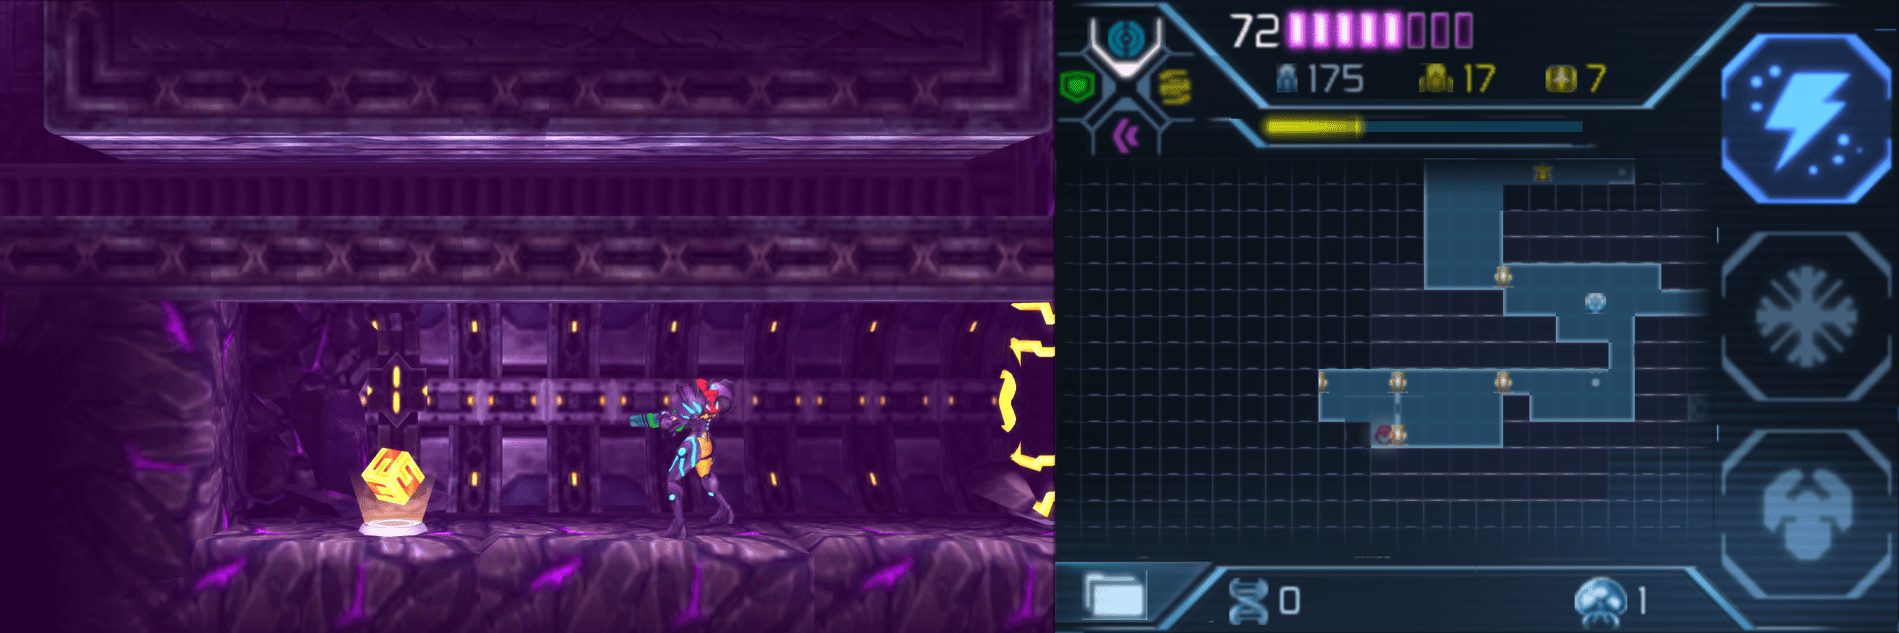
Aeion Tank #8
Location: Area 7 (First Visit)
Requirements: Grapple Beam, Spider Ball, Power Bombs
Make your way back into the room you grabbed Energy Tank #8 from, with the water, weeds, and spikes. You’ll see a small tunnel in the upper left of this room, so jump up and then yank a Grapple block to the right. Drop back down and then jump up in the opening in the ceiling to see that, now wouldn’t you know it, the Grapple block is covering that darn fan that was blowing downwards earlier. Get yourself on the wall and Spiderspark in between the weeds and spikes; you’ll go flying the the far wall, where all you’ll need to do is follow the tunnel downwards and you’ll grab AEION TANK #8!
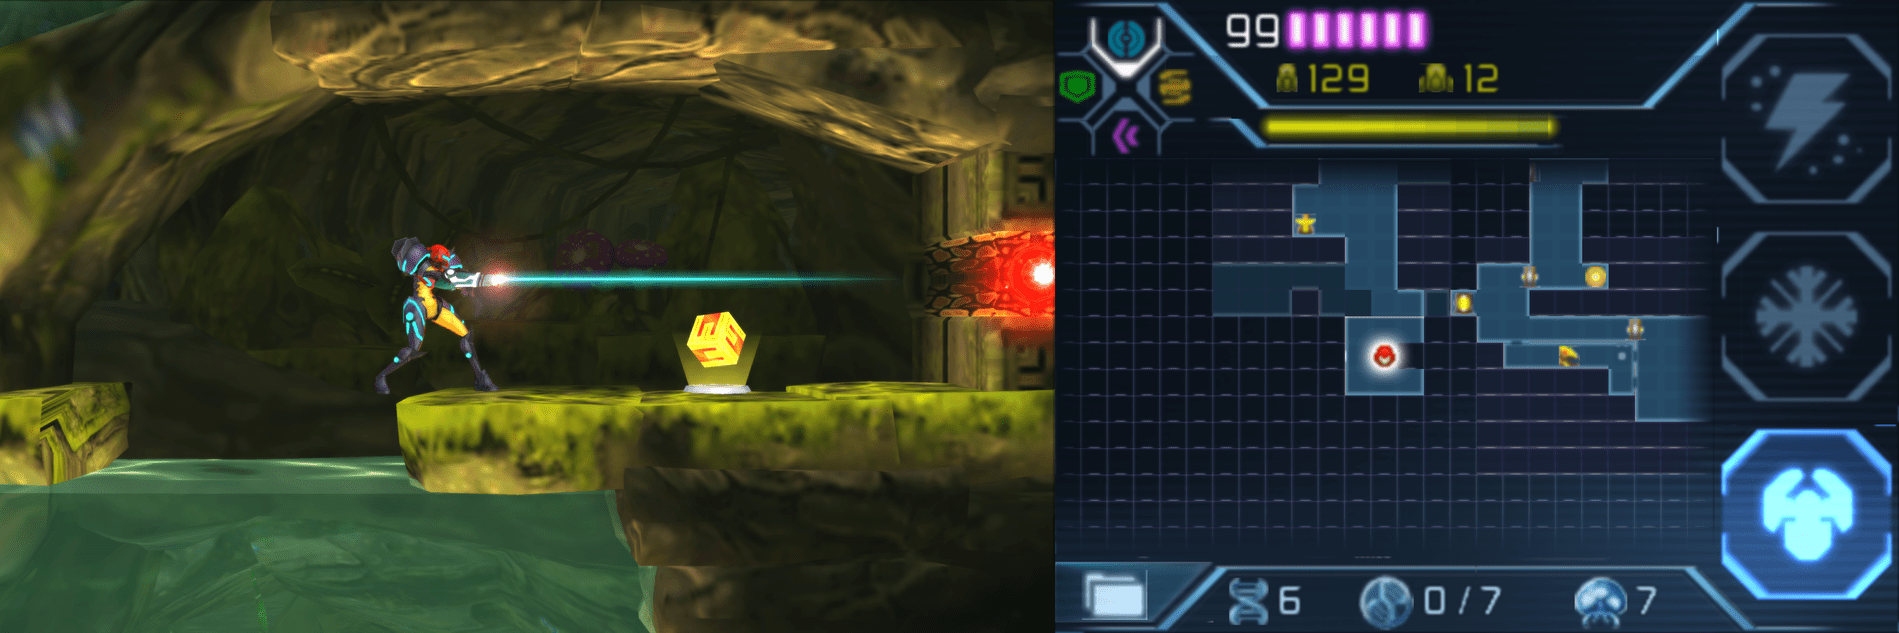
Aeion Tank #9
Location: Area 7 (First Visit)
Requirements: Grapple Beam, Missiles
Get into the second last room of Area 7 before the connecting elevator room to Area 8. Get to the lower platform, destroy the missile block again, and slip into the tunnel. You’ll shoot another missile through a small crack to destroy a block and then destroy a second red Grapple block. Get out of the tunnel and make your way back to the opening you just cleared. You’ll probably need to destroy the missile block again, so do so and climb into the tunnel; you’ll drop down further and be confronted with an Autrack and Autoad. Destroy them and go through the Blast Door on the left. You’ll finally be rewarded with AEION TANK #9!
Aeion Tank #10
Location: Surface Area (Third Visit)
Requirements: Grapple Beam, Phase Drift or Spider Ball
After passing the Teleportal and the Save Station, enter the Spazer Beam door. This new room will have a tricky puzzle inside of it! Jump up on the right side and you’ll see a blue Grapple block across from you. Grapple over to it, BUT LET GO of your grapple when you’re in between the orange spikes. As you fall, hug the left side, and you’ll land on a small platform (the right side is pitfall blocks); aim above you and latch onto the blue Grapple block above you and tuck into the Morph Ball tunnel. Use either the Spider Ball on the roof or the Phase Drift to get across the – all together now! – bridge of pitfall blocks and you’ll grab AEION TANK #10!

Aeion Tank #11
Location: Area 2 (Second Visit)
Requirements: Grapple Beam, Bombs
get to the long shaft room on the westside of Area 2 (there’s a hot zone that leads to a Missile Recharge Station in this room if you need a visual reference to use on your map!). Once there, drop down until you see a couple of crystals on the right-side wall. Have the Infant destroy them and then Spider Ball it across the roof the now-opened up area. Lay a bomb and SUPER MISSILE EXPANSION #20 will reveal itself.
Almost directly across from that is a wall that can be broken on the left side (use your Scan Pulse to find it!). Bust in and grapple across using the blue Grapple block and you’ll land directly on top of AEION TANK #11.
Aeion Tank #12
Location: Area 2 (Second Visit)
Requirements: Power Bombs, Plasma Beam, Missiles
Head to the room directly above where you acquired the High Jump Boots (they don’t connect, so take another way; just using this as a landmark!). Go through the Plasma Beam door and get next to the Morph Ball tunnel and the fan. Jump up, lay a Power Bomb, and immediately after fire a missile straight ahead. Quickly roll through the tunnel to grab AEION TANK #12.
Aeion Tank #13
Location: Area 3 (Second Visit)
Requirements: Spazer Beam, Space Jump or Grapple Beam
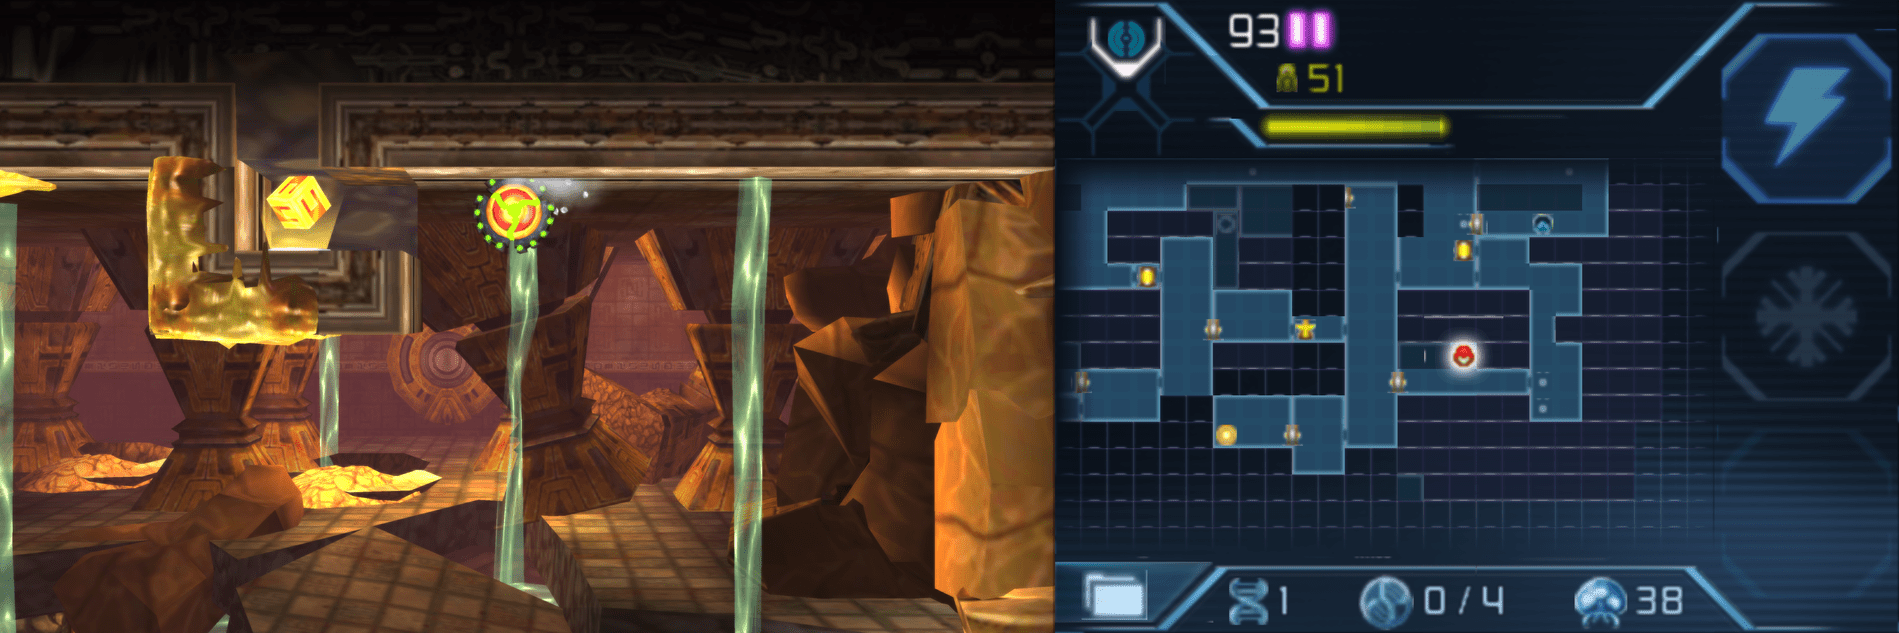
You’ll want to start off at the Teleportal in the lowest point of Area 3. When you’re ready, exit the Teleportal and slip into the long shaft you find yourself in. Drop pretty much to the bottom of the shaft and take the Blast Door on your right. Go through, and you’ll find yourself in another long shaft room; head up about half-way until you see a Morph Ball tunnel on the right wall. Slip through and then either grapple or simply Space Jump upwards in between the yellow-gunk-covered tunnel and blast open the Gigadora with your Spazer Beam. AEION TANK #13 will be waiting for you on the other side

Aeion Tank #14
Location: Area 4 (Second Visit)
Requirements: Lightning Armor, Bombs
Drop down to the second level of the Diggernaut chase scene and head towards the right. You’ll come across a small tunnel submerged in water covered in red weeds that’s under the main walkway. Use your Scan Pulse, activate your Lightning Armor and lay some bombs to gain entry into the tunnel – AEION TANK #14 will be waiting for you there!
Aeion Tank #15
Location: Area 5 (Second Visit)
Requirements: Power Bomb, Lightning Armor, Baby Metroid
Exit back into the Atrium room and then jump up and over, dropping down on the right side. About halfway down, pretty close to the Missile Recharge Station, you’ll see another door with a yellow shield on it. Blast it away with a Power Bomb and enter the new room. You can either charge up your Lightning Armor and roll through the weeds and navigate the blocks there, or you can slip into the lower tunnel and roll towards the right, letting the Baby Metroid eat the crystals blocking the tunnel’s exit. Either way, you’ll pop right out with AEION TANK #15 awaiting you! Excellent – your Aeion gauge is now maxed out!