


Metroid Prime Hunters Walkthrough: Bosses
Here you’ll find a detailed list of strategies, information, and tips for fighting the many bosses of Metroid Prime Hunters. Before we begin, though, first:
A Note About Metroid Prime Hunters Bosses
Hunters does their boss encounters a bit differently than other Metroid games in that it relies less on strategies and pattern recognition as it does on your ability to perform and hit the enemy you’re fighting. There are multiple fights where you will know exactly what you need to do and where you need to fire within the first couple seconds of the battle – the challenge comes from being able to actually do it!
Due to this, my ability to help you out with these boss encounters is going to be… limited, let’s just say. I can still provide some tips and tricks, plus which weapon will serve you best for a few of these baddies, but you’re ultimately going to be doing most of the heavy lifting yourself. When I say “hit Boss X here”, that may sound easy enough, but be a pain in the butt to actually do!
Nevertheless, let’s get to the bosses! They will be broken up into two sections – Bosses and Hunters. Hunter encounters will be written from the perspective of your first encounter with them, using the toolset that you had at the time. Keep in mind, Hunters will randomly spawn up in designated areas after, so feel free to battle them with whatever weapons you want, but keep in mind – if you lose, whatever Hunter defeated you will steal an Octolith and you’ll have to fight and defeat them again to get it back!
Hunter Battles
Boss Battles
- Cretaphid V1
- Slench V1
- Cretaphid V2
- Slench V2
- Slench V3
- Fire Spawn
- Cretaphid V3
- Arctic Spawn
- Cretaphid V4
- Slench V4
- Gorea
- Gorea V2
HUNTER BATTLES
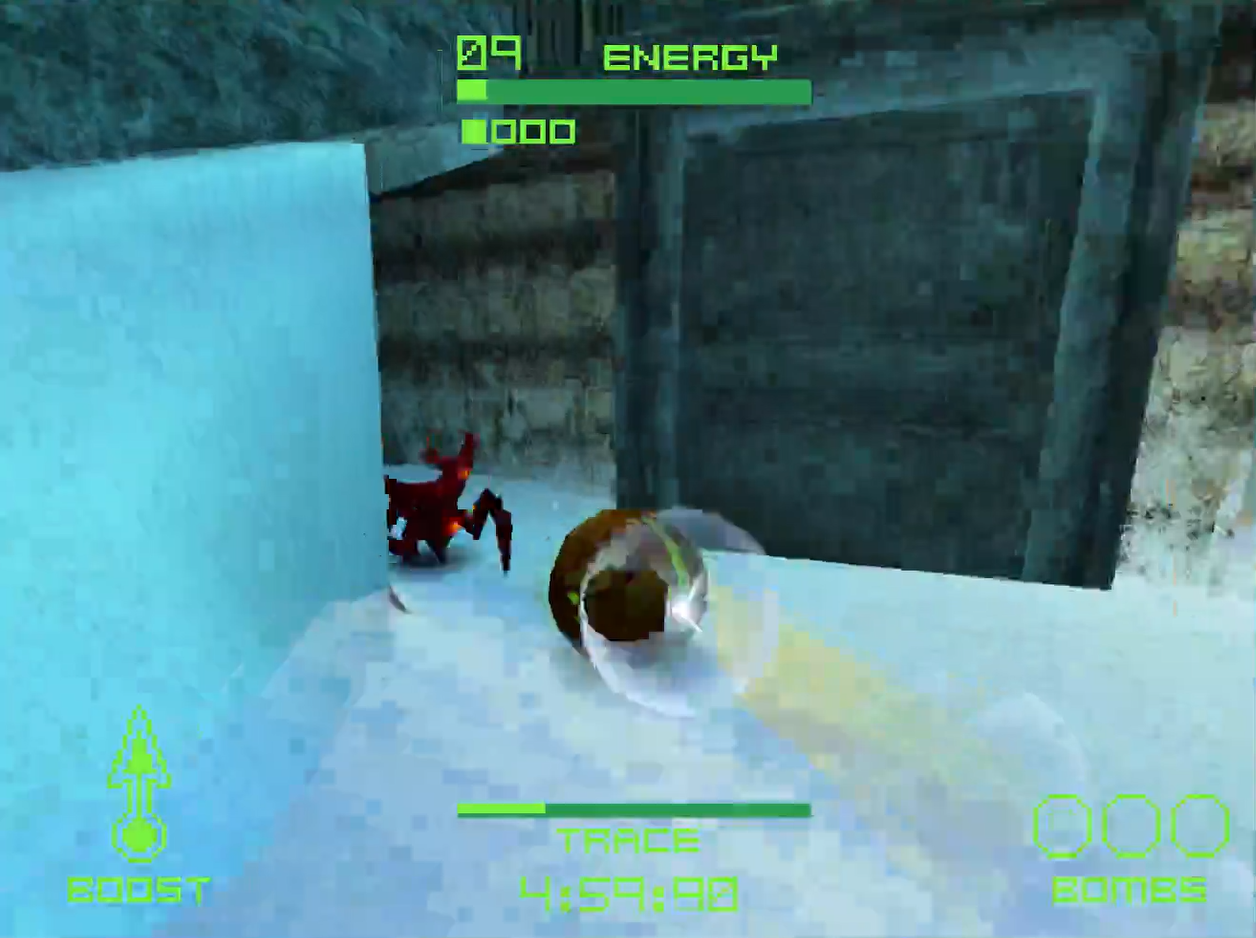
Kanden
Alt Form: Stinglarva
Weakness: Battlehammer
The first Hunter you’ll encounter on your journey is Kanden, a genetically engineered member of the Enoema specifies, built by the Enoema Living Weapons project to be the ultimate fighter! Fortunately for us, he sounds tougher than he actually is.
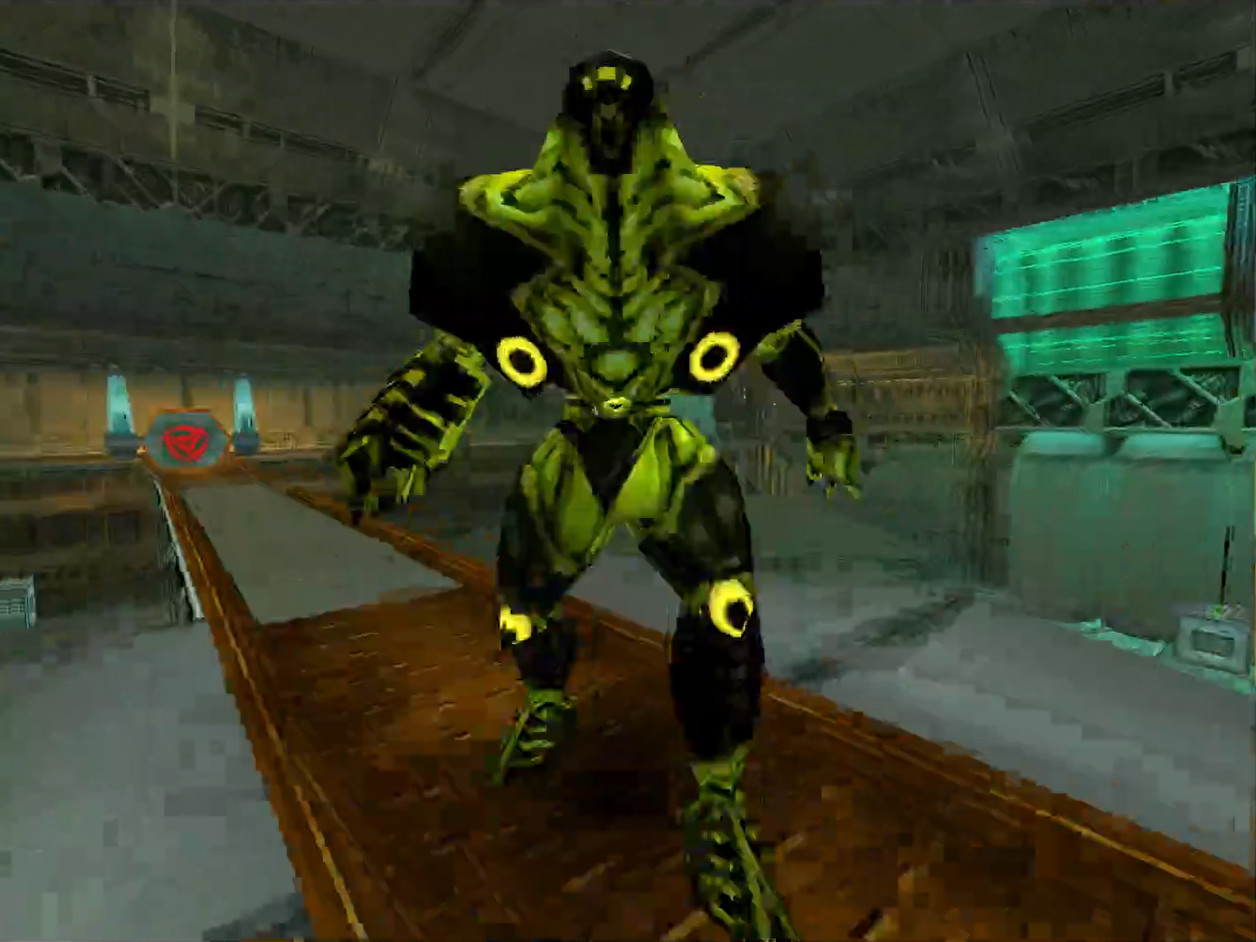
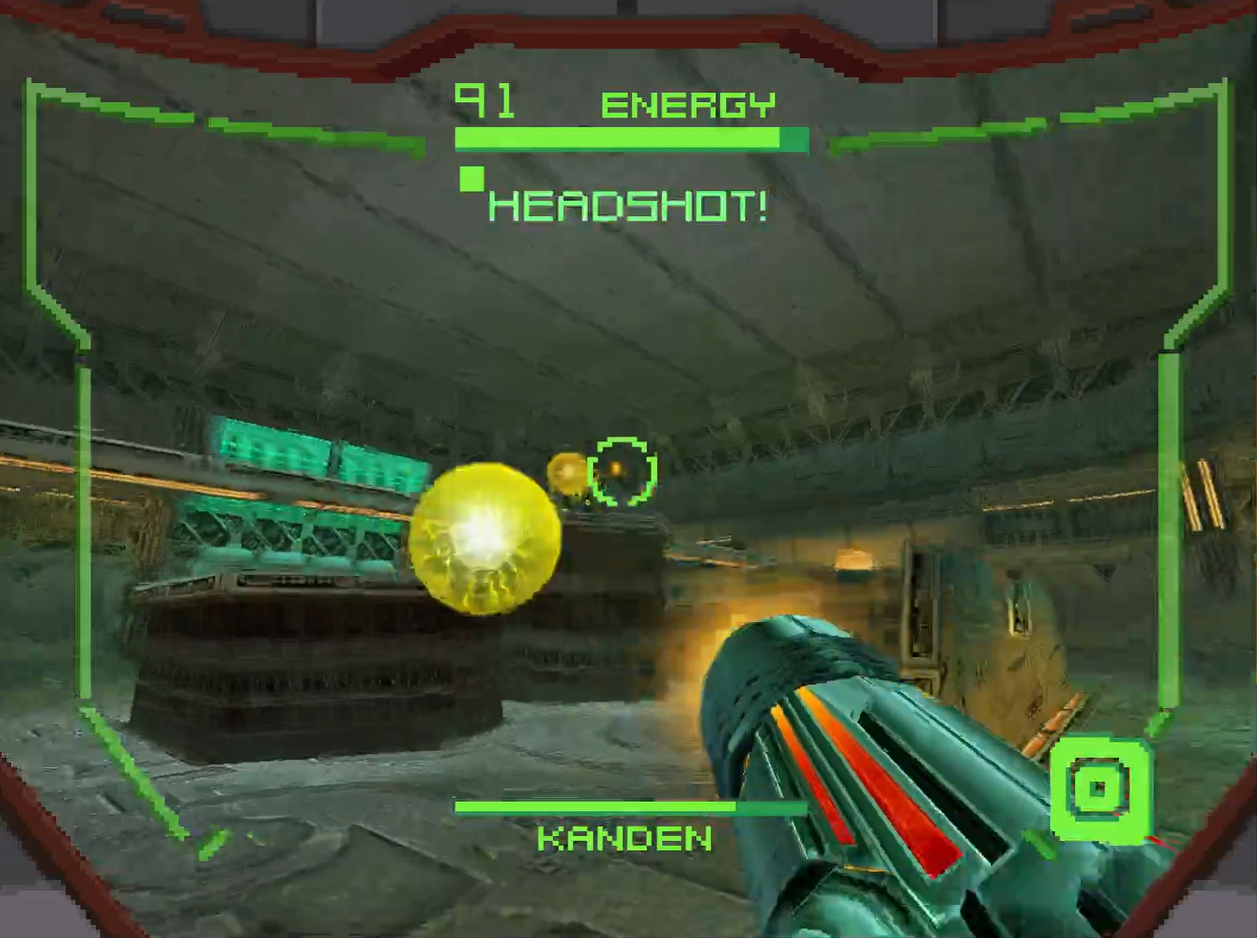
You’ll first encounter Kanden fairly early in the game, in Celestial Archives’ Data Shrine 03. Kanden moves fairly fast first such a big guy and utilizes the Volt Driver, which is actually fairly similar to your Power Beam, except more powerful but with a slower fire rate. The Volt Driver has a charged shot that can hone in on you, so he careful.Kanden will be on top of the catwalk in the room and moving up and down constantly, so targeting him will be tricky. Fortunately, Kanden has a big body which is easier to hit than some other Hunters. Unfortunately, he has a smaller sized head, so headshots will have to be precise to land.
Kandens alt-form is Stinglarva, which is almost like a slug that slithers on the ground, albeit quickly. His Stinglarva will drop little mines that will look familiar to Morph Ball bombs, so you’ll want to land enough hits quickly enough to get Kanden back to his regular form. Spam missiles and charged shots, and if you find you’re not connecting, Morph down and drop some bombs for him to slither over.
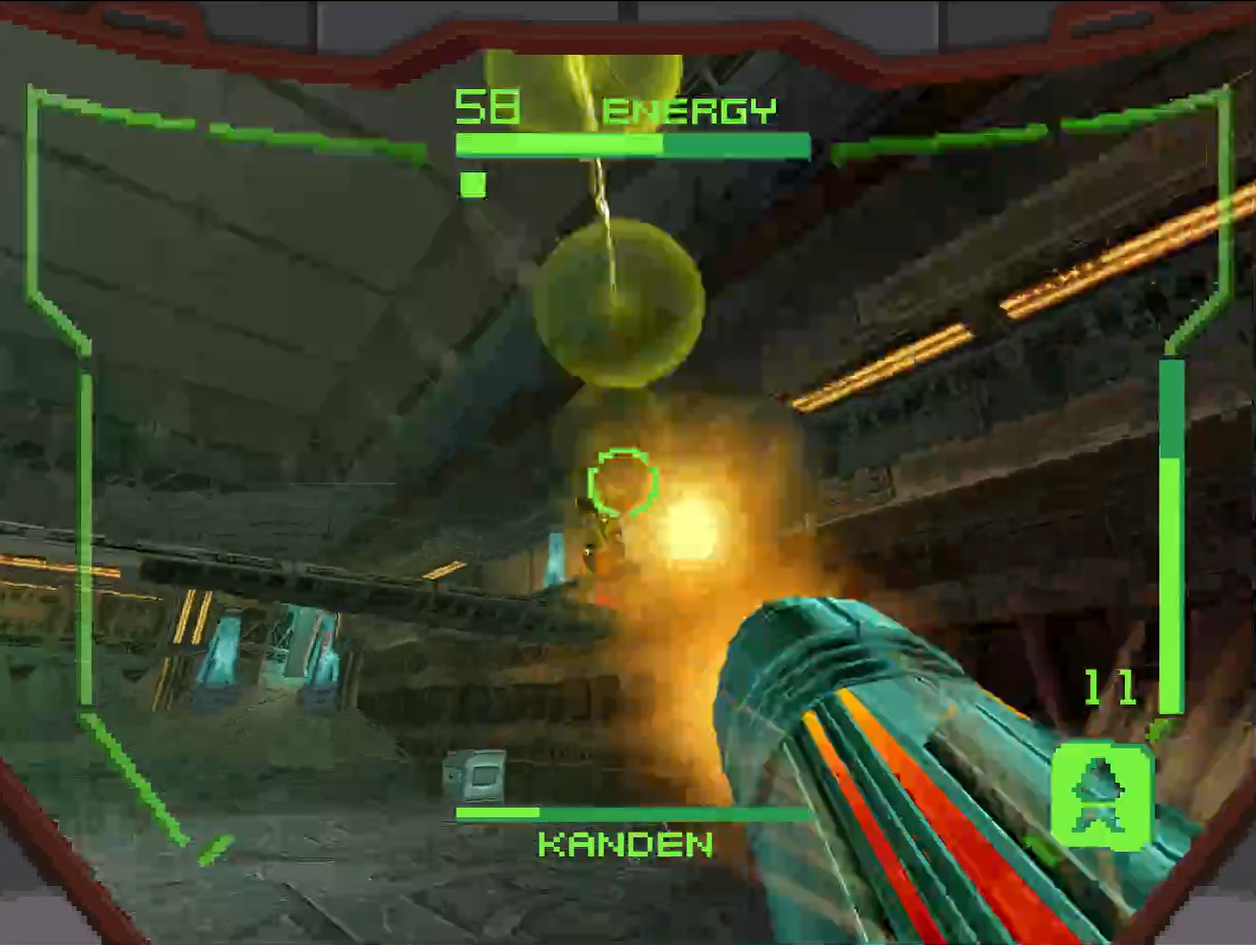
Kanden is weak to the Battlehammer, which unfortunately, you won’t have when you first fight him, so you’ll need to make do with Charged Shots, missiles, and your Morph Ball for now. Kanden is sometimes a bit hard to hit, but not an opponent who will give you a run for your money.
Spire
Alt Form: Dialanche
Weakness: Judicator
The second Hunter we’ll face off against is a bit of tragic figure; an alien named Spire, last of race of creatures known as the Diamonts, who vanished from the planet Mondreus. Spire is searching for his people, and is after the Ultimate Power to help him in his quest. Spire can be tricky, but ultimately, no match for Samus.
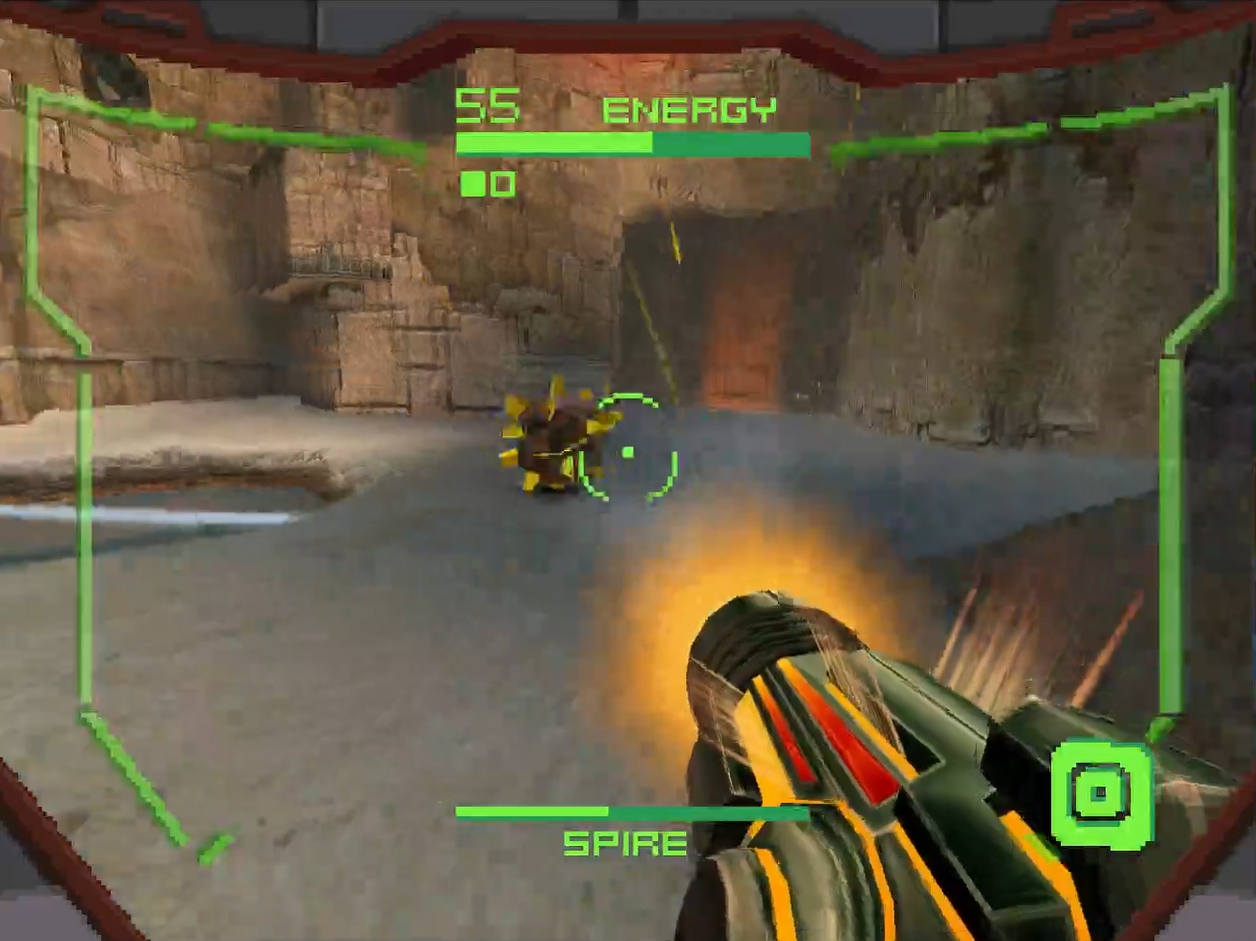
Spire uses the Magmual as his primary weapon, which obviously has fire properties attached to it. Getting his will burn you, so stay clear! Fortunately, like the Battlehammer, the Magmaul’s rate of fire is slower, and its shots arc upwards before falling down, which will give you an extra second to get out of the way. Where Spire really can be dangerous is using his alt-form, the Dialanche. This is big, moves fairly quickly, and has rocks that protrude out to attack you, making its range of attack huge!
Your first encounter with Spire will be in a few spots in the Alilnos High Ground; you’ll start off firing at Spire, who will be on a perch above you firing Magmaul shots down on you. Once you blast him a few times, Spire will jump down and usually bust out the Dialanche in the close quartered room (this is right before you get the second Shield Key on your first trip to Alinos). Once you’ve damaged him enough, Spire will retreat back into the High Ground.
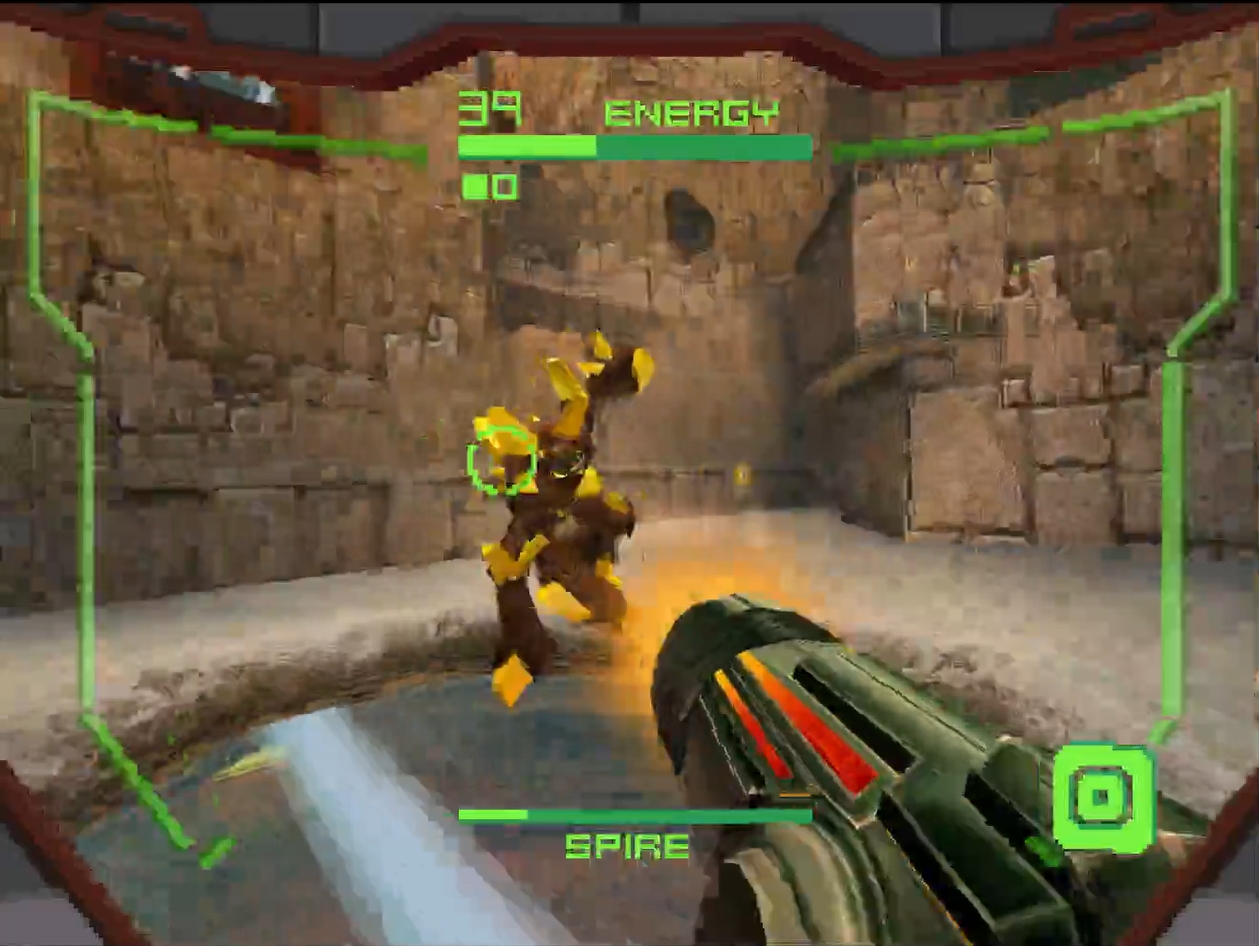
Now you can go and have a good ol’ fashioned slugfest with the Diamont, one the extra space will serve you well with, as it makes avoiding the Dialanche easy. You won’t have the Judicator for your first encounter, but when you have it, it will make sort work of Spire. Keep attacking and you’ll best this Hunter in no time.
Weavel
Alt Form: Halfturret
Weakness: Volt Driver
Our third Hunter to step up to Samus is Weavel, an elite Space Pirate warrior from a unspecified team that has actually battled Samus once before, in Brinstar! Samus left Weavel for dead there once, and hopefully, the second time will go just as poorly for this Hunter.
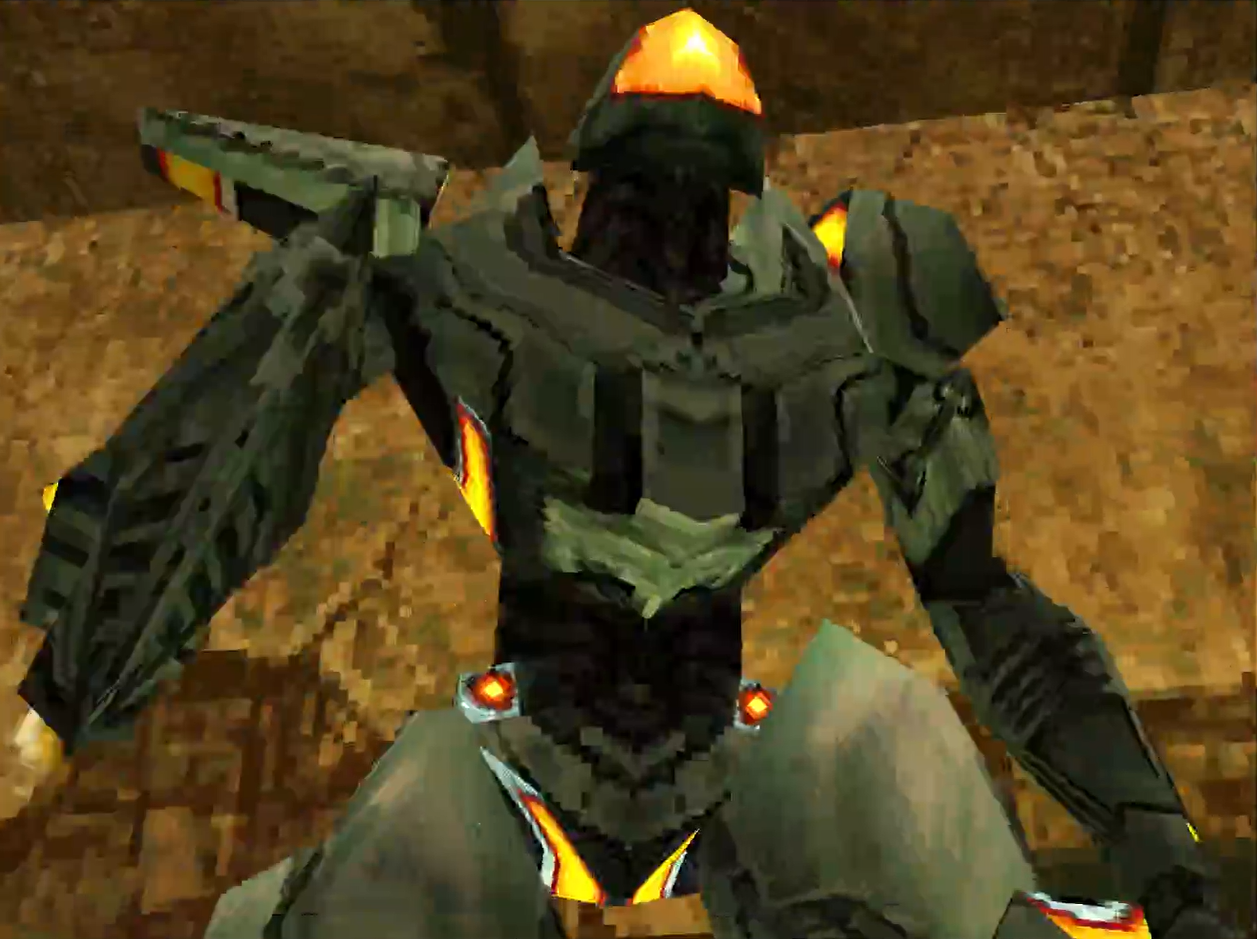
Weavel is a sort of hybrid Hunter – both quick, but also decently powerful. He’ll attack you with the Battlehammer, which fires concussive blasts in an arc that will create a blast radius when it lands on any surface that will damage you. The Battlehammer doesn’t have the quickest rate of fire, and it takes a moment for the shots to lob their way back down to actually hit you, so as long as you’re moving in quick circular directions around Weavel, you should be fine.
As is becoming a pattern, we don’t have the weapon that Weavel is weak to, the Volt Driver, in our first encounter with him, so we’ll have to make do with our Power Beam and missiles. Additionally, the first time that you encounter Weavel, you’ll actually be on your way from the Stronghold Void, meaning you’ll only have a few minutes to put the Space Pirate away before it’s game over. You’ll be able to deal some pretty quick damage in the upper part of the Echo Hall room, and when you land enough hits, Weavel will switch into his alt form, the Halfturret, and go into the lower part of the room.
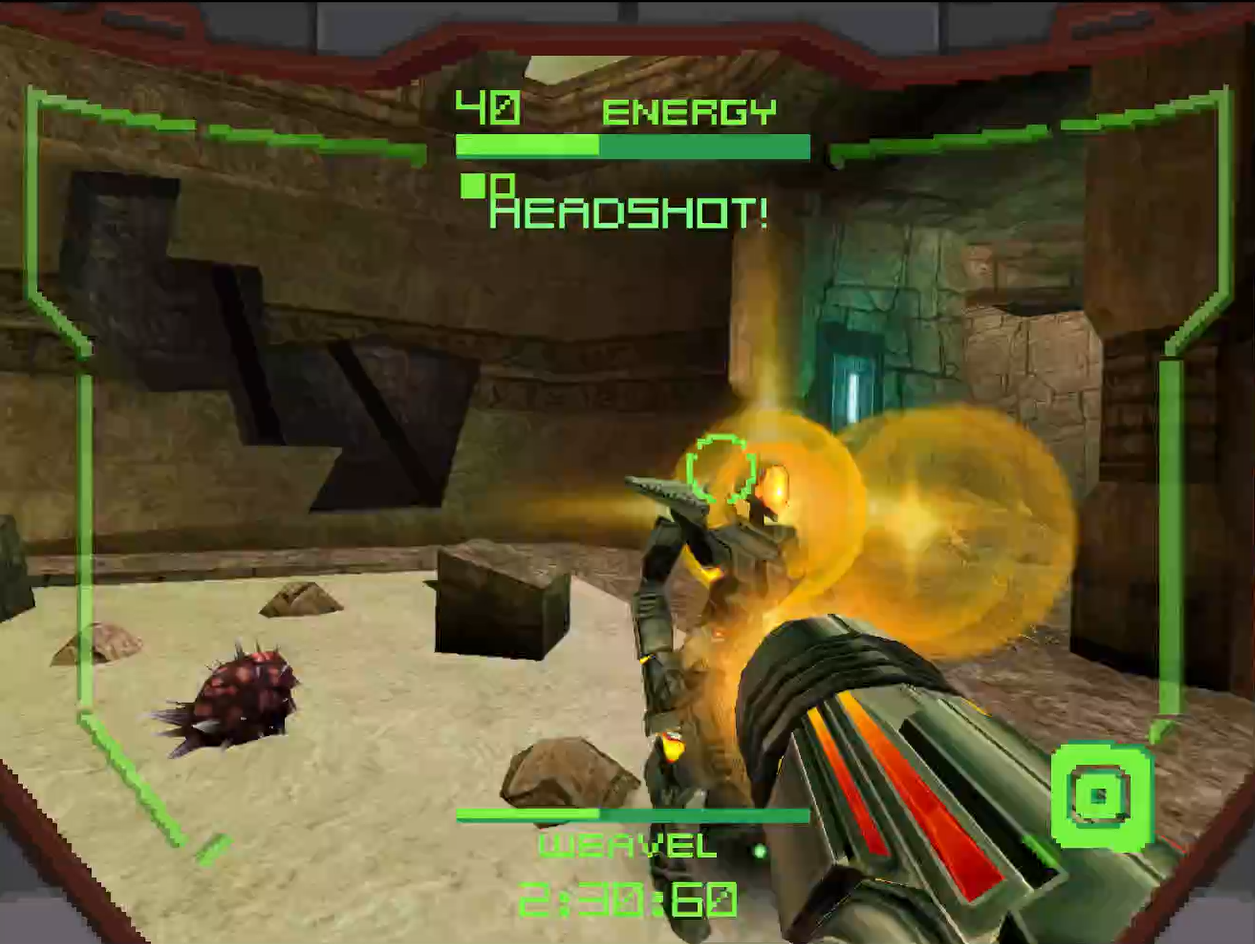
The Halfturret is both good and bad; bad, in that in allows Weavel to drop a turret that will constantly be shooting at you; good, in that this turret is stationary, making landing hits a lot easier. Almost every battle I’ve fought again Weavel has seen the Pirate favor close quarters combat, so blast away until you’ve put him down for the count… again!
Sylux
Alt Form: Lockjaw
Weakness: Imperialist
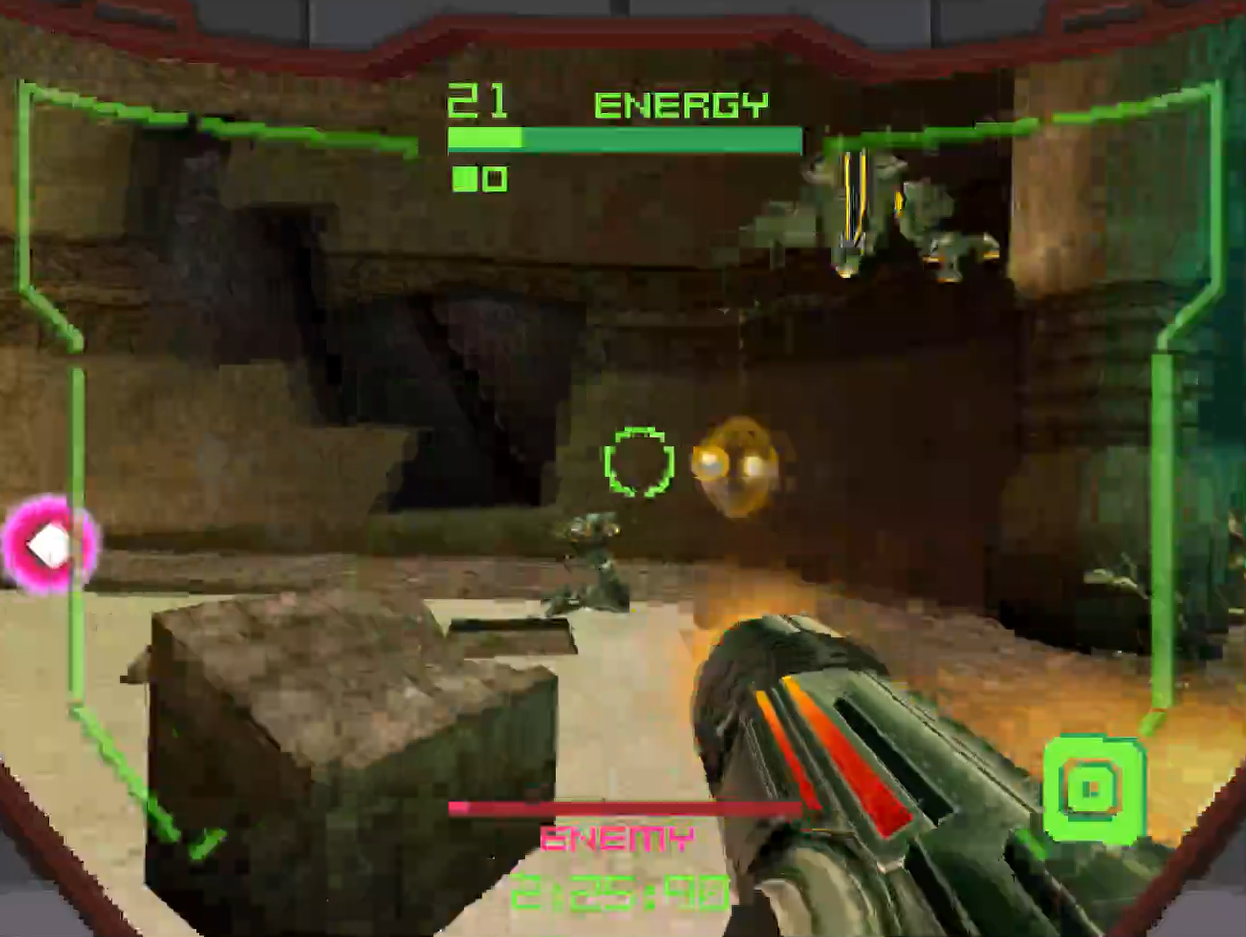
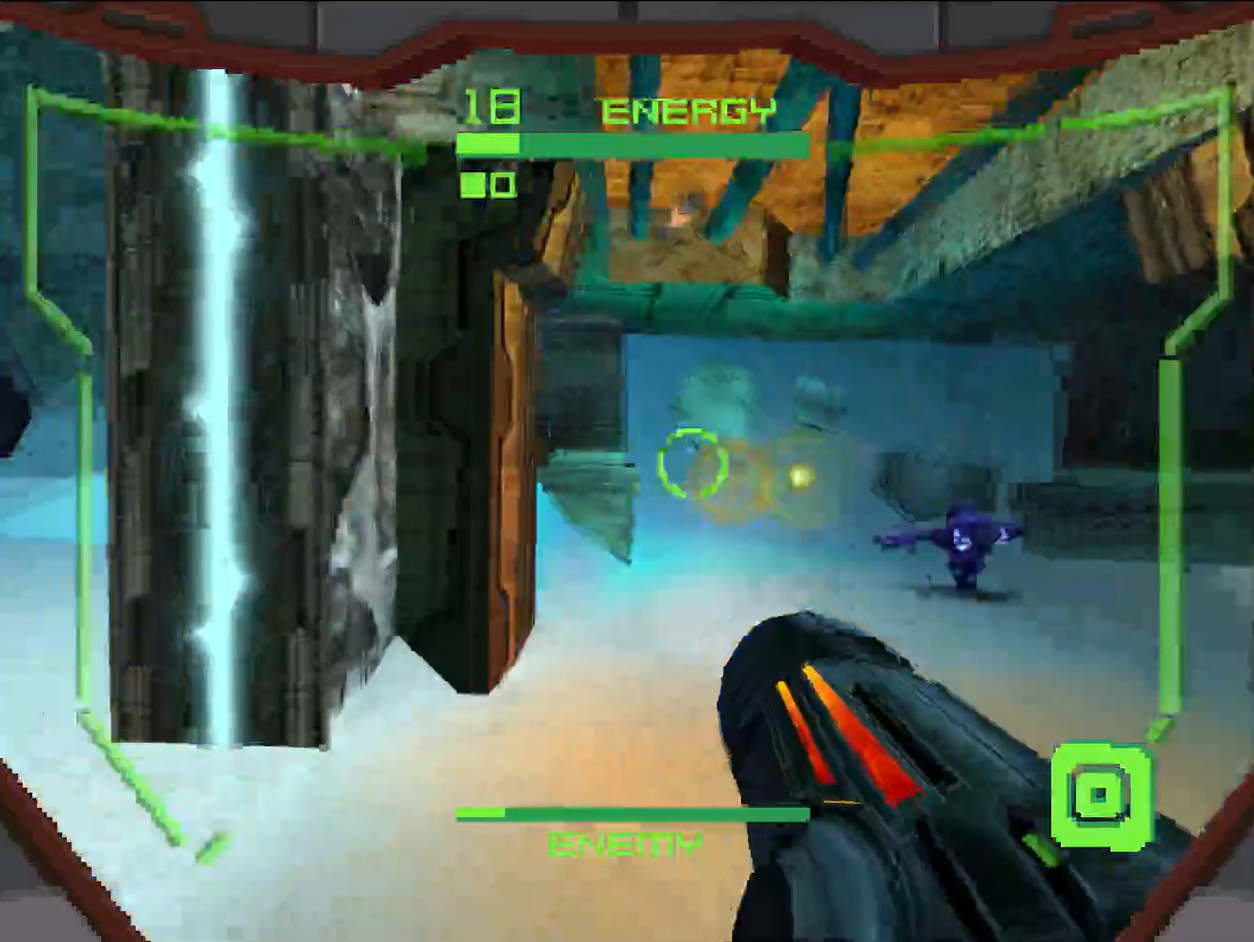
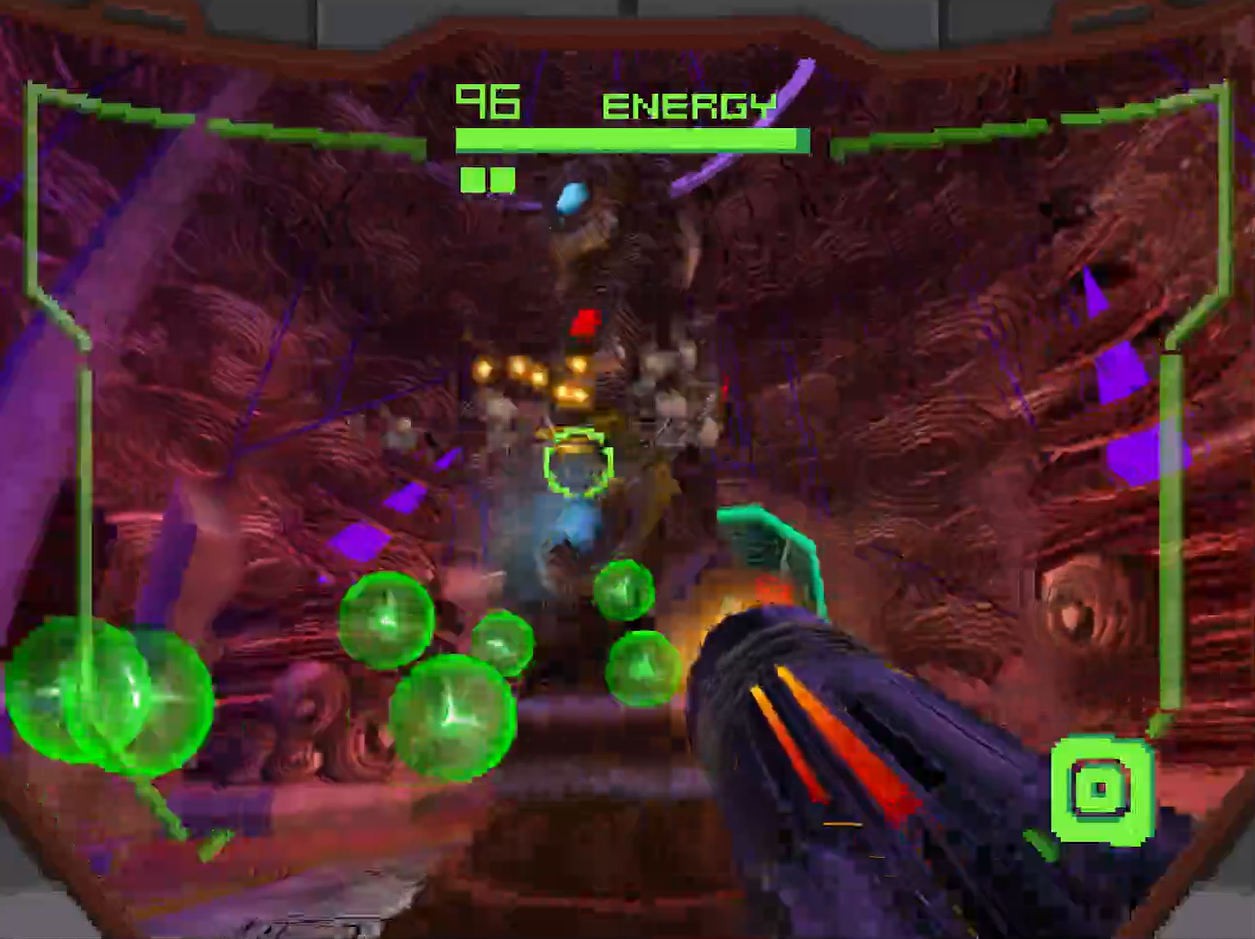
The fourth Hunter you face off with is easily the most famous of the bunch – the renegade known only as Sylux, a Hunter with a deep grudge against the Galactic Federation and a penchant for stealing classified technology from them. Sylux made his debut in Metroid Prime Hunters before moving on to bigger and better things in the series!
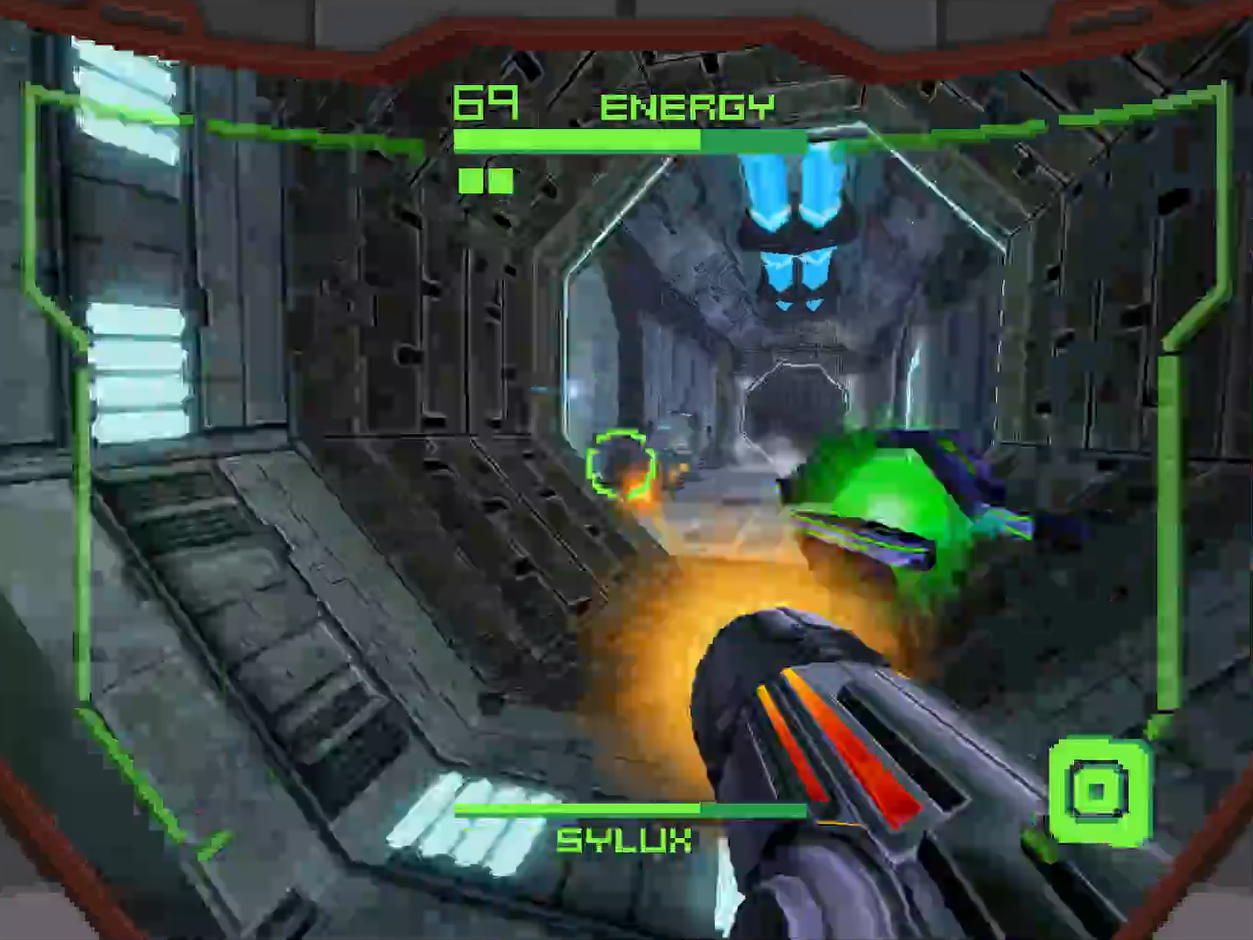
Sylux is a a definite step up from the other Hunters you’ve encountered in terms of his difficulty. Sylux is fast, the Shock Coil has crazy range, his alt-form is powerful, and he’s got some backup in your first fight. This will likely be the toughest test you’ve faced in the game yet, and naturally, your first encounter will see you lacking the weapon Sylux is weak to, the Imperialist.
The first thing you’ll notice about this mysterious Hunter is its weapon of choice, the Shock Coil. This is a unique weapon in that it doesn’t fire shots, but rather, it emits a continuous burst of neutrinos (for all you non-scientist out there, a neutrinos is “a subatomic particle that is very similar to an electron, but has no electrical charge”, and is “an elementary particle that interacts via the weak interaction and gravity“). Long story short – this hurts, and it will latch onto the nearest target it sees, draining energy. The longer the Shock Coil is attached, the more energy it drains. The range of the Shock Coil is quite large too, and breaking free once it’s on you is no treat either, as you’ll need to hit Sylux with enough shots to get him to break the hold. The silver lining is that the damage it inflicts starts off relatively low, so you won’t lose all your life right away.
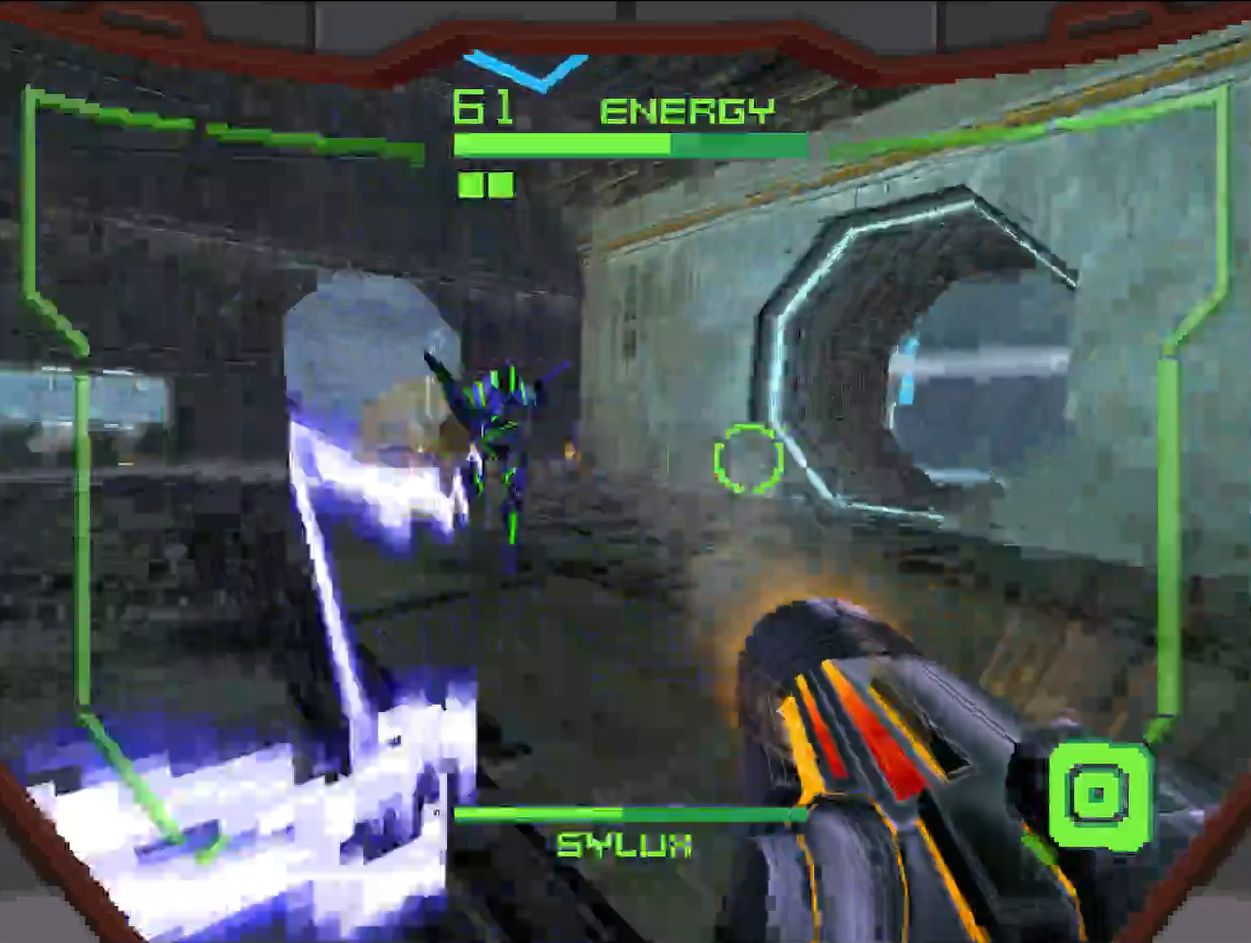

Sylux also has an alt-form known as the Lockjaw, an incredibly fast and agile Morph Ball-esque form. Sylux will be able to lay mines using the Lockjaw, just like the Morph Ball, but Sylux will also be able to string two of those mines together to create a tripwire. Needless to say, you’ll want to avoid that!
As for the actual battle, the first time you’ll encounter Sylux is in VDO’s Weapon Complex. You’ll run right into the Hunter and need to chase him down a bit. If Sylux grabs you with the Shock Coil, try and blast him with missiles. Continue fighting down the hallway, watching out for Lockjaw mines, and Sylux will eventually lead you outside to a open air courtyard. Get ready, because Sylux will call his ship, the Delano 7 (scan this now since this is your only shot to do so!) which will fire missiles at you, in addition to his Shock Coil going crazy and the Lockjaw mines everywhere.
Just keep up your attack, ignore the Delano 7, and fire away at Sylux as much as you can with either missiles, Morph Ball bombs, or honestly, just rapid fire Power Beam shots. Sylux is quick, and will try and duck and dodge out of your line of sight, so just keep him in your line of vision as much as you can. Sylux doesn’t have a ton of health, thankfully, so keep it up and the Hunter will retreat (for now).
Noxus
Alt Form: Vhoscythe
Weakness: Magmaul
The fifth Hunter encounter will actually you stumble across a firefight between Trace, who we’ll touch on in a bit, and the righteous Hunter known as Noxus, a member of the spiritual Vhozon species, who wants to collect the Ultimate Power to make sure no bad guys get their hands on it, while using that Power to administer justice on anyone deemed evil.

Noxus is a Hunter centered around the Ice element, which means that your most effective weapon to use will be the Magmaul, which (say it with me!) we don’t have quite yet in our initial encounter. For now, stick with Power Beam and Missiles to lay in the hurt. Noxus will use the Judicator, an ice-based Beam weapon that will freeze you if it hits you. Noxus will also use a close quarters area-of-effect attack that will once again leave you completely frozen for a few seconds.
The Vhoscythe is Noxus’s alt-form, which will turn the Hunter into a spinning top, kinda like what we see in the movie Inception, though this spinning top deals some serious damage if it hits you. Fortunately, countering it isn’t that hard, and you’ll have enough space to put some distance between yourself and the Vhoscythe.
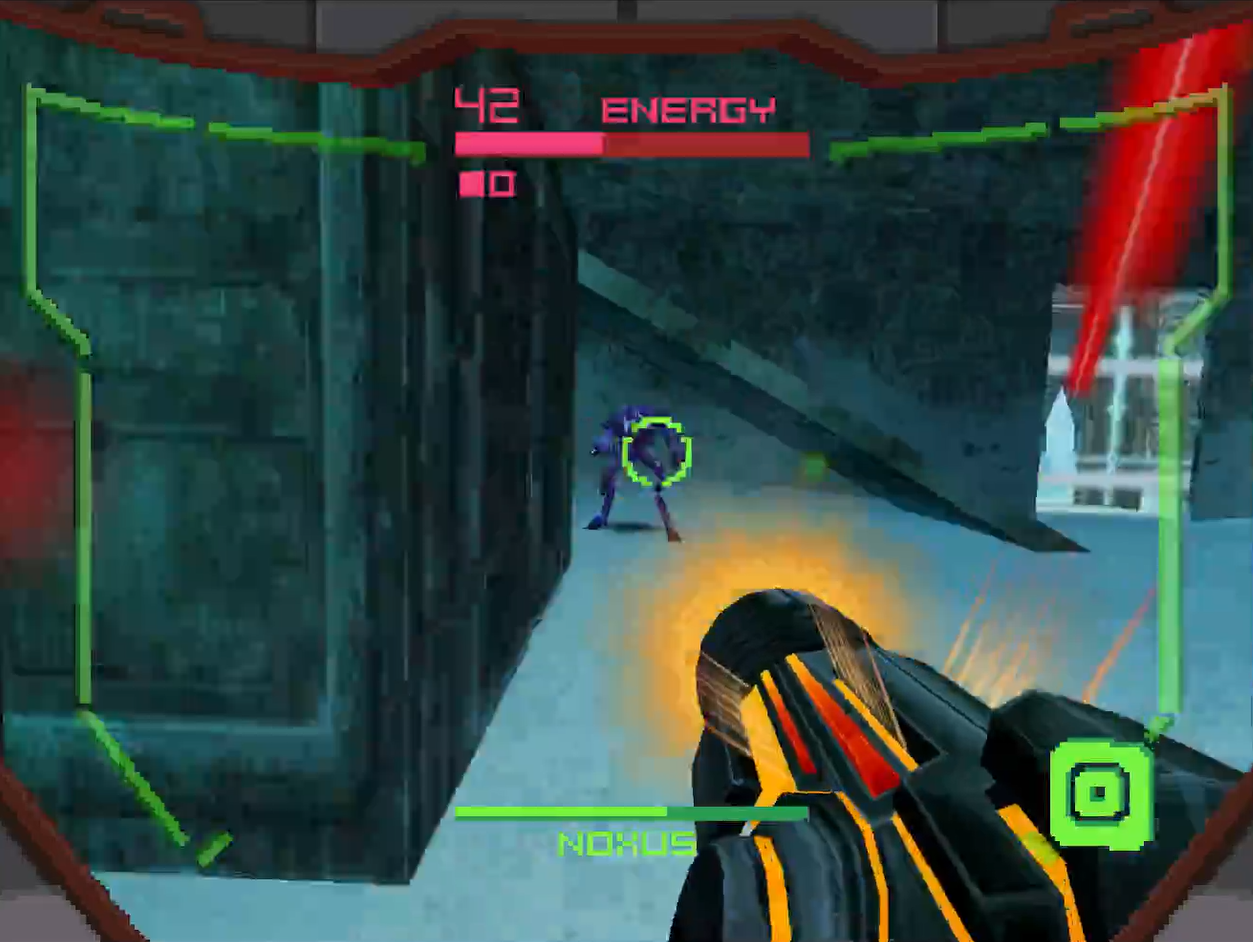
For your first battle, you’ll want to avoid going out into the open area, as you’ll have to deal with not only Noxus, but Trace’s Imperialist shots as well. Keep the fight in the enclosed area by the door if you can – you may take more damage from Noxus in close quarters, but probably less overall than trying to go at it against both Hunters. There will be some points where Noxus will hide under the stairway on the outside – go ahead and chase him down, but try and hug the wall to avoid the Imperialist shots.
This fight hopefully shouldn’t give you too much trouble. Keep up the attack, avoid the Judicator as best you can, and Noxus will be defeated.
Trace
Alt Form: Triskelion
Weakness: Shock Coil
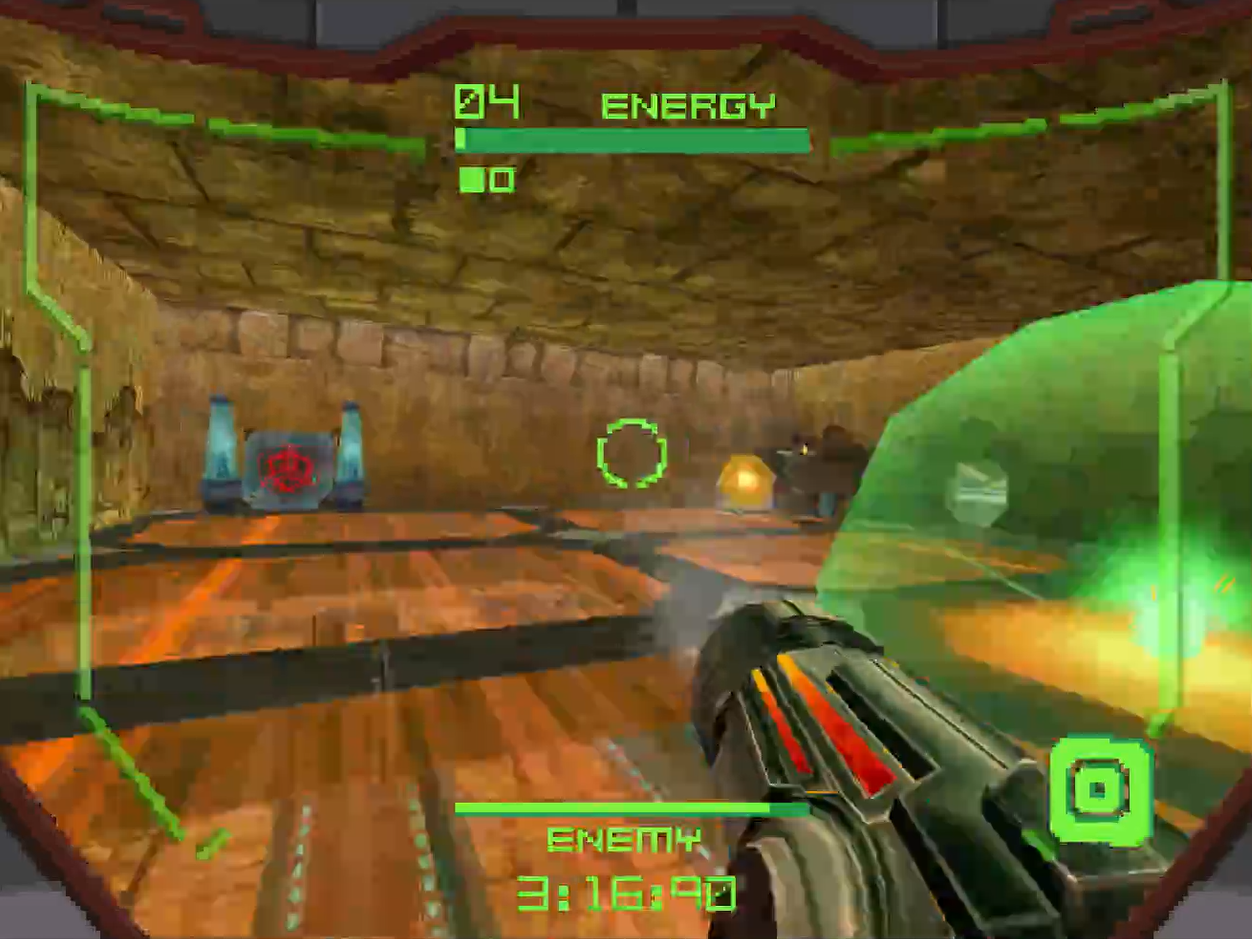
Finally, we’ve arrived at our final Hunter encounter. We got a taste of what this deadly marksman could do earlier, but now it’s time to finally contend with the Kriken sniper, Trace. This fearsome foe is on a quest to find worlds that the Kriken Empire can invade, so we’ll need to lay down the law.
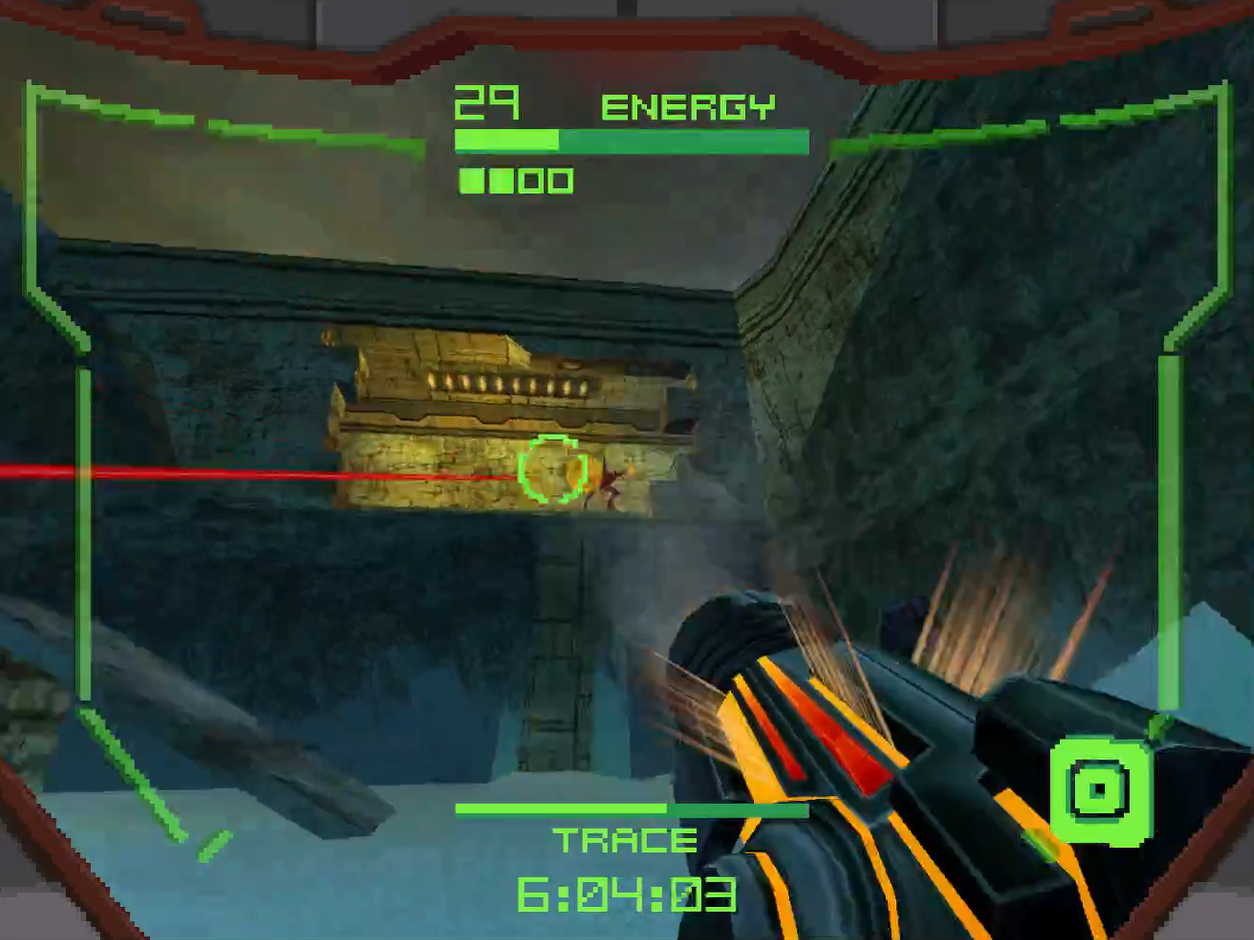
I think Trace is one of the more difficult Hunters to deal with, in large part to his camouflage and to his alt-form, the Triskelion. As you know from the Noxus fight, Trace uses the Imperialist, a high energy sniper rifle deals massive damage with each hit. Because of this, Trace will typically strike from a distance, and he will have the ability to camouflage himself, making pinning down his actual location difficult. Because of this, getting close to Trace and engaging in close quarters combat is actually a pretty effective strategy.
Keep in mind, that means chances are good you’re going to be dealing with the Triskelion, Trace’s alt-form. He will basically turn into a creepy little bug that lunges and attacks you, not entirely dissimilar from a Facehugger from the Alien franchise. The Triskelion moves fast, is hard to hit, and is able to cloak itself in camouflage, so you’ll need to decide if close quarters combat is worth that, or if you’re better off fighting from a distance. Personally, I’d still say up close is the way to go, as you can always lay your Morph Ball bombs and those can still do nice damage.
In your first fight, you’ll square off with Trace in the Sic Transit, the same room you fought Noxus in, although you’ll be fighting him after you’ve obtained the Octolith, meaning that, just like the Weavel fight, the countdown is on. You’ll need to finish this fight off quick. Trace’s camouflage dragging the fight out will be your biggest concern here, which is another reason I’d advocate for CQC. No surprise, but you won’t have the Shock Coil, Trace’s weapon weakness, in your original battle, so you’ll want to rely on your tried and true Power Beam.
Just don’t lose sight of Trace and you should be okay. The Triskelion can be nasty, but to cross the bridge, you gotta get wet, as they say. Keep up the attack and Trace should fall.
BOSS BATTLES
Cretaphid V1
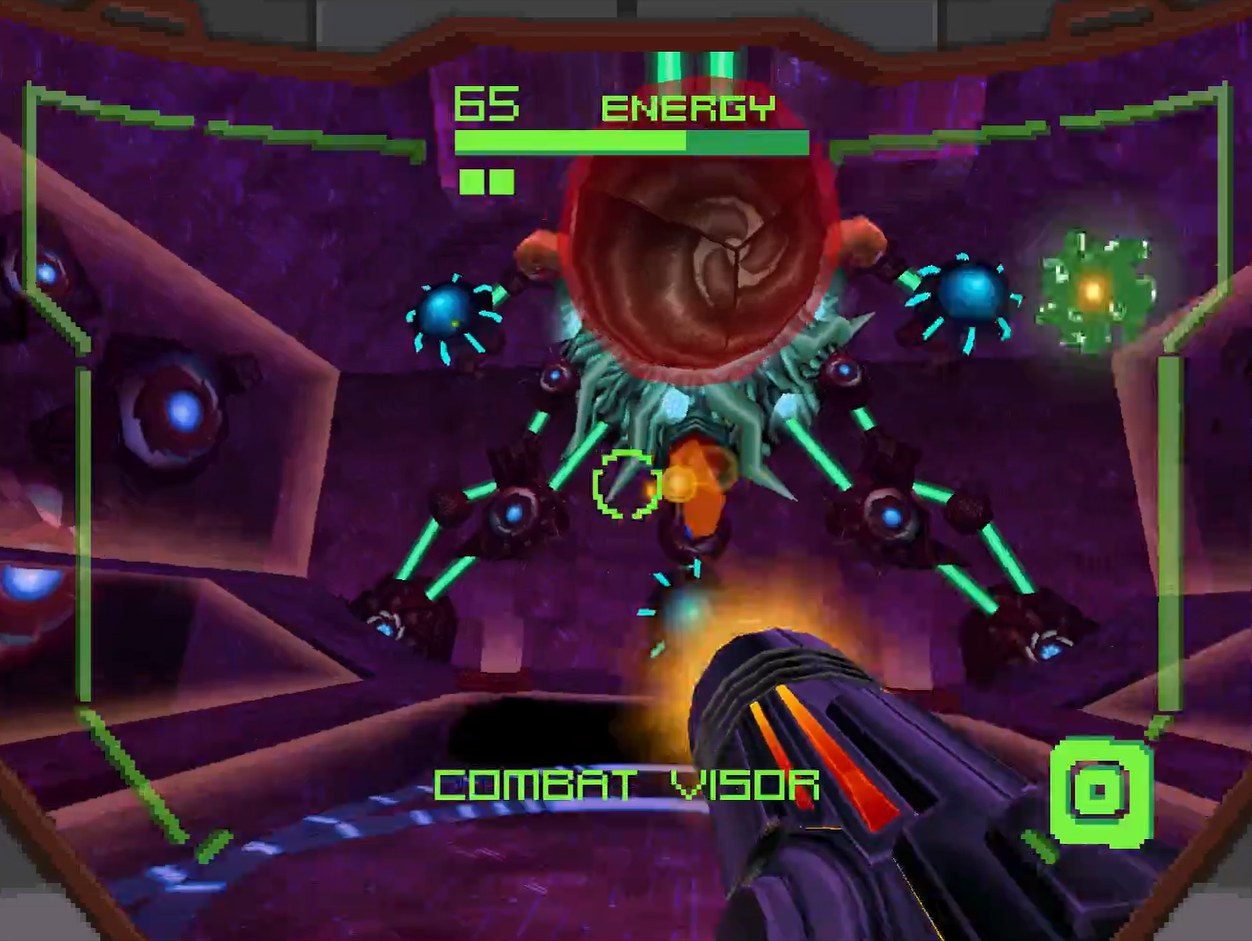
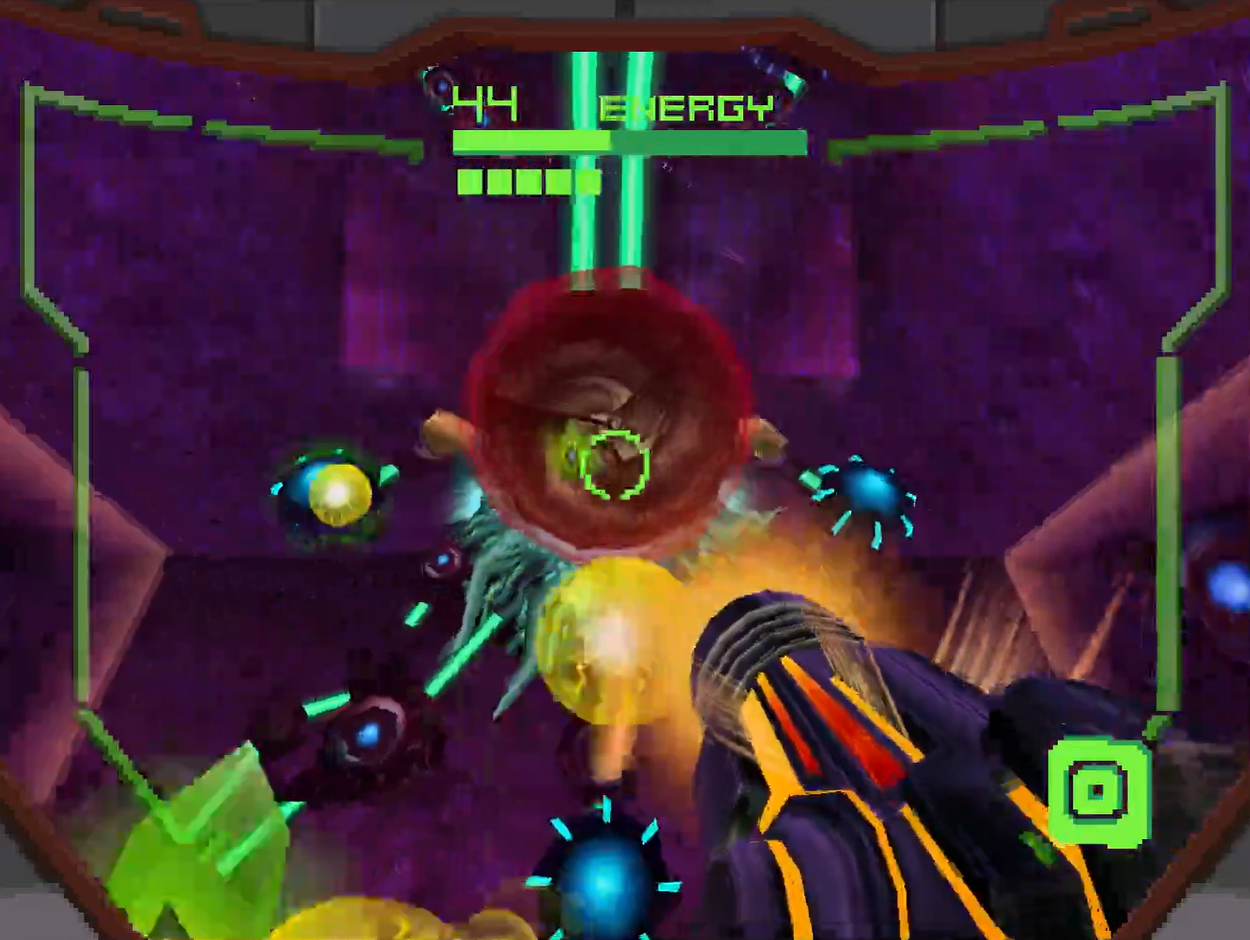
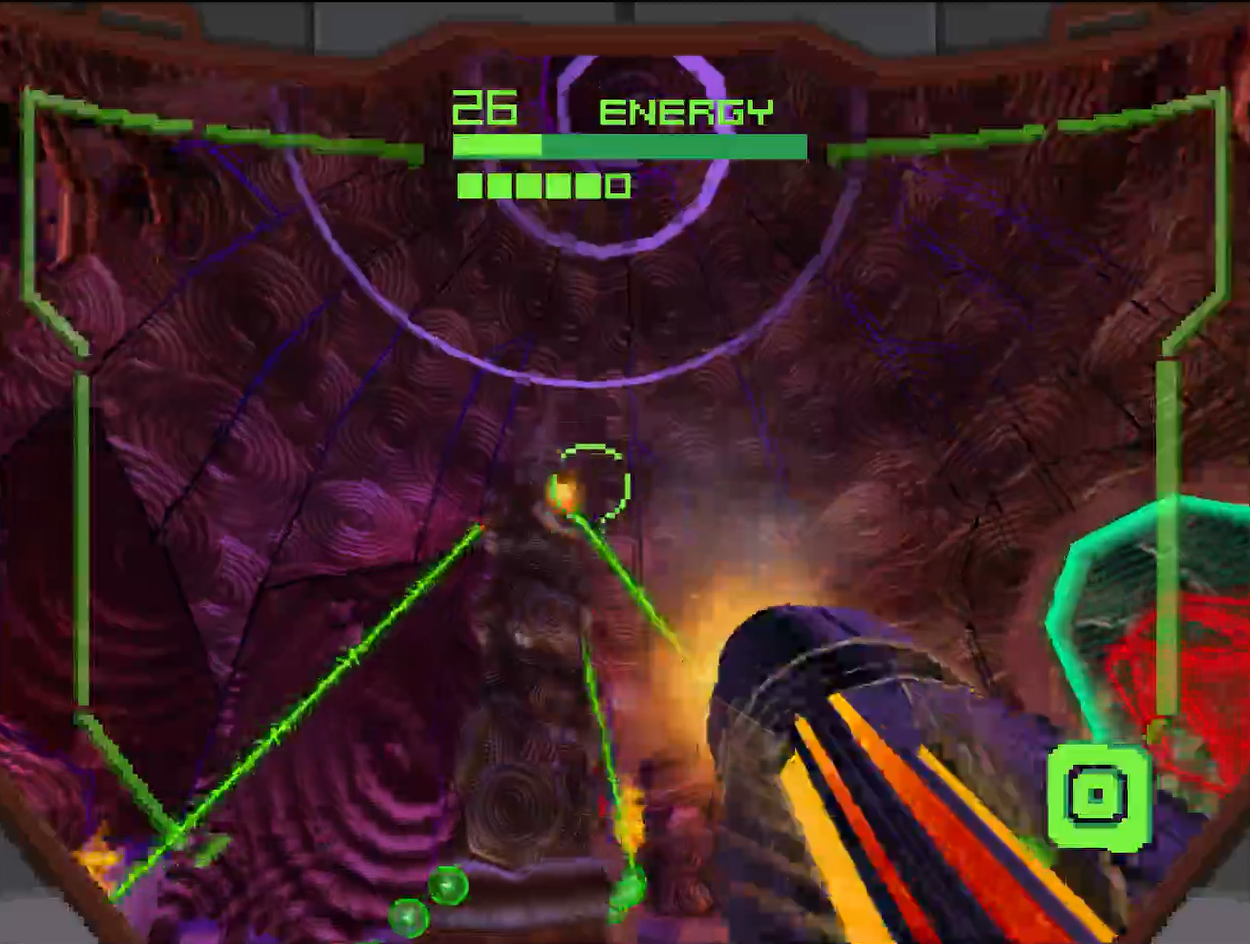
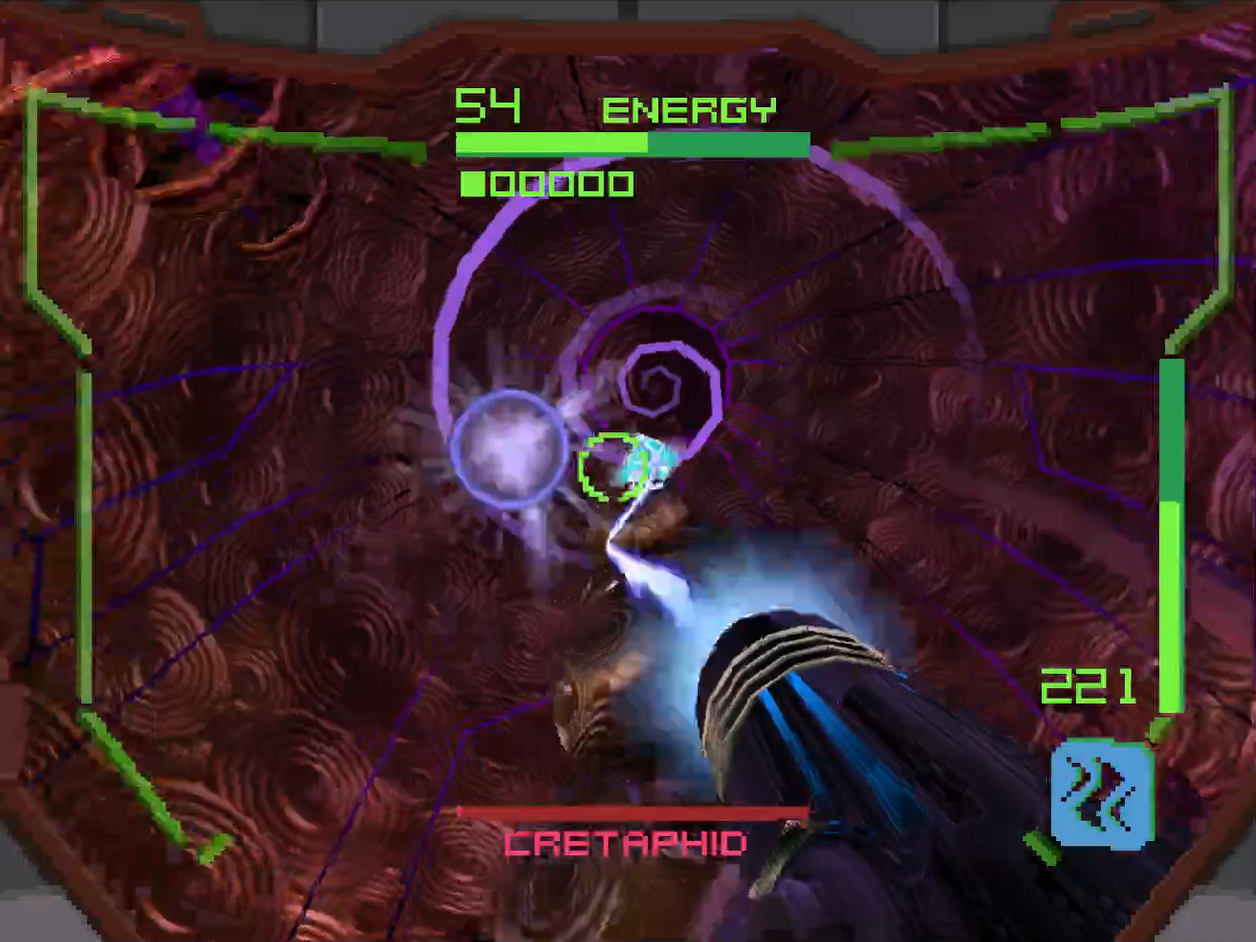
Ever been to a movie and had to sit in the very front row and crank your neck backwards to see the screen? That’s kind of what fighting the Cretaphid is like, and unfortunately for us and our neck vertebrae, we will have to fight this Guardian a few times!
The Cretaphid is product of the Alimbic military and is regarded as a top-of-the-line defence mechanism, and for good reason: actually damaging this thing is pretty tough! As you’ll have noticed, the Cretaphid is stationed in the middle of the room, but is able to spin in position. All over the “body” of the Cretaphid are nodes that are sometimes red, sometimes blue. You’ll want to concentrate fire on these nodes when they are BLUE; when they’re red, they are invulnerable. Each node is only blue for a few seconds, so you’ll need to act fast and aim true! If you’re lucky, some of the nodes will drop health or missiles!

Of course, the biggest problem that you’ll have is that one level of the nodes will be shooting energy beams that will shoot up in down, in addition to spinning around the room in time with the Cretaphid. You’ll want to basically just move in time with the rotation of the Cretaphid; duck under the energy beams if you can, but patience will be key here, as if you rush to blast a blue node and take damage doing it, that’s an easy to way to lose the fight. Take these nodes out first, if possible.
I’d stick with your Power Beam in this section, as your rate of fire will be so much quicker and you’ll want to save those missiles. When all the nodes have been destroyed, the inner module of the defence mechanism will pop out above the body. FIRE AT IT! Use either charged shots or missiles and you’ll start to finally damage the Cretaphid! This inner module will fire its own missiles at you, so watch out. You’ll also have only maybe 10 seconds or so before it goes back inside, so fire quickly.
You’ll activate the next phase, where the energy beams will switch to a different level on the body, when the inner module gives off a big explosion. Rinse and repeat as many times as you need and the Cretaphid will be no more!
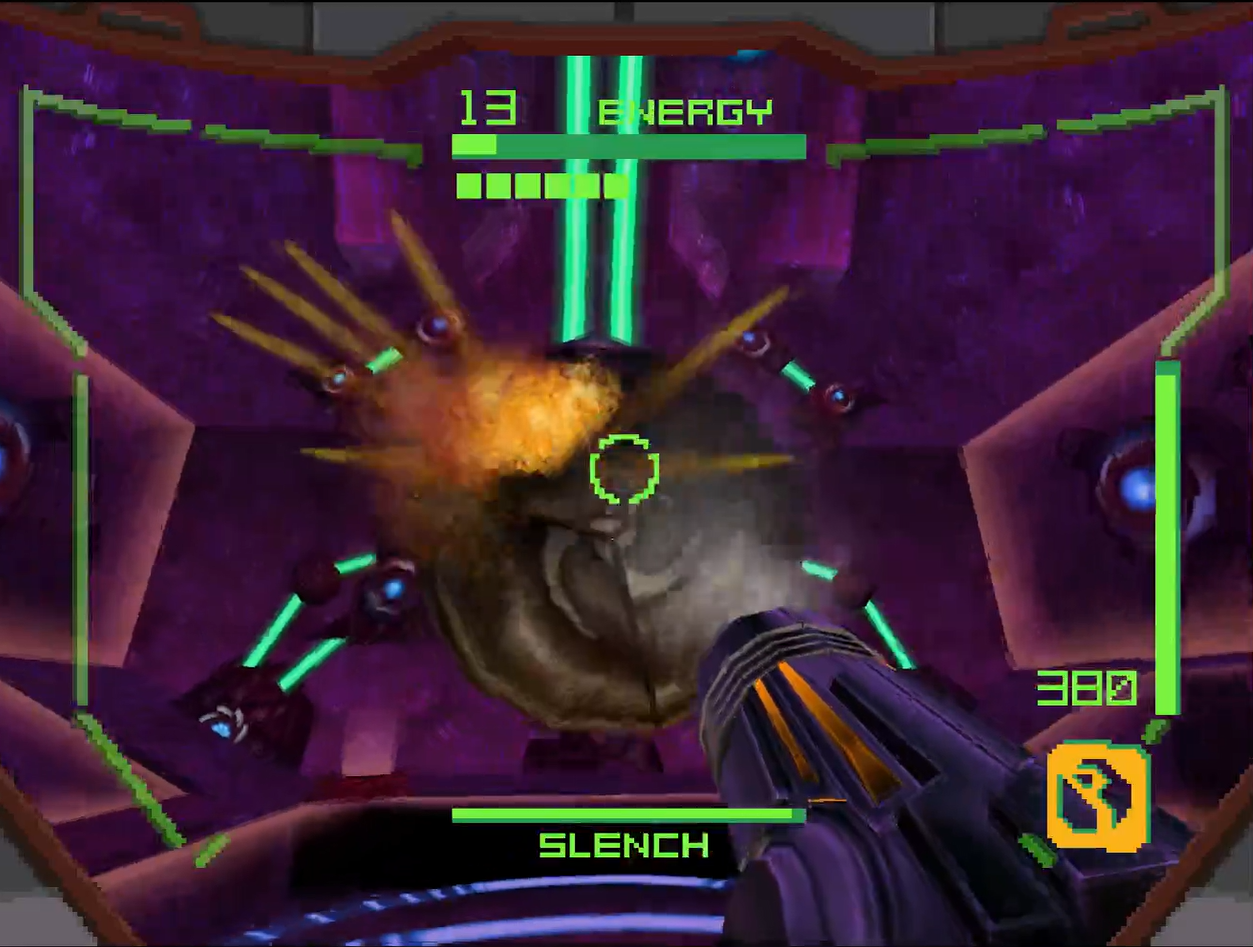
Slench V1
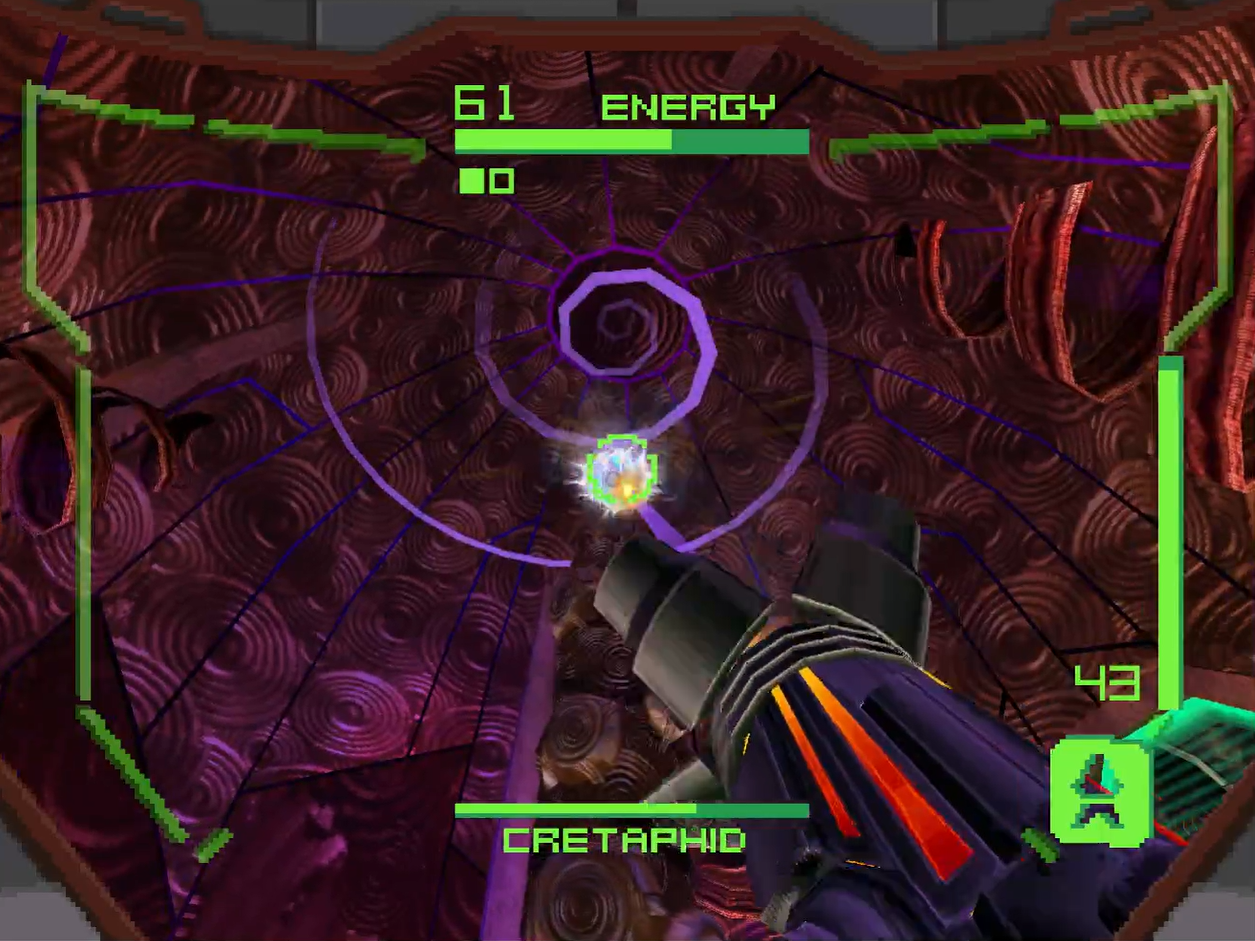
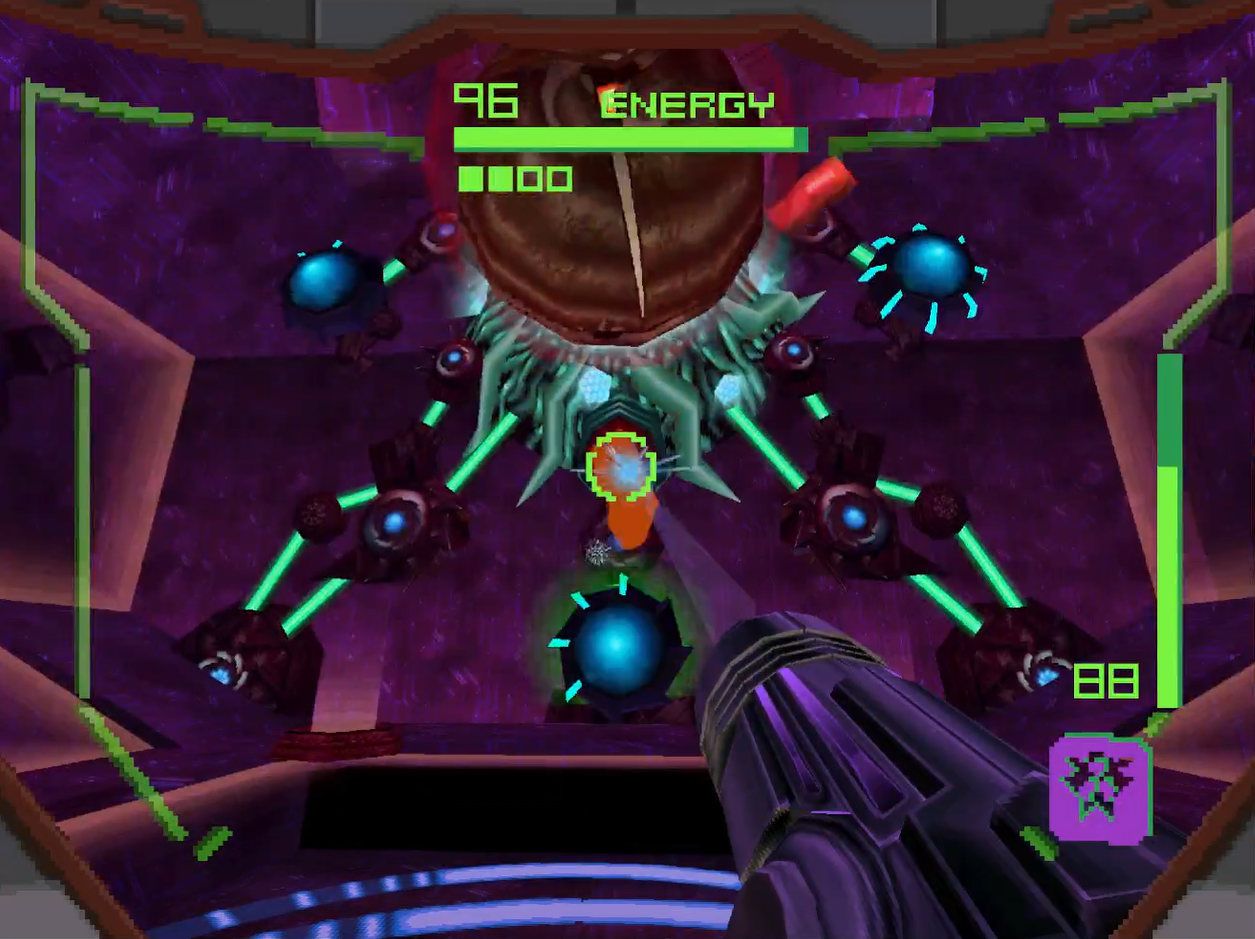
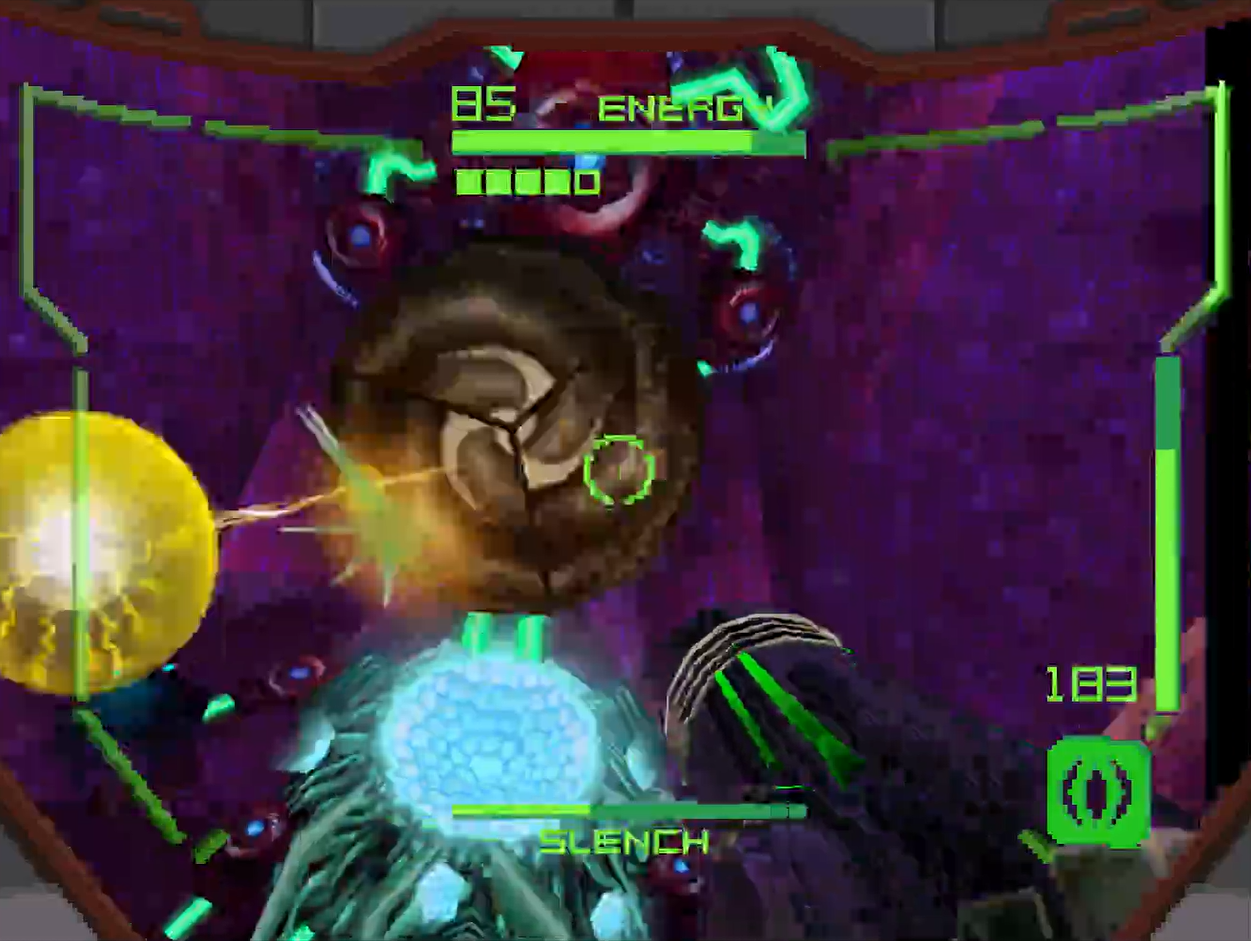
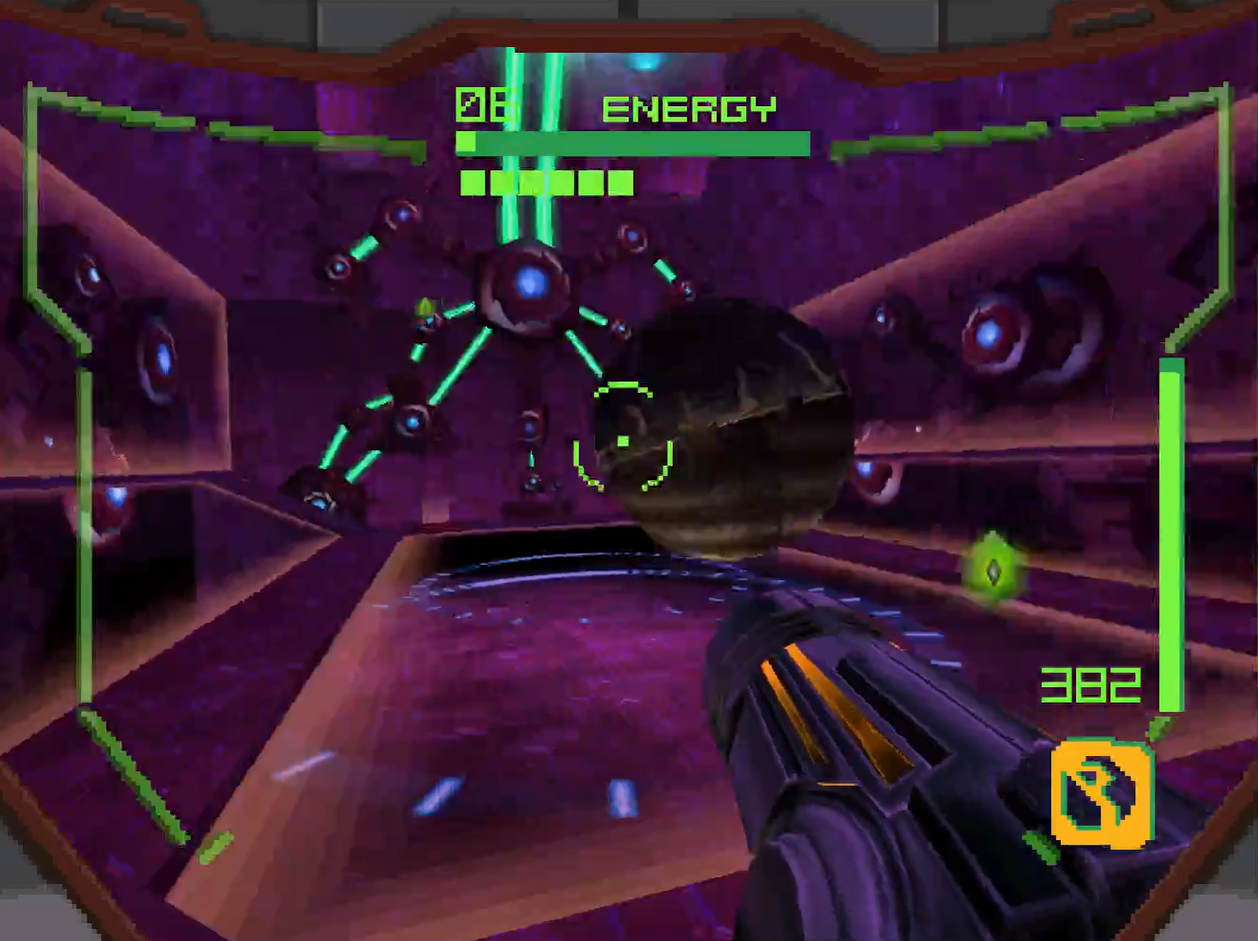
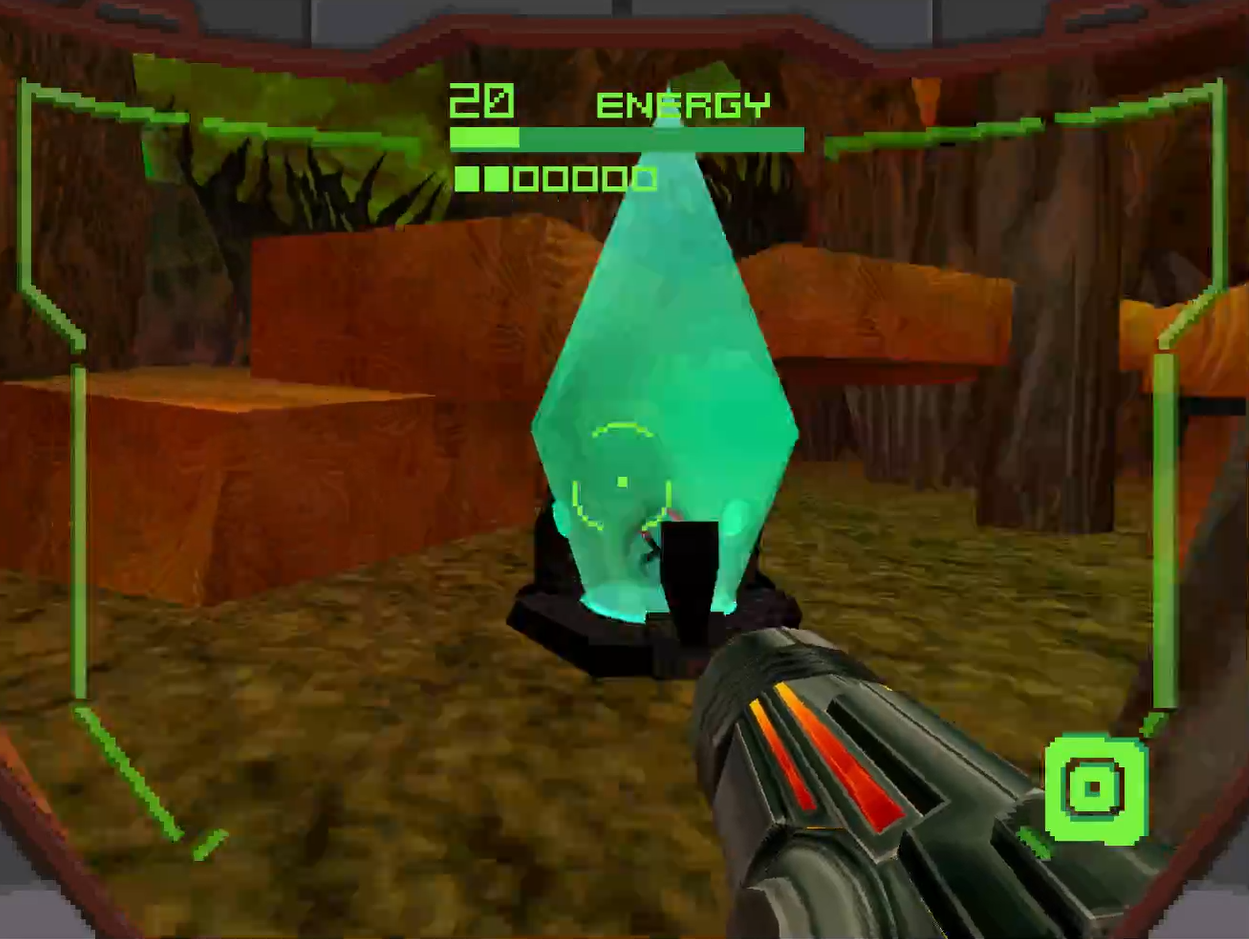
Meet the Slench. This is the second Alimbic defence mechanism that you’ll encounter multiple times over the course of your adventure. The Slench resembles a big mechanical eyeball and is fastened to the wall by three synapses; when the Slench is attached to the wall, it is completely invulnerable to weapon fire. Our goal is to destroy the synapses and then damage the Slench! It’s worth noting that every single Slench has two scans, an “A” form (when it’s attached to the wall) and it’s “B” form (when it’s free and floating around, which we’ll get to in a sec).
To start off, let’s get a better idea of how the battle operates when the Slench is attached to the wall. You’ll see that there are two energy blasters on either side of the mechanism (scan these too!) that will be firing at you constantly, in addition to the Slench itself firing off these green gas-like torpedo’s at you; these are actually very welcome, as you can shoot them down to for health and ammo. You’ll want to destroy the three synapses attaching the Slench to the wall in order to get it into its second form, BUT you’ll have to destroy them all quickly. The synapses will regenerate after a minute or so, so you’ll want to take them all out right after the other. I’d use missiles to do this, as they won’t be much use in the second phase. Once all three synapses have been destroyed, the Slench will break free and the second phase will begin.
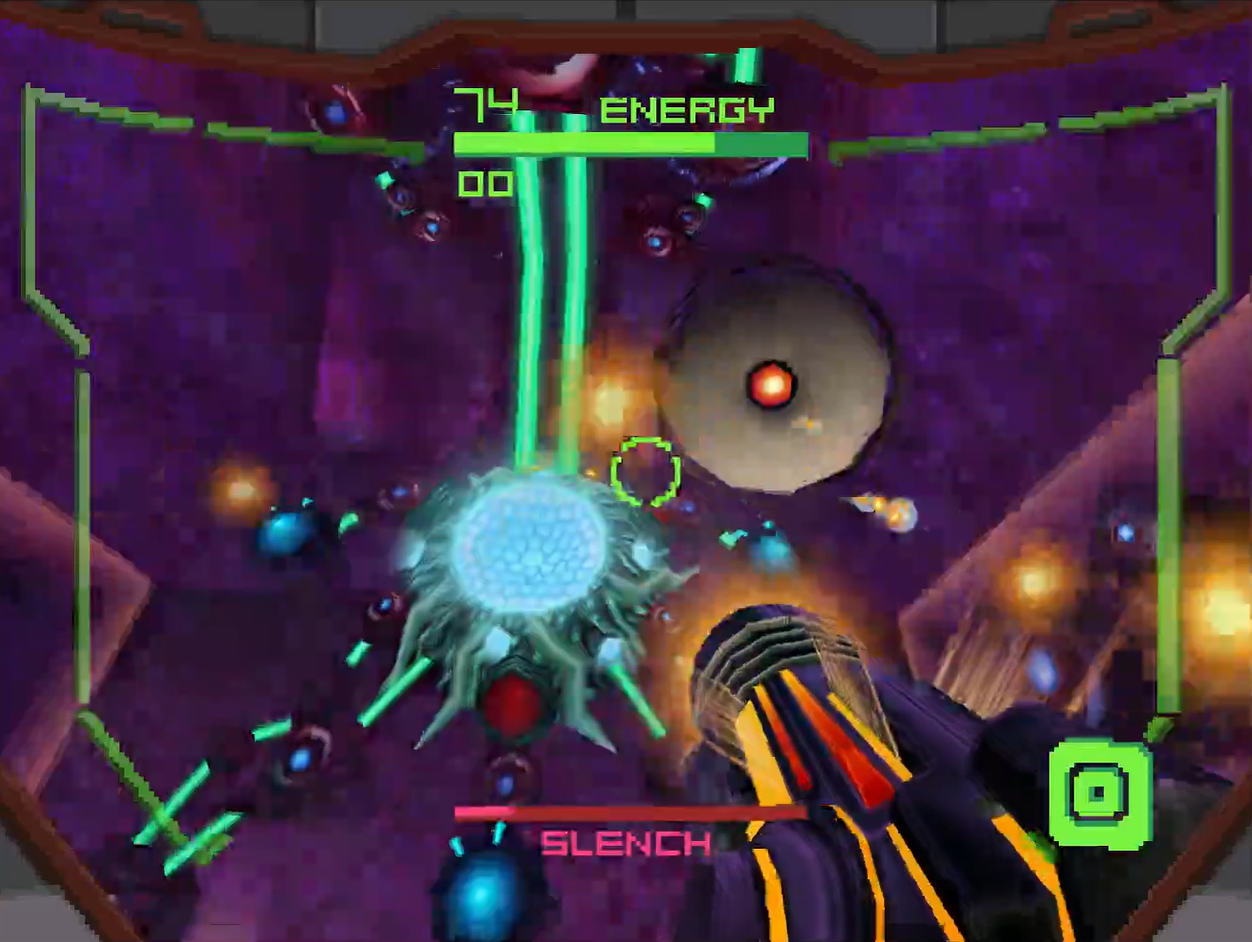
Now you’ll see the force field around the mechanical eye is gone and the Slench will be flying around the room. There will be a barrage of energy shots headed your way from the eye in the center of the Slench’s “eye”, but if you keep moving, they should have a hard time hitting you. What we’ll want to do is aim for the Slench’s eye, which is easier said than done. If you’re confident in your aim, use your missiles, but you won’t have that much time to line up a shot before the Slench retreats back into the wall and into it’s A form, so you might want to just rapid fire Power Beam shots in the general direction if you feel that you’re struggling to land a hit.
Some of these Slench fights can take a while, especially if you need to heal after each B sequence, so just keep at it and repeat the strategy listed above. Eventually, the Slench will be defeated.
Cretaphid V2
Weakness: Battlehammer
We once again are facing off with the Cretaphid, and although the premise of the battle remains largely the same, this defence mechanism will have a few new tricks up its proverbial sleeve.
As mentioned, the general idea of this fight is identical to the previous one before, so to repeat what I wrote for Cretaphid V1: The Cretaphid is stationed in the middle of the room, but is able to spin in position. All over the “body” of the Cretaphid are nodes that are sometimes red, sometimes blue. You’ll want to concentrate fire on these nodes when they are BLUE; when they’re red, they are invulnerable. Each node is only blue for a few seconds, so you’ll need to act fast and aim true! If you’re lucky, some of the nodes will drop health or missiles! The main difference this time is how the Cretaphid goes about attacking you.
Whereas last time, we had to contend with lasers that would get fired out from a particular row of nodes, this time, every single node will release a green ball of charged up energy . These cannot be shot down or destroyed, so don’t even try; simply avoid them. The good news is that as long as you’re strafing in a circular motion around the Cretaphid, you will almost never get hit by the green energy balls (what a sentence) as long as you’re strafing. The downside is that you will need to be strafing and in motion for basically the entirety of the fight, which can make shooting the nodes trickier. If you’re tempted to stop and willing to take a hit in order to shoot a node, I would recommend doing so if you think the situation is right; otherwise, play it safe and keep strafing.
Each node you shoot down means one less ball of energy, so keep at it. Using the Battlehammer will inflict damage quicker, but I find that the trajectory of the Battlehammer shots make it miss more often than not, so use that if you want, but I personally stuck with the Power Beam. When all the nodes have been destroyed, the inner module will pop out, so don’t waste any time inflicting as much damage as you can!
Rinse, lather, and repeat, and you’ll have defeated the second Cretaphid!
Slench V2
Weakness: Judicator
The Slench is back, bigger and badder than ever, and this time, the two energy blasters it will be equipped with Magmaul weaponry, so getting hit means you get a nice little sear.
To quickly recap the general premise of the fight: The Slench resembles a big mechanical eyeball and is fastened to the wall by three synapses; when the Slench is attached to the wall, it is completely invulnerable to weapon fire – this is its “A” form. Our goal is to destroy in quick succession the three synapses holding it to the wall, which will cause the Slench to detach and enter its “B” form; this will see the Slench fly across the room with its “eye” open, allowing you to fire in the center of the eye and damage it.
That being said, you shouldn’t be surprised to learn that the Slench has some new moves to deal with, but let’s start from the beginning. You’ll want the Judicator equipped, and you’ll immediately want to take out the three synapses as quick as you can to get the Slench into a position where you can damage it. This part is virtually identical to the first fight, different beams aside. As always, if you need health/ammo, blast some of the green torpedo’s and recharge.
Where the fight is a bit different will be in the second phase, when the Slench is in it’s B form. Whereas last time, the Slench floating in a stationary figure eight position, this time, the Slench will be floating and bobbing all around the room, meaning you yourself will also have to move in order to avoid its Magmaul shots. This sounds easy, but it makes hitting the weak spot a bit tougher since you’ll have less time to line up a shot.
I actually think this might be the least challenging Slench fight based on what kind of health you should hopefully have at this point in the game, so follow the same strategy as last time and this Slench will be down for the count in no time.
Slench V3
Weakness: Battlehammer
Your old friend the Slench is back for a third outing, and this time, it’s all about electricity! The Slench and its energy blasters will be utilizing Volt Driver weaponry, so make sure you keep the hits you take to a minimum, as the static discharge will interfere with your movements.
As the previous encounter, the general idea of the Slench fight remains unchanged: the Slench resembles a big mechanical eyeball and is fastened to the wall by three synapses; when the Slench is attached to the wall, it is completely invulnerable to weapon fire – this is its “A” form. Our goal is to destroy in quick succession the three synapses holding it to the wall, which will cause the Slench to detach and enter its “B” form; this will see the Slench fly across the room with its “eye” open, allowing you to fire in the center of the eye and damage it.
To start off, equip your Battlehammer and take out the three synapses; this version of the fight is identical aside from the weaponry, so you should be familiar now with what you need to do. Shoot down the torpedo’s if you need health, ammo, etc.
When the Slench is free and floating around in it’s B form, it’s pretty much the same fight too, EXCEPT for a nasty new trick the mechanical eyeball has: when you see the Slench pause its floating and close its “eyelid”, watch out: it’s about to divebomb right into you, which is a crushing blow that deals major damage. You’ll need to be quick, Morph down, and then boost the heck out of there before you get clobbered. Combine that with the constant Volt Driver shots and the Battlehammer’s relative inaccuracy, and don’t be surprised if this fight surprises you with its challenge.
The V3 version of the Slench seems to have a significant amount of more health than its predecessors, or maybe it just seems like it, so buckle in for a long fight. Follow the same strategies as before and you should eventually come away with an Octolith!
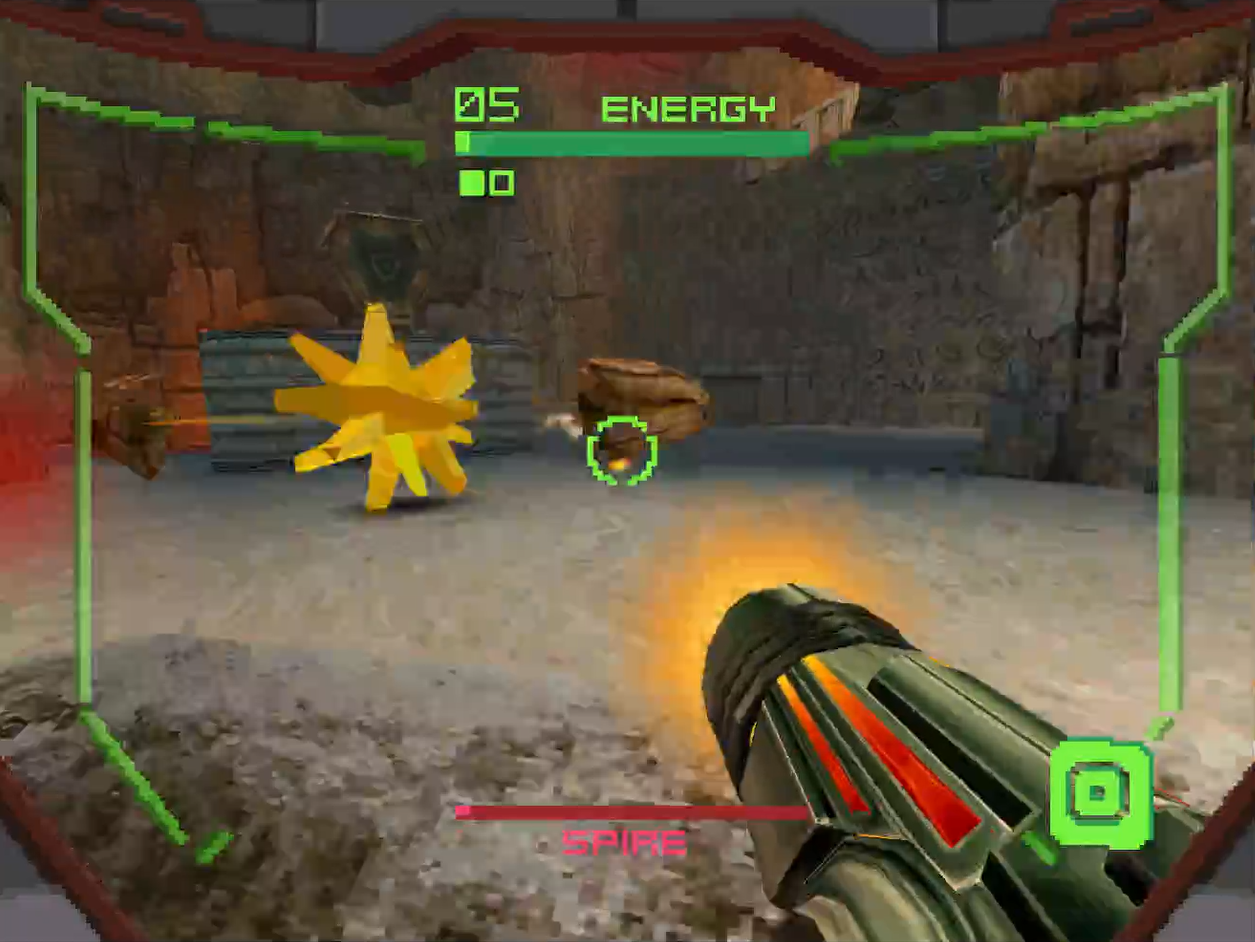
Fire Spawn
Weakness: Judicator
This is more of a mini-boss than a legit boss boss, but you can still end up in trouble if you’re careless. The Fire Spawn with throw globs of magma at you, which will stay and burn your armor if it lands, so your best bet is going to be a mix of bold offence and strategic hiding. You’ll want to have the Judicator equipped, as it will deal the most damage to the Fire Spawn. The Fire Spawn will rise up from the pool of magma, attack you, and go back down; first thing we want to is head upwards on the path and take cover behind the rocks. When the Fire Spawn rises up, it will open its mouth for a quick second – this is your chance to blast it with a charged Judicator shot! As soon as your shot goes off, whether it’s a hit or miss, retreat back to cover behind the rocks and avoid the fireball!
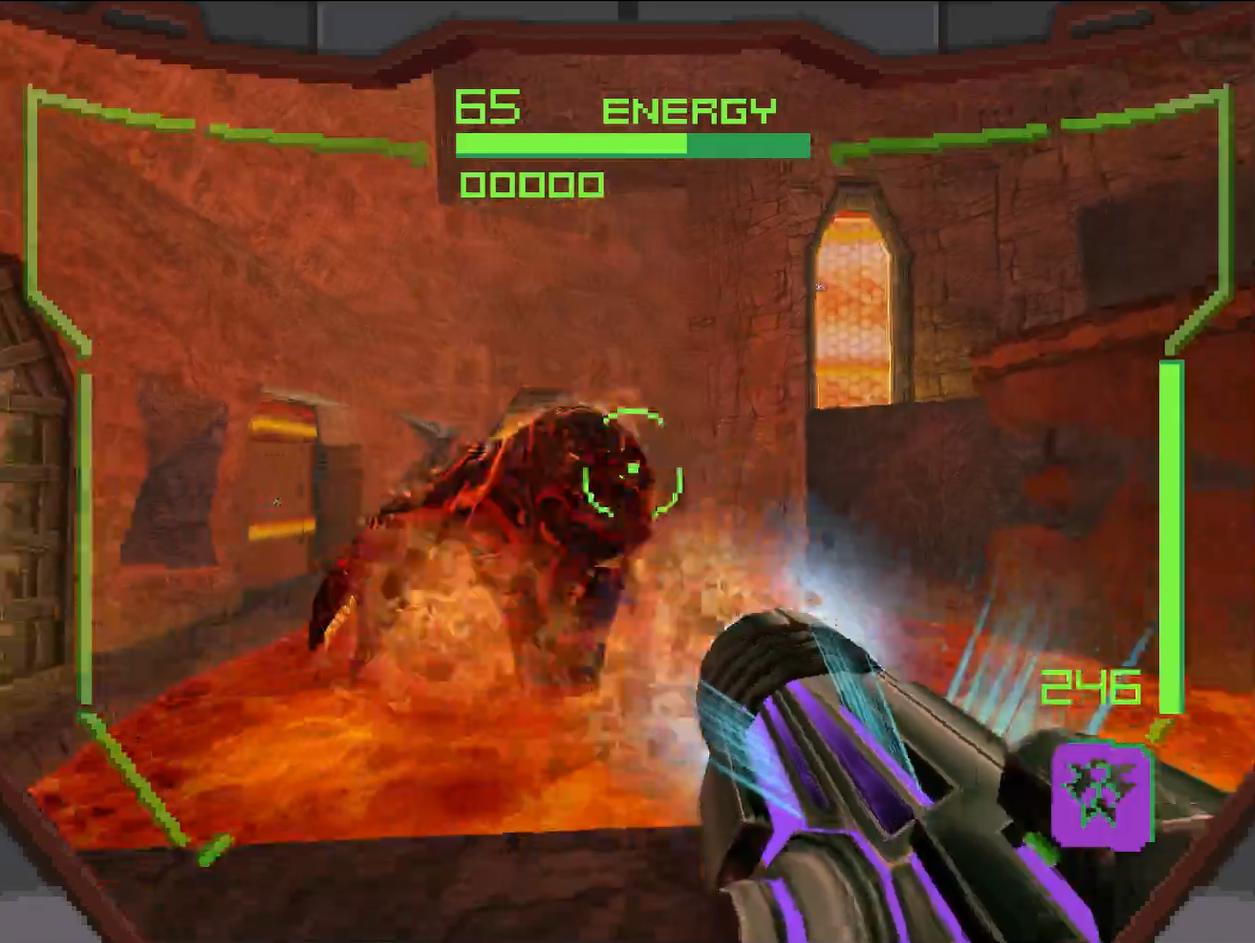
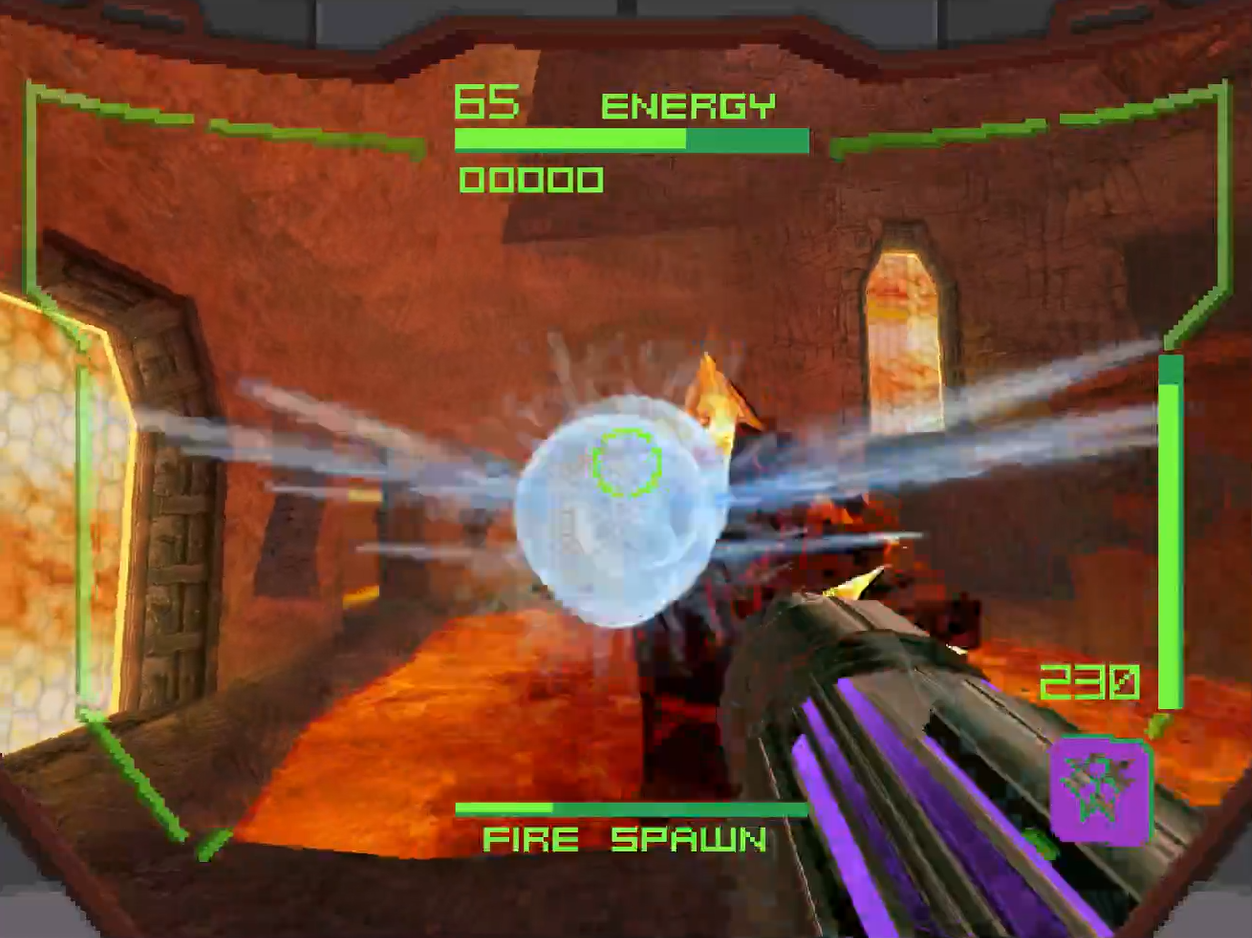
Keep up this simple strategy and with a few charged Judicator shots, this boss will fall and you can grab the Magmaul!
Cretaphid V3
Weakness: Volt Driver, Shock Coil, Judicator
Not had enough neck pain and motion sickness from strafing in a circle continuously? Don’t worry, the Cretaphid V3 has you covered!
Back for a third time is the Alimbic defence mechanism, and this time, the difficulty will be ramped right up.To quickly recap the general gist again of how this fight plays out: The Cretaphid is stationed in the middle of the room, but is able to spin in position. All over the “body” of the Cretaphid are nodes that are sometimes red, sometimes blue. You’ll want to concentrate fire on these nodes when they are BLUE; when they’re red, they are invulnerable. Each node is only blue for a few seconds, so you’ll need to act fast and aim true! If you’re lucky, some of the nodes will drop health or missiles! When all the nodes have been shot, the inner module will pop out for a few seconds, allowing you to open fire.

This encounter could easily be summed as Cretaphid’s V1 + V2 = V3, as you will have to contend with BOTH the energy lasers that one of the rows of nodes will shoot out AND the green balls of energy that EVERY node will shoot out. This fight is difficult, even if you’re using one of the weapons that the Cretaphid is weak to. I personally flipped between using the Power Beam for it’s high rate of fire and the Shock Coil for its ability to find the vulnerable nodes, but use whatever you feel most comfortable in.
Try and take out the nodes shooting the lasers first, as it will make strafing around the room easier, and don’t be afraid to underduck below the lasers either. This is a classic example of a boss fight where, unfortunately, there’s not much to discuss in terms of strategy. You know what to do, and you’ll certainly take some damage along the way.
Keep it up, always be in motion, and make your opportunities to pummel the inner module count, and this third version of the Cretaphiod will meet the same fate as the previous two.
Arctic Spawn
Weakness: Magmaul
This is a pretty similar strategy to the Fire Spawn, although with the caveat that there’s nowhere for you to take cover! Same kind of idea though – the Arctic Spawn will rise up from the snow on the ground, attack you with a snowball that will freeze you, and disappear back underground as soon its attack is done. You’ll want the Magmaul for this one, and luckily, at this point in the game, you should be able to brute force your way past this beast. As soon as the Arctic Spawn rises up from the ground, you’ll have a second or so to fire its open mouth with a charged Magmaul shot. Let that magma fly!
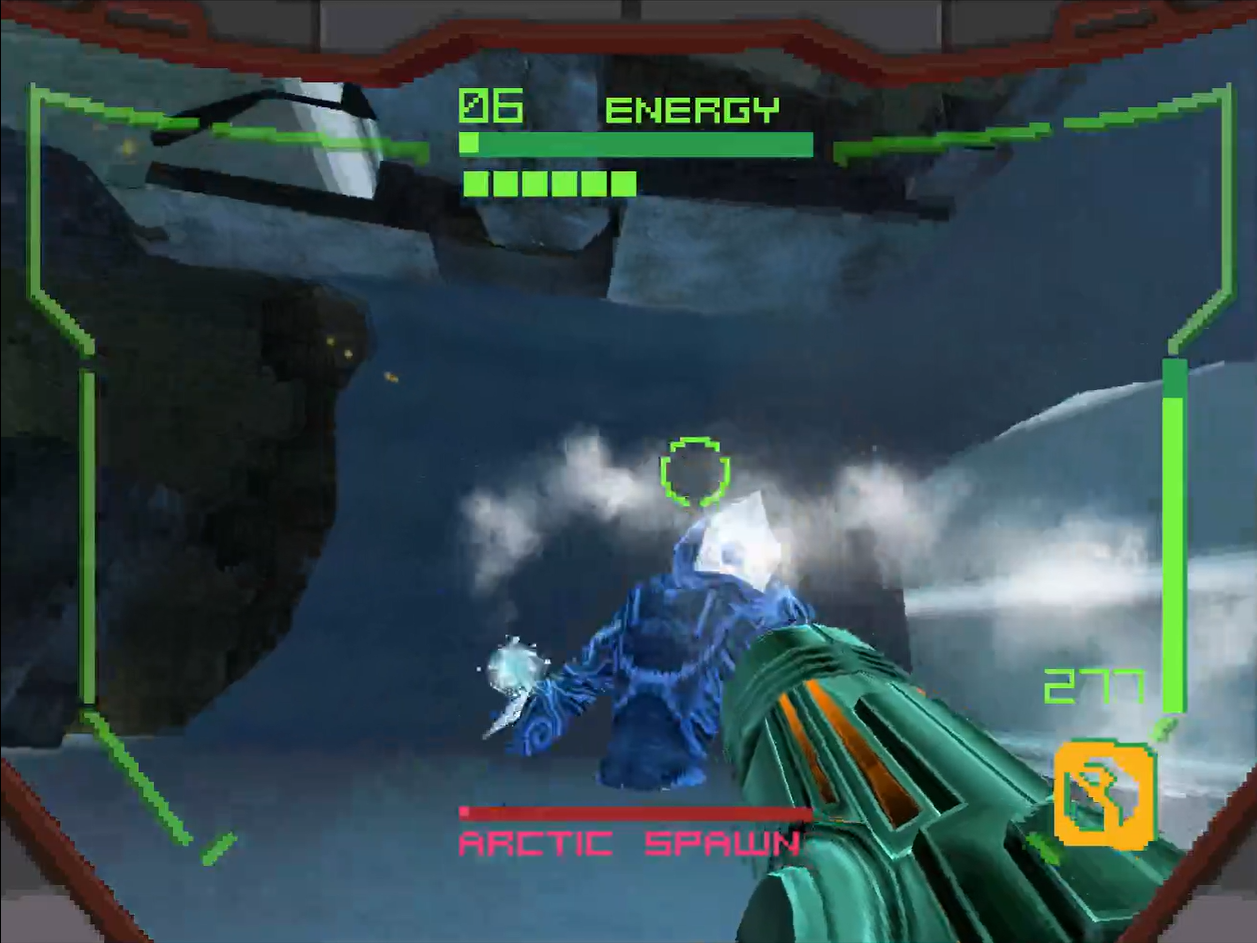
A few shots, and the Arctic Spawn will melt away like a snowball on a hot day, and you’ll be free to grab the Imperialist!
Cretaphid V4
Weakness: Shock Coil
Here we go! The final, and most challenging, Cretaphid is finally here! All the neck pain and nausea will be worth it once we finish off this final version.

So, let’s start from the beginning, one last time: The Cretaphid is stationed in the middle of the room, but is able to spin in position. All over the “body” of the Cretaphid are nodes that are sometimes red, sometimes blue. You’ll want to concentrate fire on these nodes when they are BLUE; when they’re red, they are invulnerable. Each node is only blue for a few seconds, so you’ll need to act fast and aim true! If you’re lucky, some of the nodes will drop health or missiles!
But WAIT! This Cretaphid has an ability that none of the other models had: the ability to MOVE! That’s right, this model will actually move around the room, kind of like an evil Roomba, and packs a massive whollop if you come in contact with it. Avoid the Cretaphid at all costs. Not only that, but this model will shoot out green energy lasers, which are more destructive than the other lasers the previous models spit out, and green balls of energy which you’ll still want to be strafing around and avoiding. Combined these attacks with the moving Cretaphid, and you’re going to need to sharp on your feet to avoid taking a ton of damage.
For this fight, I’d recommend using the Shock Coil exclusively; its honing ability is going to be invaluable with everything else going in. As always, use whatever you’re comfortable with, but the inner module is also weak to the Shock Coil, so this is a great option. You’ll want to acquire every Energy Tank and Universal Ammo Expansion you can before going into this battle to make your life easier, but other than that, the best I can offer you is that you know the strategy by now, you know how to put away Cretaphid’s, and you know what your weapon strengths and weaknesses are.
Don’t be discouraged if this takes a try or two, keep up the attack, stay frosty on your meet, and watch your movements. After enough time, the final Cretaphid will finally fall!
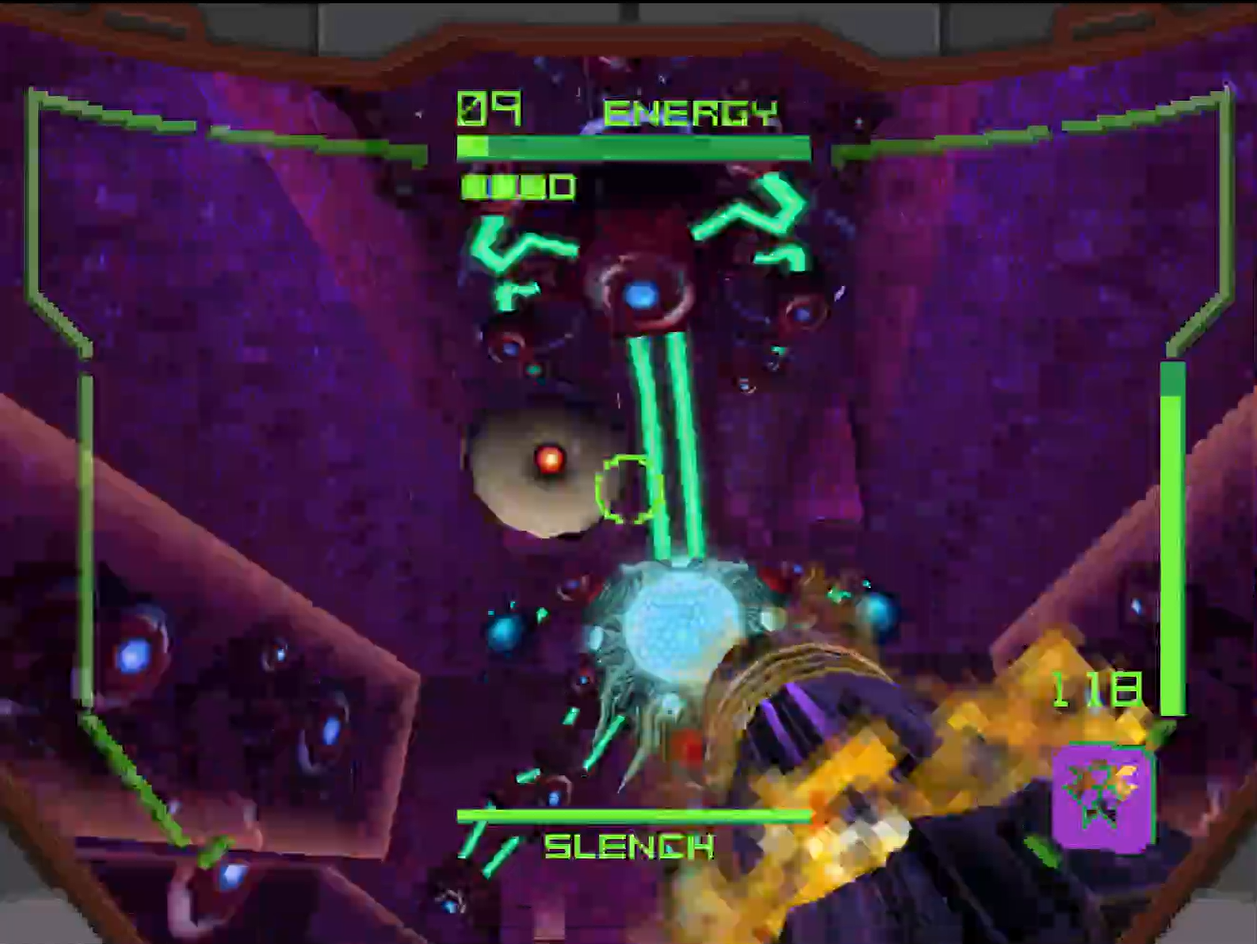
Slench V4
Weakness: Magmaul
Here we go! At last – the final Slench! Appropriately enough, this is the most difficult version to face off with, as not only does this last model utilize Judicator weaponry – meaning you can get frozen in place – but the Slench in its A form is actually hanging from the ceiling, not the wall!
For the final time, let’s recap: the Slench resembles a big mechanical eyeball and is fastened to the ceiling by three synapses; when the Slench is attached to the ceiling, it is completely invulnerable to weapon fire – this is its “A” form. Our goal is to destroy in quick succession the three synapses holding it to the ceiling, which will cause the Slench to detach and enter its “B” form; this will see the Slench fly across the room with its “eye” open, allowing you to fire in the center of the eye and damage it.
The Magmaul is what you’ll want to use to deal the most damage, so as always, make a beeline for the three synapses. Because the Magmaul fires an arced shot, you might want to jump up when you’re firing to get a little closer to the synapses to destroy them quicker. You’ll need to avoid the torpedo’s and Judicator shots, and getting the Slench free of the synapses is definitely more difficult (and frankly, more painful on the neck as you’ll need to adjust the camera basically straight up), but once the Slench is free, we can start the attack.
In its B form, the Slench will still shoot you with Judicator shots and will still pause, close its eyelid, and dive bomb you. These hurt, a lot, so clear these as best as you can. The Slench has a new attack as well, one where it will curl up and close its eyelid and just… roll around. Truth be told, this is pretty easy to avoid, so just get on the sides of the arena and catch your breath while the Slench just rolls around (you can’t damage it when it’s doing this) and just wait for it to stop moving before you resume the attack.
Utilize your Magmaul to deal the most damage, but if you want to use other weapons too, go for it. You’ve defeated three Slench’s by now, so you shouldn’t need me to tell you how to finish this one off. Keep up the attack and bring it home, and you’ll finally have the final Octolith as your well earned reward!
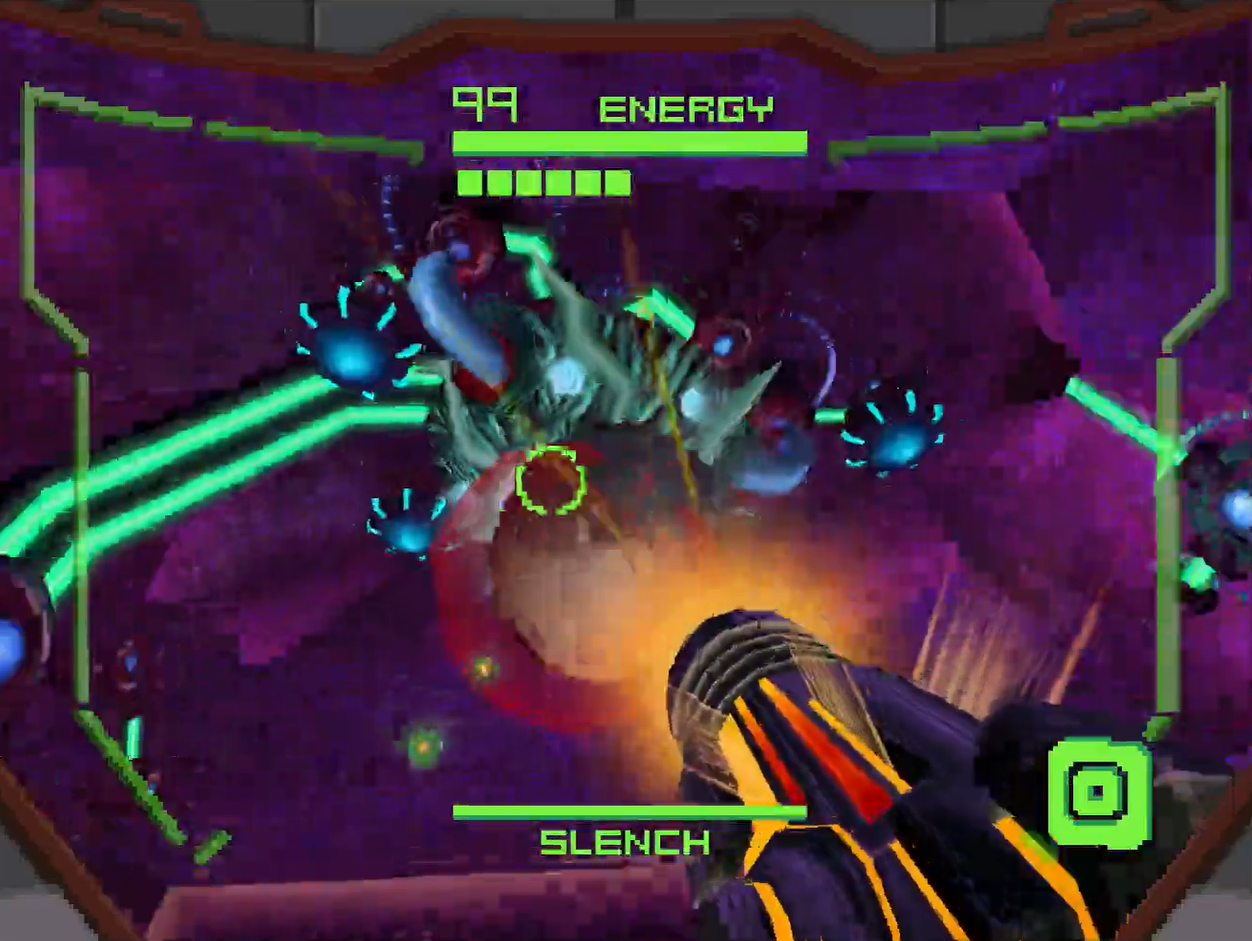
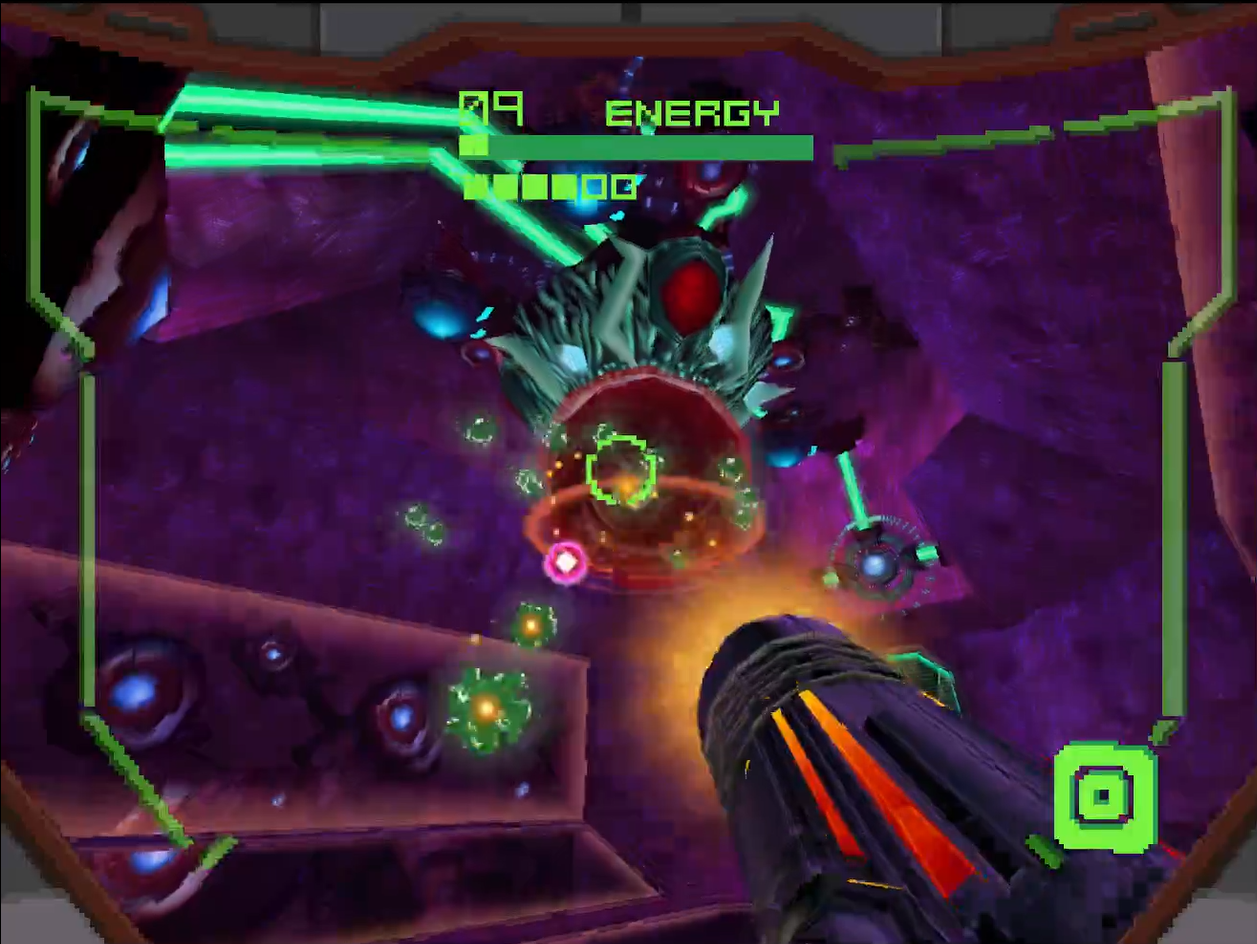
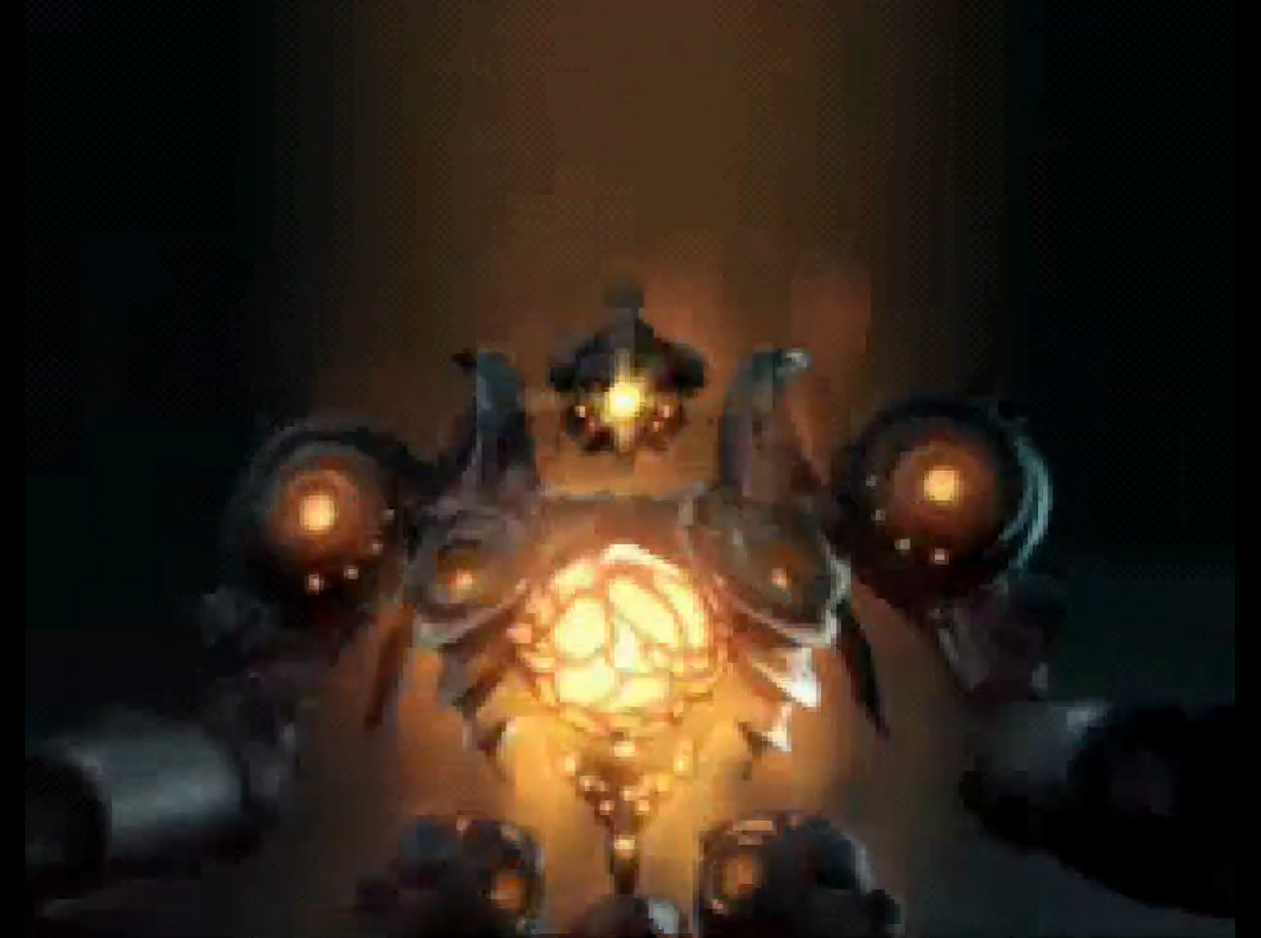
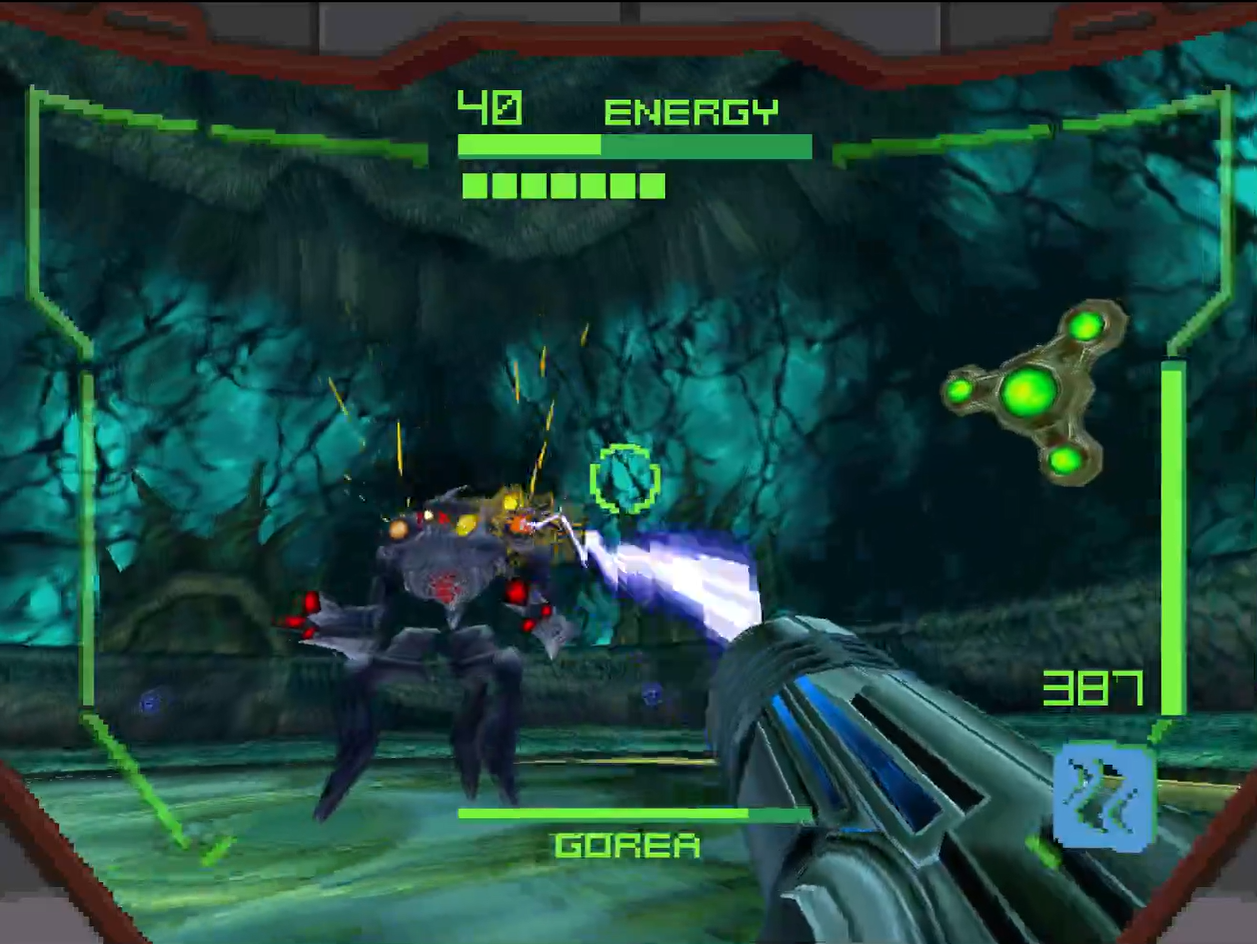
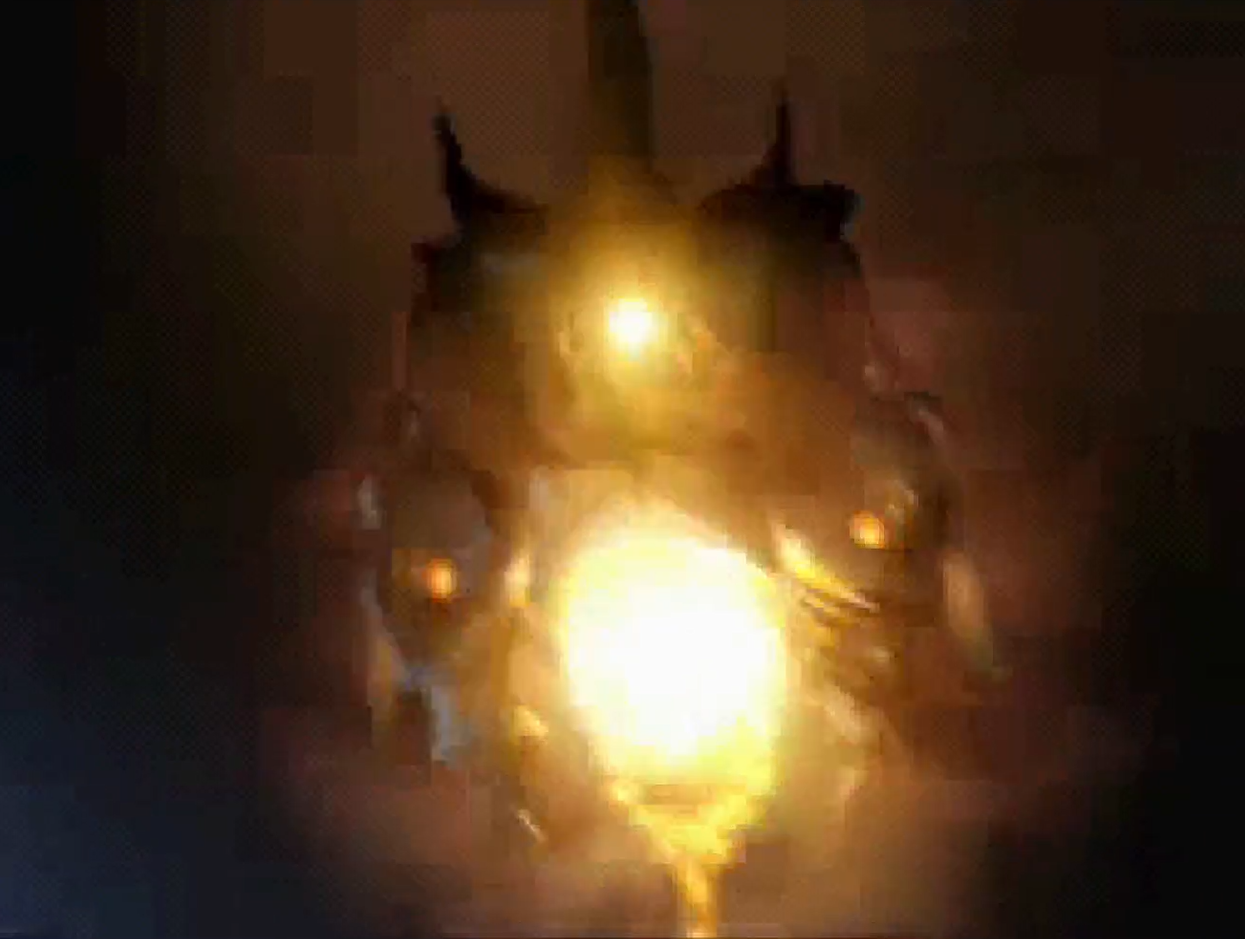
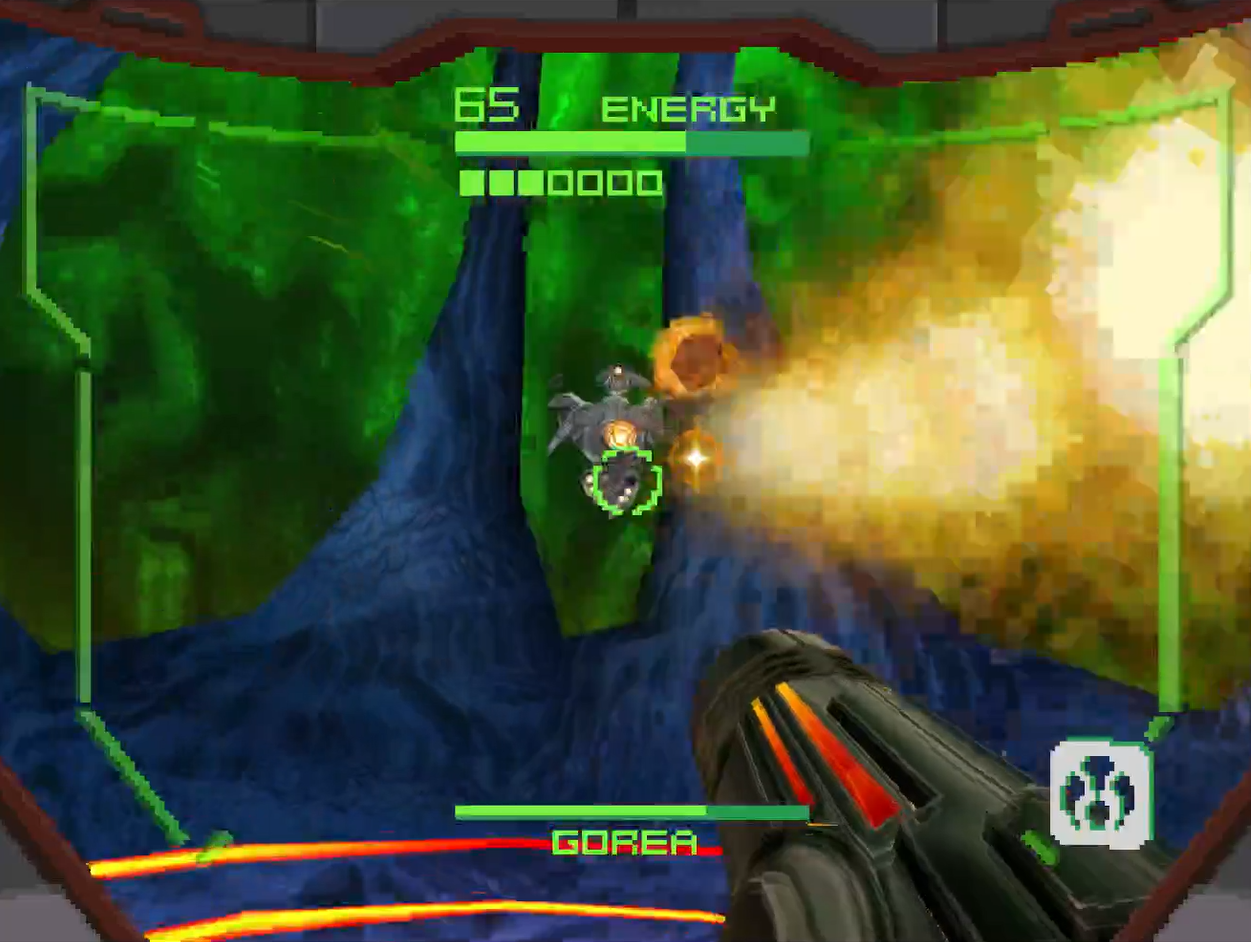
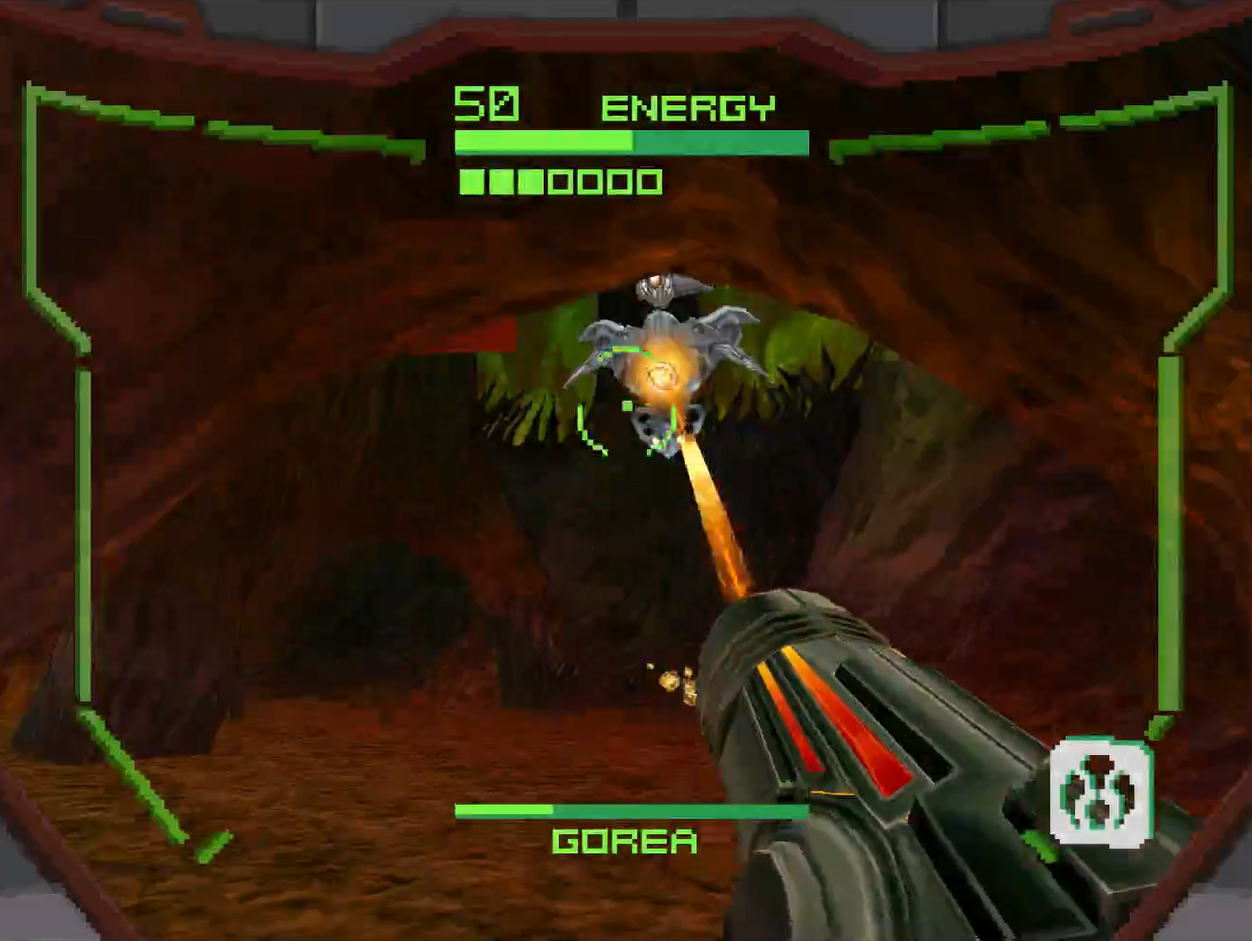
Gorea
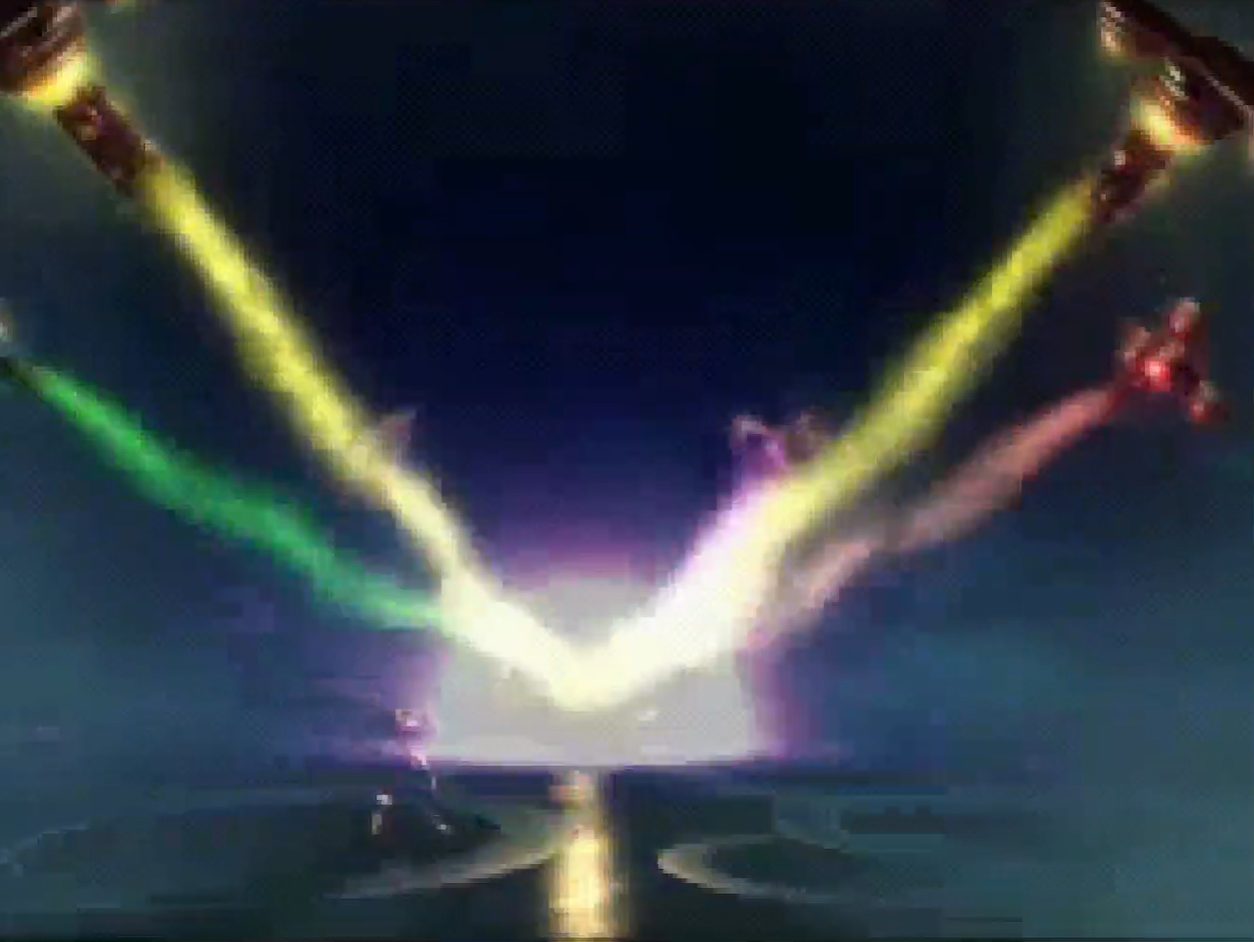
Here we are at last, at the heart of the Oubliette, taking on celestial calamity known only as Gorea!
Gorea will waste no time making an introduction, as a cut scene plays out showing the vile creature absorbing the powers of each bounty hunter before discarding them away with its gnarly tentacles. The trap of luring you to the Alimbic Cluster with the promise of Ultimate Power is almost complete. The only thing standing between Gorea and the destruction of the galaxy is you! Let’s do this!
Gorea will start off the battle in a “standard” form that resembles that of the Hunters you fought; it will have a head, arms, shoulders, torso, and legs, plus a Seal Sphere that’s actually used to contain the fell beast. This is important for a few reasons; first, is because you’ll want to scan Gorea FOUR TIMES to get the complete set (First, in its regular form; second, it’s arms have their own dedicated scan; third, Gorea when it switches upside down; fourth, the Seal Sphere itself).
It’s also important because Gorea’s shoulders are where we’ll be focusing our attacks. You’ll need to break both shoulders to get to the point where you can do real damage to it.
First things first, though: if you want to get the TRUE ENDING to the game, you’ll have to do a bit of legwork before you even land the first hit at all.
You’ll notice that the arena has six panels on the wall, with each corresponding to a weapon color. As you no doubt have put together yourself, you’ll need to shoot the panels with the corresponding weapon, however, you’ll need to do it in the correct order to obtain the true ending. The order you want to shoot them is:
Yellow > Green > Orange > Blue > Purple > Red
If you shoot them in that order with each weapon, you’ll hear a chime go off and receive a transmission from your Gunship about a “Photon Avalanche”. I don’t know what that means, but the important thing is that you can now start focusing your attacks on Gorea, who has no doubt been attacking you while you’ve been shooting the panels. Before we combat the beast, let’s get a feel for its attacks.
Gorea has absorbed each Hunter, and thus has a deviation of each beam that it will attack you with. As a quick summary: the Battlehammer will now have a charged attack, unlike yours, which will knock you silly; the Imperialist will now fire TWO shots, one from each arm; the Shock Coil will be able to track you down at incredible long range; the Judicator will now fire TWO charge shots, doubling the area around Gorea you’ll be frozen in; the Volt Driver will fire two electrical orbs that will slowly draw closer to you; and the Magmaul will again spit fire that will burn you from both arms. If you get too close to Gorea, it will also greet you with a good, ol’ fashioned melee attack, either punching or stomping if you’re in Morph Ball form.
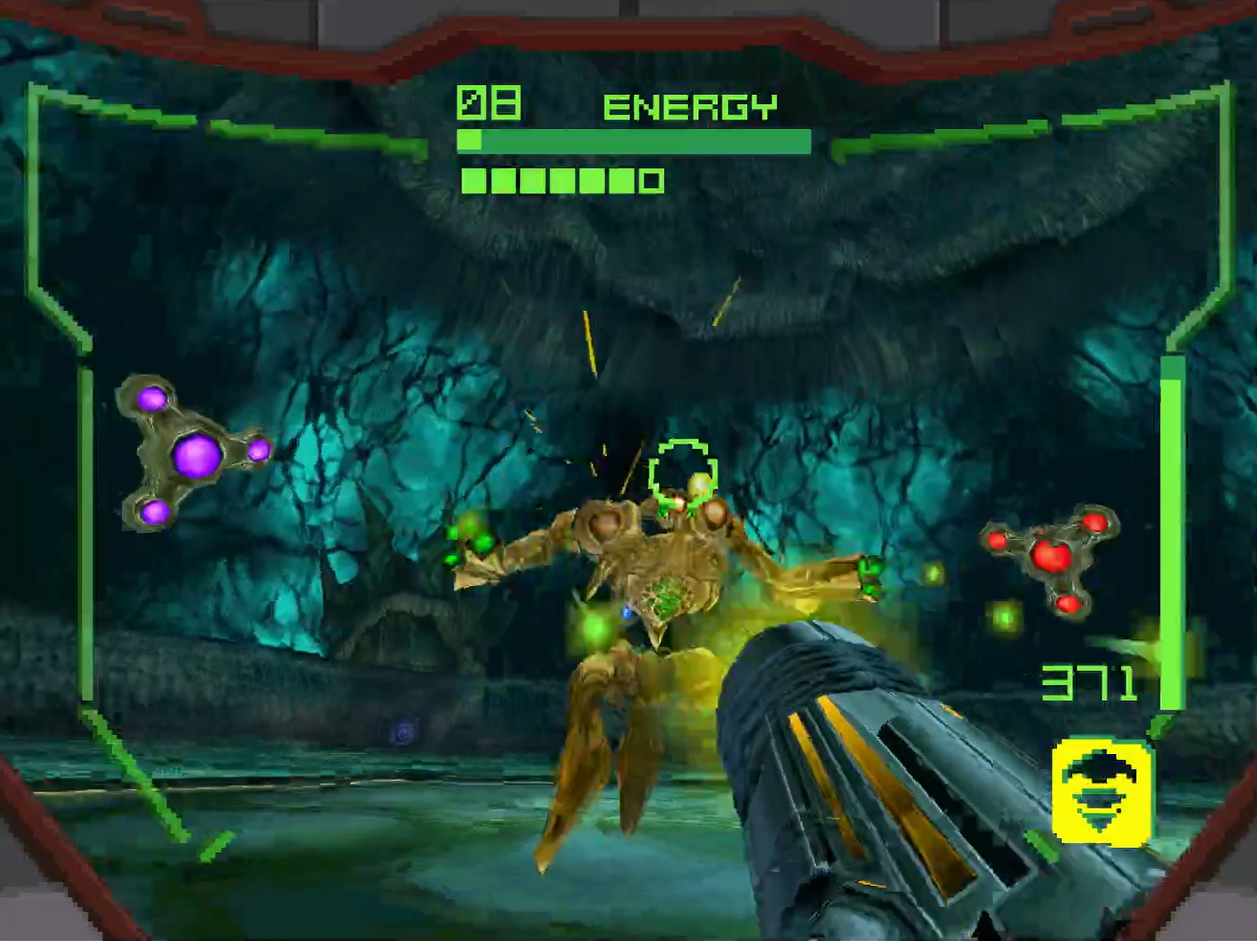
You’ll want to start off by attacking Goreas arms, specifically, its shoulders. Shoot them enough, and they will be destroyed. You’ll get a yellow energy refill each time you destroy one, BUT be careful – the arms regenerate quickly! I’d recommend attacking an arm, getting it to the red health zone, and then switching focus to the other arm. Destroy the second arm completely and then come back and finish off the first.
Now, this is very important and took me longer than I would care to admit to really figure out: you need to attack Gorea with the appropriate weapon, or your attacks will do no damage! Whatever color Gorea is, attack with that beam! For example, when Gorea is blue, you may be tempted to switch to the Imperialist to take it out, but that just means that Gorea in fact is attacking with the Imperialist, and you’ll want to use the Shock Coil! Learn from my mistakes here, friends! For what it’s worth, I’ve found the Shock Coil and Magmaul to be particularly effective, as well as the Imperialist if your aim is good enough.
Once both arms are destroyed, Gorea will start to levitate and the Seal Sphere will reveal itself. A friendly reminder to scan both, and an FYI – whatever beam you dealt the finishing blow to Gorea’s arms with will be the beam you’ll stick with for this phase.

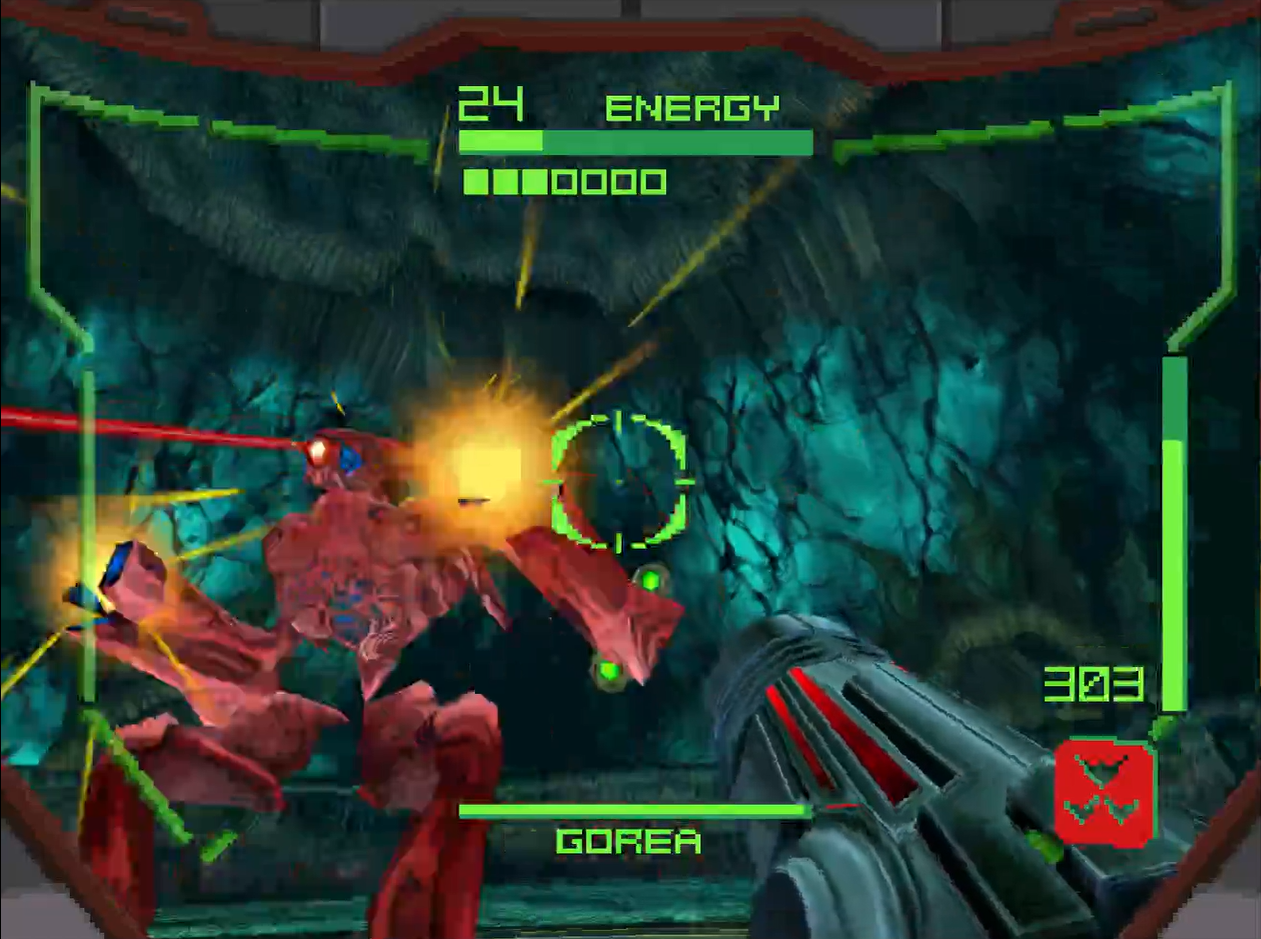
Concentrate fire on the Seal Sphere. This will almost be similar to the Cetraphid fight in that you’ll want to constantly keep moving side to side or in a circular motion (just watch for the energy shield on the ground). Gorea’s big attack in this phase involves it shooting out a tentacle that will grab you and yank you around the arena, eventually bringing you closer to Gorea for massive damage. If you get caught by this, flail and jump and even Morph down and boost away – just don’t let yourself get hit.
A less threatening attack is when the tentacles start throwing the item orbs, which are actually a scannable creature called Trocras, at you. This can still hurt, but it’s easy enough to avoid. Those Trocras’ will be in the arena, on the other side of the energy shield, if you need any more ammo or an occasional health refill too.
Once Gorea has taken enough damage, it will come back down and assume its “Hunter” form, and you’ll start the whole song and dance again. Its attacks will stay consistent throughout the entire fight, so keep at it. You’ll likely need three or four phases to finish the job, but keep at it, and the scourge of the Alimbic Cluster will fall!
Now it’s time to finish the job.
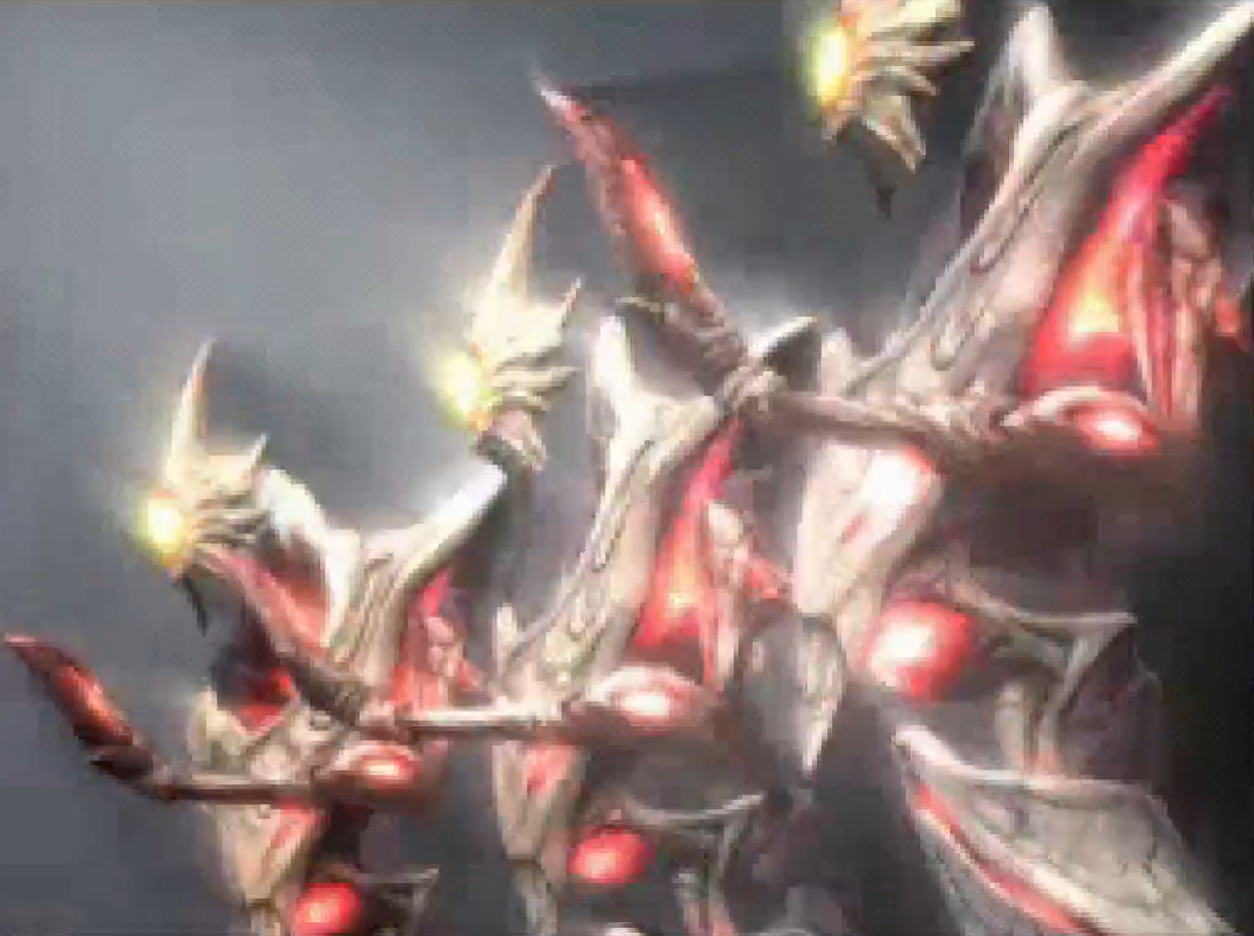
Gorea V2
This is it. The final battle. Let’s rid the Tetra galaxy of this calamity once and for all!
There’s both good news and bad news. The good news is that this battle is actually incredibly easy, especially compared to the war we just went through against Gorea’s first form. The bad news is that, well, this battle isn’t particularly fun. You’re going to be in the worlds most tedious game of hide and seek, but hey, we’ve come this far; there’s no going back now!
You’ll be transported to a different part of Oubliette, one that looks pretty creepy, atop a massive hollowed out tree, with a spiralling pathway leading down towards the ground. Gorea itself has now fused with the Seal Sphere and has taken a more spectral form, capable of teleporting around the arena, but still possessing a physical body that can be damaged. Or so we think.
You will immediately get a transmission from your Gunship indicating that, of all of the extensive weaponry we have collected over the course of this adventure, not a single one of them in capable of injuring Gorea. Greeeeat. No big deal though – as soon as the battle starts, make a beeline to the base of the tree at the bottom and in the center of the hollowed out base, you will find what very well could have been the Ultimate Power all along – the OMEGA CANNON! This weapon will fire off a massive burst of radioactive energy, and is just what’s needed to put Gorea down for the count for good!
Gorea will have a few new tricks up its sleeve for this fight, but it’s nothing that should give you trouble. In close quarters, the celestial calamity will fire off a laser in a straight line, which can hurt big time, but is pretty easy to avoid. When you’re further away, Gorea will summon small meteors that can pass through solid objects to hone in on you. Gorea can summon a few of these meteors at a time, and they hurt if they hit you, but thankfully, the move slowly and are telegraphed by a sound, so you’ll know they’re coming. One blast from the Omega Cannon will destroy the meteors, and more often than not, they’ll drop some health, so you should be able to stay pretty topped off.
Honestly, the hardest thing in this fight is going to be actually finding Gorea to hit it. This monster will teleport and show up in random places all over the arena, sometimes towards the top, sometimes hiding to the side of the tree, and sometimes on the polar opposite end of wherever you are. Use your radar to keep track of Gorea’s movements and blast it with the Omega cannon every chance you get. If you were good enough to beat Gorea’s first form, you’re more than good enough to beat its second, so keep up the attack. It may take a while, but you’ll destroy this ancient evil once and for all!
Congratulations! You beat Metroid Prime Hunters!