


Metroid II: Return of Samus Walkthrough: Metroid Strategies
Here you’ll find a detailed list of strategies, information, and tips in fighting the various Metroid evolutions you’ll encounter on Sr388. By and large, 95% of every Metroid fight is: A) don’t get hit by the moving Metroid, and B) fire missiles at it! There’s not really any special attacks you need to know about, nor is there a surefire strategy to defeat any of these menaces – it’ll once again be up to you and your ability to perform. That being said, you can certainly utilize this guide for some pointers and suggestions!
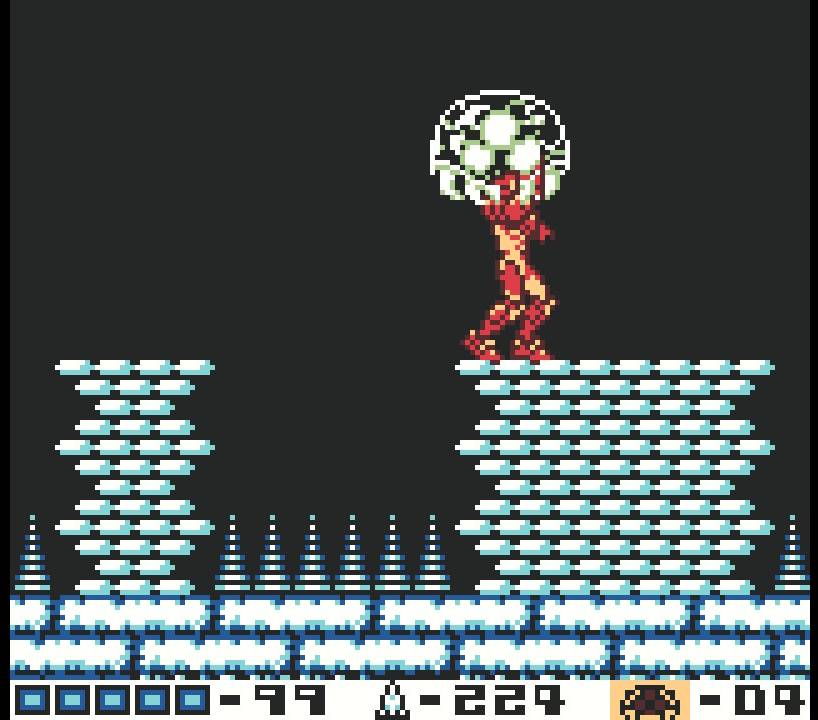
Standard Metroids
Nothing beats the classics, am I right? I don’t need to tell you the damage a regular Metroid will inflict if it grabs a hold of you, so hit it with the Ice Beam, and while it’s frozen, pump it with five missiles to destroy it. If you do get caught by the Metroid, get into Morph Ball form, roll back and forth and lay bombs to shake it off.
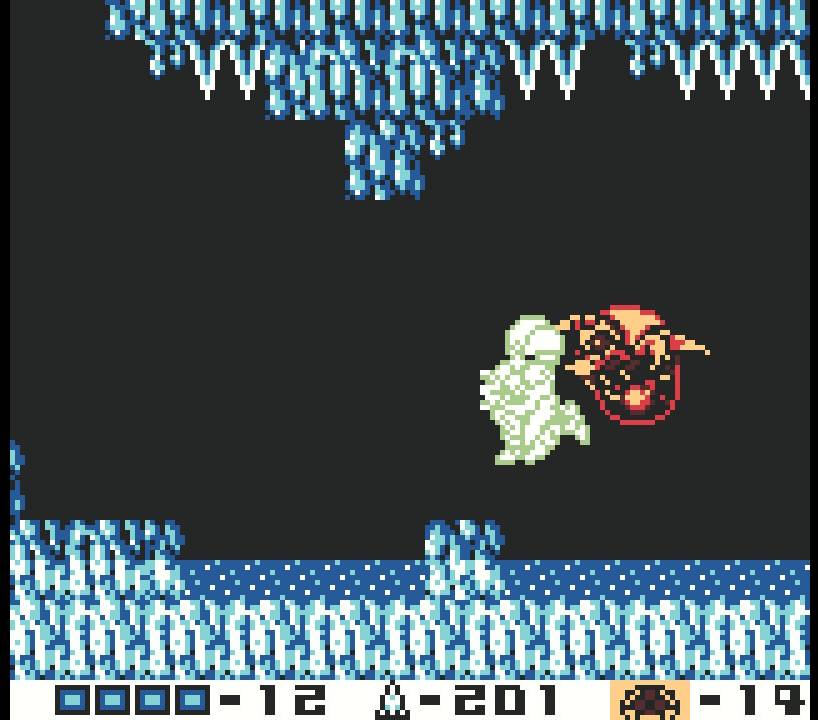
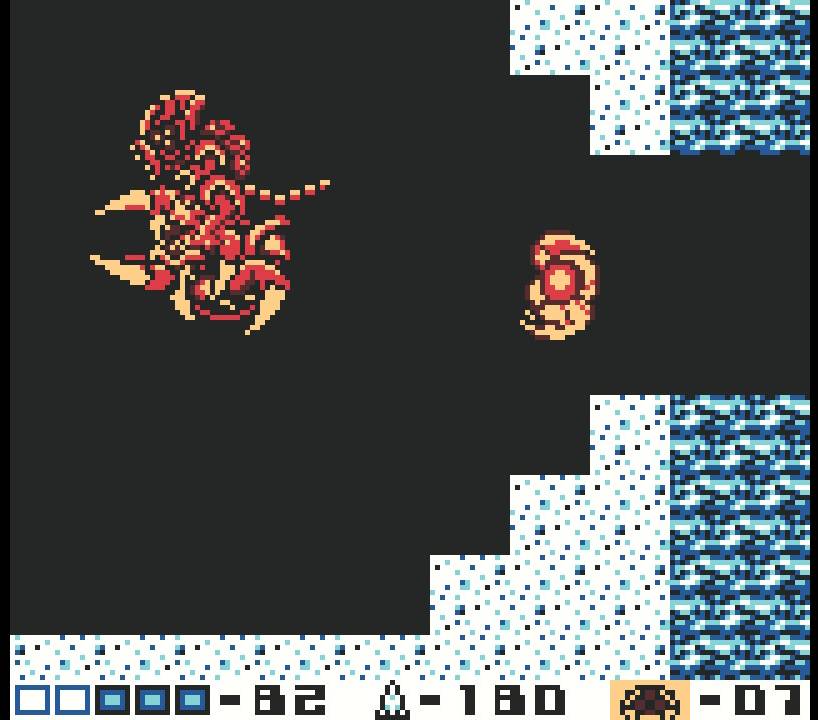
Alpha Metroids
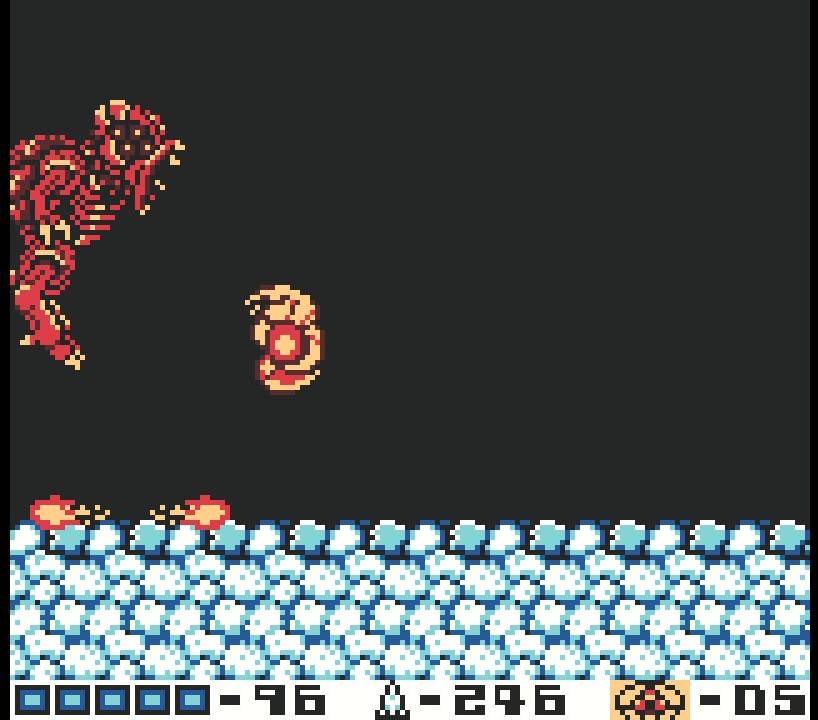
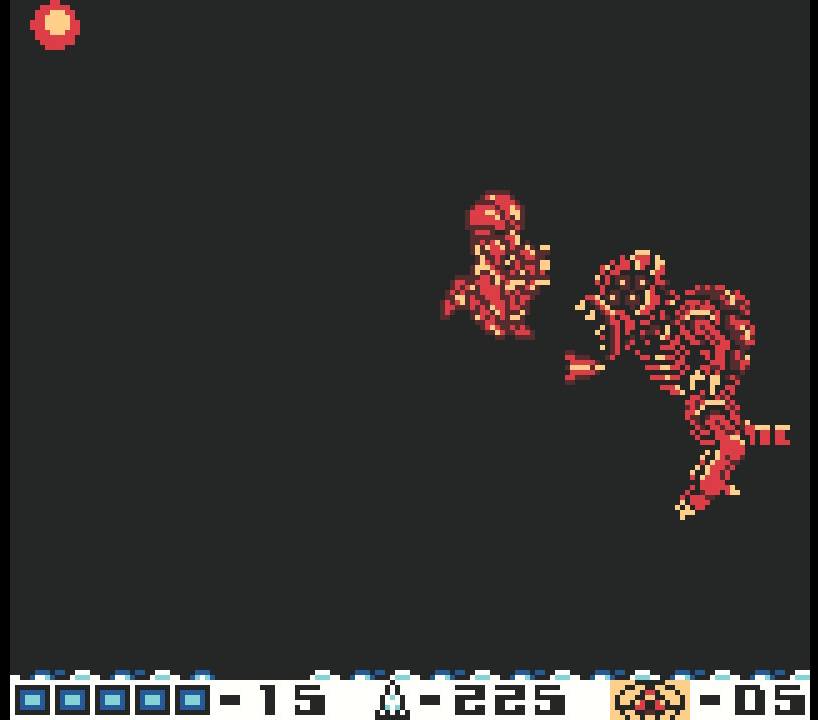
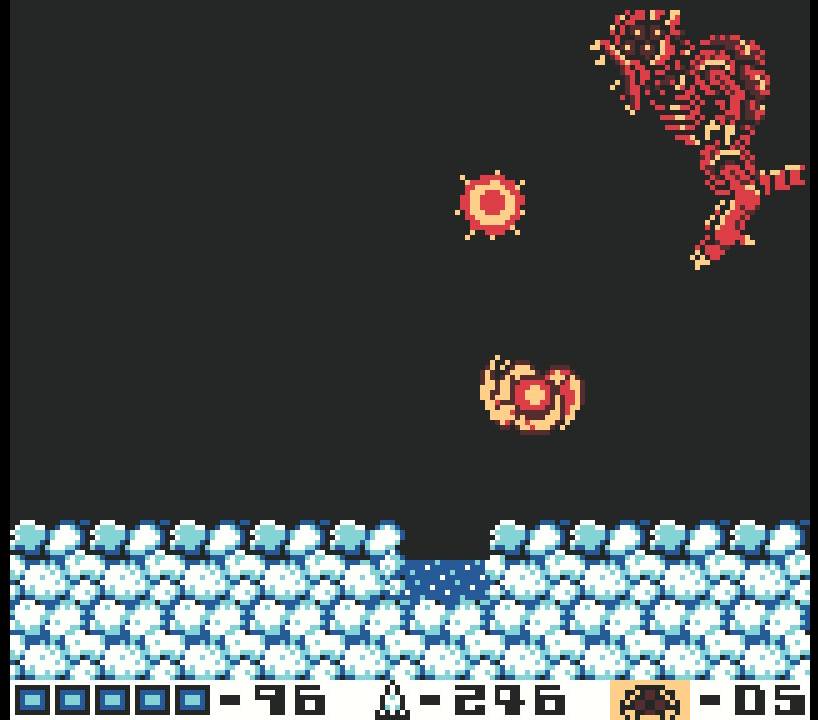
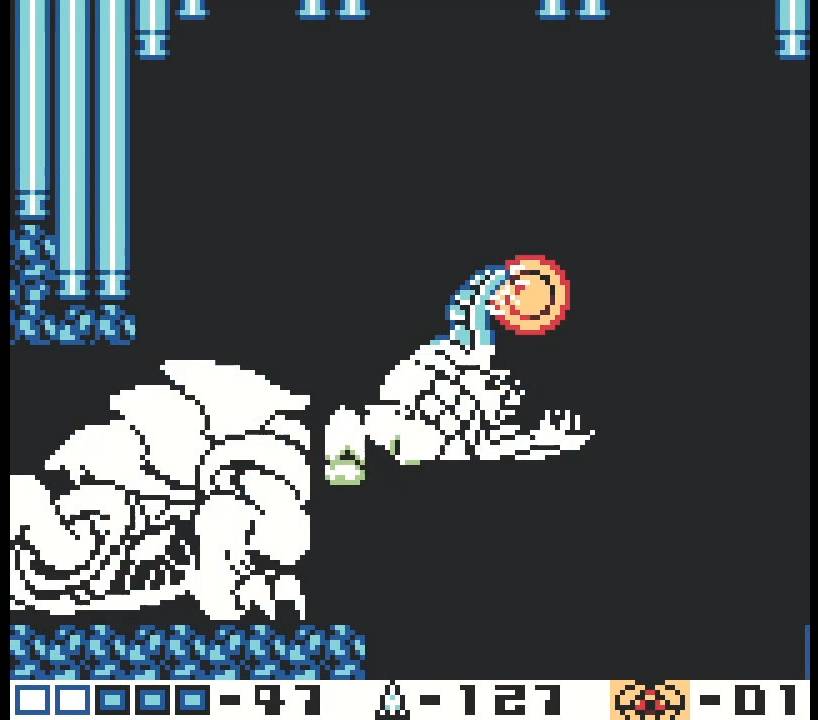
You’ll come across a Metroid husk – which are going to be great visual queues as to which direction a Metroid will be in – and from it, a new type of Metroid will emerge: the Alpha Metroid!
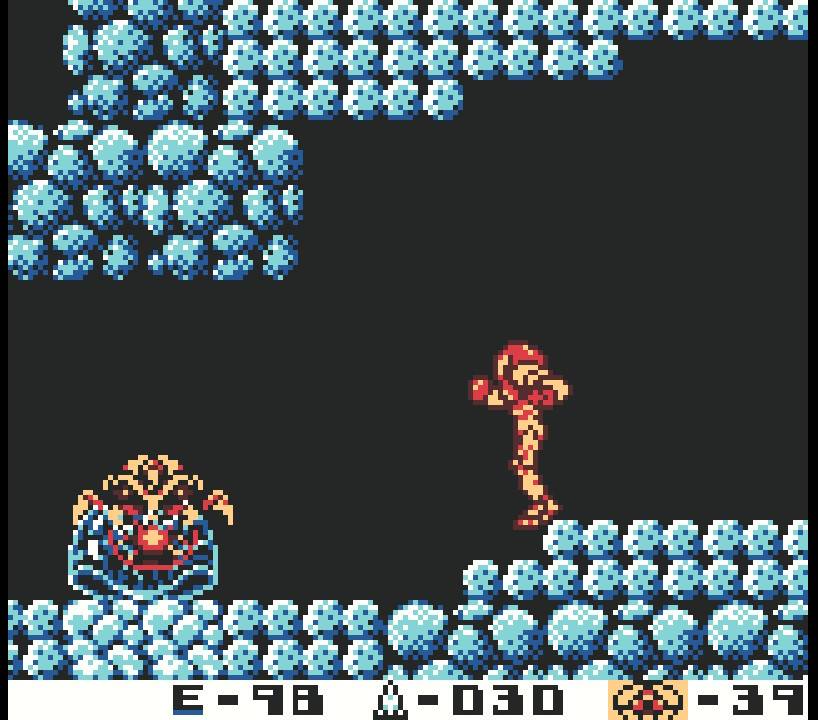
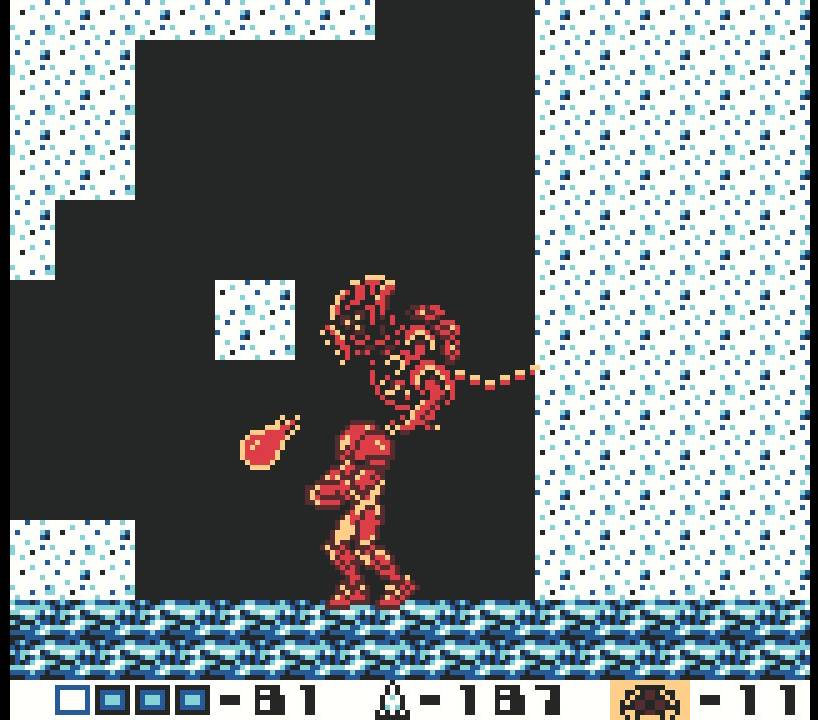
As I mentioned earlier, there are no “strategies” per say – you just need to nail the Alpha Metroid with FIVE missiles to its underbelly. The Alpha doesn’t really attack either; it’s only move is to just fly into you, so on the whole, they shouldn’t give you a ton of trouble, but just in case, use this quick trick to take them out: Alpha’s will always fly and bob in the direction that you are moving, though on a second or so delay. Jump up, and the Alpha will follow, which will open up its underbelly for attack! Shoot your missiles upwards and try to chain the shots – the Alpha will recoil upwards after you shoot it, so try and get it into a rhythm where you’re firing a missile upwards, it recoils, adjust slightly so you’re under the Alpha, and fire again.
Five missiles will destroy the creature, and the sounds of an earthquake will be heard all across the planet. The earthquake indicates Phase One is over. If you need it, jump up to the ledge directly above the Metroid husk and refill both your energy and missiles (may as well!). Phase Two is about to begin!
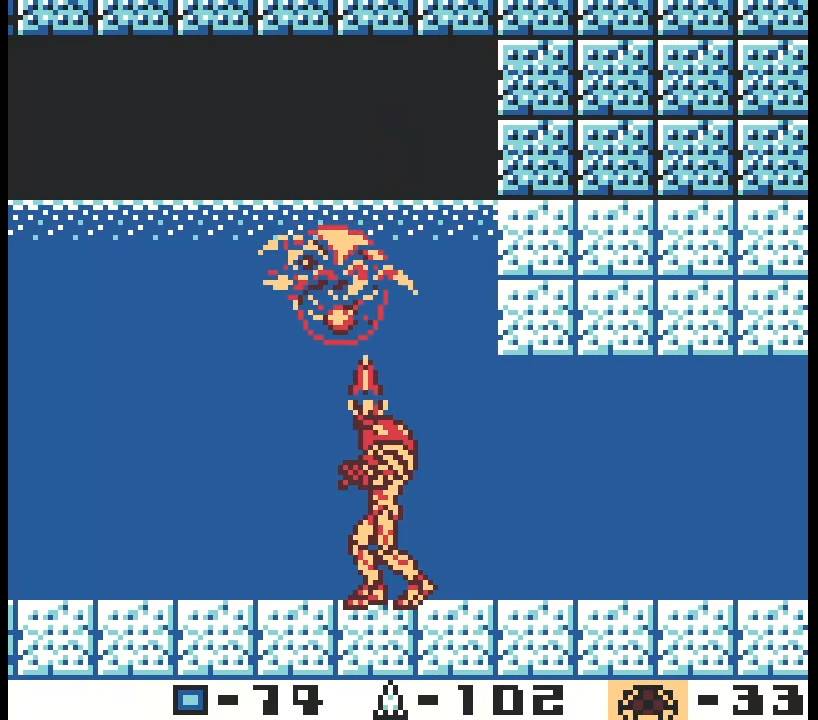
Gamma Metroids
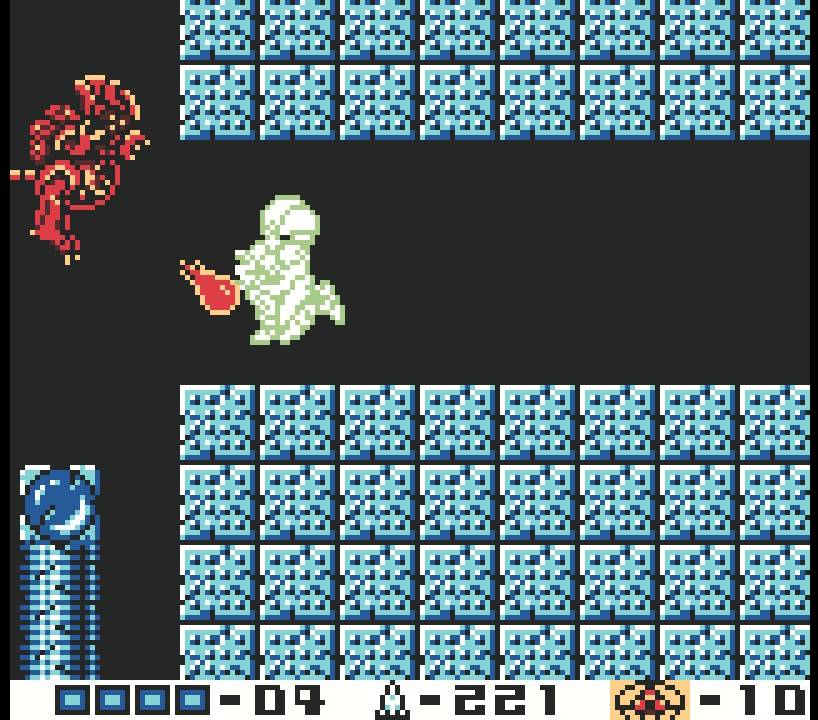
As you enter the room, you’ll run into what looks like a regular Alpha Metroid, until it starts to change and evolve into a deadly GAMMA METROID! Gamma Metroids are bigger, bulkier, faster, hit harder, and have a higher defence, so you’ll need to be on your game. Additionally, the Gamma’s also have some sort of electrical bolt that they will fire in short bursts, typically in a sweeping, clockwise motion. Luckily, this attack doesn’t shoot far (it almost looks like it’s attached to the Gamma, actually), but that means getting close to this Metroid is going to be bad for your health.

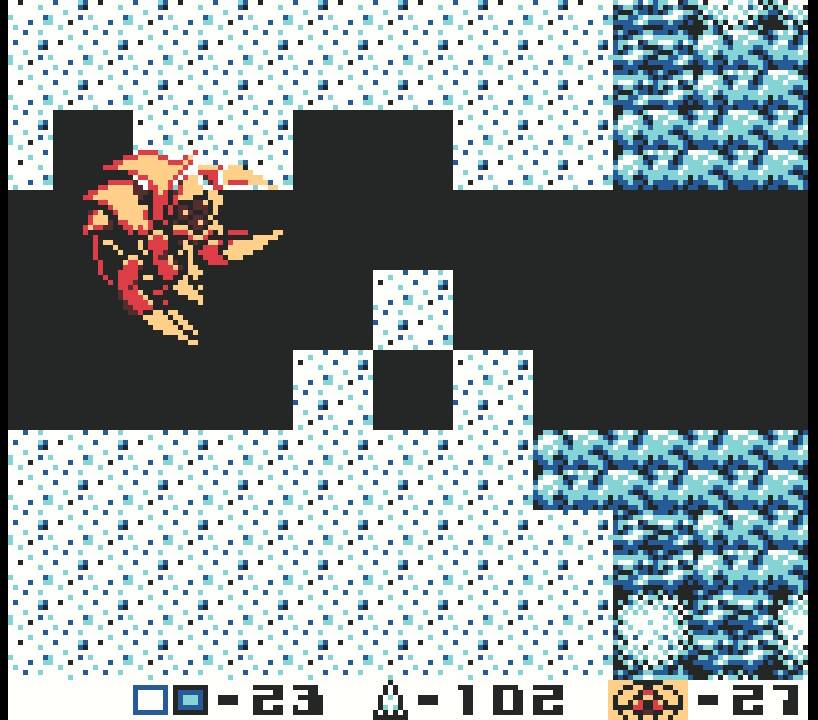
That’s too bad, as Gamma’s have the same tendency as the Alpha Metroids to just ram into you as their primary attack, and their bigger bodies makes them harder to avoid. Fortunately, that also means that their weak spot is bigger too! You’ll want to direct your missiles to the underside, directly to the face, or to the back. Gamma Metroid’s will require double the missiles – 10 – to be destroyed, so aim true.
A couple of quick hacks that might make your life easier: use the same jumping technique that we employed on the Alpha Metroids where you jump straight up to lure the Gamma after you, allowing you to blast its underside. Another neat trick that we can pull off (not in every Gamma fight, but in a few) actually involves using the Game Boy’s limitations to our advantage! If you need a reset or a break, just walk away from the Gamma and put some distance between yourself and it. If any creature is off-screen, it’s basically frozen. This means you can creep forward a bit and blast the Metroid with a free missile shot if it’s positioned right!
Try and get the Gamma into a rhythm where you’re standing stationary and blasting it with a missile, the Metroid gets knocked back, and when it comes back towards you, BAM – another missile! Ten missiles later, and you will destroy this monster!
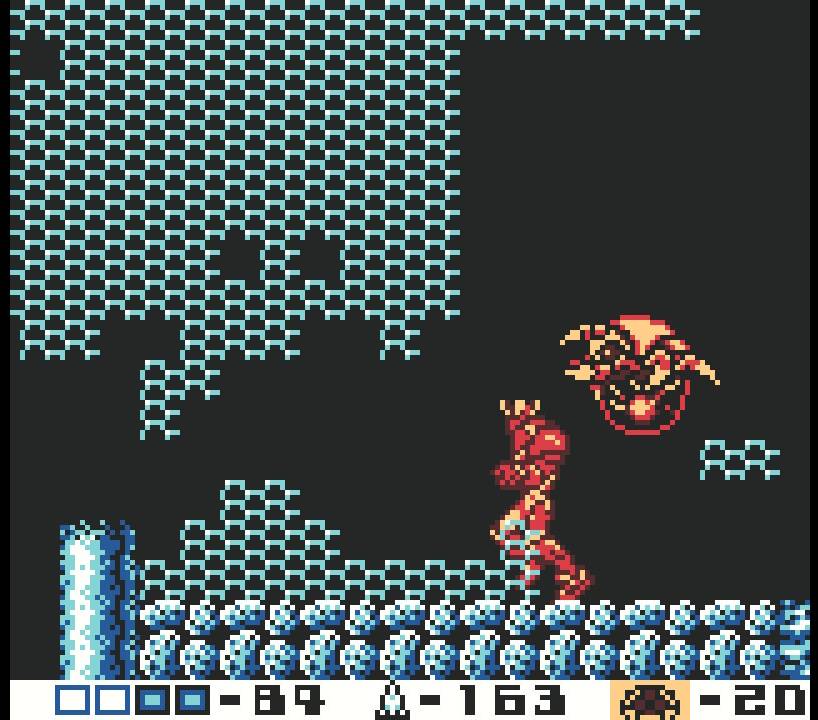
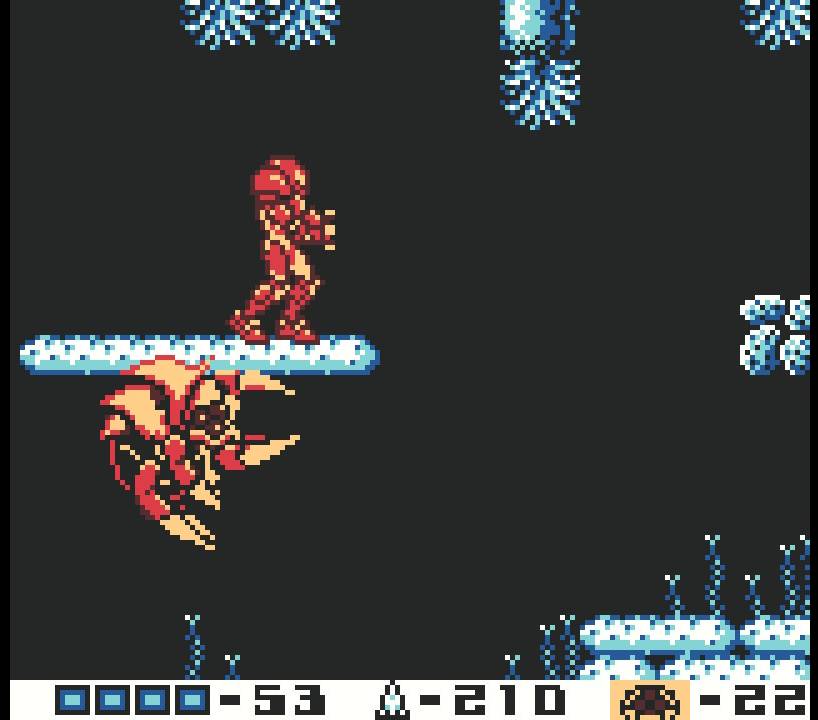
Zeta Metroids
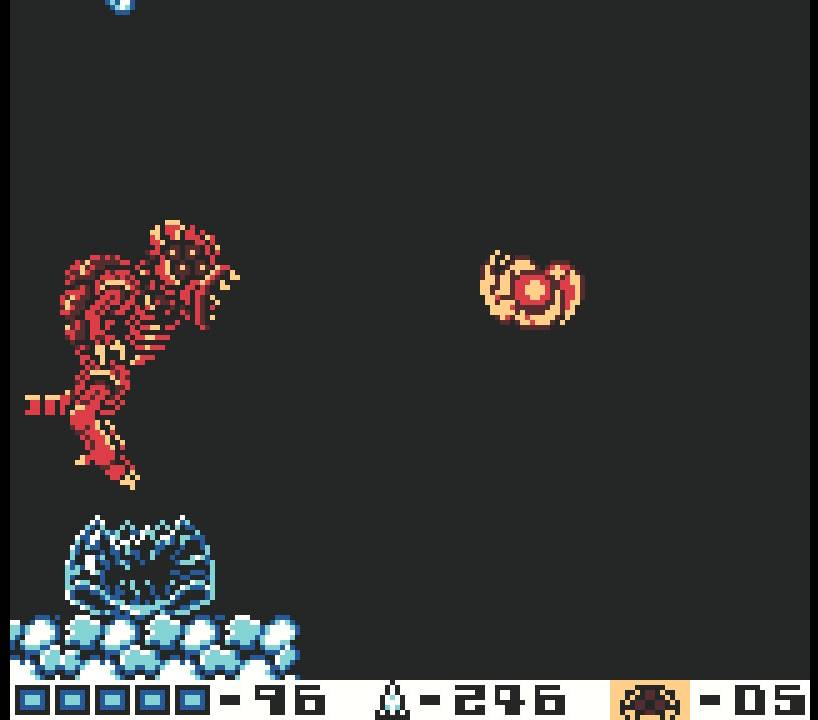
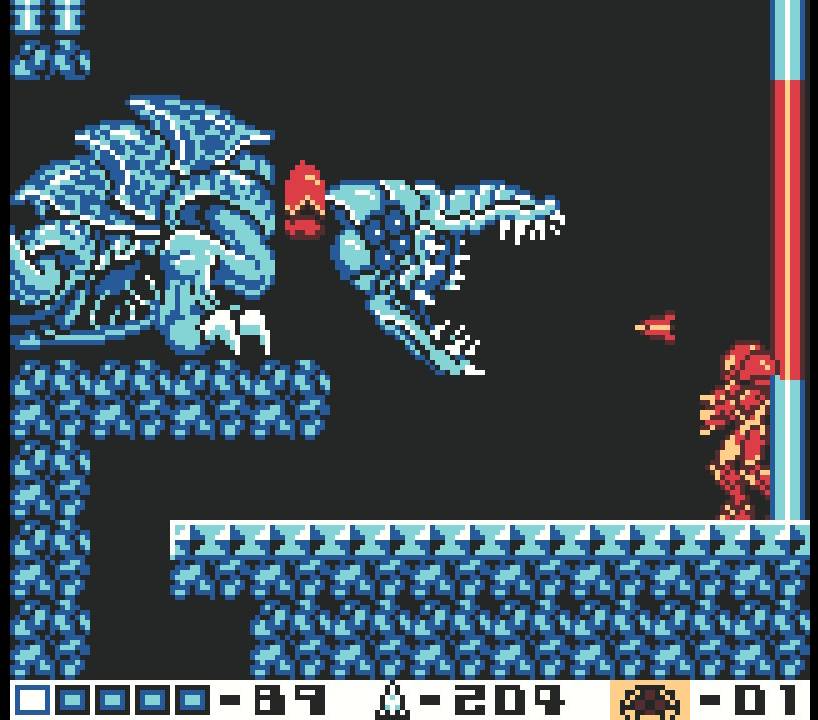
Enter the latest evolution in the Metroid line – the ZETA METROID! This Metroid is fast, agile, and deadly. I dare say that the Zeta might give you more of a challenge than any other Metroid type. The Zeta will constantly be flying and trying to ram you, typically doing so starting in a high position and then swooping down towards you. Zeta Metroids don’t have the electrical current attack of the Gamma Metroids fortunately, but unfortunately, they have a fireball attack, which hits much harder.
The hardest thing about combating the Zeta will be hitting it. This Metroid is always moving, and quickly, making it tough to nail it with missile shots. Any time the Zeta is somewhat stationary, it’s almost directly above you too, which makes moving to attack it a dangerous tactic. The only area that will take damage is the face, so don’t even try to hit the back, underside, feet, etc. Making matters worse is that the Zeta Metroid’s defence has increased over its pre-evolutions, requiring you to blast it with TWENTY missiles.

The first Zeta Metroid in particular might give you troubles. The room you will fight it in is covered in sand, which will make this probably the most challenging of the three Zeta Metroid’s you need to take out. Remove as much of the sand as you can and jump over the Zeta when it flies towards you; use that time to reposition yourself to try and jump up for a missile attack to the skull. You’ll be in for a tough battle, but with enough patience and a little luck, you’ll destroy the Zeta Metroid just like it was any other creature.
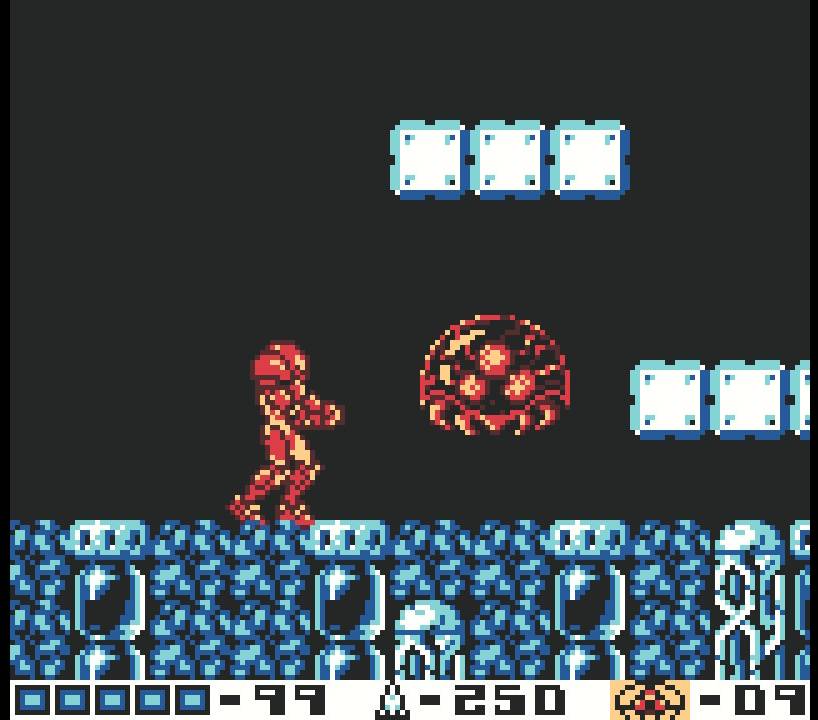
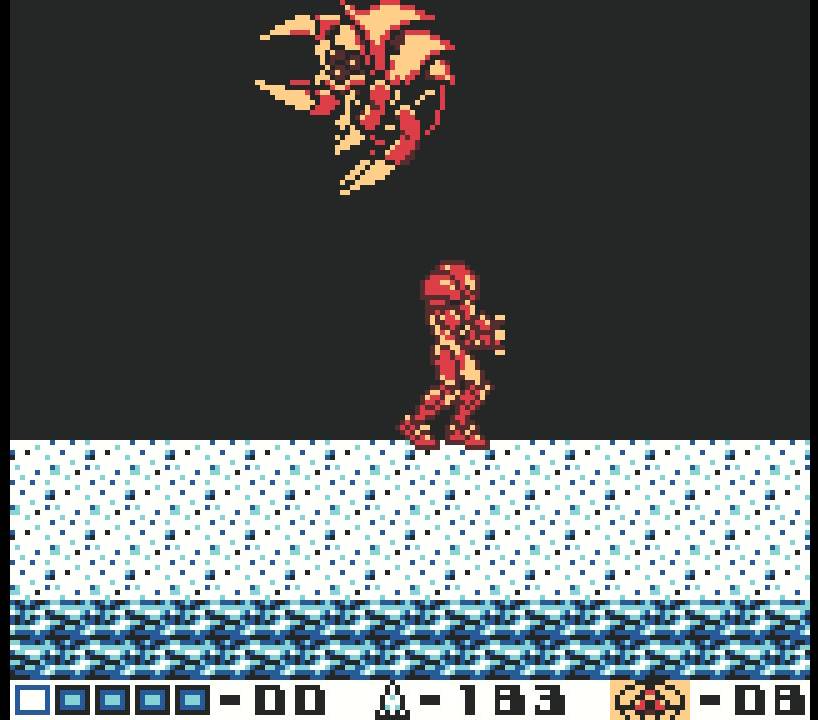
Omega Metroids
The apex predator of SR388 has finally revealed itself – the indomitable OMEGA METROID!
These hulking creatures are the final line of evolution for most Metroids, and certainly the most powerful opponent we’ve faced thus far. The Omega isn’t quite as speedy or agile as the Zeta Metroid, but the Omega Metroid more than makes up for it with steely defence and brute strength.
Most of the same movement patterns from the Zeta Metroid are true for the Omega Metroid as well – it will always be flying around, and it will often try and position itself directly above you, or somewhere else where it will be inconvenient to hit. It can shoot out a fireball which does major damage to you, and creates a shockwave on the floor if it misses.
Thankfully, in terms of attacks, this is pretty much it. The difficulty comes not from not knowing what to expect, but from being able to go head-to-head with the Omega in close quarters combat. This Metroid is an absolute tank, requiring THIRTY (3-0) missiles to either its back, chest, or head in order to put it down. You will absolutely miss on some of these shots too, so expect anywhere from 40 to 60 missiles in order to get the job done.
What will help you immensely in this fight is the Screw Attack. The Screw Attack itself won’t damage the Omega Metroid, but it will allow you to become impervious to damage, so you can Screw Attack into or away from the Omega and you won’t take any damage. You can also Screw Attack through the fireballs, so make sure to do that as well. This is a great asset when you need to just put some space between you and the Omega Metroid.
I’ve found the Omega Metroids are (for whatever reason – maybe because they’re slower?) also more susceptible to getting lured into that attack rhythm – you know the one where you hit it with a missile, stun the creature backwards a bit, and then by the time its recovered and moving again, you’ve nailed it with another missile. It’s not always perfect, but check out this video to see what I mean. If you can do this, it will make your life significantly easier.
Keep attacking, Screw Attack as much as you can when you’re not firing missiles, and hopefully you can lure the Omega into that familiar pattern of missile/stun backwards/charge forwards/missile. With enough punishment, this Metroid will fall.
Queen Metroid
This is it! The fight for all of the marbles! Samus versus the desperate Metroid Queen, the last known living Metroid! Your mission is almost done, but putting down this final nemesis will be, by far, our toughest challenge yet!
The Queen Metroid is a hulking, almost dinosaur-like creature with a long, flexible neck and a nasty bite. The good news is that the Queen actually has a fairly limited attack toolbox; the bad news is that the Queen’s defence is on a whole other level. You will need to fire off ONE HUNDRED AND FIFTY missiles directly into the Queen’s mouth in order to destroy it, so buckle up.

(Worth noting before we get into the fight – you’ll notice a small tunnel underneath the Queen; if things get really hairy and you’re looking for a reset, roll into that tunnel and you’ll fall down, landing back in the room with the Ice Beam. Use that to tactically retreat and try again.)
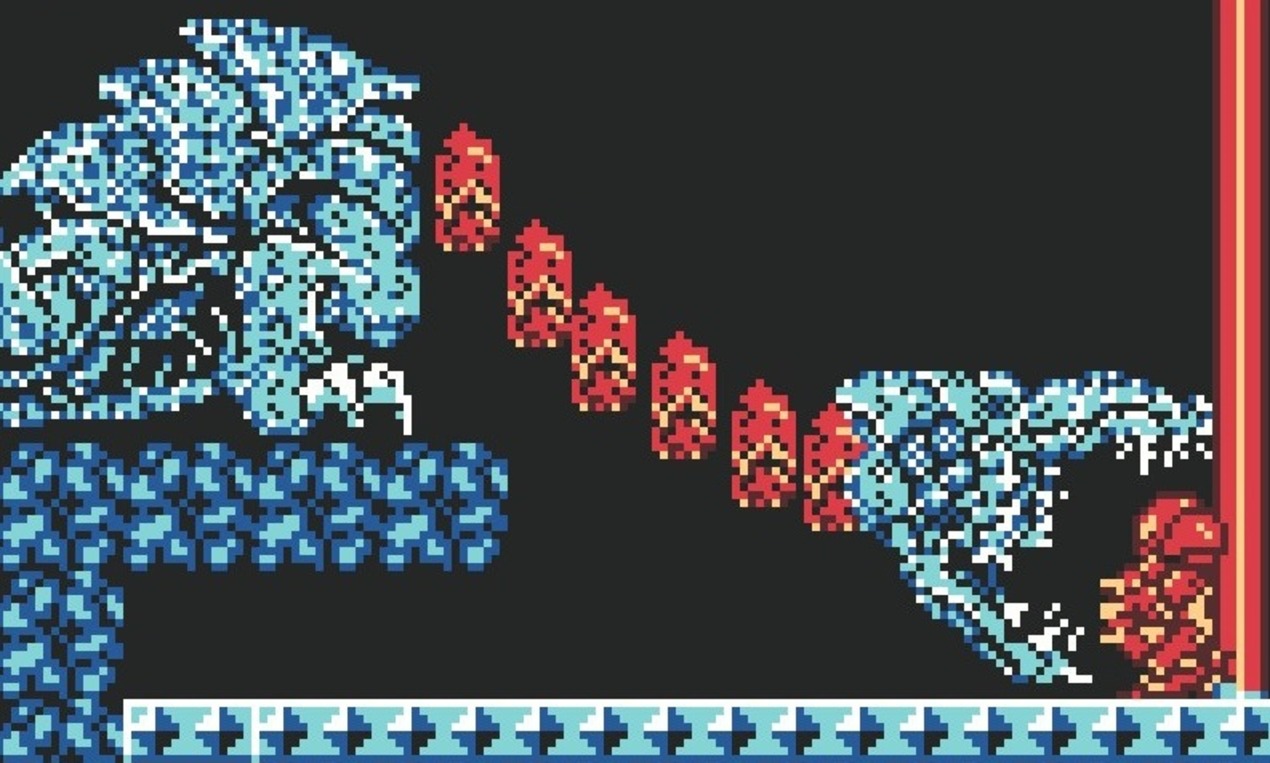
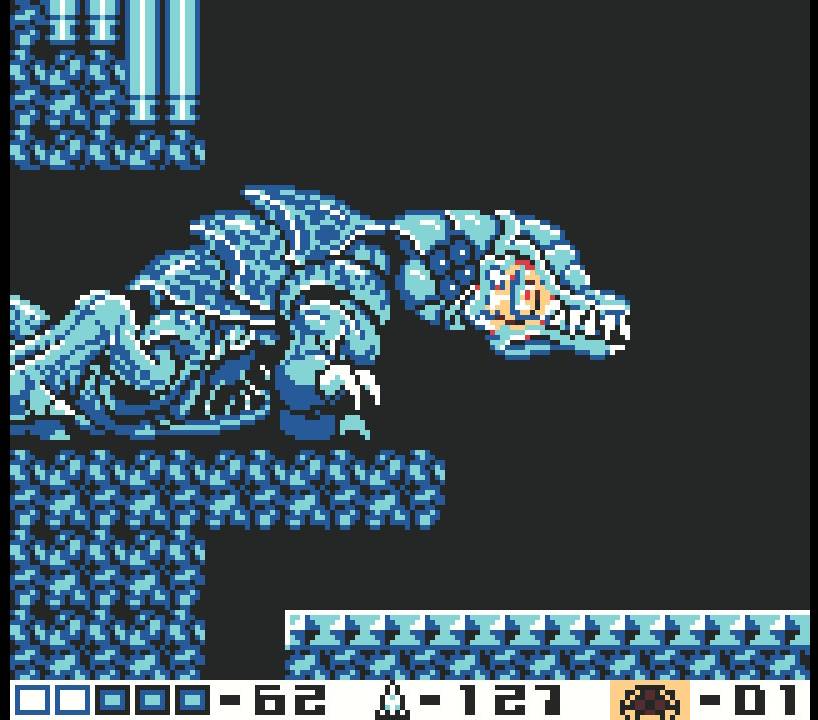
The Queen has two main attacks – the first of which is smashing you with her jaws. She’ll move her head with both her mouth open and her mouth closed, and I think they do about the same amount of damage, so just try and jump over her head. She will always attack twice (and sometimes three times when she gets low on health), so just be ready for the followup swipe after the first. The second attack will follow you, so if you jumped high, she’ll bite you higher in the air, so keep that in mind – a good strategy might be performing a short Space Jump over the first attack to get you to about the halfway mark of the back wall, and then a second, long Space Jump to clear you of the second.

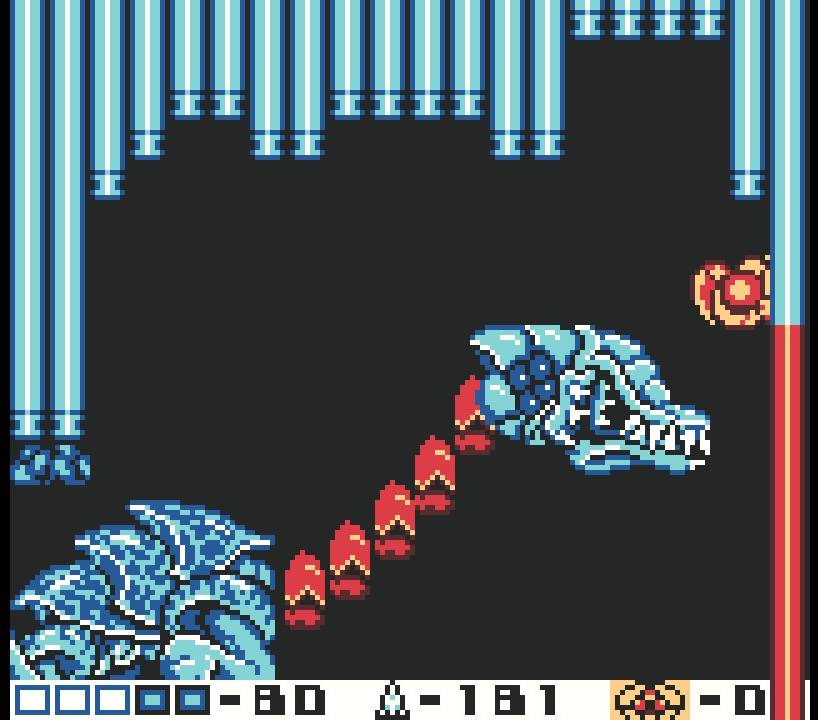
The Queen will almost always follow that up with shooting these three red fireball blobs at you – these can be destroyed with missiles, but a far easier method is to just Screw Attack through them. You won’t destroy them, but they won’t damage you either, so do this and they’ll fly off screen, leaving you no worse for wear.
You’ll want to fire missiles into the Queen’s mouth to damage it, but with the amount of missiles needed to destroy her and the amount of damage those jaw attacks hit you for, you will almost certainly die if you try and fight this final Metroid in a traditional way. We’re going to employ a different strategy, one that requires courage and precision.
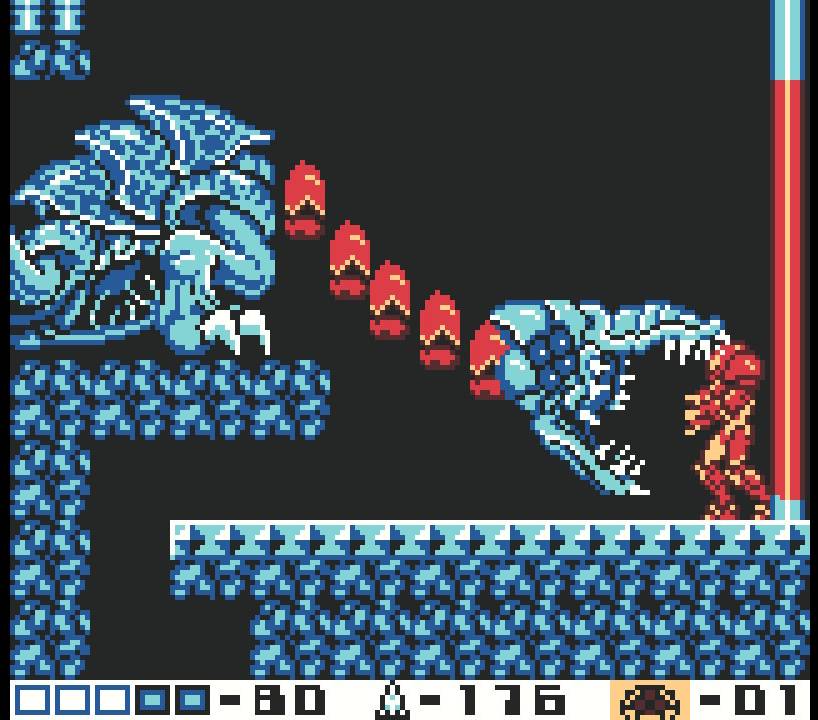
Anytime that the Queen Metroid lunges at you with her mouth open, instead of jumping over the attack, stand your ground and fire a missile into the Queen’s mouth. This will stun her for a few seconds, hopefully directly in front of you so you don’t even have to move, allowing you to fire off ten to fifteen missiles directly in her mouth. This is BY FAR a more effective strategy than trying to avoid taking damage from her attacks – you’ll still take damage here more than likely, but you’ll also be dishing it out just as fast.
Keep in mind – this obviously only works when the Queen’s mouth is open. If she attacks you with her snout, jump over it. This is my preferred method for defeating her. There is another way, however, and it involves even more risk.
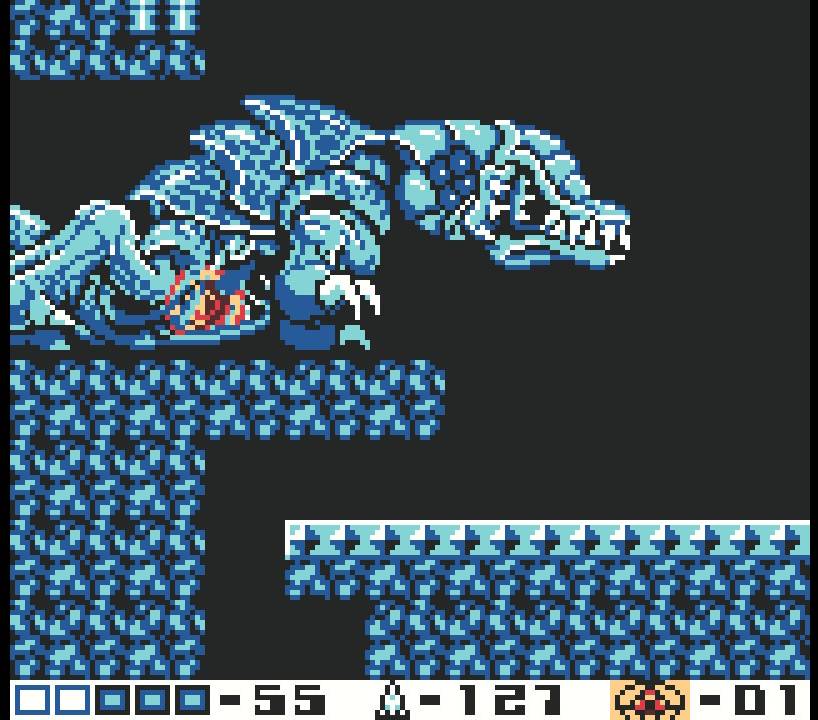
If you start to run low on missiles, stick to the same strategy of holding your ground and stunning the Queen when it has its mouth open. You’ll need to stun her so she is directly in front of you; once she’s stunned, morph down and roll inside her mouth. You will take damage here, so try and act fast. Roll towards her belly, and once you’re in the nucleus, lay some bombs. This will cause big damage! The Queen will spit you out after, and you’ll need to do this about four or five more times to defeat her.
Whatever method you prefer, stick to it, keep firing away, and the Queen Metroid will finally be defeated. Your mission is finally over.