


Metroid II: Return of Samus Walkthrough: The Tower – Zeta Metroids
Walkthrough
- A Few Things To Know Before Starting
- The Ruins – Alpha Metroids
- The Waterworks – Gamma Metroids
- The Complex – Gamma Metroids
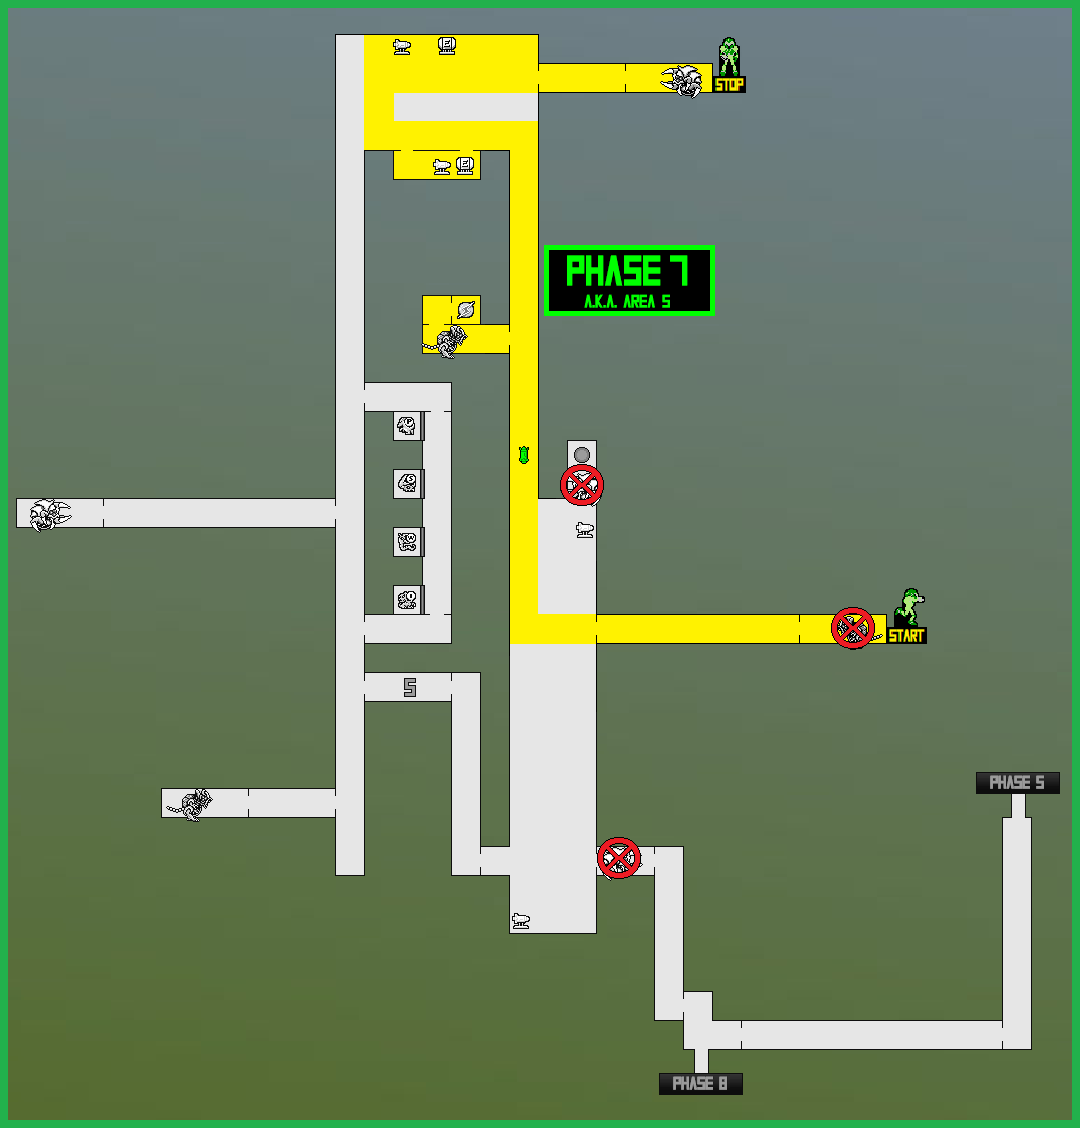
- The Tower – Zeta Metroids
- The Tunnels – Omega Metroids
- The Finale – Queen Metroid
Phase Five
We have a couple of small pit stops to make before we get to the meat and potatoes of this chapter, so let’s get going!
You should have used the routes to get you back to the areas where Phase Three and Four meet – if you went through the Morph Ball tunnels with all the spikes around you and past the thin bridge that used to have lava under it, you’re in the right spot! Phase Five is now officially underway, and unlike the last couple of Phases, there isn’t really a key set piece that you need to look out for.
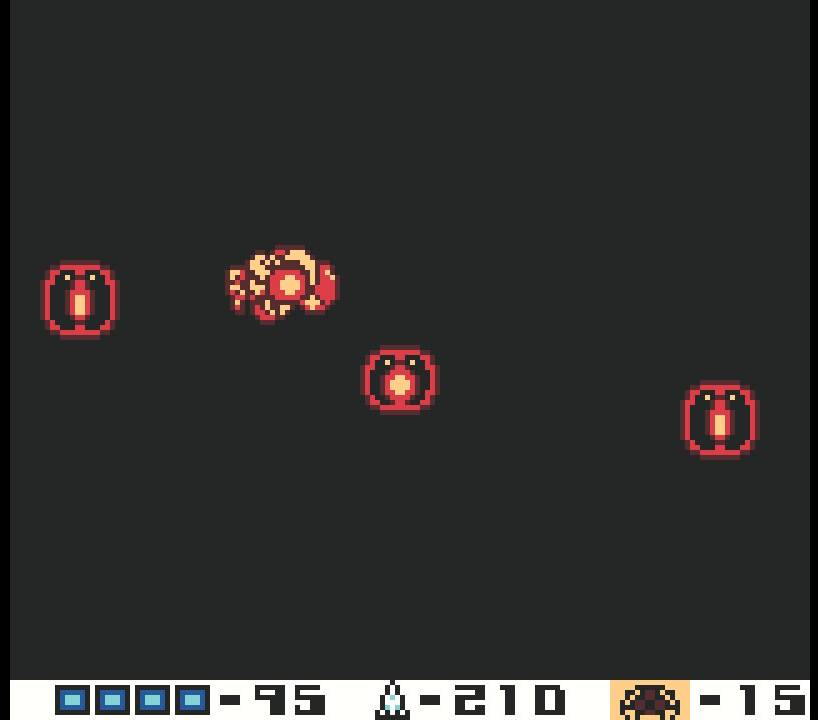
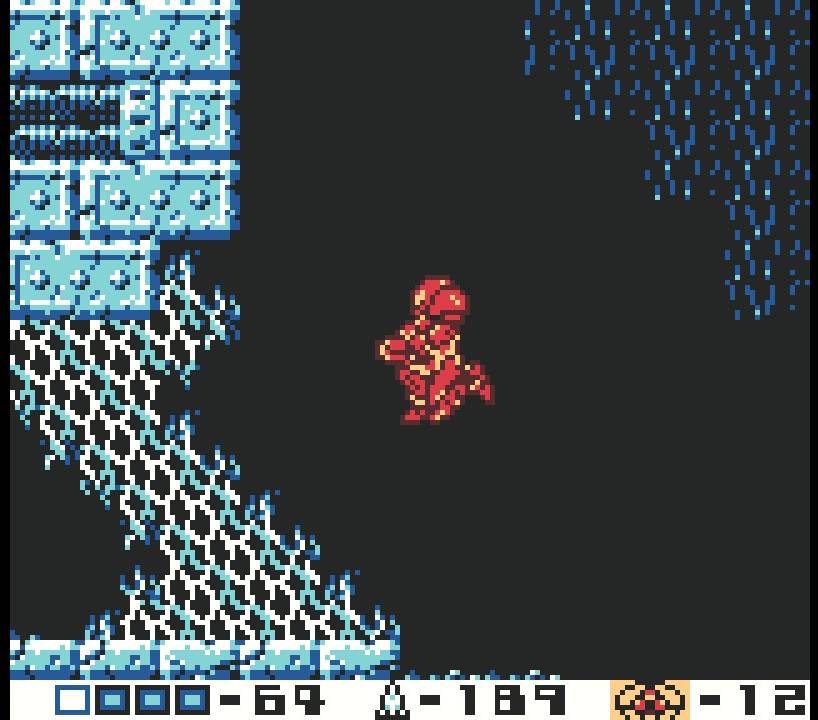
Head down the pathway, past the Metroid husk, and then take the passageway on your left. You’ll enter a long hallway with lots of small platforms, lava underneath you, and about a hundred jumping enemies called Octroll’s. This is actually kind of good, because your Plasma Beam will make short work of them, and they typically drop large energy refills. Slowly and carefully take them all out and proceed to the other end of the room through the passageway.

The next room has nothing in it, so just Space Jump upwards and take the top-right exit into another long hallway. Same idea as before – slowly proceed and take out all of the Octroll’s until you go through the left-side passageway. There will be a singular GAMMA METROID for you to eradicate in this room, so do your thing and then you’ll hear the familiar sounds of SR388 shaking.
… and that’s actually it for Phase Five! Backtrack to basically where you started from, head a little closer towards the entrance to the Complex in Phase Four (use the routes as always to help you navigate!) and stop when you see the tunnel heading downwards where previously there used to be lava.
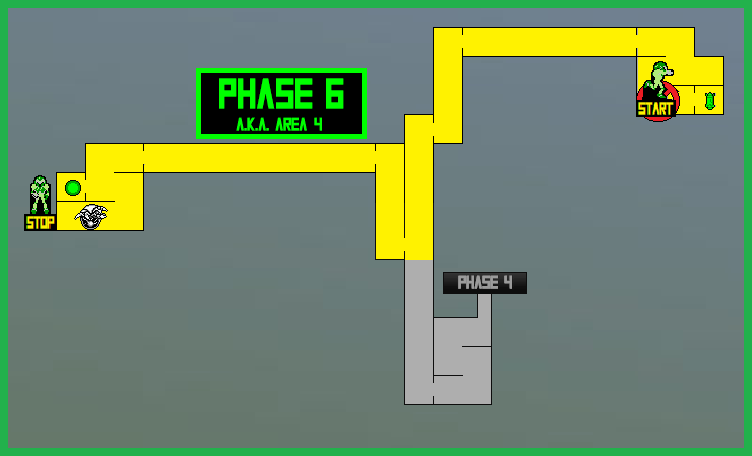
Phase Five Route:
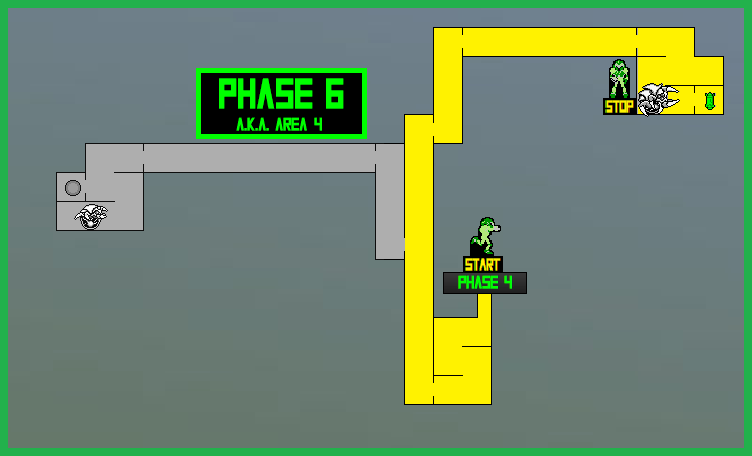
Phase Six
This is another small detour before we get to the next big set piece, so once you’re at the entrance to Phase Six, start dropping down, watching for all the spikes, and follow the path until you reach a point where you see two Metroid husks. You can either go up or go left, and it doesn’t really matter which way you take, but if you wanna stick together, head up.
Continue your ascent upwards, following the path until you get to a passageway on the right leading you into a new room. Watch out for a new enemy called a Moto – they’re kind of like those enemies in Zelda you need to hookshot their metal faceplate off, they hit hard! Keep following the path – it’s pretty much a straight shot – until you enter a new room with lava at the bottom.
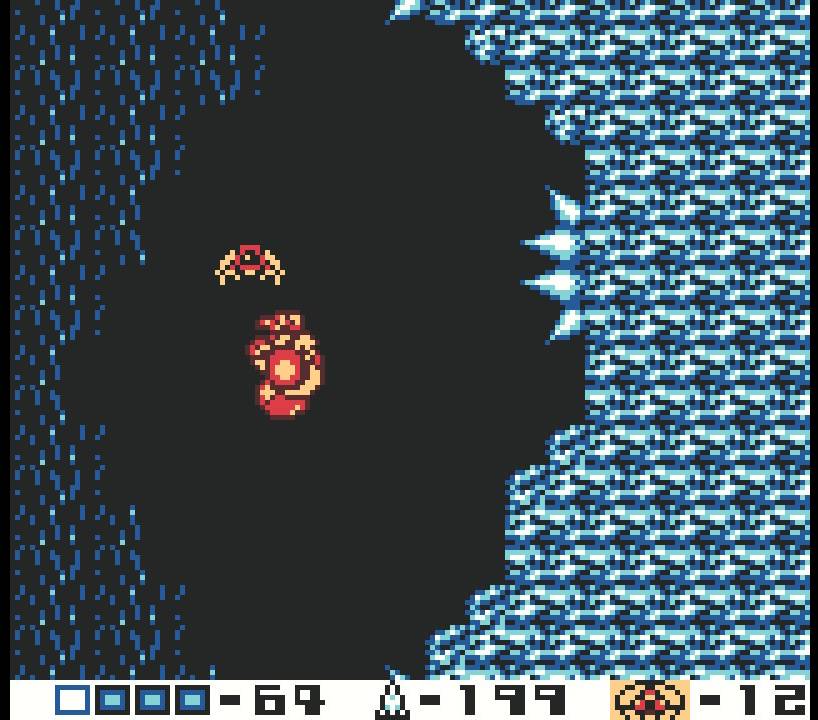
There will be more new creatures in this new room, although you wouldn’t necessarily call them enemies. These little guys are called Flitt’s, and they look very cool if you ask me with their red and black sprite! They basically will function as platforms for you to jump on to get across the lava, but watch out – the Flitt’s will disappear after a second or two, so move fast.
Once you’ve crossed the lava, you’ll enter a new room housing one GAMMA METROID. Get your knives out and send it swimming with the fishes, and once you’re done, head to the right side of the room where you’ll see a Missile Refill. Use it, and then backtrack to the two Metroid husks.
Once you’re there, head left. Follow the pathway up, and once again, when you enter the new room, you’ll see a bunch of Flitt’s, although these ones are moving side to side. You can ride them or just Space Jump across the room, but either way, get through the left-side passageway. Get into the new room and wipe away a single ALPHA METROID – this will cause another earthquake, bringing Phase Six to an end. There’s an Energy Refill on the left side of the room, so make sure you heal up before moving on!
Once you’re ready, you’ll need to backtrack a ways to Phase Five and position yourself at the newly lava-free entrance to Phase Seven. As always, use the routes to help you navigate, and when you’re ready, we’ll continue!
Phase Six Routes:
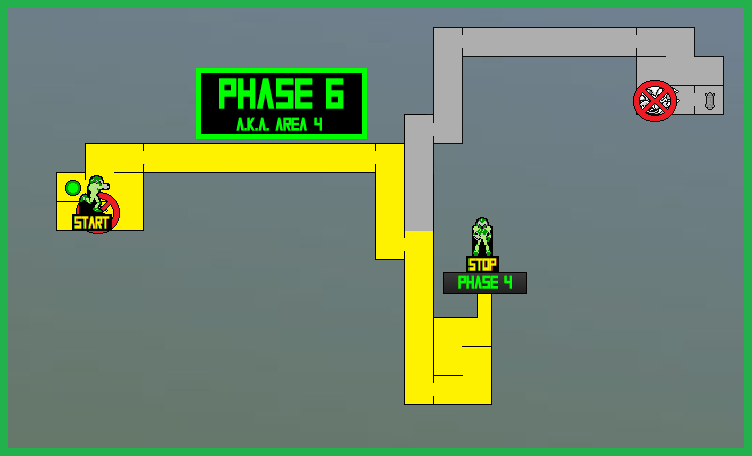
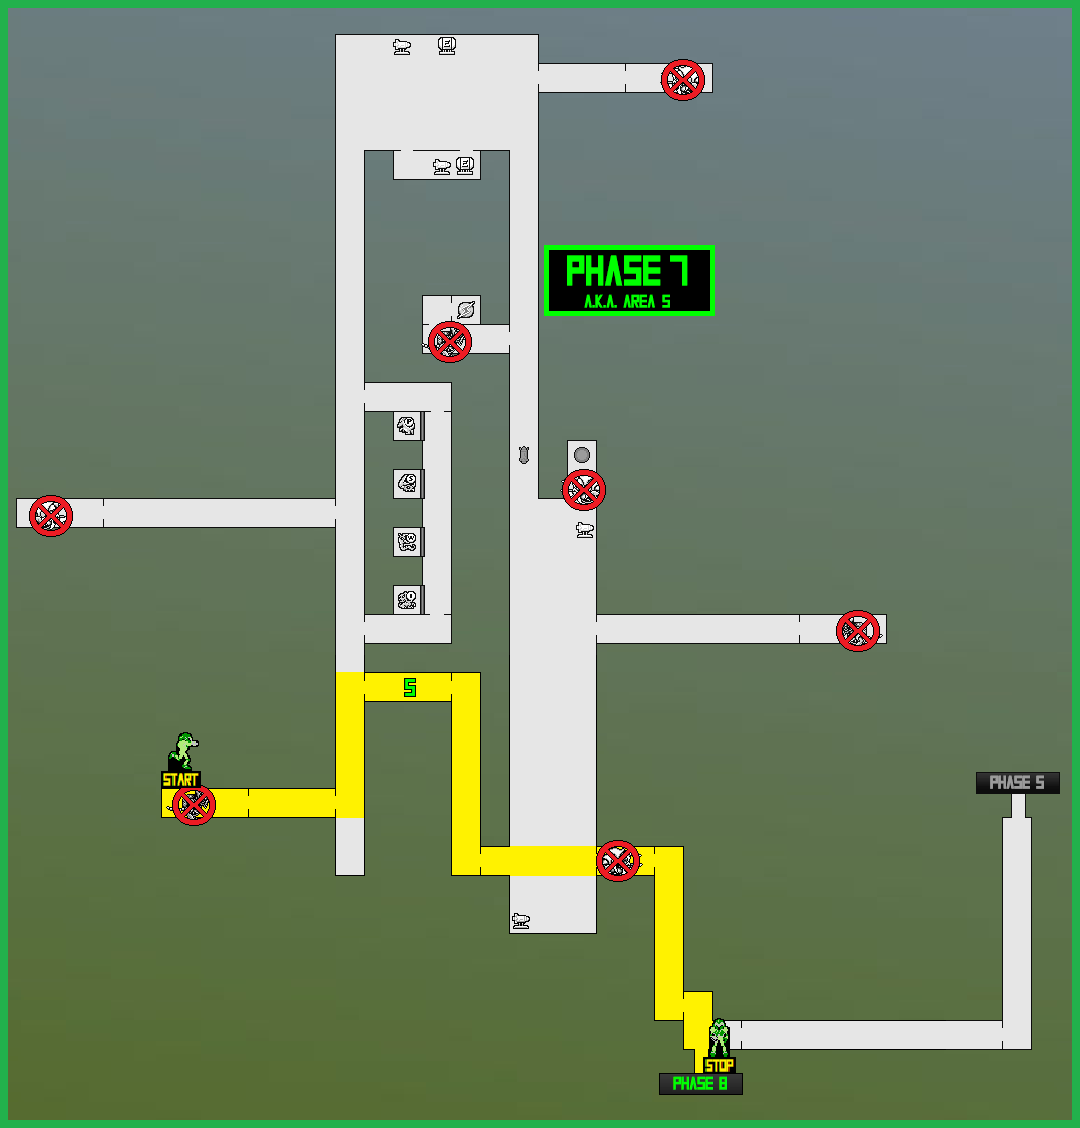
The Tower
Once you’re at the entrance to Phase Seven, start dropping down and blasting any enemies foolish enough to trifle with you. There are a ton of hostile lifeforms on this pathway, but you should be able to one shot most of them, and luckily, the path is pretty straightforward for a while. Carefully press forward and go through the right passageway when you get there.
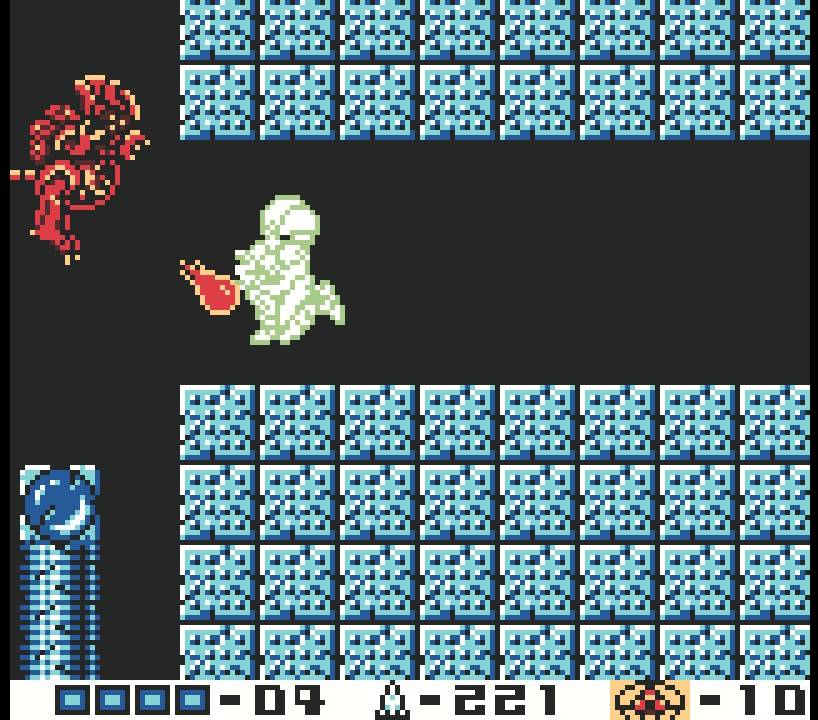
You’ll enter a new room with lava on the ground and some more new creatures attacking you – the bat-like, bomb-dropping Drivel (Metroid II’s enemy names remain undefeated) and more Skreek’s, so watch out and proceed forward into the next room. This room is actually the Phase Eight entrance, so remember this spot. For now, jump up and go through the passageway on the top-left. Head up and up once again until you find yourself at another passageway in the top-left corner.
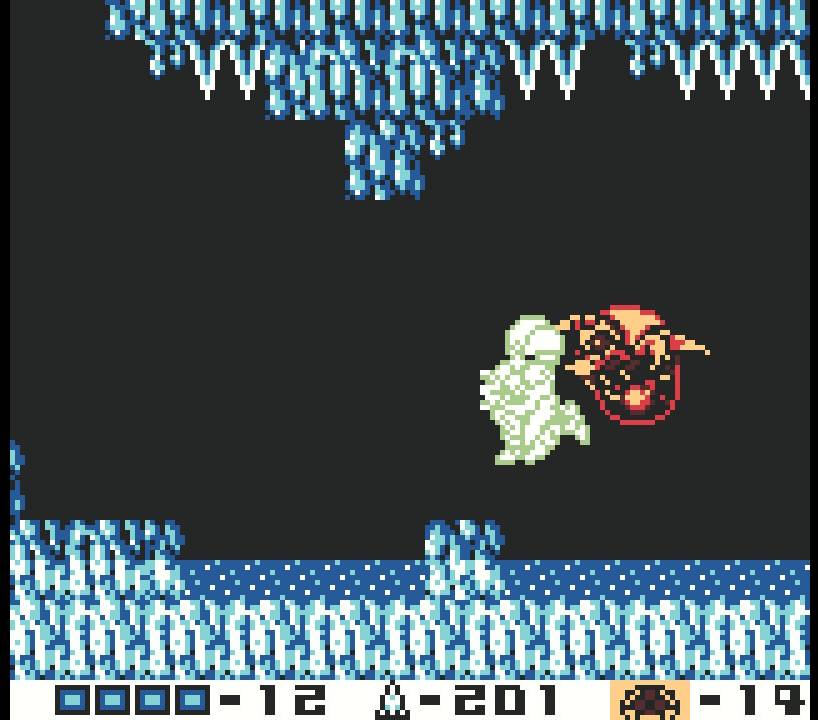
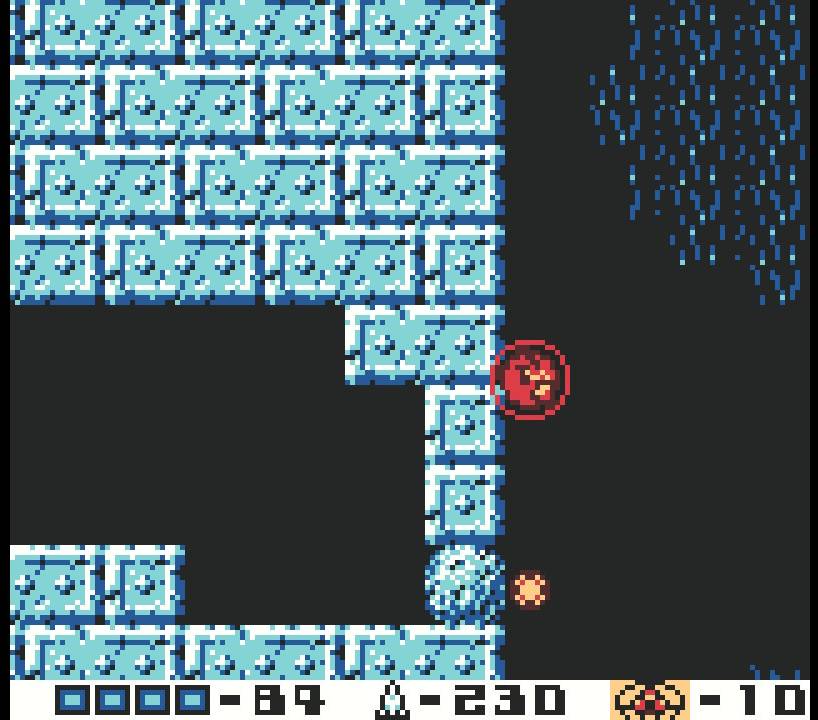
Get ready, because you’re about to run face-first into a GAMMA METROID in this next room. This is a tricky confrontation as you’re in a very small hallway with no room to jump or maneuver. All you can hope for is that you get the Gamma into a rhythm with your missiles and that you don’t take too much damage.
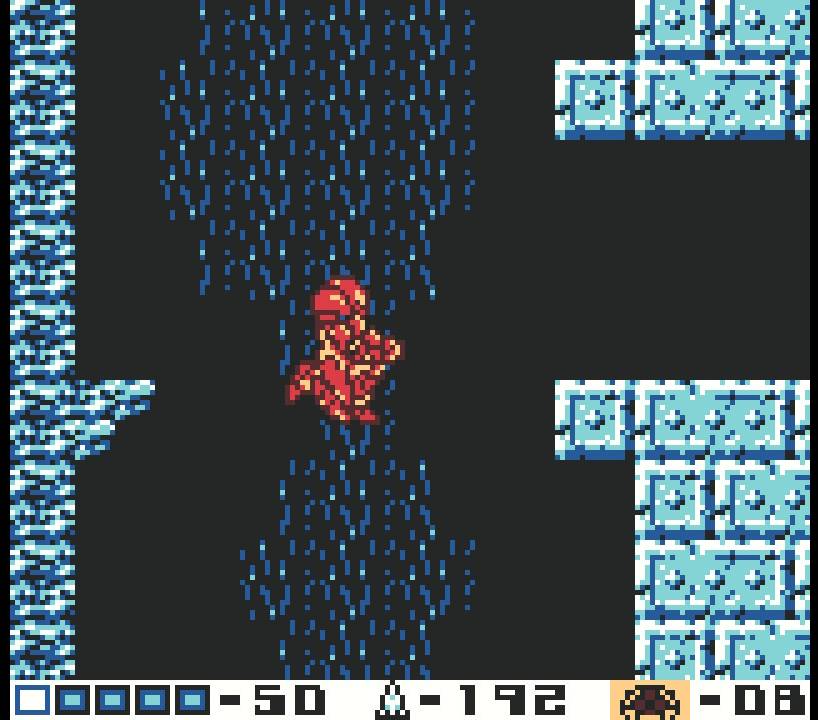
Proceed ahead and you will finally reach The Tower. As the name implies, past two Metroid husks, you’ll see a giant structure that keeps going up and up. This Tower was likely another remnant left behind by the mysterious and ethereal Chozo species before they departed SR388 (As an aside, anyone who’s played Samus Returns might know that “departed” isn’t exactly the right word to use). The Tower has the final few powerups and expansions of the game, so let’s get started!
The first thing you’ll want to do is drop through the second Metroid husk into the water. Head left and you’ll see a Morph Ball tunnel; roll through and you’ll see MISSILE EXPANSION #19 sitting there! Grab it and head back to the two husks. I’d recommend either entering the Tower quickly to save your game or making a save state, cause the next part is a bit tough.

Next up, you’ll want to Space Jump upwards a ways, steering slightly to the right. You’ll see two ledges on the right wall – keep jumping until you get to the higher one. There should be a bunch of spikes on that upper ledge, but if you lay a bomb beside them on the rightside wall, a small tunnel will open up, allowing you to drop down and grab MISSILE EXPANSION #20.
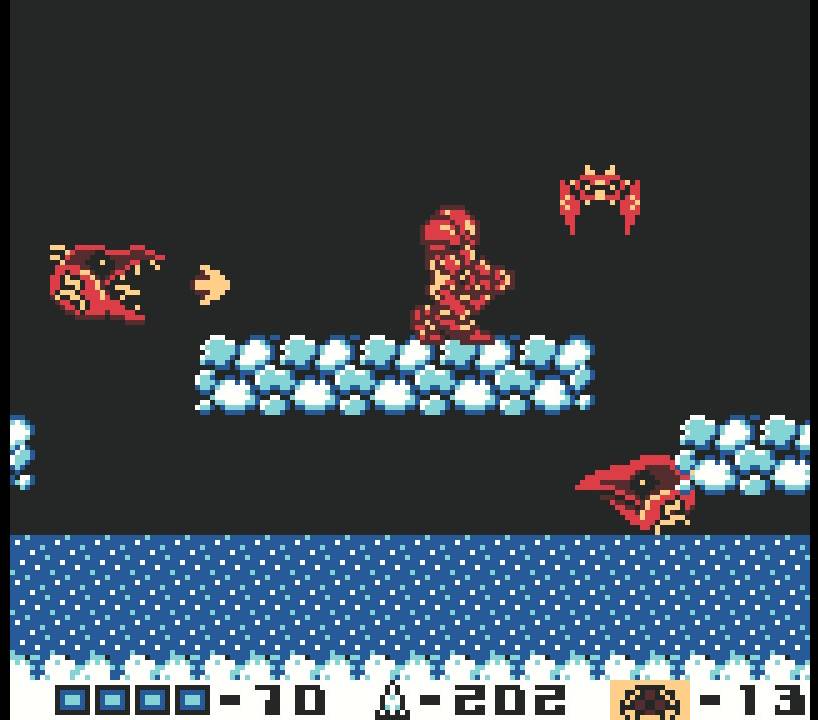
Get back up to the ledge and jump upwards. You’ll immediately be accosted by a GAMMA METROID. This is a trickier confrontation because you really only have three very small platforms to balance on, so the chances of you getting bonked off screen by the Gamma and needing to start the fight over are pretty high. It’s safer to stick to the side and just blast the Metroid with missiles – you’ll probably take more damage, but there’s an Energy Refill in the left wall, so just give yourself a top up before dropping down.
Drop down to the first ledge on the right wall that you Space Jumped over earlier. Enter the new room and start carefully Space Jumping across the room; there are spikes everywhere, including floating in the middle of the room, so short, controlled jumps are your friend. Once you get to the end of the room, pause before entering the new room. Business is about to pick up….
The Tower Route:
Zeta Metroid
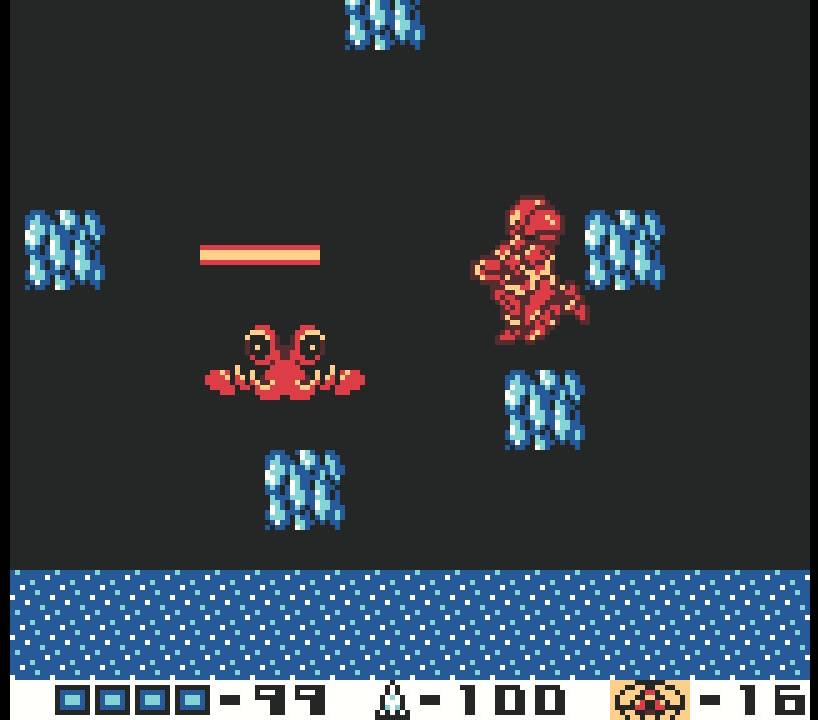
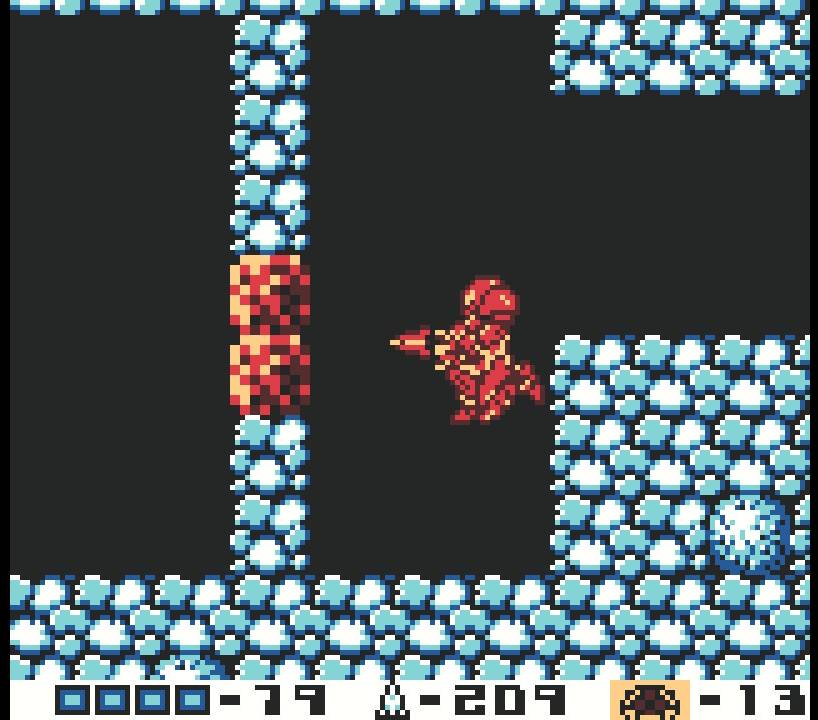
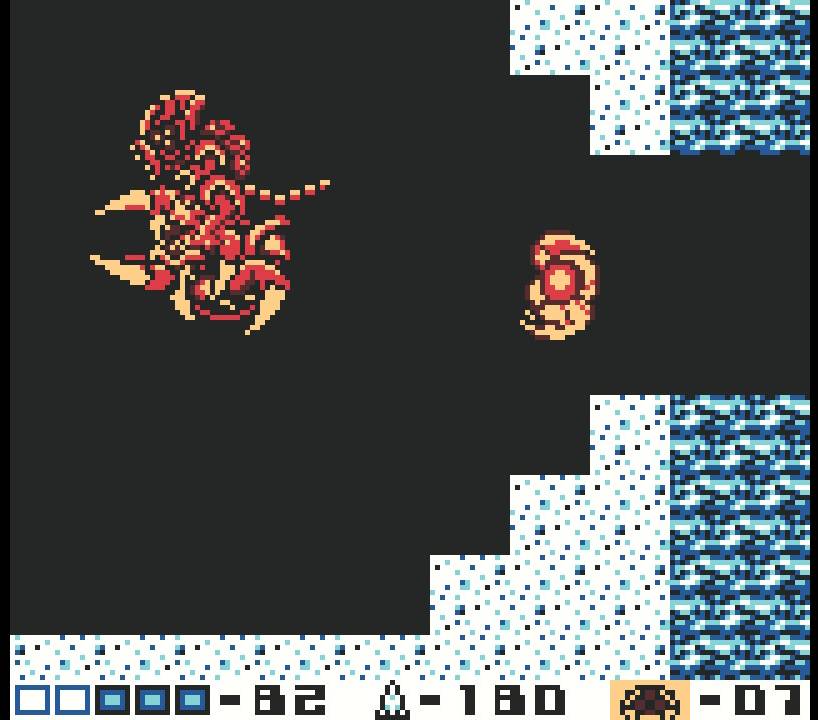
Enter the latest evolution in the Metroid line – the ZETA METROID! This Metroid is fast, agile, and deadly. I dare say that the Zeta might give you more of a challenge than any other Metroid type. The Zeta will constantly be flying and trying to ram you, typically doing so starting in a high position and then swooping down towards you. Zeta Metroids don’t have the electrical current attack of the Gamma Metroids fortunately, but unfortunately, they have a fireball attack, which hits much harder.

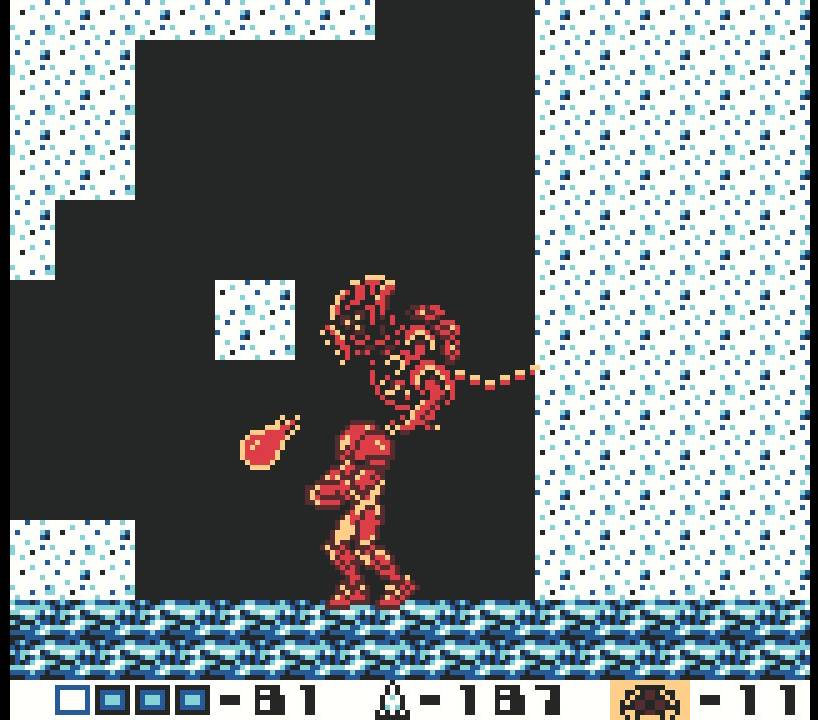
The hardest thing about combating the Zeta will be hitting it. This Metroid is always moving, and quickly, making it tough to nail it with missile shots. Any time the Zeta is somewhat stationary, it’s almost directly above you too, which makes moving to attack it a dangerous tactic. The only area that will take damage is the face, so don’t even try to hit the back, underside, feet, etc. Making matters worse is that the Zeta Metroid’s defence has increased over its pre-evolutions, requiring you to blast it with TWENTY missiles.
This particular Zeta Metroid room is covered in sand, which will make this probably the most challenging of the three Zeta Metroid’s you need to take out. Remove as much of the sand as you can and jump over the Zeta when it flies towards you; use that time to reposition yourself to try and jump up for a missile attack to the skull. You’ll be in for a tough battle, but with enough patience and a little luck, you’ll destroy the Zeta Metroid just like it was any other creature.
The Screw Attack
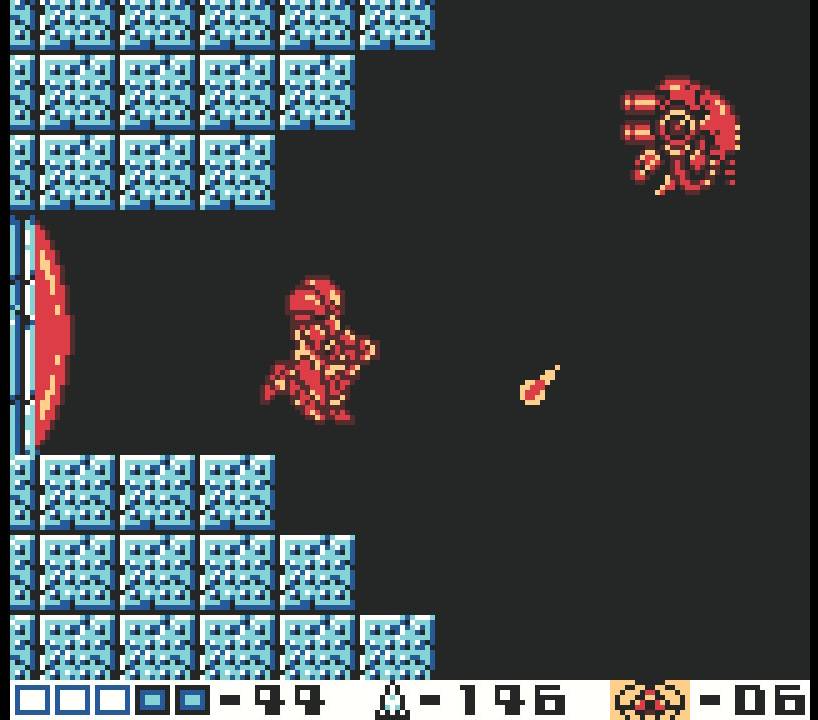
With the first Zeta Metroid conquered, head back out to the outside of the Tower. If you need to, refill your energy, and when you’re ready, start Space Jumping upwards again. Direct your jump so you’re hugging the side of the Tower. Keep jumping up and you’ll see a narrow gap between the Tower and a spire of rock, so squeeze in and in short order you should see a Metroid husk and a Missile Refill. Jump or use your Spider Ball to creep up the side of the Tower until you see a block that looks like it can be bombed. Destroy it, and slip inside.
Walk inside, past yet another husk, and you’ll be confronted by another ZETA METROID. There’s a lot more space to work with, so this fight won’t be as tricky as the last Zeta encounter, but don’t let your guard down. Do what you need to do to destroy this Metroid, and then jump upwards through the small opening in the ceiling.
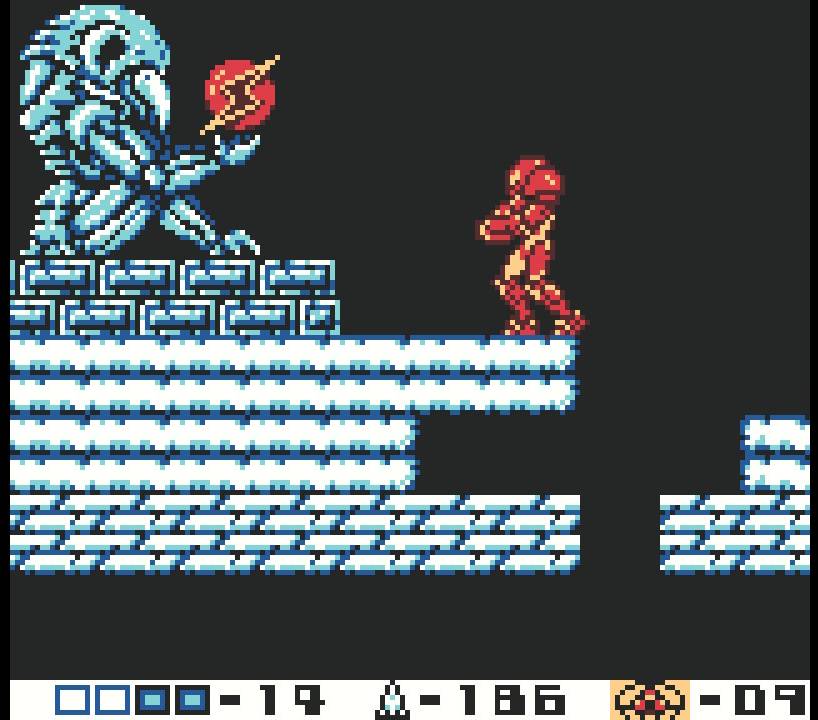
Roll towards the left, lay some bombs on the top of the little nook you’re in, and jump through to the upper part of the room. Head left, bomb the destroyable block and slip into the right side of the room, directly under a Chozo Statue. Bomb the ceiling and shoot the orb the Chozo is holding and you’ll finally be rewarded with Samus’s ultimate weapon and the final powerup of the game – the SCREW ATTACK!
With Samus now able to slice anything that moves into smithereens whenever she Space Jumps, the Screw Attack is going to make traversal significantly easier for us. Exit the Tower and slip back outside; Space Jump upwards and don’t stop until you reach the roof of the Tower.
Press forward a bit and you should see an opening in the roof. Drop down and the screen will be completely black, which will make navigation here a bit tricky to say the least. A good way to keep track of if you are moving or not is to lay bombs when you’re rolling – they’ll tell you if you’re actually moving forwards or not! To get what we need, you’ll want to 1) land! 2) roll to the right as far as you can – you’ll be able to see an expansion under you when you reach the end. 3) jump up and activate your Spider Ball. You’ll pop out outside beneath a Metroid husk and ENERGY TANK #5! 4) Drop back down and roll back to the beginning. Lay a bomb and you should see yourself drop down. Roll to the right to grab MISSILE EXPANSION #21! 6) Get the heck out of the tunnel!

From here, Space Jump to the top left corner of the room and get on the top most ledge. Activate your Spider Ball and start crawling towards the roof. Lay a bomb at the first little flat portion of the wall and you’ll see the beginnings of a tunnel. Just like we did earlier, what you’ll probably find easier is just laying a bomb, letting it explode to take out the next block above you and just quickly reactivating your Spider Ball as you go up. Do this enough times and you’ll reach a tunnel at the very top that will house the last two expansions of the game – MISSILE TANK #22 and ENERGY TANK #6. Congratulations!
(Not to be a buzzkill, but just as a quick aside about the sixth Energy Tank – unfortunately, the game only allows you to hold five Energy Tanks, so this final Tank won’t actually do anything, but hey, it’s still pretty cool you just grabbed 100% items!)
Now that you are powered up and equipped with maximum firepower, roll through the tunnel and lay some bombs to drop back down. You’ll conveniently drop right into a ledge in the upper right corner of the room that has a passageway to the right. Go inside and carefully Space Jump across the room and take the right passageway again. The next room will be covered in sand, so make yourself a pathway and get ready to tangle with a GAMMA METROID. Clobber it upside the head, and then exit back to the Tower, stopping when you get to the roof.
Screw Attack Route:
Metroids in the Tower
We’re almost finished! Only a few loose ends to take care of, and now that we’re fully equipped, we can just go Metroid to Metroid. Ready? Let’s go!
Drop down the left side of the Tower and just let yourself fall for what will seem like forever. Eventually, you’ll see an opening on your right that will take you inside the Tower, but just fall past it for now. You’ll want to take the first entrance to your left, which will be about halfway down. Space Jump across the spikes in the room and step inside the leftmost room. You’ll have to destroy the final GAMMA METROID of the game, which should be no problem for a stone cold Gamma killer like yourself. Once the job is done, exit out of this room and back outside the Tower.

Drop down even further and take the lower left entrance. You’ll once again need to jump over some floating spikes, so do so and take the left passageway. In this new room, you will encounter the third and final ZETA METROID. You’ve got lots of space to work with again, so outmaneuver and outlast the vile creature, and in short order, you’ll hear the familiar rumblings of an earthquake. You know what that means!
Exit this room and backtrack until you’re outside the Tower again. Hold on, though! There’s something we can do inside of the Tower itself before taking off!
I mentioned earlier that you’d have the opportunity to select the beam of your choosing. Well, that time is now! If you’re not satisfied with your current beam of choice, then Space Jump all the way up to the upper left entrance on the right side of the Tower and enter. Walk forward and you’ll see a floating platform; almost directly under that, there’s no real floor, so if you walk ahead, you’ll descend into a new room.
This new room will have a couple of Gonzoo’s for you to take care of, and more importantly, four red blast doors. Behind each blast door is a different type of beam, so if you want to switch it up, the time is now. From the top to the bottom, the doors lead you to the PLASMA BEAM, SPAZER BEAM, WAVE BEAM, and ICE BEAM respectively. It’s worth noting that you’ll need the Ice Beam for the later portion of the game, but you’ll have an opportunity to grab this beam only later. For the other three beams, this is it. Choose wisely and when you’re ready, exit the Tower to the left.
Drop down to the lowest entrance on the right and cut through the Tower one last time (there’s a Save Station along the way, so use it if you want), exiting on the right again. Before you leave this arena, I would strongly recommend refilling both your missiles and energy – trust me when I say that you will need them!
Exit the Tower room and get yourself to the Phase Eight entrance. Your deadliest challenge is yet to come…
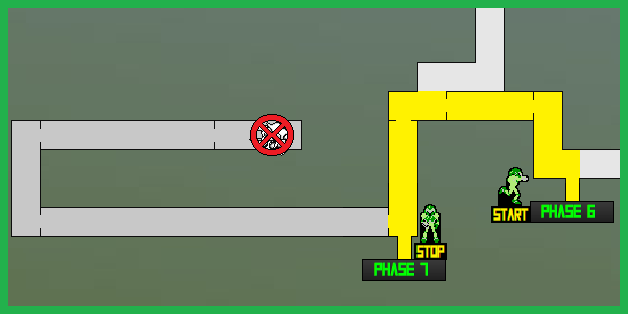
Metroids in the Tower Route:

Phase Seven to Phase Eight Route:
Next Chapter: The Tunnels – Omega Metroids