


Making the “Forbidden” Metroid Prime 2 Cake
Last year for April Fool’s, I made a joke about how Nintendo would make Ridley plushies, and then created a Ridley plushie myself. This year, I took on a new challenge: recreating the “forbidden” promotional cookie from Metroid Prime 2: Echoes.
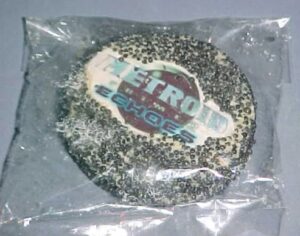
From examining the picture, a few things stood out to me. One, the black crusty bits that surrounded the cookie looked very similar to nonpareil sprinkles. You usually see them in fun, rainbow colors, but it’s possible to get them in any color that you so desire.
Two, it looked like the logo for the game was edible ink printed on edible paper and stuck on the cookie. The evidence for that is that the logo is much too precise for it to be made with icing at such a small scale (even though there are definitely pros that can get it to look exceptionally close). In addition, it appears that the nonpareils don’t stick onto the logo, which would make sense considering that the edible paper would prevent the nonpareils from sticking.
Three, it appears that the cookie was decorated as such: the cookie was dipped in an icing, the edible paper was placed on top, and then the entire confection was dunked in a tub of nonpareils. That would make it easy to have these produced in bulk for a promotional event.
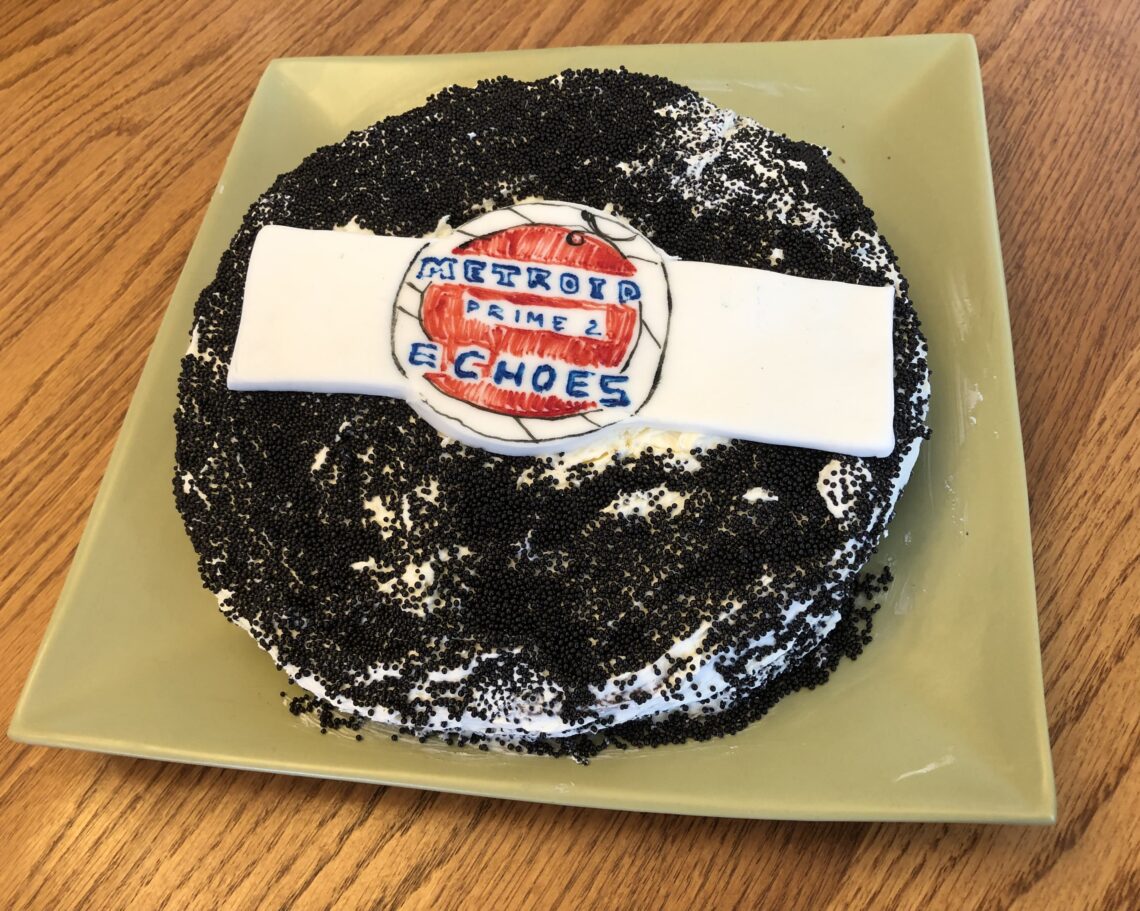
Since I don’t have access to a printer that can print edible ink and paper, I decided that instead of a cookie, I would create a cake that looked like the forbidden cookie instead. So, I had to readjust my plans to making a cake that looked like the real deal, but still tasted, well, edible.
I used two different recipes for this cake: a “blue velvet” cake and an American buttercream frosting. I also special ordered an entire pound of black nonpareil sprinkles, bought fondant, and got edible markers.
I went above and beyond for this cursed monstrosity.

The nice thing about making this cake is that even if it doesn’t look 100% accurate, it doesn’t really necessarily matter. It’s supposed to look like something that has been left at the bottom of Torvus Bog for approximately five years. However, you’ll need some special equipment to make this cake.
Having an electric mixer is essential, and a stand-up mixer makes the frosting part so much easier. Other essentials are two 9″ round cake pans and a rolling pin. The edible markers might be worth the money, but if you’re a dab hand at piping you might get away with icing the lettering on the cake itself.
If you’ve made it this far, you might want to even follow along and make this yourself. If so, it’s time to gather your ingredients, and let’s start making this cake!
Because I am American, I used a recipe that is in imperial measurements. I will put in approximate metric units, but please keep in mind that it might not be the closest.
Blue Velvet Cake
1 1/2 cups (192g) sugar
1/2 cup (113g) butter
2 large eggs
1 tablespoon white vinegar
blue food coloring/paste
1 teaspoon vanilla extract
2 1/4 cup (288g) all purpose flour
2 tablespoons cocoa powder
1 teaspoon baking soda
1 cup (235ish ml) buttermilk
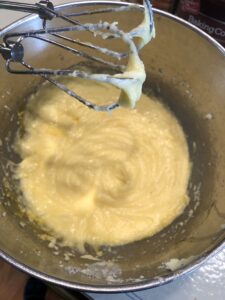
Preheat oven to 350 F (175 C). Start by creaming the butter and sugar with the mixer, then slowly add the eggs one at a time.
Add the vinegar, vanilla, and food coloring. Remember, you can always add more food coloring, but you can’t take it away!
In another bowl, mix the flour, cocoa powder, and baking soda. Slowly add the flour mixture to the liquid mixture, mixing well after each batch.
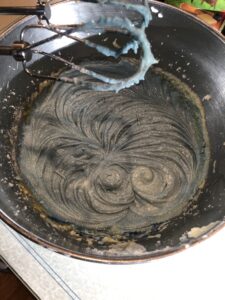
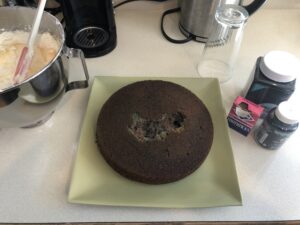
Pour the mixture into two (very well greased) 9″ round cake pans and bake for 20-25 minutes or until a toothpick comes out clean.
Let the cakes cool on a wire rack until they are completely cool (otherwise the frosting will melt!).
Next up is the American buttercream frosting!
American Buttercream Frosting
3 sticks/ 1 1/2 cups (340g) room temperature unsalted butter
pinch of salt
3 cups (375g) powdered sugar
1 tablespoon vanilla extract
tablespoons cream or milk
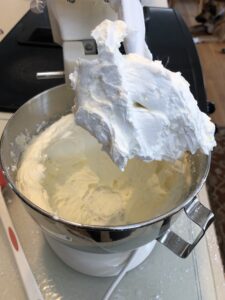
Whip the butter for 6-7 minutes on medium speed until light and fluffy.
With the mixer on low speed, slowly add the sugar in batches until the sugar is dissolved.
Add the vanilla and cream, and mix until incorporated. Finally, on medium speed, beat the frosting for an additional 6 minutes until fluffy.
Now it’s time to decorate! For this cake, I only used one of the cake layers, and about half of the frosting. But if you want to go all out, you could make a double layered cake! Just be sure to have enough nonpareils to cover the cake!
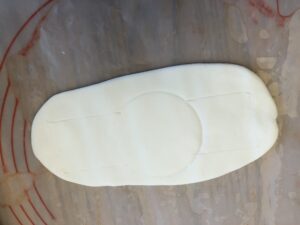
Use a spatula to cover the cake with the frosting, then use a toothpick and glass to make a general pattern in the frosting. This is important, as it will help the fondant to stick!
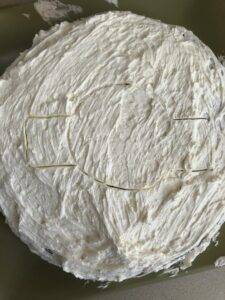
Next up, add the nonpareils! Use a spoon to sprinkle them on.
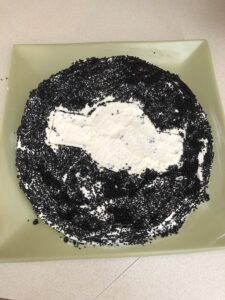
Finally, it’s time for the fondant decoration. Knead some fondant out, then roll it out with a rolling pin.
Using a glass and a toothpick, make a pattern that closely resembles the same pattern on the cake. Then, carefully cut out the fondant and flip over.
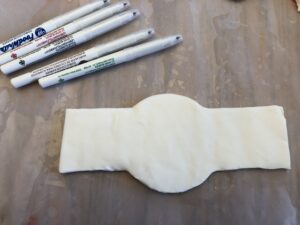
Using edible markers, decorate the fondant to resemble the Metroid Prime 2: Echoes logo!
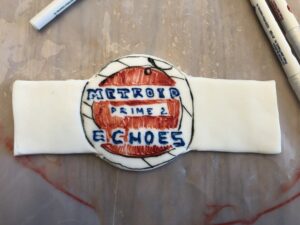
Finally, place the fondant on top of the cake and serve with coffee or tea. Your forbidden cake is now done!

Happy April Fool’s Day! What other Metroid based food would you like to see?

Isabel Braman is the Community Manager of Omega Metroid and curator of the Metroid 35 fanzine. She likes to create stuff!


